The Smell of Molten Projects in the Morning

Ed Nisley's Blog: Shop notes, electronics, firmware, machinery, 3D printing, laser cuttery, and curiosities. Contents: 100% human thinking, 0% AI slop.

Tag: Improvements

Making the world a better place, one piece at a time

  • OMTech 60 W Laser: Improved Lighting

    OMTech 60 W Laser: Improved Lighting

    The OMTech 60 W laser arrived with an LED strip light under the gantry:

    OMTech 60W laser - OEM lighting
    OMTech 60W laser – OEM lighting

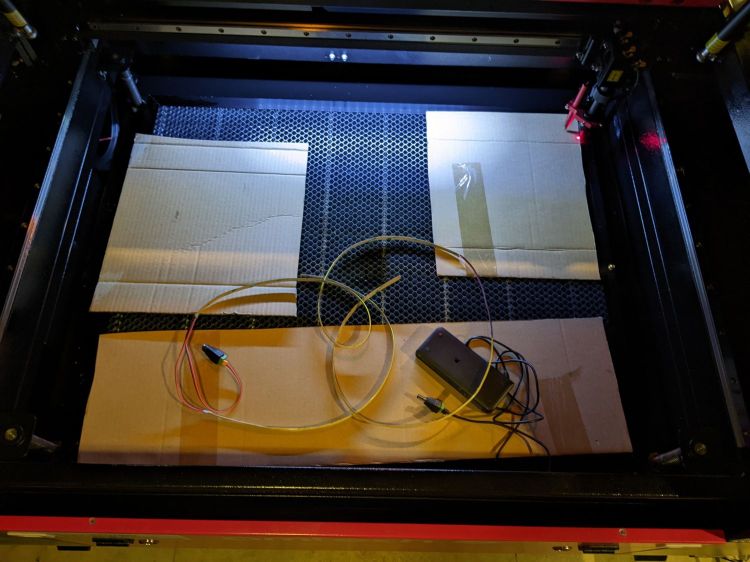
    That works reasonably well, if only because the pool of light travels with the gantry, but it’s always behind the area where you’re (well, I’m) setting up the Thing To Be Cut. An overhead can lamp with a warm-white CFL bulb contributes the yellowish foreground lighting, although I cast a big shadow when leaning into the cutter.

    Adding three COB LED strips along the sides definitely improved the situation:

    OMTech 60W laser - COB LED strips
    OMTech 60W laser – COB LED strips

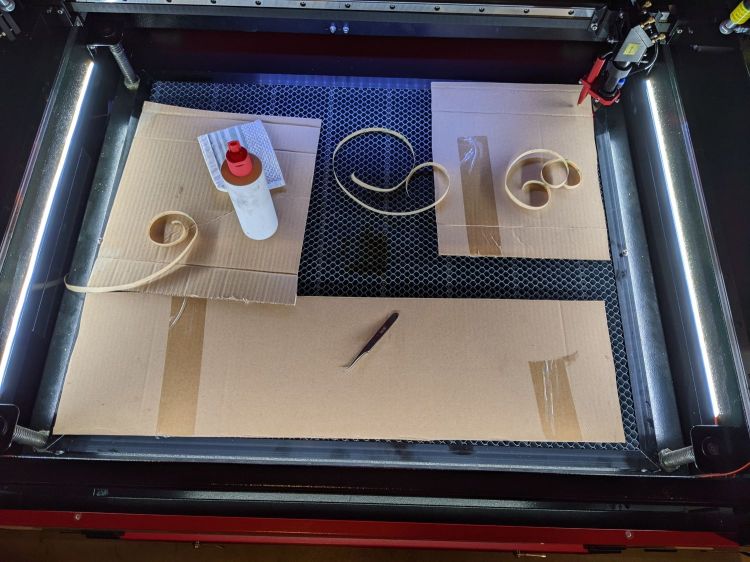
    The glare will require shades along their top, but that’s in the nature of fine tuning.

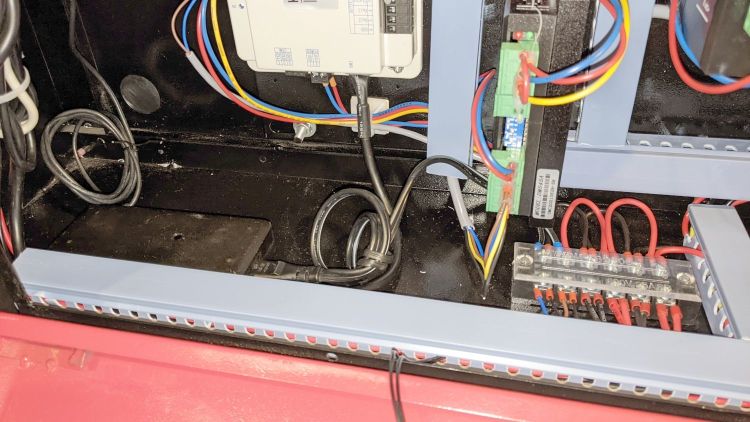
    I got 24 V COB LEDs to match the cutter’s power supply and reduce the overall current along the strips, but upon further inspection the OEM power supply seems under-specified for its job. The XY stepper drivers each draw 3.5 A peak, the Z (they call it U) axis driver is set for 5.1 A peak, and the knockoff RuiDa controller also runs at 24 V with an unspecified current.

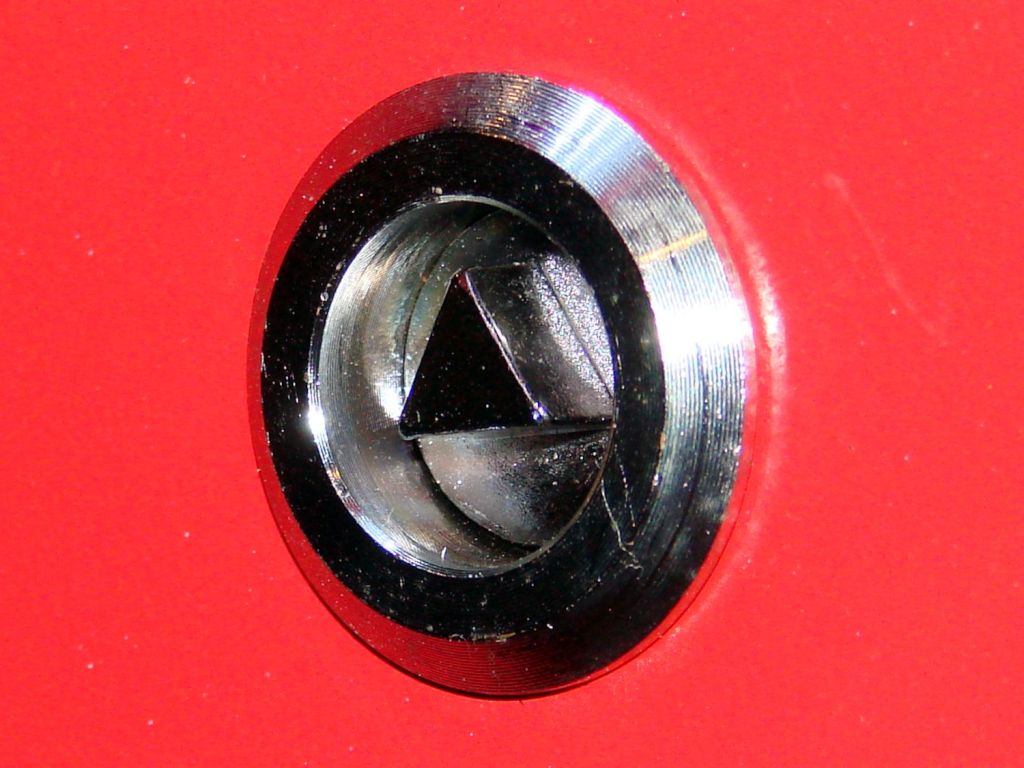
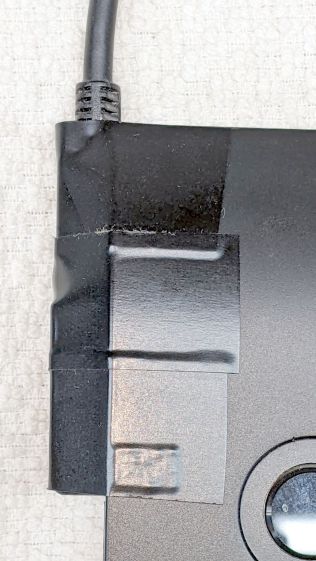
    Rather than stress the OEM supply, some rummaging in the Big Box o’ Wall Warts produced the 24 V 2 A power brick shown in the first picture. The previous owner had cut off the no-doubt specialized connector, so I had no qualms about splicing in a 5.1 mm coaxial power plug.

    On the other end, I amputated the AC line plug, crimped on a pair of ferrules, and inserted them into the AC power barrier strip inside the electronics bay:

    OMTech 60W laser - LED power supply
    OMTech 60W laser – LED power supply

    Yes, that little smudge in the middle of the brick is an Genuine Embossed Apple logo, so you know it’s gotta be good.

  • OMTech 60 W Laser: Beam Alignment Check Targets

    OMTech 60 W Laser: Beam Alignment Check Targets

    The canonical beam alignment target seems to involve tape stuck on the mirror bracket:

    OMTech 60W laser beam test - tape target
    OMTech 60W laser beam test – tape target

    With a full-power beam burned through it:

    OMTech 60W laser beam test - mirror 1
    OMTech 60W laser beam test – mirror 1

    The roll of “white masking tape” supplied by OMTech turned out to be knockoff tapeless sticky adhesive film. After sticking a length to the mirror bracket, the white backing tape peels right off, leaving the adhesive film stuck to the bracket. Well, my tapeless sticky roll was running low, so this roll won’t go to waste.

    A laser cutter can make intricate paper doodads, so I conjured better targets from the Vasty Digital Deep:

    OMTech 60W laser - beam alignment - 2022-03-22
    OMTech 60W laser – beam alignment – 2022-03-22

    They’re burned into an ordinary manila file folder in “dot mode”: 2 ms pulses at 30% power separated by 0.25 mm. The 1 mm graticule locates the beam relative to the center, which is pretty close to the actual center of the opening, because the outer 17 mm cut fits neatly into the 17.5 mm hole. The label tells you where it goes and which line should point up.

    Your mileage will vary, but the general idea is to have a disk held in place by actual masking tape:

    OMTech 60W laser beam test - mirror 1
    OMTech 60W laser beam test – mirror 1

    Admittedly, orienting the graticule requires a bit of dexterity, but getting it pretty close is pretty easy.

    Set the laser to fire a single 10 ms pulse when you press the front-panel button, thereby toasting a spot at the most intense part of the beam:

    OMTech 60W laser beam test - mirror 1 fired
    OMTech 60W laser beam test – mirror 1 fired

    Repeat to record the beam position at all three mirrors:

    OMTech 60W laser beam test - mirror 3 fired
    OMTech 60W laser beam test – mirror 3 fired

    The focal point target serves to verify the focused beam size and its alignment with respect to the aiming laser spot:

    OMTech 60W laser beam test - focus point
    OMTech 60W laser beam test – focus point

    That target came from a scrap of cardboard while I was figuring out how to make the things.

    All in all, OMTech did a pretty good job of aligning the beam, although the red laser dot needed a nudge. Now I have a record of where the beam was before I mess with clean the mirrors and lenses.

    The SVG image as a GitHub Gist:

    Loading
    Sorry, something went wrong. Reload?
    Sorry, we cannot display this file.
    Sorry, this file is invalid so it cannot be displayed.

  • OMTech 60 W Laser: Hatch Latch Phasing

    OMTech 60 W Laser: Hatch Latch Phasing

    The OMTech laser cutter has six access hatches, each with one or two latches. These are not locks, although you do need a triangular “key” to turn the latch plug:

    OMTech laser - latch - cylinder point up
    OMTech laser – latch – cylinder point up

    Being that type of guy, I want all the latches to have the same plug orientation when they’re closed, so that I can hold the key one way, poke it into any latch without thinking too hard, and have it fit onto the plug:

    OMTech laser - latch key - latched position
    OMTech laser – latch key – latched position

    A quarter-turn clockwise (remember clocks with hands?) then releases the latch:

    OMTech laser - latch key - unlatched position
    OMTech laser – latch key – unlatched position

    Inside the hatch, the closed position corresponds to a tongue capturing a flange around the cabinet opening (not shown):

    OMTech laser - latch - latched position
    OMTech laser – latch – latched position

    After the quarter-turn, the tongue releases the flange:

    OMTech laser - latch - unlatched position
    OMTech laser – latch – unlatched position

    So, we’re not talking high security here.

    As delivered, the plugs had more-or-less random orientations when they were closed and some required a counterclockwise quarter-turn to release.

    It turns out the latches aren’t a complete unit that simply drops into a hole in the hatch:

    OMTech laser - latch parts
    OMTech laser – latch parts

    I sympathize with whoever must assemble ten handfuls of parts into ten latches on a production line and I also understand why orienting the plug wasn’t on that person’s to-do / QC checklist. I further understand why two cylinders lacked the big toothed washer under the nut; it’s not essential to the function and nobody will ever miss it.

    The plug has a triangle on one end (for the key) and a square on the other (for the tongue), with one triangle point aligned to a side of the square:

    OMTech laser - latch plug
    OMTech laser – latch plug

    To my way of thinking, that point must be upward, as shown in the first picture, when the latch is secured.

    The cylinder can fit into the square(-ish) hatch hole in four possible ways, but its symmetry allows only two unique orientations. It must look like this in order to put that point upward when the plug is maximally counterclockwise (my finger is pointing upward):

    OMTech laser - latch cylinder
    OMTech laser – latch cylinder

    So I devoted a pleasant half-hour to reducing the latch entropy.

    The screw attaching the tongue to the plug also controls the friction of that spring against the plug as you (well, I) turn it. All the screws now sport a dab of Loctite to ensure the tension remains mostly constant (at least for a while), as do the two large nuts lacking corresponding toothed washers.

    The “key” has no marking to indicate its “point-up” orientation, so I stuck a snippet of label on one side, with a jaunty red highlight marking the point. Something better will surely occur to me, but it’s no longer in the critical path.

  • OMTech 60 W Laser: Ventilation

    OMTech 60 W Laser: Ventilation

    The best place for the OMTech laser cutter seems to be snuggled at base of the chimney, venting into the long-disused fireplace through the steel plate adapting a long-gone wood stove to the opening:

    Duct fan installed
    Duct fan installed

    The short run of flexible tubing allows some give-and-take at the cutter’s vent outlet. The elbow on the duct fan’s output terminates in a blast gate to cut off the draft blowing up (or down!) the flue with the fan off.

    The cutter arrived with a huge high-speed axial blower screwed to its output baffle:

    OMTech 60W laser - OEM vent fan
    OMTech 60W laser – OEM vent fan

    The noise from that fan had to be heard to be believed.

    The cylindrical exhaust duct attached directly to the motor with four screws, only two of which matched holes in the baffle plate:

    OMTech 60W laser - modified vent
    OMTech 60W laser – modified vent

    A trial fit revealed the assembly rattled something awful: those two screws let the duct vibrate against the baffle. Match-drilling two more holes into the baffle let me mount the duct with three screws and, in combination with the foam gasket, it is now solid and quiet.

    A quick check shows the duct fan draws 10 to 11 m/s through the baffle at full throttle, roughly 400 CFM. That’s pretty close to the flow measured through a long pipe and, with only 6 ft³ of stink inside the laser’s cabinet, ought to exhaust the fumes just fine.

  • Huion Tablet USB Cable Realignment

    Huion Tablet USB Cable Realignment

    The Huion tablet on my desk has its USB cable sticking straight out of the left side, whereupon it must loop around to burrow under the shelf under my monitor on its way to the port on the back of the PC case. The loop snagged on all the clutter atop the desk and I finally got around to Fixing That Problem:

    Huion tablet - rerouted USB cable
    Huion tablet – rerouted USB cable

    Of course, it wasn’t quite that simple.

    Right angle USB Mini-B connectors are still a thing:

    Huion tablet - USB angle adapters
    Huion tablet – USB angle adapters

    Which is a “left angle” adapter and which is a “right angle” adapter depends on which supplier you ask and how much you trust their descriptions / product photos, so you should get a set containing both: it’s the only way to be sure.

    The one on the right (a “right angle”) shows a bit of carving, which came after the completely unsurprising discovery that the stylin’ curves on the side of the tablet collided with the rectangular adapter:

    Huion tablet - misfit adapter
    Huion tablet – misfit adapter

    Some diligent X-Acto knife work carved away enough of both the adapter and the tablet case to snugly join them:

    Huion tablet - plastic surgery
    Huion tablet – plastic surgery

    The hackery over on the far right fits around the USB cable’s molded connector. I simply cut away any parts that touched until the adapter seated firmly in the USB socket and the cable exited parallel to the edge.

    Part of this involved not carving deeply enough into the adapter or cable connector to expose the internal wiring. I assumed the tablet didn’t have anything vital immediately inside that fancy curve, so that’s where I dug deepest.

    Stick adapter + cable to the tablet with good-quality electrical tape and now the cable points directly to where it should go.

    Declare victory and move on!

  • Expedient Caster Wrench

    Expedient Caster Wrench

    Cranked down as far as it would go, a new adjustable height workbench in Mary’s sewing room turned out to be just slightly higher than the other work surfaces adjoining it, so I replaced its 3 inch casters with 2 inch versions:

    Sewing bench - 2 vs 3 inch casters
    Sewing bench – 2 vs 3 inch casters

    The bench arrived as a kit and included the 17 mm flat wrench required to snug the hex head on the 3/8-16 threaded stem atop the 3 inch caster against the bottom of the bench foot. The 2 inch caster also has a threaded stem, but of course it has a 14 mm hex head.

    I traced around a 14 mm open-end wrench on a scrap of aluminum and introduced the outline to Tiny Bandsaw:

    Improvised 14 mm caster wrench - rough cut
    Improvised 14 mm caster wrench – rough cut

    A little belt sander action cleaned up the outside, some hand filing matched the wrench to the hex, and it came out OK, even before I scrubbed the dirt off its white-ish pebble-finish coating:

    Improvised 14 mm caster wrench - finished
    Improvised 14 mm caster wrench – finished

    The bare steel wrench arrived with the bench and has 13 and 17 mm openings. I briefly considered embiggening the 13 mm end, but came to my senses.

    Aluminum isn’t a particularly good metal for wrench duty, but this one had to apply maybe 1/3 of a turn to each of four stems, stopping when snug, and it performed just fine. It’s now sleeping in the wrench drawer, dreaming of another job that may never arrive.

    The smaller casters lowered the bench by about an inch, whereupon cranking the surface up a bit less than half an inch aligned it perfectly.

  • Work Glove Security Tags

    Work Glove Security Tags

    Having worn my work glove collection to exhaustion, the fanciest two pairs in a new selection came with elaborate security tags:

    Elaborate Security Tag dissection
    Elaborate Security Tag dissection

    Finding a standard tag inside inside the fancy shell shouldn’t come as any surprise, but I’m surprised the retail loss ratio for a pair of $20 gloves can support that much hardware.

    I went through the self-checkout area and didn’t do anything special, so either those lanes don’t have tag scanners or the tags are security theater.