With the intent of being able to find a picture of the battery in our 2015 Subaru Forester when I need it:
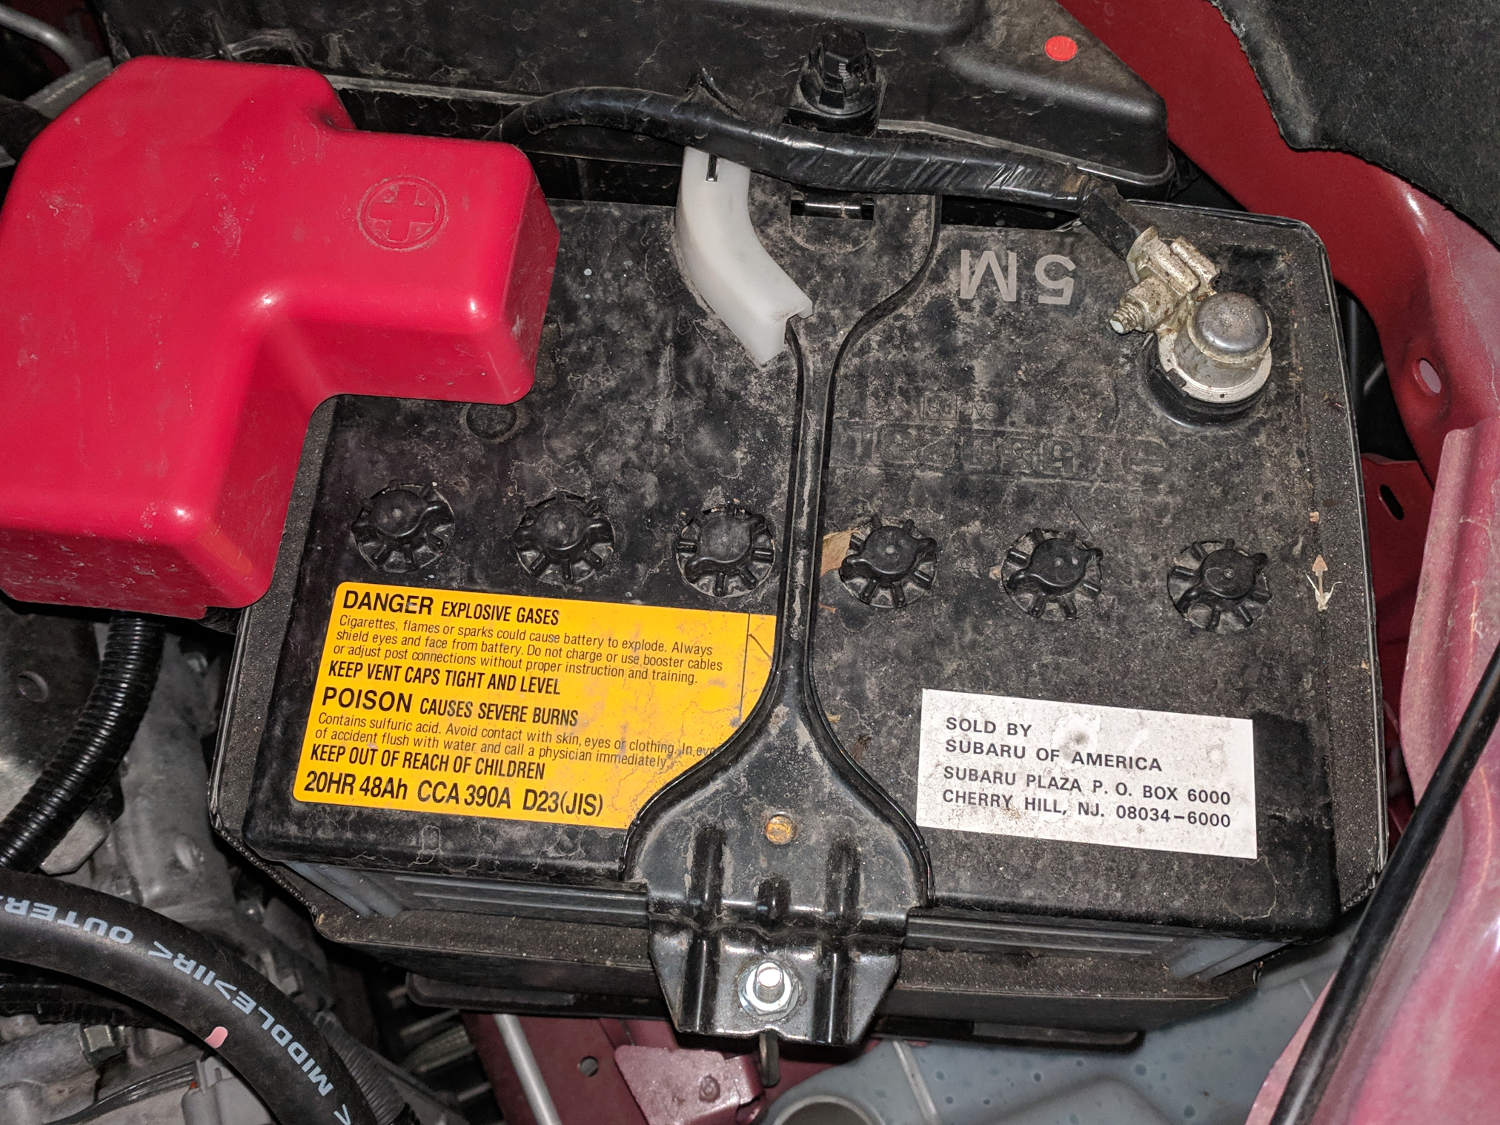
The manual says the “battery type” is 55D23L, with a 48 A·h capacity.
Here in the US, we measure a battery’s physical size with “Group Size” numbers which have no relation with JIS numbers, despite some overlapping or similar numeric values. The money quote:
Definition of Group Size: The Battery Council International (BCI) assigns numbers and letters to common battery types. These numbers and letters are standards for maximum container size, location and type of terminal and special container features.
So, it’s random. Choose a retailer, feed in the automobile year / make / model, and discover I need a Group 35 battery.
The label includes “390 CCA”, which is the Cold Cranking Amps rating:
The rating refers to the number of amps a 12-volt battery can deliver at 0°F for 30 seconds while maintaining a voltage of at least 7.2 volts
So, if you’re building an automotive gadget and expect the battery to deliver something like 12 V, you’re wrong. Bonus protip: look up “load dump” to get an idea of the highest voltage.
The “20 HR 48 Ah” specifies the Reserve Capacity:
Amp Hour or C20 is an indicator of how much energy is stored in a battery. It is the energy a battery can deliver continuously for 20 hours at 80°F without falling below 10.5 volts.
So a constant load of 2.4 A would do the trick, should you leave a few lights on overnight during the summer. In wintertime, you’re on your own.
Because hell hath no fury like that of an unjustified assumption, the terminals are on the top surface toward the rear, with the positive lug on the left when you’re standing at the front bumper. That may be the “L” in “D23L”.
Long ago, I ran afoul of an automotive battery which required knowing the terminal chirality and, of course, I bought the wrong one. Now I have a picture!