Ed Nisley's Blog: Shop notes, electronics, firmware, machinery, 3D printing, laser cuttery, and curiosities. Contents: 100% human thinking, 0% AI slop.
For reasons that should not require explanation by now, Mary just acquired a large sewing table (along with a Sears Kenmore Model 158 sewing machine that’s slightly older and fancier than the three we already have). The table has an opening fitted to the machine base, but the rubber pads atop the leveling screws had long since stiffened up and two screws were frozen in place. A few drops of penetrating oil released the screws and, mirable dictu, they have ordinary 6-32 threads.
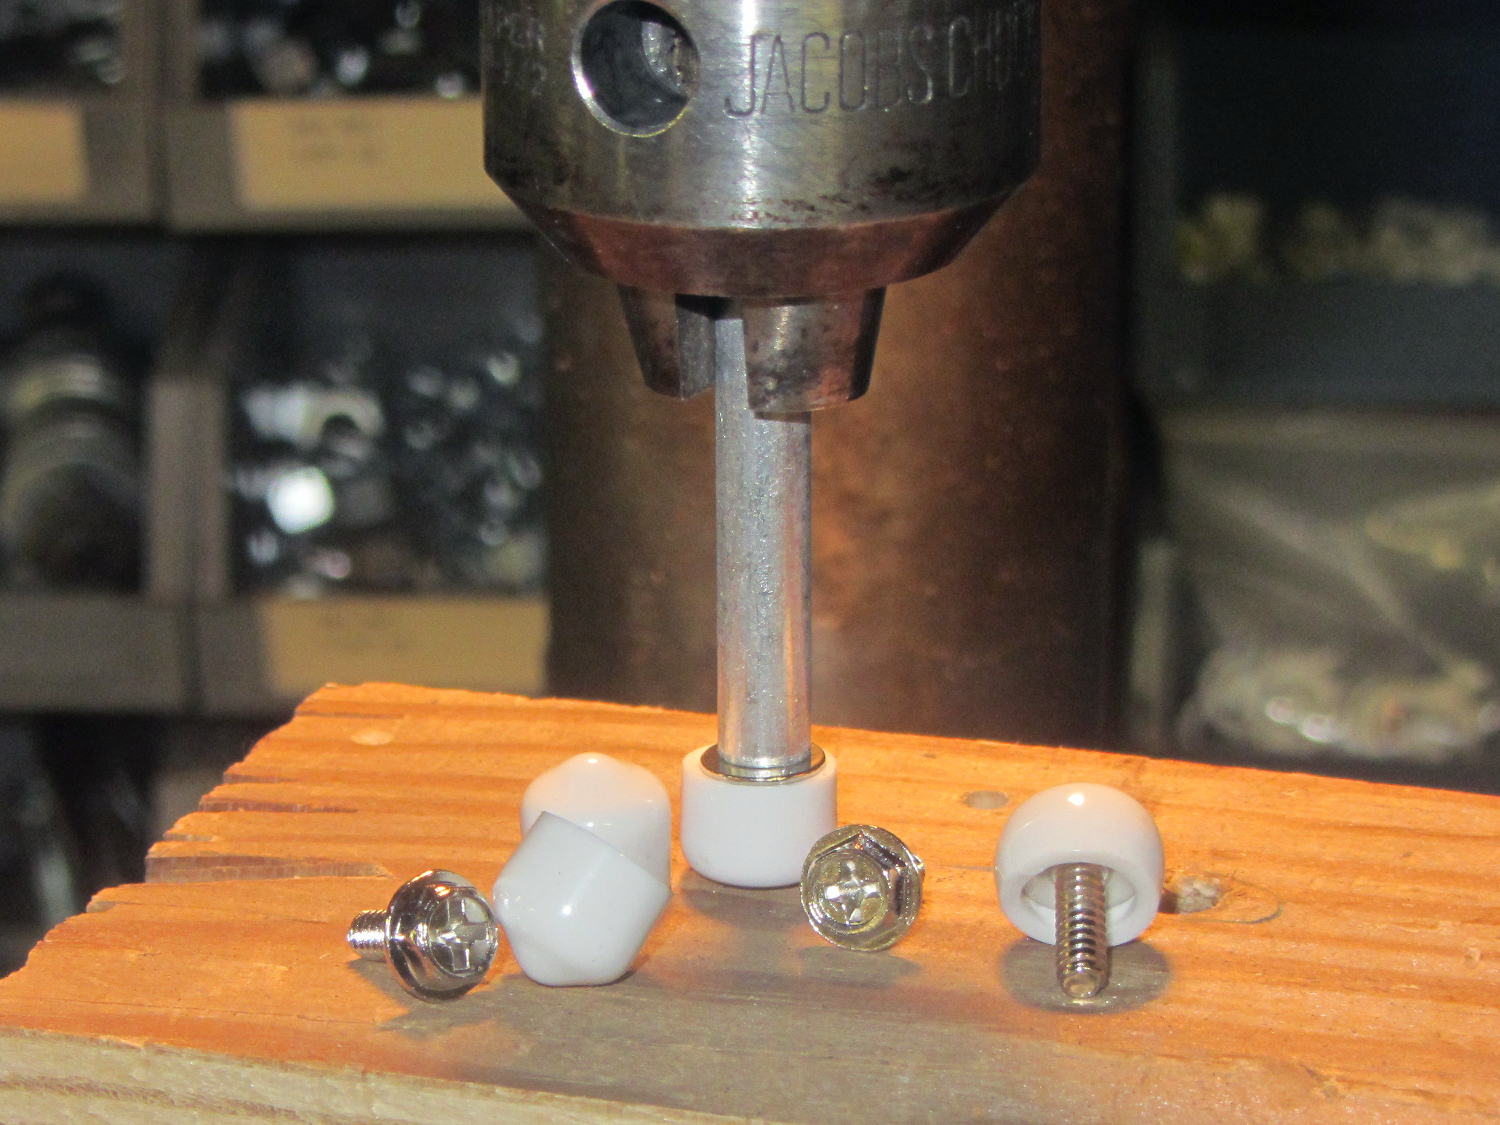
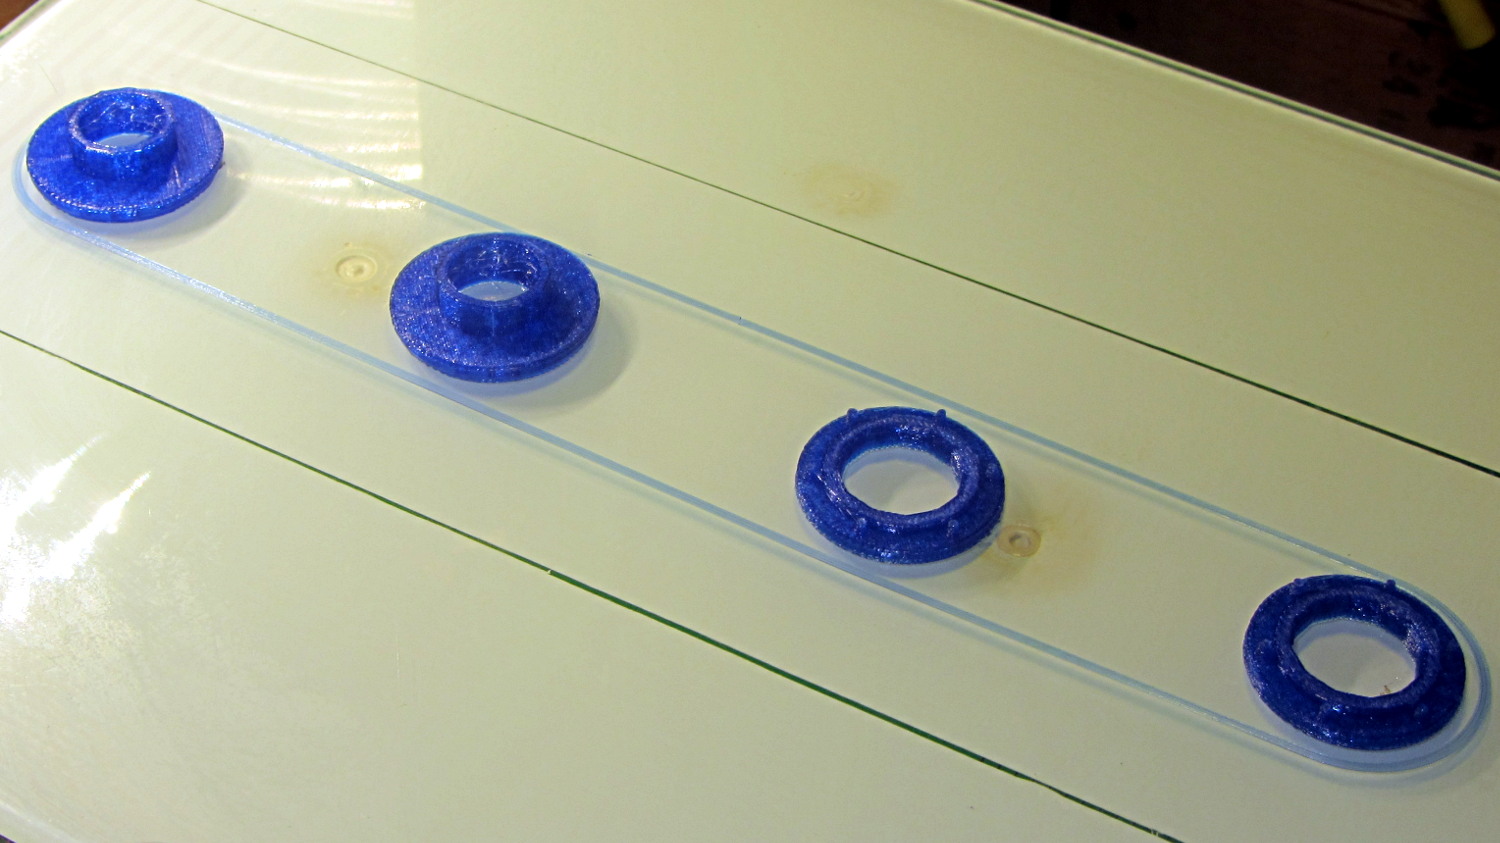
Some rummaging turned up four PC case screws and soft caps intended for wire shelves, which easily combined into replacement machine supports:
Sewing Machine Supports – inserting screws
Once again, I’m using the drill press as a low-force arbor press, with a chunk of aluminum tubing to shove the screw flange into the slightly smaller plastic cap.
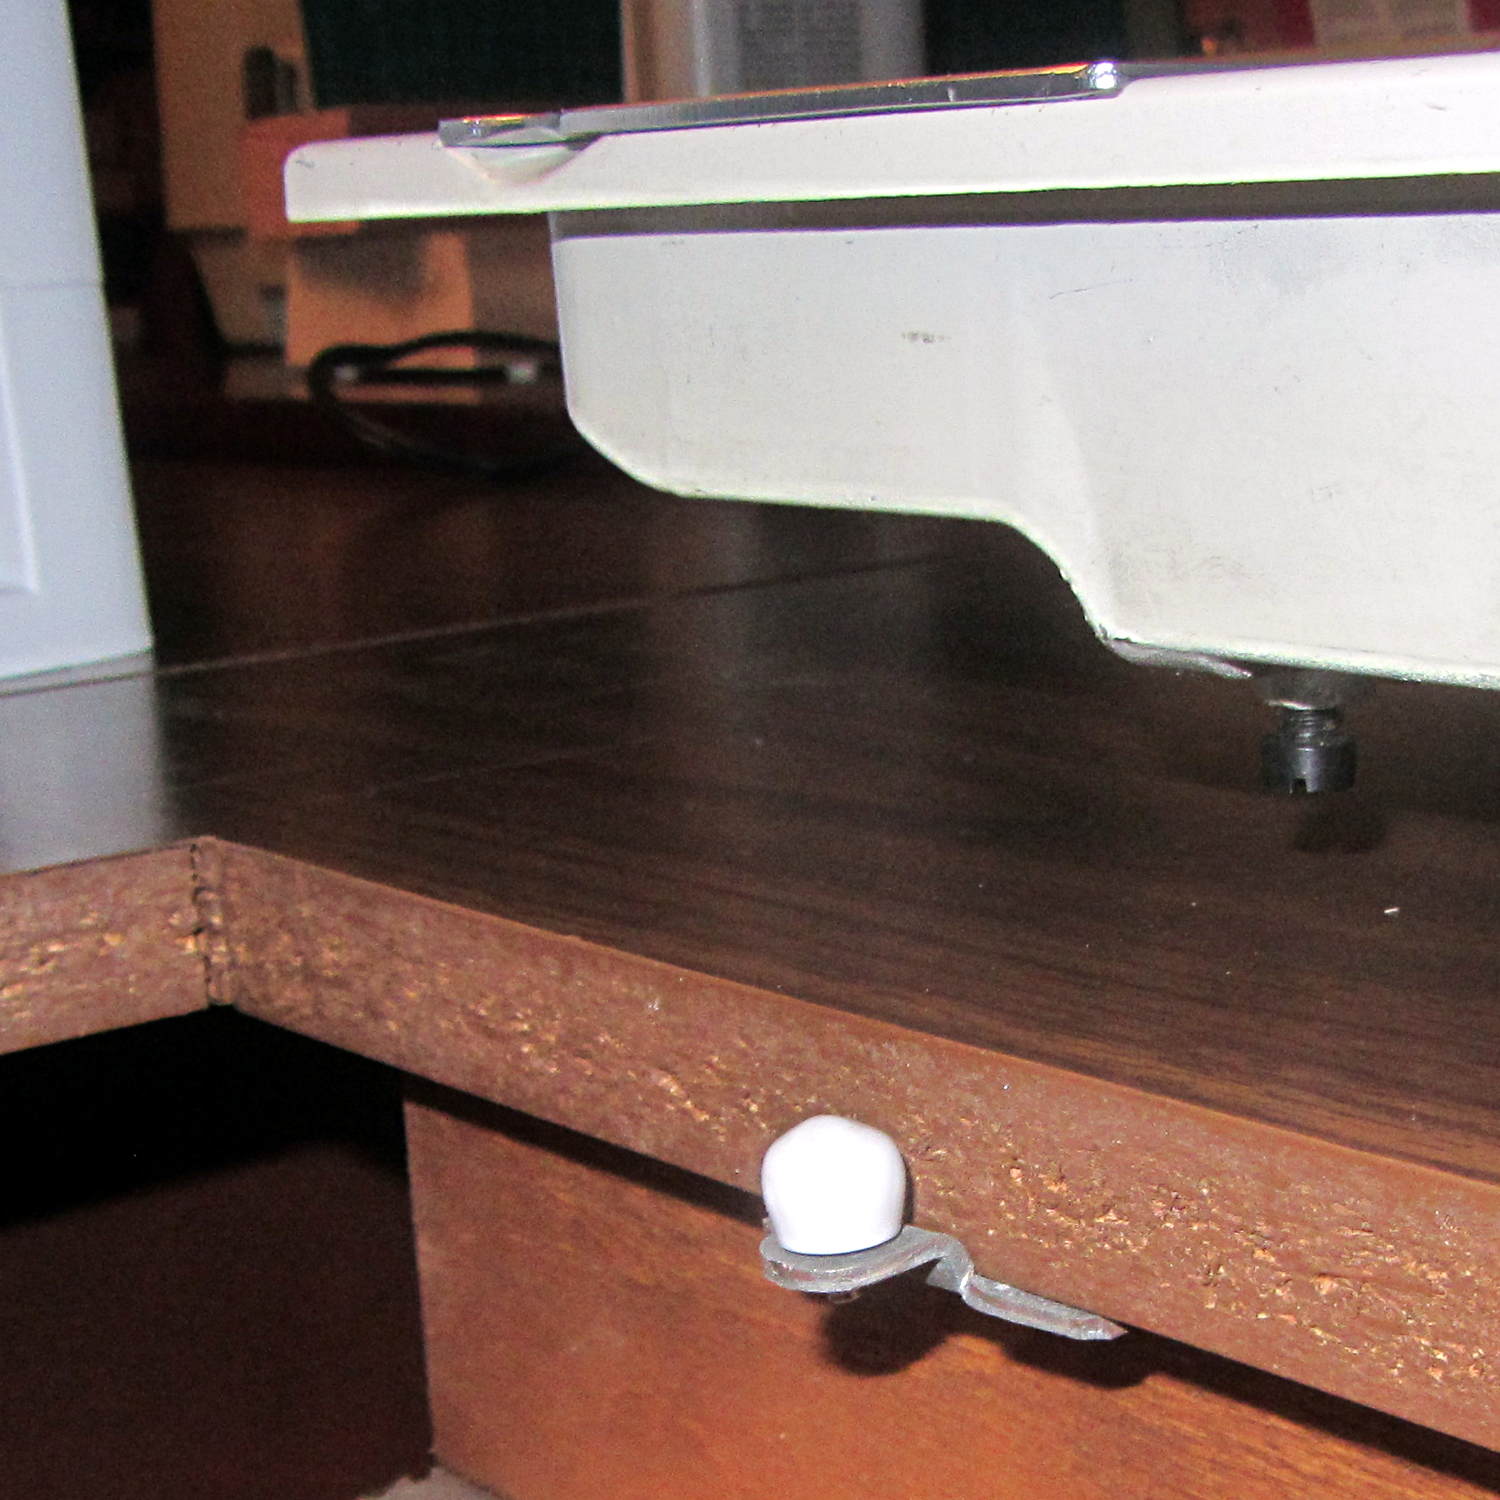
Spun into their brackets, they look quite nice, not that anybody will ever see them:
Sewing Machine Supports – installed
The new-to-us table replaces the incredible collection of junk previously supporting Machine #3. I tucked some plastic foam around the near and right edges to fill the small gaps and it fits well:
Sewing Machine Supports – machine installed
Obviously, the foam will fall out whenever Mary lifts the machine to tinker with machinery under the platform, so we’ll see how often pins & needles slip through the cracks without the foam.
It turns out that non-alkalized / non-Dutch-process cocoa has a much lower surface energy than good old Hershey’s, to the extent that my Fireball Cocoa Recipe produces powder bombs, even after far more stirring than I’m willing to exert.
The trick is to stir the mud for a while, then let it set for 15 minutes:
Cocoa mud
That apparently gives the cocoa time to get along with the milk and join forces. Stir it up again, let it sit for a few minutes, then proceed with the recipe: smooooth cocoa with no powder bombs.
A bit more Vietmamese cinnamon is no bad thing, either …
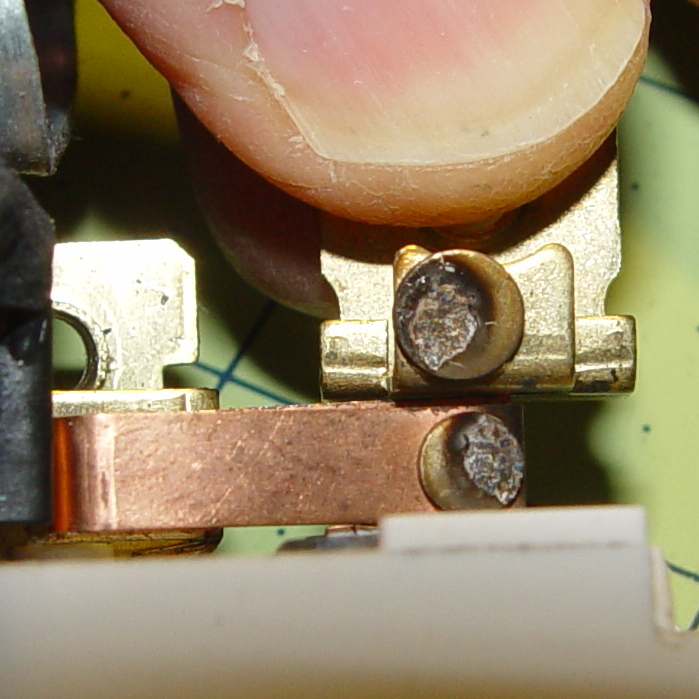
The dual switch controlling the bathroom lights began requiring some fiddling, which was not to be tolerated. After replacing the switch, I cracked the old one open to see what’s inside…
The failed side of the switch controlled the lights over the sink:
Light switch contacts – lights
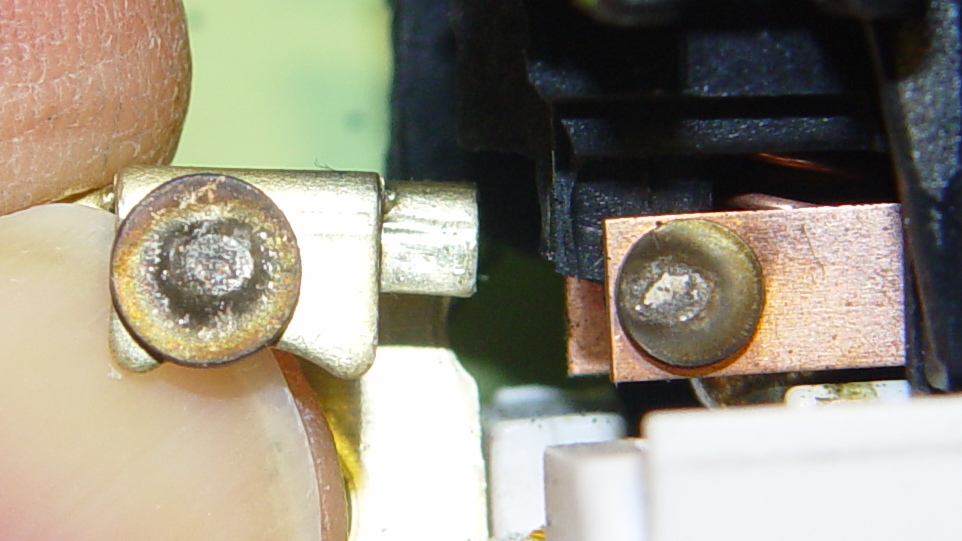
The side for the ceiling vent fan + light got much less use, still worked, and look a bit less blasted.
Light switch contacts – ceiling fan
Not much to choose between the two. It’s been running for nigh onto two decades, so …
The Suction Control slider on the handle of our shiny new Kenmore Progressive vacuum cleaner varies the speed of the howling motor in the base unit, rather than venting more or less air into the pipe. We like that, but it’s all too easy to inadvertently slide the control and never notice it, sooo I marked the default condition:
Although every vacuum cleaner we’ve ever owned has touted its “quiet operation”, we always wear 30 dB ear muffs and it’s sometimes hard to tell the difference between full throttle and not quite so fast…
The tiny posts on the fencing helmet ear grommet produced a remarkable amount of PETG hair, because the nozzle had to skip between four separate pieces on the platform at each layer:
So I told Slic3r to build each part separately:
Fencing helmet grommet – separate builds – first attempt
Due to absolutely no forethought or planning on my part, that actually worked. Slic3r defines a cylindrical keep-out zone around the nozzle that I set to 15 mm radius and 25 mm height, but those numbers are completely wrong for the M2, particularly with a V4 hot end.
To the rear, the nuts & bolts along the bottom of the X gantry sit 5 mm above the V4 nozzle, with the relaxed actuator on my re-relocated Z-axis home switch at Z=+1 mm:
V4 PETG – extruder priming
To the front, the bed fan doesn’t sit much higher:
M2 V4 Extruder – 24 V fans
As it turned out, the front washers built first, sitting there in front of the gantry and behind the fan, the rear washers appeared last, and Everything Just Worked.
However, even though the M2’s layout won’t allow for automated layout, I figured I could do it manually by building the parts from front to rear:
Fencing Helmet Ear Grommet – Slic3r layout
That way, the already-built parts never pass under the gantry / switch. For particularly tall parts, I could remove / relocate the bed fan to clear the already-built parts as they appear.
Come to find out that Slic3r, for whatever reason, doesn’t build the parts in the order you’d expect from the nice list on the far right side of the screen:
Sequential Build Order – Slic3r vs Pronterface
Worse, the Slic3r 3D preview shows the threads by layer (which is what you’d expect), rather than by object for sequential builds:
Slic3r – sequential preview vs build order
I don’t know how you’d force-fit a four-dimensional preview into the UI, so I won’t complain at all.
There’s no way to tell which part will build first; selecting the part will highlight its entry in the list (and vice versa), but the order of appearance in that list doesn’t tell you where the G-Code will appear in the output file. That’s not a problem for extruders with a keep-out volume that looks like a cylinder, so there’s no reason for Slic3r to do it any differently: it will manage the extruder position to clear all the objects in any order.
The Pronterface preview creates the objects by reading the G-Code file and displaying the threads in order, so, if you’re quick and it’s slow, you can watch the parts appear in their to-be-built order. The detailed preview (in the small window on the right in the screenshot) does show the parts in the order they will be built as you scroll upward through the “layers”, which is the only way you can tell what will happen.
So doing sequential builds requires iterating through these steps until the right answer appears:
Add all objects separately to get each one as a separate line in the list to the right
Using the More option to duplicate objects produces multiple objects per line = Bad Idea
Arrange objects in a line from front to back
Export G-Code file
Load G-Code file into Pronterface
Pop up the Pronterface layer preview, scroll upward to show build order, note carefully
Rearrange parts in Slic3r accordingly
That’s do-able (note the different order from the Slic3r preview):
Fencing helmet grommet – manual sequential build
But it’s tedious and enough of a pain that it probably makes no sense for anything other than parts that you absolutely can’t build any other way.
In this case, completing each of the bottom washers separately eliminated all of the PETG hair between the small pegs. The upper washers still had some hair inside the inner cylinder, but not much. If you were fussy, you could suppress that by selecting “Avoid crossing perimeters”, at the cost of more flailing around in the XY plane.
All those spare grommets will make a good show-n-tell exhibit…
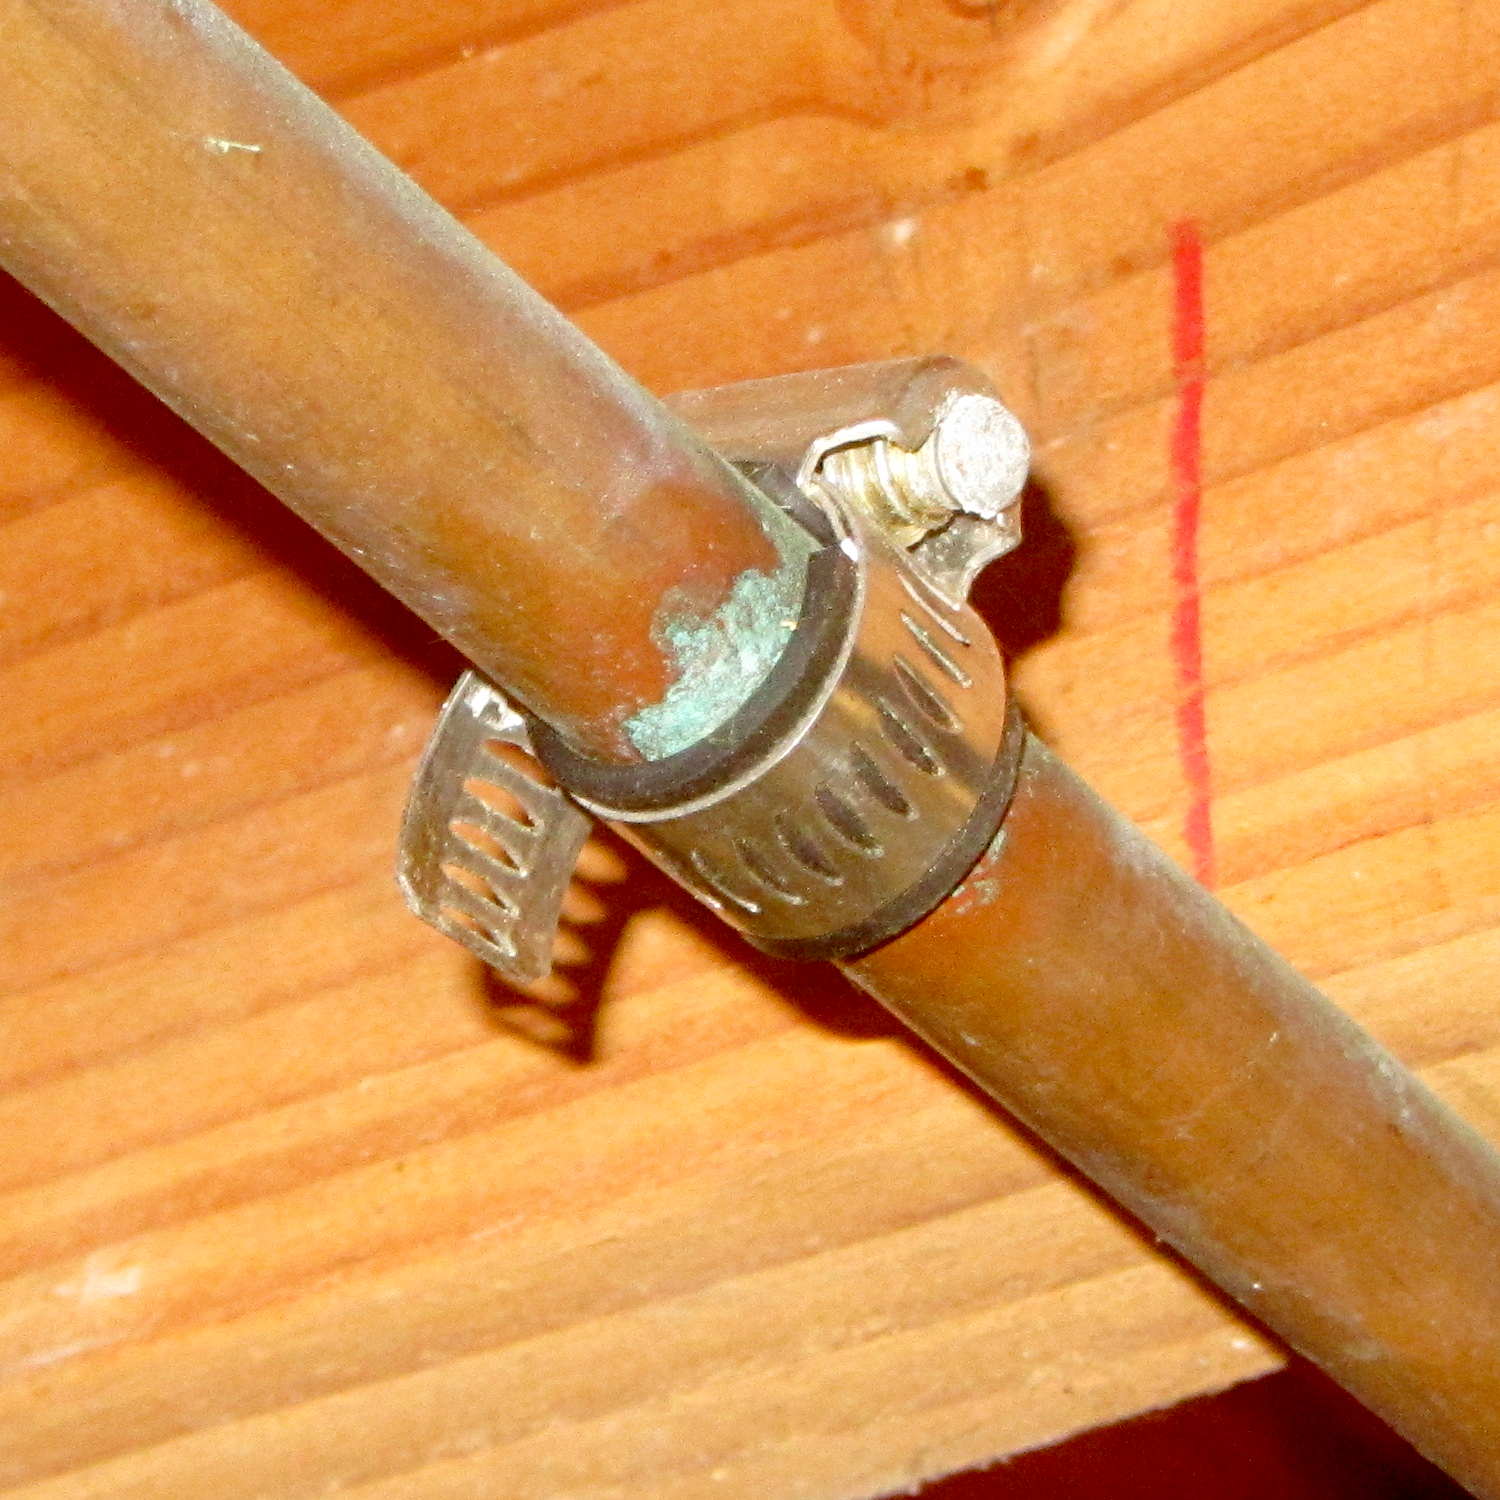
When we moved into this house, I noticed a hose clamp around the half-inch copper pipe carrying hard water to the toilets and kitchen sink:
Hose clamp patch on copper pipe
That’s obviously a whole bunch easier than removing and replacing a section of copper pipe, so I’d say it was entirely justified. The fact that it hasn’t leaked for at least the last quarter century counts for something.
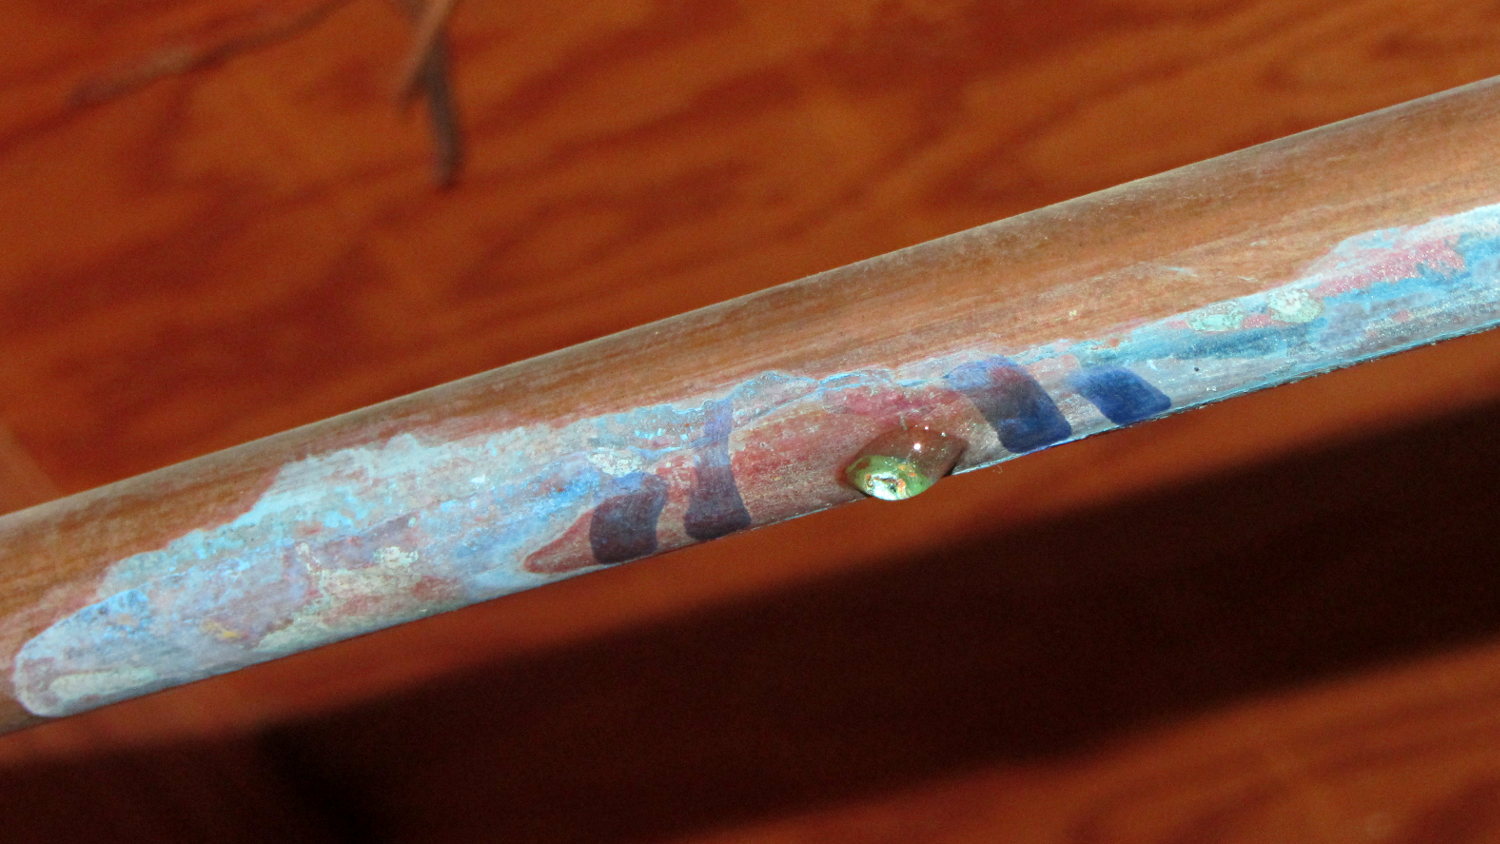
However, Mary recently discovered a small wet spot on the basement floor. Looking directly upward, we saw:
Copper pipe corrosion pinhole – 1
That was in open air; I added the marks around the corrosion to highlight it.
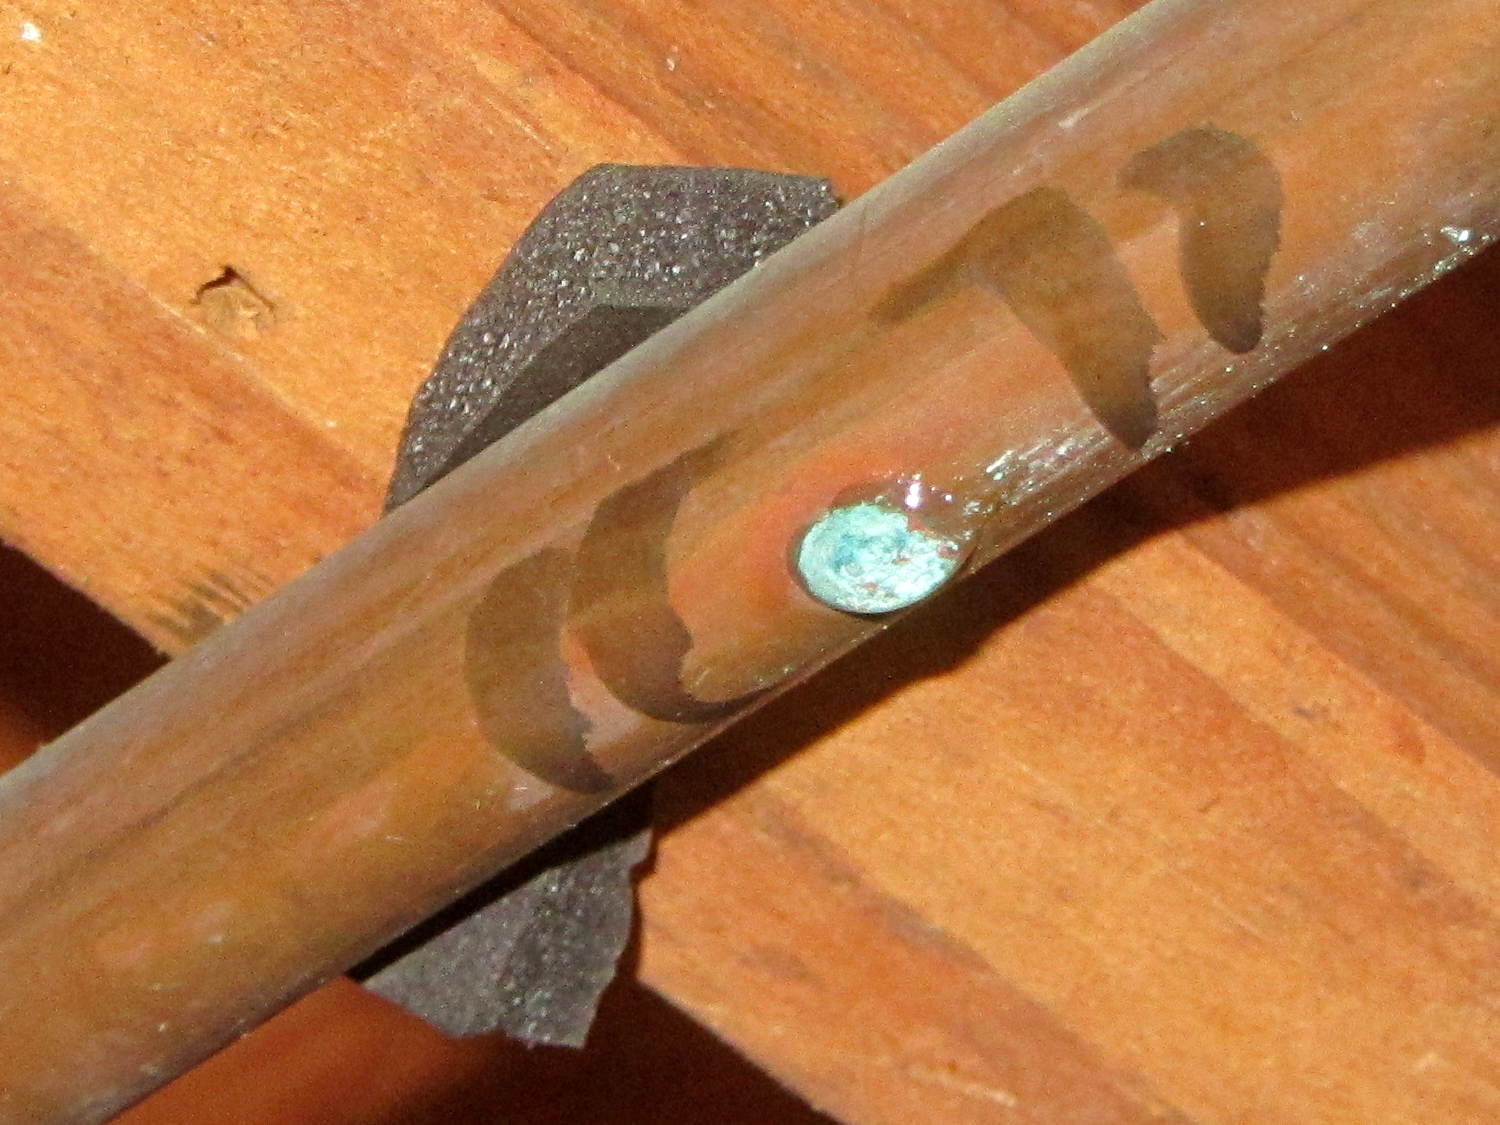
I’d applied some foam insulation on the supply end of the pipe and, just to check, peeled it back:
Copper pipe corrosion pinhole – 2
Huh. Although that leak was slow enough to not leak out of the insulation (the slit was upward), disturbing the corrosion produced a regular drip. Again, those marks are new.
OK, two active pinhole leaks and a small dry green spot further downstream says it’s finally time to replace that pipe. The lengths of pipe with the pinholes add up to about eight feet, which suggests the plumber installed a bad piece of pipe back in 1955.
Yes, I applied two more hose clamps for the holiday season, but that can’t last.
Having a good stock of tees, elbows, and unions on hand, all I need is 21 feet (not 20, alas) of shiny new copper pipe to replace the entire run containing all the pinholes; I’m not going to fiddle around replacing just a few sections.