|
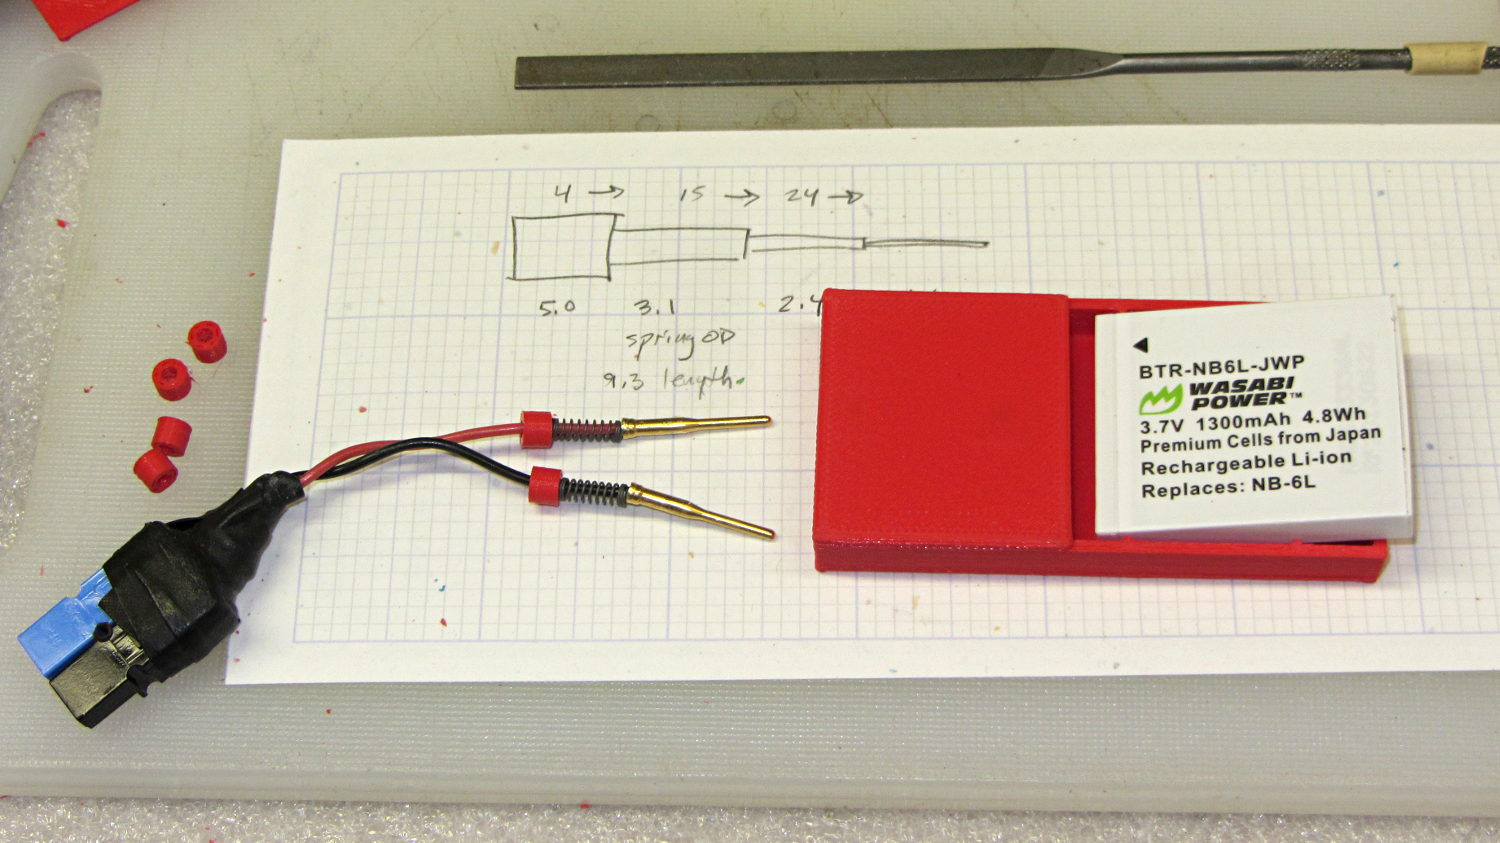
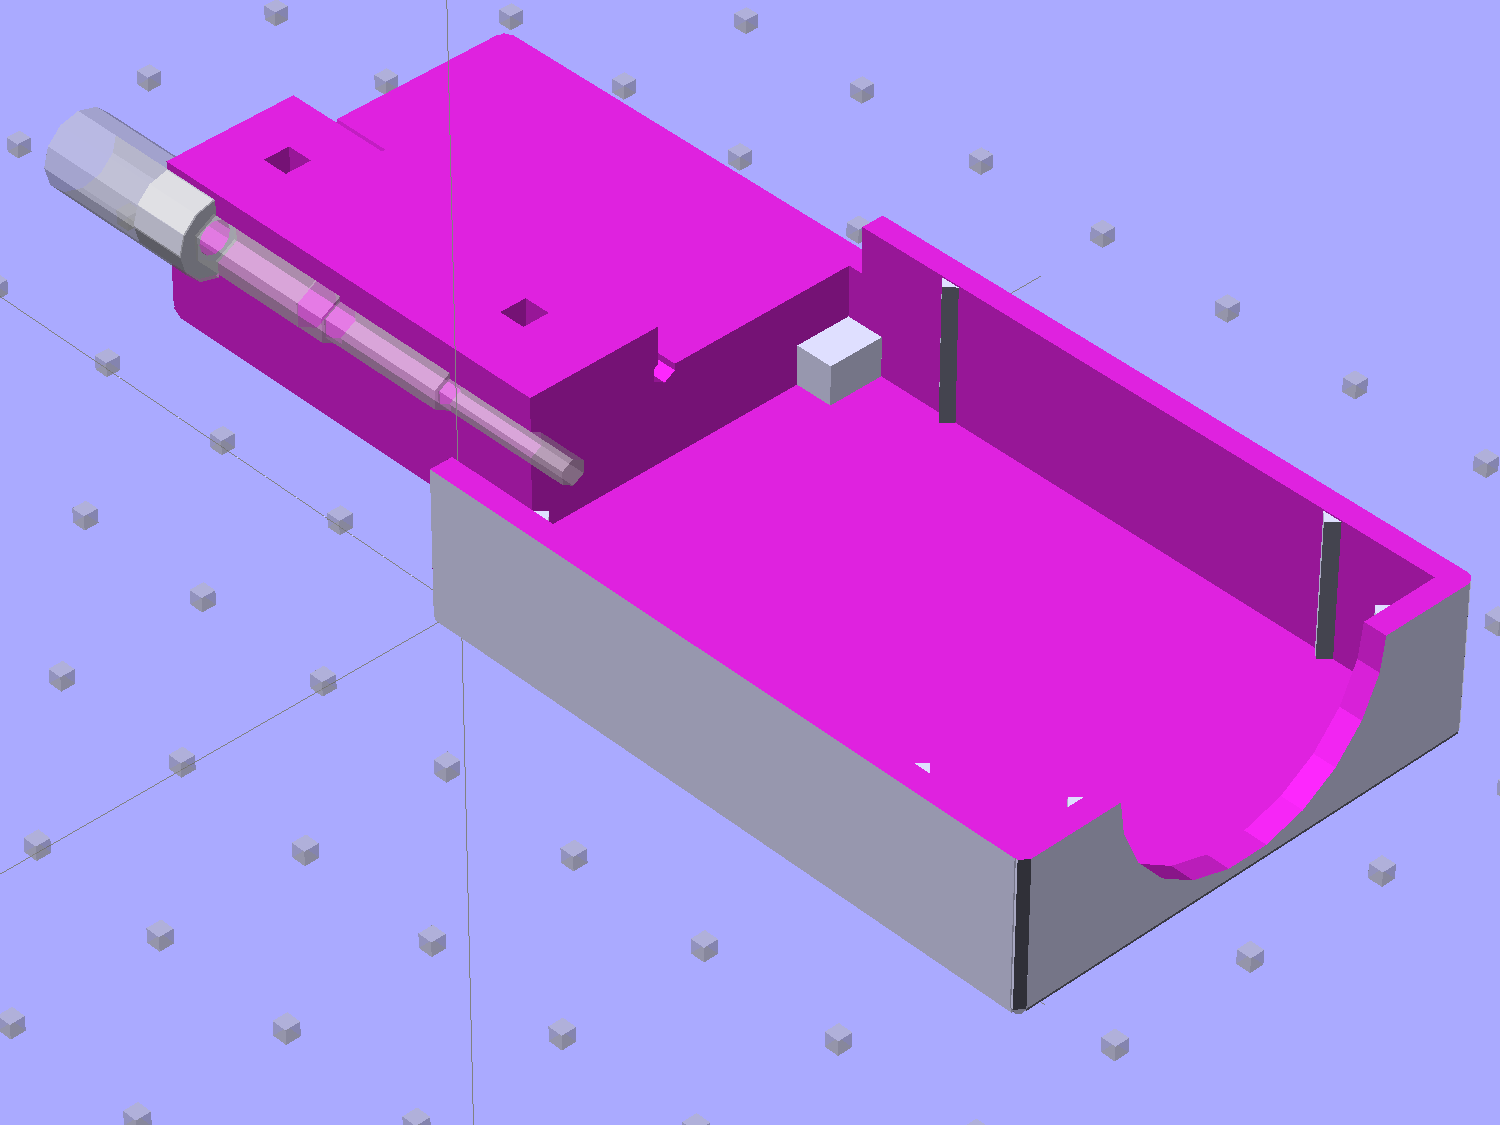
// Holder for Sony NP-BX1 Li-Ion battery |
|
// Ed Nisley KE4ZNU January 2013 |
|
// 2018-11-15 Adapted for wire leads from 1.5 mm test pins, added upright wire bases |
|
|
|
// Layout options |
|
|
|
Layout = "Show"; // Show Build Fit Case Lid Pins |
|
|
|
//- Extrusion parameters – must match reality! |
|
// Print with +2 shells and 3 solid layers |
|
|
|
ThreadThick = 0.25; |
|
ThreadWidth = 0.35; |
|
|
|
HoleWindage = 0.2; |
|
|
|
function IntegerMultiple(Size,Unit) = Unit * ceil(Size / Unit); |
|
|
|
Protrusion = 0.1; // make holes end cleanly |
|
|
|
inch = 25.4; |
|
|
|
BuildOffset = 3.0; // clearance for build layout |
|
|
|
Gap = 2.0; // separation for Fit parts |
|
|
|
//- Battery dimensions – rationalized from several samples |
|
// Coordinate origin at battery contact face with key openings below contacts |
|
|
|
Battery = [43.0,30.0,9.5]; // X = length, Y = width, Z = thickness |
|
|
|
Contacts = [[-0.75,6.0,6.2],[-0.75,16.0,6.2]]; // relative to battery edge, front, and bottom |
|
|
|
KeyBlocks = [[1.75,3.70,2.90],[1.75,3.60,2.90]]; // recesses in battery face set X position |
|
|
|
//- Pin dimensions |
|
|
|
ID = 0; |
|
OD = 1; |
|
LENGTH = 2; |
|
|
|
PinShank = [1.5,2.0,6.5]; // shank, flange, compressed length |
|
PinFlange = [1.5,2.0,0.5]; // flange, length included in PinShank |
|
PinTip = [0.9,0.9,2.5]; // extended spring-loaded tip |
|
|
|
PinChannel = PinFlange[LENGTH] + 0.5; // cut behind flange for solder overflow |
|
PinRecess = 3.0; // recess behind pin flange end for epoxy fill |
|
|
|
|
|
echo(str("Contact tip dia: ",PinTip[OD])); |
|
echo(str(" .. shank dia: ",PinShank[ID])); |
|
|
|
OverTravel = 0.5; // space beyond battery face at X origin |
|
|
|
//- Holder dimensions |
|
|
|
GuideRadius = ThreadWidth; // friction fit ridges |
|
GuideOffset = 7; // from compartment corners |
|
WallThick = 4*ThreadWidth; // holder sidewalls |
|
|
|
BaseThick = 6*ThreadThick; // bottom of holder to bottom of battery |
|
TopThick = 6*ThreadThick; // top of battery to top of holder |
|
|
|
ThumbRadius = 10.0; // thumb opening at end of battery |
|
|
|
CornerRadius = 3*ThreadThick; // nice corner rounding |
|
|
|
CaseSize = [Battery.x + PinShank[LENGTH] + OverTravel + PinRecess + GuideRadius + WallThick, |
|
Battery.y + 2*WallThick + 2*GuideRadius, |
|
Battery.z + BaseThick + TopThick]; |
|
|
|
CaseOffset = [-(PinShank[LENGTH] + OverTravel + PinRecess),-(WallThick + GuideRadius),0]; // position around battery |
|
|
|
LidOverhang = 2.0; // over top of battery for retention |
|
|
|
LidSize = [-CaseOffset.x + LidOverhang,CaseSize.y,TopThick]; |
|
|
|
LidOffset = [0.0,CaseOffset.y,0]; |
|
|
|
//———————- |
|
// Useful routines |
|
|
|
module PolyCyl(Dia,Height,ForceSides=0) { // based on nophead's polyholes |
|
|
|
Sides = (ForceSides != 0) ? ForceSides : (ceil(Dia) + 2); |
|
|
|
FixDia = Dia / cos(180/Sides); |
|
|
|
cylinder(r=(FixDia + HoleWindage)/2,h=Height,$fn=Sides); |
|
} |
|
|
|
//——————- |
|
//– Guides for tighter friction fit |
|
|
|
module Guides() { |
|
translate([GuideOffset,-GuideRadius,0]) |
|
PolyCyl(2*GuideRadius,(Battery.z – Protrusion),4); |
|
translate([GuideOffset,(Battery.y + GuideRadius),0]) |
|
PolyCyl(2*GuideRadius,(Battery.z – Protrusion),4); |
|
translate([(Battery.x – GuideOffset),-GuideRadius,0]) |
|
PolyCyl(2*GuideRadius,(Battery.z – Protrusion),4); |
|
translate([(Battery.x – GuideOffset),(Battery.y + GuideRadius),0]) |
|
PolyCyl(2*GuideRadius,(Battery.z – Protrusion),4); |
|
translate([(Battery.x + GuideRadius),GuideOffset/2,0]) |
|
PolyCyl(2*GuideRadius,(Battery.z – Protrusion),4); |
|
translate([(Battery.x + GuideRadius),(Battery.y – GuideOffset/2),0]) |
|
PolyCyl(2*GuideRadius,(Battery.z – Protrusion),4); |
|
|
|
} |
|
|
|
//– Contact pins |
|
// Rotated to put them in their natural oriention |
|
// Aligned to put tip base / end of shank at Overtravel limit |
|
|
|
module PinShape() { |
|
|
|
translate([-(PinShank[LENGTH] + OverTravel),0,0]) |
|
rotate([0,90,0]) |
|
rotate(180/6) |
|
union() { |
|
PolyCyl(PinTip[OD],PinShank[LENGTH] + PinTip[LENGTH],6); |
|
PolyCyl(PinShank[ID],PinShank[LENGTH] + Protrusion,6); // slight extension for clean cuts |
|
PolyCyl(PinFlange[OD],PinFlange[LENGTH],6); |
|
} |
|
} |
|
|
|
// Position pins to put end of shank at battery face |
|
// Add wire exit channel between pins |
|
// Does not include recess access |
|
|
|
module PinAssembly() { |
|
|
|
union() { |
|
for (p = Contacts) |
|
translate([0,p.y,p.z]) |
|
PinShape(); |
|
translate([-(PinShank[LENGTH] + OverTravel) + PinChannel/2, |
|
(Contacts[1].y + Contacts[0].y)/2, |
|
Contacts[0].z]) |
|
cube([PinChannel,(Contacts[1].y – Contacts[0].y),PinFlange[OD]],center=true); |
|
} |
|
} |
|
|
|
//– Case with origin at battery corner |
|
|
|
module Case() { |
|
|
|
difference() { |
|
|
|
union() { |
|
|
|
difference() { |
|
|
|
translate([(CaseSize.x/2 + CaseOffset.x), // basic case shape |
|
(CaseSize.y/2 + CaseOffset.y), |
|
(CaseSize.z/2 – BaseThick)]) |
|
hull() |
|
for (i=[-1,1], j=[-1,1], k=[-1,1]) |
|
translate([i*(CaseSize.x/2 – CornerRadius), |
|
j*(CaseSize.y/2 – CornerRadius), |
|
k*(CaseSize.z/2 – CornerRadius)]) |
|
sphere(r=CornerRadius,$fn=8); |
|
|
|
translate([-OverTravel,-GuideRadius,0]) |
|
cube([(Battery.x + GuideRadius + OverTravel), |
|
(Battery.y + 2*GuideRadius), |
|
(Battery.z + Protrusion)]); // battery space |
|
} |
|
|
|
Guides(); // improve friction fit |
|
|
|
translate([-OverTravel,-GuideRadius,0]) // battery keying blocks |
|
cube(KeyBlocks[0] + [OverTravel,GuideRadius,0],center=false); |
|
translate([-OverTravel,(Battery.y – KeyBlocks[1].y),0]) |
|
cube(KeyBlocks[1] + [OverTravel,GuideRadius,0],center=false); |
|
|
|
} |
|
|
|
translate([(-OverTravel), // battery top access |
|
(CaseOffset.y – Protrusion), |
|
Battery.z]) |
|
cube([CaseSize.x,(CaseSize.y + 2*Protrusion),(TopThick + Protrusion)]); |
|
|
|
translate([(CaseOffset.x – Protrusion), // battery insertion allowance |
|
(CaseOffset.y – Protrusion), |
|
Battery.z]) |
|
cube([(CaseSize.x + 2*Protrusion),(CaseSize.y + 2*Protrusion),(TopThick + Protrusion)]); |
|
|
|
|
|
translate([(Battery.x – Protrusion), // remove thumb notch |
|
(CaseSize.y/2 + CaseOffset.y), |
|
(ThumbRadius)]) |
|
rotate([90,0,0]) |
|
rotate([0,90,0]) |
|
cylinder(r=ThumbRadius, |
|
h=(WallThick + GuideRadius + 2*Protrusion), |
|
$fn=22); |
|
|
|
PinAssembly(); |
|
|
|
translate([CaseOffset.x + PinRecess/2 + Protrusion/2,(Contacts[1].y + Contacts[0].y)/2,Contacts[0].z]) |
|
cube([PinRecess + Protrusion, |
|
(Contacts[1].y – Contacts[0].y + PinFlange[OD]), |
|
2*PinFlange[OD]],center=true); |
|
|
|
} |
|
|
|
} |
|
|
|
// Lid position offset to match case |
|
|
|
module Lid() { |
|
|
|
translate([-LidSize.x/2 + LidOffset.x + LidOverhang,LidSize.y/2 + LidOffset.y,0]) |
|
difference() { |
|
hull() |
|
for (i=[-1,1], j=[-1,1], k=[-1,1]) |
|
translate([i*(LidSize.x/2 – CornerRadius), |
|
j*(LidSize.y/2 – CornerRadius), |
|
k*(LidSize.z – CornerRadius)]) // double thickness for flat bottom |
|
sphere(r=CornerRadius,$fn=8); |
|
|
|
translate([0,0,-LidSize.z/2]) |
|
cube([(LidSize.x + 2*Protrusion),(LidSize.y + 2*Protrusion),LidSize.z],center=true); |
|
|
|
cube([LidSize.x/4,0.75*LidSize.y,4*ThreadThick],center=true); // epoxy recess |
|
} |
|
|
|
} |
|
|
|
|
|
//——————- |
|
// Build it! |
|
|
|
if (Layout == "Case") |
|
Case(); |
|
|
|
if (Layout == "Lid") |
|
Lid(); |
|
|
|
if (Layout == "Pins") { |
|
color("Silver",0.5) |
|
PinShape(); |
|
PinAssembly(); |
|
} |
|
|
|
if (Layout == "Show") { // reveal pin assembly |
|
difference() { |
|
Case(); |
|
|
|
translate([(CaseOffset.x – Protrusion), |
|
Contacts[1].y, |
|
Contacts[1].z]) |
|
cube([(-CaseOffset.x + Protrusion), |
|
CaseSize.y, |
|
(CaseSize.z – Contacts[0].z + Protrusion)]); |
|
|
|
translate([(CaseOffset.x – Protrusion), |
|
(CaseOffset.y – Protrusion), |
|
0]) |
|
cube([(-CaseOffset.x + Protrusion), |
|
Contacts[0].y + Protrusion – CaseOffset.y, |
|
CaseSize.z]); |
|
} |
|
|
|
color("Silver",0.15) |
|
PinAssembly(); |
|
|
|
translate([0,0,Battery.z + Gap]) |
|
Lid(); |
|
} |
|
|
|
if (Layout == "Build") { |
|
translate([-(CaseSize.x/2 + CaseOffset.x),-(CaseOffset.y – BuildOffset),BaseThick]) |
|
Case(); |
|
translate([CaseSize.y/2,(CaseOffset.x/2 – BuildOffset),0]) |
|
rotate([0,0,90]) |
|
Lid(); |
|
} |
|
|
|
if (Layout == "Fit") { |
|
Case(); |
|
translate([0,0,(Battery.z + Gap)]) |
|
Lid(); |
|
color("Silver",0.25) |
|
PinAssembly(); |
|
|
|
} |
|
|