Ed Nisley's Blog: Shop notes, electronics, firmware, machinery, 3D printing, laser cuttery, and curiosities. Contents: 100% human thinking, 0% AI slop.
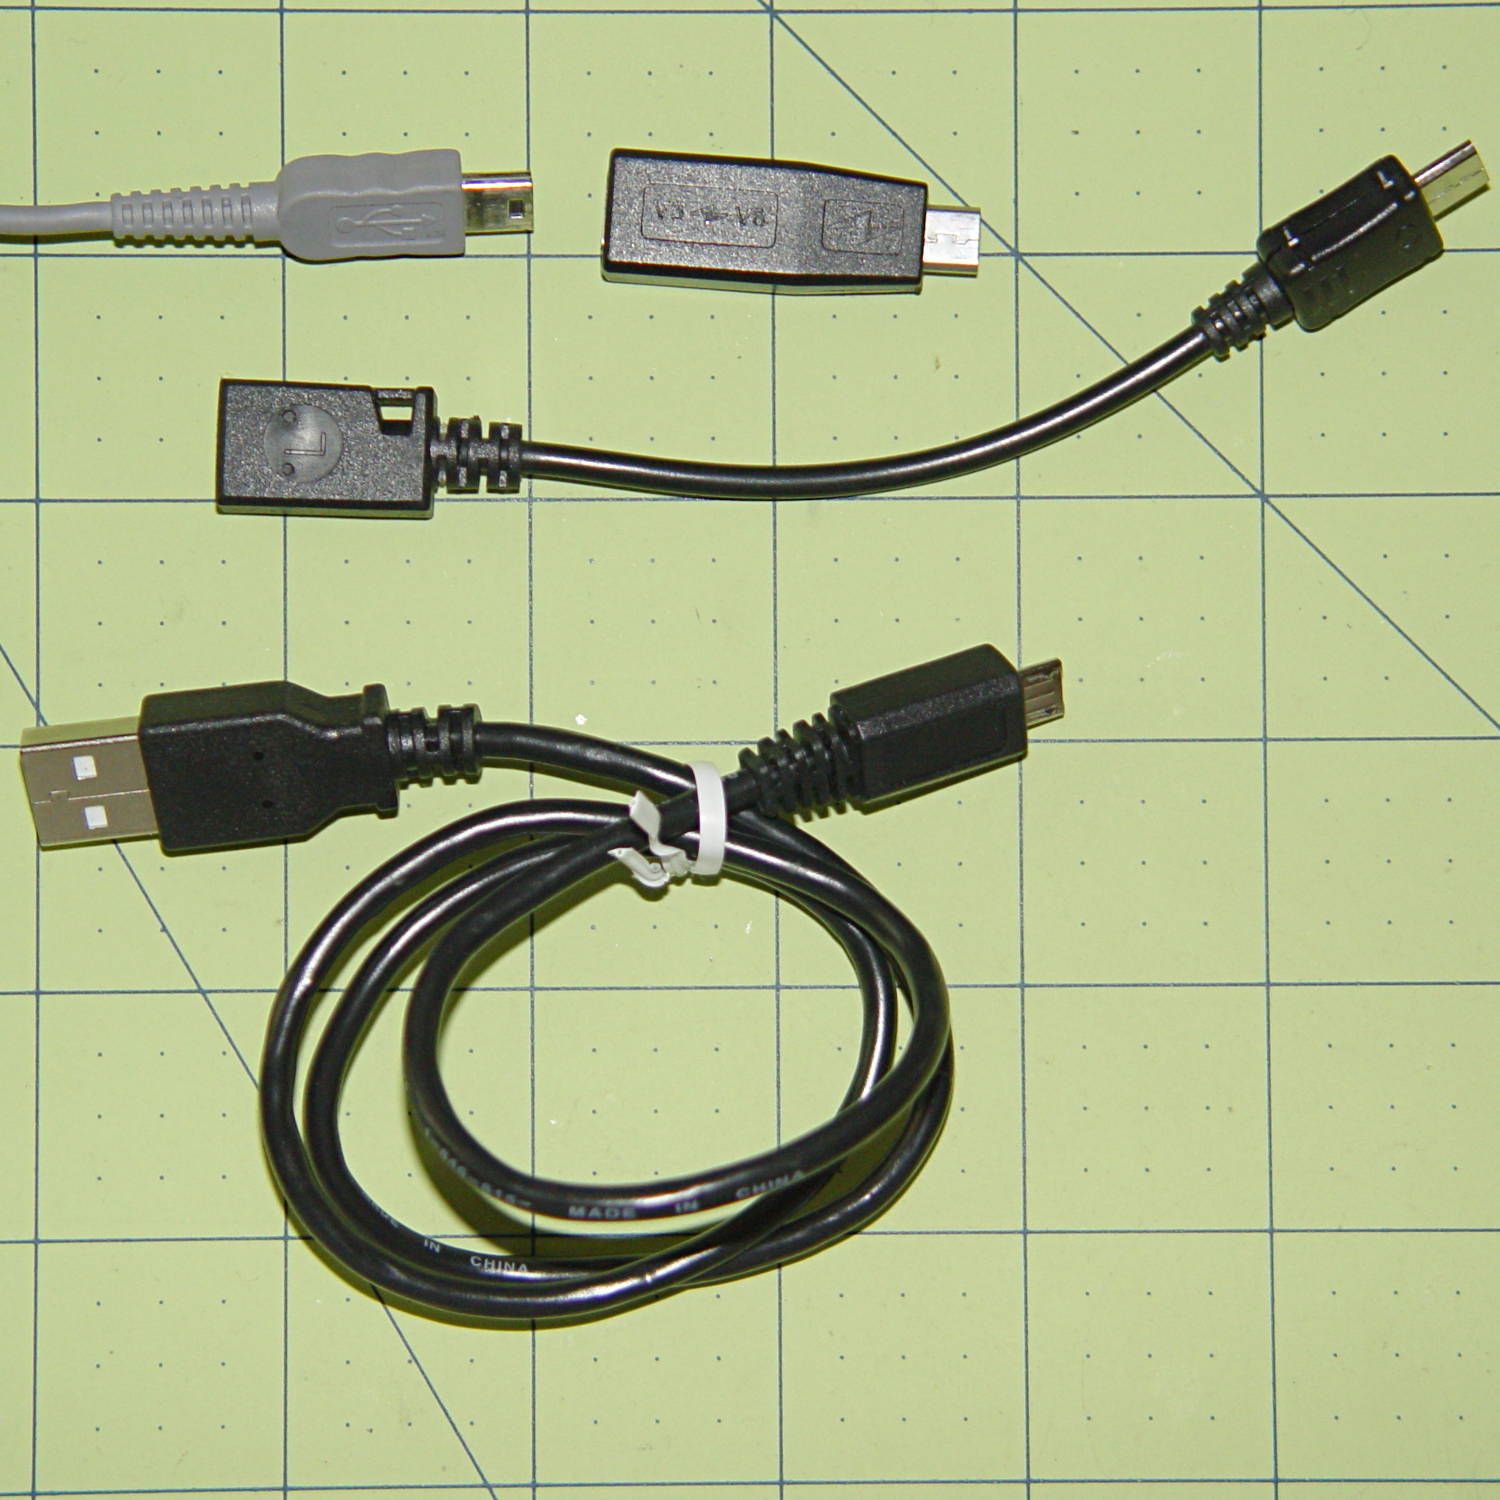
The Sony HDR-AS30V camera has a USB Micro-B jack. One might think all three of these cables / adapters should work:
USB Micro-B adapters
But no:
The blocky Mini-to-Micro adapter on the top has no data lines
The Mini-to-Micro adapter cable works
The lower cable produces dependable disconnects
There is, of course, no way to determine any of that, except by trying each one to see what happens; the product descriptions diverge from the truth in myriad ways.
The camera came with a Micro-B cable that undoubtedly worked, but you try keeping track of one particular USB cable amid all the others.
Pinning the top of Mary’s latest quilt used more than 1600 pins: three boxes of specialized quilting safety pins, plus straight quilting pins tucked into all the 3D printed / silicone filled caps. Less than a quarter of the quilt top fits on the table:
Quilt top with pins
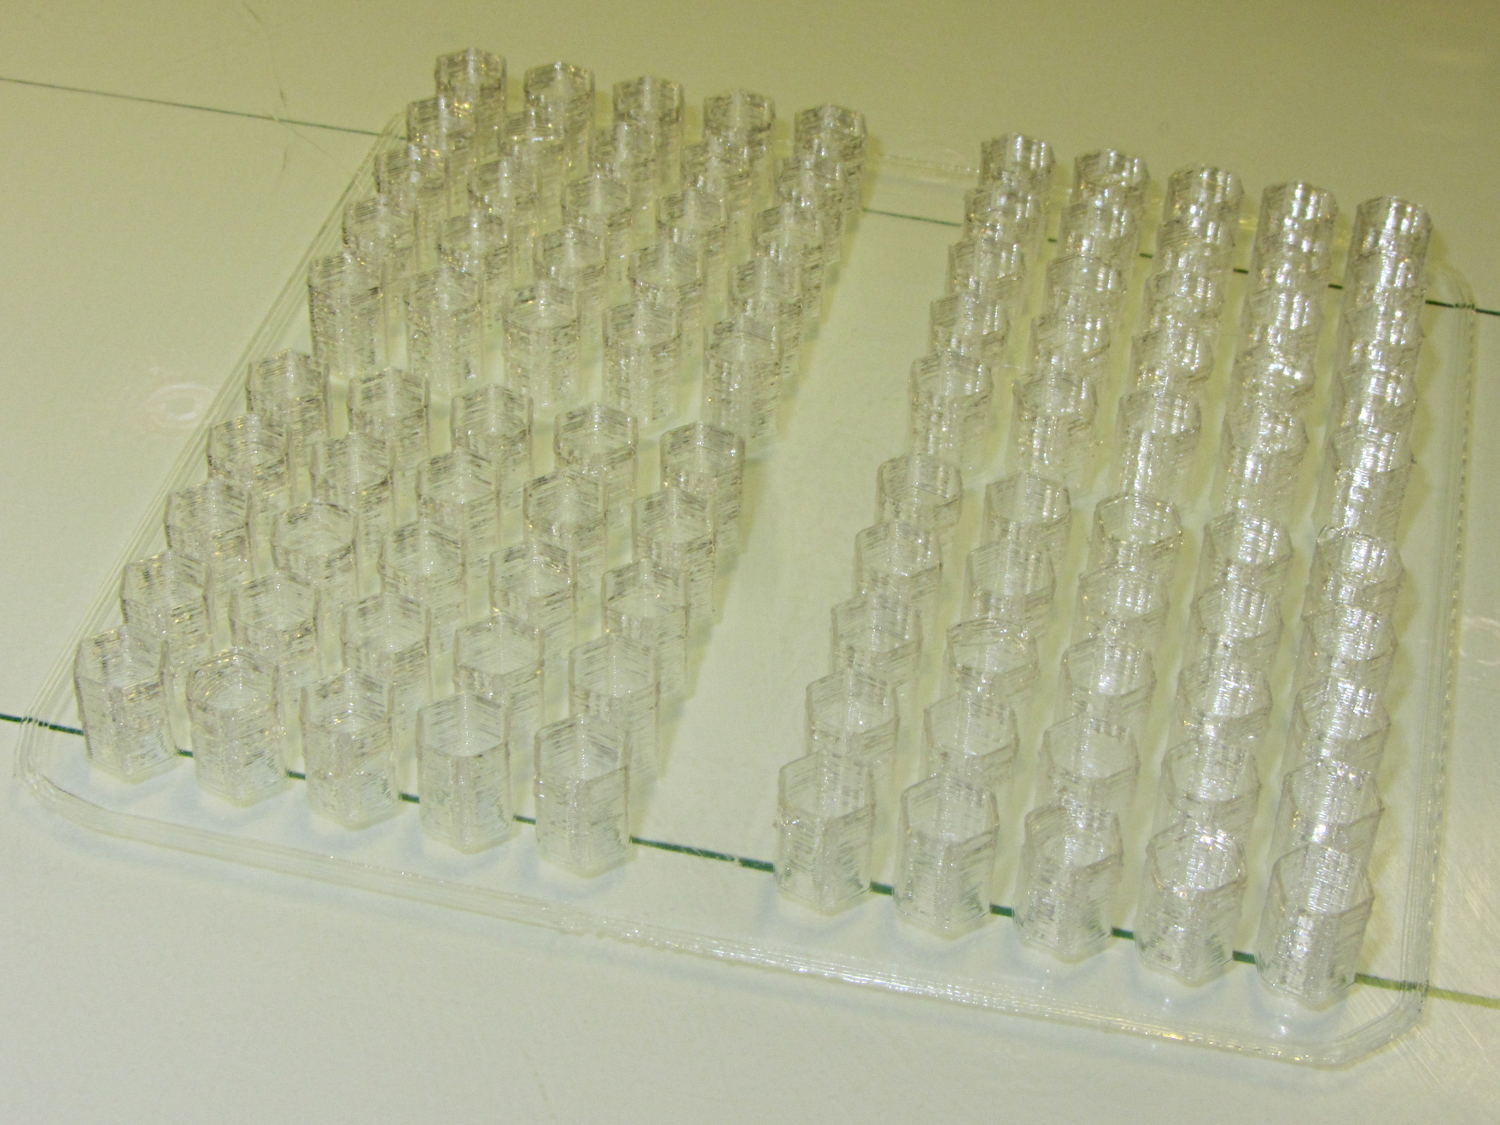
Although Mary doesn’t need them right now, I made another batch of 100 caps for her next project:
Quilting pin caps – 4 x 25 – on platform
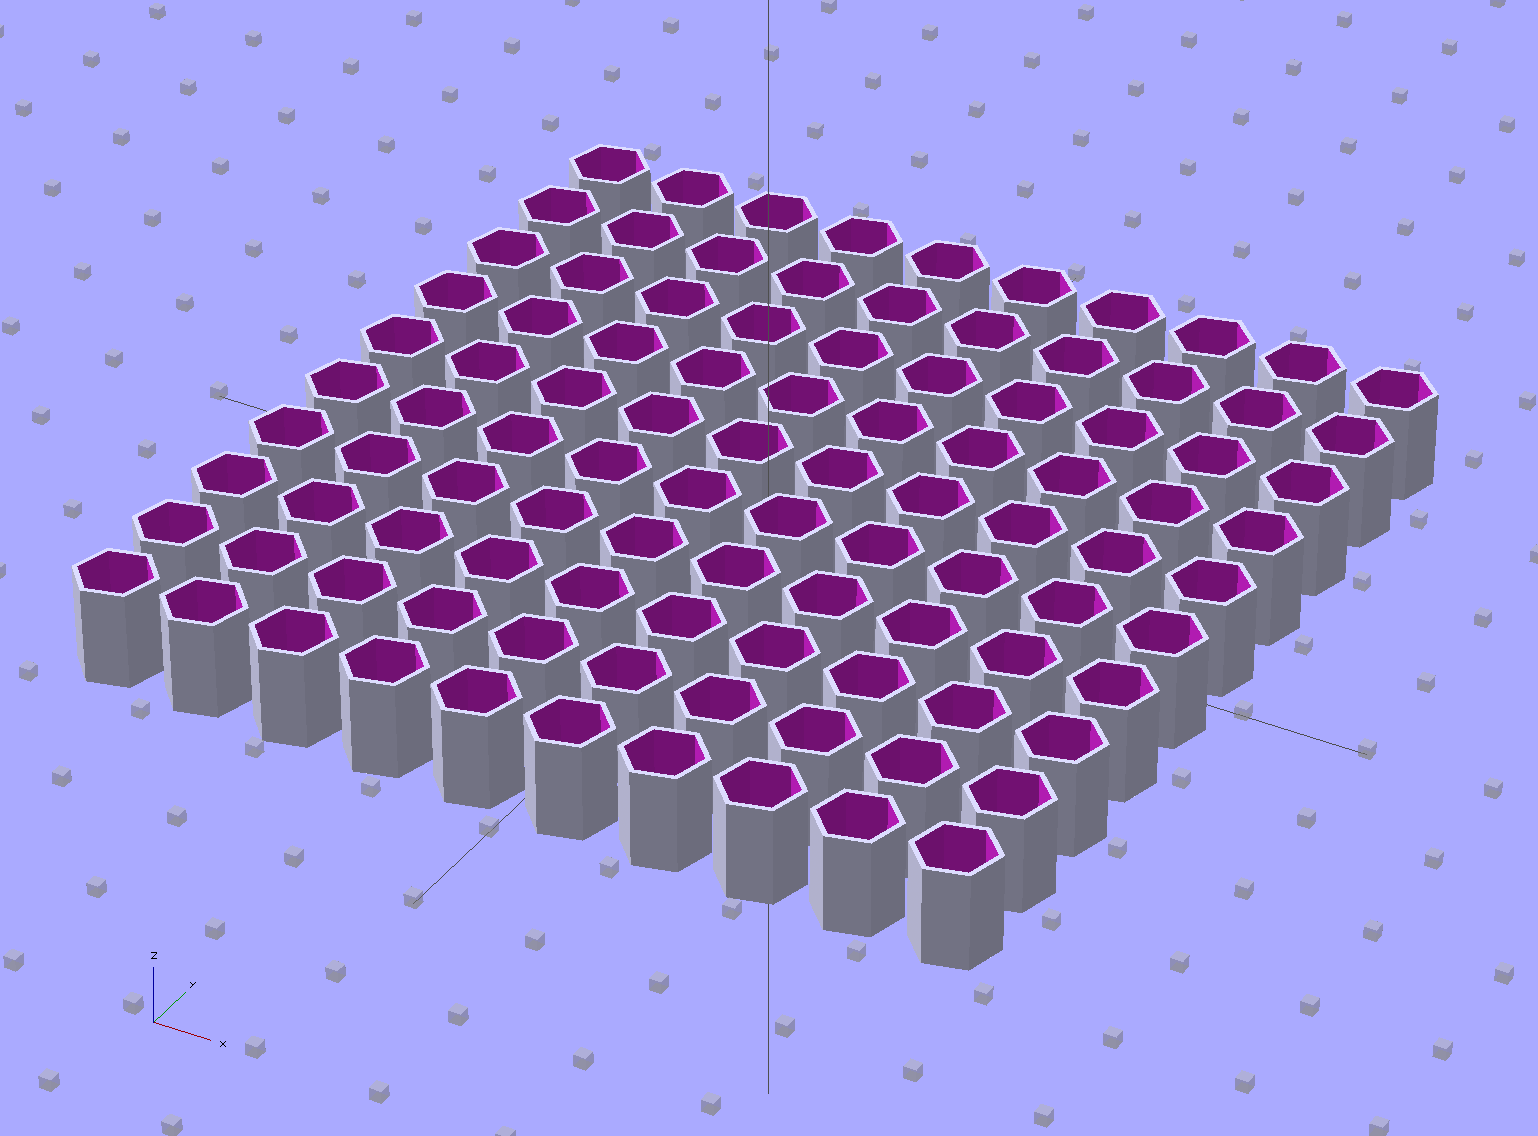
I tweaked the OpenSCAD source to build a 10×10 array:
Quilting Pin Cap – 10×10 array
But it turns out that a 5×5 array of caps, duplicated four times, works out better:
Quilting Pin Cap – 5×5 array
Slic3r takes far longer to process the larger array than to make four copies of the smaller array.
Half an hour later, they’re ready for silicone fill. In retrospect, natural PLA wasn’t a good choice for this job: there’s no way (for me) to take a picture of translucent silicone in crystalline PLA atop waxed paper on a white cutting board under fluorescent light…
On the upside, however, you can see exactly how far the pin goes into the cap:
With the platform and extruder starting at the 19.5 °C = 67 °F Basement Laboratory ambient …
The extruder takes 1 minute to reach 175 °C, overshoots to about 180 °C, crosses 175 °C going downward at 1:30, then gets up to 174 °C again at 3:15. I ran a PID tuning session quite a while ago with inconclusive results. Reducing the initial overshoot would probably increase the time-to-get-ready, with no net improvement.
The platform, which isn’t the stock Makergear hardware, requires 3:30 to reach 69 °C, just under the 70 °C target, at which point it’s ready to start. There’s no insulation under the PCB-trace heater, but some previous tinkering implies that running bare doesn’t make much difference, particularly with a fan blowing on the top surface of the glass.
Remember that’s with an outboard SSR to unload the RAMBo’s MOSFET.
By and large, the M2 is ready to print in under 5 minutes from a standing start, which is just about enough time to spritz hair spray on the platform, load the G-Code into Pronterface, and so forth and so on.
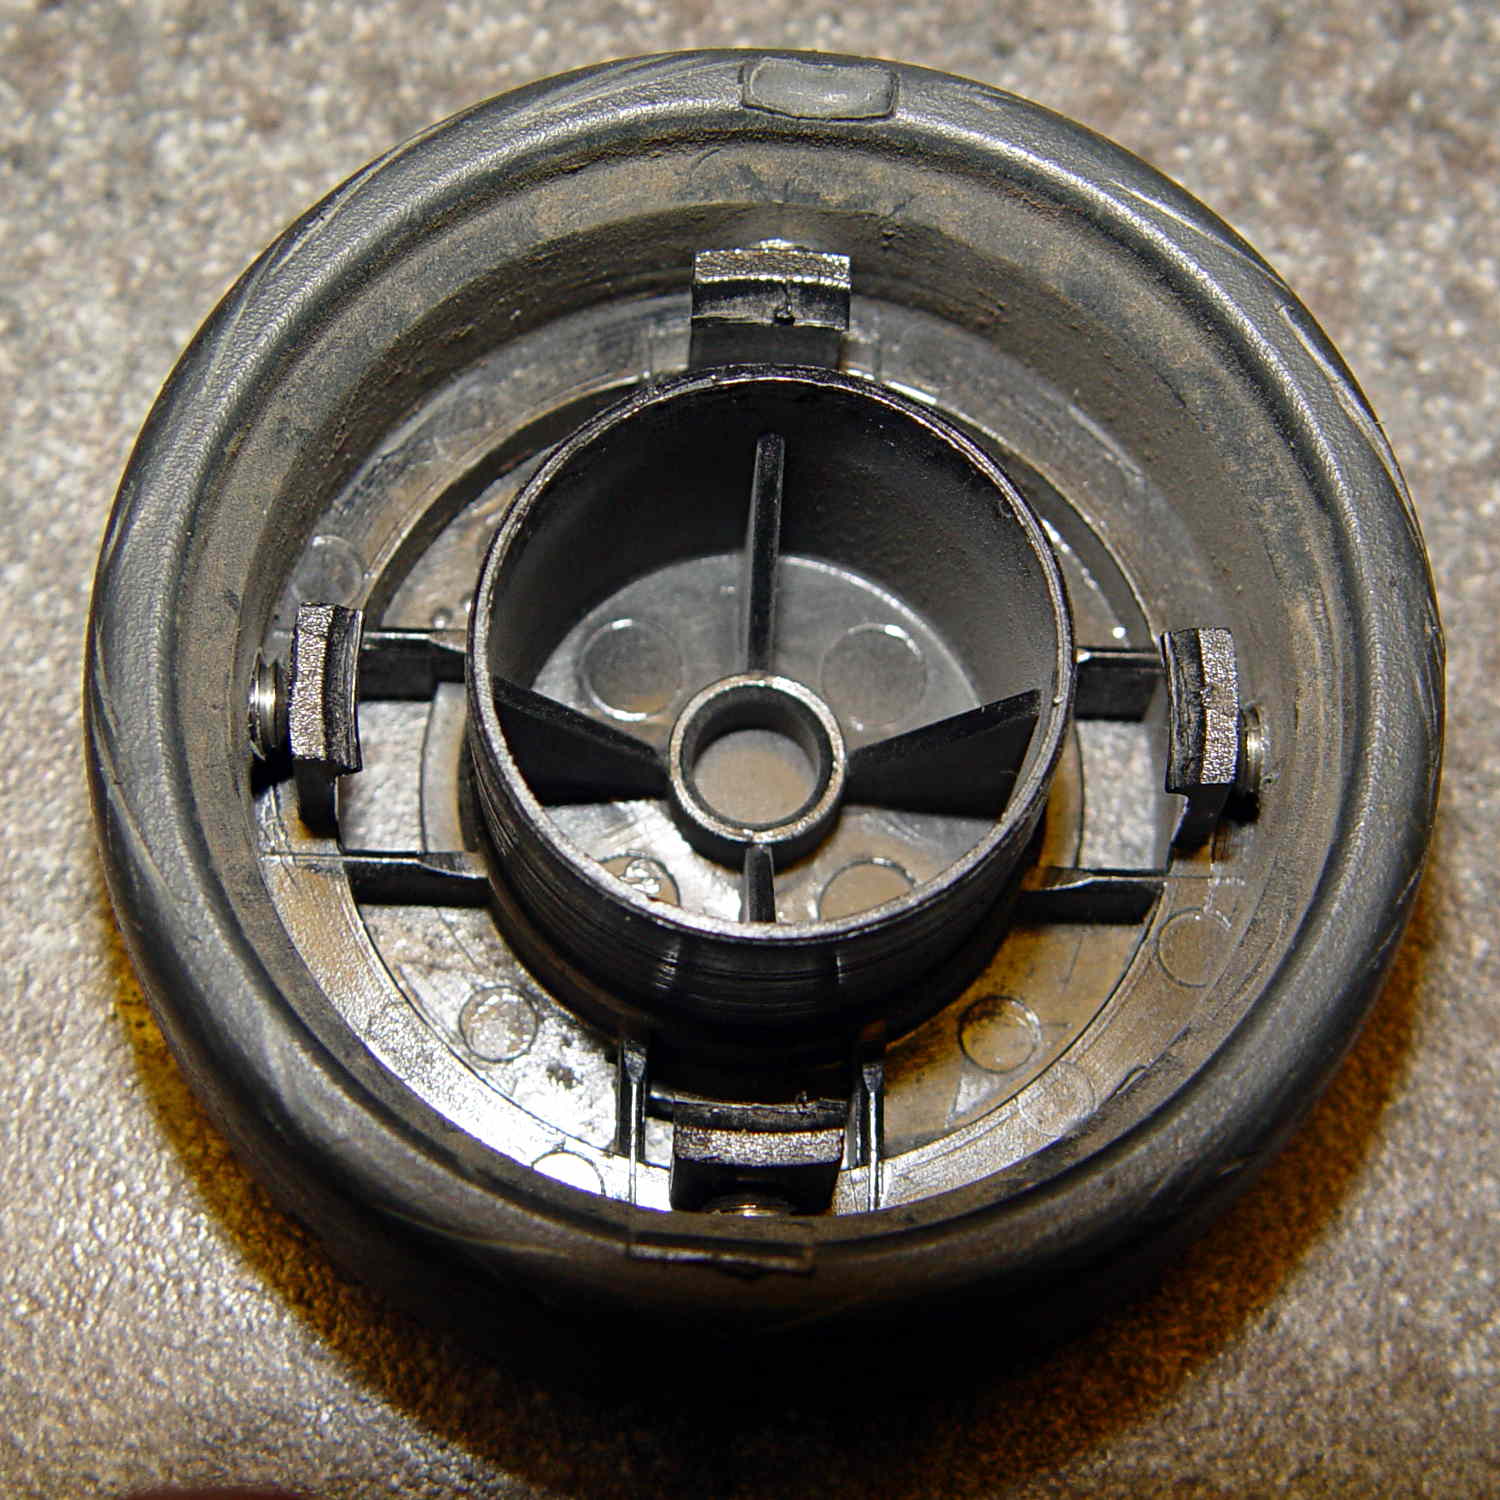
We still haven’t exhausted the never-sufficiently-to-be-damned Samsung Quiet Jet vacuum’s bag supply, so when a wheel fell off the floor brush again, I had to come up with a better fix than a twist of wire. Obviously, those delicate little retaining latches need more persuasion.
Capture the wheel in the Sherline’s 4-jaw chuck on the rotary table and drill four holes just below the end of the latches:
Samsung wheel – drilling
The wheel is 20 mm thick. The holes lie 9 mm back from the open end of the wheel or 11 mm from the closed end at the chuck face. Drill maybe 6 mm down; I did it by eye, jogging slowly downward until the tip of the drill touched the latch.
Tap the holes and install four 8-32 setscrews:
Samsung wheel – setscrews installed
I don’t have a bottoming tap, but an ordinary plug tap was Good Enough; the incomplete threads should hold the setscrews in place.
Reinstall the wheel, tighten the setscrews, and wrap festive silicone tape around the whole affair:
Samsung floor brush – wheel installed
I heroically resisted the temptation to pry the other wheel off for a preemptive repair …
These seem to be ordinary birch logs, cut into short chunks, sporting a top crosscut loaded with fire starter:
Light-n-Go Bonfire Log – stacked
The front of the label makes them seem wonderfully eco-friendly, but the fine print on the back shows that they’re from the Old World:
Light-n-Go Bonfire Log – origin label
There’s surely a universe where shipping heat-treated firewood from Estonia to Poughkeepsie makes perfect sense. I just didn’t realize I was living in it.
Last week I gave a class at Squidwrench that helped bootstrap folks from new-to-Arduino to won’t-blow-it-up, showing how the I/O pins work in digital and analog mode with a bit of hands-on experimentation:
Potentiometer – analog input
We also covered some setup, how the whole compiler thing works, and suchlike.
The parts kit contains a 10 kΩ pot (with detents!), a green LED (with resistor!), and a jumper that serves as both a switch and a short antenna for an input without a pullup. They’re all terminated in header pins with heatstink tubing for strain relief.
The ZIP file with all the source code (ArduinoIOIntro-2014-06.zip.odt) masquerades as an OpenDocument text file, because WordPress prohibits ZIP files. Just rename it to remove the ODT suffix, unzip it, and there you are. It also includes the PDF, because none of the Arduino files have any comments at all…