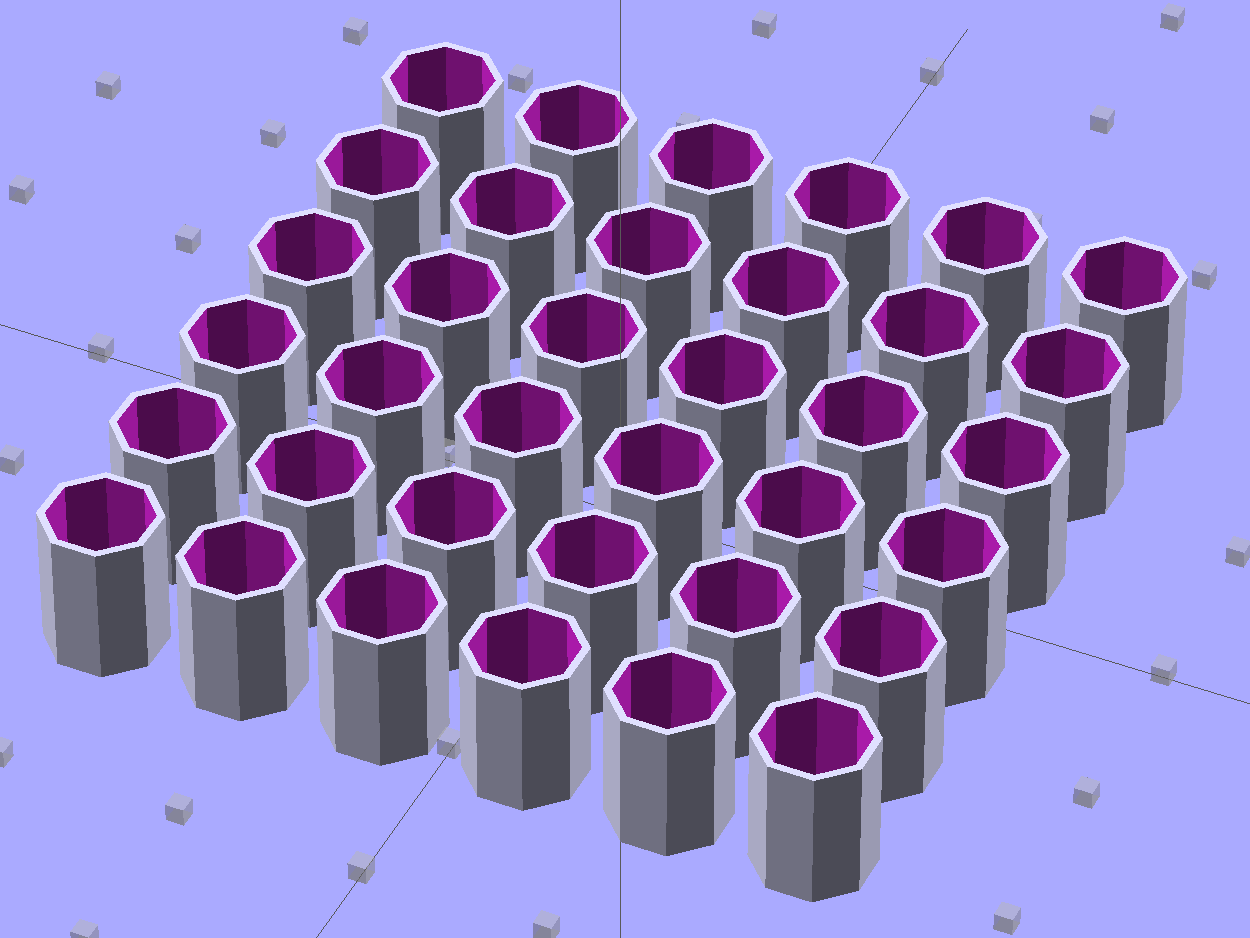
These quilting pin caps are slightly longer than the previous version and, due to the M2’s smaller nozzle, have slightly thinner single-thread walls. Because Slic3r does a better (although not ideal) job of path planning than Skeinforge, it’s easier to create an array of the caps in the solid model than to manually add duplicates in Slic3r:
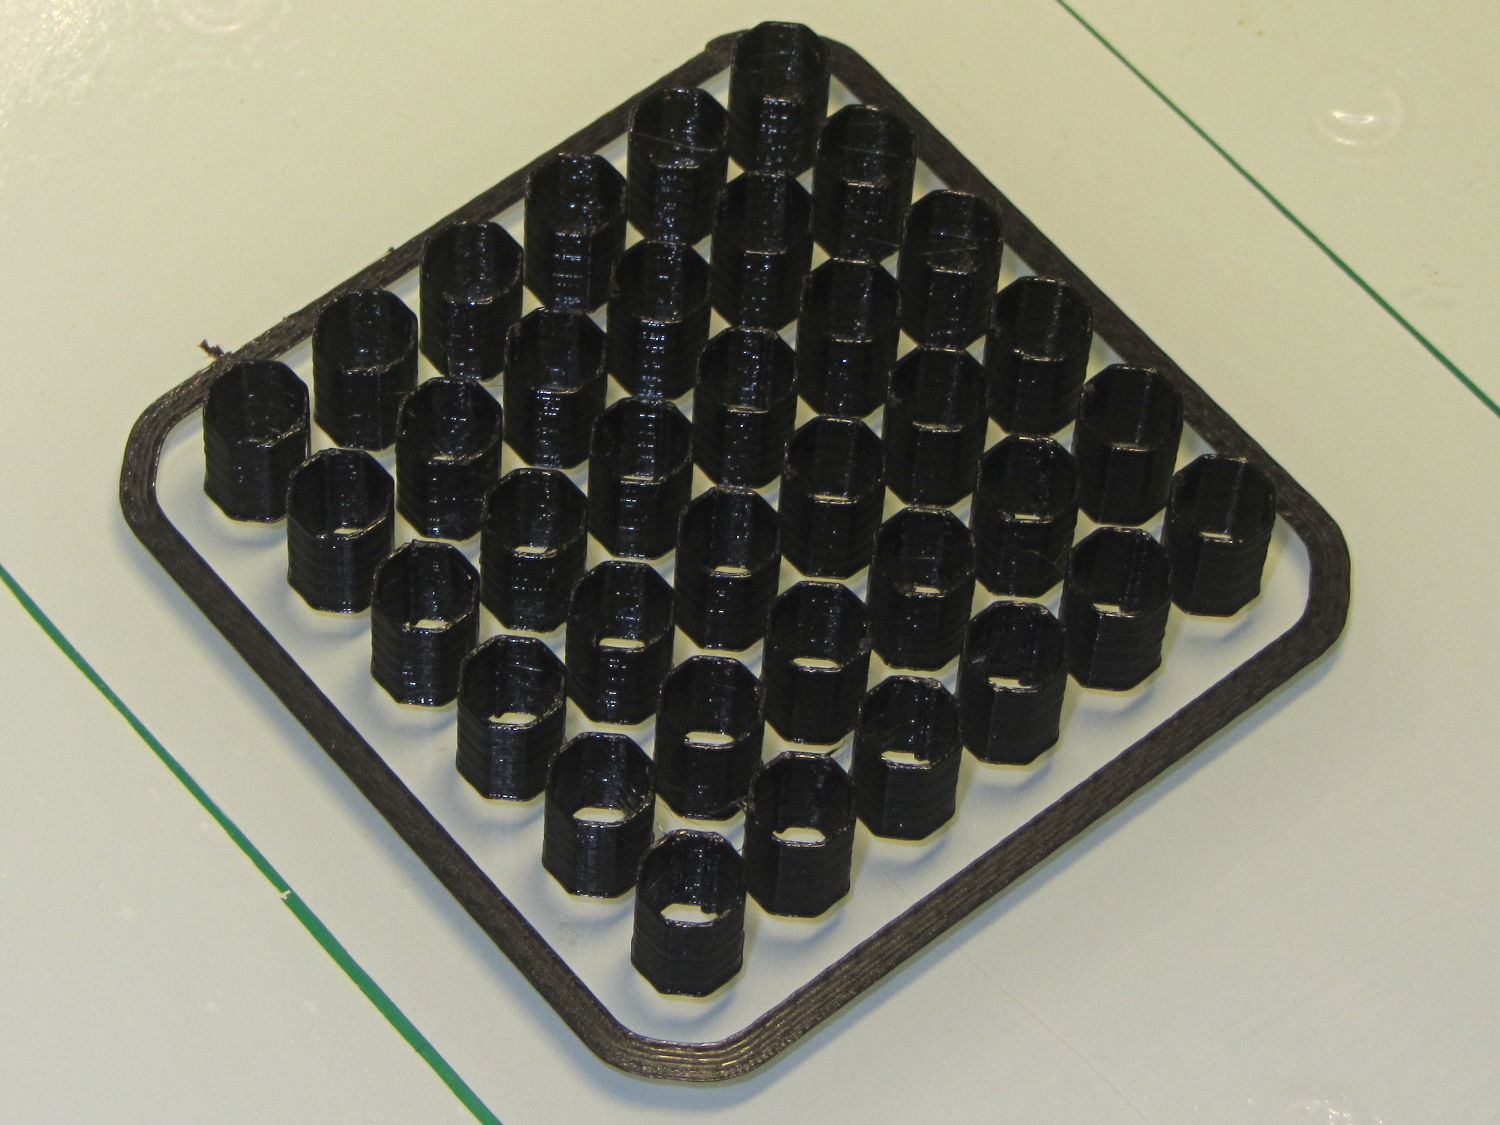
They look like egg cases from Prometheus:
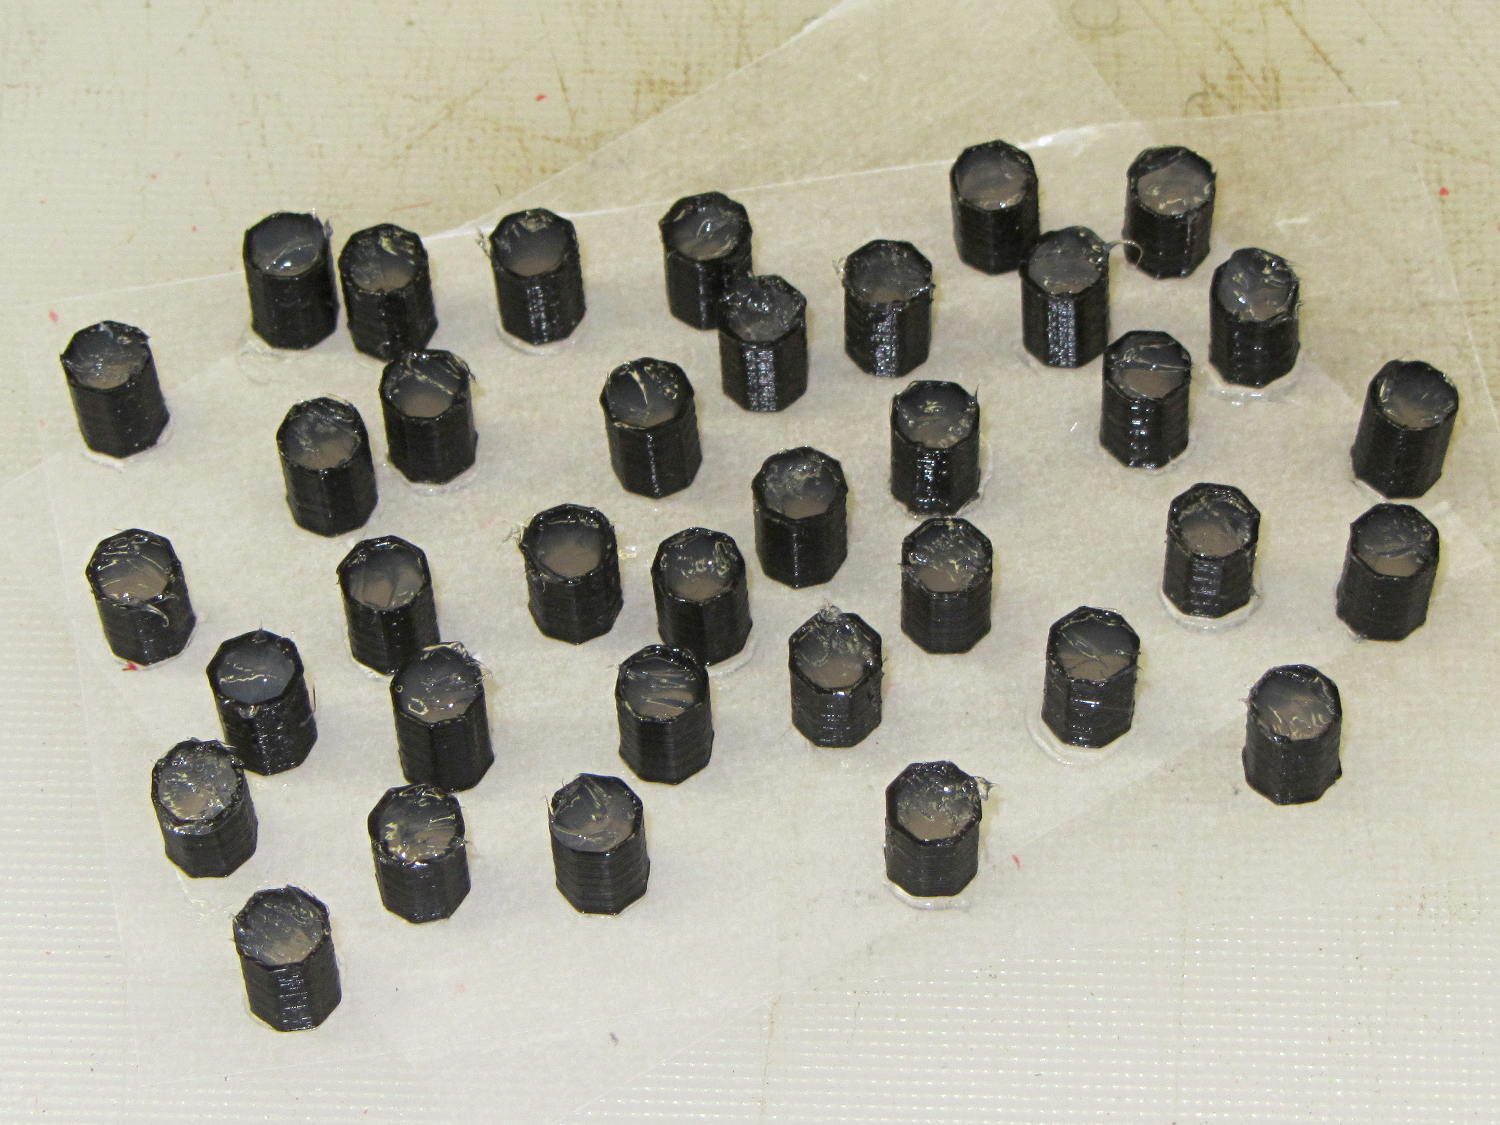
Fill with silicone caulk on waxed paper and they look even more like that:
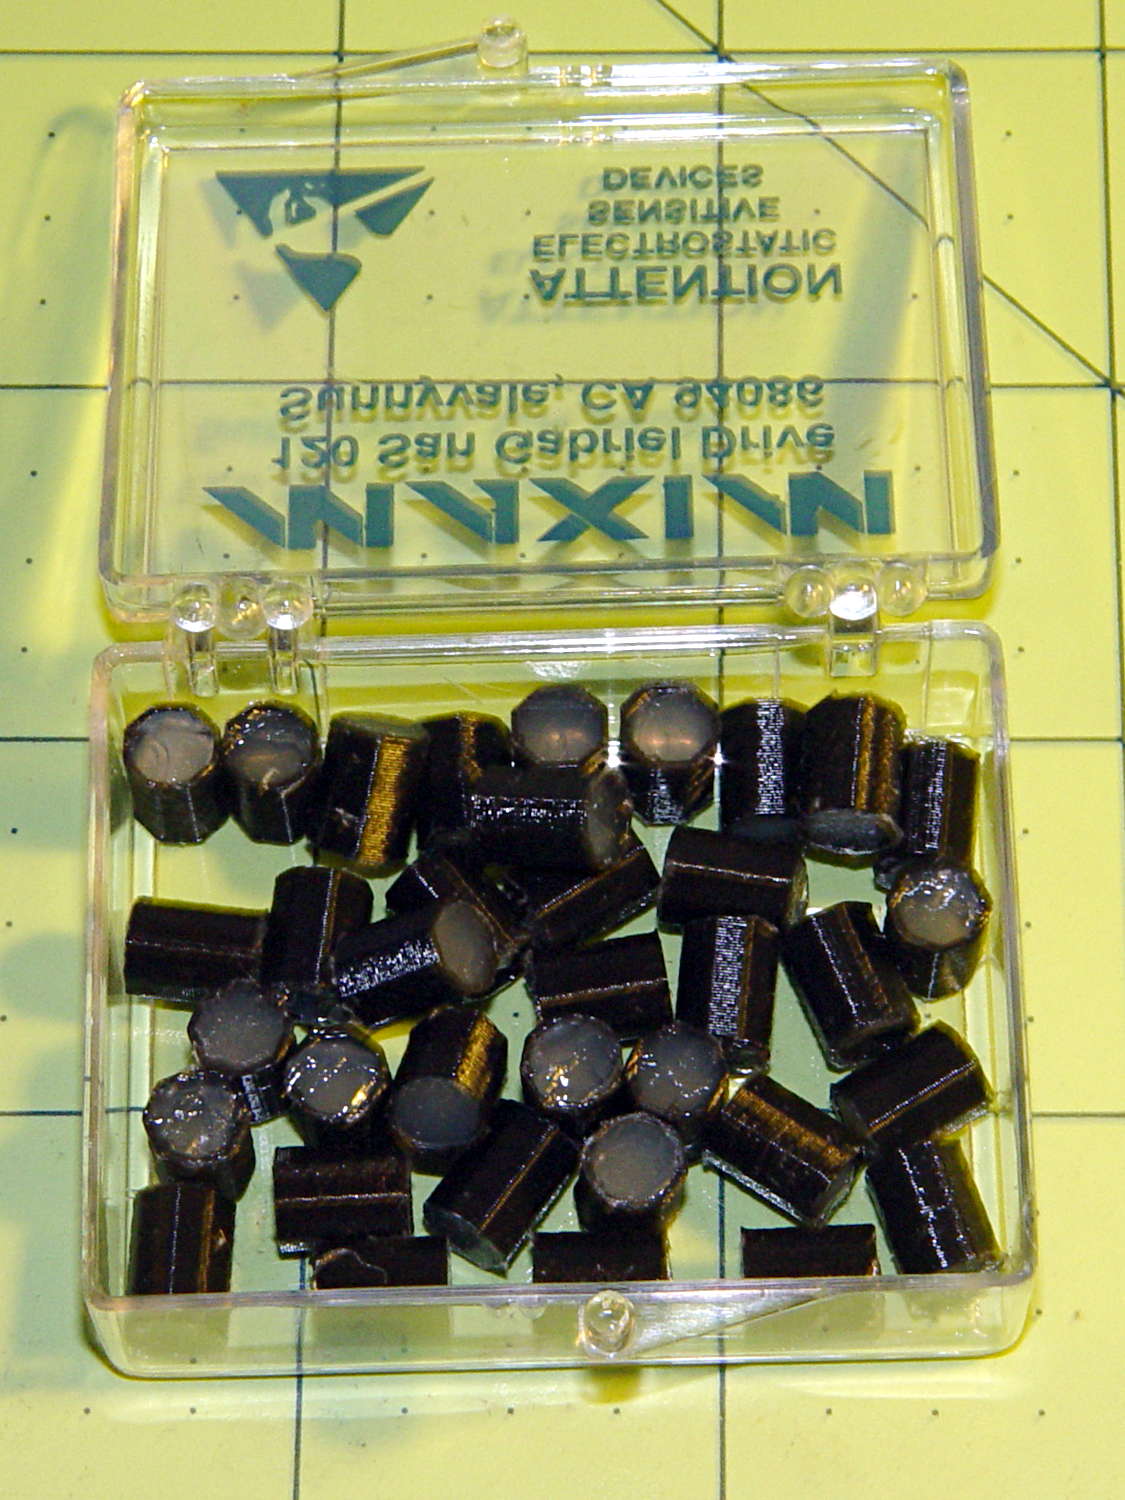
Fast-forward a few days, rub off the excess caulk, trim off a few blobs, and they’re ready for presentation:
In use, they look about like you’d expect:
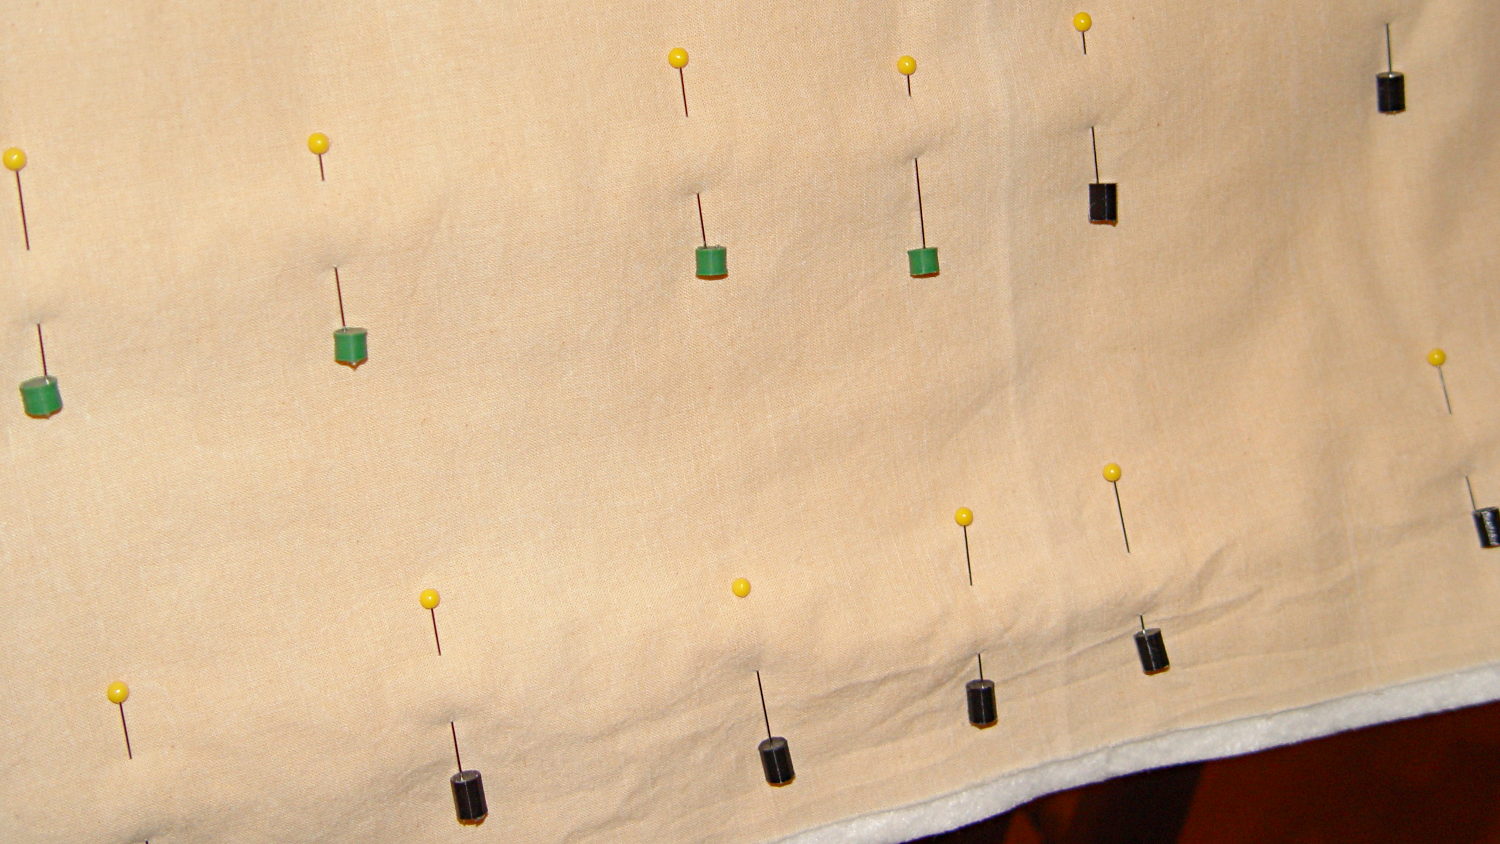
The pin caps I made from a 5 gallon bucket’s O-ring gasket didn’t work out well, as the plastic didn’t like being poked with pins and put up a stiff resistance. Silicone caulk has exactly the right consistency.
When Mary ramps up a full-scale quilt, we’ll need a few hundred of the things. The commercial version has dropped to 40 cents each, which makes all this worthwhile.
The OpenSCAD source code:
// Quilting pin caps
// Ed Nisley KE4ZNU April 2012
//	January 2013 - modify for Slic3r and M2

//- Extrusion parameters must match reality!
//  Print with +1 shells and 3 solid layers

ThreadThick = 0.20;
ThreadWidth = 0.40;

HoleWindage = 0.2;

function IntegerMultiple(Size,Unit) = Unit * ceil(Size / Unit);

Protrusion = 0.1;			// make holes end cleanly

//----------------------
// Dimensions

ID = 5.0;
OD = ID + 2*ThreadWidth;
Length = 8.0;
Sides = 8;

CapArray = [6,6];			// XY layout of caps
CapsOC = OD + 2.0;			// OC spacing

//----------------------
// Useful routines

module PolyCyl(Dia,Height,ForceSides=0) {			// based on nophead's polyholes

  Sides = (ForceSides != 0) ? ForceSides : (ceil(Dia) + 2);

  FixDia = Dia / cos(180/Sides);

  cylinder(r=(FixDia + HoleWindage)/2,
           h=Height,
	   $fn=Sides);
}

module ShowPegGrid(Space = 10.0,Size = 1.0) {

  RangeX = floor(100 / Space);
  RangeY = floor(125 / Space);

	for (x=[-RangeX:RangeX])
	  for (y=[-RangeY:RangeY])
		translate([x*Space,y*Space,Size/2])
		  %cube(Size,center=true);

}

module PinCap() {
	rotate(180/Sides) {
		difference() {
		PolyCyl(OD,Length,8);
		translate([0,0,-Protrusion])
			PolyCyl(ID,(Length + 2*Protrusion),8);
		}
	}

}

//----------------------
// Build them!

ShowPegGrid();

translate([(-CapsOC*(CapArray[0] - 1)/2),(-CapsOC*(CapArray[1] - 1)/2),0])
	for (i=[0:(CapArray[0] - 1)],j=[0:(CapArray[1] - 1)])
		translate([i*CapsOC,j*CapsOC,0])
			PinCap();
They seem to work pretty well…

Comments
10 responses to “Quilting Pin Caps: More!”
It’s nifty when a 3D printer is not only good for rapid prototyping, but it can undersell a (presumably) mass produced commercial product. However, it seems to me like you could just cut up straws and fill them with silicone caulk for this use.
Well, only by placing zero value on my time; I couldn’t sell those little doodads for a good price. The fiddle factor required to load each one with caulk outweighs almost everything else, but the satisfaction of making exactly what my Lady wants counts for even more.
For low-volume production of a customized part where next-day delivery isn’t of the essence, 3D printing can’t be beat!
Mary insisted on a key design point: the caps should not roll off her not-always-horizontal quilting work surface. Squares seemed too pointy, octagons looked prettier, and I’ll try hexagons with the next batch: some of these attempted to perpetrate an escape.
And if hexagons are too chunky, you can split the difference and print septagons! This is where 3D printers really shine – it would be obnoxious to produce other ways, but adjusting your polygon side count is easy with derived geometry like this.
The asymmetry would be so disturbing: it must be done!
You’re thinking the canisters in Prometheus are egg cases a la Alien? I’ve been hashing this out with a friend and though they’re certainly reminiscent in form, we’re wondering whether what they’re filled with is maybe seeds of life in a vial floating in -Miracle Grow- a bio-catalyst.
There’s this whole “It’s not exactly a prequel” vibe about Prometheus, but, yeah, those eggs contain a whole bunch of it’s-not-good-for-you in one tidy package.
Dilute it, drink it, and get tentacles in your eyeballs: we are so not going there.
Or squeeze out a foot long 1/4″ dia. bead and slice it up after it hardens?
Lacking a 3D printer, that’s probably what I’d do… but, hey, it’s just sitting there, right? [grin]
It would certainly cure faster in open air, without being tucked into those cute little tubes!
oops, I posted before I read the requirement for non-rolliness.
Well, maybe you could keep it from developing a flat spot along the bottom side, but I’d most likely produce a flattened sausage shape that’d stick to the waxed paper like, uh, glue.