Ed Nisley's Blog: Shop notes, electronics, firmware, machinery, 3D printing, laser cuttery, and curiosities. Contents: 100% human thinking, 0% AI slop.
When I wired up the MPCNC’s tool length probe, I planned to reinforce the wiring with a dab of epoxy. What I didn’t notice in my enthusiasm, alas, was the opening from the rear to the front in each pin slot:
Epoxied connector – rear
Which let the epoxy flow completely through the connector:
Epoxied connector – front
So I cut the mess off and applied heatstink tubing on each wire, just like I should have in the first place.
Now you know the rest of the story …
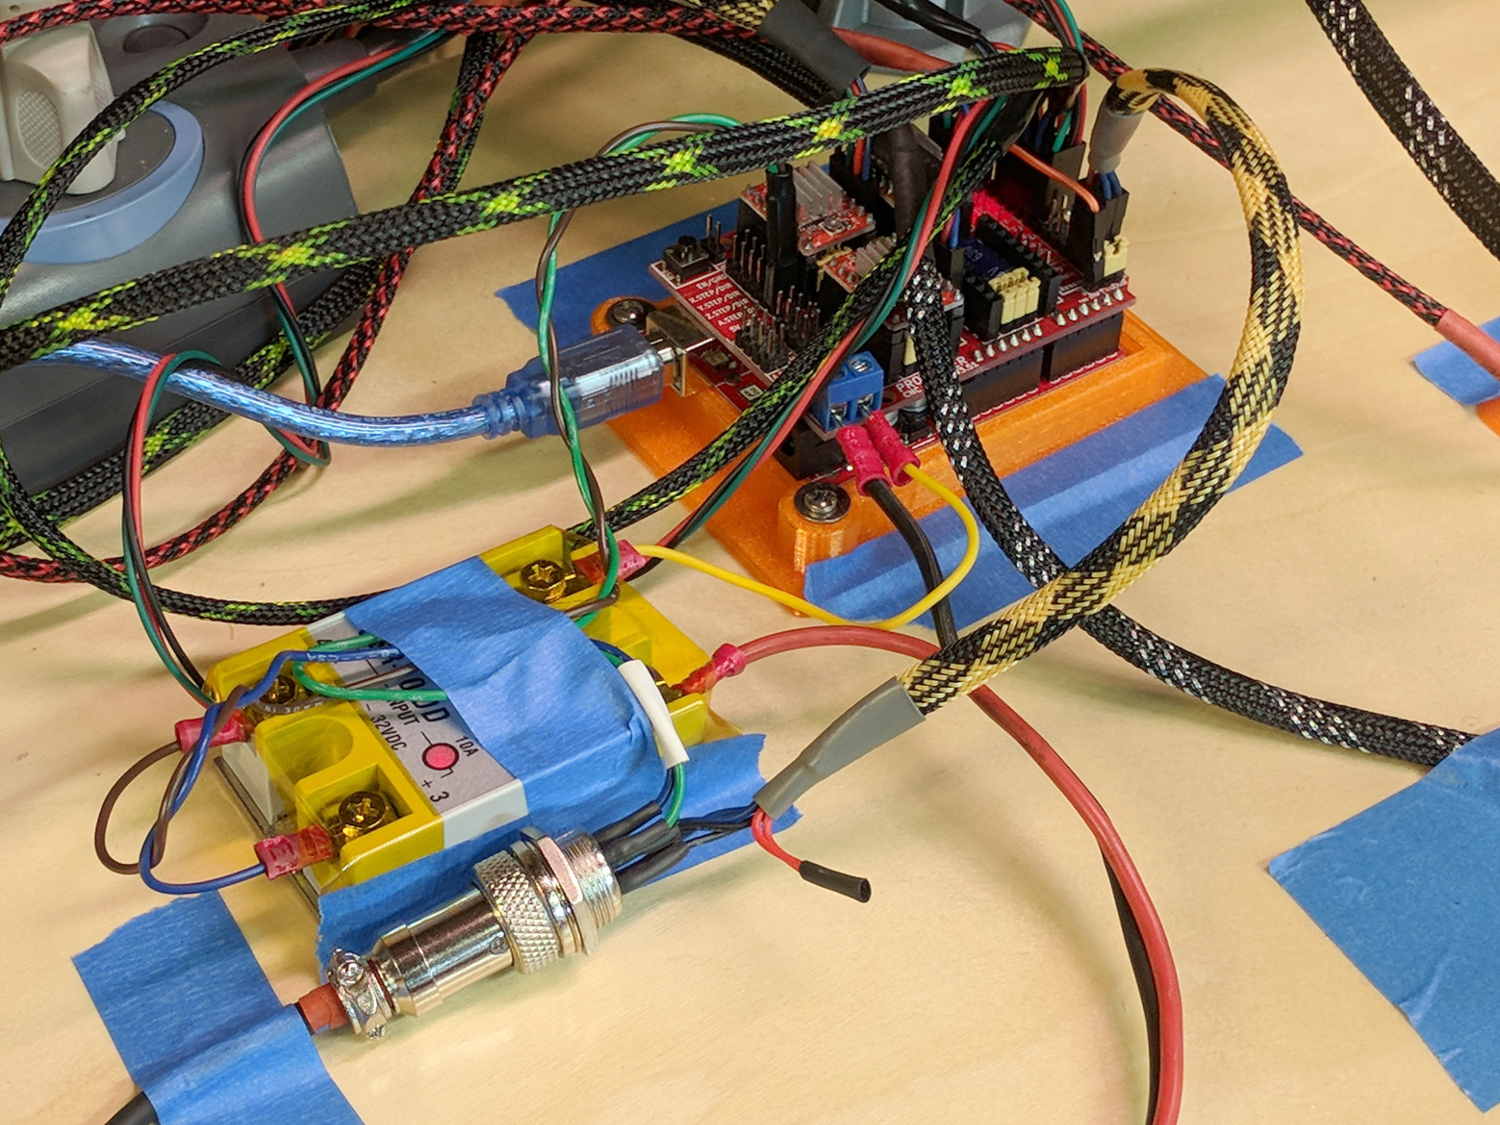
I really dislike pin headers as cable connectors, but that’s what the Protoneer CNC board uses:
MPCNC – Protoneer Wiring – SSR
It’ll be Good Enough if I don’t do anything else particularly stupid.
The recent bitter cold and gusty winds swirled a dry snowfall around our back patio, where it clung to the (otherwise invisible) spider silk strands on the cedar shakes:
Although I repaired the spout a while ago, those water bottles were never satisfactory and saw very little use. A recent cabinet cleanout showed the “stainless steel” has passed beyond its best-used-by date:
Stainless steel water bottle – rust
With no regard for whether the patient would survive the operation, I peeled off its rubber foot and applied the Lesser Hammer:
Stainless steel water bottle – insulation
The “insulation” seems to be a rigid urethane-like foam disk few millimeters thick on the bottom of the interior flask, with good old air around the sides.
The bottles never worked very well and now we know why.
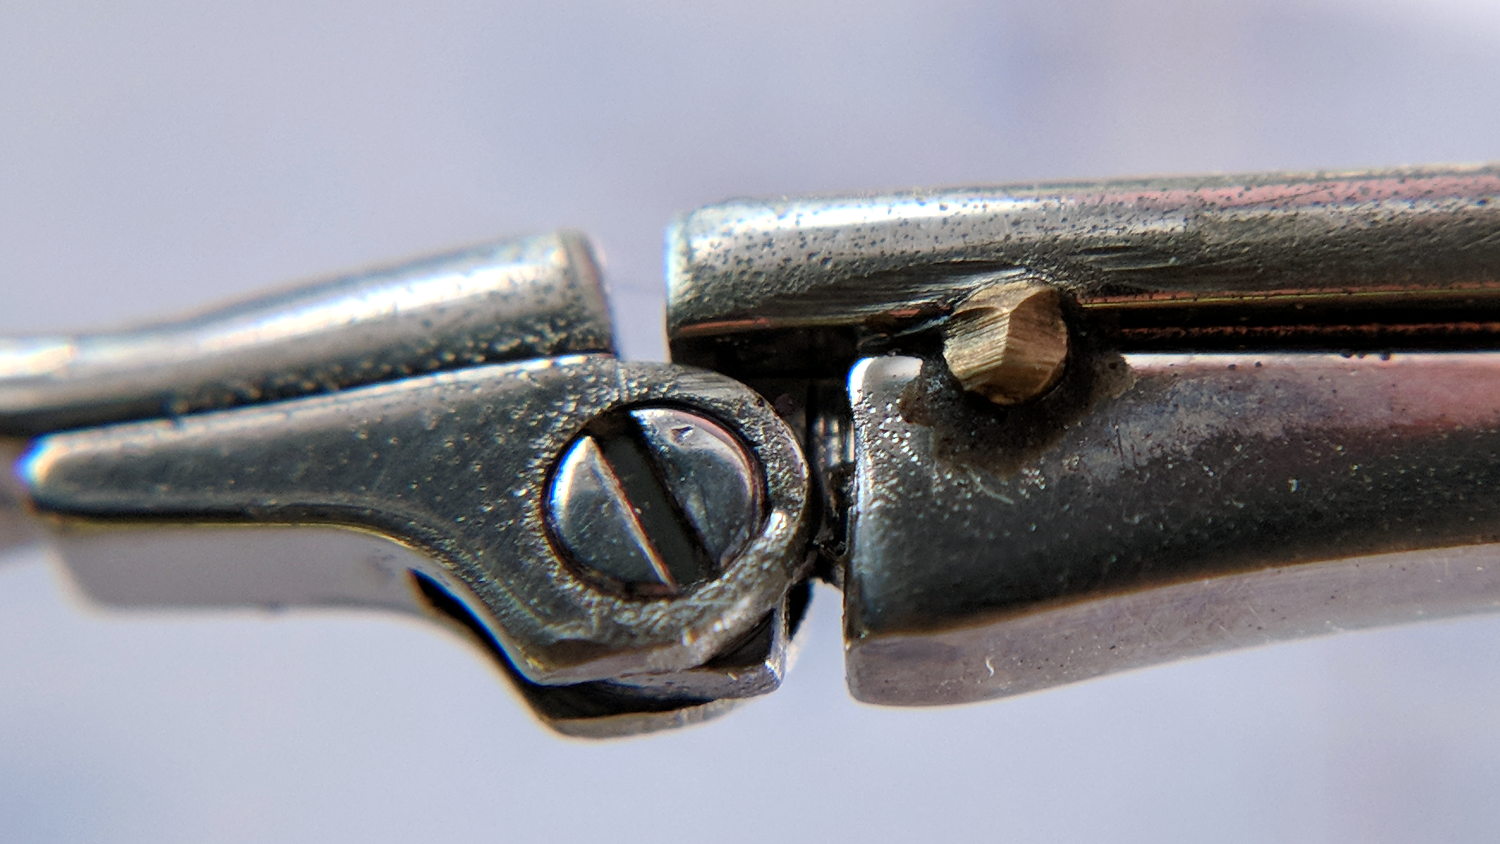
After three years, the temple screw on Mary’s oldest and most-battered “reading” glasses worked loose. A dab of low-strength Loctite should hold it in place forever more:
Reading glasses temple repair
That brass stake pin certainly adds a Steampunk flair to the proceedings …
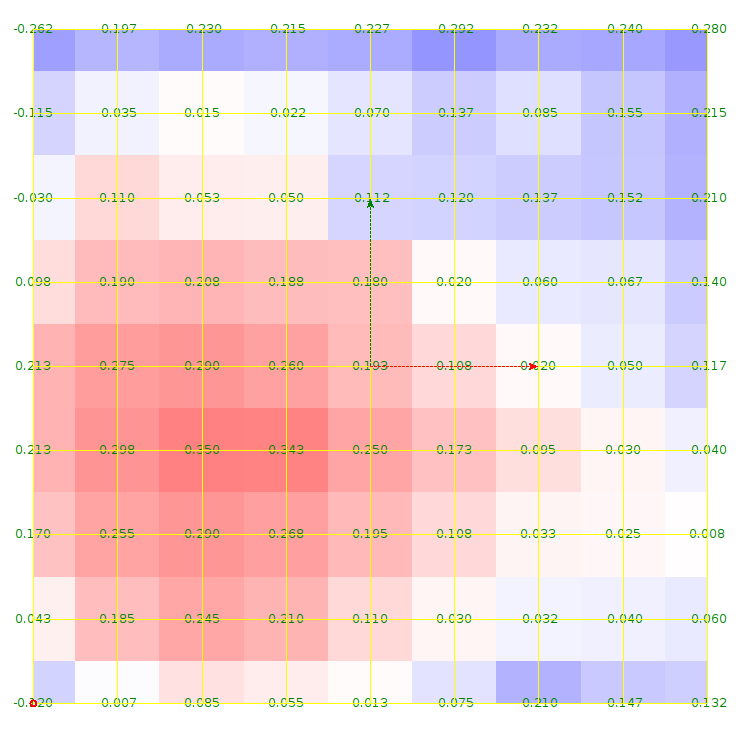
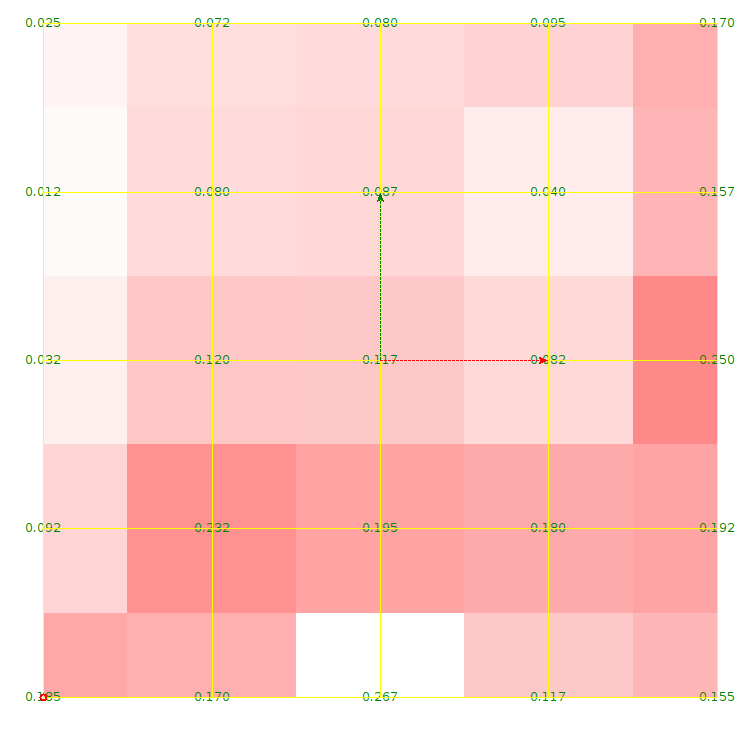
The first height map looks like a mountain sproinged right up through the glass:
ProbeArray-Glass-50
More red-ish means increasing height, more blue-ish means increasing depth, although you can only see the negative signs along the left edge.
The Z axis leadscrew produces 400 step/mm for a “resolution” of 0.0025 mm. The bCNC map rounds to three places, which makes perfect sense to me; I doubt the absolute accuracy is any better than 0.1 mm on a good day with fair skies and a tailwind.
The peak of the mountain rises 0.35 mm above the terrain around it, so it barely counts as a minor distortion in the glass sheet. Overall, however, there’s a 0.6 mm difference from peak to valley, which would be enough to mess up a rigidly held pen tip pretty badly if you assumed the glass was perfectly flat and precisely aligned.
Rotating the glass around the X axis shows a matching, albeit shallower, dent on the other side:
ProbeArray-Glass-flip-50-2018-01-05
For all its crudity, the probe seems to be returning reasonable results.
The obvious question: does it return consistent results?
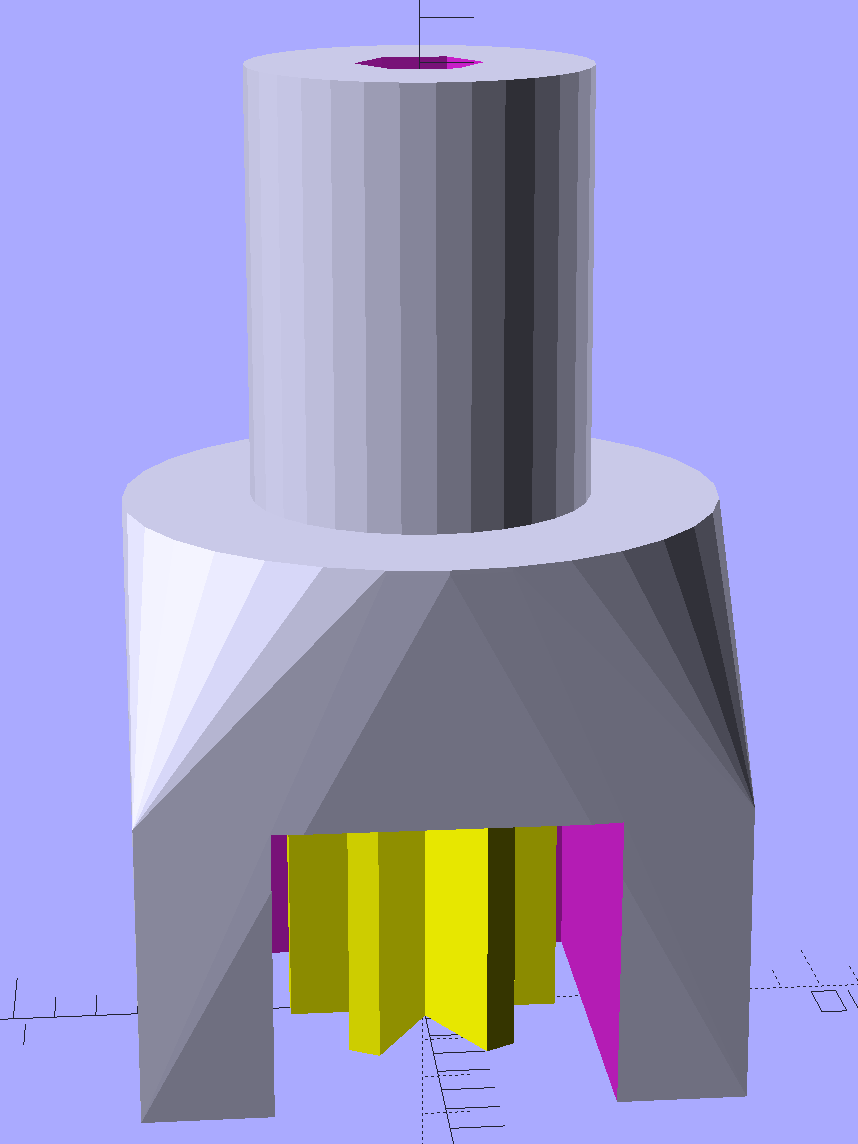
A little support pillar makes a printable holder for a small tactile pushbutton:
Z Axis Height Probe – solid model
A(n) 0-80 brass washer epoxied atop the butt end of a P100-B1 pogo pin keeps the pin from falling out and provides a flat button pusher:
MPCNC – Simple Z probe – push plate
With the epoxy mostly cured, ease the pin off the tape, flip the whole affair over, shove the switch into position, realign vertically with point down, then let the epoxy finish curing with the washer held in place against the switch to ensure good alignment:
MPCNC – Simple Z probe – epoxy curing
The brass tube ID is a sloppy fit around the pogo pin, but it’s also many pin diameters long and the position error isn’t worth worrying about.
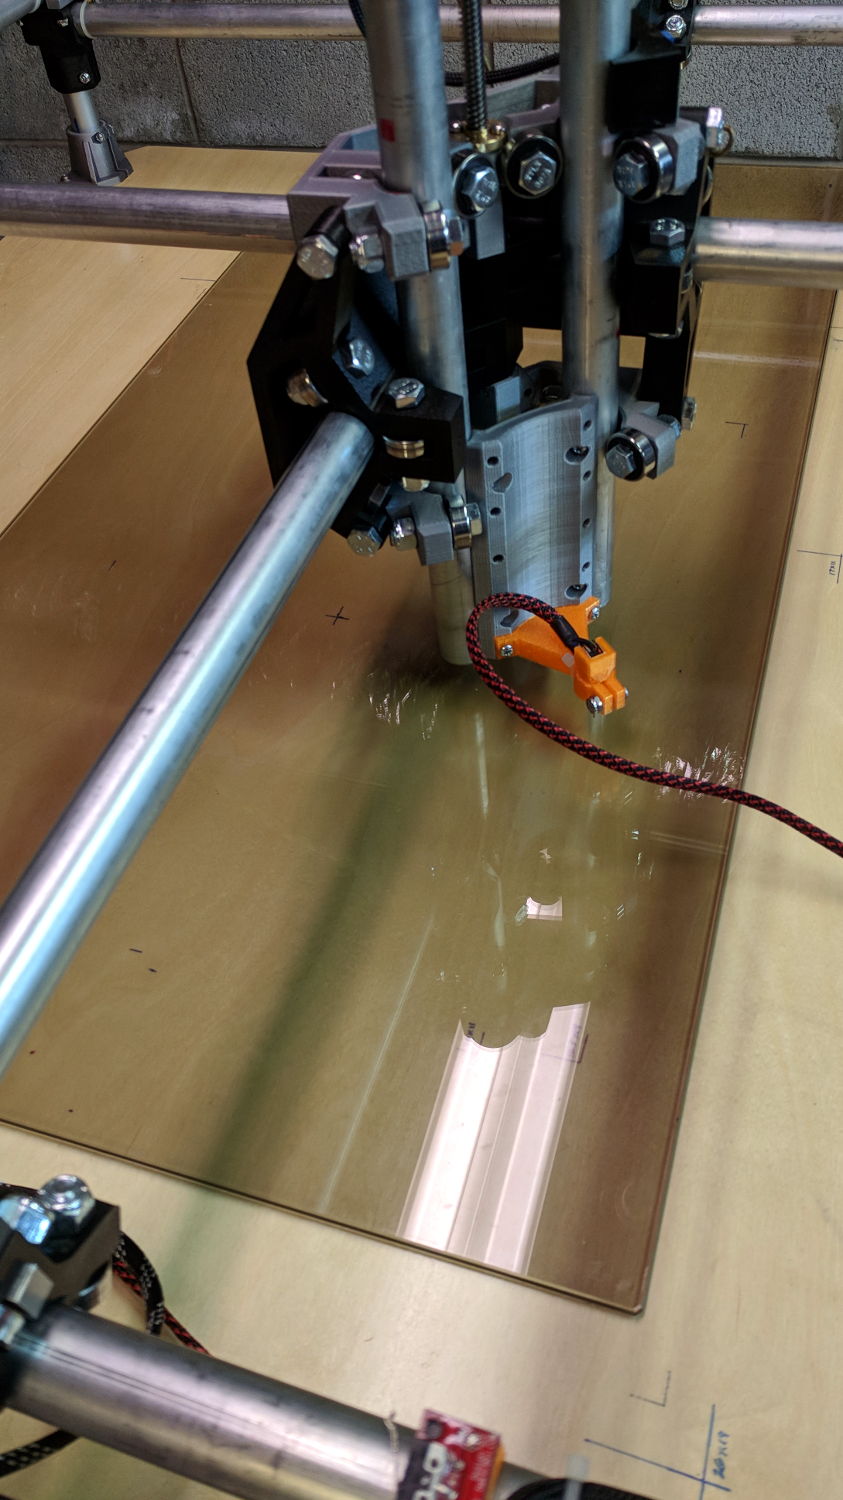
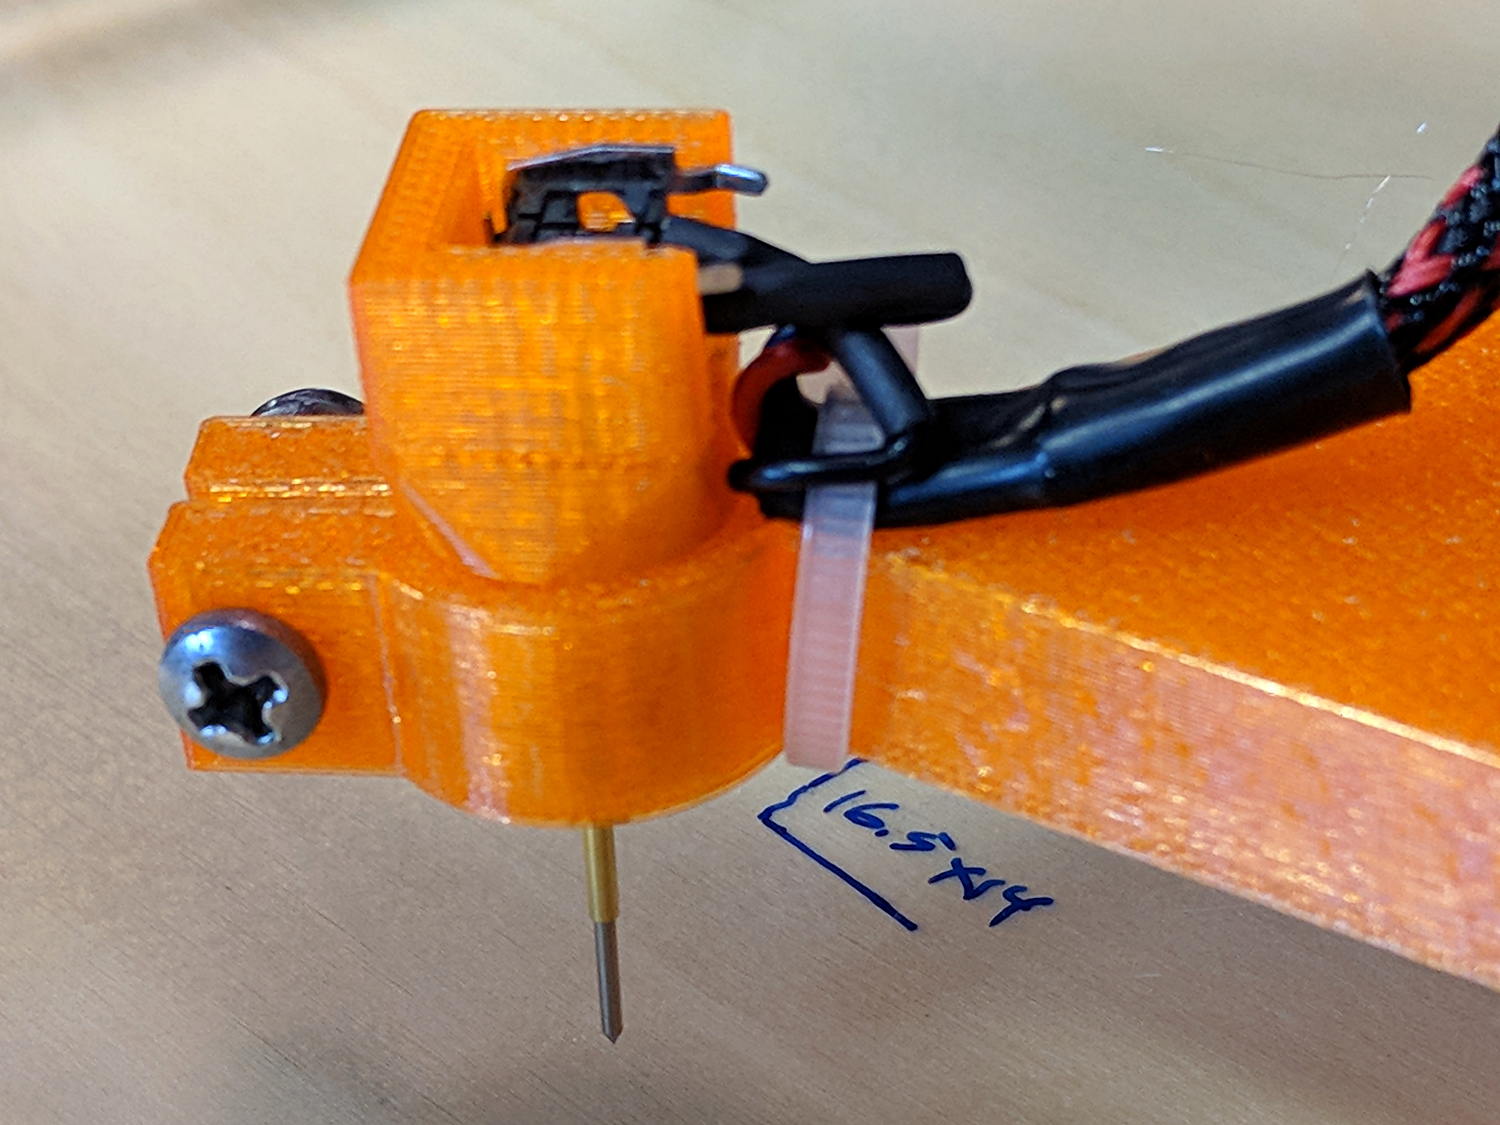
Solder a cable, clamp it in the pen holder, attach to tool holder:
MPCNC – Simple Z probe – installed
The pogo pin provides half a dozen millimeters of compliance, letting the initial probe speed be much higher than the tactile pushbutton’s overshoot could survive, after which a low-speed probe produces a consistent result.
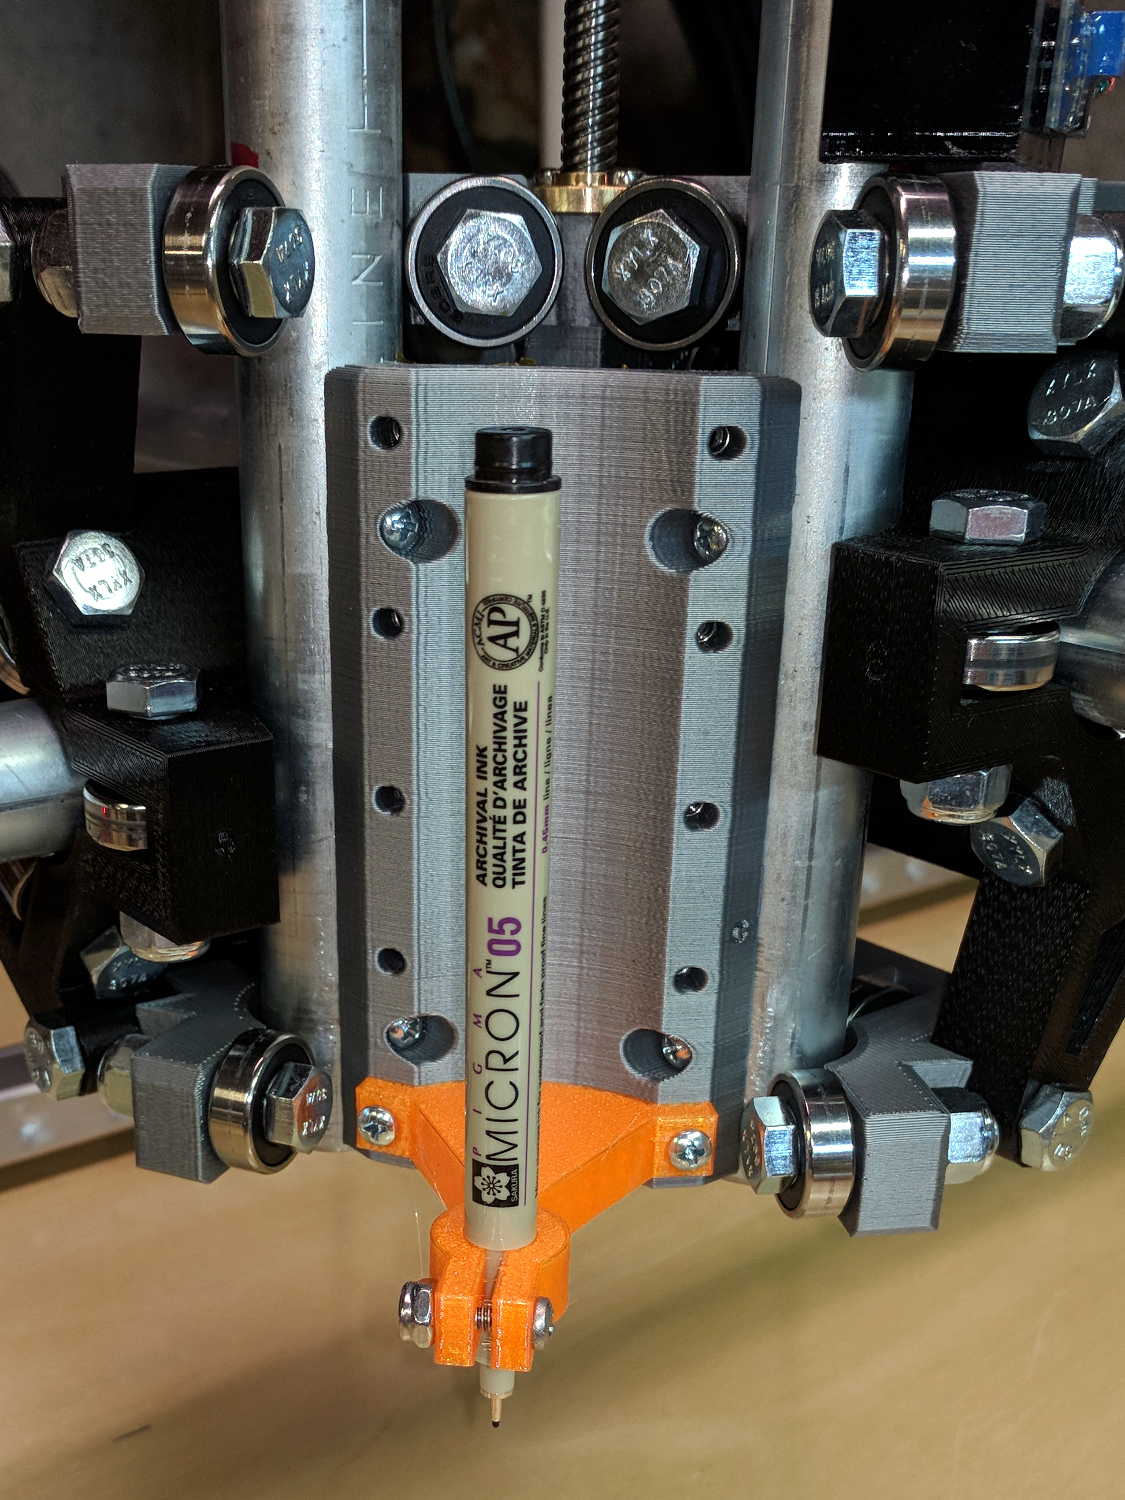
The pen body seats atop the holder, with its narrower snout inside the clamp, giving positive control of the point position:
MPCNC – Sakura in pen adapter
Unfortunately, should one forget to zero the pen tip to the paper surface before starting a plot, Bad Things happen to good tips:
MPCNC – Sakura pen – crushed tip
The holder really needs at least a few millimeters of compliance, as a fiber-tip pen makes a fairly delicate tool not intended for applying much force at all to anything.