Ed Nisley's Blog: Shop notes, electronics, firmware, machinery, 3D printing, laser cuttery, and curiosities. Contents: 100% human thinking, 0% AI slop.
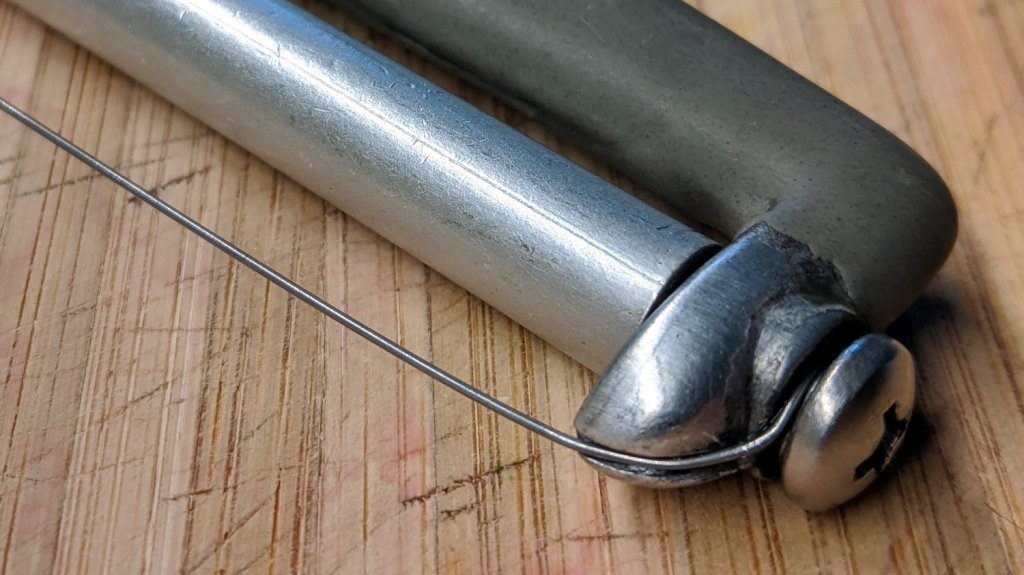
Repairing it with a length of 20 mil = 0.5 mm music wire didn’t take long:
Cheese slicer – new wire
What did take a while was removing one of the screws, turning off another millimeter of thread, and sticking it back in again. The new wire is slightly thinner, stacks up just slightly less under the screw head (maybe I used two turns instead of three?), and let the thread stick into the Delrin bushing I put inside the aluminum roller.
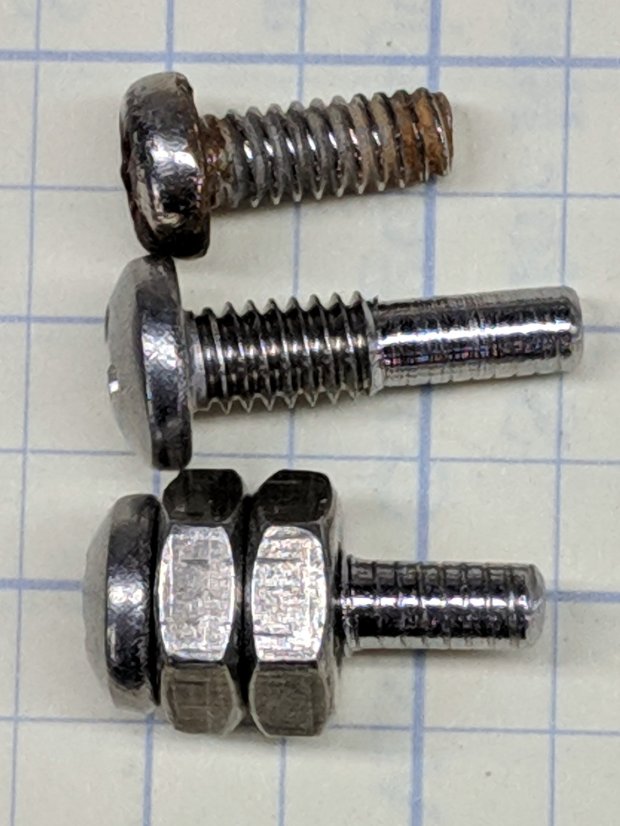
Imagine the middle screw with a slightly longer smooth end and you’ve got the idea:
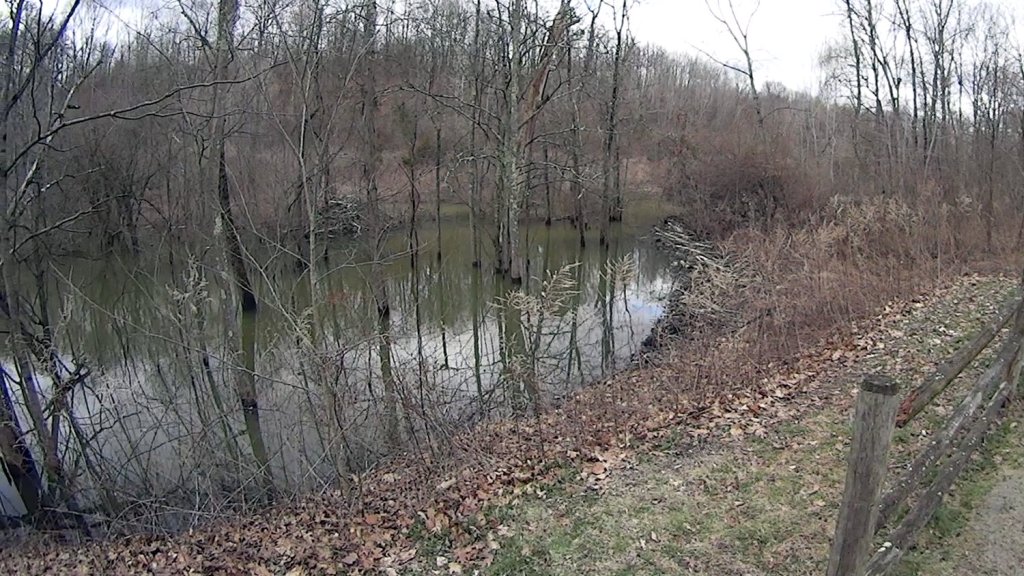
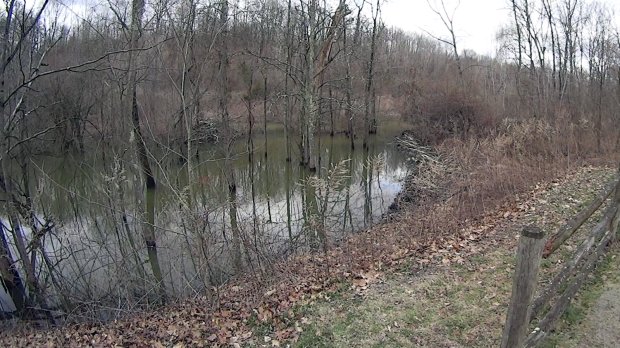
The furry engineers in charge of maintenance laid several layers of branches along the breast of their dam:
Beaver Lodge and Dam – raised dam – 2020-03-31
Their pond is maybe nine inches deeper than a few weeks ago. The rail trail has little danger of flooding, even as the water creeps closer, because the roadbed is higher than the far shoreline.
This appeared while we uprooted a row of forsythia along the north border:
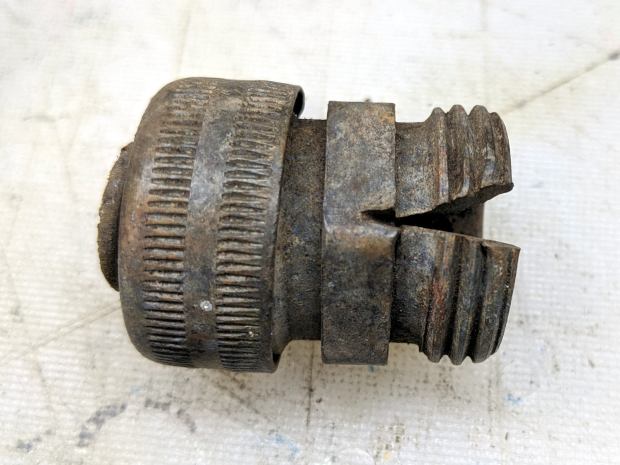
Brass hose fitting vs lawnmower
Although FOD has killed a good share of my lawn mowers and blades over the decades, this happened long before my administration and I can’t take credit for the precision targeting.
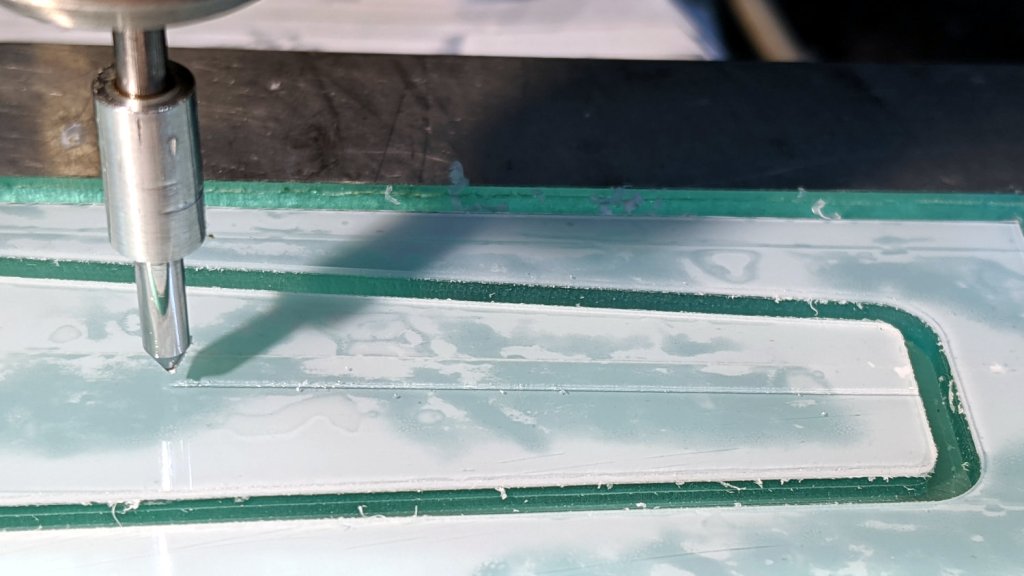
After removing debris, flattening the top surface, and generally paying more attention to detail, the PETG sheet has much better adhesion to the fixture:
Tek CC – Milled cursor – cleaned fixture
This time, I traced the inside of a drag-knife cut cursor to extract the blank from the stock and, yes, used new double-sided tape under the lower white protective film on the PETG.
Fewer air bubbles means better adhesion:
Tek CC – Milled cursor – fixture adhesion
Spinning the 1/8 inch end mill at about 5000 RPM produced finer swarf at the Sherline’s maximum 609 mm/min = 24 inch/min pace, with less uplift. I suspect Moah RPMs! would be even better, constrained by melting the plastic into heartache & confusion.
Scribe the hairline with the diamond tool, ease the finished cursor off the fixture, scribble Sharpie into the scratch, and wipe
Tek CC – Milled cursor – second try
It’s Pretty Good™ when seen against an un-laminated bottom deck drawn with a Pilot V5RT pen:
Tek CC – Milled cursor – unlaminated bottom deck
The diamond point tears a slightly gritty path through the PETG, which then looks a bit more granular than a real hairline. I’ve been using four passes for emphasis; perhaps fewer would be better.
The Noto (“No Tofu”) font family includes nearly All. The. Languages., which is certainly a noble goal, but I’m just not ever going to need fonts like these:
./NotoSerifTelugu-Regular.ttf
./NotoSansBengali-Bold.ttf
./NotoSansGurmukhiUI-Bold.ttf
./NotoSansGurmukhi-Bold.ttf
./NotoSerifTamil-Regular.ttf
./NotoSansOriyaUI-Bold.ttf
./NotoSerifSinhala-Regular.ttf
./NotoSerifSinhala-Bold.ttf
./NotoSerifMalayalam-Bold.ttf
./NotoSansTelugu-Bold.ttf
./NotoSansAvestan-Regular.ttf
… and so forth and so on …
A bit of searching & listing identified the few I might ever use, so armor those against the coming catastrophe:
There seems no regex-ish way of picking those out; next time, I’ll recycle the list as a script.
With armor in place, remove the rest:
find . -perm -u=w -type f -exec sudo rm '{}' \;
Rebuild the font caches:
sudo fc-cache -v -f
Maybe do such things near the end of the day, when you’re going to shut down anyway, because you’ll want to restart any programs using fonts in any nontrivial way.
Making the desired fonts read-only may confuse the next update involving the Noto fonts, but this setup (Xubuntu 18.04 LTS) is getting old and maybe something else will happen when I get around to installing a whole new release.
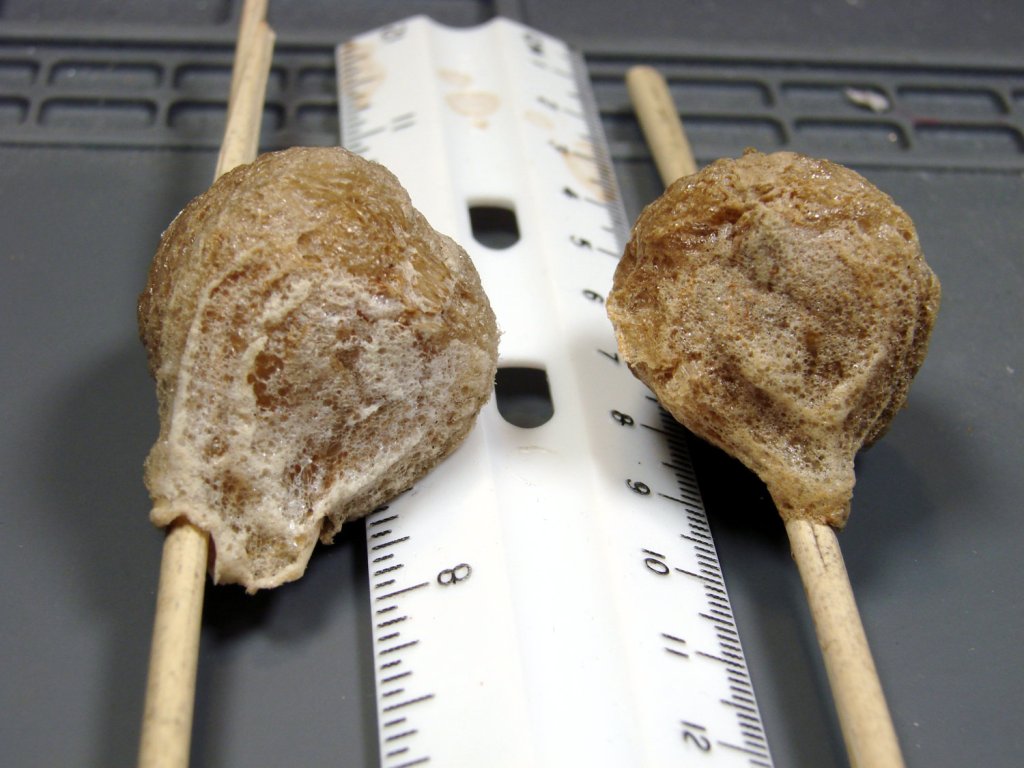
We extracted the Praying Mantisoothecae while clearcutting the decorative grasses bracketing the front door. As far as I can tell, they’re still charged up and ready for use.
The masses resemble rigid foam wrapped around grass stems:
Praying Mantis ootheca – stem side
It’s a mechanical joint, not an adhesive bond, and the dried stems slide freely through the openings:
Praying Mantis ootheca – bottom
From one side:
Praying Mantis ootheca – right
And the other:
Praying Mantis ootheca – left
They’re now tied to stems of the bushes along the front of the house, which (I hope) will resemble what the little ones expect to find when they emerge, whenever they do.
The white separating film on the double-sided tape makes the cursor milling fixture look presentable:
Tek CC – Cursor milling fixture – 2-side tape applied
Some deft X-acto knife work exposed the trench around what will be the cursor’s perimeter, in the hope of keeping tape stickiness out of the milling cutter.
Peeling off the white film and sticking a PETG cursor blank to the tape reveals I didn’t do a particularly good job of cleaning the rubble from the trench edges:
Tek CC – Milled cursor – bad tape application
These PETG sheets arrive with a transparent film on one side and a white film on the other. The picture shows the white film on the bottom of the PETG sheet, with the dark areas corresponding to places where the film sticks to the tape and the tape sticks to the fixture. The lighter areas show an air gap in (at least) one of those interfaces; given the amount of clutter, I think it’s mostly between the tape and the fixture.
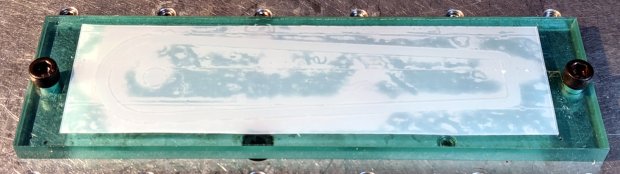
I milled the cursor with a 1/8 inch = 3.175 mm cutter:
Tek CC – Milled cursor – outline
The ball of swarf around the cutter wasn’t as threatening as it appears, because it had very little adhesive holding it together. The rows of swarf surrounding the PETG show why putting the tape all over the fixture isn’t a particularly good idea. ‘Nuff said.
Engraving the hairline with the diamond drag bit was entirely uneventful:
Tek CC – Milled cursor – hairline scribe
Four passes at Z=-2 mm = 300 g downforce put a delicate scratch across the surface. Run a fat black Sharpie along the hairline, wipe off the excess with denatured alcohol, and peel the white film from the other side:
Tek CC – Milled cursor – first try
It’s sitting atop the doodle giving the dimensions, such as they are, for the milling fixture.