Ed Nisley's Blog: Shop notes, electronics, firmware, machinery, 3D printing, laser cuttery, and curiosities. Contents: 100% human thinking, 0% AI slop.
The previous owners apparently surrounded a cedar (?) tree with a ring of large, decorative rocks. The tree vanished long before we arrived, with the stump accreting random stones, bricks, and similar impedimenta ever since; my first task involved (re)moving a couple hundred pounds of rocky debris.
After using the stump as a fulcrum for that steel bar to break the rotted roots and loosen the surrounding soil, it’s out and away:
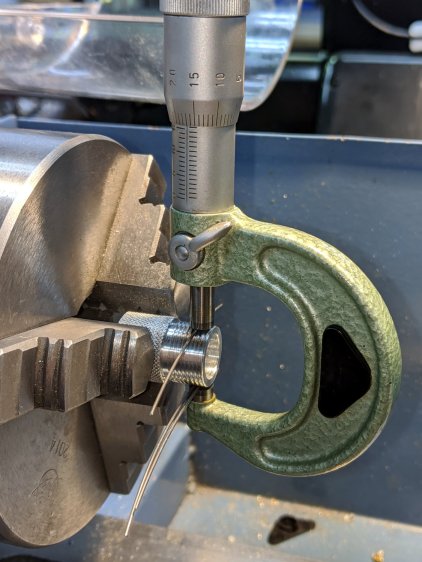
Those are three lengths of music wire, slightly bent from their storage roll, held in place with a precision clamp metric micrometer. Given the crudity of the setup, the uncalibrated wire diameter, and my lack of thread-fu, the results came out both close and unconvincing.
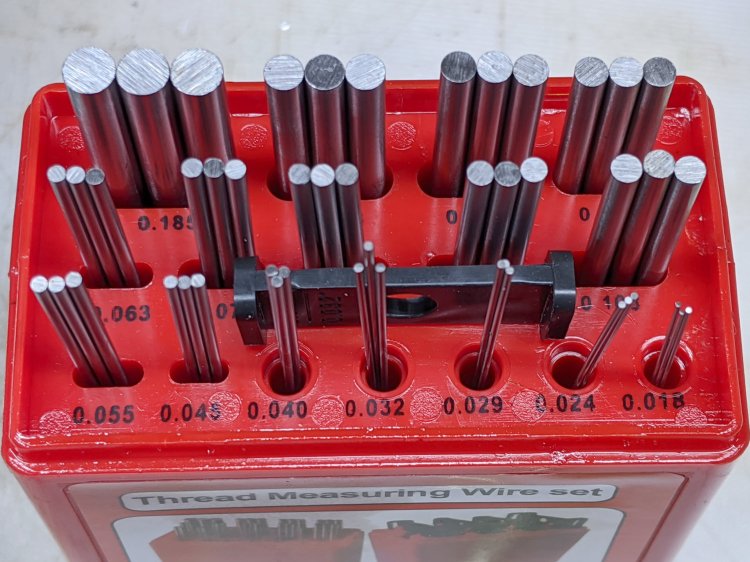
The 185 mil “wires” (they’re all allegedly ground rod) will let me cut threads matching things like a Jesus nut; they’re suited for 3 TPI / 8 mm pitch screws. Mostly, wires from the front row will be all I ever need.
The black doodad (the set includes half a dozen for all the wire sizes) fits over the micrometer anvil and holds two wires betwixt anvil and screw, leaving me to manipulate the screw, the third wire, and the micrometer with my remaining hands. Hence the vise holding the micrometer, which is known to be Very Bad Practice.
From the side:
Thread Measuring Wires – overview
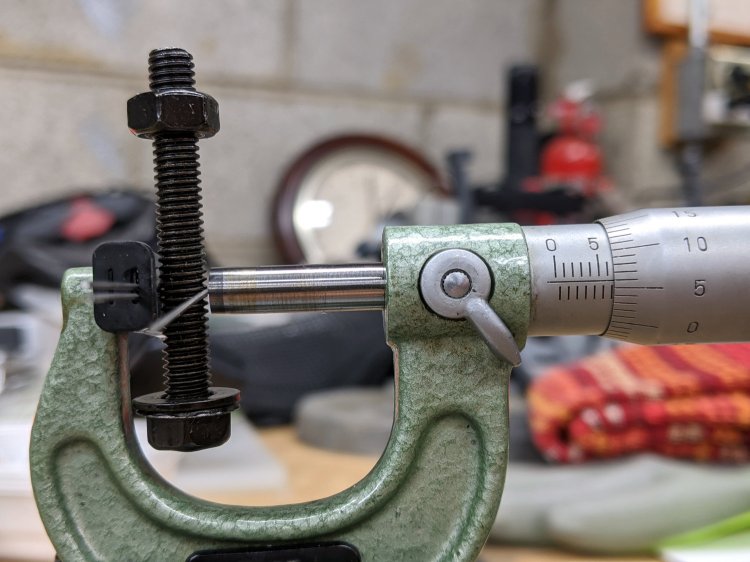
All of the smaller wires measure 0.5 mil too thin, which is likely due to my lack of calibrated measurement equipment:
Thread Measuring Wires – scant 24 mil
The few thread pitch diameters I measured also came out slightly too small, again likely due to calibration and screw tolerances.
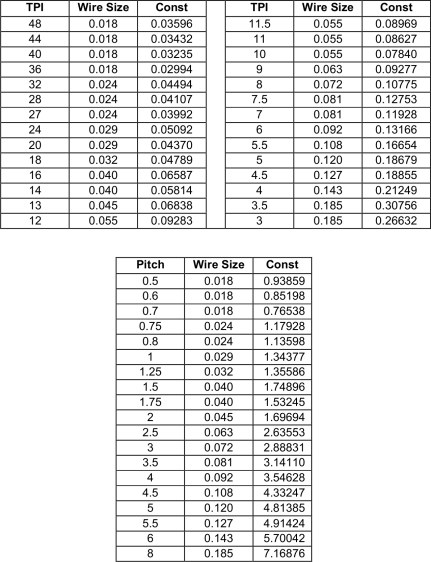
To forestall link rot, a slightly rearranged version of their tables of wire constants:
Thread Wire Measurement Constants
The lower table has metric thread pitches with the wire sizes in inches.
You measure the distance over the recommended wire (in inches or millimeters, as appropriate), subtract the constant, and get the pitch diameter in the same units. Conversely, add the constant to the desired pitch diameter to get the target over-wire distance, carefully cut the thread until it measures a bit less than that, back up sixty seconds, and cut it spot on.
Verily, it is written: there is no UnDo key (⎌) in machine shop work.
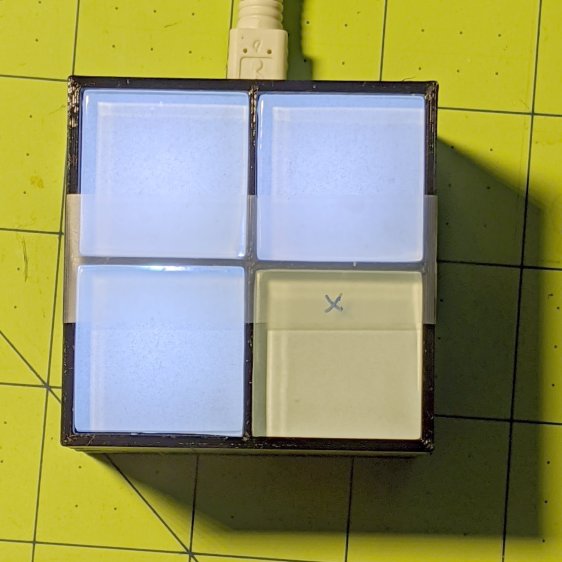
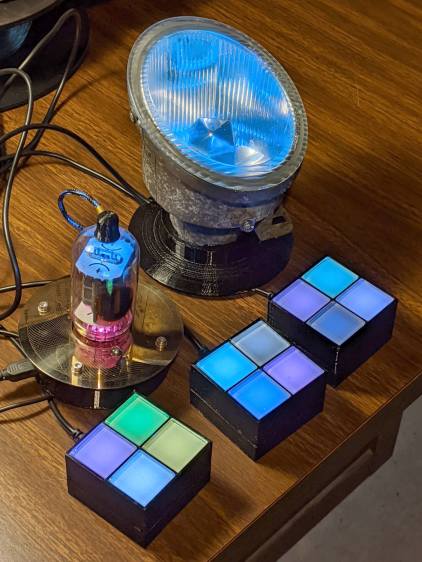
After building the third Glass Tile unit, one of the LEDs didn’t light up due to an easily diagnosed problem:
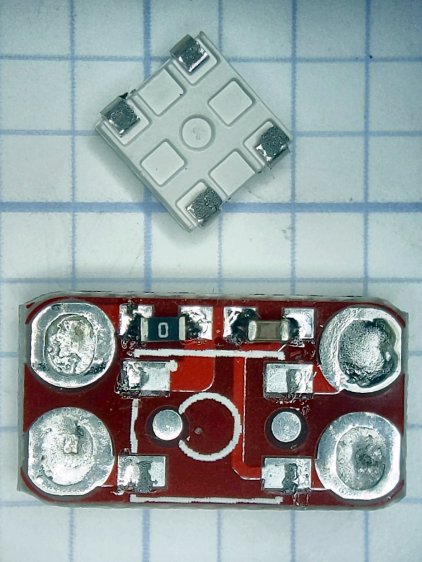
Glass Tile – WS2812 failure – PCB cold solder – as found
A closer look:
Glass Tile – WS2812 failure – PCB cold solder
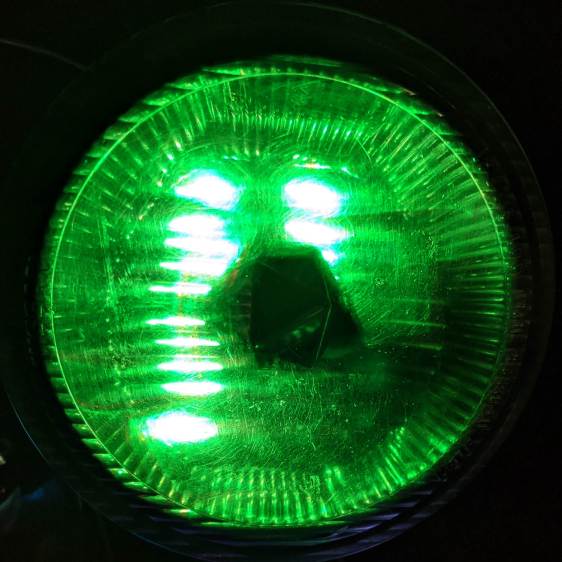
Shortly thereafter, the Nissan Fog Lamp developed an obvious beam problem:
Nissan Fog Lamp – failed WS2812 effect
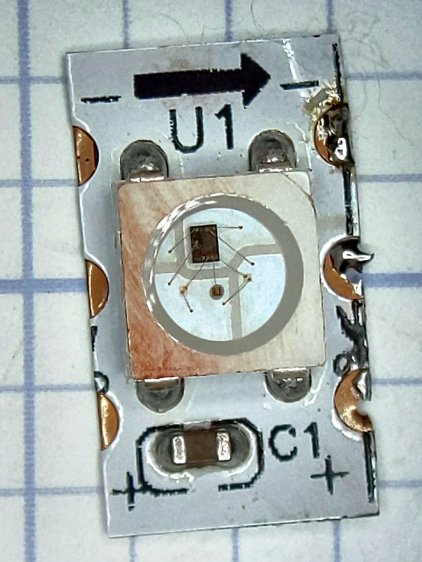
The WS2812 had the proper voltages / signals at all its pins and was still firmly stuck to the central “heatsink”:
Nissan Fog Lamp – failed WS2812 detail
It also passed the Josh Sharpie Test:
Glass Tile – WS2812 failure – tape – unknown
I’m particularly surprised by this one, because eleven of the twelve flex-PCB WS2812s in the Hard Drive Platter light have been running continuously for years with no additional failures.
The alert reader will note the common factor: no matter what substrate the LED is (supposed to be) soldered to, no matter when I bought it, no matter what it’s wired into, a WS2812 will fail.
They’re all back in operation:
Glowing Algorithmic Art
Although nobody knows for how long …
Obviously, it’s time to refresh my programmable RGB LED stockpile!
Although Jason’s comment suggesting carbon-fiber reinforcing rods didn’t prompt me to lay in a stock, ordinary music wire should serve the same purpose:
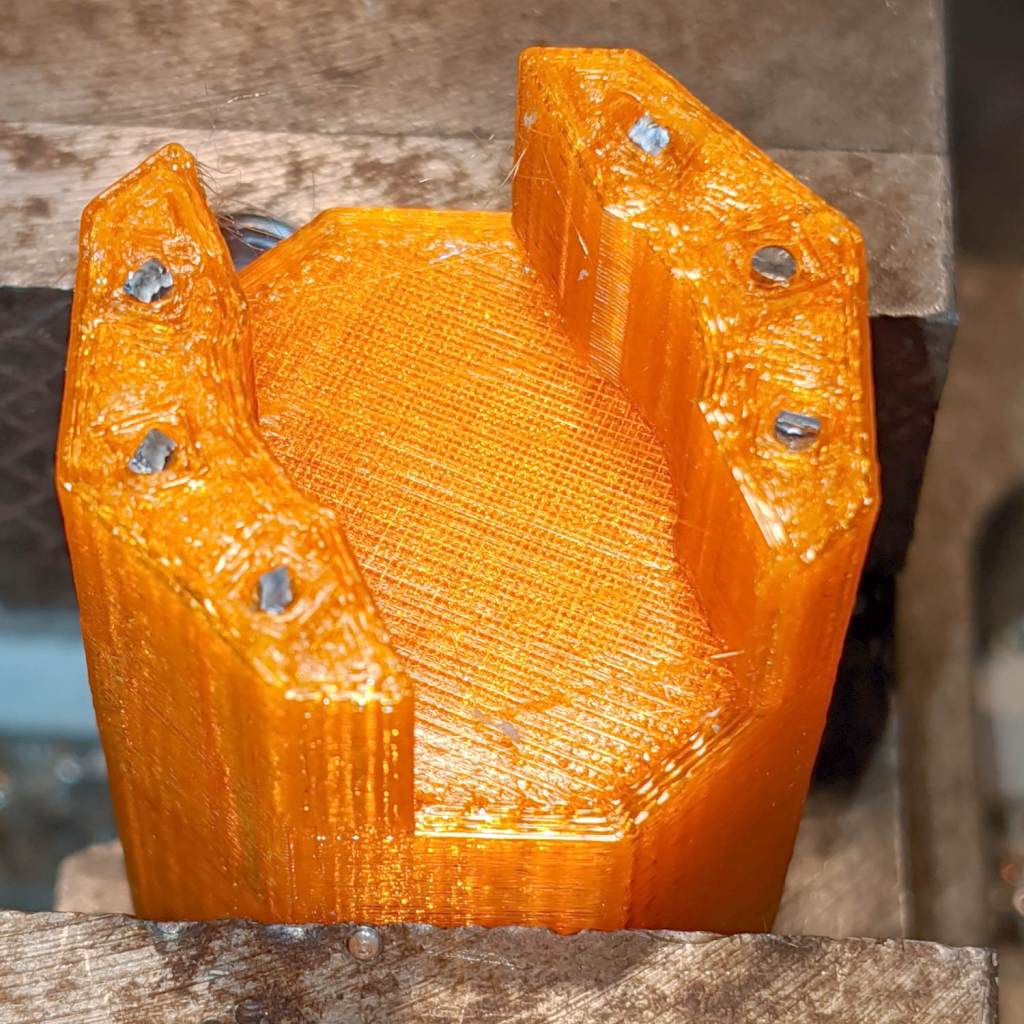
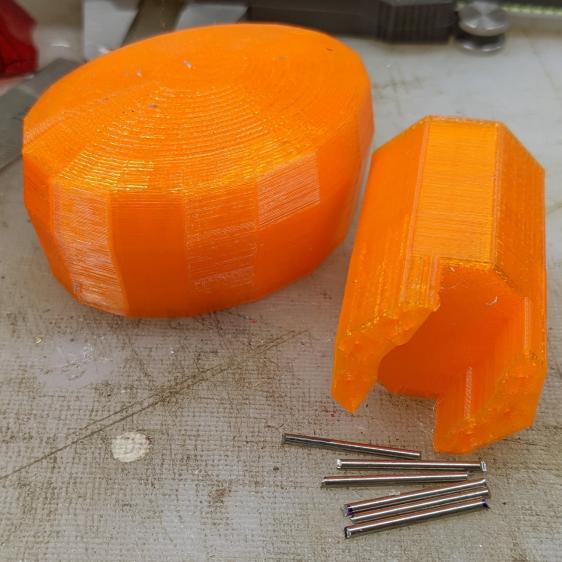
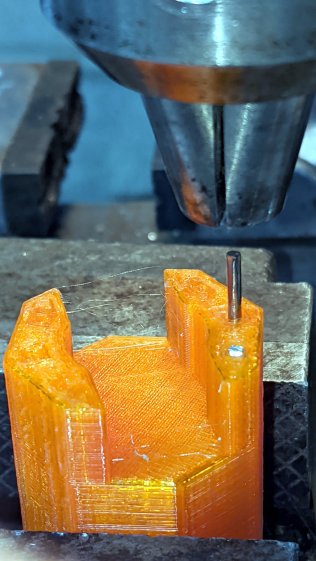
Hose Valve Knob – cut pins
The pins are 1.6 mm diameter and 20 mm long, chopped off with hardened diagonal cutters. Next time, I must (remember to) grind the ends flat.
The solid model needs holes in appropriate spots:
Hose Valve Knob – Reinforced – Slic3r
Yes, I’m going to put round pins in square holes, without drilling the holes to the proper diameter: no epoxy, no adhesive, just 20 mm of pure friction.
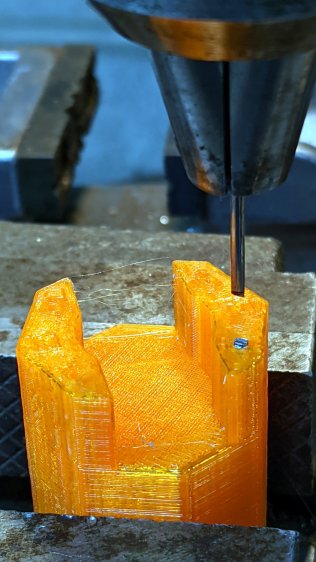
The drill press aligns the pins:
Hose Valve Knob – pin ready
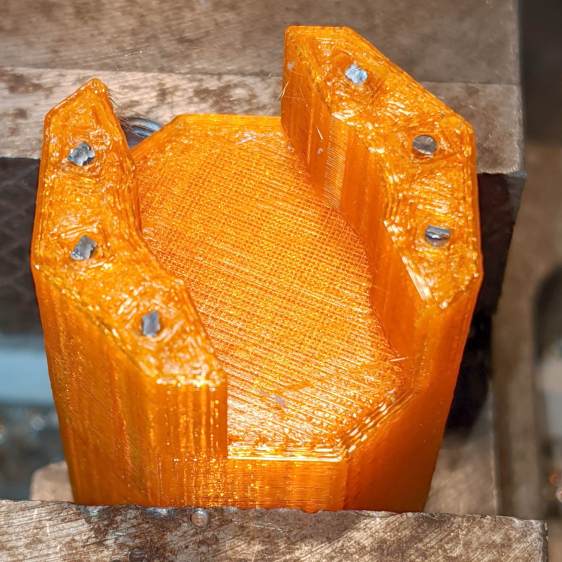
And rams them about halfway down:
Hose Valve Knob – pin midway
Close the chuck jaws and shove them flush with the surface:
Hose Valve Knob – pins installed
You can see the pins and their solid plastic shells through the wrench stem:
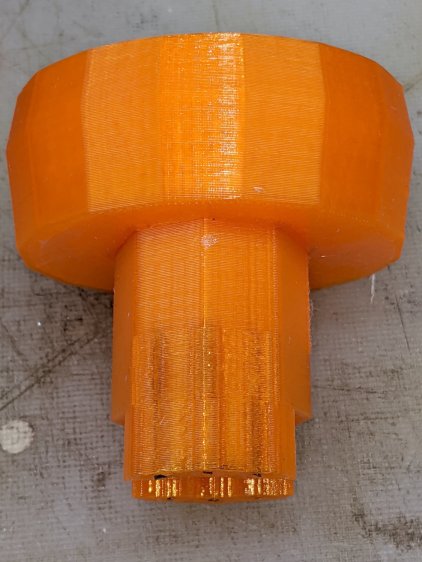
Hose Valve Knob – assembled
Early testing shows the reinforced wrench works just as well as the previous version, even on some new valves sporting different handles, with an equally sloppy fit for all. No surprise: I just poked holes in the existing model and left all the other dimensions alone.
This file contains hidden or bidirectional Unicode text that may be interpreted or compiled differently than what appears below. To review, open the file in an editor that reveals hidden Unicode characters.
Learn more about bidirectional Unicode characters
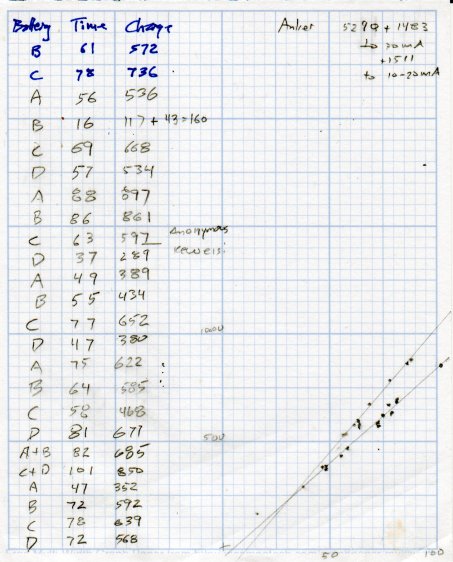
The vertical axis is the total charge in mA·h, the horizontal axis is the discharge time = recorded video duration. Because 1 A = 1 coulomb/s, 1 mA·h = 3.6 C.
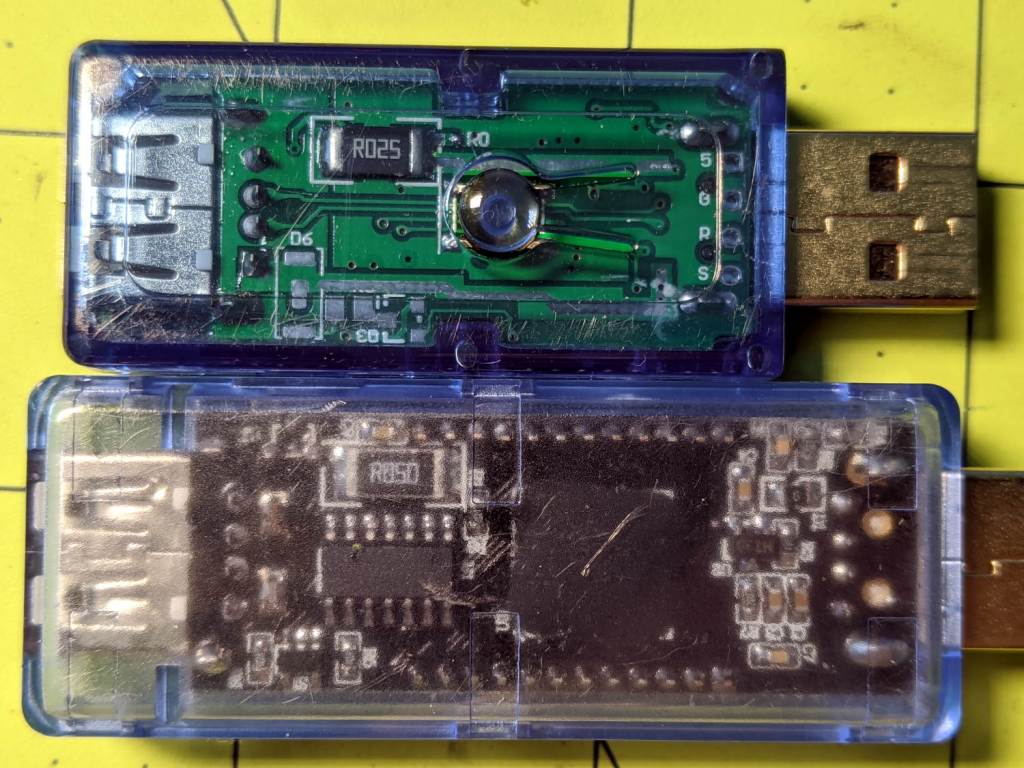
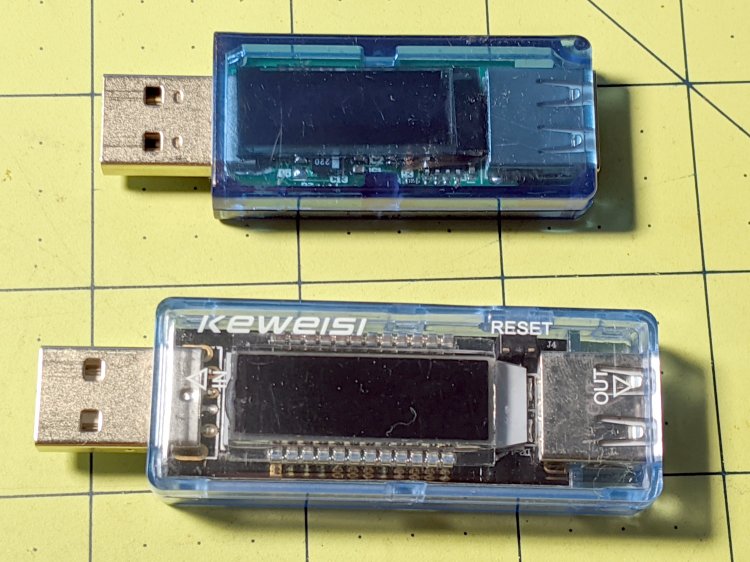
When you have one tester, you know the USB current. When you have two testers, you’re … uncertain.
The upper tester is completely anonymous, helpfully displaying USB Tester while starting up. The lower one is labeled “Keweisi” to distinguish it from the myriad others on eBay with identical hardware; its display doesn’t provide any identifying information.
The back sides reveal the current sense resistors:
USB Testers – sense resistors
Even the 25 mΩ resistor drops enough voltage that the charger’s blue LED dims appreciably during each current pulse. The 50 mΩ resistor seems somewhat worse in that regard, but eyeballs are notoriously uncalibrated optical sensors.
The upper line (from the anonymous tester) has a slope of 11.8 mA·h/minute of discharge time, the lower (from the Keweisi tester) works out to 8.5 mA·h/minute. There’s no way to reconcile the difference, so at some point I should measure the actual current and compare it with their displays.
Earlier testing suggested the camera uses 2.2 W = 600 mA at 3.7 V. Each minute of runtime consumes 10 mA·h of charge:
10 mA·h = 600 mA × 60 s / (3600 s/hour)
Which is in pretty good agreement with neither of the testers, but at least it’s in the right ballpark. If you boldly average the two slopes, it’s dead on at 10.1 mA·h/min; numerology can produce any answer you need if you try hard enough.
Actually, I’d believe the anonymous meter’s results are closer to the truth, because recharging a lithium battery requires 10% to 20% more energy than the battery delivered to the device, so 11.8 mA·h/min sounds about right.