Ed Nisley's Blog: Shop notes, electronics, firmware, machinery, 3D printing, laser cuttery, and curiosities. Contents: 100% human thinking, 0% AI slop.
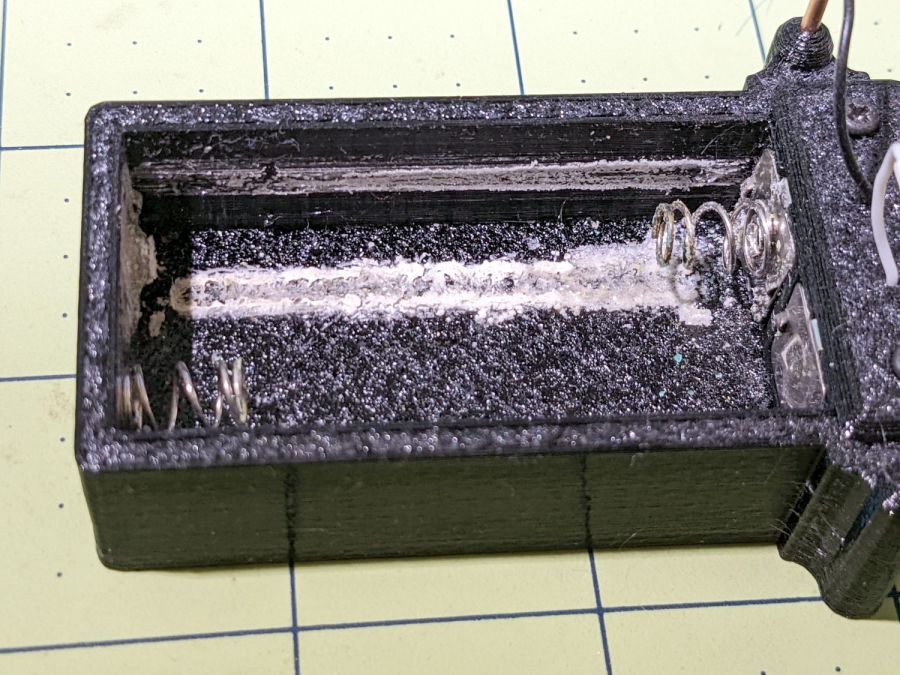
Even my simple discrete LM3909 circuit can blink a blue LED from a battery producing under 1 V, but those cells were flat dead. Gotta look over there more often, I suppose.
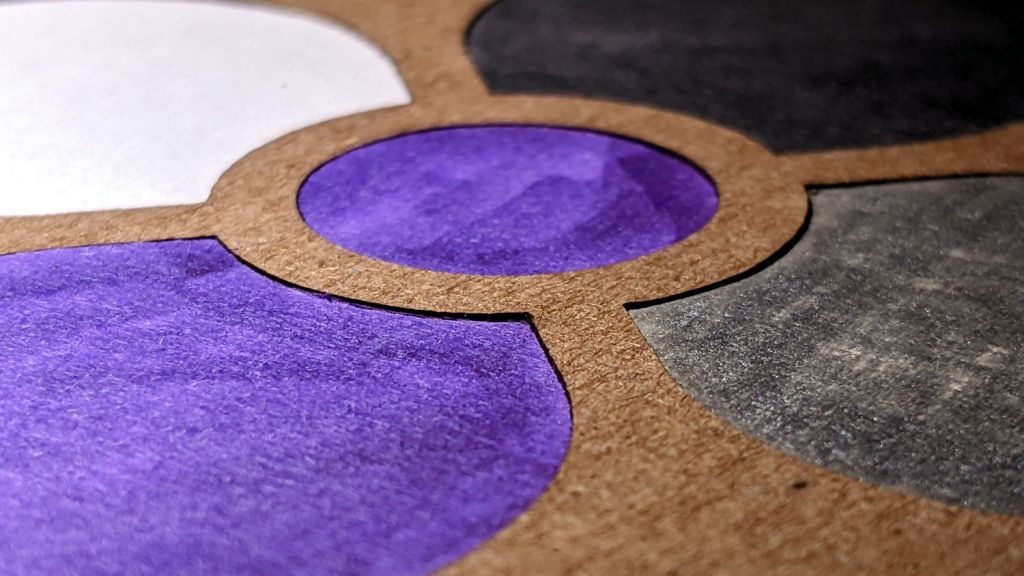
Yes, there really is a difference between 35 mil and 57 mil chipboard:
Chipboard coaster – 35 mil white vs 57 mil kraft
The thinner leaves (0.92 mm) have one delicate white surface that presents much better color when scribbled with fat-tip colored markers. The thicker frame (1.45 mm) is ordinary kraft chipboard which seems much more durable and looks terrible when colored.
Although it may be a case of gilding the dandelion, a durable kraft frame sets off the petal colors and, being slightly thicker, may also protect them from immediate destruction by sweaty drinks.
We’re talking artsy coasters here, not cheap disposable junk. Right?
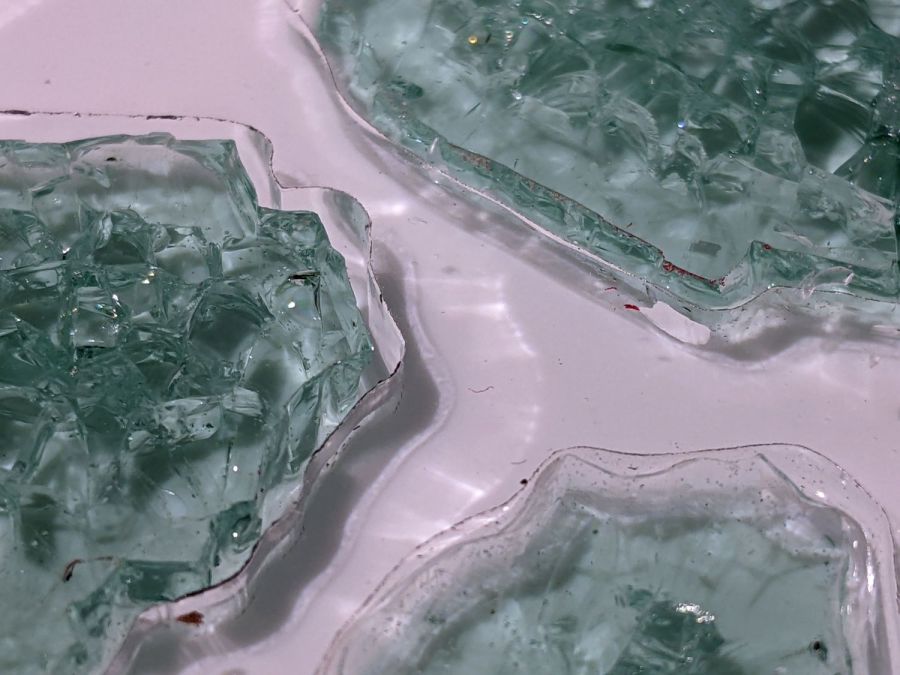
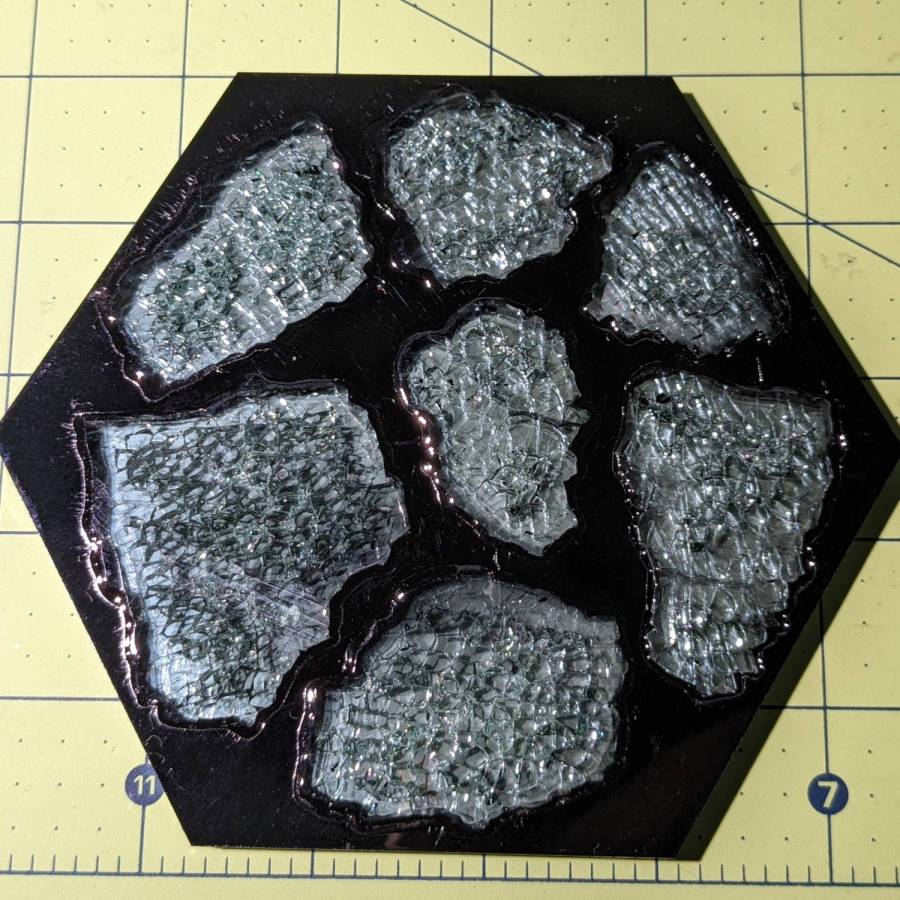
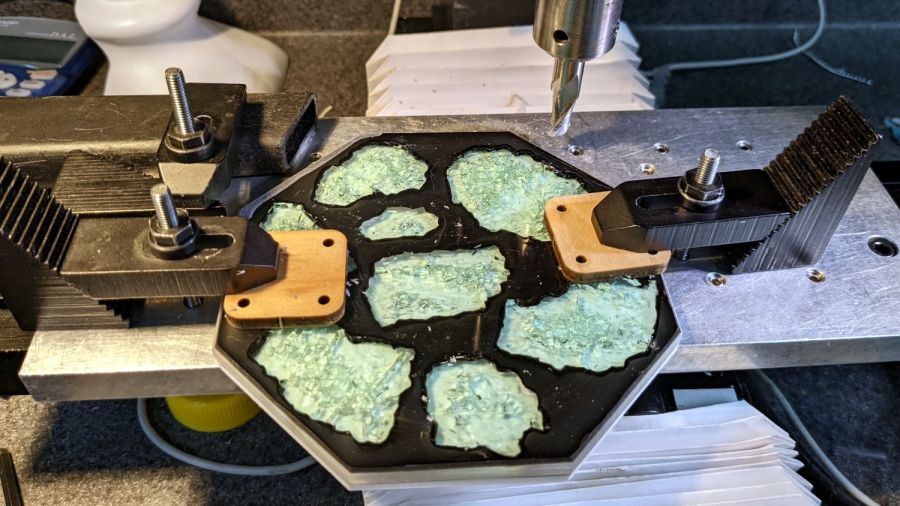
So I assembled a coaster from shattered glass in a clear surround with black epoxy atop a mirror base:
Smashed Glass Coaster 2 – mid-layer glass pour
Each fragment sits on a blob of black epoxy that eventually oozed out to fill the gap between the mirror and the transparent layer. You can see the oozing start around the two fragments in the upper left.
A top layer of black acrylic sits flush with the upper surface of the glass, seen here with the protective paper in place before pouring black epoxy into the gap around the perimeter of each fragment:
Smashed Glass Coaster 2 – masked top
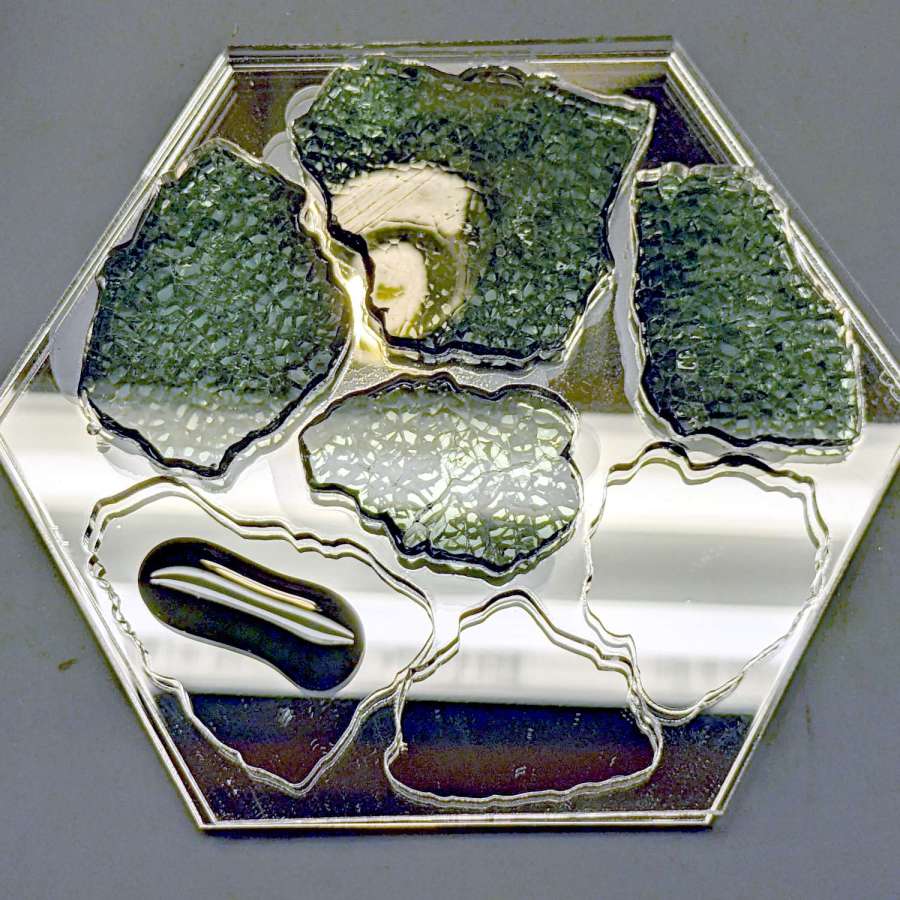
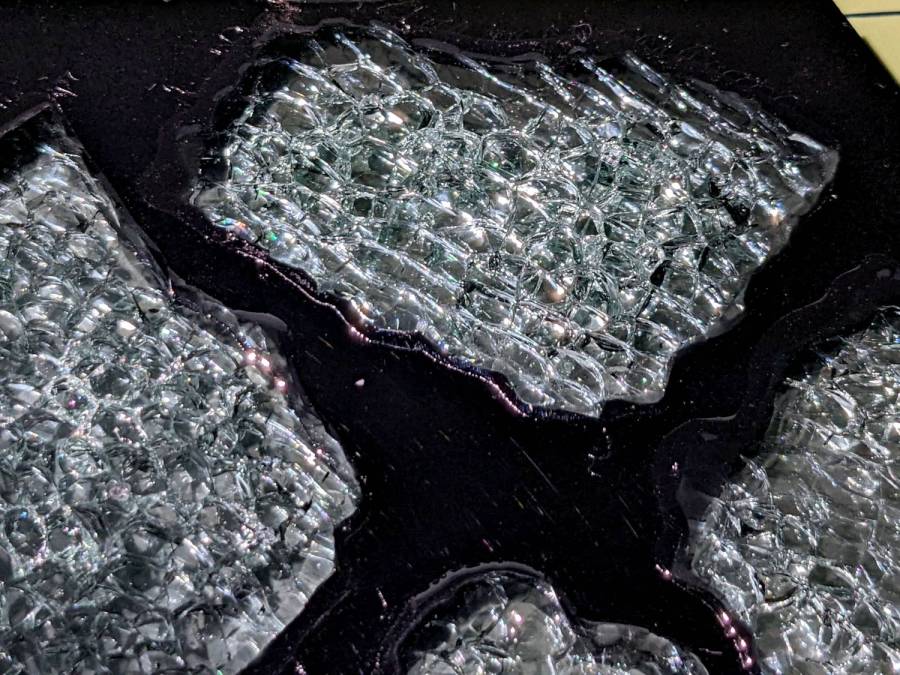
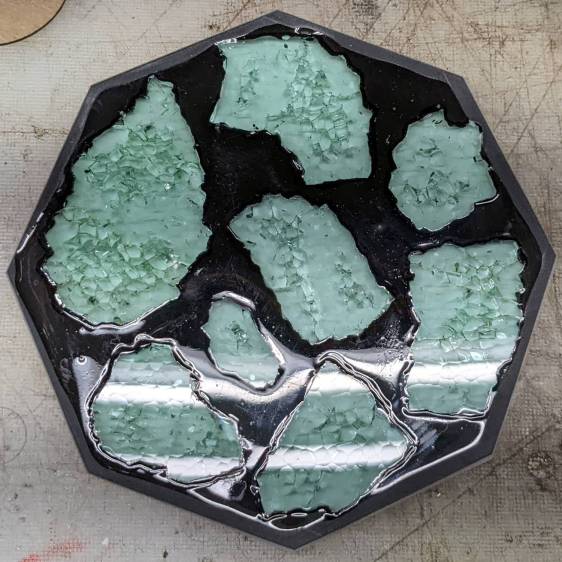
Peeling the paper away exposes an almost perfect surface, with the epoxy forming a slight curve between the black acrylic and the glass:
Smashed Glass Coaster 2 – overview
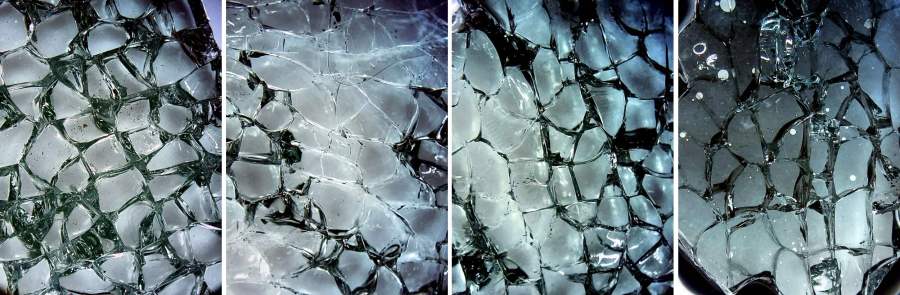
The mirror doubles the number of glass cuboids and their glittery gaps:
Smashed Glass Coaster 2 – fragment detail
All in all, it turned out well, but the epoxy pouring and leveling is tedious.
It might be possible to assemble a coaster upside-down, with the black layer stuck to something like Kapton tape and the fragments carefully aligned in their openings to make the entire top surface a plane. The tape should keep the epoxy from oozing out of the gaps, although a perfect seal may be impossible.
Then fill the gaps with black epoxy, lay the clear middle layer in place, run a dollop of epoxy on each fragment, lay the mirror in place, and hope there’s enough epoxy to fill all the gaps and not enough to make a mess around the perimeter.
With a bit of luck, that wouldn’t require so much hand finishing.
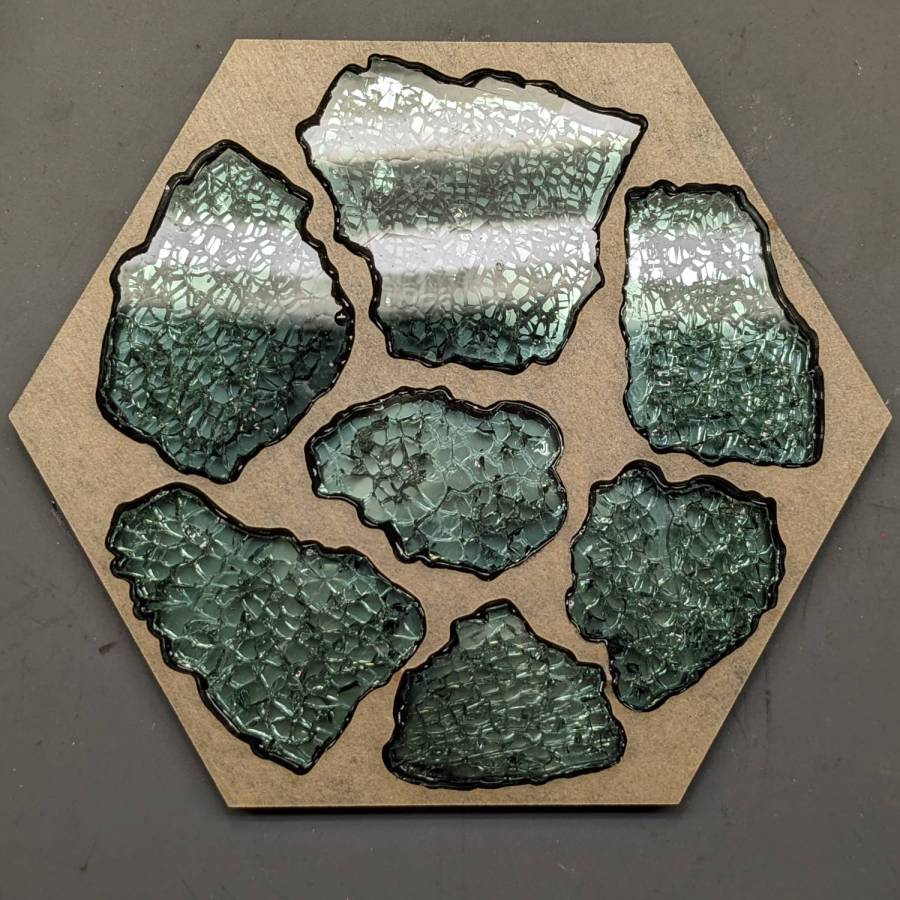
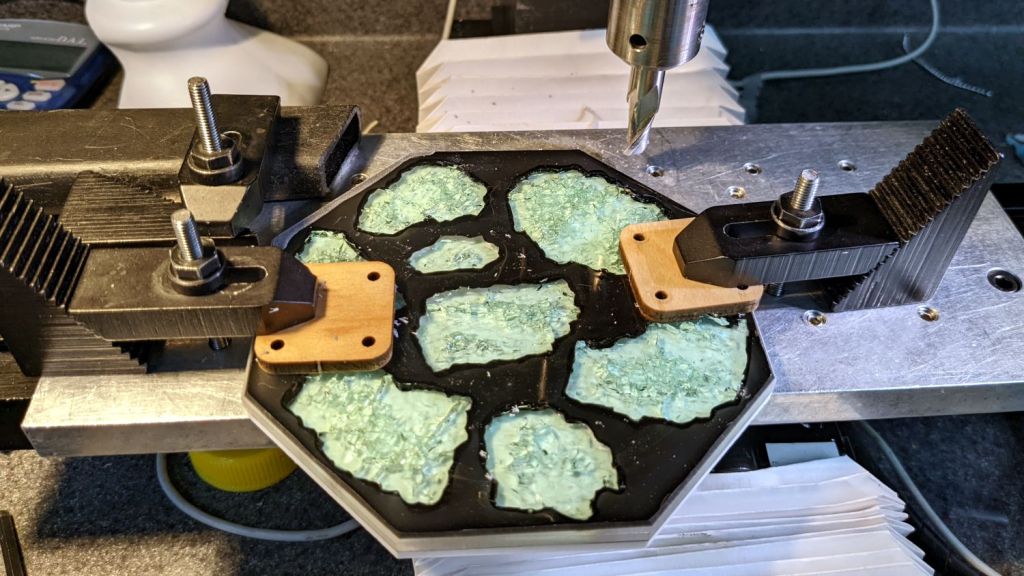
The next coaster must have a perimeter shrinkwrapped around the fragments, if only to break the low-vertex-count polygon tradition.
So I clamped it to the Sherline’s tooling plate and milled off the rim:
Smashed Glass Coaster – meniscus removal
Given the Sherline’s cramped work envelope, all the action took place along the rearmost edge, requiring eight reclampings indexed parallel to the table with a step clamp.
The cutter cleared off everything more than 0.3 mm above the surface of the glass chunks. I could probably have gone another 0.1 mm lower, but chopping the bit into the edge of a shattered glass fragment surely wouldn’t end well.
Polishing the dark gray milled surface might improve it slightly, at the risk of scuffing whatever poured epoxy stands slightly proud of the glass:
Smashed Glass Coaster – leveled edge
Perhaps if I define it to be a border, everybody will think it was intentional.
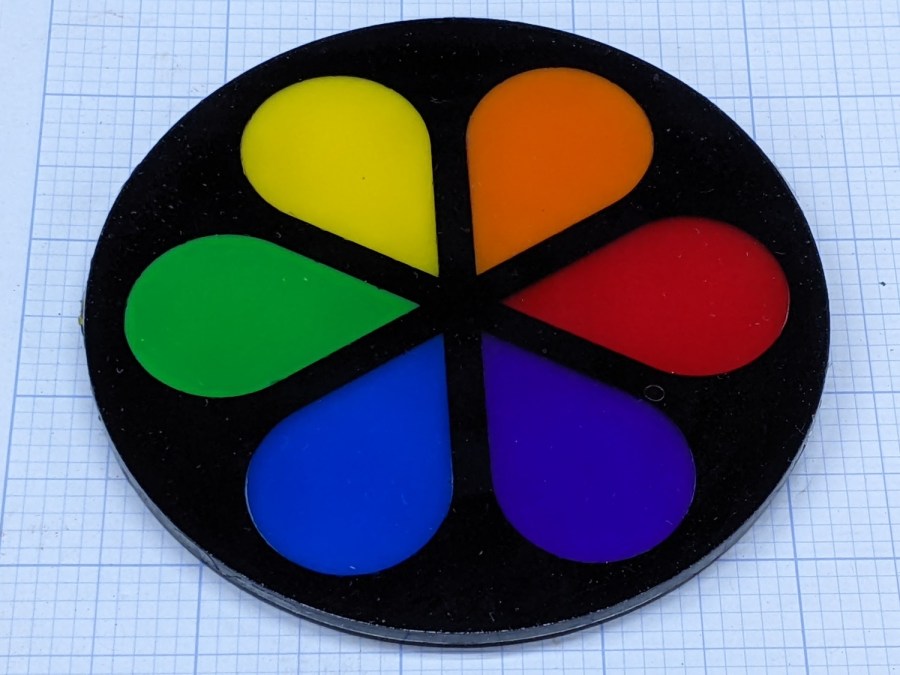
The petals stand slightly proud of the black top frame, as the colored sheets were marginally thicker than the black sheet, but it looks OK in person. They’re all epoxied to a transparent base plate, so the bottom view is pretty much the same:
Cut Acrylic Coaster – bottom
Because the bottom is perfectly smooth, I think it looks better than the top, which shows irregularities around the petals where the epoxy didn’t quite fill the gaps. There is one small bubble you won’t notice if I don’t tell you about it.
I laid a small bead of epoxy around the perimeter of the base, laid the black frame in place, ran a bead along the midline of each petal shape plus a drop in the round part, laid the petals in place, and hoped I didn’t use too much epoxy. It turned out all right, with only a few dribbles down the edge that wiped off easily enough.
I peeled the protective plastic off the top while the epoxy was still tacky, which pulled far too many fine filaments across the surface:
Cut Acrylic Coaster – frayed top
After the final cure, I managed to scrape most of them off with a thumbnail; I hope to never make that mistake again.
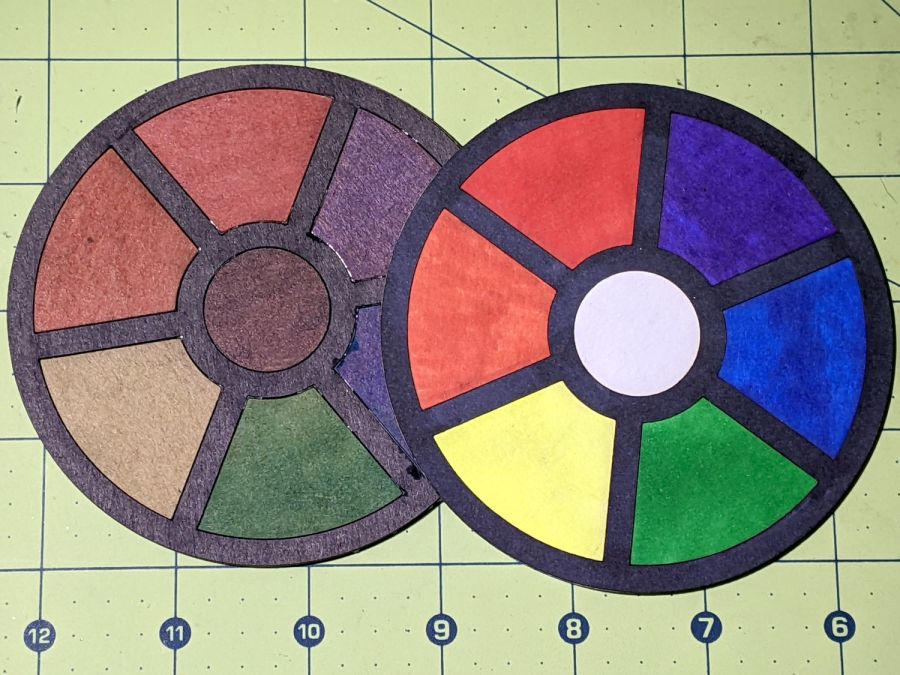
As you might expect, acrylic plastic’s pure saturated colors wipe the floor with Sharpie-scribbled white chipboard:
Chipboard coaster – rounded petals – front vs back cut
The black frame makes the whole thing overly dark, so the next attempt should use white or perhaps a transparent layer atop a mirror base.
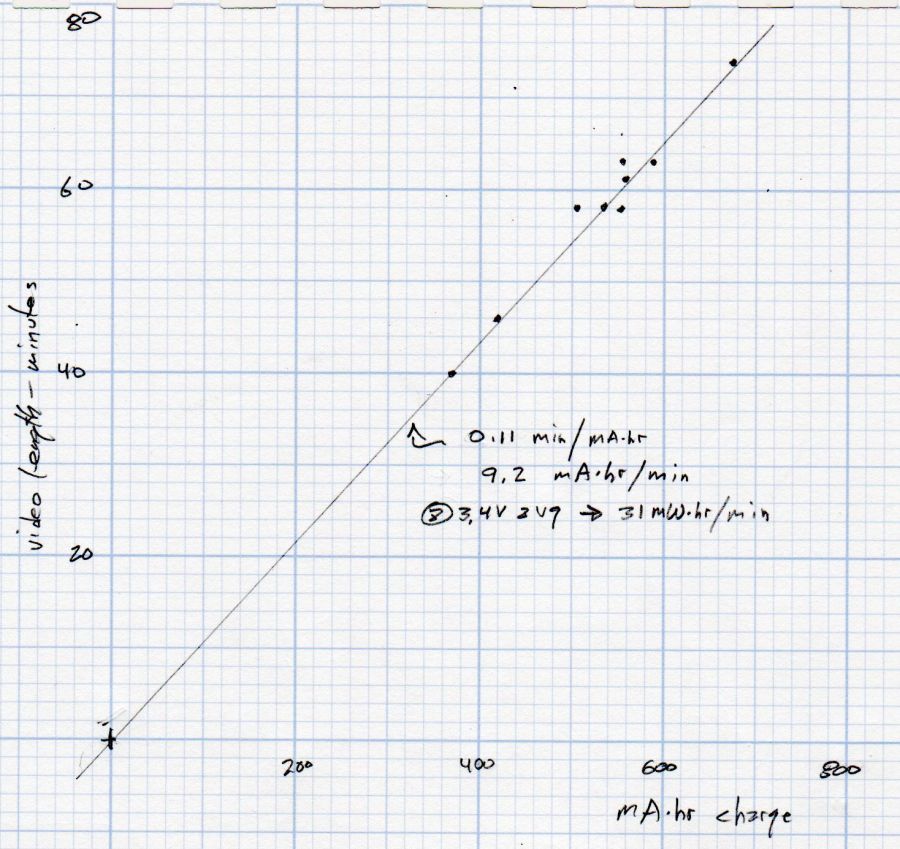
Having run the Newmowa NP-BX1 batteries through my old Sony HDR-AS30V helmet camera a few times, a plot seemed in order:
Newmowa NP-BX1 video duration vs charge
The cluster of dots shows most of our rides last about an hour.
The line is an eyeballometrical fit, slightly coerced to pass through the origin because that’s where it should go.
The 9.1 mA·hr/min slope is in reasonable agreement with past results, given different batteries and charger. The Keweisi meter emerged first from the box.
Straining the hr/min dimensional nonsense out of the slope suggests the camera averages 550 mA and 1.9 W. Derating those by a few percent to account for the recharge efficiency might be in order, but they’re surely in the right ballpark.