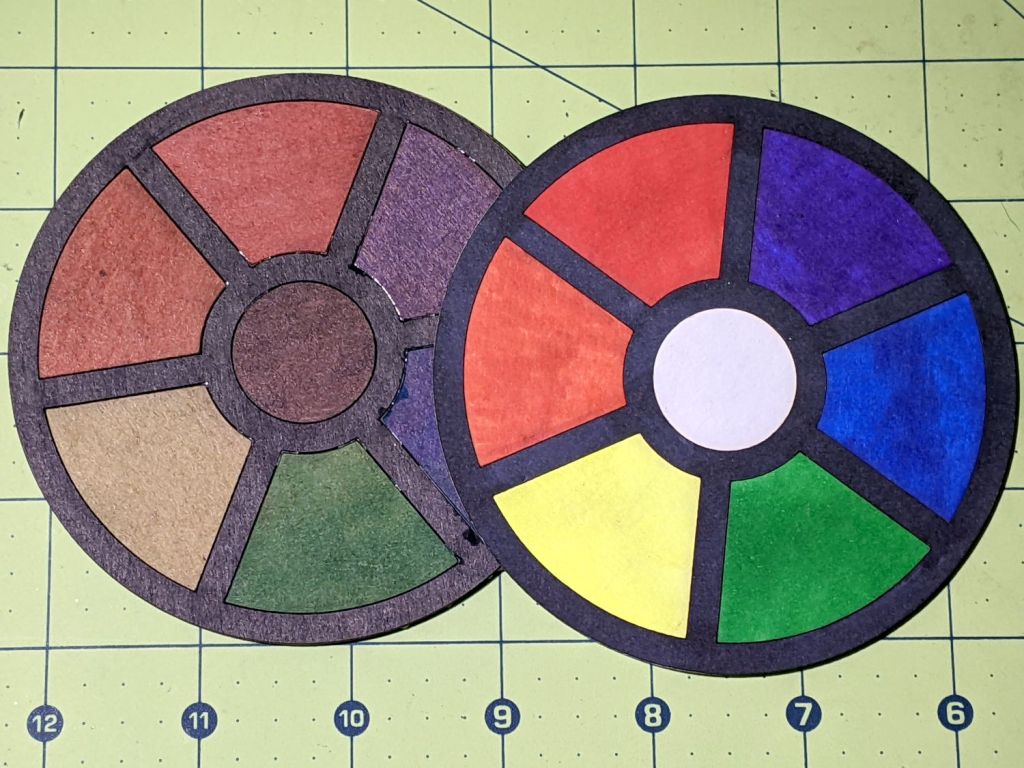
Making a coaster with petals from the NBC peacock turned out to be trickier than I expected:

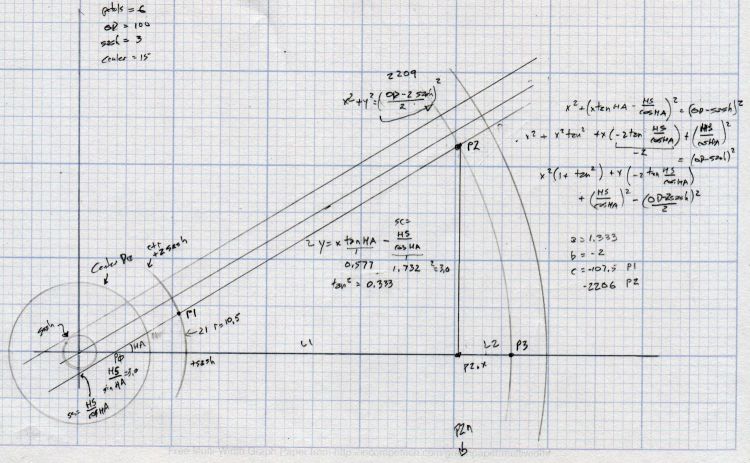
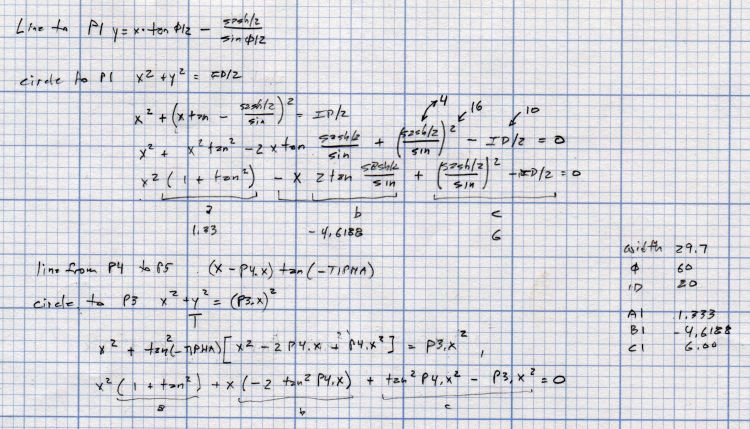
Protracted doodling showed that I cannot math hard enough to get a closed-form solution gluing a circular section onto the end of those diverging lines:

However, I can write code to recognize a solution when it comes around on the guitar.
Point P3 at the center of the end cap circle will be one radius away from both P2 at the sash between the petals and P4 at the sash around the perimeter, because the circle will be tangent at those points. The solution starts by sticking an absurdly small circle around P3 out at P4, then expanding its radius and relocating its center until the circle just kisses the sash, thus revealing the location of P2:
t1 = tan(PetalHA);
sc = (Sash/2) / cos(PetalHA);

<< snippage >>

P3 = P4;        // initial guess
r = 1.0mm;      // ditto
delta = 0.0mm;
do {
  r += sin(PetalHA) * delta;
  P3.x = P4.x - r;
  dist = abs(P3.x * t1 - sc) / sqrt(pow(t1,2) + 1);
  delta = dist - r;
  message("r: ",r,"  delta: ",delta);
} while (abs(delta) > 0.001mm);

P2 = [P3.x - r*sin(PetalHA),r*cos(PetalHA)];
The dist variable is the perpendicular distance from the sash line to P3, which will be different than the test radius r between P3 and P4 until it’s equal at the kissing point. The radius update is (pretty close to) the X-axis difference between the two, which is (pretty close to) how wrong the radius is.
As far as I can tell, this will eventually converge on the right answer:
r: 1.0000mm  delta: 13.3381mm
r: 6.1043mm  delta: 6.2805mm
r: 8.5077mm  delta: 2.9573mm
r: 9.6394mm  delta: 1.3925mm
r: 10.1723mm  delta: 0.6557mm
r: 10.4232mm  delta: 0.3087mm
r: 10.5414mm  delta: 0.1454mm
r: 10.5970mm  delta: 0.0685mm
r: 10.6232mm  delta: 0.0322mm
r: 10.6355mm  delta: 0.0152mm
r: 10.6413mm  delta: 0.0071mm
r: 10.6441mm  delta: 0.0034mm
r: 10.6454mm  delta: 0.0016mm
r: 10.6460mm  delta: 0.0007mm
Obviously, efficiency isn’t a big concern here.
Having found the center point of the end cap, all the other points fall out easily enough and generating the paths follows the same process as with the simple petals. The program performs no error checking and fails in amusing ways.
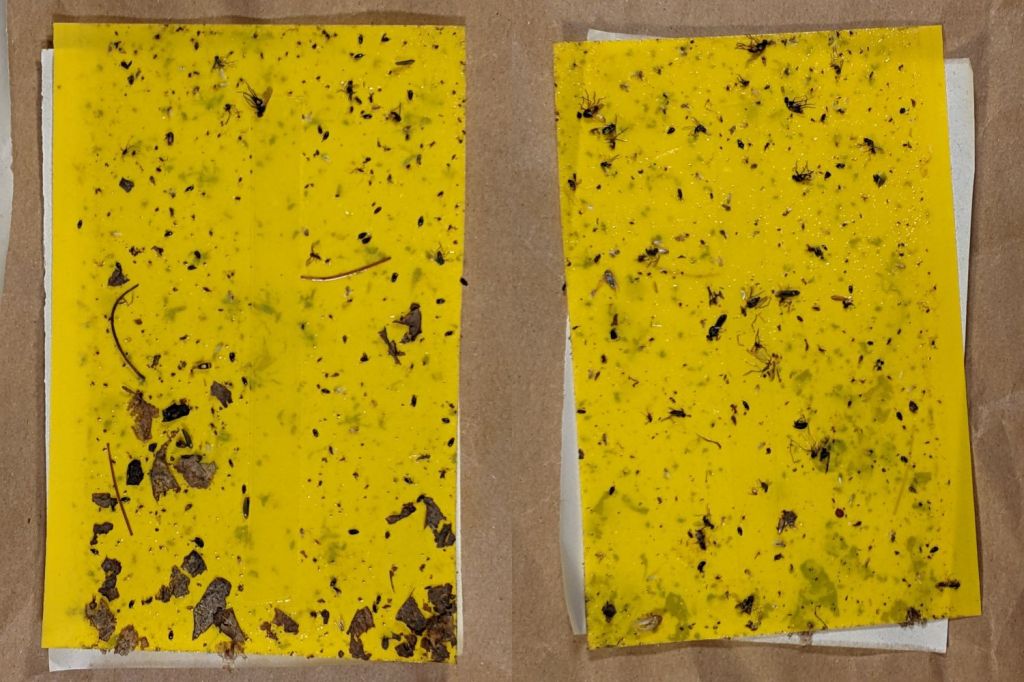
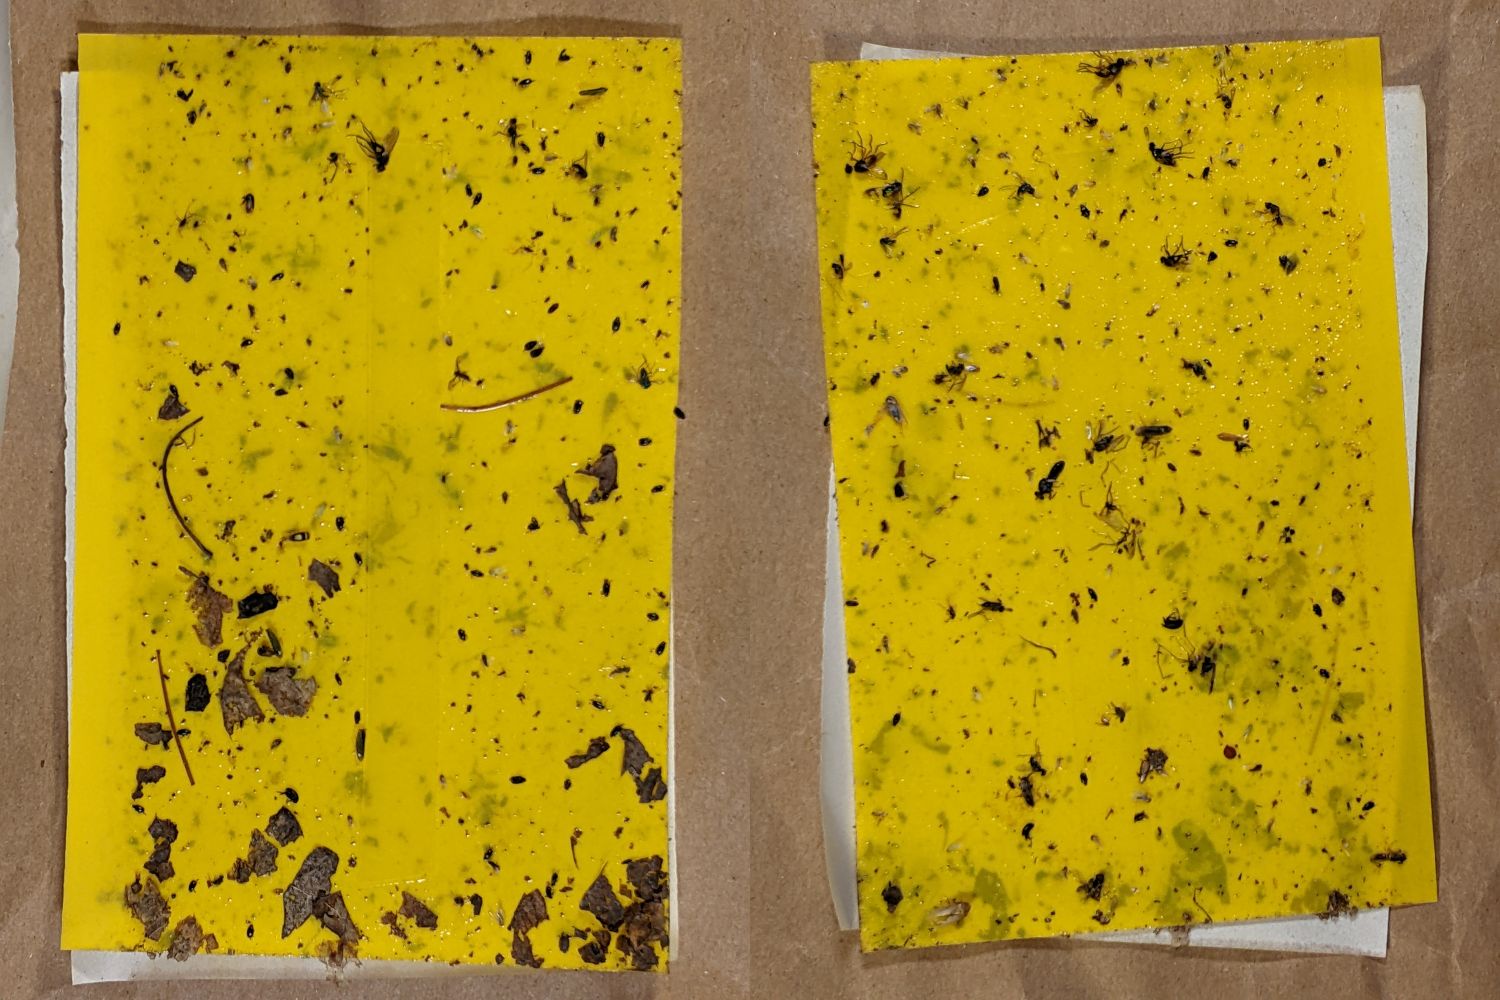
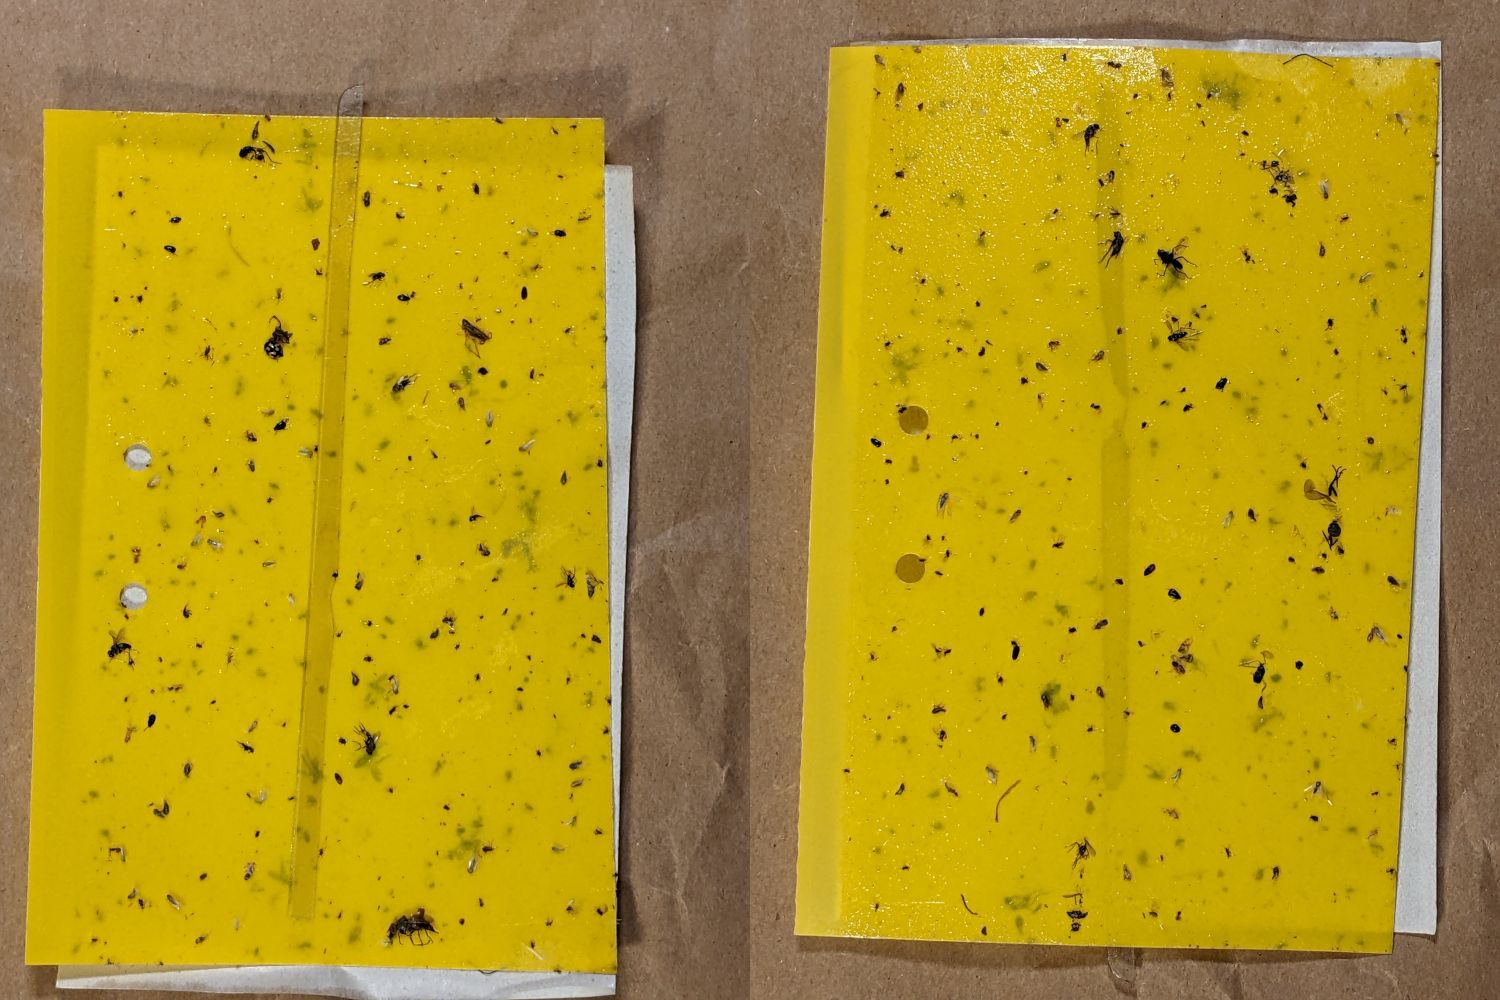
As before, laser cutting the chipboard deposits some soot along both sides of the kerf. It’s noticeable on brown chipboard and painfully obvious on white-surface chipboard, particularly where all those cuts converge toward the middle. I applied low-tack blue masking tape as a (wait for it) mask:

Whereupon I discovered the white surface has the consistency of tissue paper and removing the tape pretty much peels it right off:

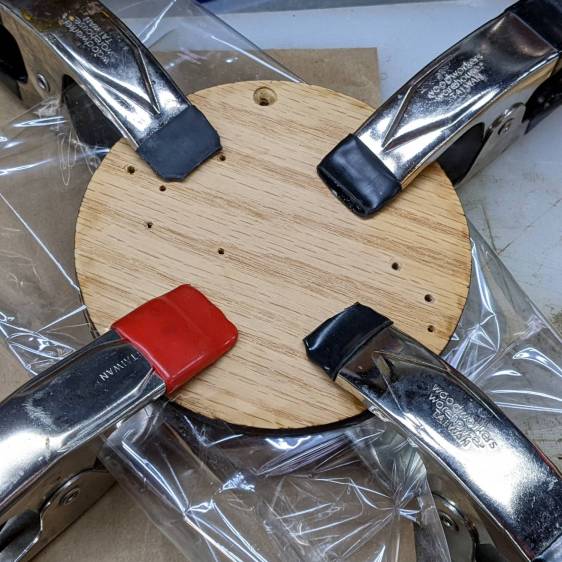
Putting the chipboard up on spikes and cutting it from the back side, with tabs holding the pieces in place (so they don’t fall out and get torched while cutting the next piece), should solve that problem.
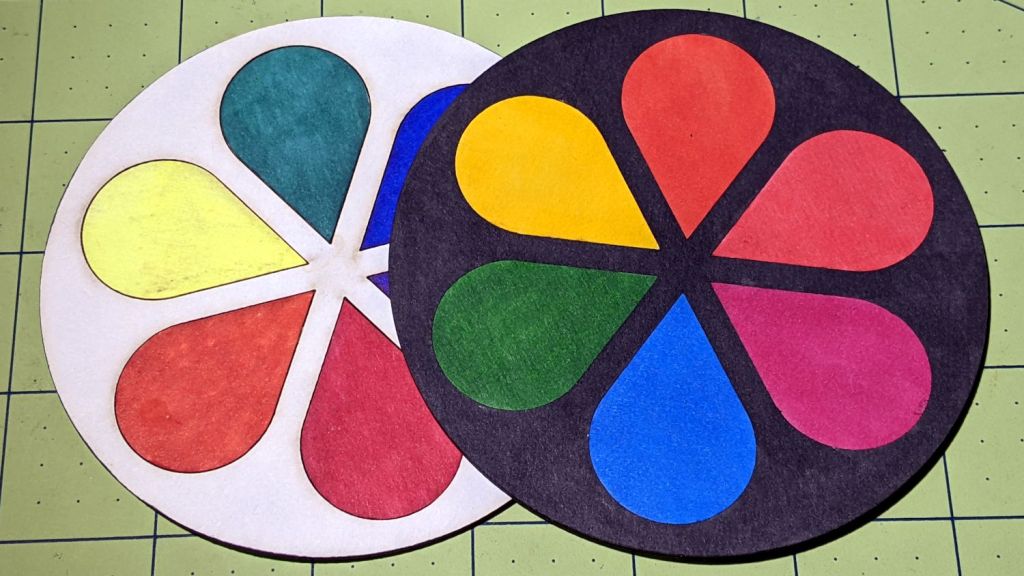
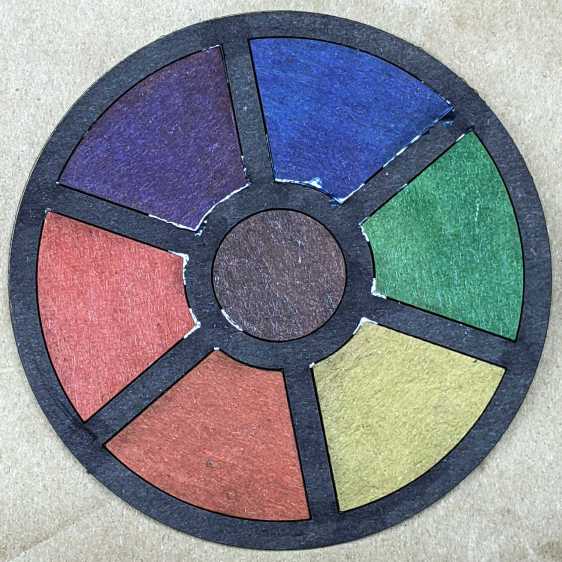
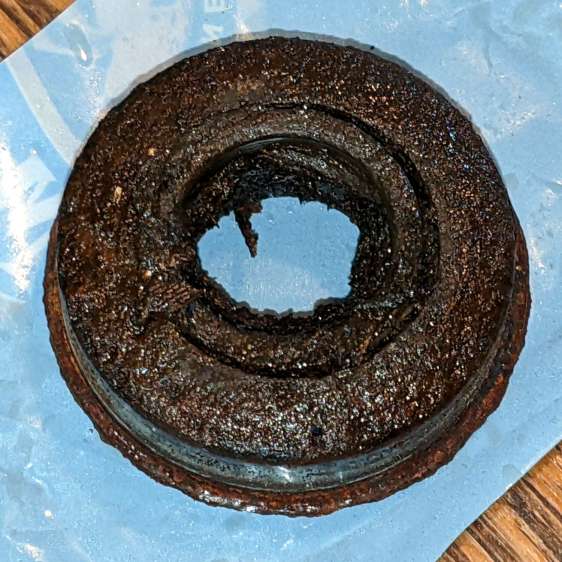
In the meantime, a black frame conceals many issues:

I must up my coloring game; those fat-tip markers just ain’t getting it done.
The GCMC and Bash source code as a GitHub Gist:
| // Round Petals Test Piece | |
| // Ed Nisley KE4ZNU | |
| // 2022-07-17 Coasters with round-end petals | |
| layerstack("Frame","Petals","Rim","Base","Center","Tool1"); // SVG layers map to LightBurn colors | |
| //—– | |
| // Library routines | |
| include("tracepath.inc.gcmc"); | |
| include("tracepath_comp.inc.gcmc"); | |
| include("varcs.inc.gcmc"); | |
| include("engrave.inc.gcmc"); | |
| FALSE = 0; | |
| TRUE = !FALSE; | |
| //—– | |
| // Command line parameters | |
| // -D various useful tidbits | |
| // add unit to speeds and depths: 2000mm / -3.00mm / etc | |
| if (!isdefined("OuterDia")) { | |
| OuterDia = 100.0mm; | |
| } | |
| if (!isdefined("CenterDia")) { | |
| CenterDia = 0.0mm; | |
| } | |
| if (!isdefined("NumPetals")) { | |
| NumPetals = 6; | |
| } | |
| if (!isdefined("Sash")) { | |
| Sash = 5.0mm; | |
| } | |
| // Petal values | |
| PetalAngle = 360.0deg/NumPetals; // subtended by inner sides | |
| PetalHA = PetalAngle/2; | |
| PetalOD = OuterDia – 2*Sash; | |
| PetalID = CenterDia + 2*Sash; | |
| PetalOAL = OuterDia/2 – Sash – (Sash/2)/sin(PetalHA); | |
| //message("petalOAL: ",PetalOAL); | |
| P4 = [PetalOD/2,0.0mm]; | |
| // Find petal vertices | |
| P0 = [(Sash/2) / sin(PetalHA),0.0mm]; | |
| t1 = tan(PetalHA); | |
| sc = (Sash/2) / cos(PetalHA); | |
| if (P0.x < PetalID/2) { | |
| a = 1 + pow(t1,2); | |
| b = -2 * t1 * sc; | |
| c = pow(sc,2) – pow(PetalID/2,2); | |
| xp = (-b + sqrt(pow(b,2) – 4*a*c))/(2*a); | |
| xn = (-b – sqrt(pow(b,2) – 4*a*c))/(2*a); | |
| y = xp*t1 – sc; | |
| if (FALSE) { | |
| message("a: ",a); | |
| message("b: ",b); | |
| message("c: ",c); | |
| message("p: ",xp," n: ",xn," y: ",y); | |
| } | |
| P1 = [xp,y]; | |
| } | |
| else { | |
| P1 = P0; | |
| } | |
| P3 = P4; // initial guess | |
| r = 1.0mm; // ditto | |
| delta = 0.0mm; | |
| do { | |
| r += sin(PetalHA) * delta; | |
| P3.x = P4.x – r; | |
| dist = abs(P3.x * t1 – sc) / sqrt(pow(t1,2) + 1); | |
| delta = dist – r; | |
| message("r: ",r," delta: ",delta); | |
| } while (abs(delta) > 0.001mm); | |
| P2 = [P3.x – r*sin(PetalHA),r*cos(PetalHA)]; | |
| PetalWidth = 2*r; | |
| if (FALSE) { | |
| message("P0: ",P0); | |
| message("P1: ",P1); | |
| message("P2: ",P2); | |
| message("P3: ",P3); | |
| message("P4: ",P4); | |
| } | |
| // Construct paths | |
| PetalPoints = {P1,P2}; | |
| OutArc = varc_cw([P2.x,-P2.y] – P2,-r); | |
| OutArc += P2; | |
| PetalPoints += OutArc; | |
| if (P0 != P1) { | |
| PetalPoints += {[P1.x,-P1.y]}; | |
| InArc = varc_ccw(P1 – [P1.x,-P1.y],PetalID/2); | |
| InArc += [P1.x,-P1.y]; | |
| PetalPoints += InArc; | |
| } | |
| else { | |
| PetalPoints += {P0}; | |
| } | |
| //— Lay out the frame | |
| linecolor(0xff0000); | |
| layer("Frame"); | |
| if (CenterDia) { | |
| goto([CenterDia/2,0mm]); | |
| circle_cw([0mm,0mm]); | |
| } | |
| repeat(NumPetals;i) { | |
| a = (i-1)*PetalAngle; | |
| tracepath(rotate_xy(PetalPoints,a)); | |
| } | |
| goto([OuterDia/2,0]); | |
| circle_cw([0mm,0mm]); | |
| //— Lay out internal pieces for oriented cutting | |
| // baseplate | |
| layer("Base"); | |
| relocate([OuterDia + 2*Sash,0]); | |
| goto([OuterDia/2,0]); | |
| circle_cw([0mm,0mm]); | |
| // central circle | |
| if (CenterDia) { | |
| layer("Center"); | |
| relocate([OuterDia/2 + Sash,-(OuterDia – CenterDia)/2]); | |
| goto([CenterDia/2,0mm]); | |
| circle_cw([0mm,0mm]); | |
| } | |
| // petals | |
| layer("Petals"); | |
| repeat(NumPetals;i) { | |
| org = [PetalWidth/2 – OuterDia/2,-(OuterDia + Sash)]; | |
| relocate([(i-1)*(PetalWidth + Sash) + org.x,org.y]); | |
| tracepath(rotate_xy(PetalPoints,90deg)); | |
| } | |
| // Debugging by printf() | |
| if (FALSE) { | |
| layer("Tool1"); | |
| linecolor(0xff1f00); | |
| goto([Sash/2,0mm]); | |
| circle_cw([0mm,0mm]); | |
| goto(P0); | |
| circle_cw([0mm,0mm]); | |
| goto([0,0]); | |
| move([OuterDia/2,0]); | |
| goto([0,0]); | |
| move(OuterDia/2 * [cos(PetalHA),sin(PetalHA)]); | |
| goto(P2); | |
| move_r([0,-PetalWidth/2]); | |
| } |
| #!/bin/bash | |
| # Round petals test piece | |
| # Ed Nisley KE4ZNU – 2022-07-17 | |
| Flags='-P 4 –pedantic' # quote to avoid leading hyphen gotcha | |
| SVGFlags='-P 4 –pedantic –svg –svg-no-movelayer –svg-opacity=1.0 –svg-toolwidth=0.2' | |
| # Set these to match your file layout | |
| ProjPath='/mnt/bulkdata/Project Files/Laser Cutter/Coasters/Source Code' | |
| LibPath='/opt/gcmc/library' | |
| ScriptPath=$ProjPath | |
| Script='Round Petals.gcmc' | |
| [ -z "$1" ] && petals="6" || petals="$1" | |
| fn=RoundPetals-$petals.svg | |
| echo Output: $fn | |
| gcmc $SVGFlags \ | |
| -D "NumPetals=$petals" \ | |
| –include "$LibPath" \ | |
| "$ScriptPath"/"$Script" > "$fn" | |


