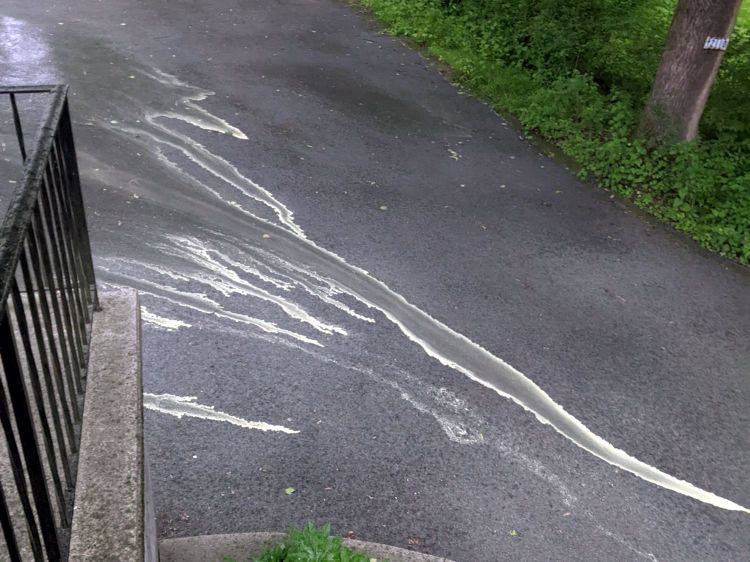
When the driveway runs yellow in the rain, it’s pine pollen season:
Our robot vacuum snuffles up quite a collection of dust:

Peeling a layer of the usual fuzz off the filter reveals the pollen:

This, too, shall pass and my eyes will rejoice.
The Smell of Molten Projects in the Morning
Ed Nisley's Blog: Shop notes, electronics, firmware, machinery, 3D printing, laser cuttery, and curiosities. Contents: 100% human thinking, 0% AI slop.

When the driveway runs yellow in the rain, it’s pine pollen season:
Our robot vacuum snuffles up quite a collection of dust:
Peeling a layer of the usual fuzz off the filter reveals the pollen:
This, too, shall pass and my eyes will rejoice.

The Dell Optiplex 9010 acting as a file server woke up dead after I plugged it in after returning from a road trip. Its ID sticker shows a manufacturing date almost exactly nine years ago and the problem was exactly what you might expect:

I’d never measured 100 mV on a CR2032 before.
Because the Optiplex runs headless in the basement, diagnosis required hauling it upstairs, booting it with a display & keyboard, whacking the date into the current decade, then resetting a few other vital bits.
The electrolytic caps looked to be in fine shape, though.

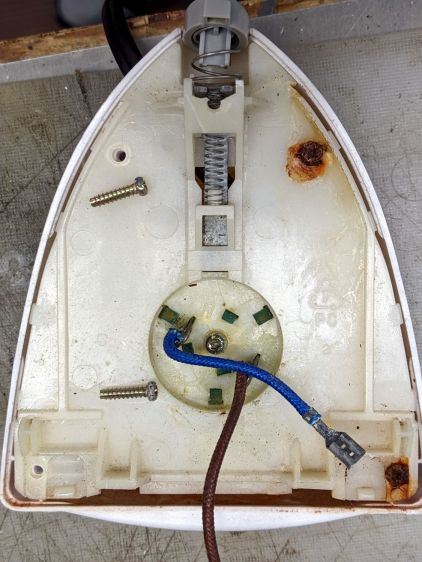
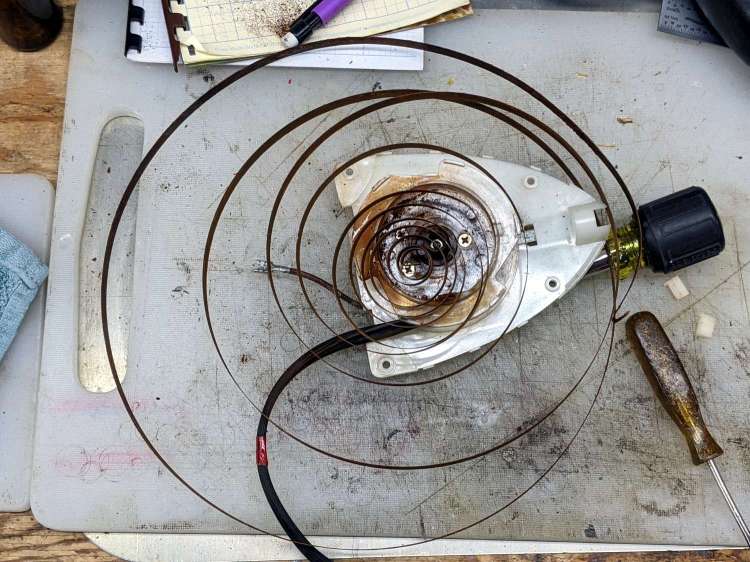
Some weeks ago the Sunbeam clothes iron Mary uses for her quilting projects stopped retracting its cord and a few days ago the entire compartment holding the cord spool simply fell off:

One plastic stud and two thin plastic tabs held the compartment onto the rest of the iron. How they lasted this long I do not know, but they are neither replaceable nor fixable.
When you see badly rusted screws in an electrical device, you know the story cannot end well:
And, indeed, it hasn’t:
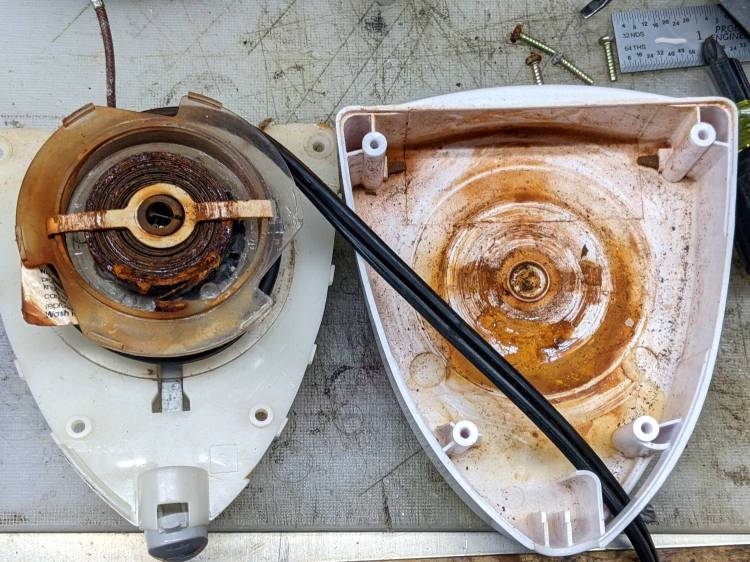
This being a steam iron, it has a water tank that gets filled through an awkward port with a sliding cover. Mary is as conscientious a person as you’ll ever meet, but the occasional spill has certainly happened and it is painfully obvious the iron’s designers anticipated no such events.
The coil spring had rusted into a solid mass:
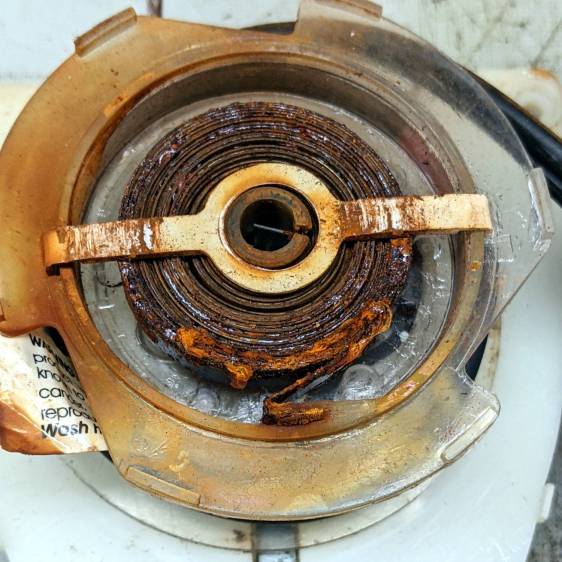
I removed the spring, soaked it in Evapo-Rust for a few hours, then cleaned and oiled it:
Rewinding and reinstalling the spring showed it has lost its mojo and cannot retract more than a few feet of cord.
She’s in the middle of a quilting project and will replace the iron with whatever cheapnified piece of crap might be available these days. Similar irons have reviews reporting they begin spitting rust after a few months, which suggests the plastic tank or stainless steel hardware in this one have been cost-reduced with no regard for fitness-for-use.

A stack of glass shelves has long awaited this fate:

As with the paving tile, the image came from a grayscale photo run through a halftone filter. The leftmost four images were burned through a titanium dioxide layer poured / spread over the glass surface. The rightmost two were burned directly into the glass, serving as a reminder that glass absorbs infrared radiation. The power levels varied from 15% to 60%, although I wasn’t taking notes, with a 400 mm/s scan speed.
It looks much the same when viewed from the rear:

Although the process is often described as blasting chips out of the glass, there’s definitely melting going on. A closer look at the middle image in the top row, with darker gray patches from titanium fused into the glass:

Some pits have only a tiny dot of titanium, almost invisible against the glare from the glass around the rim:
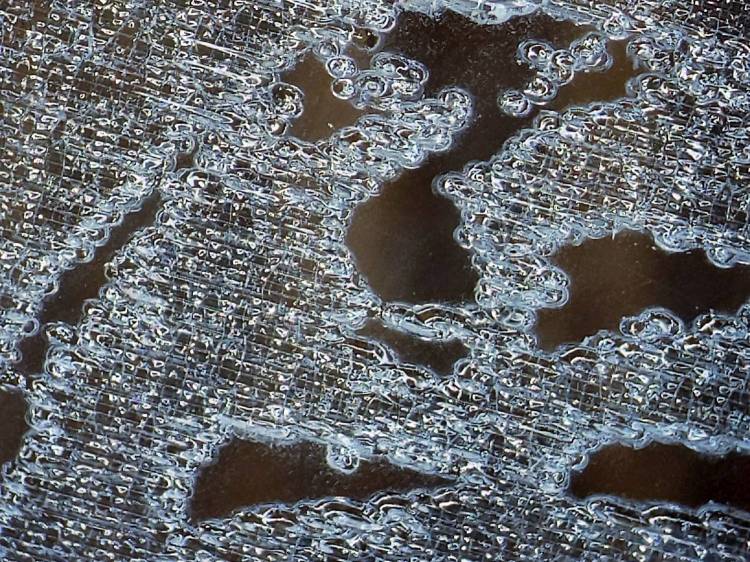
A very close look shows damaged glass, with titanium in some of the pits:
Higher laser power fuses more titanium into contiguous areas that appear much darker, as in the middle bottom image:
This is loosely based on commentary in two LightBurn forum threads about variations on what’s known as the Norton White Tile Method, with more examples on the V1 Engineering forum. Just applying TiO₂ seems less awful than various paints / primers / whatever, with the additional benefit of eliminating the overhead of spraying / cleaning up.
The secret seems to be having enough power to chip the glass and decompose the TiO₂ into darker titanium, while not blasting the result entirely off the surface. Fairly obviously, this will require more experimentation than I’ve done so far.
Minimal assist air protects the laser focus lens from the debris and plenty of ventilation air carries the abrasive result out of the cabinet.
Not something I foresee doing a lot of, but at least I know what happens.
Dump enough titanium dioxide powder into denatured alcohol to make a thin slurry, bloosh it onto a reasonably clean paving / floor / whatever tile, spread it out with a chip brush, let the alcohol evaporate, then try a few images with various laser power settings scanned at 400 mm/s:

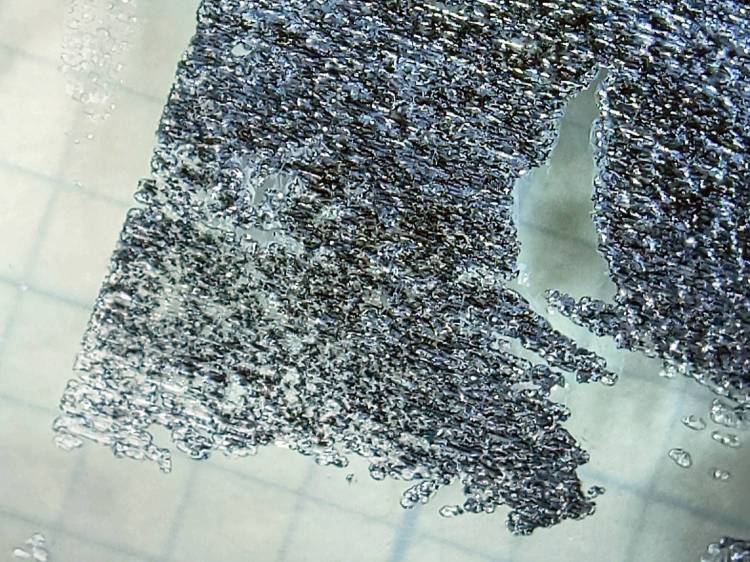
Wash off the TiO₂ powder to leave the fused titanium behind:

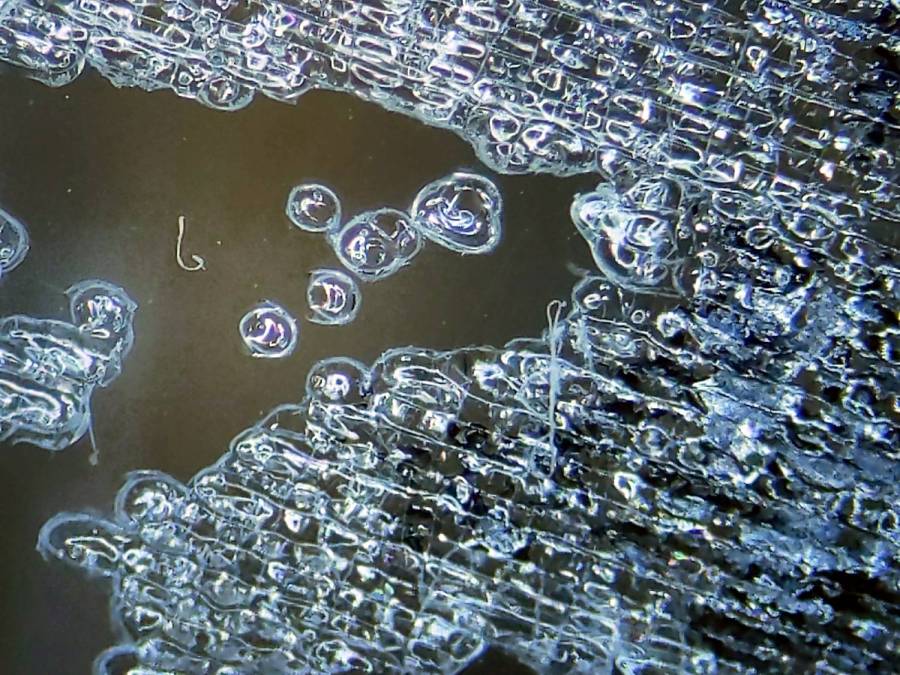
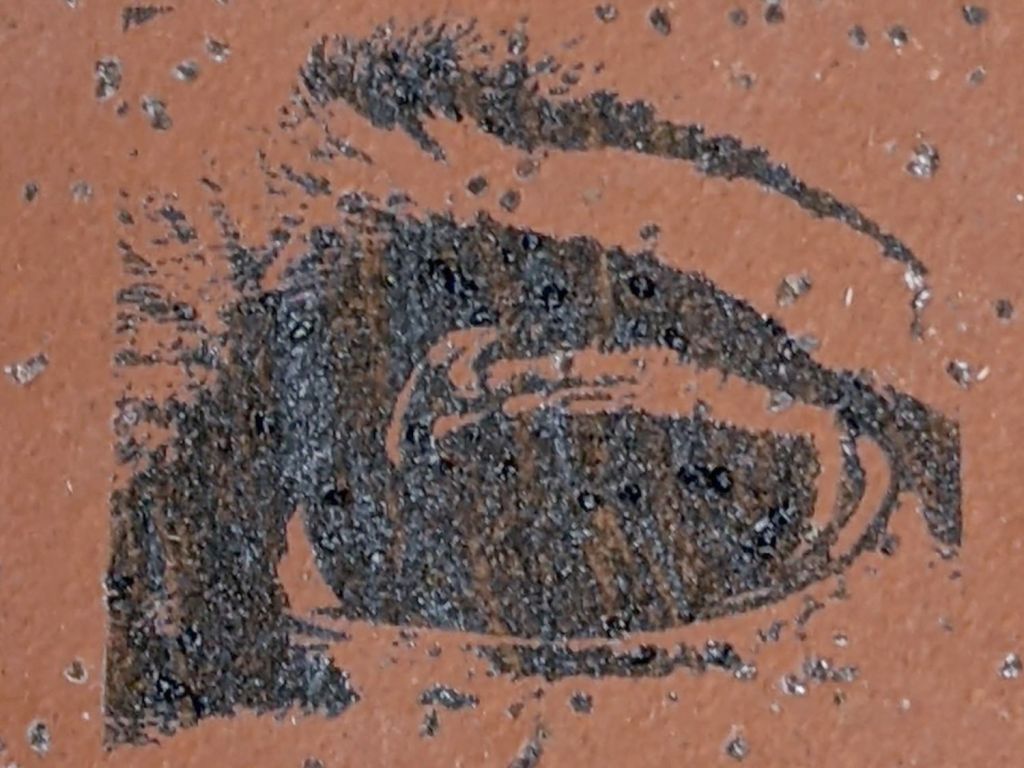
A closer look at the middle eye:

The small granules spread across the surface are glass chips that probably improve traction, so this must have been a paving or floor tile intended for wet areas. A small stack of whole tiles and fragments Came With The House™, they’ve come in handy over the years, and that’s all we know.
The darkest image was at 40% power (maybe 24 W) and the lightest at 15%, although my notes are a bit fuzzy, and it started as a grayscale image dithered into on/off dots.
Obviously, my imaging hand is weak, but it does verify that TiO₂ powder will produce some sort of image without all the bother and solvents associated with paints / primers and the removal thereof.

Entirely by accident, I discovered that engraving a hairline with LightBurn’s Dot Mode using 1 ms burns and 0.1 mm spacing produces a continuous trench, rather than the series of dots at 0.25 mm:

The left is at 20% power (12-ish W) and the right is at 30% (18-ish W), both filled with Pro Sharpie red ink.
The V-shaped groove is even more obvious when seen end-on:

In both cases, the travel speed seems to be about 10 mm/s regardless of the speed set in the cut layer parameters. The higher power level produces a slightly wider cut that doesn’t seem deeper, which I cannot explain.
Filled with red lacquer crayon, the hairline looks absolutely gorgeous:

Engraving the PETG sheet with the protective film in place produces a neat cut with the film edges fused to the plastic.
Cutting the outline and pivot hole in the same operation ensures everything remains perfectly aligned:

Scribble red crayon over the film, make sure the trench is completely filled, peel the film off with some attention to not smearing the pigment, and it’s about as good a hairline as you (well, I) could ask for:

The pigment in the trench is about 0.2 mm wide, with slight heat distortion along each side, and I’ll call it Plenty Good Enough.
Totally did not expect this!
Getting a good-looking hairline on a good-looking cursor turns out to be a major challenge, because there’s nowhere to hide the blunders. A few of the many dead ends along the way shows what’s involved:
https://softsolder.com/2020/05/06/tek-circuit-computer-cursor-hairline-scraping/
https://softsolder.com/2021/01/26/tek-circuit-computer-cursor-hairline/
https://softsolder.com/2021/02/16/tek-circuit-computer-sawed-hairline-fixture/
https://softsolder.com/2021/04/13/tek-cc-milled-cursor-vs-speed-vs-coolant/
https://softsolder.com/2021/04/15/tek-cc-milled-cursor-mvp/
Plenty of Quality Shop Time™ along the way, though …
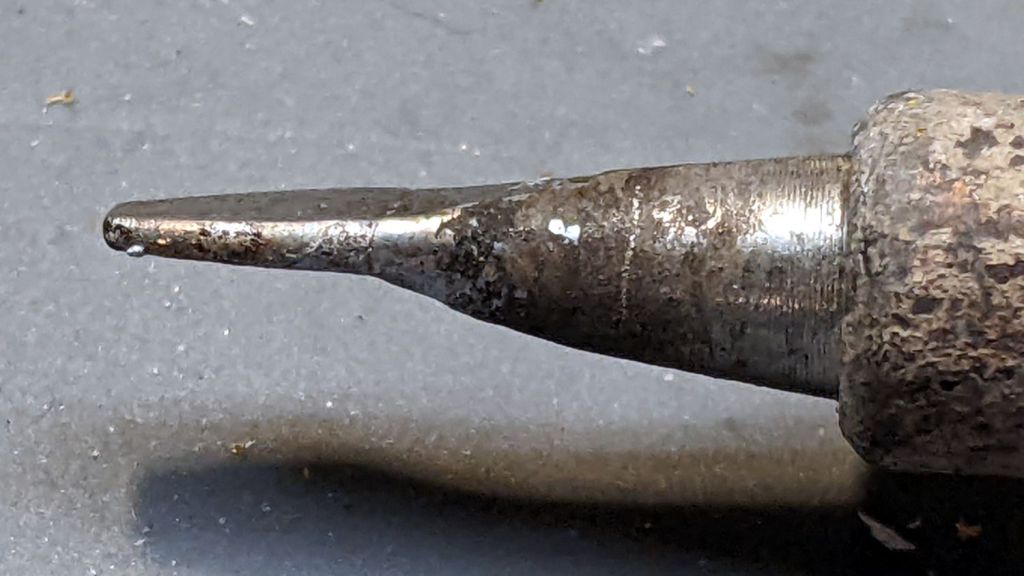
An upcoming project calls for cutting dozens of lengths from a spool of 550 (pound tensile strength) all-nylon paracord, which means I must also heat-seal the ends. Cold-cutting paracord always produces wildly fraying ends, so I got primal on an old soldering iron tip:

Bashed into a flattish blade, it does a Good Enough job of hot-cutting paracord and sealing the end in one operation:

Setting the iron to 425 °C = 800 °F quickly produces reasonably clean and thoroughly sealed cut ends.
Obviously, I need more practice.
Yes, I tried laser cutting the paracord. Yes, it works great, makes a perfectly flat cut, and heat-seals both ends, but it also makes no sense whatsoever without a fixture holding a dozen or so premeasured lengths in a straight line. No, I’m not doing that.
