The weakest fluorescent shop light fixtures always fail during cold weather (apart from the usual early tube failures) and this winter’s cold spells triggered the usual carnage, so I picked up half a dozen (cheap) 22 W LED T8 tubes and set about rewiring three defunct (cheap) fluorescent fixtures from the recycle heap. The new LED tubes run directly from the AC line; you must remove the fluorescent fixture’s ballasts / capacitors / starters and rewire the “tombstone” lampholders accordingly.
The first challenge, as always, involved taking the fixtures apart. Turns out prying the endcap away from the fixture enough to clear the pair of bumps punched into the metal does the trick:
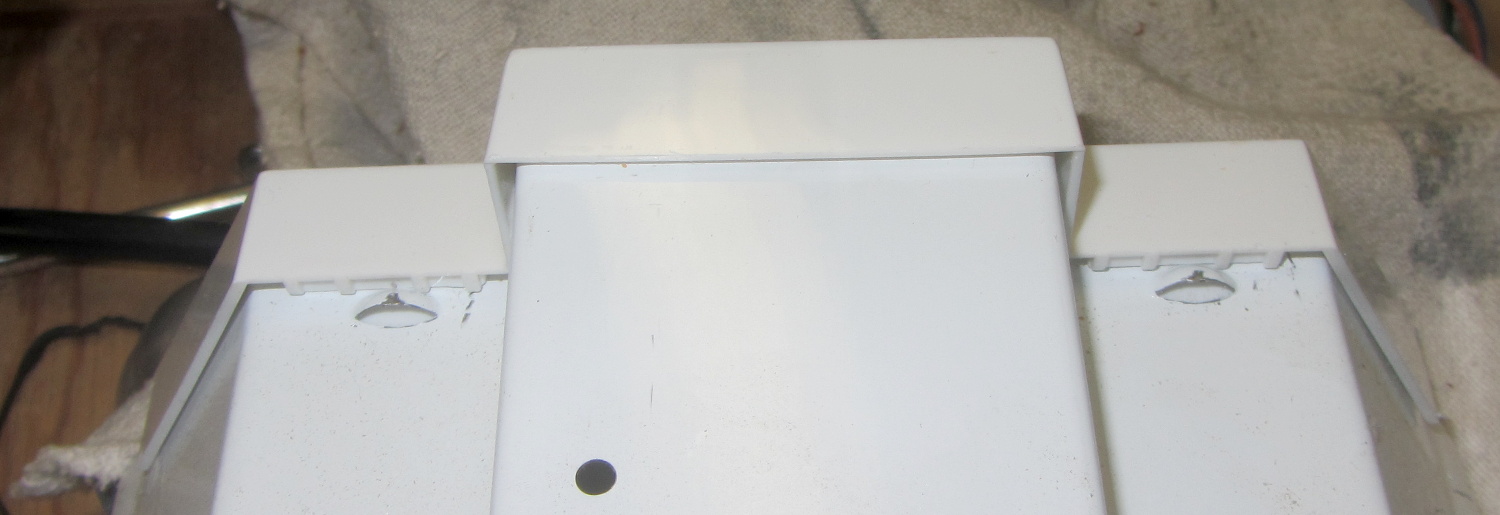
Each endcap contains the ballast inductor / choke and power-factor correction capacitor for one tube. The inductors from one shoplight had a fancy plastic tab that might have held the capacitor in place, but that’s about the only difference:

The 150 kΩ resistor has its leads twisted around the capacitor leads without benefit of that fancy solder stuff one might think necessary for a good connection.
The capacitor contacts use the minimum possible amount of material:
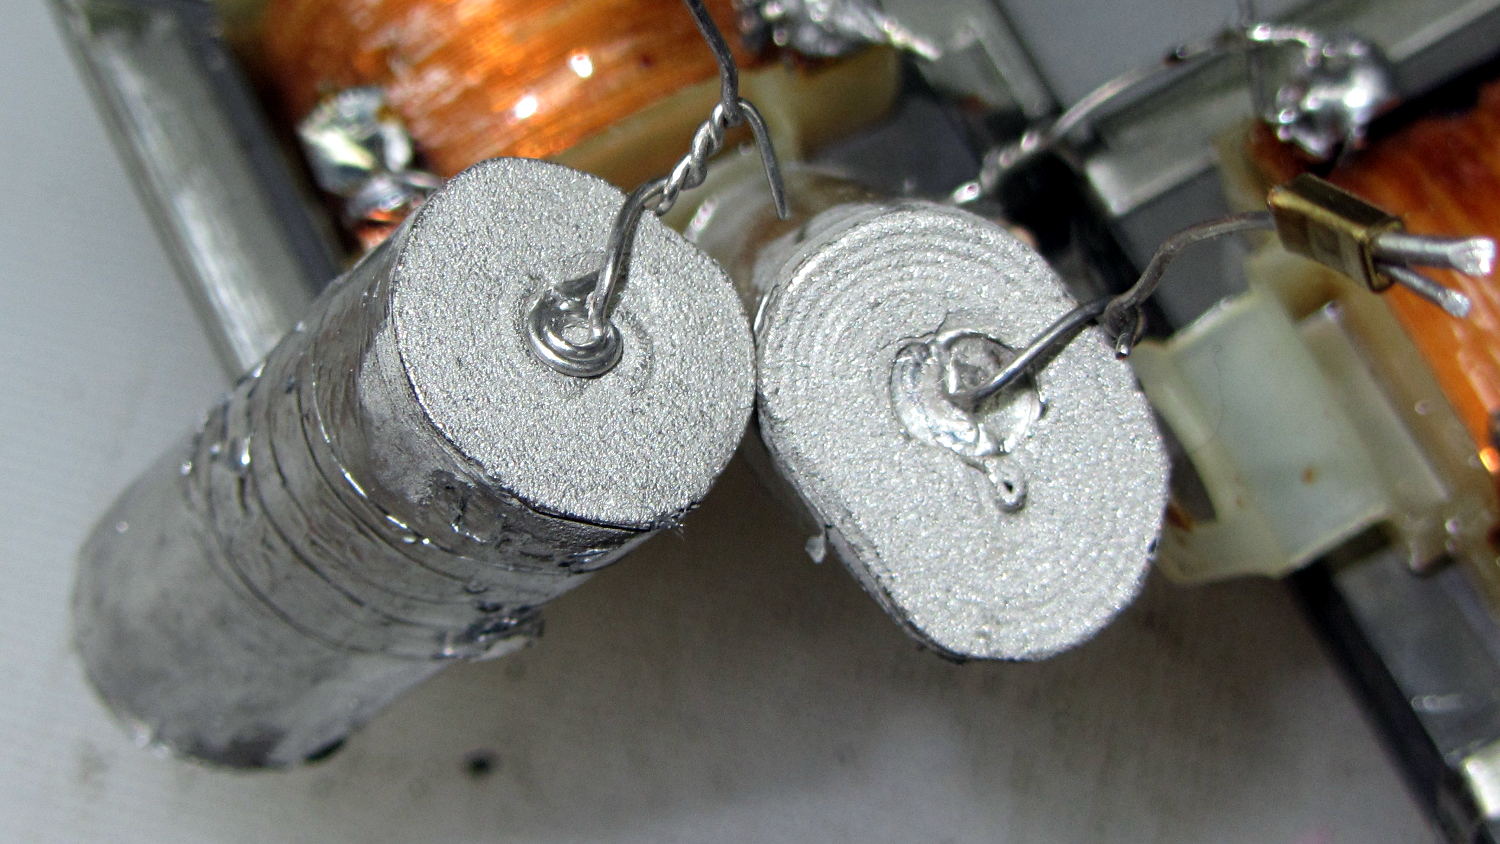
I think the caps use metallized Mylar film, but who knows?
The inductors measure 280 mH and the caps a whopping 5 µF. I might trust the inductors in a low-voltage circuit, but the caps have no redeeming features and went directly to the trash.
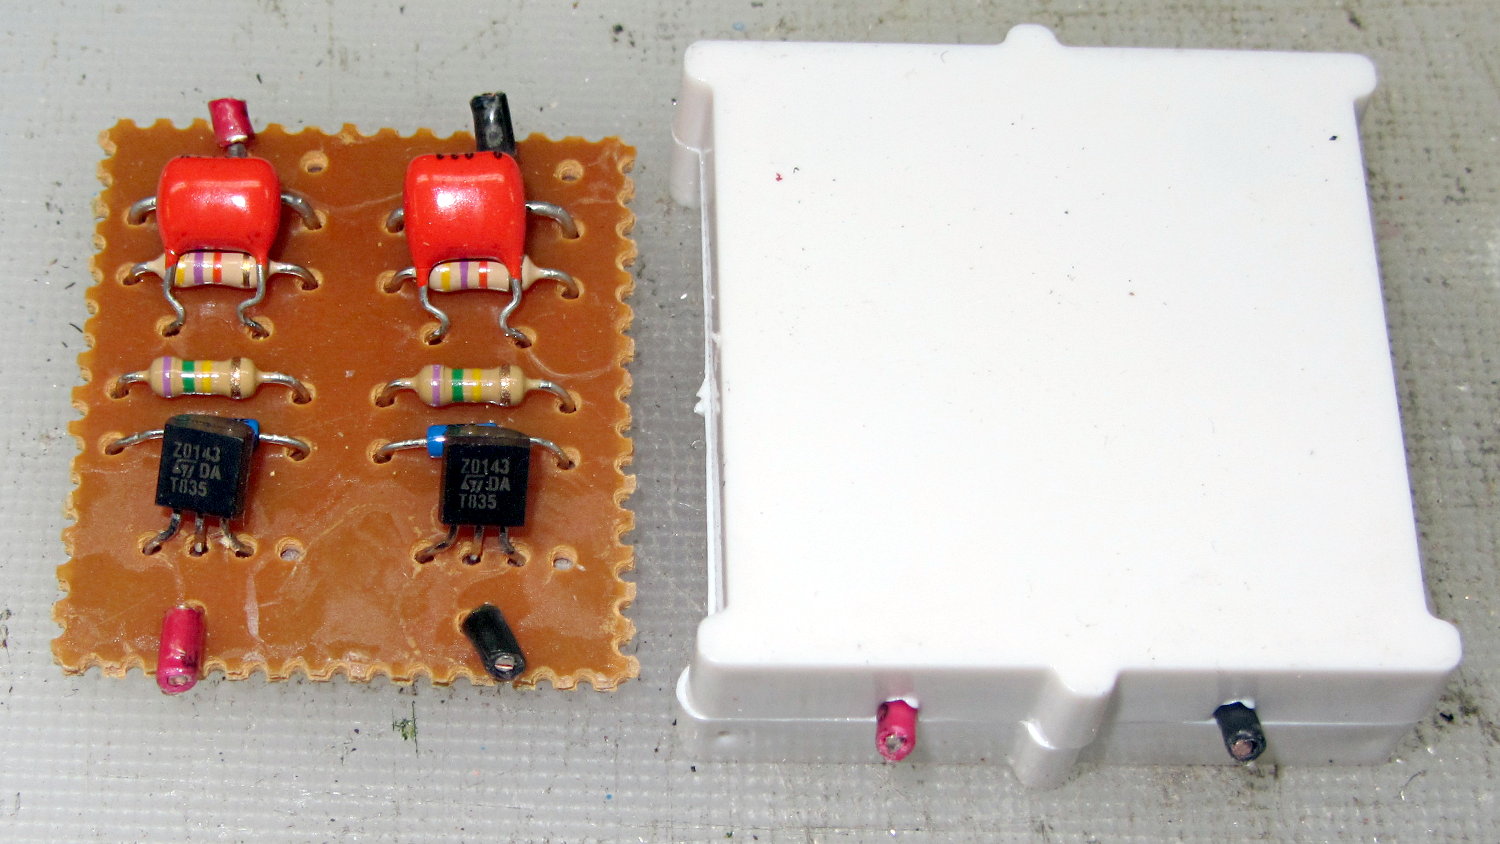
The starter PCB lived in the center of the fixture:
I deliberately picked LED tubes with the AC line contact on one end and the neutral contact on the other, so as to not put line and neutral contacts in the same tombstone. After rewiring, the neutral endcap looks like this:
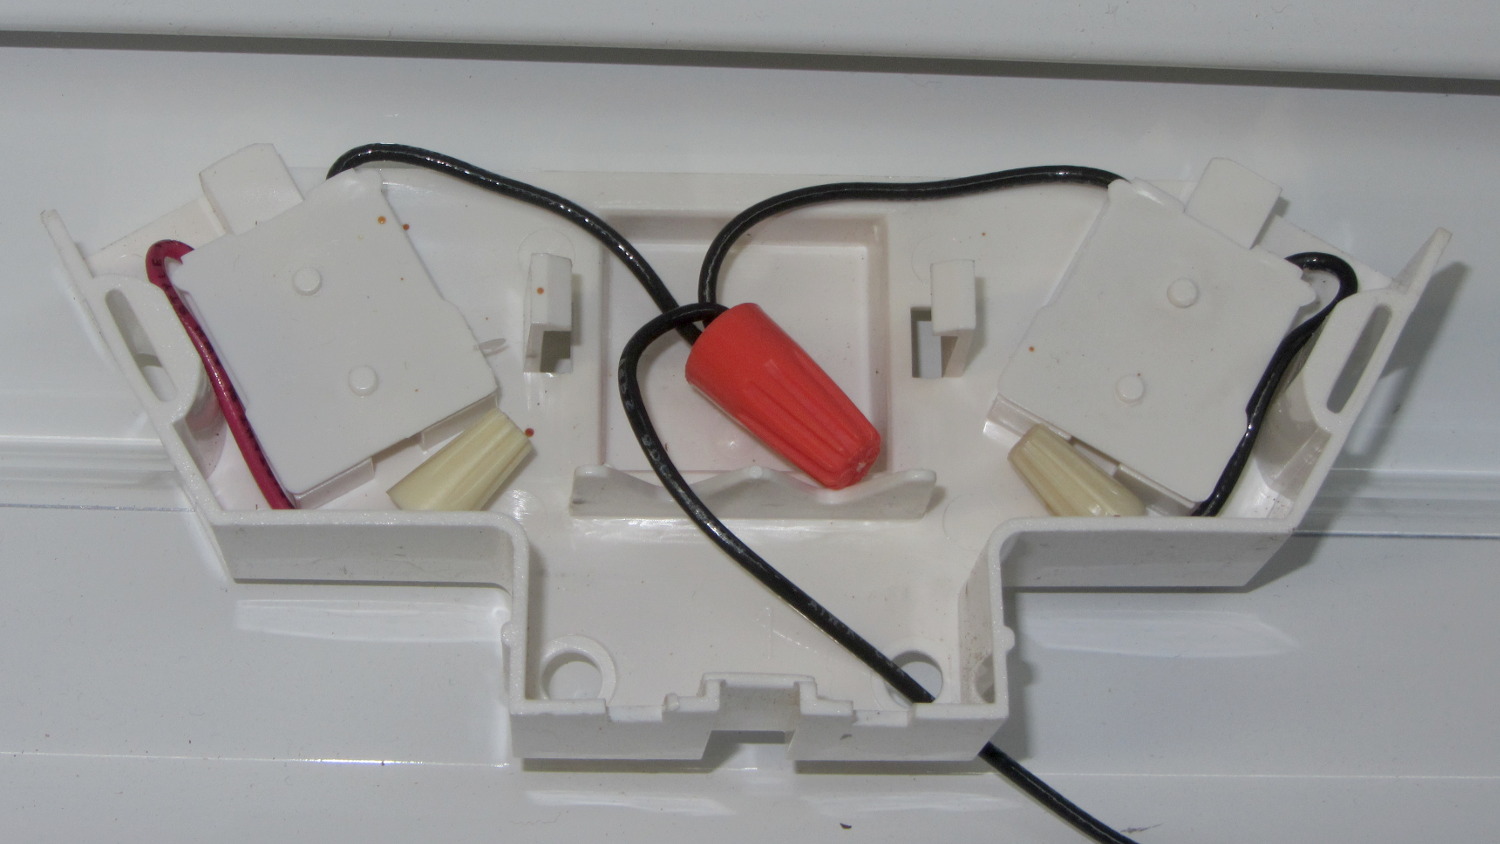
The other endcap holds the power cord and has a green earth ground wire snaking out to a little tab passed into a slot punched in the metal case. I replaced the tab with an actual screw / solderless connector / toothed washer, but have no pix to show for it.
The LED tubes run at 6500 K and contrast harshly with the warm-white tubes in the fluorescent shoplights. I went with the highest light output, because even the best (cheap) LED tubes produce barely half the output of the fluorescents: 2000-ish lumens vs 3900-ish.

Comments
11 responses to “LED Shoplight Conversion: Fluorescent Fixture Teardown”
Hmm. Black wire on a neutral connection?
Inside the fixture, they used black wires and red wires, with nary a white wire to be seen. Exactly one of those black wires ran the entire length of the fixture, so that’s what I used, leaving me with a nice collection of shorter wires.
FWIW, two short wires do not add up to one fixture: they met at the starter in the middle. Spanning the fixture with a red wire would require two wire nuts on four more inches of wire near the middle.
I can’t make this stuff up, honest!
Must keep these in mind, though I’d need LEDs as bright as the fluorescents. My electronic ballast $20 shoplights are OK in the cold (min 35F), though the coldest fixture needs old-style fat bulbs rather than T8s. I’ve had 1-2 failures out of 15 fixtures in a decade, and 5-ish years on the bulbs.
I really want something better for general lighting. The 6 CFs 14′ up in the trusses light up slowly in the cold, but I need an omnidirectional pattern. Maybe more bulbs. 1600 lumen LEDs are too expensive for this purpose. (Our local power company lineman told me of a customer who did a sulfur plasma lamp system in his barn, with light pipes. Cheaper than a lot of grow lights, I suppose…)
,
Obviously, Home Depot’s low-end stuff isn’t up to those specs.
How can that possibly produce genuine organic free-range fresh-squeezed dope? [grin]
I finally went whole hog and bought a fixture intended for lighting warehouses. It sports six T5 tubes and two ballasts (one running four tubes, the other running two) and offering a whopping 31,000 lumens. I added switches so I could run the ballasts independently, so I can run it at 1/3, 2/3 and full brightness. The color rendering is quite good, the ballasts are quality Fulham units with programmed start, and it runs in any weather. I only have one of them, as it’s $130 or so, but when I want PLENTY of light, it rocks. It’s great for small electronic work, and (I’d guess) quilting. It also makes a dandy SAD light (much cheaper and much brighter than the ones offered for “medical” uses like that).
Even at 6500k, I suspect the LED spectrum isn’t as bad as the cold white fluorescent one. Is that starter board one for each tube (looks like two identical circuits). All it would have to do is short briefly then open. I’d be curious as to the schematic. Shouldn’t be tough, looks like six components and a one-sided board.
Here ya go: [grin]

Small parts:
– Caps “0.033 / K.100”
– TO-92 “Z0143 / ST DA / T835”
– Blue diode “ST / DB3 / C832”
– Black diode “1N4004 / RFE”
The ST is a stylized logo for STMicroelectronics: the DB3 is a diac, but the Z0143 looks like a house mark.
T835 is a triac. Z0143 is likely a date code. Bing search brings up Z104.3 Top 40 radio in Baltimore. [grin]
Heh, I can receive Z104.3 from here (I’m about an hour west of Baltimore). They’ve changed call signs and formats several times over the years.
Weird, looks more like a phase control dimmer than the time delay I expected. I suppose it just acts like a voltage dropper for the filaments, along with a chopper to give the inductive kick to start the arc. Thanks for the info!
[…] That emerged from the fourth defunct fluorescent fixture I converted to use LED tubes. […]