The Smell of Molten Projects in the Morning

Ed Nisley's Blog: Shop notes, electronics, firmware, machinery, 3D printing, laser cuttery, and curiosities. Contents: 100% human thinking, 0% AI slop.

Tag: Repairs

If it used to work, it can work again

  • Patio Chair Foot Adapters

    Patio Chair Foot Adapters

    Some years ago we acquired a free quartet of aluminum-frame patio chairs in need of new straps and feet. Eventually enough straps broke to force me to re-strap the things and I finally got around to replacing the badly worn OEM feet:

    Patio Chair Foot Adapter - OEM feet
    Patio Chair Foot Adapter – OEM feet

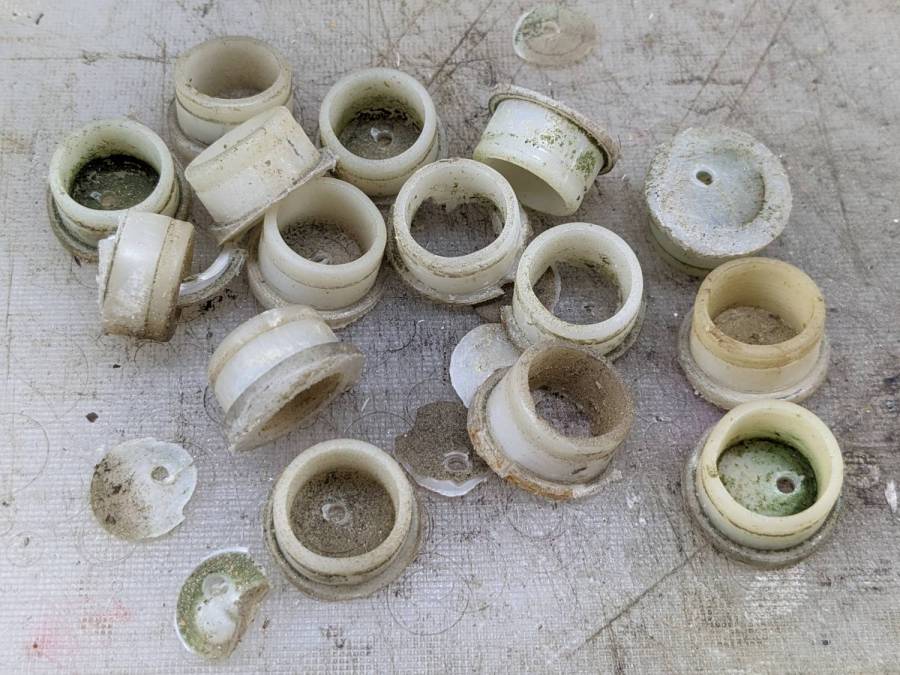
    The small drilled holes let me yoink most them out with sheet-metal screw attached to a slide hammer, then apply the Designated Prydriver to the most recalcitrant / broken ones.

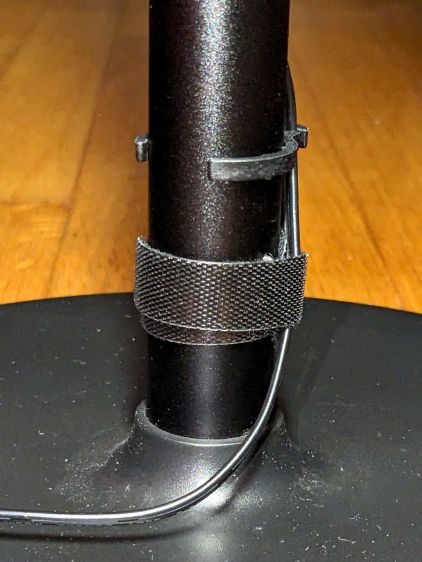
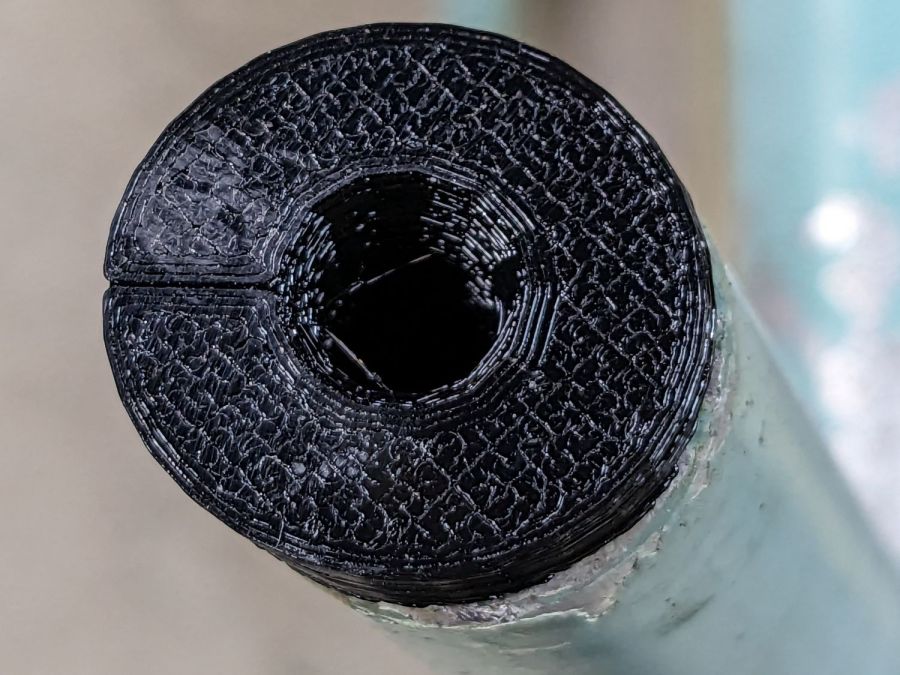
    Some feet had worn enough to expose the aluminum tubes, but most had at least a thin layer of plastic:

    Patio Chair Foot Adapter - OEM foot erosion
    Patio Chair Foot Adapter – OEM foot erosion

    Obviously, I should have stripped and repainted the frames (if that’s possible, as they’re probably powder-coated), but a man’s gotta know his limitations and this job needed to get done.

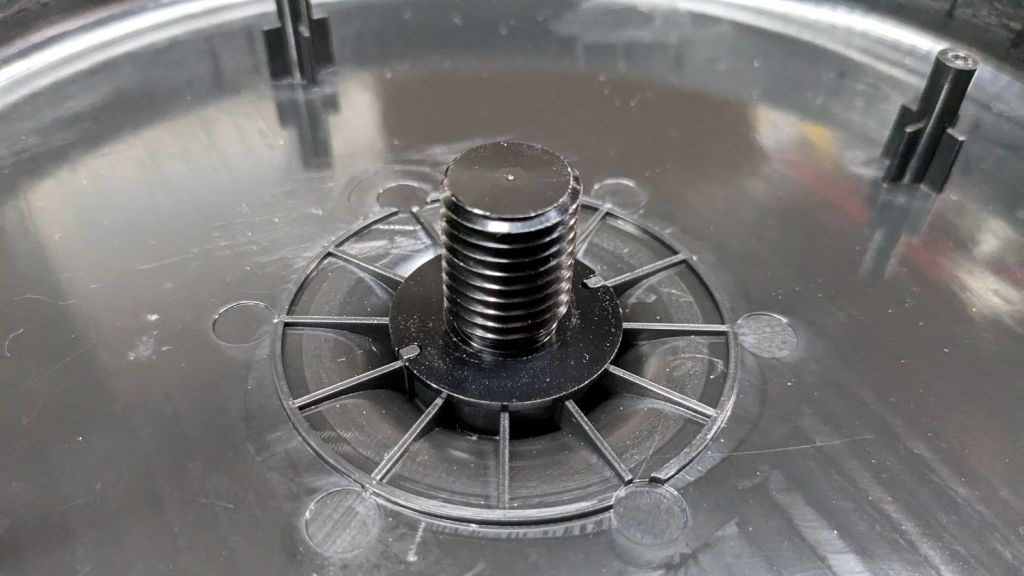
    One might think patio furniture replacement feet are cheap & readily available, but no amount of keyword engineering produced search results with any degree of assured fit, so I conjured adapters for screw-in feet from the vasty digital deep:

    Patio Chair Foot Adapters - solid models
    Patio Chair Foot Adapters – solid models

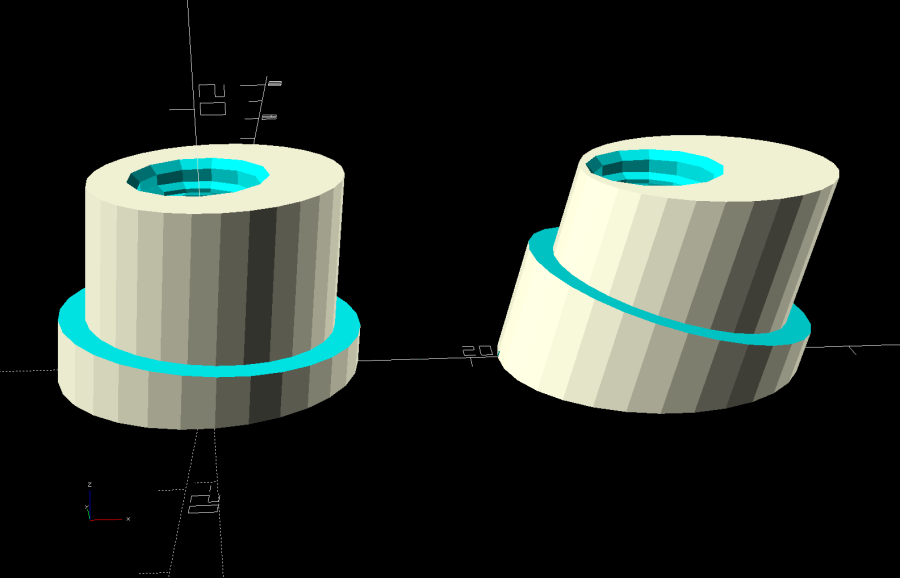
    This was a long-awaited opportunity to explore the BOSL2 library and it worked wonderfully well. Each adapter is whittled from a huge hex nut with threads that perfectly fit the M8×1.25 stud, which stands vertically through the middle of the (slightly oval) bottom surface parallel to the floor.

    The front tubes have a 5° angle with respect to the vertical:

    Patio Chair Foot Adapter - front
    Patio Chair Foot Adapter – front

    And the rear tubes are 15° off:

    Patio Chair Foot Adapter - rear
    Patio Chair Foot Adapter – rear

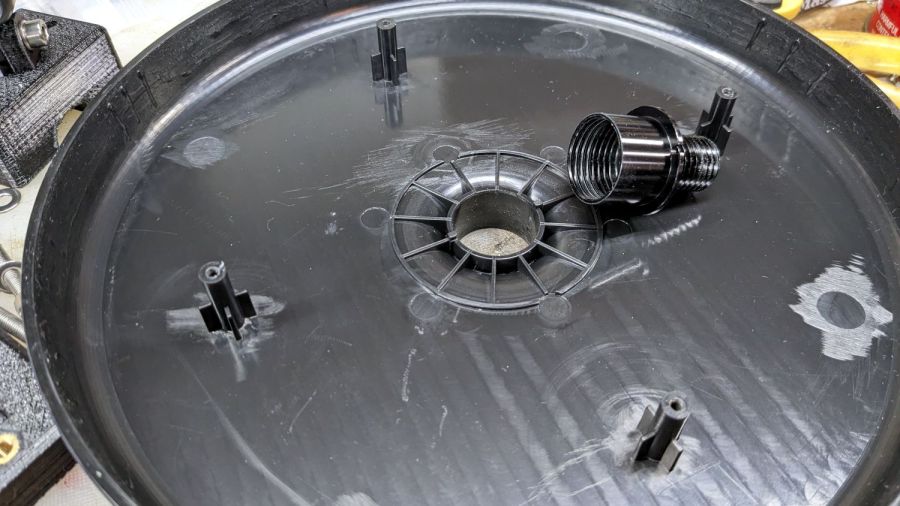
    Each adapter has an orientation notch pointing toward the front of the front leg and the rear of the rear leg:

    Patio Chair Foot Adapter - orientation notch
    Patio Chair Foot Adapter – orientation notch

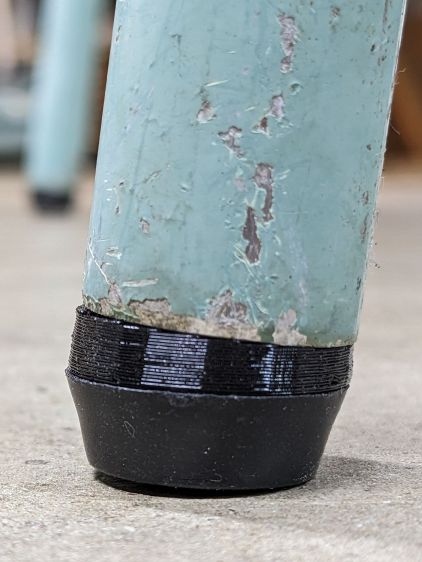
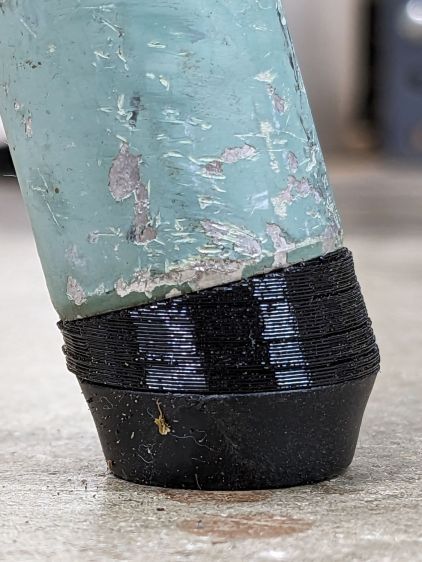
    I expected to apply adhesive on the inside and outside of the adapters, but they tapped firmly into place inside the legs and the studs screwed firmly into them, so we’ll see how they survive in actual use. I expect the studs to rust after a while, but that might not be the most awful thing ever to happen.

    The OpenSCAD source code as a GitHub Gist:

    // Patio chair foot adapter
    // Ed Nisley – KE4ZNU – 2023-06
    include <BOSL2/std.scad>
    include <BOSL2/threading.scad>
    LegAngles = [5,15];
    /* [Hidden] */
    ThreadThick = 0.25;
    ThreadWidth = 0.40;
    HoleWindage = 0.2;
    Protrusion = 0.1; // make holes end cleanly
    function IntegerMultiple(Size,Unit) = Unit * ceil(Size / Unit);
    ID = 0;
    OD = 1;
    LENGTH = 2;
    inch = 25.4;
    //———————-
    // Dimensions
    LegTube = [18.8 – HoleWindage,22.5,0];
    Stud = [8.0,1.25,10.0]; // M8x1.25 foot stud
    FlangeBase = 3.0;
    //———————–
    for (i=[0:len(LegAngles)-1]) {
    ang = LegAngles[i];
    FlangeIncr = LegTube[OD]*tan(ang);
    Flange = [Stud[0],LegTube[OD],FlangeBase + FlangeIncr];
    translate([i*1.5*Flange[OD],0,0])
    difference() {
    translate([0,0,0*-FlangeIncr/2])
    threaded_nut(2*Flange[OD],Stud[0],1.5*Stud[2],Stud[1],
    anchor=BOTTOM,bevel=false,$slop=0.2);
    rotate([0,ang,0]) {
    translate([0,0,FlangeBase + FlangeIncr/2])
    tube(4*Stud[2],2*Flange[OD],LegTube[ID]/2,
    anchor=BOTTOM);
    tube(4*Stud[2],2*Flange[OD],Flange[OD]/2,
    anchor=CENTER);
    }
    cube([Flange[OD],ThreadWidth,2*ThreadThick],anchor=BOTTOM+RIGHT);
    }
    }

  • Punching the Exercise Ticket

    Punching the Exercise Ticket

    An unfortunate confluence of weather, schedule, and enthusiasm led to mowing all the yard in one session:

    Mowing pattern - 2023-05-27
    Mowing pattern – 2023-05-27

    I managed to remember to pause the tracker during a break in the middle, so it’s really just shy of three wall-clock hours from start to finish. It’s amazing how much work you (well, I) can get out of 100 mg of caffeine.

    Despite what you see here, the path on what’s euphemistically called “our lawn” show a much more organized solution to the problem of covering our property with non-overlapping foot-and-a-half stripes. As with my leaf-shredding track, I neither venture into the road nor mow the neighboring yards.

    Bonus: slept like a stone that night …

  • Miroco Floor Lamp Base Details

    Miroco Floor Lamp Base Details

    The pole of our much-repaired Miroco floor lamp screws into a weighted base:

    Miroco floor lamp base - assembled
    Miroco floor lamp base – assembled

    Because the lamp has a big nut apparently holding the pole socket to the base, I figured a dab of threadlock on the pole or the base would solve the problem: lock the pole to the socket, then remove the nut to disassemble when needed. That turned out to be a Bad Idea™.

    The socket is a plastic part separate from the base cover plate:

    Miroco floor lamp base - socket
    Miroco floor lamp base – socket

    A pair of keys prevent the socket from rotating in the hole:

    Miroco floor lamp base - socket in place
    Miroco floor lamp base – socket in place

    Four threaded bosses (two visible there) hold the rim of the cover to the weight, with the socket doing the hard work.

    A fender washer atop the weight distributes stress from the pole:

    Miroco floor lamp base - weight top washer
    Miroco floor lamp base – weight top washer

    Another fender washer on the bottom of the weight lets the nut jam against steel, rather than soft plastic:

    Miroco floor lamp base - weight bottom washer
    Miroco floor lamp base – weight bottom washer

    FWIW, the nut is either a perfect 15/16 inch or, more likely, a sloppy 24 mm.

    In any event, permanently locking the pole to that socket will also lock the pole to the base, with no way to dismantle the lamp when I must once again repair it.

    Perhaps a wrap of PTFE tape on the threads will stiffen it enough?

    Certain better looking than black duct tape …

  • Dirt Devil Stick Vacuum: Floor Brush Salvage

    Dirt Devil Stick Vacuum: Floor Brush Salvage

    The knuckle joint on the Dirt Devil stick vacuum failed, so it followed us home instead of leaping into the trash:

    Dirt Devil - broken swivel joint
    Dirt Devil – broken swivel joint

    Although the fitting seems to be made of ABS, it’s now missing major chunks of plastic in the high-stress areas, so rebuilding it seems not worth the effort.

    Because we don’t have any carpets and this one will never leave the basement, I extracted the carpet beater brush and its motor, only to find Yet Another Example of poor assembly practices:

    Dirt Devil - stray strands
    Dirt Devil – stray strands

    It’s a 12 V (-ish, I didn’t measure whatever comes out of the vacuum head) DC motor and those errant strands aren’t quite long enough to meet in the middle. The yellow rectangle is a thermal fuse that would be shorted out if the strands were a bit longer.

    The broken joint lets the head swivel from side to side, but the elevation joint is still good. If I don’t expect too much, the thing might still suffice for extracting dust from under the benches:

    Dirt Devil - taped joint
    Dirt Devil – taped joint

    Worst case, I can swap in a classic floor brush using one of the adapters I made a while ago:

    Dirt Devil adapters - assembled
    Dirt Devil adapters – assembled

    That was easy, if only because I skipped the hard part …

  • Zenni Optical Glasses: Nosepad Misalignment

    Zenni Optical Glasses: Nosepad Misalignment

    Mary’s new glasses arrived from halfway around the planet with excruciatingly misaligned nosepads:

    Zenni Optical glasses - misangled nosepads
    Zenni Optical glasses – misangled nosepads

    Despite past experience, Zenni generally does better than this.

    Fortunately, a few minutes with the same metal-forming pliers as before settled them in place.

    Ya gotta have tools!

  • Subaru Forest High Beam Bulbs: Thermal Damage

    Subaru Forest High Beam Bulbs: Thermal Damage

    Although these passed the annual New York State safety inspection, I thought they needed replacing:

    HB3 9005 Bulbs - bulged glass
    HB3 9005 Bulbs – bulged glass

    A closer look:

    HB3 9005 Bulbs - bulged glass - detail
    HB3 9005 Bulbs – bulged glass – detail

    The bulge was upward, of course.

    The Forester’s manual says they’re HB3 bulbs, but the rest of the world knows them as 9005 bulbs. At full power they draw 60 W = 5 A each, although we rarely drive at night and then rarely have the opportunity for much high-beam use. I assume the blackening comes from nine years of running at half-ish power as the Forester’s daytime running lights.

    The low beam headlights seem to be in fine shape.

    These two went into the tray under the floor of the rear cargo area, because the crappy bulb you have is better than the one that just burned out on the road.

  • Laser Cutter Z-Axis: Hitch in the Git-Along

    Laser Cutter Z-Axis: Hitch in the Git-Along

    My OMTech 60 W laser cutter has a stepper motor Z axis drive that has worked flawlessly since it arrived. However, it recently developed a periodic klonk during autofocusing and manual jogging, loud enough to shake the platform and rattle the cabinet’s bottom plate.

    A few minutes of poking around revealed the klonk happened on each turn of the Z axis leadscrews, which quickly led to finding the cause:

    Craft Stick - swarf in belt drive
    Craft Stick – swarf in belt drive

    It’s a rectangular wood chip, perfectly sized to jam into the Z axis motor pulley driving the belt: a belt tooth lifts up on the chip as the pulley turns, then klonks as it slips off the other side. The motor pulley and all four leadscrew pinons have the same number of teeth, so they’re all at the same point in their rotation when the belt slams down onto the pulley.

    Where might such a thing come from? Well, I recently finished a batch of plant markers and hadn’t yet cleaned out the “chip tray” which is also just the bottom plate of the cabinet:

    Craft Stick - swarf
    Craft Stick – swarf

    I briefly considered building a guard for the motor pulley, but the belt most likely carried it from elsewhere. The leadscrews have an ample coating of grease that was also smeared elsewhere on the cabinet, making the belt sticky enough to catch such things.

    The chip tray is once again pretty clean and the platform behaves normally again.

    That was easy …