The Smell of Molten Projects in the Morning

Ed Nisley's Blog: Shop notes, electronics, firmware, machinery, 3D printing, laser cuttery, and curiosities. Contents: 100% human thinking, 0% AI slop.

Tag: Repairs

If it used to work, it can work again

  • Storm Door Latch: Repair Parts

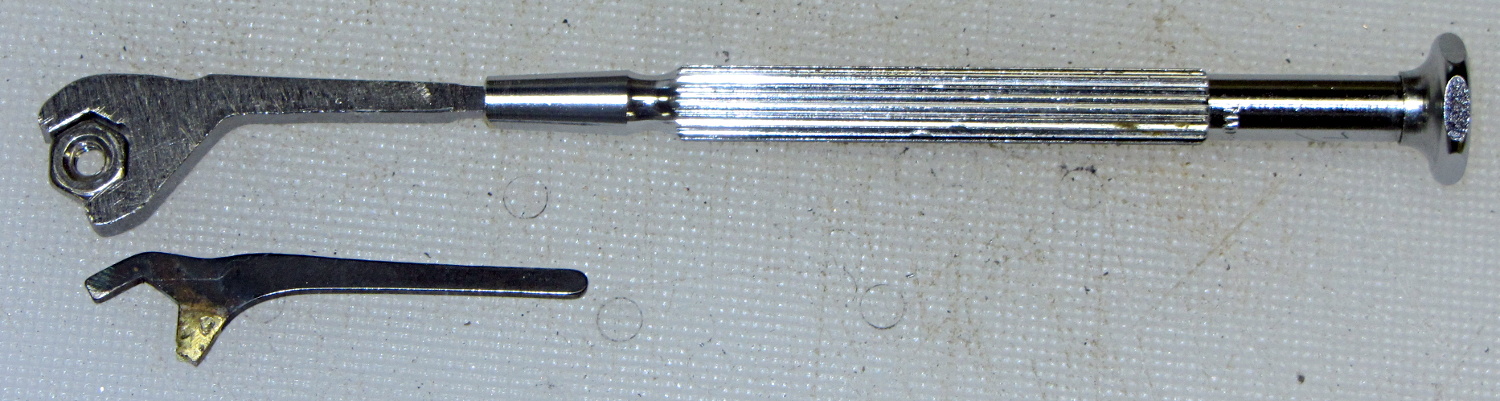
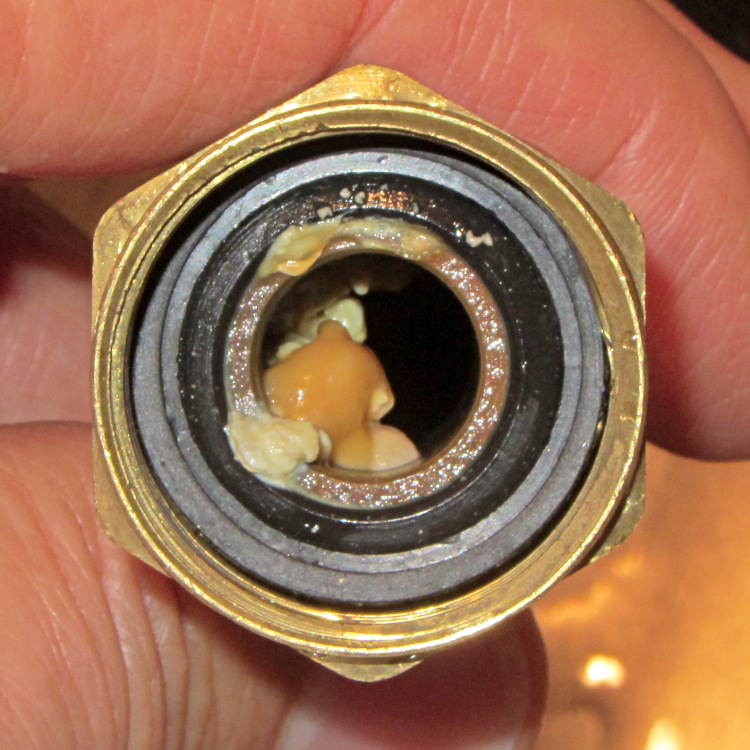
    The discussion following that post on getting feature coordinates from an existing part reminded me of an old project that I’d written up for Digital Machinist: making repair parts for the half-century old storm doors on our house. Here’s the whole latch, with a replacement drawbar and cam:

    Latch Assembly
    Latch Assembly

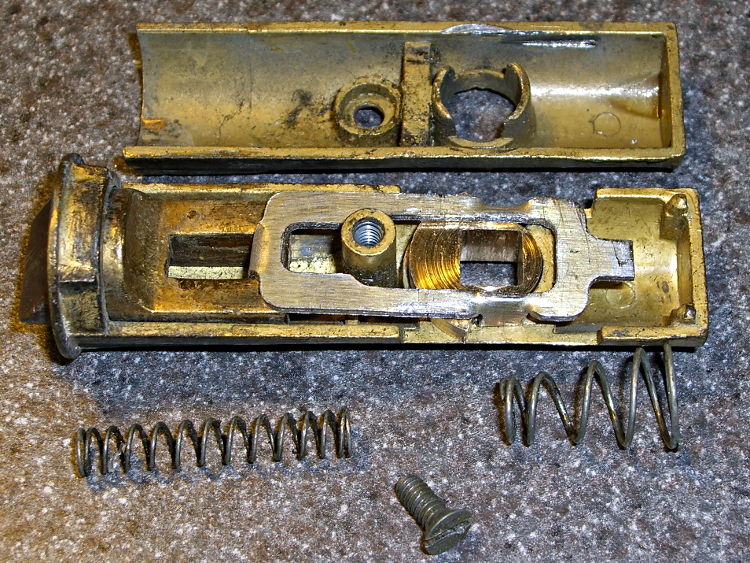
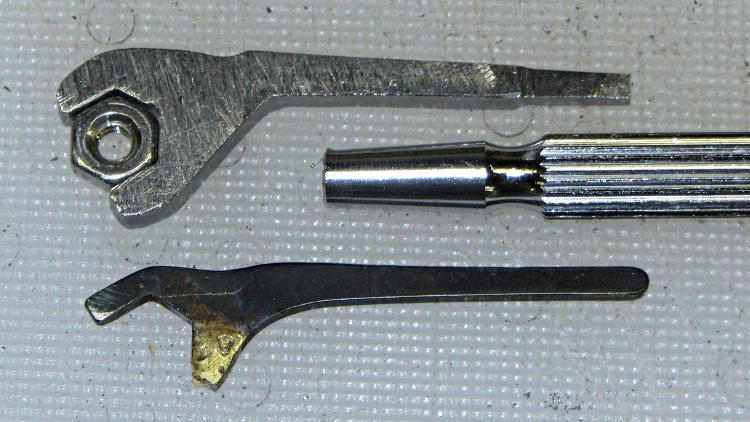
    The other side of the drawbar and cam:

    Door Latch Parts
    Door Latch Parts

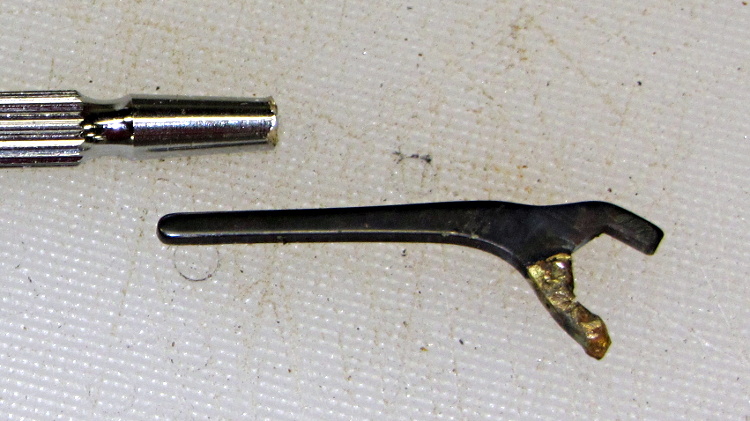
    An early version of the drawbar that engages the latch strike and gets pulled by cam:

    New and Old latch pulls
    New and Old latch pulls

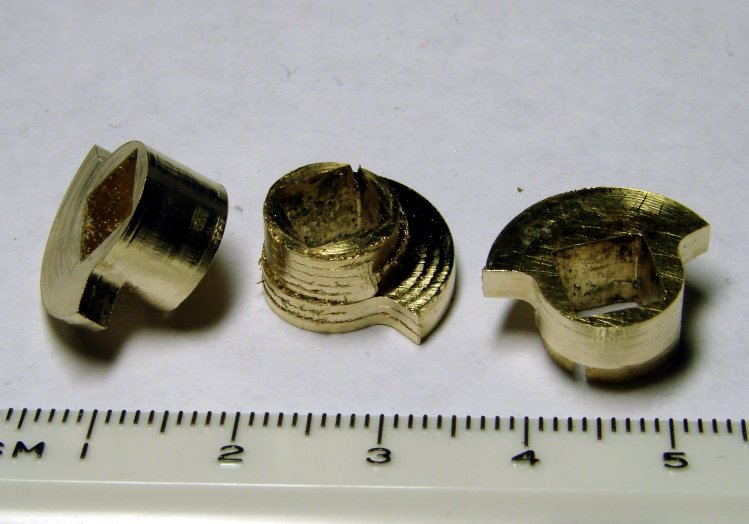
    Three iterations on a cam; the messed-up one in the center, IIRC, helped track down an EMC2 bug:

    Latch Cams
    Latch Cams

    Now that I look at it again, there’s nowhere near enough meat around that square hole for a 3D printed plastic part… so the notion of printing the complex part of the cam and adding wear bars along those ears just isn’t going to work.

    I made a fixture for the Sherline CNC mill to hold the drawbar for inside milling:

    Latch pull - Inside milling
    Latch pull – Inside milling

    Then a block screwed down in the middle clamps the drawbar in the same place for outside milling:

    Latch pull - Outside milling
    Latch pull – Outside milling

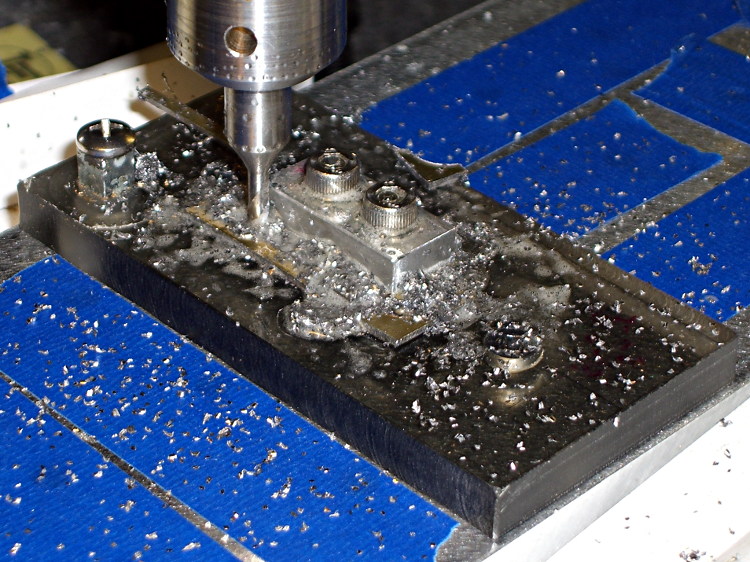
    The square post in the left rear corner holds the cam:

    Latch Cam - First Attempt
    Latch Cam – First Attempt

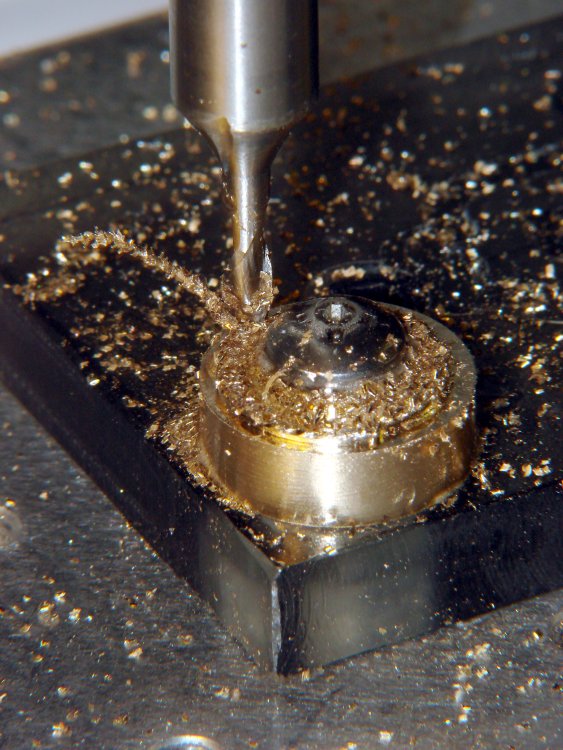
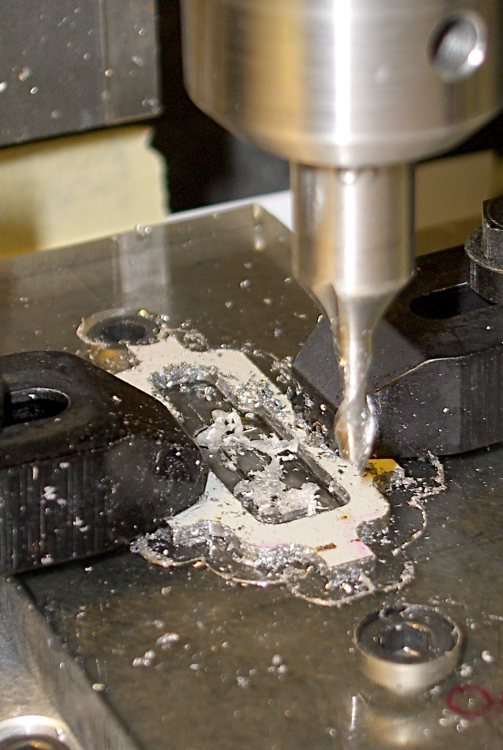
    Note that I had to file the square hole before milling the cam shape, which meant that if the CNC process screwed up, all that handwork went into the show-n-tell bin… which I’m not going to show you.

    I used an early version of the grid-overlay technique to map out the drawbar coordinates; this was an illustration for the column:

    Latch Pull Dimensions
    Latch Pull Dimensions
  • SMD-to-DIP Adapter: Pin Soldering “Fixture”

    I needed a rail-to-rail op amp in a DIP package to breadboard the amplifier for those toroids and came up dry, so I sawed out a protoboard square, glued a MAX4330 in SOT23-5 atop it in classic dead-bug style, rearranged the leads into the standard DIP pinout, and moved on:

    MAX4330 dead-bug style on DIP adapter
    MAX4330 dead-bug style on DIP adapter

    The trick to getting the header pins aligned is to stick ’em in a pile of perfboards, which instantly makes them stand up straight and parallel:

    img_3430 - SMD-to-DIP adapter - PCB soldering fixture
    img_3430 – SMD-to-DIP adapter – PCB soldering fixture

    Stick the square adapter atop the headers, solder all eight pins, glue down the SOT23, and solder it with wire-wrap snippets. Ugly, but workable…

  • Precision Wrench Rebuild

    Decades ago, one jaw on my little 1/4 inch wrench that fits 4-40 nuts broke off. I brazed it back on, fully aware that one day it would break off again, because brazing isn’t really a suitable repair technique for a wrench, even one labeled as “Precision” in that time-honored manner of all low-cost tools.

    Time passes, I’m tightening screws against 4-40 nuts, and the jaw gives way:

    Precision wrench - broken jaw
    Precision wrench – broken jaw

    So I sawed off a strip of bedframe steel that fit the nuts better than the original stamped steel, did a bit of hand filing, and came up with a reasonable replacement:

    Precision wrench - detail
    Precision wrench – detail

    I rammed it into the handle, just as they’d done with the original stamped steel shape:

    Precision wrench - rebuilt
    Precision wrench – rebuilt

    That should last approximately forever…

  • MFJ-260B HF Dummy Load – Impedance Nudging

    If you happen to own an MFJ-260B dummy load and it’s giving you weird SWR values, take the cover off and roll the power resistor in its mounting clips:

    MFJ-260B HF Dummy Load - power resistor
    MFJ-260B HF Dummy Load – power resistor

    My buddy Aitch discovered that oxide / corrosion / dirt buildup between the resistor and the clips can produce absolutely baffling results, even while passing enough current to warm up the element, far more power than you’d think would burn away any crud.

  • Repairing Yet Another Garden Sprayer

    Evidently, it’s impossible to make a spring both good and noncorrosive:

    Garden sprayer - corroded spring
    Garden sprayer – corroded spring

    I found a suitable (i.e., good, but rust-prone) spring in the Big Box o’ Medium Springs:

    Garden sprayer - spring replaced
    Garden sprayer – spring replaced

    Unlike the repair for that sprayer, this spring turned out to be long enough to work perfectly. I have no idea how long I can keep this up, but … at least I’m now keeping pace with the failures.

  • Water Heater Thermophile

    One of my fundamental rules is that you should never, ever look inside the water lines serving your faucets. Having recently replaced a water heater, I had to violate that rule and discovered this growth inside the flex tube at the hot water outlet:

    Growth in Hot Water Heater Tube
    Growth in Hot Water Heater Tube

    Anything that can thrive in 120 °F water gets my grudging respect.

    Scrubbing it with a toothbrush produced gray sludge that rinsed right out, so I guess it’s all good now…

  • Tour Easy: Yet Another Shifter Pulley

    Somehow, I think I’m never going to get around to doing a CNC version of this thing, but at least now I have more pictures…

    The overall problem comes from the fact that the Tour Easy frame geometry doesn’t match the expectations of the front shifter: the cable bends over a small finger that, on a diamond frame bike, should simply hold it in position. Here’s the finger, with a very early version of the pulley that just holds the cable slightly higher than the normal position, complete with one snapped wire showing that the pulley wasn’t getting the job done:

    Front derailleur cable - broken strand
    Front derailleur cable with broken strand

    The obvious solution involves running the cable over a nice, rounded surface that prevents abrupt bending. The most recent version looks like this:

    Shifter pulley installed - left view
    Shifter pulley installed – left view

    Yes, the end of the cable sticks out over the chain; I haven’t tucked it in yet.

    A bit of lathe work produces a 0.42 inch diameter thin brass disk with a 50 mil half-circle trench around it; in retrospect, the diameter of the trench bottom should be 0.42 inch and the OD should be about 0.45 inch. If you have really good parting-off-fu, you can produce a disk with a finished backside right on the lathe, but I had to drill an off-center hole anyway, so I thinned it on the Sherline:

    Shifter pulley - thinning
    Shifter pulley – thinning

    It looks like this after all the thinning:

    Shifter pulley - thinned
    Shifter pulley – thinned

    One flange is wider than the other: the thin flange faces front and gets a bunch of cutouts, the wide flange faces rearward and must support the bitter end of the cable.

    I lined it up in the shifter, filed a notch to fit around the shifter finger, scribed the hole location, clamped it down, and drilled the hole:

    Shifter pulley - center drilling
    Shifter pulley – center drilling

    I think the hole could be on-center with the larger disk; now that I’m keeping better notes, I’ll try that next time. If so, then I can drill it on the lathe, part it off to the correct width, and hand-file the backside flat. The general idea is to have the cable pass over the finger, which almost happens with the smaller diameter.

    Some tedious hand-filing produces notches that index over the finger and clear some protuberances on the shifter arm. This is the front face of the pulley that sits against the shifter arm, with a 5 mm socket head cap screw for scale:

    Shifter pulley with bolt - front face
    Shifter pulley with bolt – front face

    The rear face has one side of the trench filed away to get the cable out of the trench and around the bolt:

    Shifter pulley with bolt - rear face
    Shifter pulley with bolt – rear face

    Then it looks like this from the right side of the bike:

    Shifter pulley installed - right view
    Shifter pulley installed – right view

    A pleasant morning with some Quality Shop Time…