Ed Nisley's Blog: Shop notes, electronics, firmware, machinery, 3D printing, laser cuttery, and curiosities. Contents: 100% human thinking, 0% AI slop.
The knockoff Arduino Pro Mini I used for the strobe photography controller ran the default Blink sketch perfectly, but didn’t respond to its own Reset pushbutton. Probing the Reset line at pin 29 on the microcontroller showed that the pushbutton didn’t pull the +5 V line to ground, so the switch was broken, a trace was broken, or …
Touching the soldering iron to a switch pin caused the whole thing to pop loose. One glance at the pads tells you something’s badly wrong:
Arduino Pro Mini Knockoff – cold solder joints
A closeup, rotated a quarter-turn clockwise:
Arduino Pro Mini Knockoff – cold solder joint – detail
That’s the nicest picture of cold solder joints you’ve seen in a while, isn’t it?
Resoldering the switch solved the problem and, while the iron was hot, I touched all the microcontroller pins, too, just in case…
I took that picture back in mid-1969, near the Hummelstown, PA water treatment and pumping plant.
The overhead view now shows a small tank behind the water plant, with that house just across the access road at the bottom of the image:
Hummelstown PA water plant – overhead – ca 2013
Judging from the perspective and the row of bushes, the old tank probably stood across the (now abandoned) tailrace, near that little dot in the mowed area. The dam (in the lower right corner) washed away during a flood some decades ago; I have no idea where Hummelstown gets its water.
That once-spiffy limestone house, built with stone from a local quarry, has fallen on hard times:
Hummelstown PA water plant – ca 2013
The pump house features Hummelstown Brownstone, which also appears in the finest old buildings all along the East Coast. If you poke around the area, you’ll find traces of the Hummelstown Brownstone Company, including several of their quarries. If I recall the story correctly, my father was Mr. Walton’s chauffeur.
The other house may have vanished when the Graystone Farms development ate the surrounding area. Unlike most housing development names, where the name indicates something obliterated to make way for the houses, that area still has plenty of gray limestone:
Hummelstown PA water plant – Pennsy Supply Quarry – ca 2013
That’s an active limestone quarry, even if they’re not excavating the main pit these days. The orange marker in the lower left marks the water plant; Graystone Farms in the corner. Yeah, that’s a big pit.
I digitized my slide collection somewhere around the turn of the current millennium. This slide faded to a distinct magenta tint that I’ve removed with crude color correction, plenty of dust mars the image, and so forth and so on, but I (still) sympathize with that poor guy faced with a daunting task.
Imagine a kid with a camera poking around an active water treatment station in this day and age…
As I recall, a few weeks after I bought this packing tape dispenser, I dropped it with the nut downward, whereupon all six of the little tabs that were supposed to hold the tape roll in place broke off, allowing the roll to walk off the holder. Having put up with that for far too long (I don’t do a lot of shipping these days), I finally drilled and tapped three 4-40 holes and ran a trio of setscrews against the inside of the roll core:
Packing tape dispenser – improved spool holder
The holes are angled so that the setscrews bite into the core just enough to prevent it from walking away, but I can still pull the roll off when it’s empty.
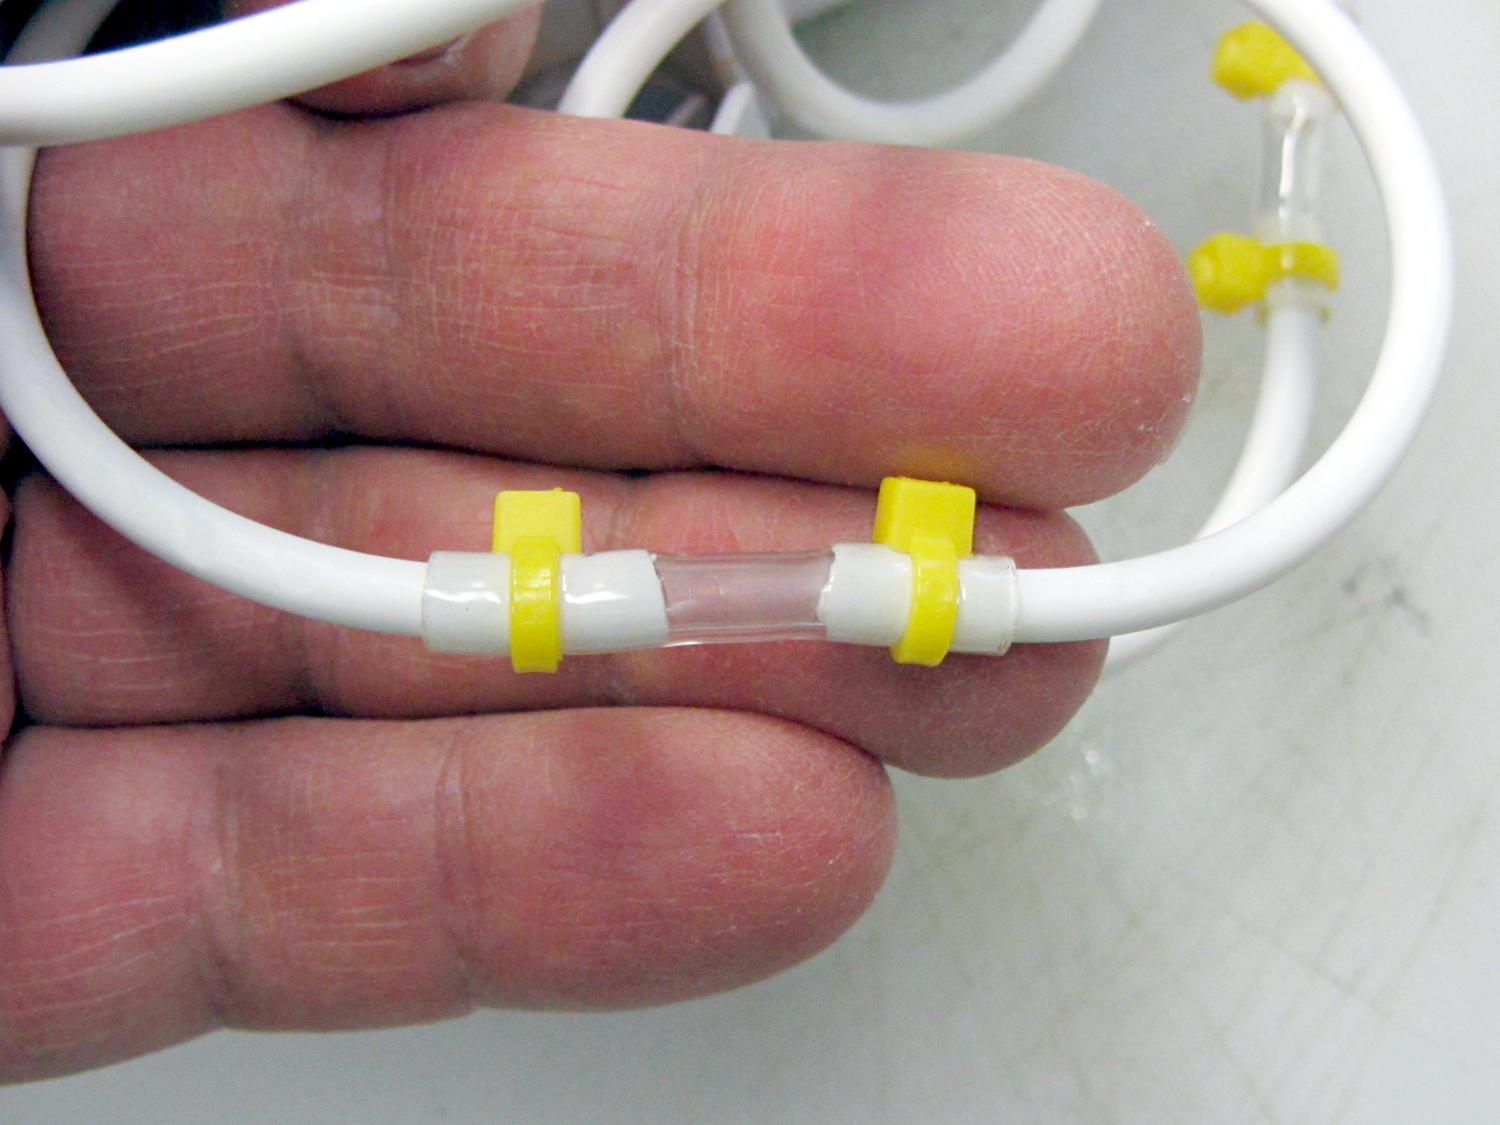
It seems the coiled hose on “water flossers” or “water jet” oral hygene appliances (I can’t even type that with a straight face) lasts about three years, then fails in a spectacular water spray. Mary’s Interplak cleaner just blew a hose, whereupon I discovered that 3/32 inch ID Tygon tubing is a very snug press fit over the 3.8 mm OD white plastic hose:
Patched Interplak tubing
The hose blew out during the early part of a protracted snow storm / cold snap, when driving out for a replacement wasn’t going to happen. This fix, ugly though it may be, has been working well enough that we’ll wait for something else to go wrong.
It’s not clear replacing the entire length of hose with Tygon tubing would work as well, because the rigid hose transmits water pressure pulses from the pump to the tip without much damping. We’re not sure how much that matters and, if the Tygon hack outlasts the OEM hose, maybe we’ll try that.
As you might expect, the hose isn’t a replaceable part. In fact, Interplak doesn’t list any replaceable parts, other than the jet tips, which never seem to wear out…
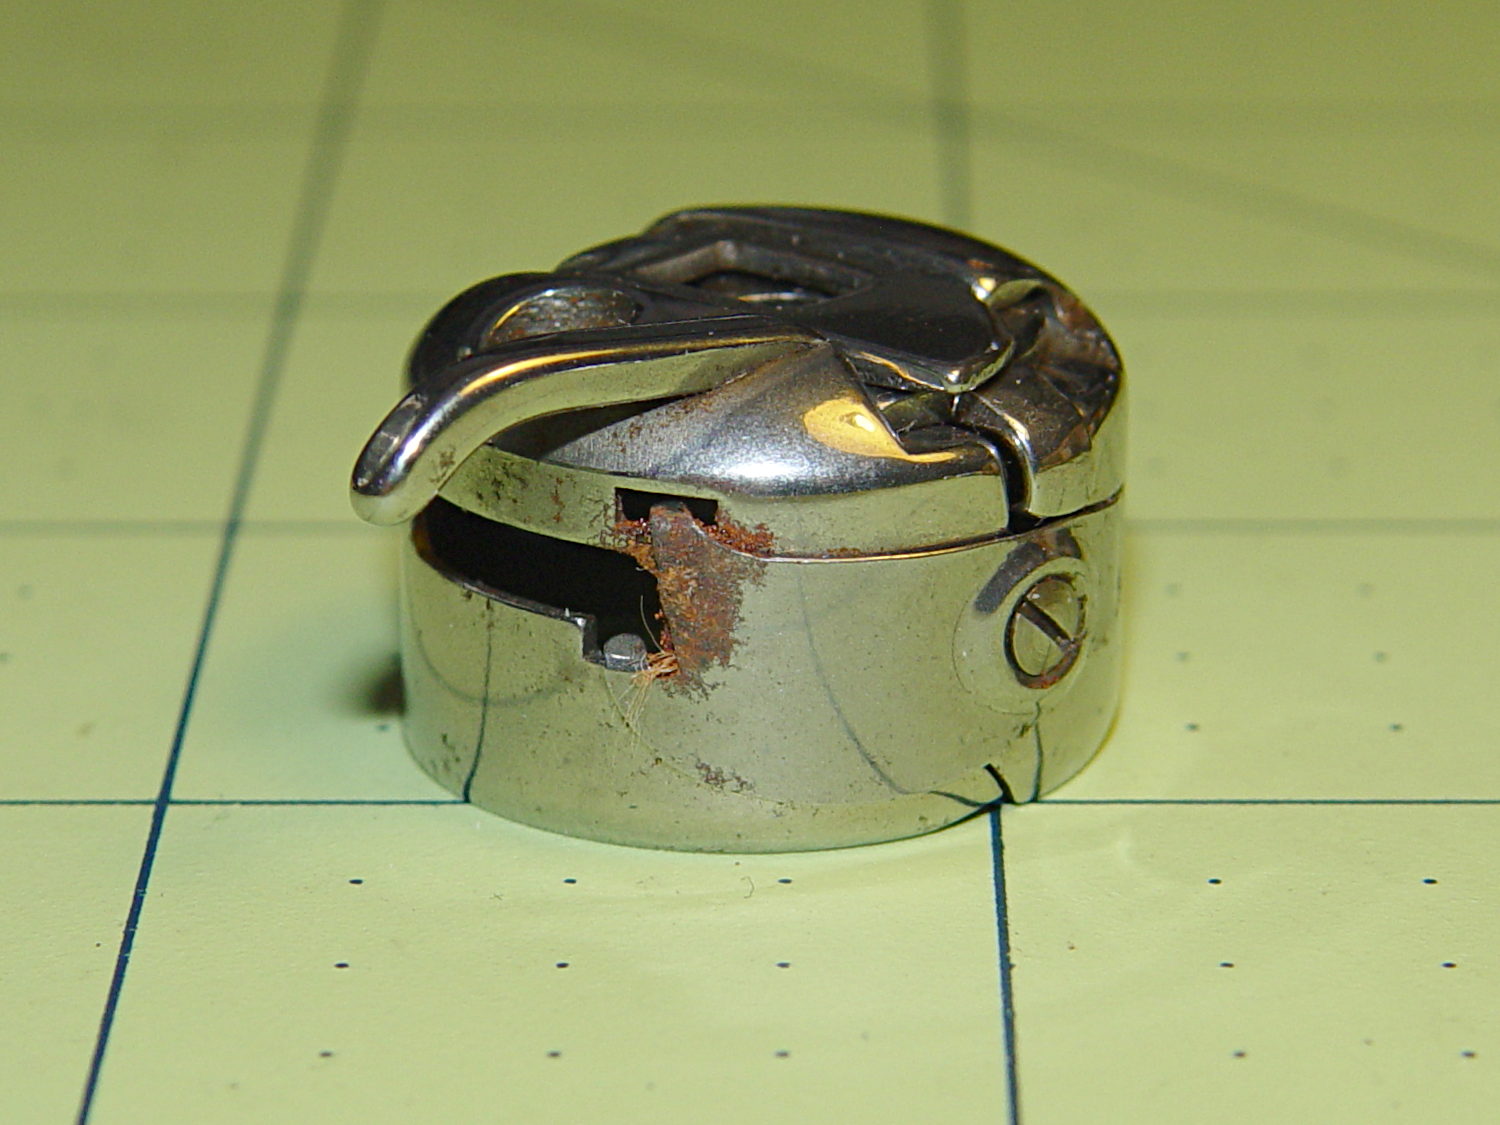
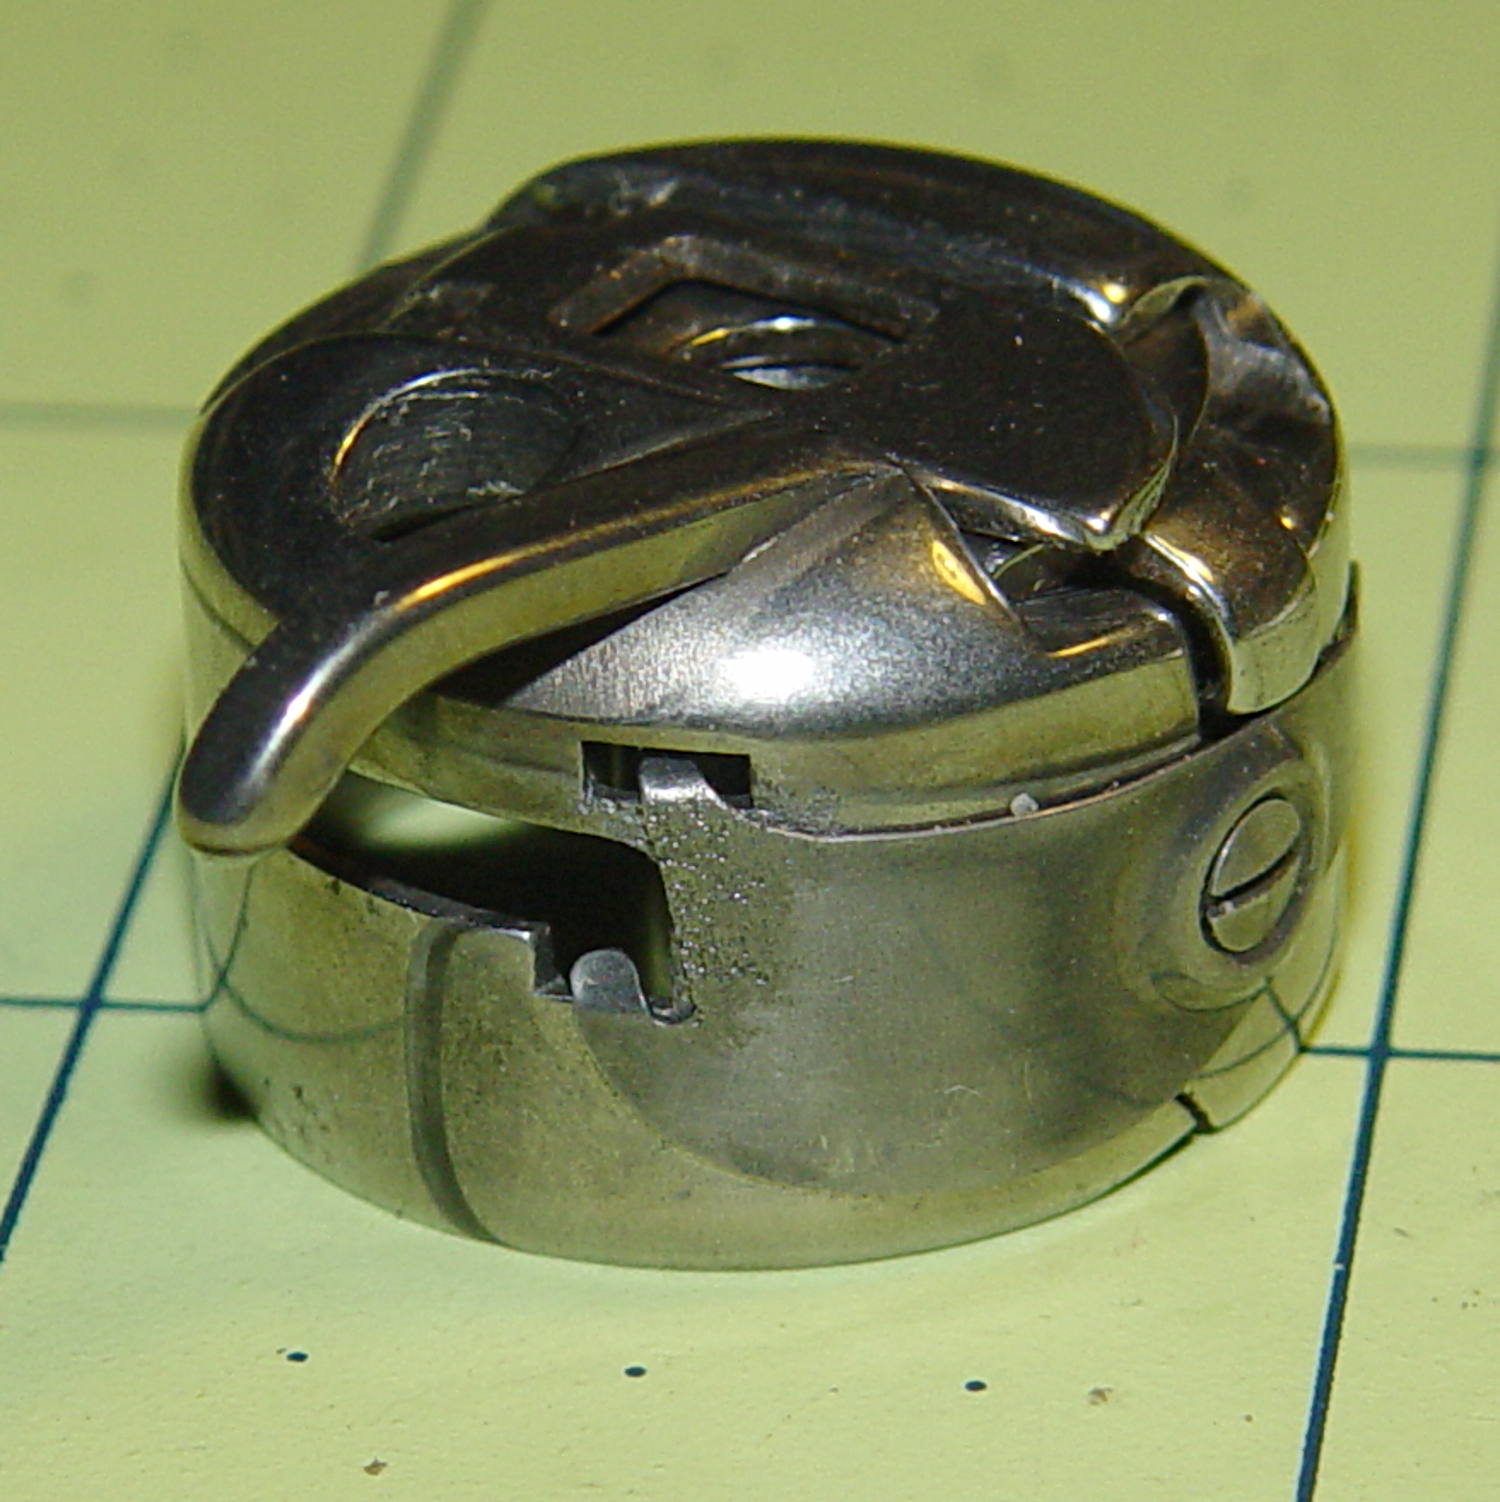
I picked up a spare sewing machine as a crash test dummy for modifications to Mary’s Kenmore Model 158. It’s in reasonably good condition, although the bobbin case showed a bit of rust:
Kenmore bobbin case – rusted overview
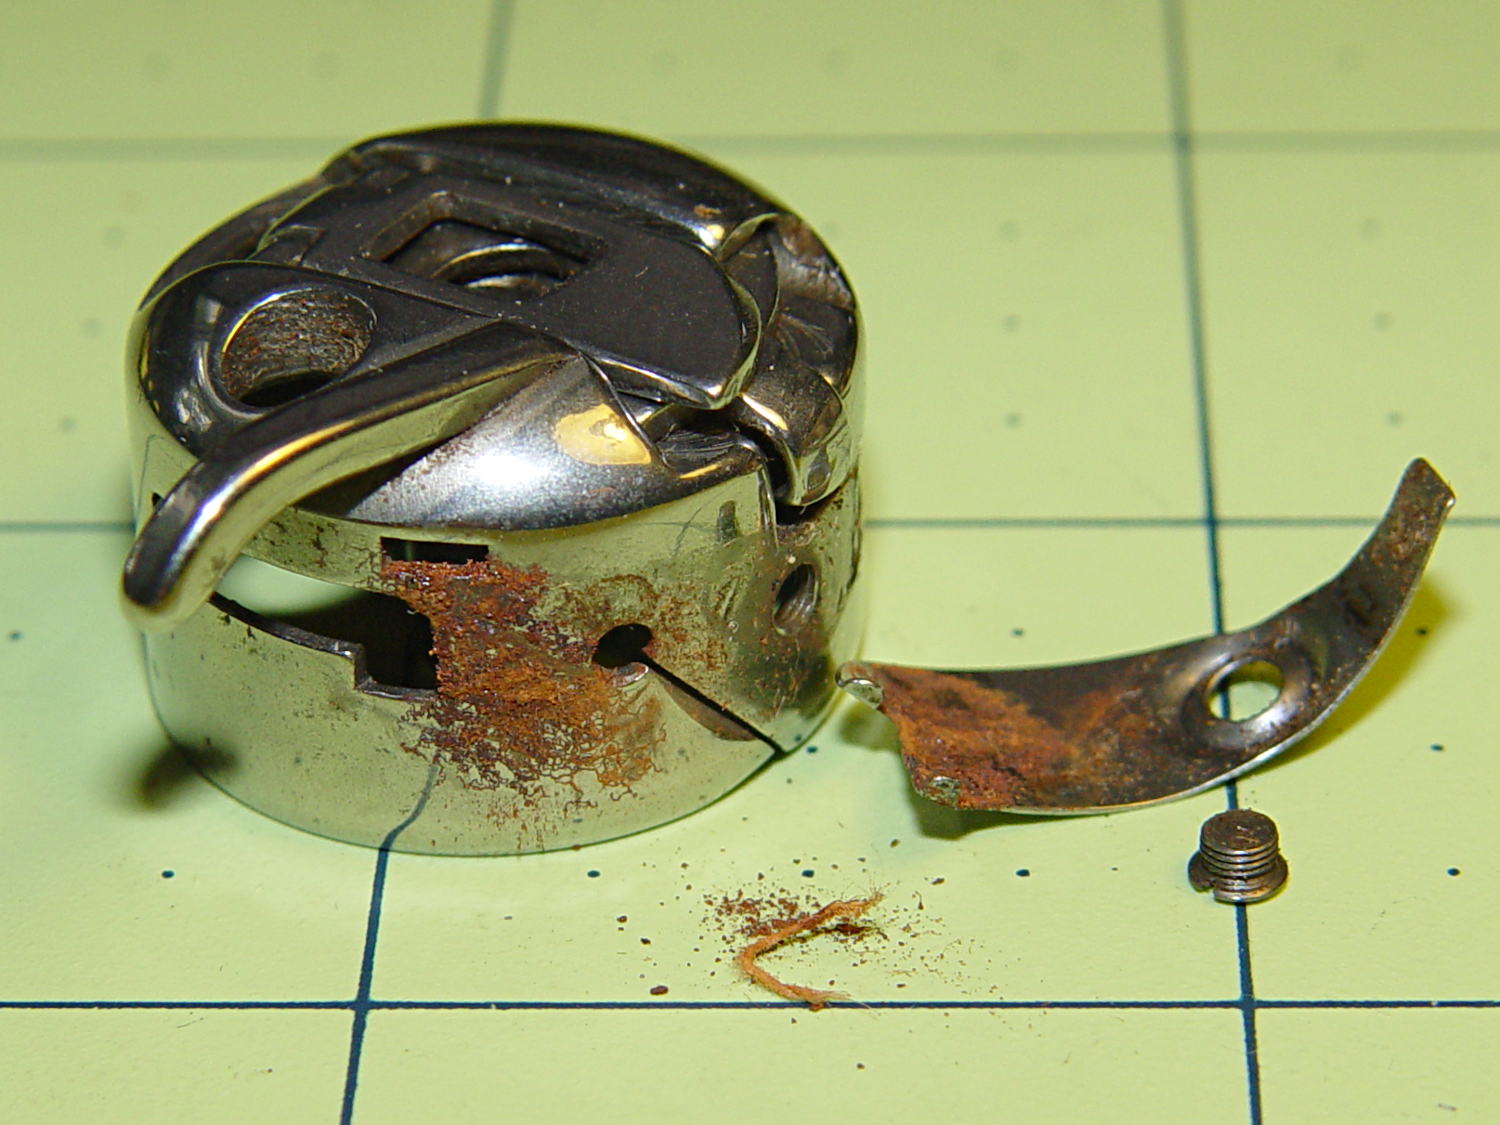
Taking the tension spring off revealed more rust:
Kenmore bobbin case – rusted parts
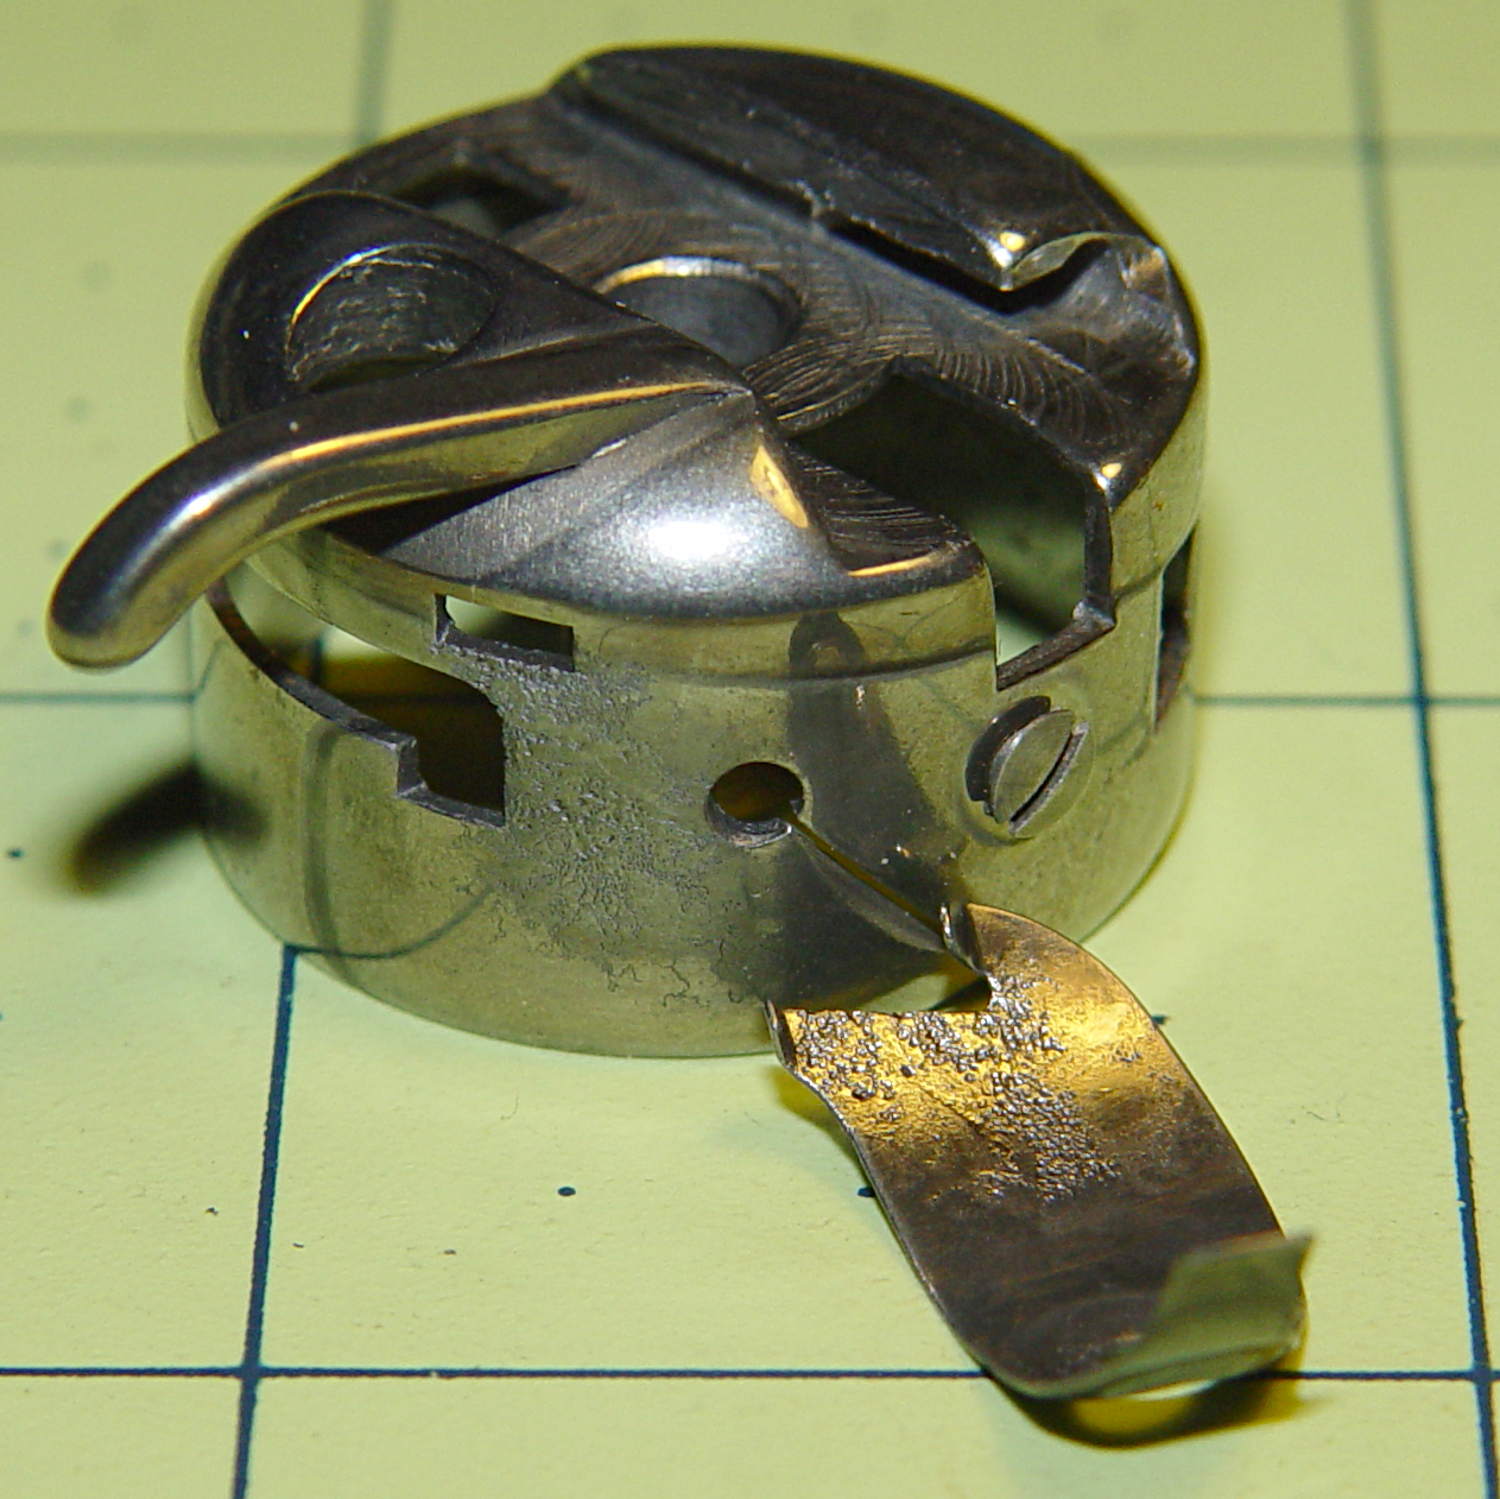
An overnight soak in Evapo-Rust got rid of the corrosion and left the pits behind:
Kenmore bobbin case – restored parts
Those imperfections on the tension spring are pits, not bumps, despite their appearance.
It doesn’t seem so bad from the outside:
Kenmore bobbin case – restored
It probably won’t work nearly as well as it should, this being one place where a smooth surface counts for a lot. Fortunately, it’s just a crash test dummy machine and good results aren’t critical.
Something Went Wrong during the elaborate dance my M2 goes through to home all three axes, resulting in the platform heater connector whacking the nozzle from the rear, the nozzle dragging off the platform to the right, and then jamming on the edge of the too-high platform on the way back. As nearly as I can tell, the command to lower the platform before doing anything else didn’t happen, after which things slid rapidly downhill.
There are disadvantages to having powerful motors and rigid machinery, but in this case the advantages outweigh them. You should browse Youtube’s collection of CNC mishaps to see what a real machine tool crash looks like.
I think that’s the second time the thing has misbehaved, so it’s doing OK. I have seen a few instances where the firmware doesn’t obey the acceleration limits, but I don’t have any way to verify what happened. If the Z-axis motor stalled while lowering the platform, that would explain everything; that same G-Code has worked flawlessly for nearly a year.
After realigning the extruder motor and checking that the hot end hadn’t gotten dislodged, I ran off a thinwall open box that showed the extruder was about 0.1 mm lower than before. That called for a tweak to the G92 setting in the startup G-Code that defines the offset between the two.
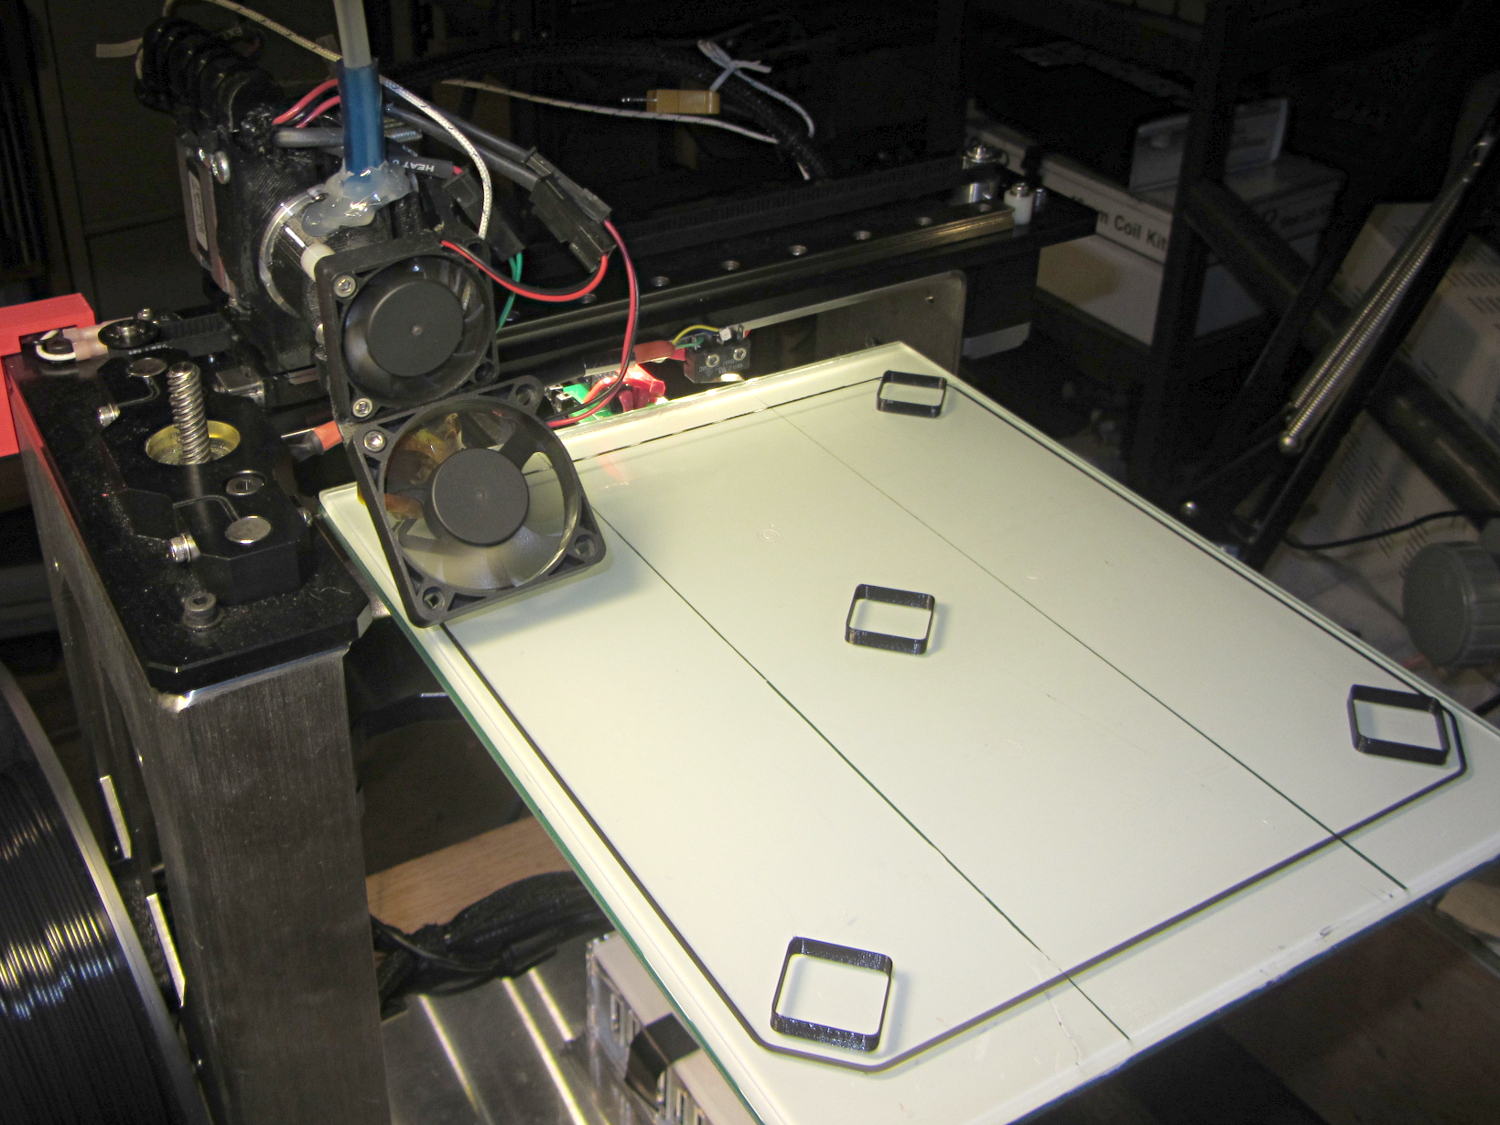
After that, I figured it would be a Good Idea to check the platform leveling, so I arranged five boxes on the platform:
M2 Platform Leveling – thinwall open box layout
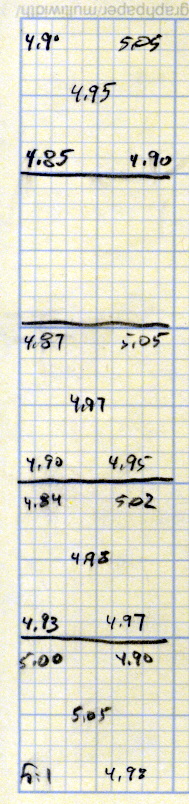
About 8 minutes later, I had the five values at the top of this scratch paper:
M2 Platform Leveling Data
Tweaking the three leveling screws under the platform and iterating with more boxes eventually got the platform aligned to about ±0.07 mm across the 200×250 mm platform diagonal; supper got in the way of repeating the last test. The bird’s nest failure of the left-front box in that test looked like an adhesion problem; in the heat of it all, I built four sets of thinwall boxes on exactly the same spots without renewing the hairspray coating.
Measuring the skirt and box heights suggested a bit of adjustment to the initial Z offset. A static measurement comes pretty close, but the actual results are what matters.
I’ll recheck the alignment at some point, but for now it’s back in operation…
The current startup G-Code from Slic3r’s configuration:
;-- Slic3r Start G-Code for M2 starts --
;  Ed Nisley KE4NZU - 15 Nov 2013
;  28 Feb 2014 tweak Z offset
; Z-min switch at platform, must move nozzle to X=130 to clear
M140 S[first_layer_bed_temperature]	; start bed heating
G90				; absolute coordinates
G21				; millimeters
M83				; relative extrusion distance
G92 Z0			; set Z to zero, wherever it might be now
G1 Z10 F1000	; move platform downward to clear nozzle; may crash at bottom
G28 Y0			; home Y to be sure of clearing probe point
G92 Y-127 		; set origin so 0 = center of plate
G28 X0			; home X
G92 X-95		; set origin so 0 = center of plate
G1 X130 Y0 F30000	; move off platform to right side, center Y
G28 Z0			; home Z with switch near center of platform
G92 Z-4.40		; set origin to measured z offset
G0 Z2.0			; get air under switch
G0 Y-127 F10000	; set up for priming, zig around corner
G0 X0			;  center X
M109 S[first_layer_temperature]	; set extruder temperature and wait
M190 S[first_layer_bed_temperature]	; wait for bed to finish heating
G1 Z0.0 F500	; plug extruder on plate
G1 E25 F300		; prime to get pressure, generate blob
G1 Z5 F2000		; rise above blob
G1 X15 Y-125 F30000	; jerk away from blob, move over surface
G1 Z0.0 F1000	; dab nozzle to attach outer snot to platform
G4 P1			; pause to attach
G1 X35 F500		; slowly smear snot to clear nozzle
G1 Z1.0 F2000	; clear bed for travel
;-- Slic3r Start G-Code ends --
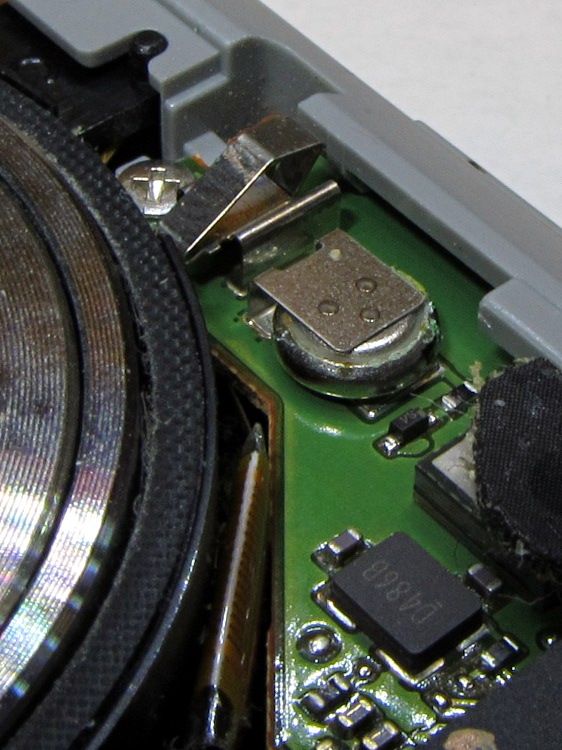
Removing the camera’s front cover (stick the screws to a length of masking tape!) reveals the backup battery hasn’t magically healed itself:
Casio EX-Z850 backup battery – corrosion
The main battery applies 3.2 V with the top terminal negative; it’s marked to help me remember that fact.
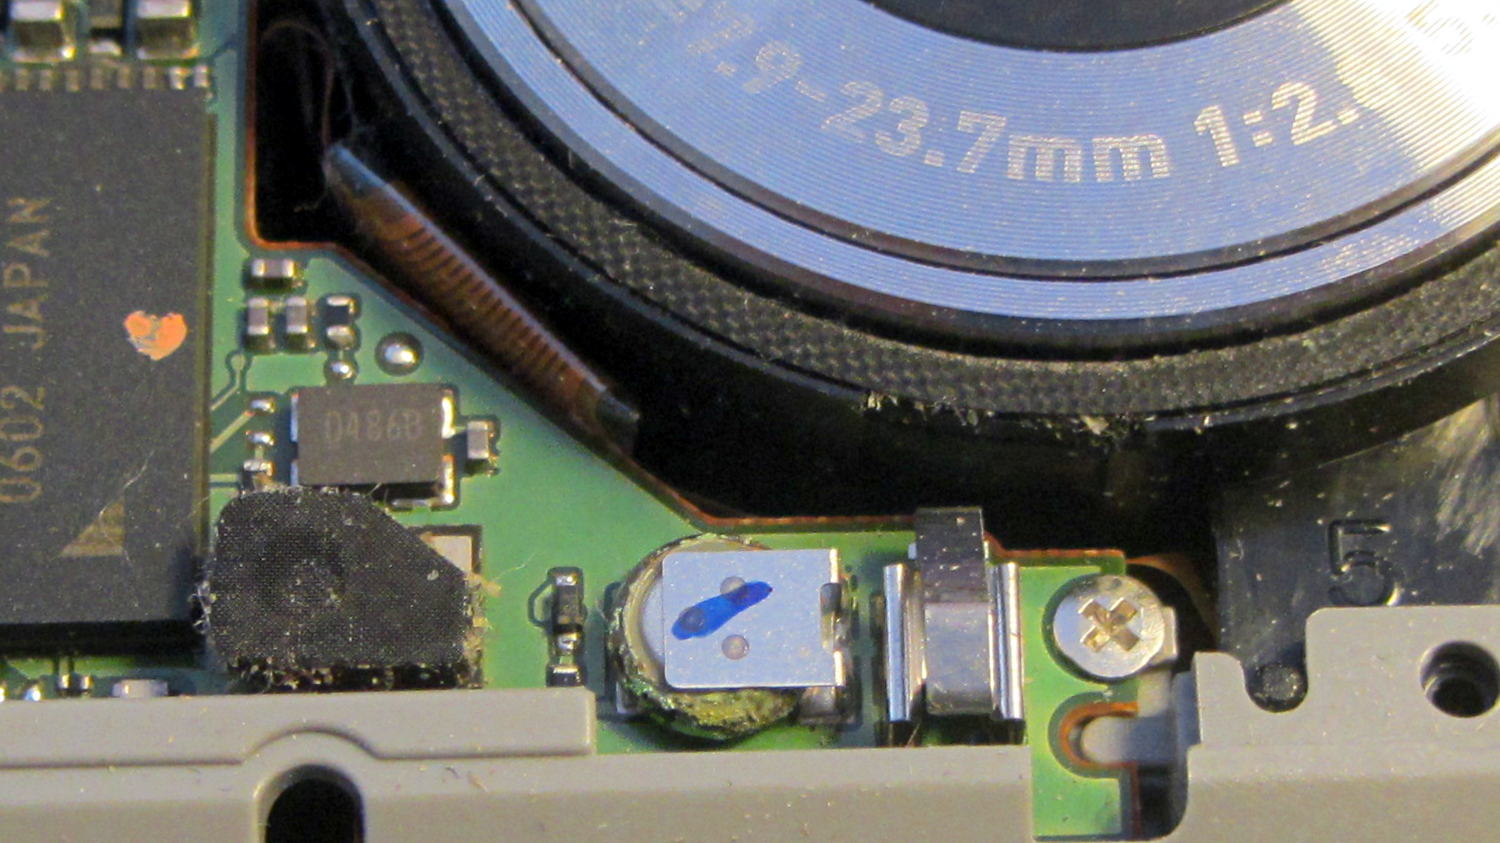
I snipped both legs of the top contact bracket, which promptly fell off, and then pushed the battery off its bottom contact. The condition of those two pads suggests a pair of cold solder joints (clicky for more dots):
Casio EX-Z850 backup battery – contact pads
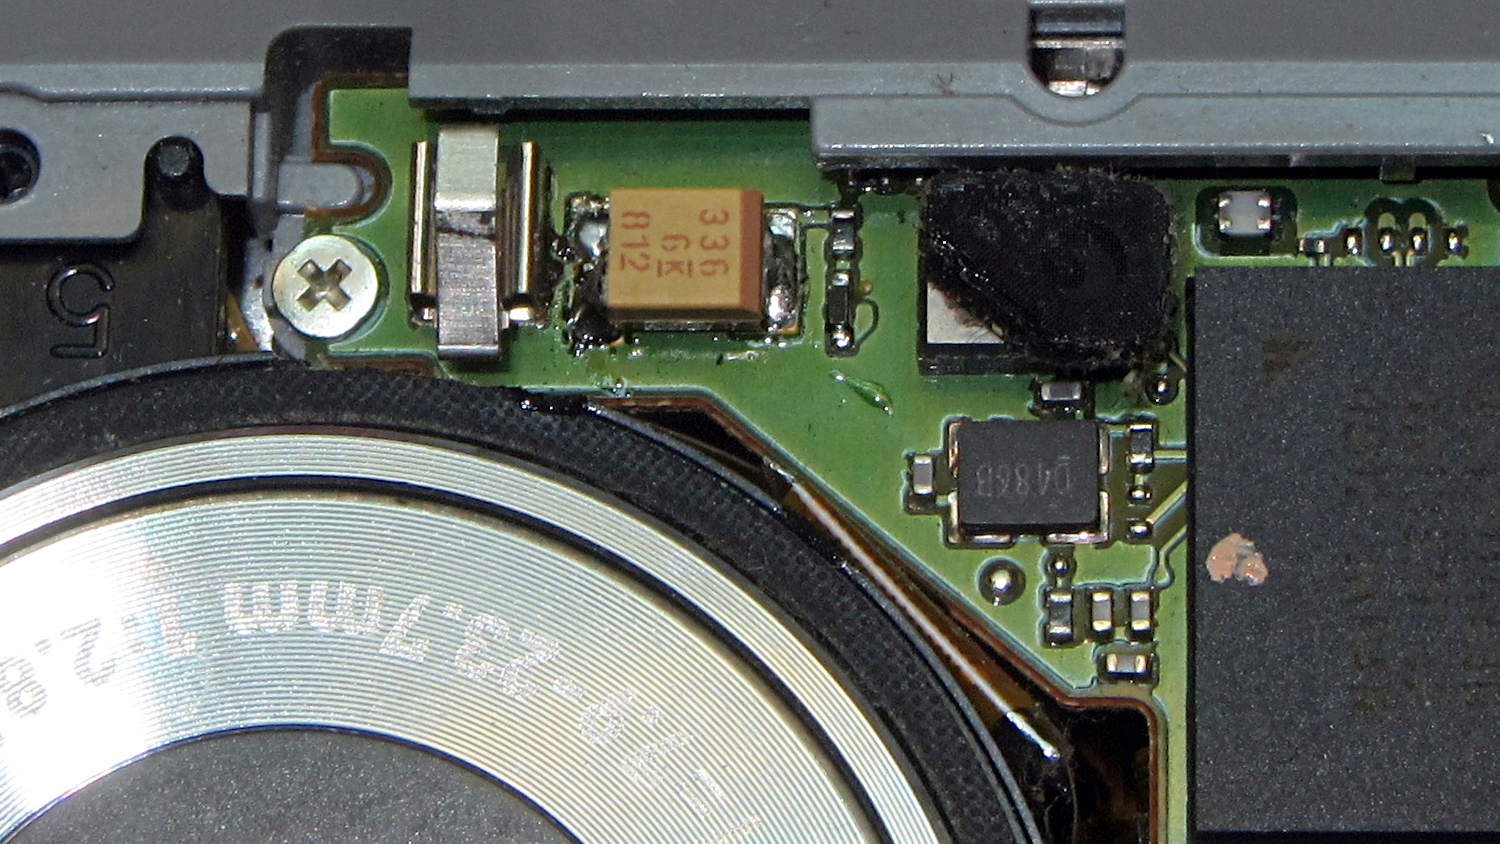
I wanted to replace it with a polyacene supercap, but there’s just not enough room in there. The biggest cap that fit was a 33 μF 16 V SMD electrolytic cap, so I soldered one in place:
I had to flip the camera around to get the soldering iron in between the cap and what looks to be an intrusion monitoring switch just to its left. No lie, that shiny metal thing seems to be a tab that presses against the front cover; it could be a static discharge / grounding point, but the base looks more complex than that.
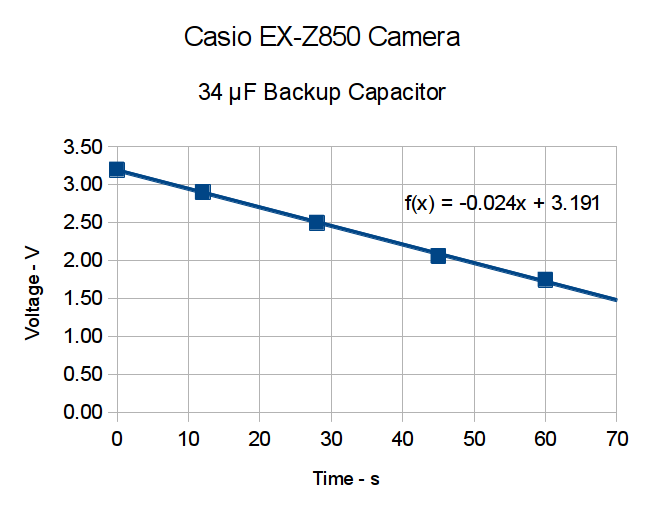
Now, a capacitor isn’t a battery, but memory backup doesn’t require much of a battery, either. I guesstimated the memory (or whatever) would draw a few microamps, at most, giving me a few seconds, at least, to swap batteries. A quick measurement shows that I’ll have plenty of time:
Casio EX-X850 backup capacitor – voltage vs time
The camera started up fine after that adventure, so the memory stays valid with the backup voltage down around 1 V.
The cap measured 34 μF, so a voltage decline of 24 mV/s works out to:
IC = C (dV/dT) = 34 μF x 24 mV/s = 820 nA
So, at least at room temperature, the memory draws less than a microamp.
I love it when a plan comes together!
With any luck, that capacitor should outlast the rest of the camera. It’ll definitely outlast a lithium battery, even if I could find one to fit in that spot.
I did those measurements by sampling the capacitor, rather than holding the meter probes in place, because the300 nA of current drawn by a 10 MΩ input resistance would cause a pretty large measurement error…