The Smell of Molten Projects in the Morning

Ed Nisley's Blog: Shop notes, electronics, firmware, machinery, 3D printing, laser cuttery, and curiosities. Contents: 100% human thinking, 0% AI slop.

Tag: M2

Using and tweaking a Makergear M2 3D printer

  • Epoxy-filled 3D Printed Characters

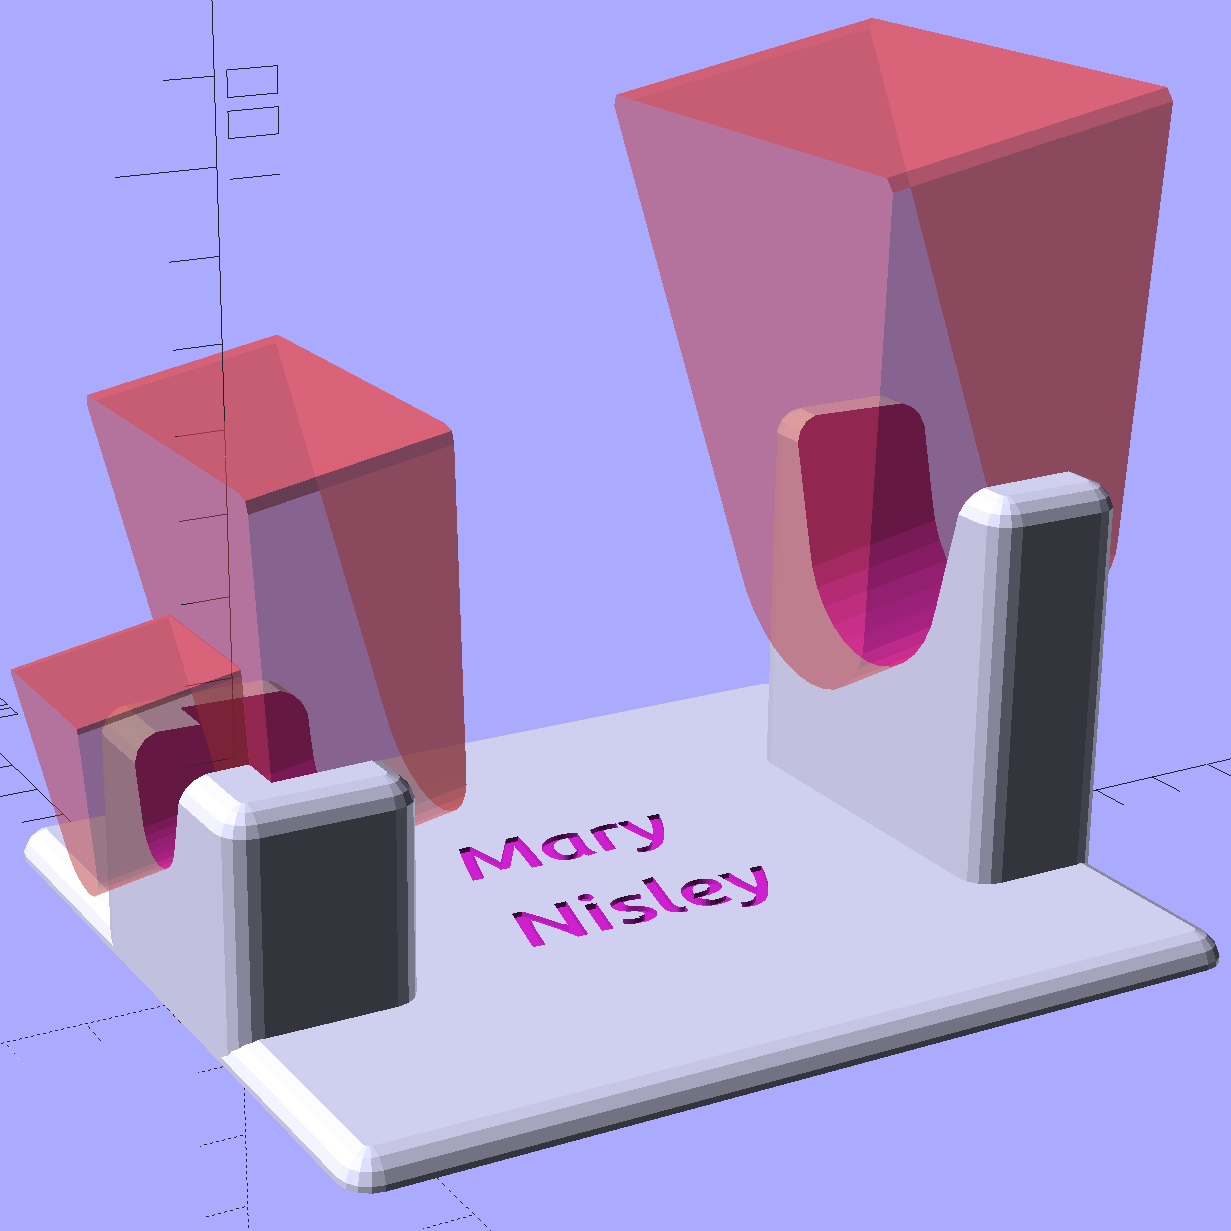
    Although Mary’s name in the base of the Clover Mini Iron holder was readable in person, I wondered what filling the characters with epoxy would do. A bit of tinkering produced a name plate:
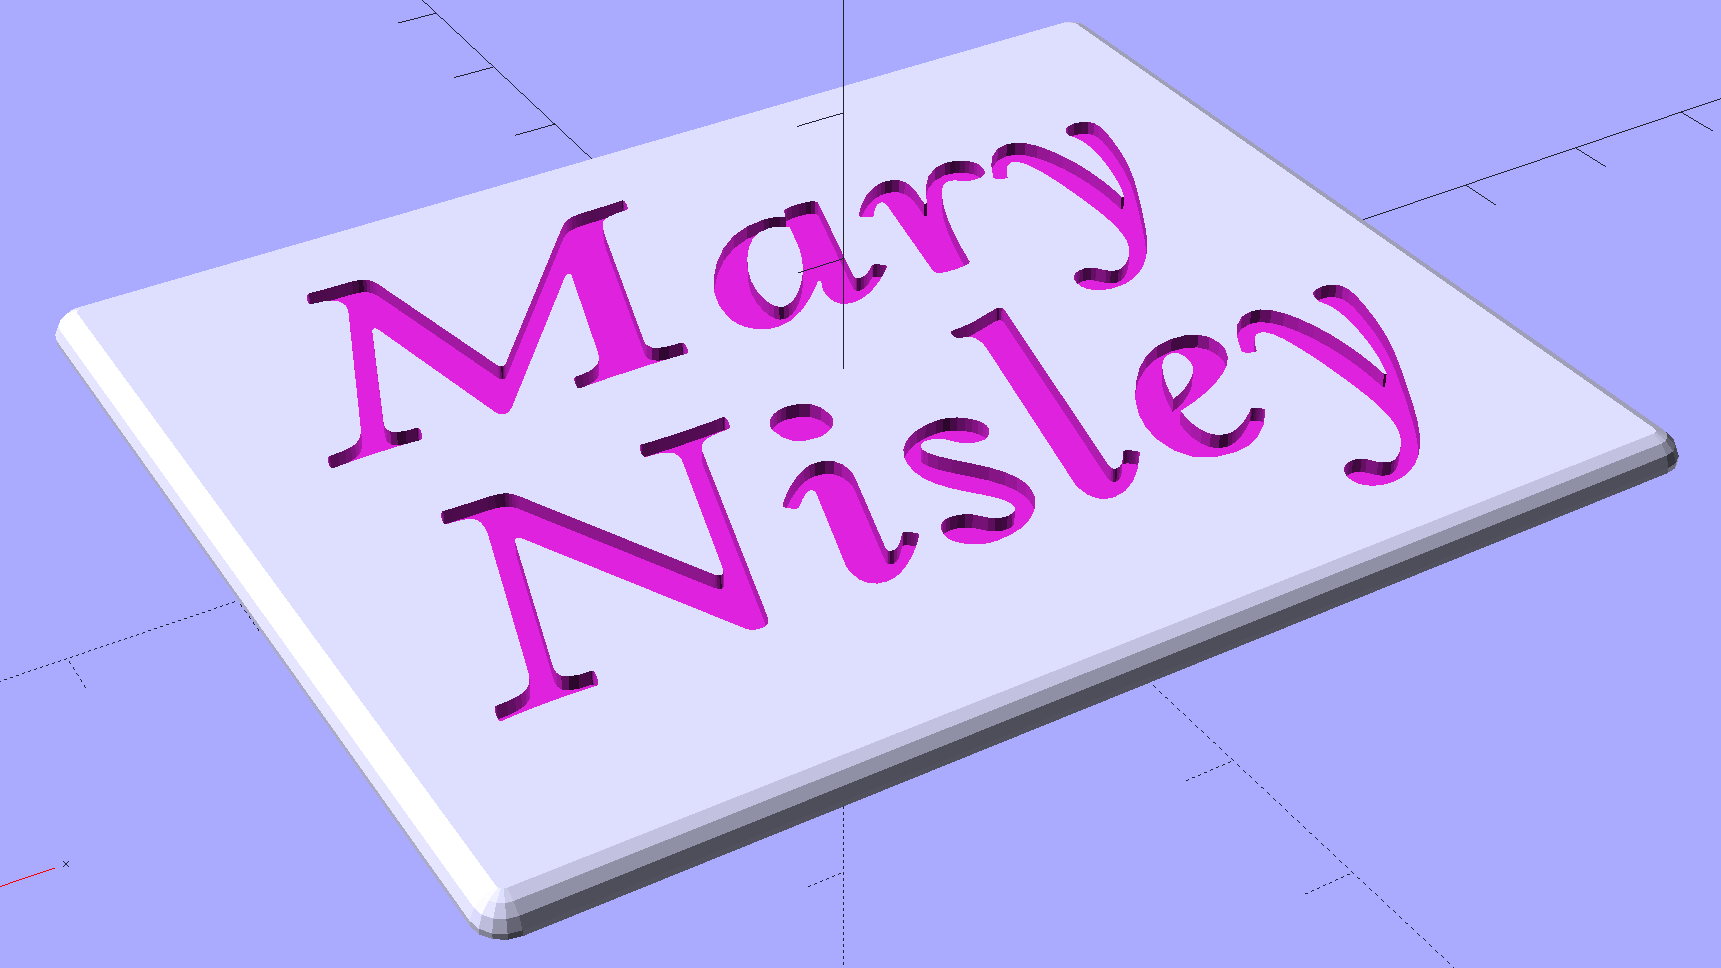
    Text Block - solid model
    Text Block – solid model

    Which is more readable in person, but magenta PETG renders it basically unreadable here:
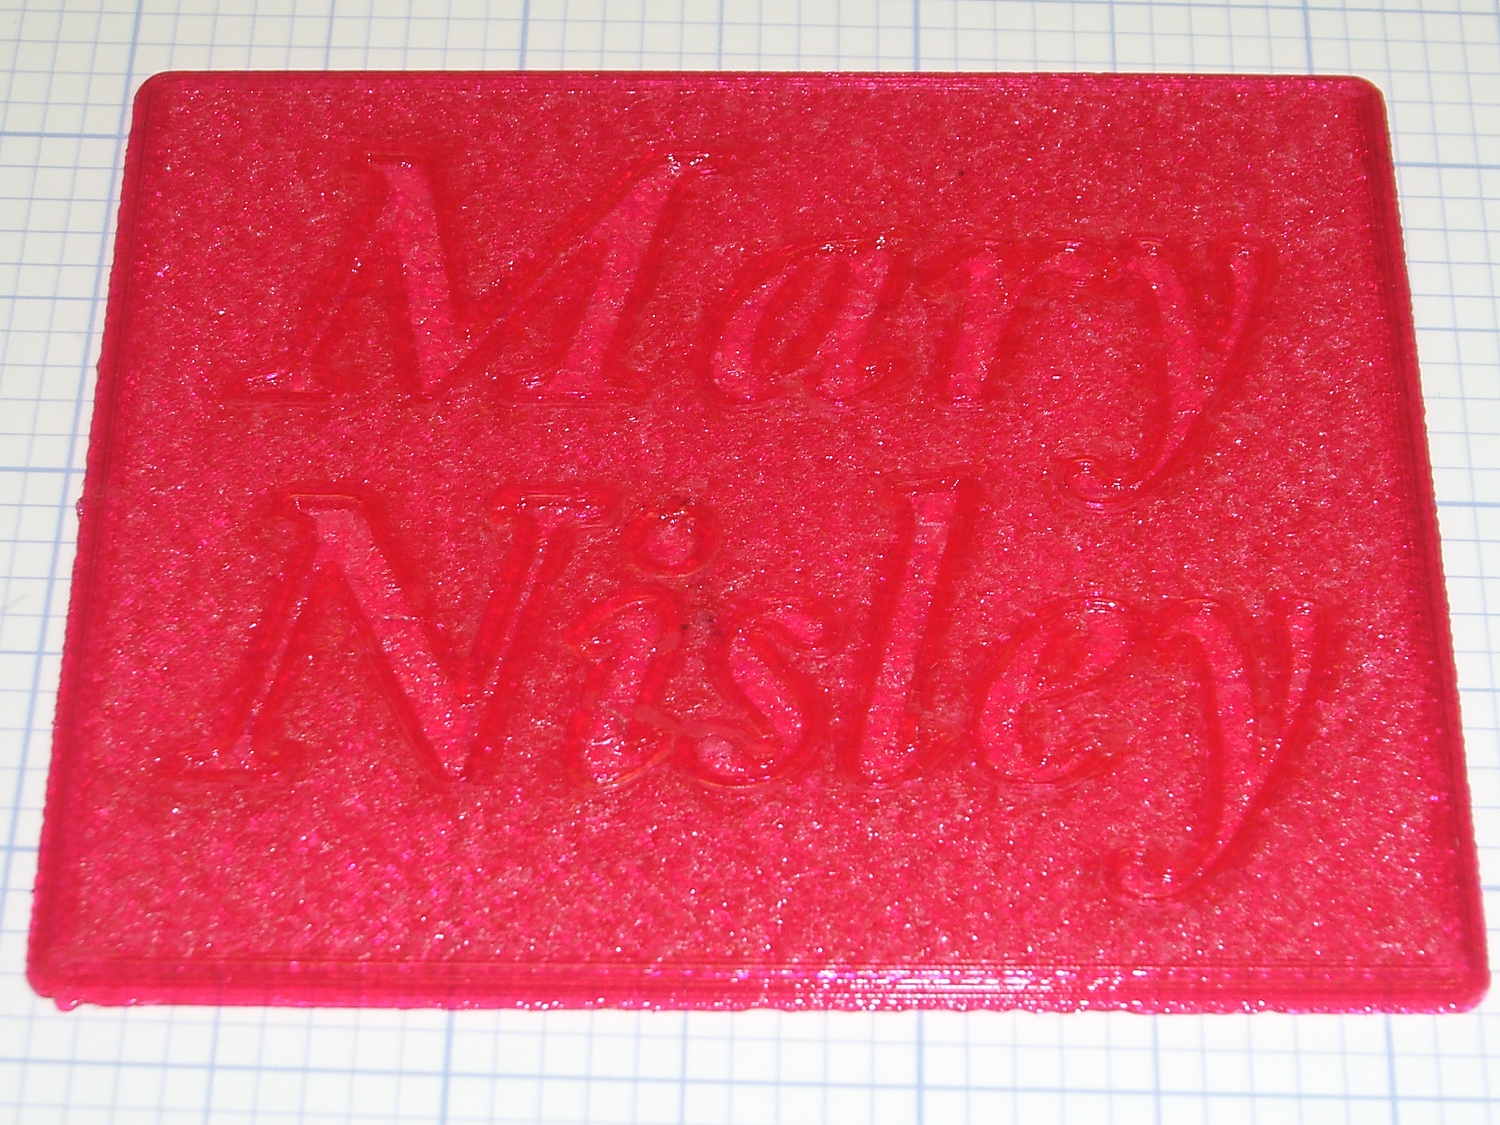
    Text Block - unfilled
    Text Block – unfilled

    The intent of this was not to produce a lovely name block, but to see what various epoxy fills and techniques produced. Think of this as the one you must build to throw away…

    I tediously filled the first line with straight JB Weld epoxy, deliberately ruining the least functional of my 1 ml syringes to ease a strand of epoxy into each letter, then poking the goo into place with a pointed rod:
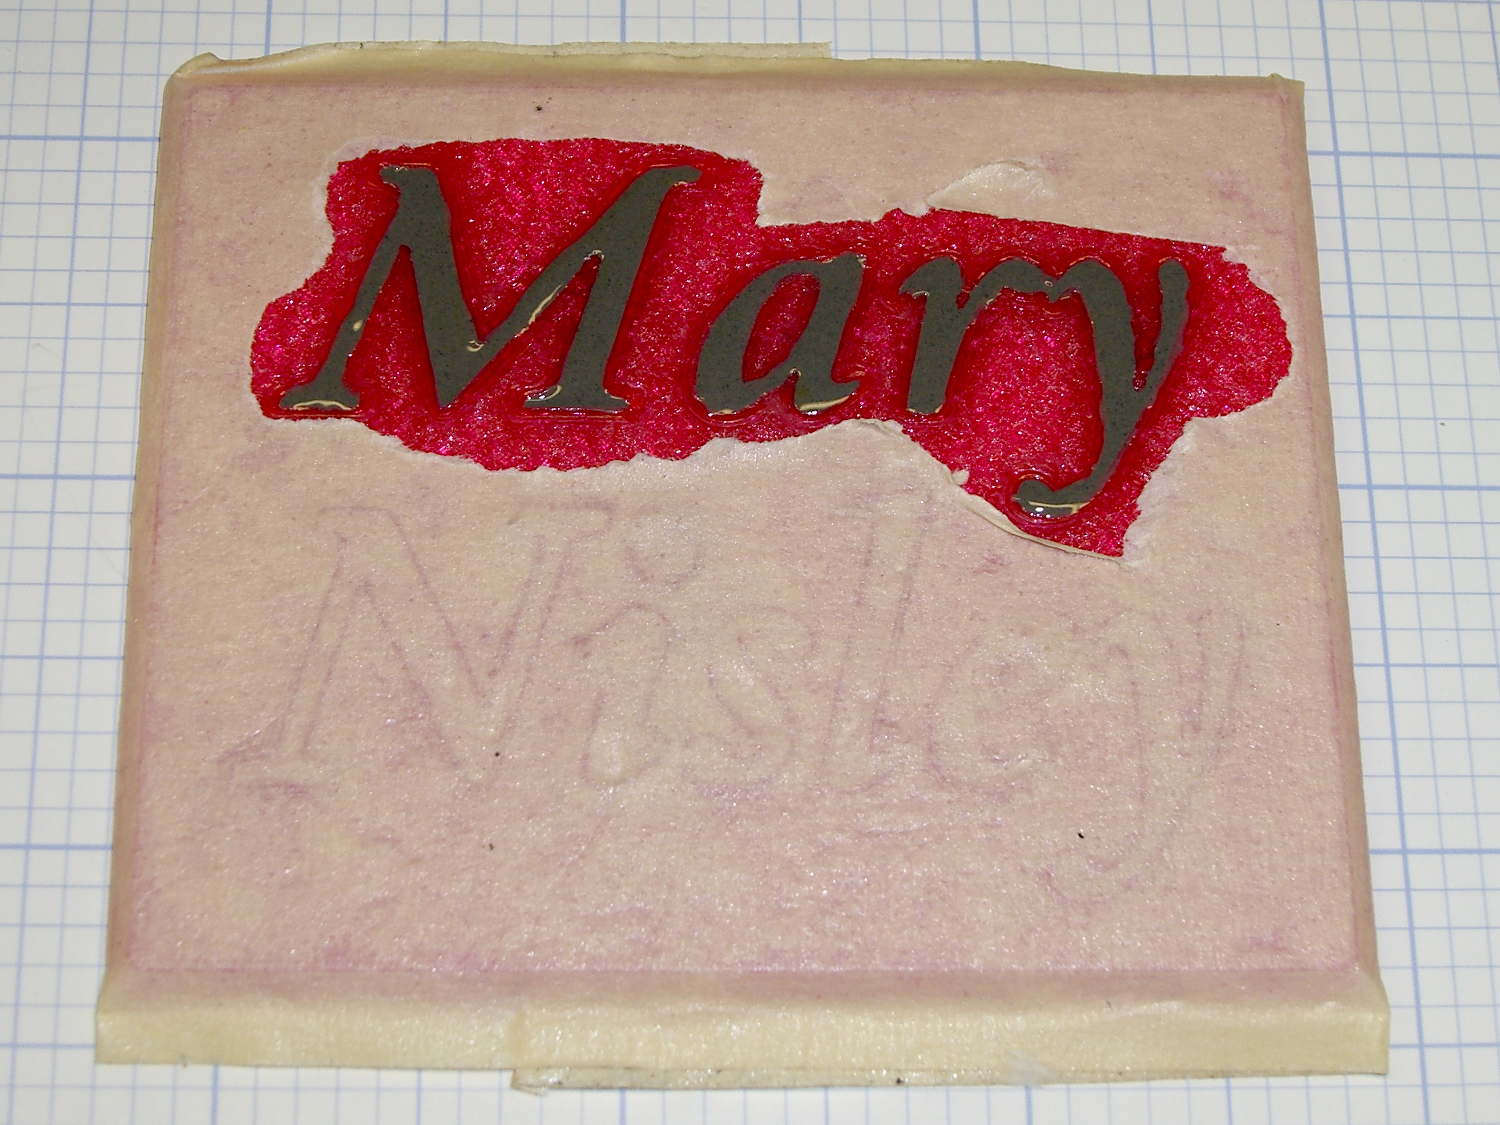
    Text Block - plain epoxy fill
    Text Block – plain epoxy fill

    That was way tedious.

    Having recently replaced the cartridge in our trusty HP Laserjet 1200, I had no qualms about step-drilling the “empty” cartridge to get the toner. For future reference, here’s where you drill into a 7115X cartridge:
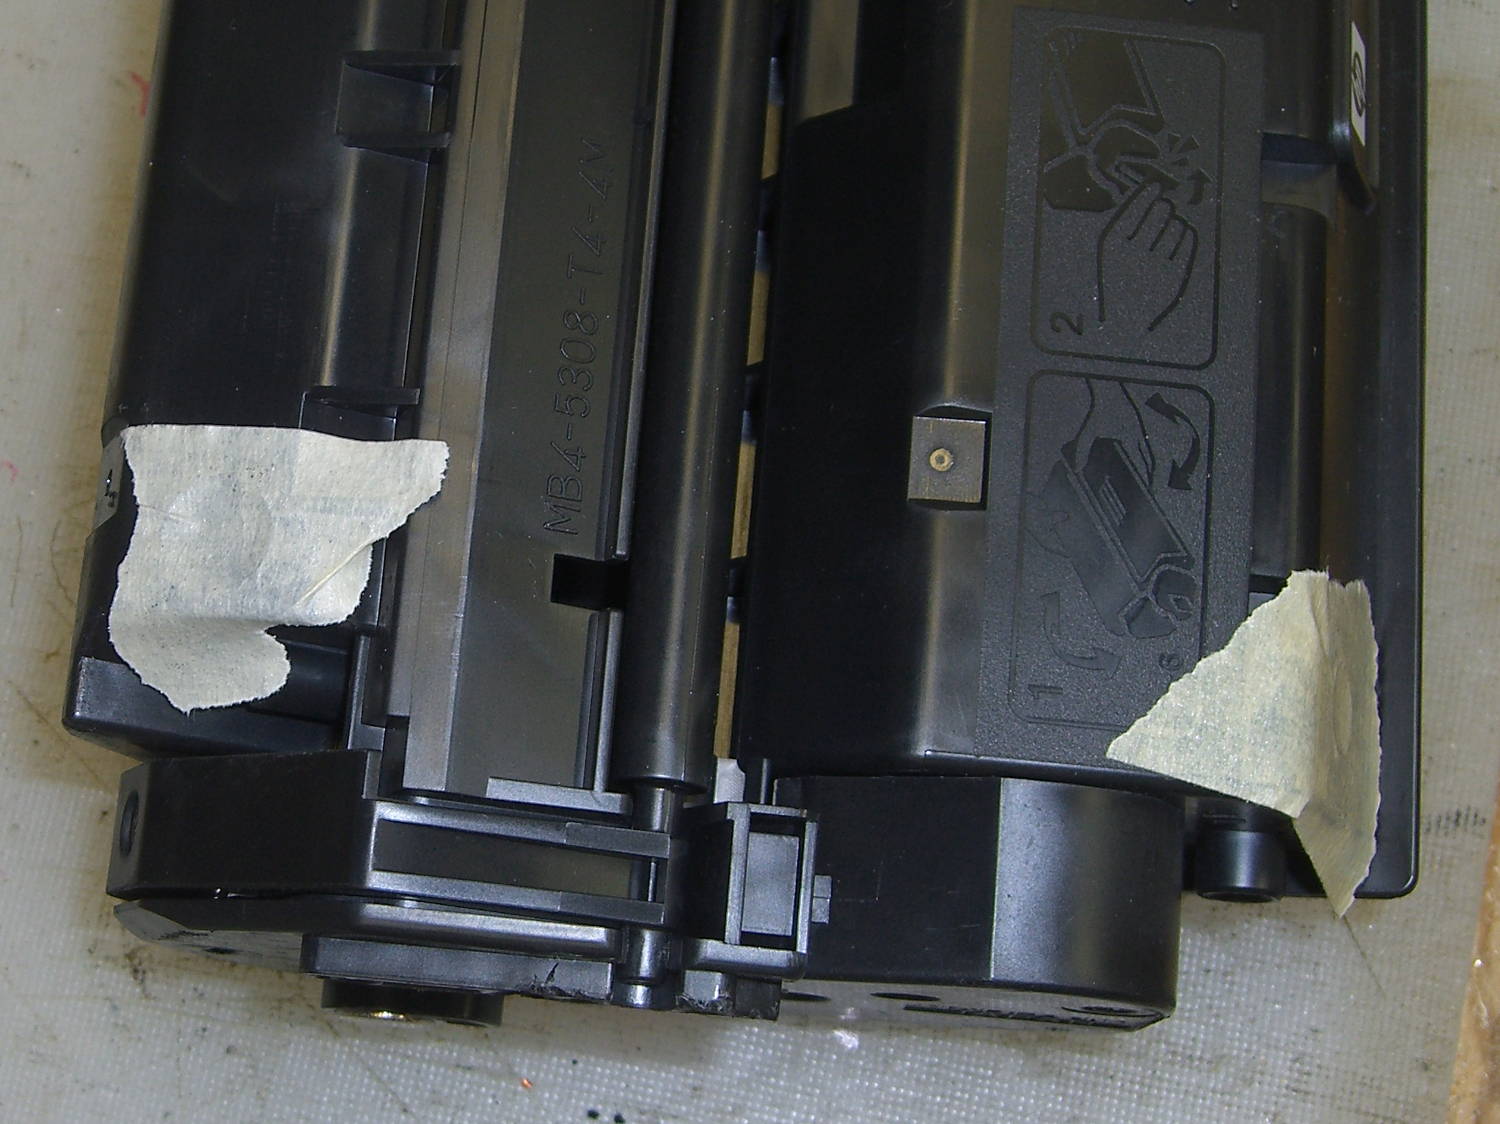
    HP 7115X Toner Cartridge - holes in waste and supply compartments
    HP 7115X Toner Cartridge – holes in waste and supply compartments

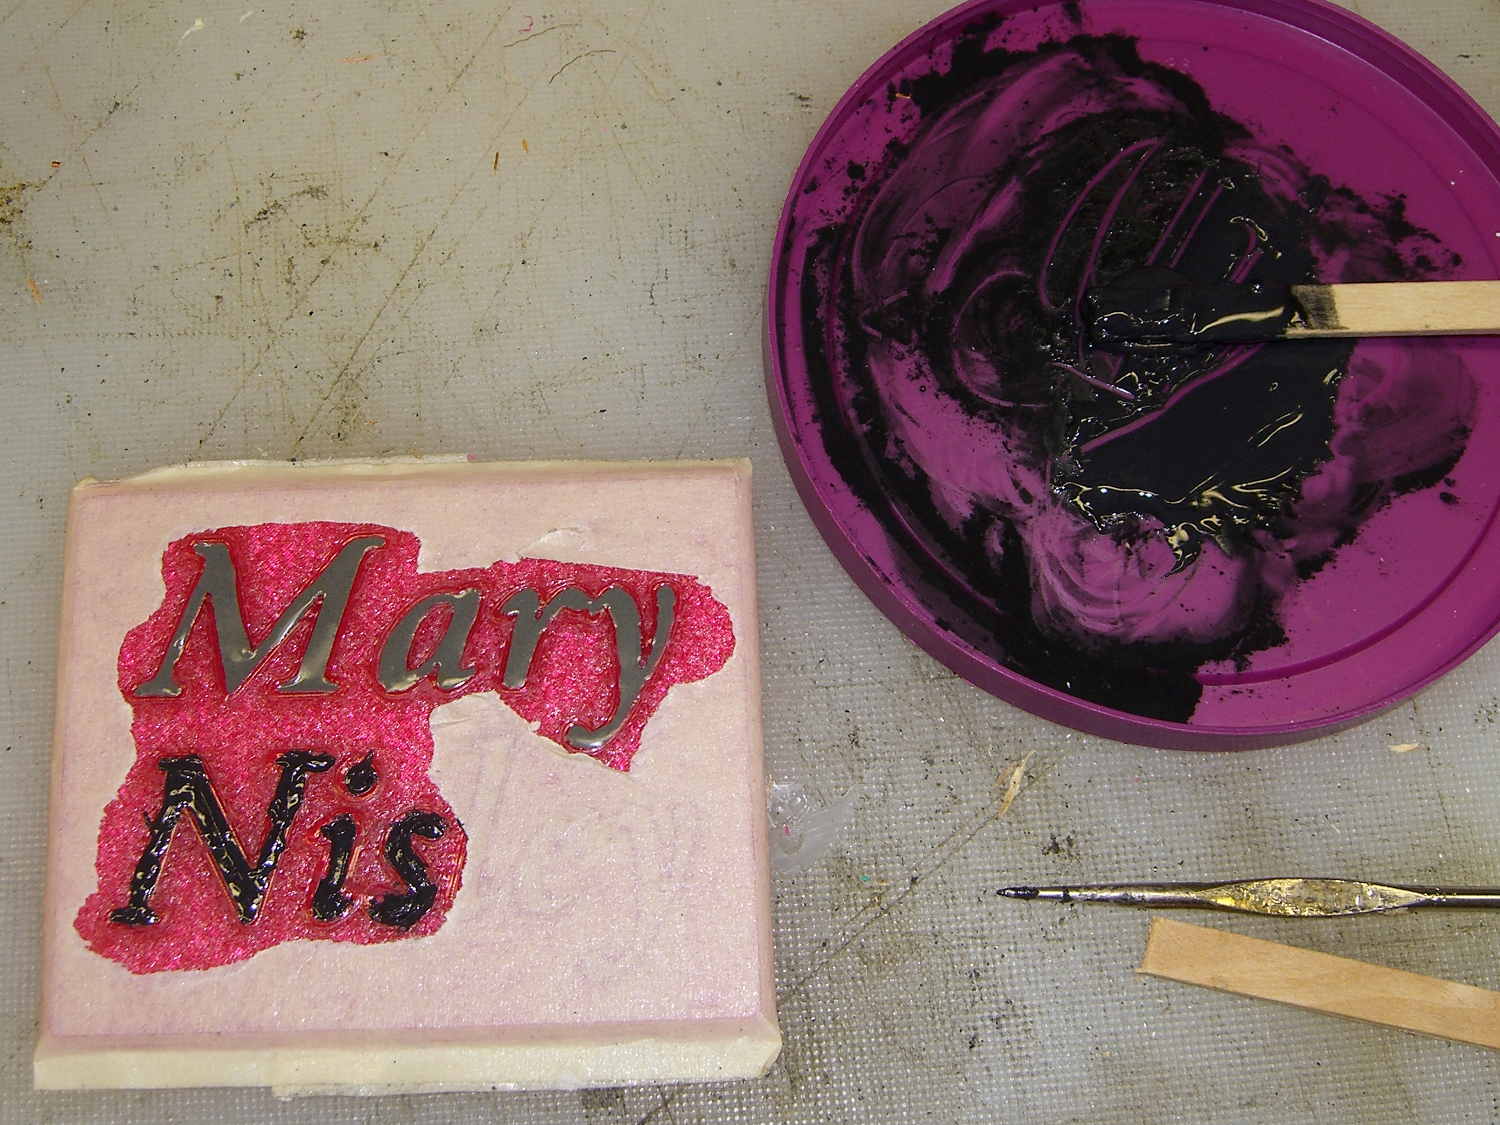
    I probably used too much toner, but one heaping pile on that wooden stick didn’t seem like a lot at the time:
    Text Block - toner black epoxy
    Text Block – toner black epoxy

    This turned the epoxy rather thick and pasty; it didn’t ease into the letters very well at all. After the usual day, it cured into a slightly rubbery solid, quite unlike the usual rock-solid epoxy blob.

    Some rummaging in the Basement Laboratory Warehouse Wing turned up two containers of aluminum powder from an Etch-a-Sketch; I mixed some into another batch of epoxy, to very little effect. With both blends, I just squished the epoxy into the letters and didn’t worry too much about slobbering any over the surface of the block.

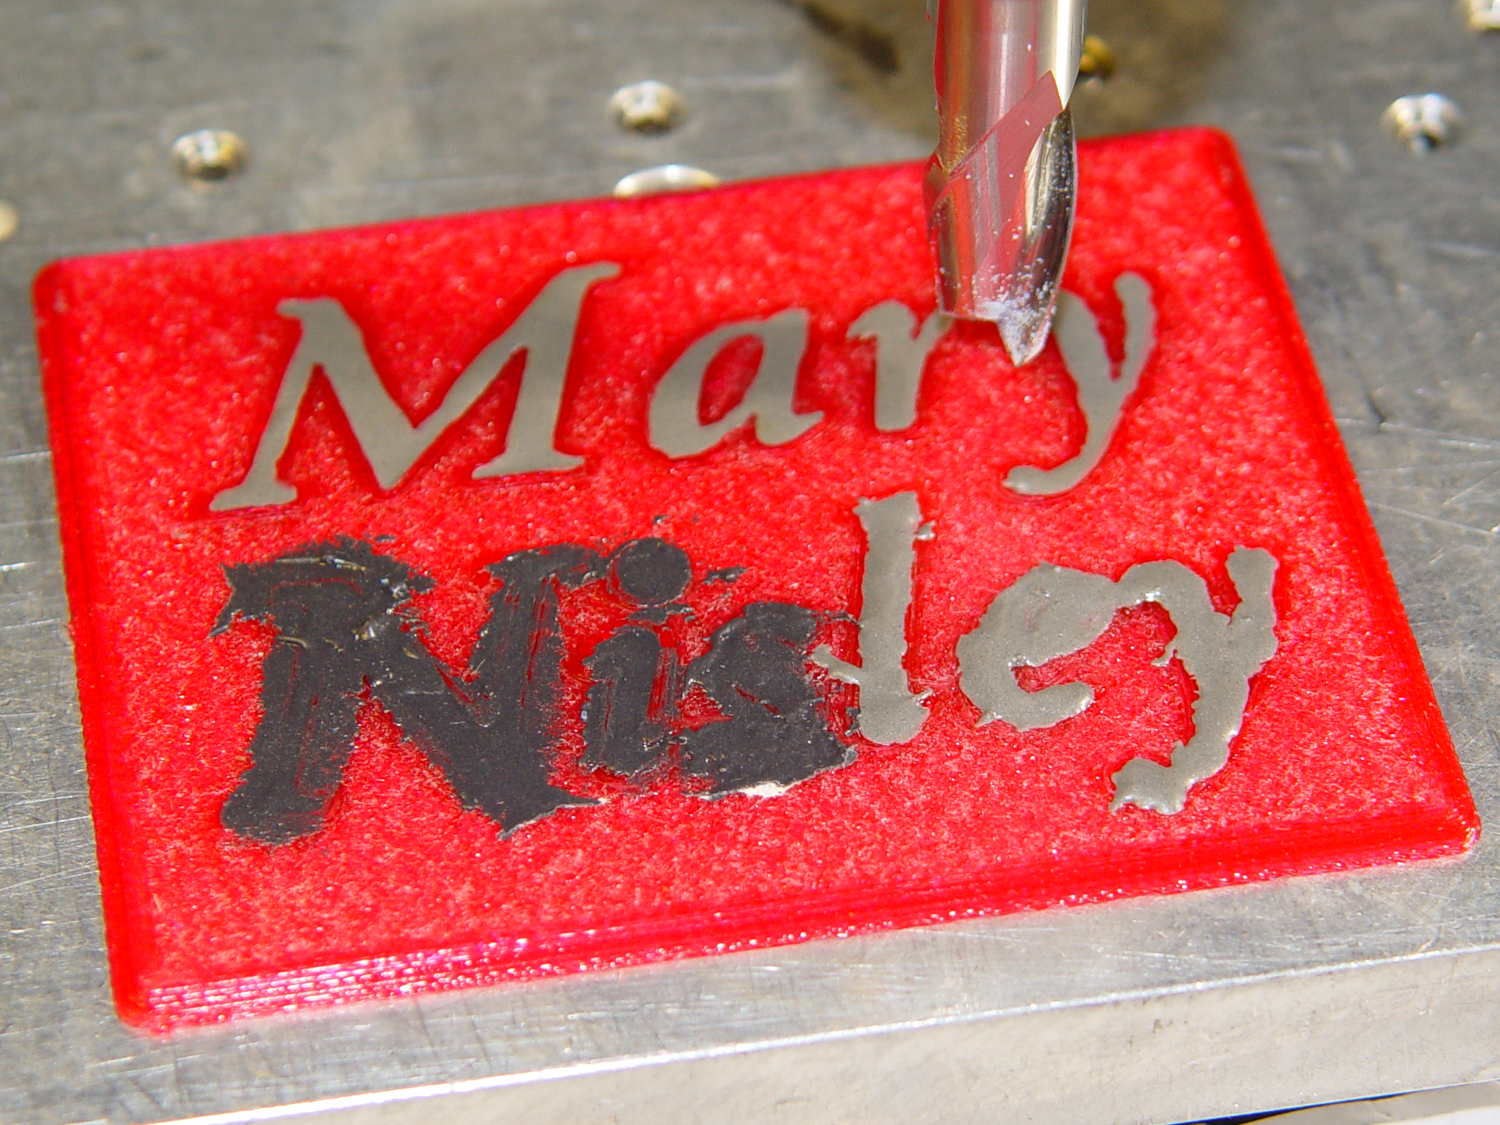
    To even off the top surface, I affixed the block to the Sherline’s tooling plate with tapeless sticky (basically double-sided tape without the tape):
    Text Block - milling setup
    Text Block – milling setup

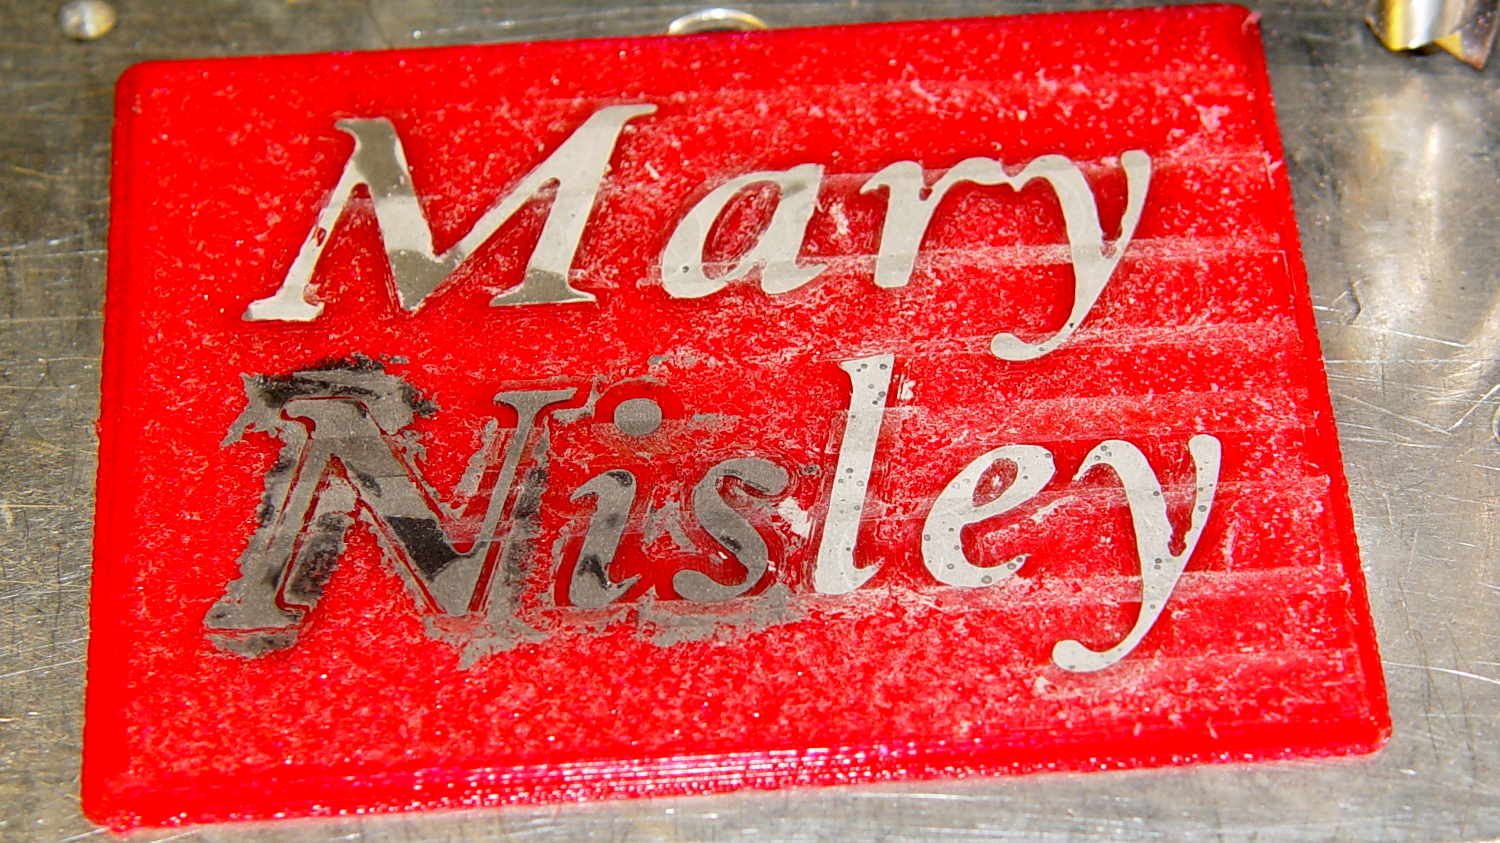
    Manually traversing the surface (3 k rpm, 24 inch/min) and stepping downward about 0.1 mm per pass gradually crisped up the letters. I expected the excess epoxy to vanish after going 0.1 mm or so into the top layer, but it actually required removing the entire 0.25 mm Hilbert-curve-filled surface layer to get rid of the epoxy that soaked into / through the tiny gaps. This is 0.4 mm down from the first pass, maybe 0.1 mm into the plastic:
    Text Block - milled 0.4 mm
    Text Block – milled 0.4 mm

    With the top layer gone, it looked rather gnarly, so I applied a sanding block that didn’t do much at all: smoother, still gnarly. Spreading maybe 0.3 ml of IPS 4 solvent adhesive over the sanded surface smoothed it a bit:

    Text Block - sanded and leveled with IPS 4
    Text Block – sanded and leveled with IPS 4

    Perhaps a topcoat of clear epoxy, along the lines of XTC-3D, would produce better results.

    The small black dots in the top line are holes from bubbles in the epoxy. The missing section of the M started out as a bubble (just visible at 0.4 mm) and gradually enlarged as pieces tore out of the recess. There’s another bubble breaking the right stroke of the “y”.

    The small dots in the “ley” are plastic spheres that carried the aluminum powder in the Etch-a-Sketch; they’re cross-sectioned and perfectly flat. The epoxy color is marginally lighter than the top line, but not enough to notice.

    Backlit on a window, nearly all of the ugly fades away:

    Text Block - backlit
    Text Block – backlit

    It’s definitely not presentation quality, that’s for sure, and I won’t attempt to fill the Mini Iron holder…

    The OpenSCAD source code, which can also produce the soldering iron holder:

    // Clover MCI-900 Mini Iron holder
    // Ed Nisley KE4ZNU - August 2015
    
    Layout = "Text";					// Iron Holder Show Text
    
    //- Extrusion parameters - must match reality!
    
    ThreadThick = 0.25;
    ThreadWidth = 0.40;
    
    function IntegerMultiple(Size,Unit) = Unit * ceil(Size / Unit);
    
    Protrusion = 0.1;
    
    HoleWindage = 0.2;
    
    inch = 25.4;
    
    Tap10_32 = 0.159 * inch;
    Clear10_32 = 0.190 * inch;
    Head10_32 = 0.373 * inch;
    Head10_32Thick = 0.110 * inch;
    Nut10_32Dia = 0.433 * inch;
    Nut10_32Thick = 0.130 * inch;
    Washer10_32OD = 0.381 * inch;
    Washer10_32ID = 0.204 * inch;
    
    //------
    // Dimensions
    
    CornerRadius = 4.0;
    
    CenterHeight = 25;							// center at cord inlet on body
    
    BodyLength = 110;							// cord inlet to body curve at front flange
    
    Incline = 10;								// central angle slope
    
    FrontOD = 29;
    FrontBlock = [20,1.5*FrontOD + 2*CornerRadius,FrontOD/2 + CenterHeight + BodyLength*sin(Incline)];
    
    CordOD = 10;
    CordLen = 10;
    
    RearOD = 22;
    RearBlock = [15 + CordLen,1.5*RearOD + 2*CornerRadius,RearOD/2 + CenterHeight];
    
    PlateWidth = 2*FrontBlock[1];
    
    TextDepth = 4*ThreadThick;
    
    ScrewOC = BodyLength - FrontBlock[0]/2;
    ScrewDepth = CenterHeight - FrontOD/2 - 5;
    
    echo(str("Screw OC: ",ScrewOC));
    
    BuildSize = [200,250,200];					// largest possible thing
    
    module PolyCyl(Dia,Height,ForceSides=0) {			// based on nophead's polyholes
    
      Sides = (ForceSides != 0) ? ForceSides : (ceil(Dia) + 2);
    
      FixDia = Dia / cos(180/Sides);
    
      cylinder(r=(FixDia + HoleWindage)/2,
               h=Height,
    	   $fn=Sides);
    }
    
    // Trim bottom from child object
    
    module TrimBottom(BlockSize=BuildSize,Slice=CornerRadius) {
    	
    	intersection() {
    		translate([0,0,BlockSize[2]/2])
    			cube(BlockSize,center=true);
    		translate([0,0,-Slice])
    			children();
    	}
    }
    
    // Build a rounded block-like thing
    
    module RoundBlock(Size=[20,25,30],Radius=CornerRadius,Center=false) {
    	
    	HS = Size/2 - [Radius,Radius,Radius];
    	translate([0,0,Center ? 0 : (HS[2] + Radius)])
    	hull() {
    		for (i=[-1,1], j=[-1,1], k=[-1,1]) {
    			translate([i*HS[0],j*HS[1],k*HS[2]])
    				sphere(r=Radius,$fn=4*4);
    		}
    	}
    }
    
    // Create a channel to hold something
    // This will eventually be subtracted from a block
    // The offsets are specialized for this application...
    
    module Channel(Dia,Length) {
    	
    	rotate([0,90,0])
    		linear_extrude(height=Length)
    			rotate(90)
    				hull() {
    					for (i=[-1,1])
    						translate([i*Dia,2*Dia])
    							circle(d=Dia/8);
    					circle(d=Dia,$fn=8*4);
    				}
    }
    
    // Iron-shaped series of channels to be removed from blocks
    
    module IronCutout() {
    
    	union() {
    		translate([-2*CordLen,0,0])
    			Channel(CordOD,2*CordLen + Protrusion);
    		Channel(RearOD,RearBlock[0] + Protrusion);
    		translate([BodyLength - FrontBlock[0]/2 - FrontBlock[0],0,0])
    			Channel(FrontOD,2*FrontBlock[0]);
    
    	}
    	
    }
    
    module TextBlock() {
    	translate([2,10,0])
    		linear_extrude(height=TextDepth + Protrusion,convexity=2)		// rendering glitches for convexity > 1
    //			text("Mary",font="Ubuntu:style=Bold Italic",halign="center",valign="center");
    			text("Mary",font="Junicode:style=Bold Italic",halign="center",valign="center",size=20,spacing=1.05);
    			
    	translate([2,-15,0])
    		linear_extrude(height=TextDepth + Protrusion,convexity=2)
    			text("Nisley",font="Junicode:style=Bold Italic",halign="center",valign="center",size=20,spacing=1.05);
    	
    }
    
    //- Build it
    
    if (Layout == "Iron")
    	IronCutout();
    
    if (Layout == "Holder" || Layout == "Show")
    	difference() {
    		union() {
    			translate([(BodyLength + CordLen)/2 - CordLen,0,0])
    				TrimBottom()
    					RoundBlock(Size=[(CordLen + BodyLength),PlateWidth,CornerRadius]);
    
    			translate([(RearBlock[0]/2 - CordLen),0,0])
    				TrimBottom()
    					RoundBlock(Size=RearBlock);
    
    			translate([BodyLength - FrontBlock[0]/2,0,0]) {
    				TrimBottom()
    					RoundBlock(Size=FrontBlock);
    			}
    		}
    		
    		translate([0,0,CenterHeight])
    			rotate([0,-Incline,0])
    				if (Layout == "Show")
    #					IronCutout();
    				else
    					IronCutout();
    		
    		translate([0,0,-Protrusion])
    			PolyCyl(Tap10_32,ScrewDepth + Protrusion,6);
    			
    		translate([ScrewOC,0,-Protrusion])
    			PolyCyl(Tap10_32,ScrewDepth + Protrusion,6);
    
    		translate([(RearBlock[0] - CordLen) + BodyLength/2 - FrontBlock[0],0,CornerRadius - TextDepth])
    			TextBlock();
    		
    	}
    	
    if (Layout == "Text")
    	difference() {
    		translate([0,0,0])
    			TrimBottom(Slice=8*ThreadThick)
    				RoundBlock(Size=[80,65,8*ThreadThick],Radius=8*ThreadThick);
    #		translate([-2,2,8*ThreadThick - TextDepth])
    			TextBlock();
    
    	}
    
  • Stereo Zoom Microscope: USB Camera Mount

    My stereo zoom microscope neatly filled the entrance pupil of the late, lamented Casio EX-Z850, so that a simple adapter holding it on the eyepiece produced credible images:

    Thinwall open boxes - side detail - 4.98 4.85 measured
    Thinwall open boxes – side detail – 4.98 4.85 measured

    Alas, the shutter failed after that image, leaving me with pictures untaken and naught to take them with.

    The least-awful alternative seems to be gimmicking up an adapter for a small USB camera from the usual eBay source:

    Fashion USB video - case vs camera
    Fashion USB video – case vs camera

    The camera’s 640×480 VGA resolution is marginally Good Enough for the purpose, as I can zoom the microscope to completely fill all those pixels. The optics aren’t up to the standard set by the microscope, but we can cope with that for a while.

    A bit of doodling & OpenSCAD tinkering produced a suitable adapter:

    USB Camera Microscope Mount - solid model
    USB Camera Microscope Mount – solid model

    To which Slic3r applied the usual finishing touches:

    USB Camera Microscope Mount - Slic3r preview
    USB Camera Microscope Mount – Slic3r preview

    A bit of silicone tape holds the sloppy focusing thread in place:

    USB Camera Microscope Mount - cap with camera
    USB Camera Microscope Mount – cap with camera

    Those are 2-56 screws that will hold the cap onto the tube. I drilled out the clearance holes in the cap and tapped the holes in the eyepiece adapter by hand, grabbing the bits with a pin vise.

    Focus the lens at infinity, which in this case meant an old DDJ cover poster on the far wall of the Basement Laboratory, and then it’ll be just as happy with the image coming out of the eyepiece as a human eyeball would be.

    I put a few snippets of black electrical tape atop the PCB locating tabs before screwing the tube in place. The tube ID is 1 mm smaller than the PCB OD, in order to hold the PCB perpendicular to the optical axis and clamp it firmly in place. Come to find out that the optical axis of the lens isn’t perfectly perpendicular to the PCB, but it’s close enough for my simple needs.

    And then it fits just like you’d expect:

    USB Camera Microscope Mount - on eyepiece
    USB Camera Microscope Mount – on eyepiece

    Actually, that’s the second version. The distance from the camera lens (equivalently: the PCB below the optical block, which I used as the datum plane) to the eyepiece is a critical dimension that determines whether the image fills the entrance pupil. I guesstimated the first version by hand-holding the camera and measuring with a caliper, tried it out, then iteratively whacked 2 mm off the tube until the image lit up properly:

    USB Camera Microscope Mount - adjusting tube length
    USB Camera Microscope Mount – adjusting tube length

    Minus 4 mm made it slightly too short, but then I could measure the correct position, tweak that dimension in the code, and get another adapter, just like the first one (plus a few other minor changes), except that it worked:

    USB Camera Microscope Mount - first light
    USB Camera Microscope Mount – first light

    That’s a screen capture from VLC, which plays from /dev/video0 perfectly. Some manual exposure & color balance adjustment may be in order, but it’s pretty good for First Light.

    It turns out that removing the eyepiece and holding the bare sensor over the opening also works fine. The real image from the objective fills much more area than the camera’s tiny sensor: the video image covers about one digit in that picture, but gimmicking up a bare-sensor adapter might be useful.

    The OpenSCAD source code:

    // USB Camera mount for Microscope Eyepiece
    // Ed Nisley KE4ZNU - August 2015
    
    Layout = "Build";                    // Show Build Mount Cap
    
    //-------
    //- Extrusion parameters must match reality!
    //  Print with 2 shells
    
    ThreadThick = 0.25;
    ThreadWidth = 0.40;
    
    HoleWindage = 0.2;
    
    Protrusion = 0.1;           // make holes end cleanly
    
    function IntegerMultiple(Size,Unit) = Unit * ceil(Size / Unit);
    
    inch = 25.4;
    
    Tap2_56 = 0.070 * inch;
    Clear2_56 = 0.082 * inch;
    Head2_56 = 0.156 * inch;
    Head2_56Thick = 0.055 * inch;
    Nut2_56Dia = 0.204 * inch;
    Nut2_56Thick = 0.065 * inch;
    Washer2_56OD = 0.200 * inch;
    Washer2_56ID = 0.095 * inch;
    
    BuildGap = 5.0;
    
    //-------
    // Dimensions
    
    //-- Camera
    
    PCBThick = 1.1;
    PCBDia = 24.5;
    PCBClampDia = 23.0;
    
    KeySize = [IntegerMultiple(27.6,ThreadWidth),IntegerMultiple(9.5,ThreadWidth),IntegerMultiple(PCBThick,ThreadThick)];
    KeyOffset = [0.0,1.5,0];
    
    CameraOffset = 22.3;                    // distance from eyepiece to camera PCB
    
    WallThick = 4.0;
    
    EyePieceOD = 30.0;
    EyePieceLen = 30.0;
    
    BodyOD = EyePieceOD + 2*WallThick;
    BodyLen = CameraOffset + EyePieceLen - 5.0;
    
    echo(str("Body length: ",BodyLen));
    
    CapSocket = 10;
    CapLen = CapSocket + WallThick;
    CableOD = 3.7;
    
    echo(str("Cap length: ",CapLen));
    
    
    echo(str("Total length: ",BodyLen + CapLen));
    
    NumScrews = 4;
    ScrewAngle = 45;
    
    NumSides = 6*4;
    
    //-------
    
    module PolyCyl(Dia,Height,ForceSides=0) {           // based on nophead's polyholes
        Sides = (ForceSides != 0) ? ForceSides : (ceil(Dia) + 2);
        FixDia = Dia / cos(180/Sides);
        cylinder(r=(FixDia + HoleWindage)/2,
                 h=Height,
                 $fn=Sides);
    }
    
    
    //-------
    // Components
    
    module LensMount() {
        
        difference() {
            cylinder(d=BodyOD,h=BodyLen,$fn=NumSides);
            translate([0,0,CameraOffset])
                PolyCyl(EyePieceOD,EyePieceLen,NumSides);
            translate([0,0,-Protrusion])
                PolyCyl(PCBClampDia,(BodyLen + 2*Protrusion),NumSides);
            for (i=[0:NumScrews-1])
                rotate(ScrewAngle + i*360/NumScrews)
                    translate([(BodyOD/2 - 1.5*Head2_56/2),0,-Protrusion])
                        rotate(180/4)
                            PolyCyl(Tap2_56,10.0,4);
        }
    }
    
    module CamCap() {
        difference() {
            cylinder(d=BodyOD,h=CapLen,$fn=NumSides);
            translate([0,0,WallThick])
                PolyCyl(PCBDia,CapLen,NumSides);
            translate(KeyOffset + [0,0,(CapLen - KeySize[2]/2 + Protrusion/2)])
                cube((KeySize + [0,0,Protrusion]),center=true);
            if (false)
                translate([0,0,-Protrusion])
                    PolyCyl(CableOD,CapLen,8);
            else
                translate([0,BodyOD/2,(CapLen - CableOD/2 + Protrusion/2)])
                    rotate([90,0,0])
                        cube([CableOD,(CableOD + Protrusion),BodyOD],center=true);
            for (i=[0:NumScrews-1])
                rotate(ScrewAngle + i*360/NumScrews)
                    translate([(BodyOD/2 - 1.5*Head2_56/2),0,-Protrusion])
                        rotate(180/4)
                            PolyCyl(Clear2_56,(CapLen + 2*Protrusion),4);
            
        }
    }
    
    //-------
    // Build it!
    
    if (Layout == "Mount")
        LensMount();
    
    if (Layout == "Cap")
        CamCap();
    
    if (Layout == "Show") {
        CamCap();
        translate([0,0,CapLen + 5])
            LensMount();
    }
    if (Layout == "Build") {
        translate([-(BodyOD/2 + BuildGap),0,0])
            CamCap();
            translate([(BodyOD/2 + BuildGap),0,0])
            LensMount();
    }
    
  • HP 7475A Plotter: Pen Refilling Station

    A place to store your vials of blended inkjet juice, plus a workstation for the plotter pen you’re refilling and that ink vial up front:

    HP7475A Plotter Pen Refilling Station
    HP7475A Plotter Pen Refilling Station

    The two pen holders accommodate ordinary fiber-tip pens and ceramic-tip pens. The slot along the front lets you keep track of the ink level, not that there’s much danger of running dry at 0.05 ml per refill from a vial holding 1 ml of blended ink. The big flange makes it harder for me to knock the damn thing over; avoiding an ink spill, even when you have a towel underneath, is a Good Thing.

    The Slic3r tool path preview shows off the Hilbert Curve top & bottom infill:

    Plotter Pen Refill Vial Holder - Slic3r preview
    Plotter Pen Refill Vial Holder – Slic3r preview

    The OpenSCAD source code:

    // HP7475A Plotter Pen Refill Station
    // Ed Nisley KE4ZNU - August 2015
    
    //- Extrusion parameters - must match reality!
    
    ThreadThick = 0.25;
    ThreadWidth = 0.40;
    
    function IntegerMultiple(Size,Unit) = Unit * ceil(Size / Unit);
    
    Protrusion = 0.1;
    
    HoleWindage = 0.2;
    
    module PolyCyl(Dia,Height,ForceSides=0) {			// based on nophead's polyholes
    
      Sides = (ForceSides != 0) ? ForceSides : (ceil(Dia) + 2);
    
      FixDia = Dia / cos(180/Sides);
    
      cylinder(r=(FixDia + HoleWindage)/2,
               h=Height,
    	   $fn=Sides);
    }
    
    
    //------
    // Dimensions
    
    WallThick = 6*ThreadWidth;
    BaseThick = IntegerMultiple(1.0,ThreadThick);
    
    VialOD = 8.0;
    VialOC = VialOD + WallThick;
    
    VialArray = [4,4];			// number of vials in each direction
    
    PenOD = [14.7,11.7];			// regular fiber pen body, ceramic *cap* dia
    NumPens = len(PenOD);			// really works for just two pens...
    PenLength = 38;
    FlangeOD = 18;
    
    echo(str("Max pen OD: ",max(PenOD)));
    echo(str("Number of pens: ",len(PenOD)));
    
    Holder = [(VialOC*VialArray[0] + WallThick),(VialOC*VialArray[1] + 2*FlangeOD + WallThick),(3*VialOD + BaseThick)];
    HolderRound = 5.0;
    
    //- Build it
    
    	difference() {
    
    		union() {
    			hull() {
    				for (i=[-1,1], j=[-1,1]) {
    					translate([i*(Holder[0]/2 - HolderRound),j*(Holder[1]/2 - HolderRound),0])
    						cylinder(r=HolderRound,h=Holder[2],$fn=8*4);
    				}
    			}
    			
    			hull() {
    				for (i=[-1,1], j=[-1,1]) {
    					translate([i*Holder[1]/2,j*(Holder[1]/2 - HolderRound),0])
    						cylinder(r=HolderRound,h=BaseThick,$fn=8*4);
    				}
    			}
    			
    			for (i=[0:len(PenOD) - 1])
    				translate([(i*Holder[0]/2 - Holder[0]/4),-Holder[1]/4,BaseThick]) {		// spacing is a total hack
    					rotate(180/12)
    						cylinder(d=FlangeOD,h=PenLength,$fn=3*4);
    				}
    		}
    		
    		for (i=[0:VialArray[0] - 1] , j=[0:VialArray[1] - 1]) {
    			vx = i*VialOC - (VialOC*(VialArray[0] - 1)/2);
    			vy = j*VialOC - (VialOC*(VialArray[1] - 1)/2) + FlangeOD;
    			translate([vx,vy,BaseThick])
    				rotate(180/8)
    					PolyCyl(VialOD,Holder[2],8);
    		}
    		
    		translate([0,(VialOD/2 - Holder[1]/2),BaseThick])
    			rotate(180/8)
    				PolyCyl(VialOD,Holder[2],8);										// edges along open side => snug fit
    		
    		for (i=[0:len(PenOD) - 1])
    			translate([(i*Holder[0]/2 - Holder[0]/4),-Holder[1]/4,BaseThick]) {		// spacing is a total hack
    				rotate(180/12)
    					PolyCyl(PenOD[i],(PenLength + Protrusion),3*4);
    			}
    		
    	}
    

    Mostly because I can…

  • Clover MCI-900 Mini Iron Holder

    Mary flattens seam allowances and prepares appliqué pieces with a Clover MCI-900 Mini Iron. The stand resembles the wire gadgets that came with soldering irons, back in the day:

    Clover MCI-900 Mini Iron - Clover holder
    Clover MCI-900 Mini Iron – Clover holder

    That stand may be suitable on a workbench, but it’s perilously unstable on an ironing board. After fiddling around for a while and becoming increasingly frustrated with it, she asked for a secure holder that wouldn’t fall over and perhaps had a heat shield around the hot end.

    I ran off a quick prototype to verify my measurements and provide a basis for further discussion:

    Clover MCI-900 Mini Iron - Level holder
    Clover MCI-900 Mini Iron – Level holder

    I proposed screwing that holder to a rectangle of leftover countertop extending under the hot end, with a U-shaped heat shield extending upward to keep fingers and fabric away from the blade. She decided the countertop might be entirely too heavy and the heat shield might be too confining, so she suggested just angling the iron upward and adding a flat platform to stabilize it.

    Her wish being my command:

    Clover MCI-900 Mini Iron - Angled holder
    Clover MCI-900 Mini Iron – Angled holder

    I’m still not convinced that having the hot end up in the air is a Good Thing, but she thinks it’s worth trying as-is. A pair of 10-32 screw holes under each end will let it mount to a base board, should that becomes necessary.

    I’ll stick a foam sheet under the platform so it doesn’t slide around. The cord normally dangles downward off the side of the ironing board or work table, so the iron won’t get up and walk away, but it might pull the whole affair toward the edge.

    Because OpenSCAD now includes a text() function, engraving her name in the platform turned out to be no big deal:

    Clover Mini Iron Holder - model
    Clover Mini Iron Holder – model

    I should fill the letters with JB Weld epoxy darkened with laser printer toner (who knew?) to make them stand out. They’re more conspicuous in person than in the picture, so maybe it doesn’t matter.

    The slots holding the iron have a semicircular bottom and straight-wall sides, created by extruding hulled 2D shapes, arranging them along the iron’s central axis, and tilting the “iron” at the appropriate angle:

    Clover Mini Iron Holder - solid model showing iron
    Clover Mini Iron Holder – solid model showing iron

    That’s a 10° tilt, chosen because it looked right. The model recomputes itself around the key dimensions, so we can raise / lower the iron, change the angle, and so forth and so on, as needed.

    Assuming that a hot end sticking out in mid-air isn’t too awful, this one looks like a keeper.

    The OpenSCAD source code:

    // Clover MCI-900 Mini Iron holder
    // Ed Nisley KE4ZNU - August 2015
    
    Layout = "Holder";					// Iron Holder
    
    //- Extrusion parameters - must match reality!
    
    ThreadThick = 0.25;
    ThreadWidth = 0.40;
    
    function IntegerMultiple(Size,Unit) = Unit * ceil(Size / Unit);
    
    Protrusion = 0.1;
    
    HoleWindage = 0.2;
    
    inch = 25.4;
    
    Tap10_32 = 0.159 * inch;
    Clear10_32 = 0.190 * inch;
    Head10_32 = 0.373 * inch;
    Head10_32Thick = 0.110 * inch;
    Nut10_32Dia = 0.433 * inch;
    Nut10_32Thick = 0.130 * inch;
    Washer10_32OD = 0.381 * inch;
    Washer10_32ID = 0.204 * inch;
    
    //------
    // Dimensions
    
    CornerRadius = 4.0;
    
    CenterHeight = 25;							// center at cord inlet on body
    
    BodyLength = 110;							// cord inlet to body curve at front flange
    
    Incline = 10;								// central angle slope
    
    FrontOD = 29;
    FrontBlock = [20,1.5*FrontOD + 2*CornerRadius,FrontOD/2 + CenterHeight + BodyLength*sin(Incline)];
    
    CordOD = 10;
    CordLen = 10;
    
    RearOD = 22;
    RearBlock = [15 + CordLen,1.5*RearOD + 2*CornerRadius,RearOD/2 + CenterHeight];
    
    PlateWidth = 2*FrontBlock[1];
    
    TextDepth = 3*ThreadThick;
    
    ScrewOC = BodyLength - FrontBlock[0]/2;
    ScrewDepth = CenterHeight - FrontOD/2 - 5;
    
    echo(str("Screw OC: ",ScrewOC));
    
    BuildSize = [200,250,200];					// largest possible thing
    
    module PolyCyl(Dia,Height,ForceSides=0) {			// based on nophead's polyholes
    
      Sides = (ForceSides != 0) ? ForceSides : (ceil(Dia) + 2);
    
      FixDia = Dia / cos(180/Sides);
    
      cylinder(r=(FixDia + HoleWindage)/2,
               h=Height,
    	   $fn=Sides);
    }
    
    // Trim bottom from child object
    
    module TrimBottom(BlockSize=BuildSize,Slice=CornerRadius) {
    	
    	intersection() {
    		translate([0,0,BlockSize[2]/2])
    			cube(BlockSize,center=true);
    		translate([0,0,-Slice])
    			children();
    	}
    }
    
    // Build a rounded block-like thing
    
    module RoundBlock(Size=[20,25,30],Radius=CornerRadius,Center=false) {
    	
    	HS = Size/2 - [Radius,Radius,Radius];
    	translate([0,0,Center ? 0 : (HS[2] + Radius)])
    	hull() {
    		for (i=[-1,1], j=[-1,1], k=[-1,1]) {
    			translate([i*HS[0],j*HS[1],k*HS[2]])
    				sphere(r=Radius,$fn=4*4);
    		}
    	}
    }
    
    // Create a channel to hold something
    // This will eventually be subtracted from a block
    // The offsets are specialized for this application...
    
    module Channel(Dia,Length) {
    	
    	rotate([0,90,0])
    		linear_extrude(height=Length)
    			rotate(90)
    				hull() {
    					for (i=[-1,1])
    						translate([i*Dia,2*Dia])
    							circle(d=Dia/8);
    					circle(d=Dia,$fn=8*4);
    				}
    }
    
    // Iron-shaped series of channels to be removed from blocks
    
    module IronCutout() {
    
    	union() {
    		translate([-2*CordLen,0,0])
    			Channel(CordOD,2*CordLen + Protrusion);
    		Channel(RearOD,RearBlock[0] + Protrusion);
    		translate([BodyLength - FrontBlock[0]/2 - FrontBlock[0],0,0])
    			Channel(FrontOD,2*FrontBlock[0]);
    
    	}
    	
    }
    
    //- Build it
    
    if (Layout == "Iron")
    	IronCutout();
    
    if (Layout == "Holder")
    	difference() {
    		union() {
    			translate([(BodyLength + CordLen)/2 - CordLen,0,0])
    				TrimBottom()
    					RoundBlock(Size=[(CordLen + BodyLength),PlateWidth,CornerRadius]);
    
    			translate([(RearBlock[0]/2 - CordLen),0,0])
    				TrimBottom()
    					RoundBlock(Size=RearBlock);
    
    			translate([BodyLength - FrontBlock[0]/2,0,0]) {
    				TrimBottom()
    					RoundBlock(Size=FrontBlock);
    			}
    		}
    		
    		translate([0,0,CenterHeight])
    			rotate([0,-Incline,0])
    				IronCutout();
    		
    		translate([0,0,-Protrusion])
    			PolyCyl(Tap10_32,ScrewDepth + Protrusion,6);
    			
    		translate([ScrewOC,0,-Protrusion])
    			PolyCyl(Tap10_32,ScrewDepth + Protrusion,6);
    
    		translate([(RearBlock[0] - CordLen) + BodyLength/2 - FrontBlock[0],0,CornerRadius - TextDepth]) {
    			
    			translate([0,10,0])
    				linear_extrude(height=TextDepth + Protrusion,convexity=1)		// rendering glitches for convexity > 1
    					text("Mary",font="Ubuntu:style=Bold Italic",halign="center",valign="center");
    					
    			translate([0,-10,0])
    				linear_extrude(height=TextDepth + Protrusion,convexity=1)		// rendering glitches for convexity > 1
    				text("Nisley",font="Ubuntu:style=Bold Italic",halign="center",valign="center");
    		}
    		
    	}
    

    The M2 buzzed away for four hours on that puppy, with the first 2½ hours devoted to building the platform. That’s the downside of applying Hilbert Curve infill to two big flat surfaces, but the texture looks really good.

  • M2 Motor Mount: Better-looking Cable Cap

    An objection was raised to my original cable strain relief technique with the PETG motor mount:

    M2 Motor Mount - PETG installed - cable brace
    M2 Motor Mount – PETG installed – cable brace

    The proffered replacement had a difficult-to-print orientation:

    M2 Motor Mount - Cable Cap - original STL orientation
    M2 Motor Mount – Cable Cap – original STL orientation

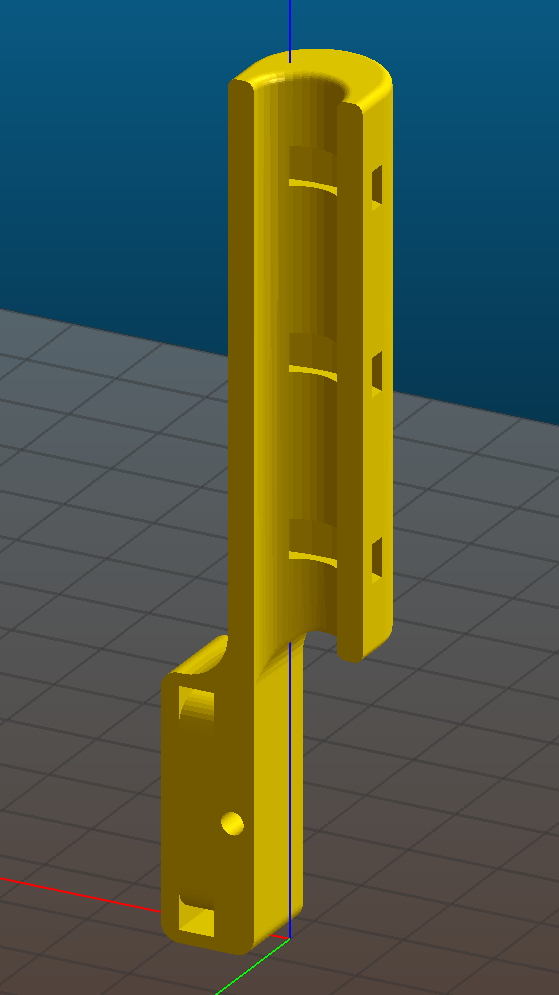
    Which Meshlab’s Manipulators Tool rotated by 90°:

    M2 Motor Mount - Cable Cap
    M2 Motor Mount – Cable Cap

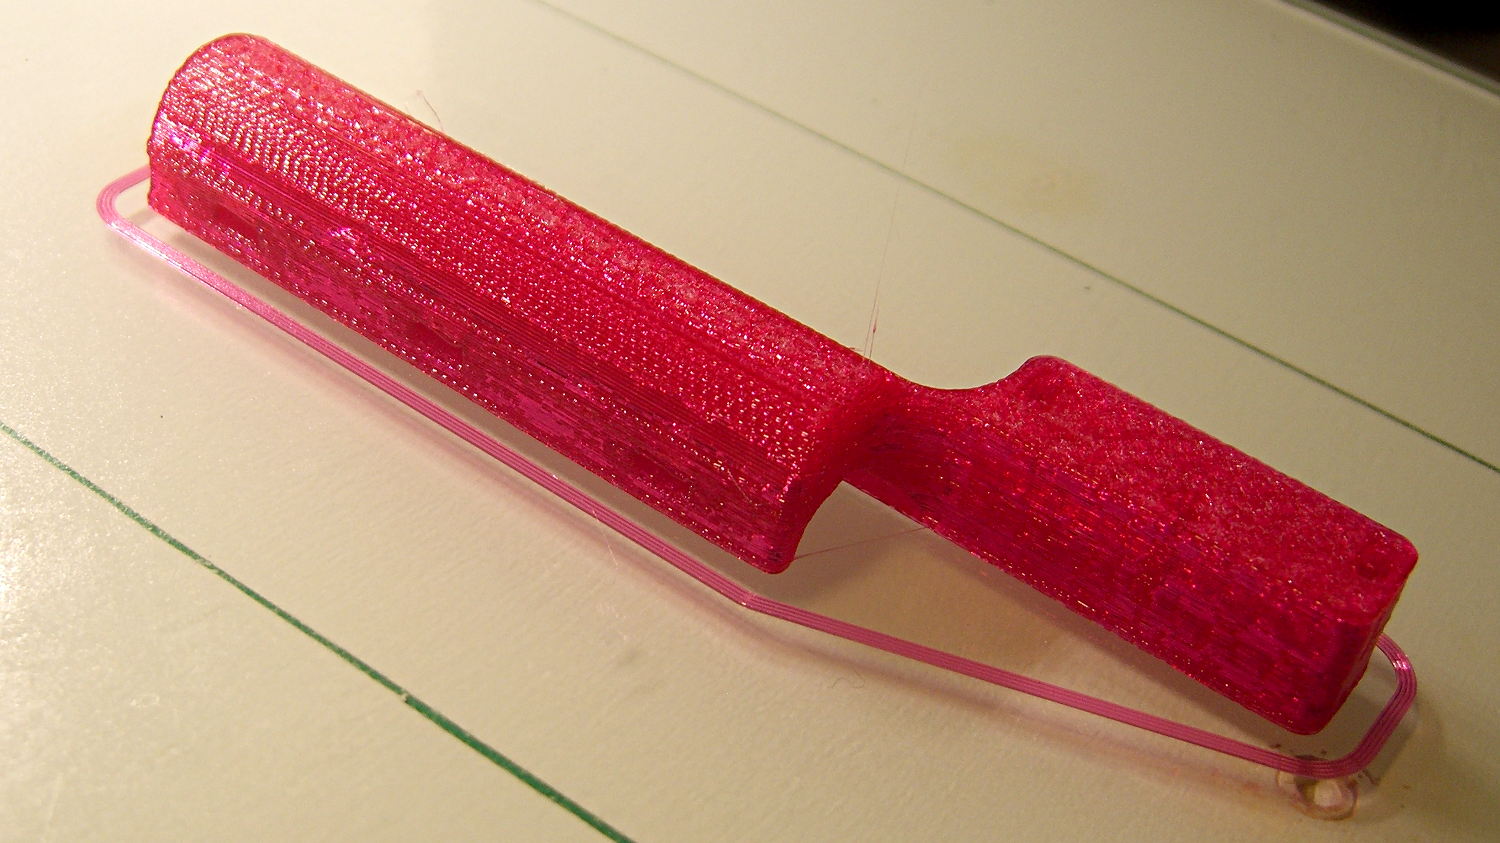
    And that printed without any drama (or support), at least after I sliced it to use a single perimeter thread that could cope with the arch:

    M2 Motor Mount - Cable Cap - on platform
    M2 Motor Mount – Cable Cap – on platform

    Then a few pretty cable ties wrapped everything up in a decorative package:

    M2 Motor Mount - Cable Cap - installed
    M2 Motor Mount – Cable Cap – installed

    And that’s that…

    Memo to Self: Bang on the ␛ key to get out of whatever mode the Manipulators Tool gets wedged into.

  • Helmet Mirror Mount: Elevation Set Screw Slide

    The elevation tension adjustment on both our bike helmet mirror mounts have become a bit sloppy. That’s no surprise, because I expected the tiny set screw in the tiny square hole near the top to eventually wear a depression in the ABS plastic arc upon which it bears:

    Helmet mirror mount - 3D model - Fit layout
    Helmet mirror mount – 3D model – Fit layout

    The only surprise was that it took four years. That’s far longer than all of the commercial mirror and their mounts lasted; this one’s definitely a keeper.

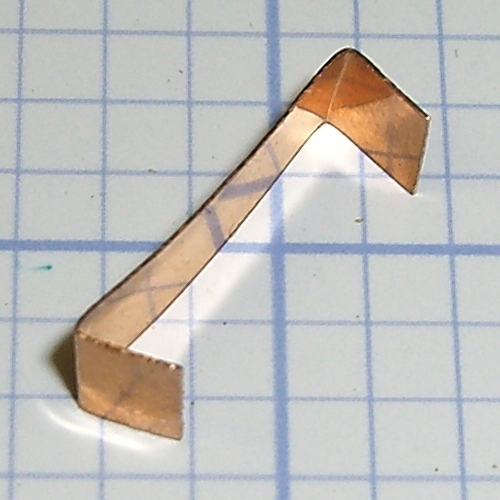
    So I got to do something I planned pretty much from the beginning of the project: cut a snippet of phosphor bronze spring stock to go between the Elevation mount and the arc, then bend the ends bent inward so they don’t slash an errant fingertip:

    Helmet mirror mount - elevation slide
    Helmet mirror mount – elevation slide

    Slipped in place, the ends look like they stick out anyway, but they’re really just about flush:

    Helmet mirror mount - El slide in place
    Helmet mirror mount – El slide in place

    Tightening the set screw pushes the strip against the arc, where it provides enough resistance to prevent slipping and enough smoothness for easy adjustment.

    While I had the mounts up on the repair stand, I unscrewed the mirror shaft and snugged up the Azimuth pivot screw by a micro-smidgen to tighten that motion.

    Four years ago, those ABS parts popped off the much-hacked Thing-O-Matic’s platform. The M2 produces somewhat better-looking results, but that yellow plastic has a certain charm…

  • Lip Balm Holder

    A bit of tinkering with the OpenSCAD code that produced the DeoxIT bottle holder delivered a place for the cylindrical objects we use just before cycling:

    Lip Balm Holder
    Lip Balm Holder

    The tubes are 1.5 diameters tall, minus a skosh, so the cylinders stand neatly inside and don’t want to fall over. I added about 1 mm clearance and you could taper the cylinder openings for E-Z insertion, although we can eke out a miserable existence with this thing as-is.

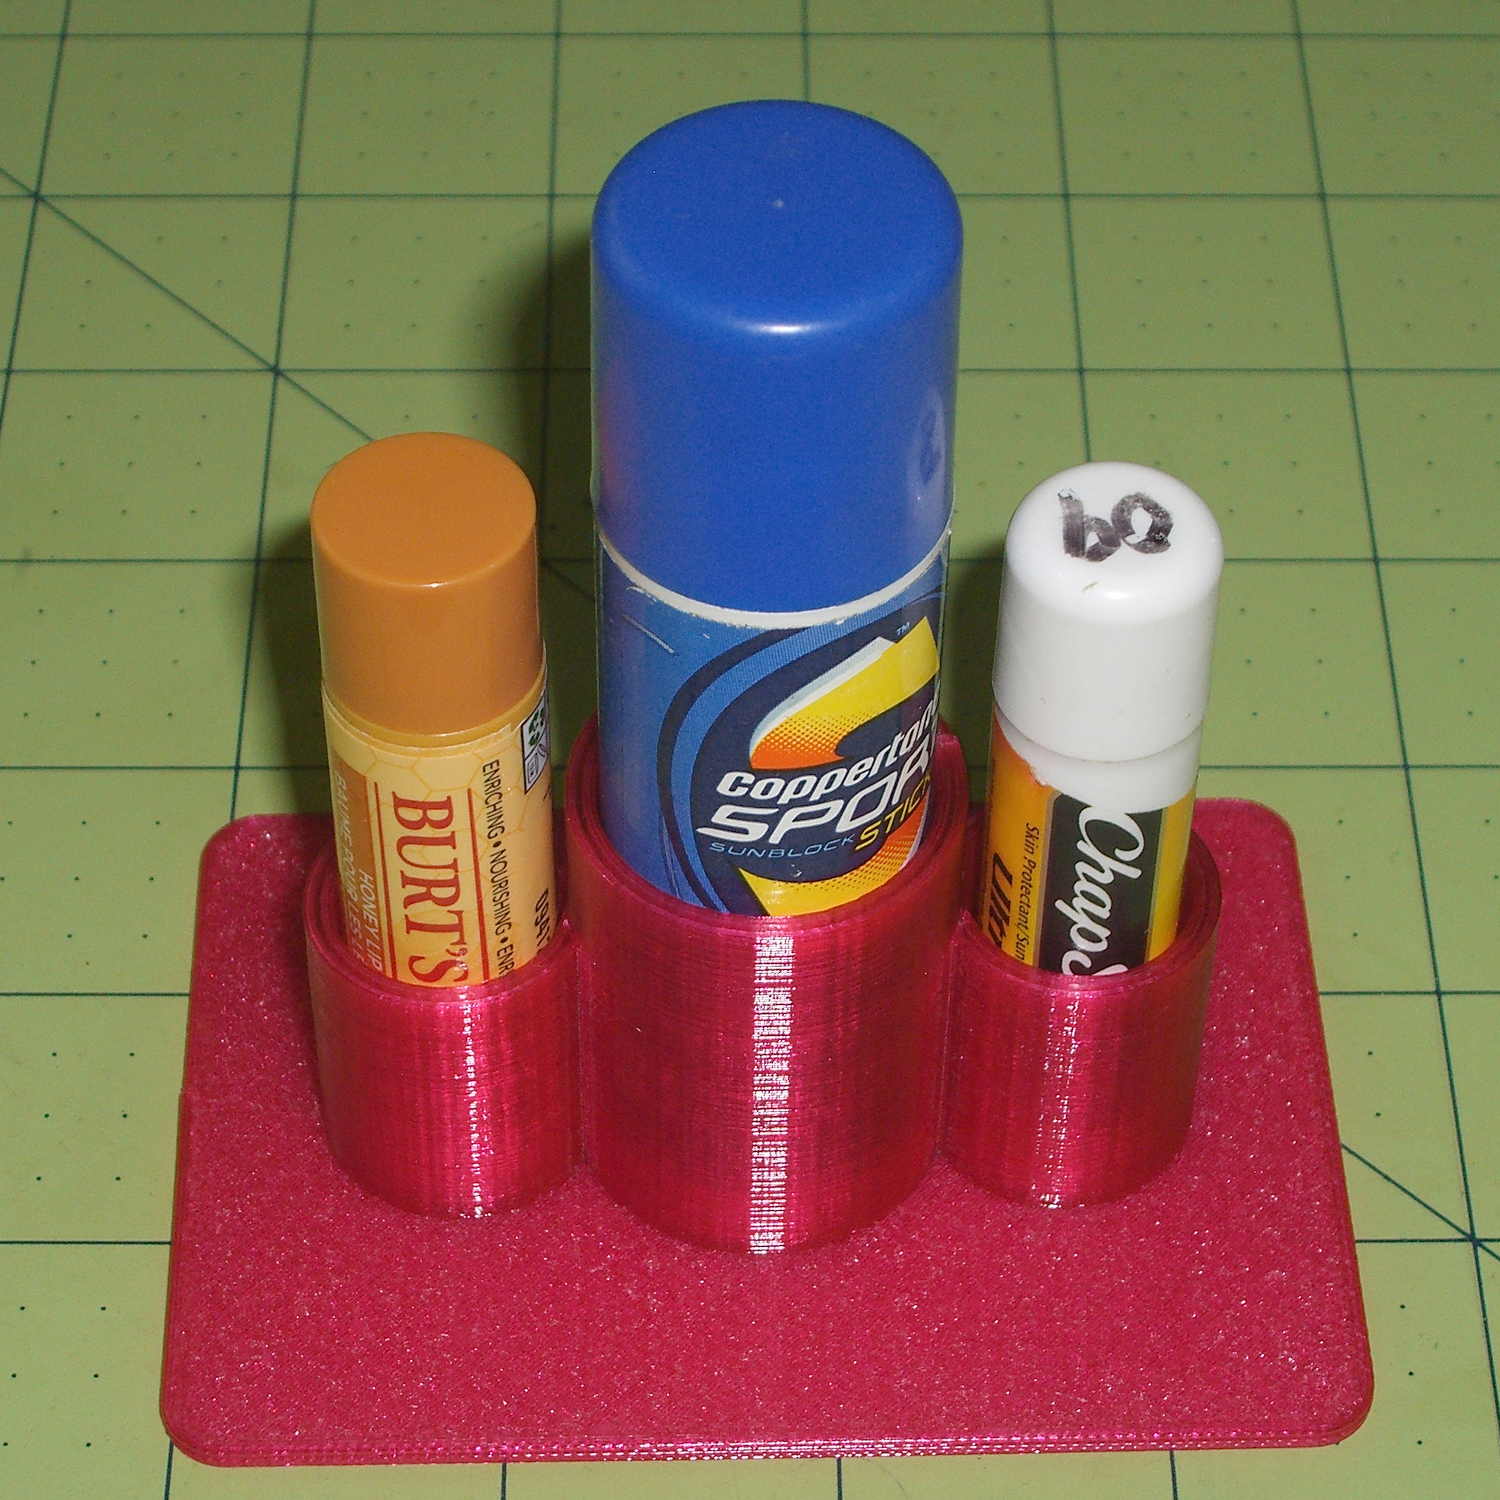
    It works exactly as you’d expect:

    Lip Balm Holder - in action
    Lip Balm Holder – in action

    That big stick in the middle is actually skin sunscreen, not lip balm; let’s not get all pedantic. The intent is to keep those cylinders from rolling off the shelf and falling into awkward locations, which this will do.

    The OpenSCAD source code is strictly from empirical:

    // Lip Balm Tube Holder
    // Ed Nisley KE4ZNU - July 2015
    
    //- Extrusion parameters - must match reality!
    
    ThreadThick = 0.25;
    ThreadWidth = 0.40;
    
    function IntegerMultiple(Size,Unit) = Unit * ceil(Size / Unit);
    
    Protrusion = 0.1;
    
    HoleWindage = 0.2;
    
    //------
    // Dimensions
    
    Tubes = [18,26];			// tube diameters plus clearance
    
    WallThick = 2.0;
    
    Plate = [1.5*(Tubes[1] + 2*Tubes[0]),2.5*Tubes[1],IntegerMultiple(2.0,ThreadThick)];
    PlateRound = 5.0;
    
    NumSides = 8*4;
    
    //- Build it
    
    	hull() {
    		for (i=[-1,1], j=[-1,1]) {
    			translate([i*(Plate[0]/2 - PlateRound),j*(Plate[1]/2 - PlateRound),0])
    				cylinder(r=PlateRound,h=Plate[2],$fn=NumSides);
    		}
    	}
    
    	translate([0,0,Plate[2]/2])
    		rotate(180/NumSides)
    			difference() {
    				cylinder(d=(Tubes[1] + 2*WallThick),h=1.5*Tubes[1],$fn=NumSides);
    				cylinder(d=Tubes[1],h=1.5*Tubes[1] + Protrusion,$fn=NumSides);
    			}
    
    	for (i=[-1,1])
    		translate([i*((Tubes[1] + Tubes[0])/2 + 1.0*WallThick),0,Plate[2]/2])
    			rotate(180/NumSides)
    				difference() {
    					cylinder(d=(Tubes[0] + 2*WallThick),h=1.5*Tubes[0],$fn=NumSides);
    					cylinder(d=Tubes[0],h=1.5*Tubes[0] + Protrusion,$fn=NumSides);
    			}