Ed Nisley's Blog: Shop notes, electronics, firmware, machinery, 3D printing, laser cuttery, and curiosities. Contents: 100% human thinking, 0% AI slop.
Category: Science
If you measure something often enough, it becomes science
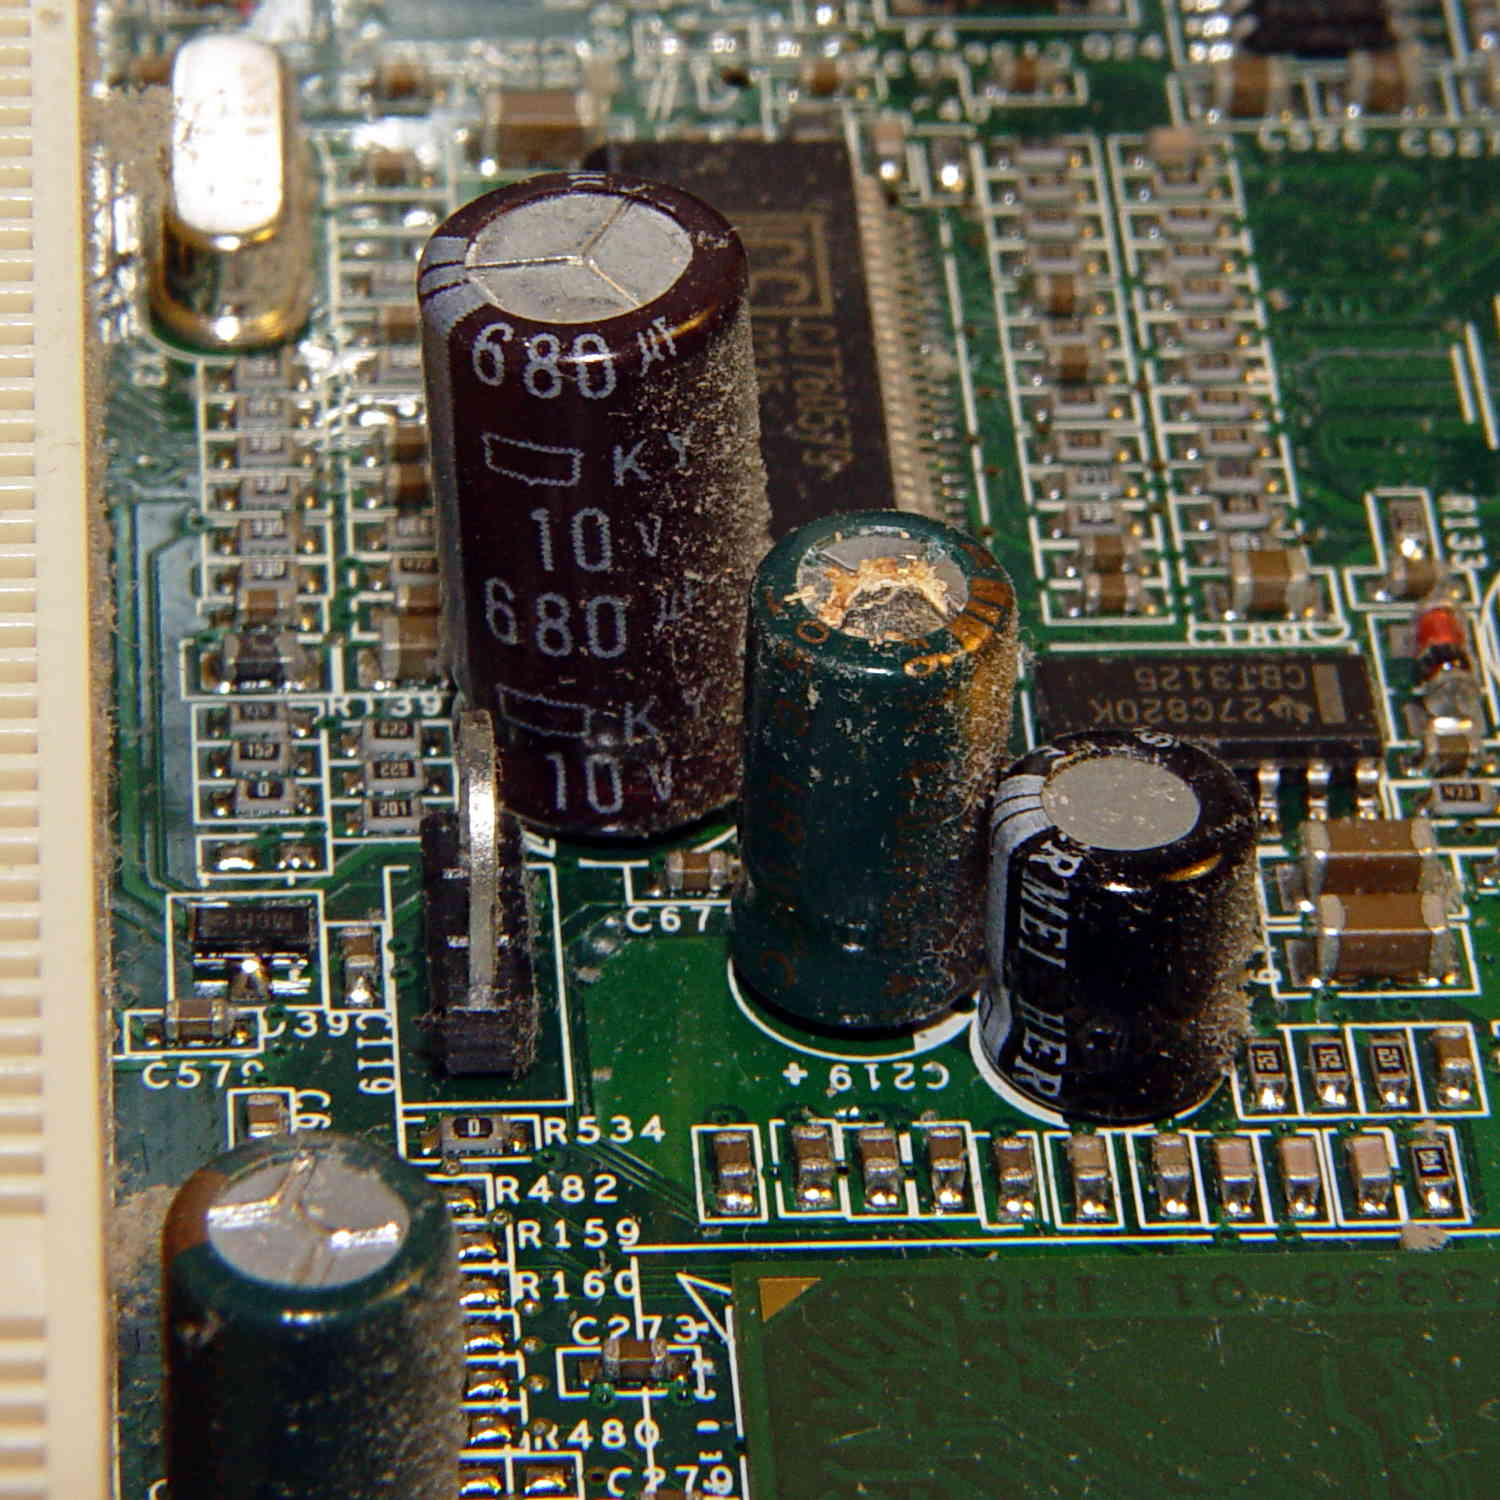
According to its Service Tag, this Dimension 2300 came off the line in late November 2002. All of the other caps on the board seemed OK, so apparently the plague affected just this lot of Hermei 470 µF 6.3 V capacitors.
Or, hey, they’re not supposed to last a dozen years and this is perfectly normal …
The humidity in the basement safe has been on the rise for the last few months:
Basement Safe Humidity
So I dumped all three bags of spent silica gel onto cookie sheets and baked them at 250 °F for a bit less than 12 hours overnight. As the (gas) oven temperature isn’t all that well regulated, I set it to 230 °F and hoped for the best. I have no way of knowing what the actual temperature was during the night.
The silica gel inside the bag from the safe weighed 583 g and the two bags that had been sitting in the basement air weighed 663 g. After baking, all three trays of beads weighed 496 g, slightly less than the 500 g direct from the factory-sealed cans.
The beads looked undamaged from their ordeal.
Two dozen scattered beads collected from the countertop and floor weighed 0.4 g, for an average weight of 0.017 g each. I definitely didn’t lose 12 g of beads during this adventure!
The translucent white beads vanish against an off-white laminate kitchen floor under ordinary lighting. They’re retroreflective enough that peering along the side of an LED flashlight lights them up; I’m pretty sure I got most of ’em.
Memo to Self: Next time, try 6 hours starting in the morning.
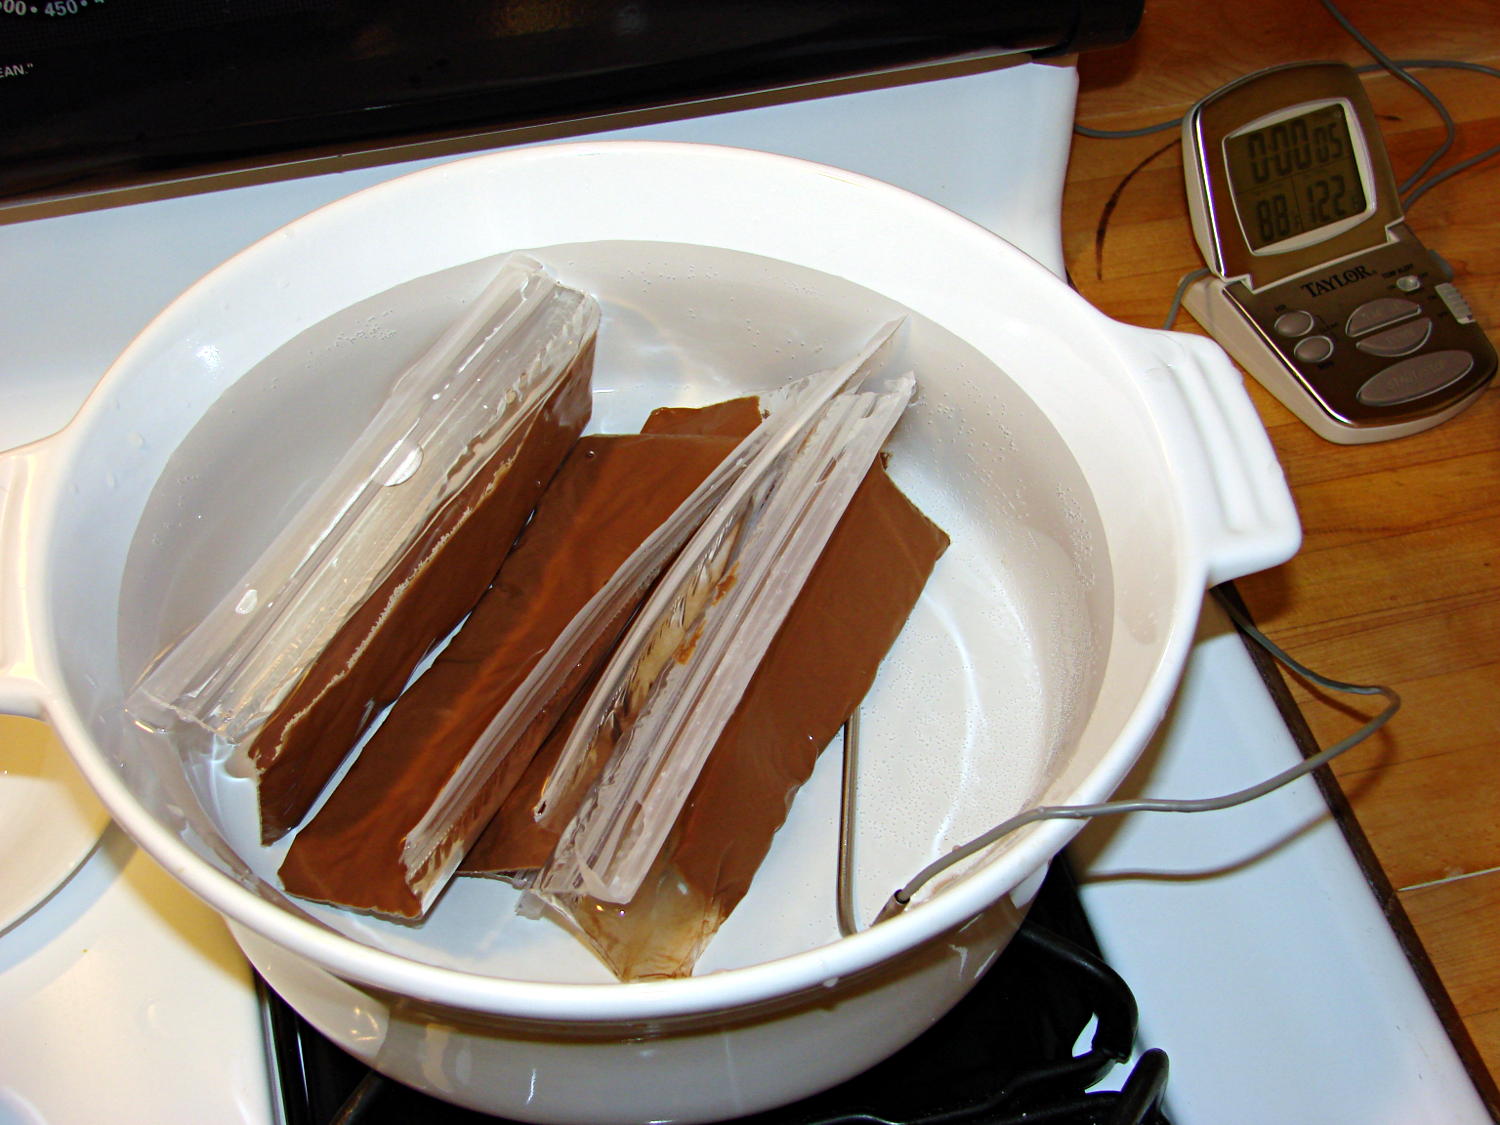
I’m producing more Tux chocolates with the 16 cavity silicone mold, so I dumped four bags (each with 50 g of chocolate chips) into a big pot of tepid water:
Milk Chocolate Bags – in Tempering Bath
I taped them closed to ensure the zip tops didn’t come unzipped while squeezing the chocolate, which worked out quite well: highly recommended.
Based on previous experience, I paid a bit more attention to the water temperature and kept it at 88±1 °F, transferring a cup or two at a time between this pot and the slightly hotter water (about 95 °F) in another pot. Although I’m sure a closed-loop sous vide bath would maintain tighter tolerances, I’m also sure that wouldn’t make any real difference in this operation.
I also wore thin white cotton gloves, in an attempt to prevent my hands from warming the chocolate above the proper temperature while squeezing the bags. That probably didn’t make any difference, because you must get pretty chummy with the bags and the gloves didn’t amount to much.
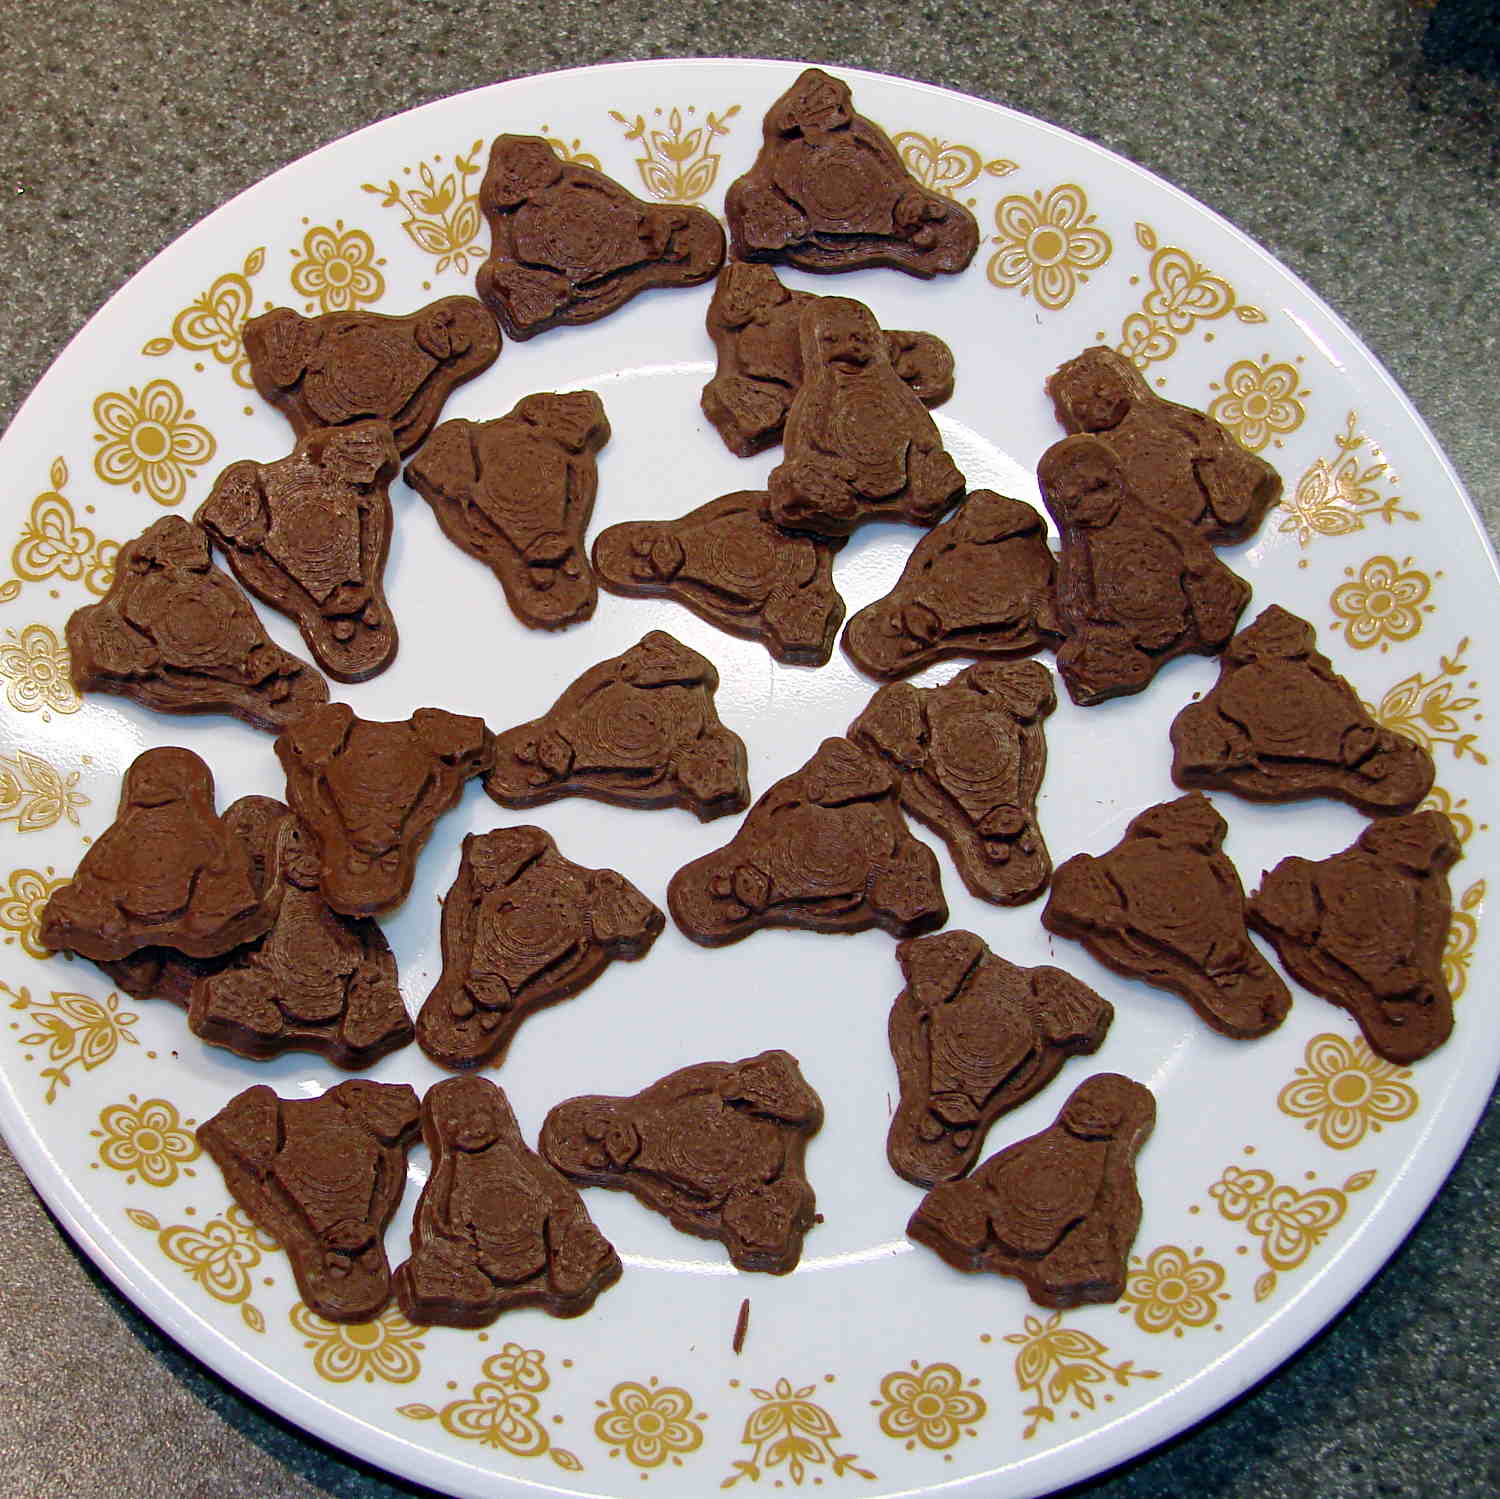
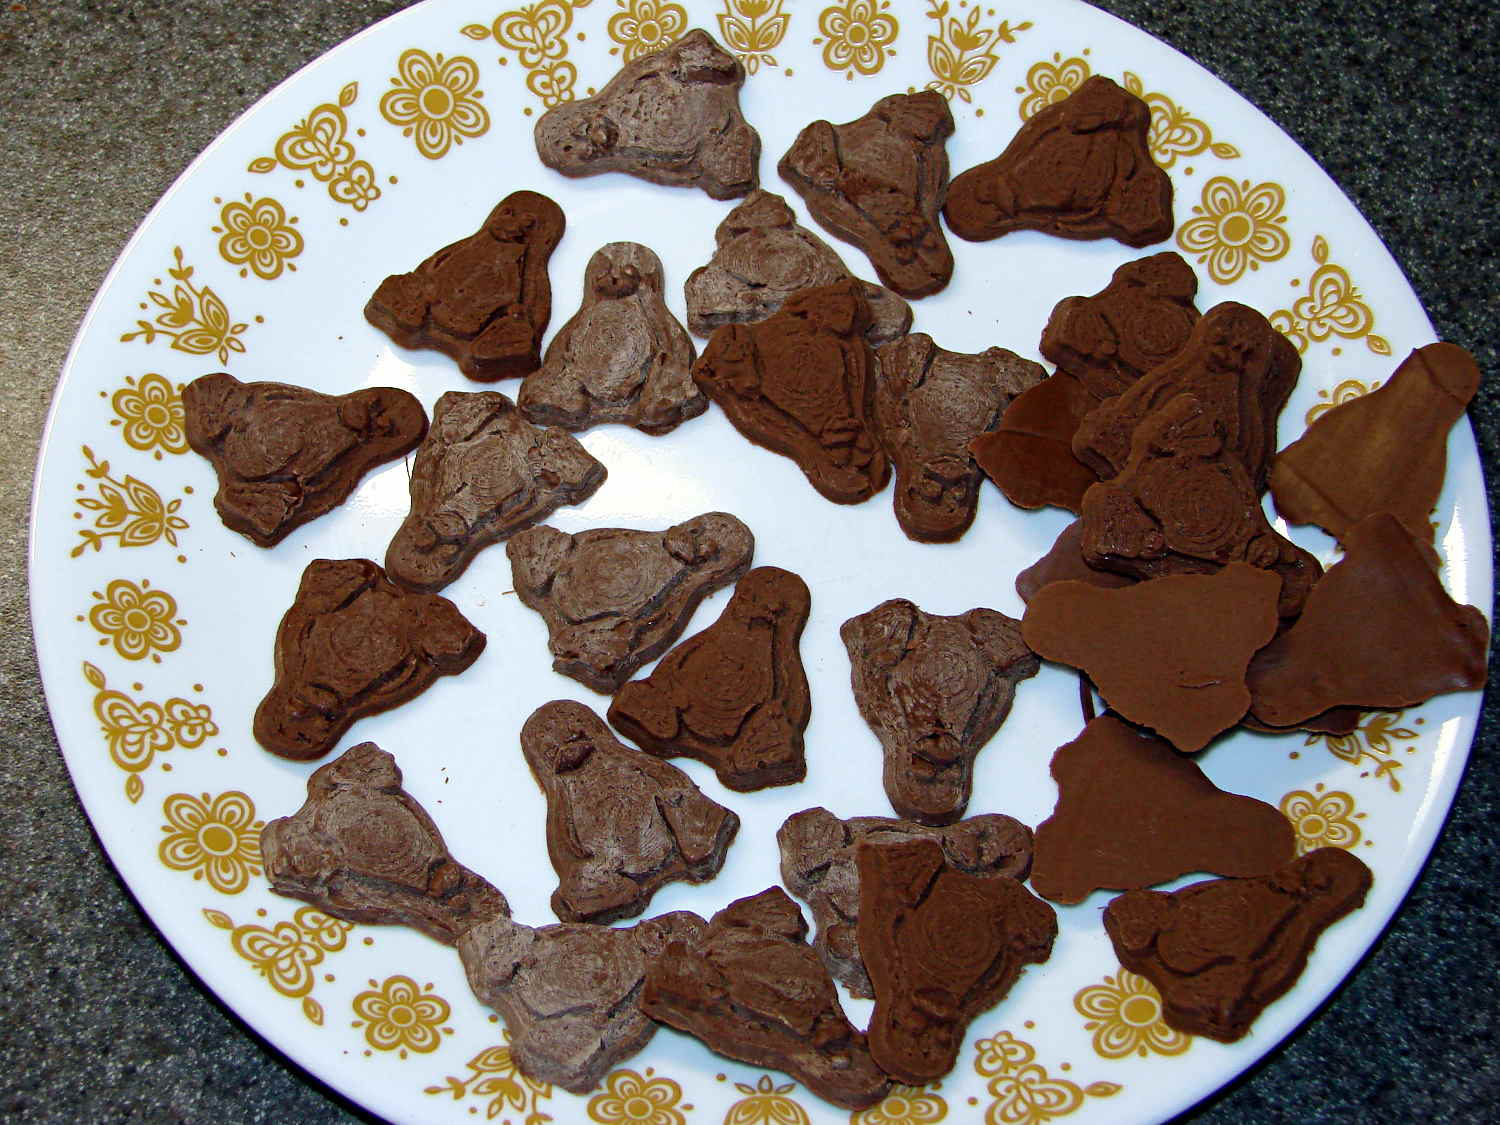
The results, just after extracting the second set of 16 chocolates (minus some, ah, shrinkage), looks pretty good:
Tux – Milk Chocolate – Batch 1
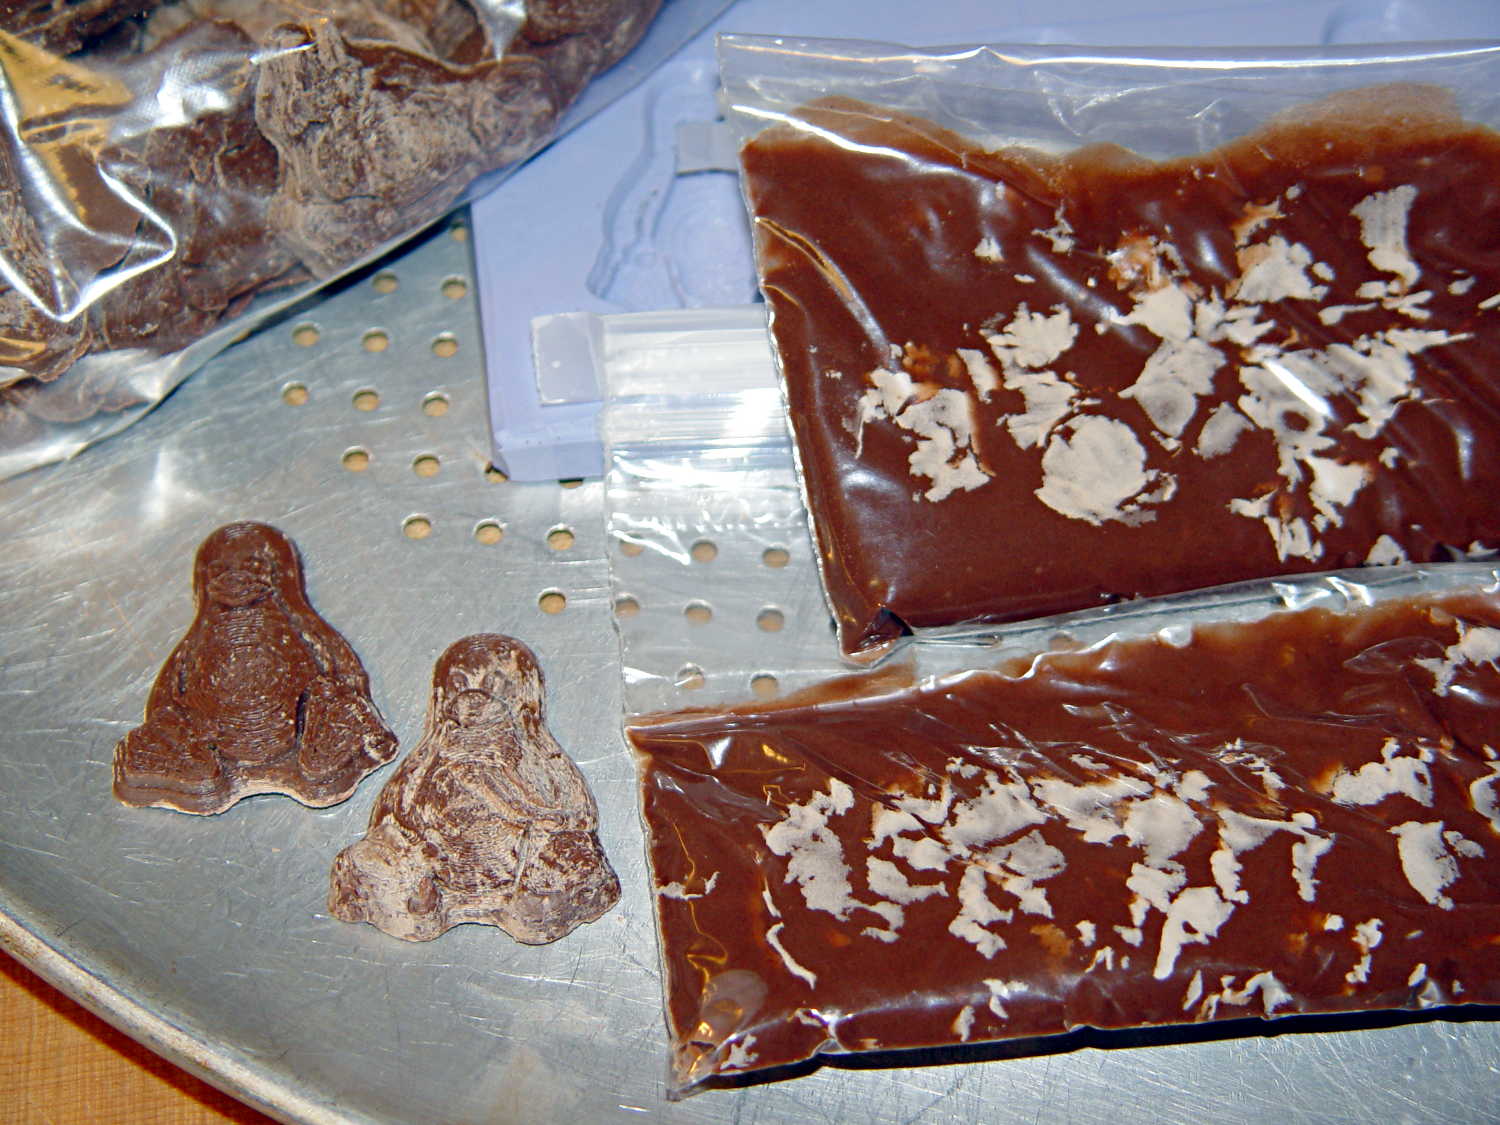
I called it quits for the evening, extracted the two unopened bags from the bath, and let them cool overnight. The next morning revealed an interesting sight:
Milk Chocolate Blooming – Tux and bags
Now, I’d kneaded all the bags to mash the melting chocolate chips together and squeeze out the air, but hadn’t done much more than that. The patches of white cocoa butter seem to correspond to individual chips within the melted mass, so it’s not entirely a temperature thing; I don’t see how to make an individual chip hotter (or colder) than everything else in the bag.
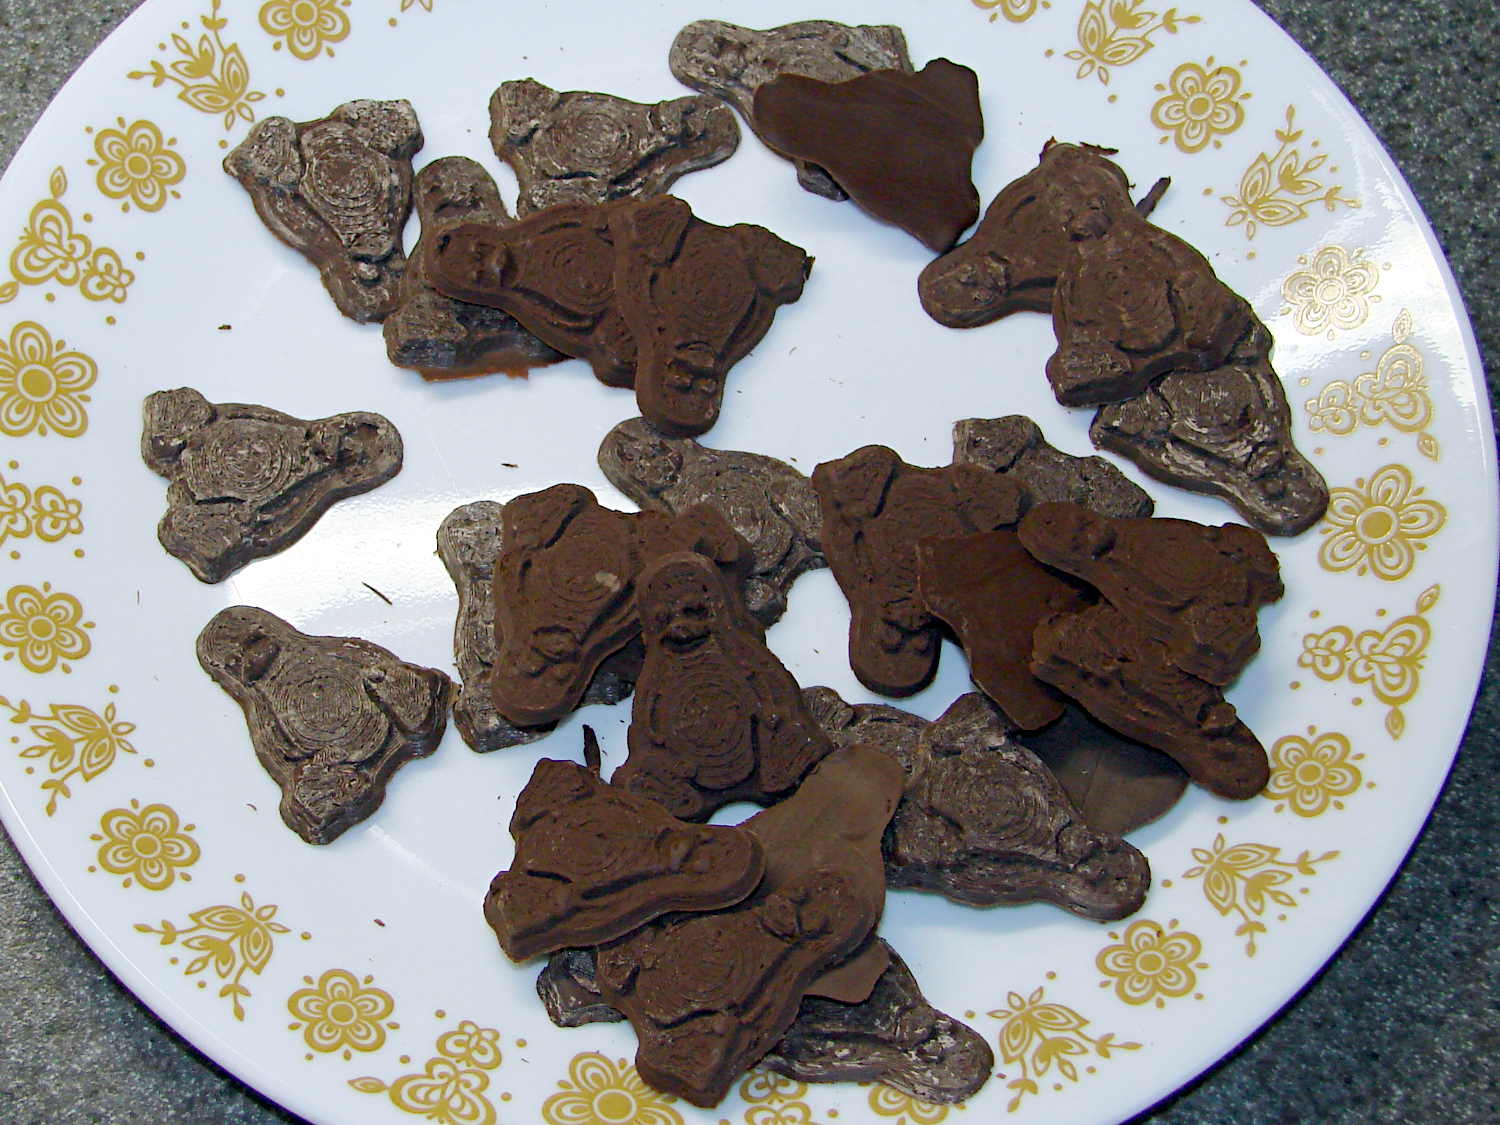
Remelting those two bags the next morning produced these Tuxen, with the very brown ones having just emerged from the mold:
Tux – Milk Chocolate – Batch 2
The proper temperature for dark chocolate is about two degrees higher than for milk chocolate, so I boosted the water bath from 88 °F to 90 °F and dropped in four bags of dark chocolate chips.
At those low temperatures, the chocolate resembles putty, rather than honey, and requires firm pressure on the bags. I think the close contact with my fingers, even with gloves, raises the temperature too much; the chocolate isn’t untempered (I think that’s the right word; “distempered” sounds much more ominous), but it may be more prone to blooming.
Thinking that the silicone mold might chill the chocolate too rapidly, I put a warming pad under the aluminum pizza pad, brought the silicone slab up to about 85 °F, and found that the chocolate molded much more readily. Cooling the mold to 72 °F, just over room temperature, took quite a while.
The first dark chocolate Tuxen were already blooming when the second set emerged:
Tux – Dark Chocolate – Batch 1
I tried cooling the mold by putting a damp towel under the pizza pan, with equivocal results: the last two sets of dark chocolate bloomed about as rapidly as the first.
It is, perhaps, significant, that the blooming seems confined to the chocolate surfaces in contact with the mold. The flat back surface of each Tux remains in good condition, which suggests that the mold temperature is more critical than I expect.
So my process, such as it is, doesn’t produce good results. Obviously, I need more practice…
Actually, with the advice & consent of my health-care provider (back in the day, we called them “doctors”), I’m titrating melatonin doses to see whether it has any effect on my wake-up-and-toss-and-turn. The pharmacology seems dubious, at best, but the stuff doesn’t appear to have any amusing side effects.
We’re both well aware that you can’t run a blinded experiment on yourself and that the placebo effect confounds null results.
I picked up some 10 mg melatonin in donkey-choking Size 00 capsules, then (lacking a balance with sub-0.1 mg resolution) cut it down using the drug-addict razor-blade-on-glass trick. I can easily do power-of-two divisions, cross-check by eyeballing the capsule fill, and assume the resulting accuracy will be Good Enough.
Useful ratios to get 8 cut-down capsules, starting with the indicated number of 10 mg capsules:
1.25 mg = 1 x 10 mg/8
2.5 mg = 2 x 10 mg/8
3.75 mg = 3 x 10 mg/8
5.0 mg = 4 x 10 mg/8
6.25 mg = 5 x 10 mg/8
7.5 mg = 6 x 10 mg/8
8.75 mg = 7 x 10 mg/8
In principle, those capsules are US-made, kosher, halal, and blah blah blah. They’re a third the price of the local health-food store’s offerings: Size 00, Size 0, and Size 2 (out of stock) capsules. I hope that a bag of 500 isn’t a lifetime supply…
A capsule size chart, swiped directly from one of the eBay suppliers, so I can find it again:
Gelatin Capsule Sizes
Cutting 10 mg retail capsules down to 5 mg shows there’s about 320 mg of powder inside: 5 mg requires 1 + 1/8 Size 4 capsules.
If you’re interested in debating homeopathy, do it somewhere else; it has no physical or clinical basis.
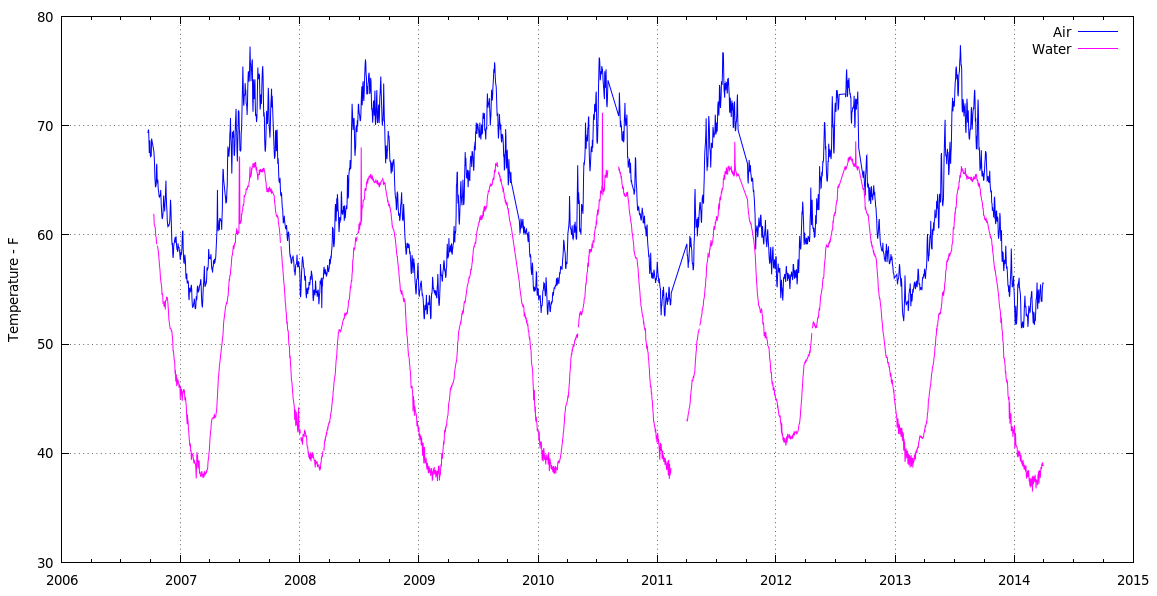
Basement Air Groundwater Minimum Temperatures – 2006-2014
Much as we thought, this past winter was really cold.
The data consists of all 3/4 million data logger records concatenated into one huge CSV file, fed through a Sed pipe to normalize all the dates & suchlike, then passed into a Python script that produces one record for each day (all 2561 of ’em) containing the date, minimum air & water temperatures, and the minimum relative humidity.
This needs (a lot) more work to be pretty, but at least the pieces hang together.
The Python source code:
#!/usr/bin/python3
''' Extract minimum groundwater / air temperatures & humidity from CSV files
'''

import sys
import csv
import datetime
import string

# Columns in Hobo datalogger CSV file

SEQNUM = 0
DATETIME = 1
AIRTEMP = 2
RELHUM = 3
WATERTEMP = 4

datapoints = {}

with open('AllClean.csv',encoding='iso-8859-15') as dbi:
    for row in csv.reader(dbi):
        if (not row[SEQNUM].startswith("#")):            # discard comments
            logdt = datetime.datetime.strptime(row[DATETIME],'%m/%d/%Y %H:%M:%S')
            logdate = datetime.datetime.date(logdt)
            if (logdate in datapoints):             # accumulate minimum temps & RH
                datapoints[logdate][0] = min(datapoints[logdate][0],row[AIRTEMP])
                datapoints[logdate][1] = min(datapoints[logdate][1],row[RELHUM])
                datapoints[logdate][2] = min(datapoints[logdate][2],row[WATERTEMP])
            else:
                datapoints[logdate] = [row[AIRTEMP], row[RELHUM], row[WATERTEMP]]

with open('AllMinData.csv','w',newline='') as csvf:
    dbo = csv.writer(csvf)
    dbo.writerow(('#Date','Min Air T','Min RH','Min Water T'))
    for key,value in sorted(datapoints.items()):
        dbo.writerow([key,value[0],value[1],value[2]])
The encoding='iso-8859-15' for the input file turns out to be absolutely essential, as the Hoboware program generating the CSV files uses a 0xb0 character for the usual degree symbol. Alas, that chokes the default utf-8, ascii, and even cp437codecs. Took a while to figure that out, it did, indeed.
There remain random anomalies in the data, in addition to the glitches produced by unplugging the remote temperature sensor cable. I may simply discard the last few records of each CSV file; right now, the Gnuplot code simply ignores temperatures under 30 °F and over 80 °F.
The Gnuplot script that produced the graph consisted of some hand-fed tweakery based on the guts of the routine that plotted the original records, with the output image bank-shotting off the clipboard into GIMP on its way to becoming a PNG file. Phew!
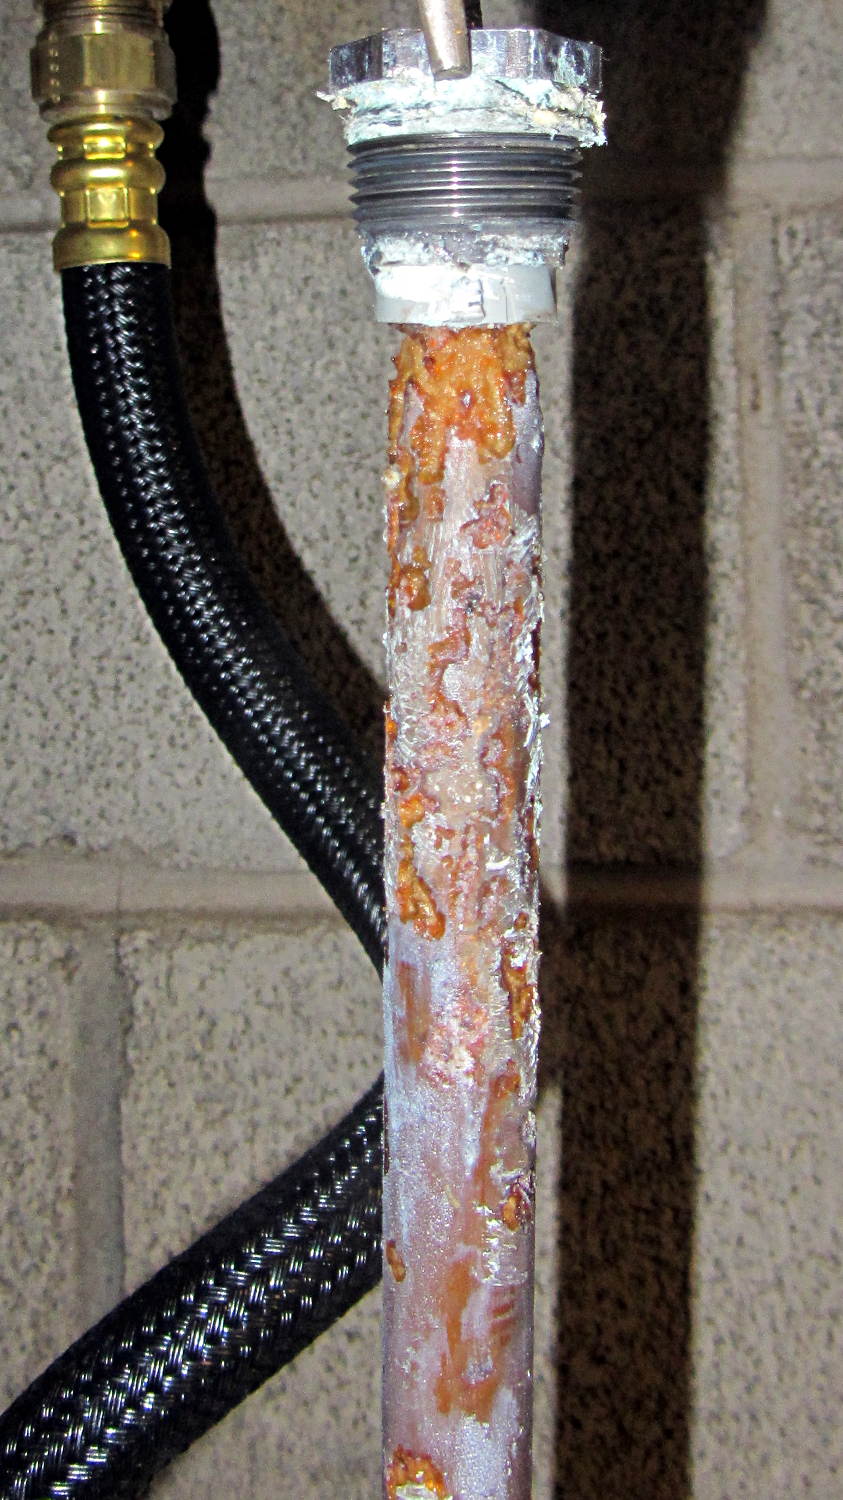
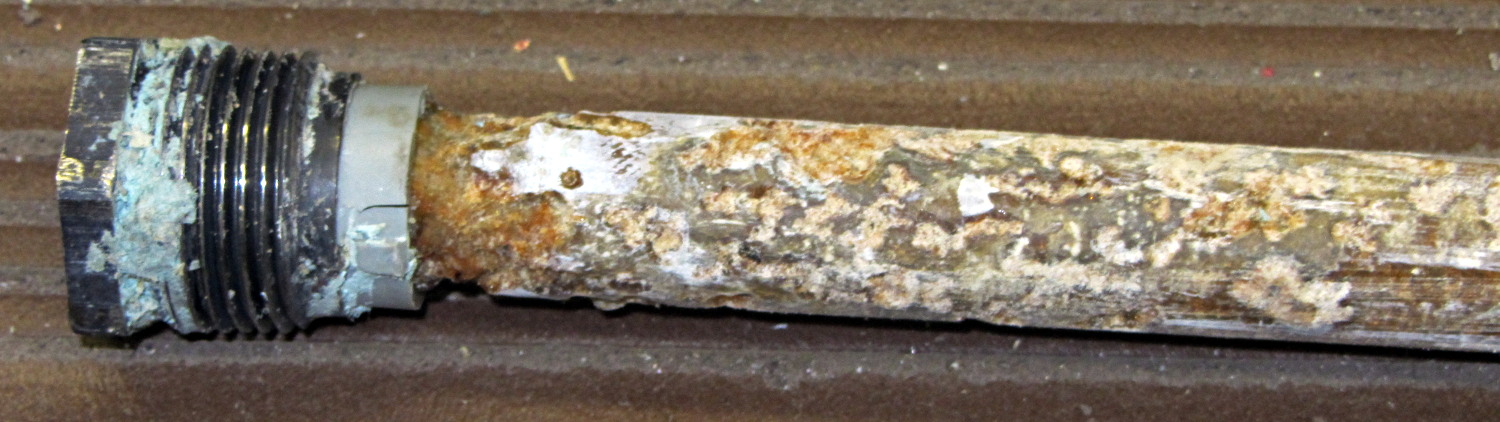
The Whirlpool water heater anode rod is corroding nicely:
Whirlpool anode rod – 2014-04
The new GE water heater anode rod seems to be passivating:
GE anode rod – coated – 2014-04
There’s some corrosion up near the bolt head, so it’s not entirely asleep:
GE anode rod – bolt – 2014-04
I hammered the coating off the rod, scuffed the shiny parts with coarse sandpaper, wiped off the dust, and stuck it back in its socket. We’ll see what it looks like next year.
Both tanks flushed nicely without too much sediment.
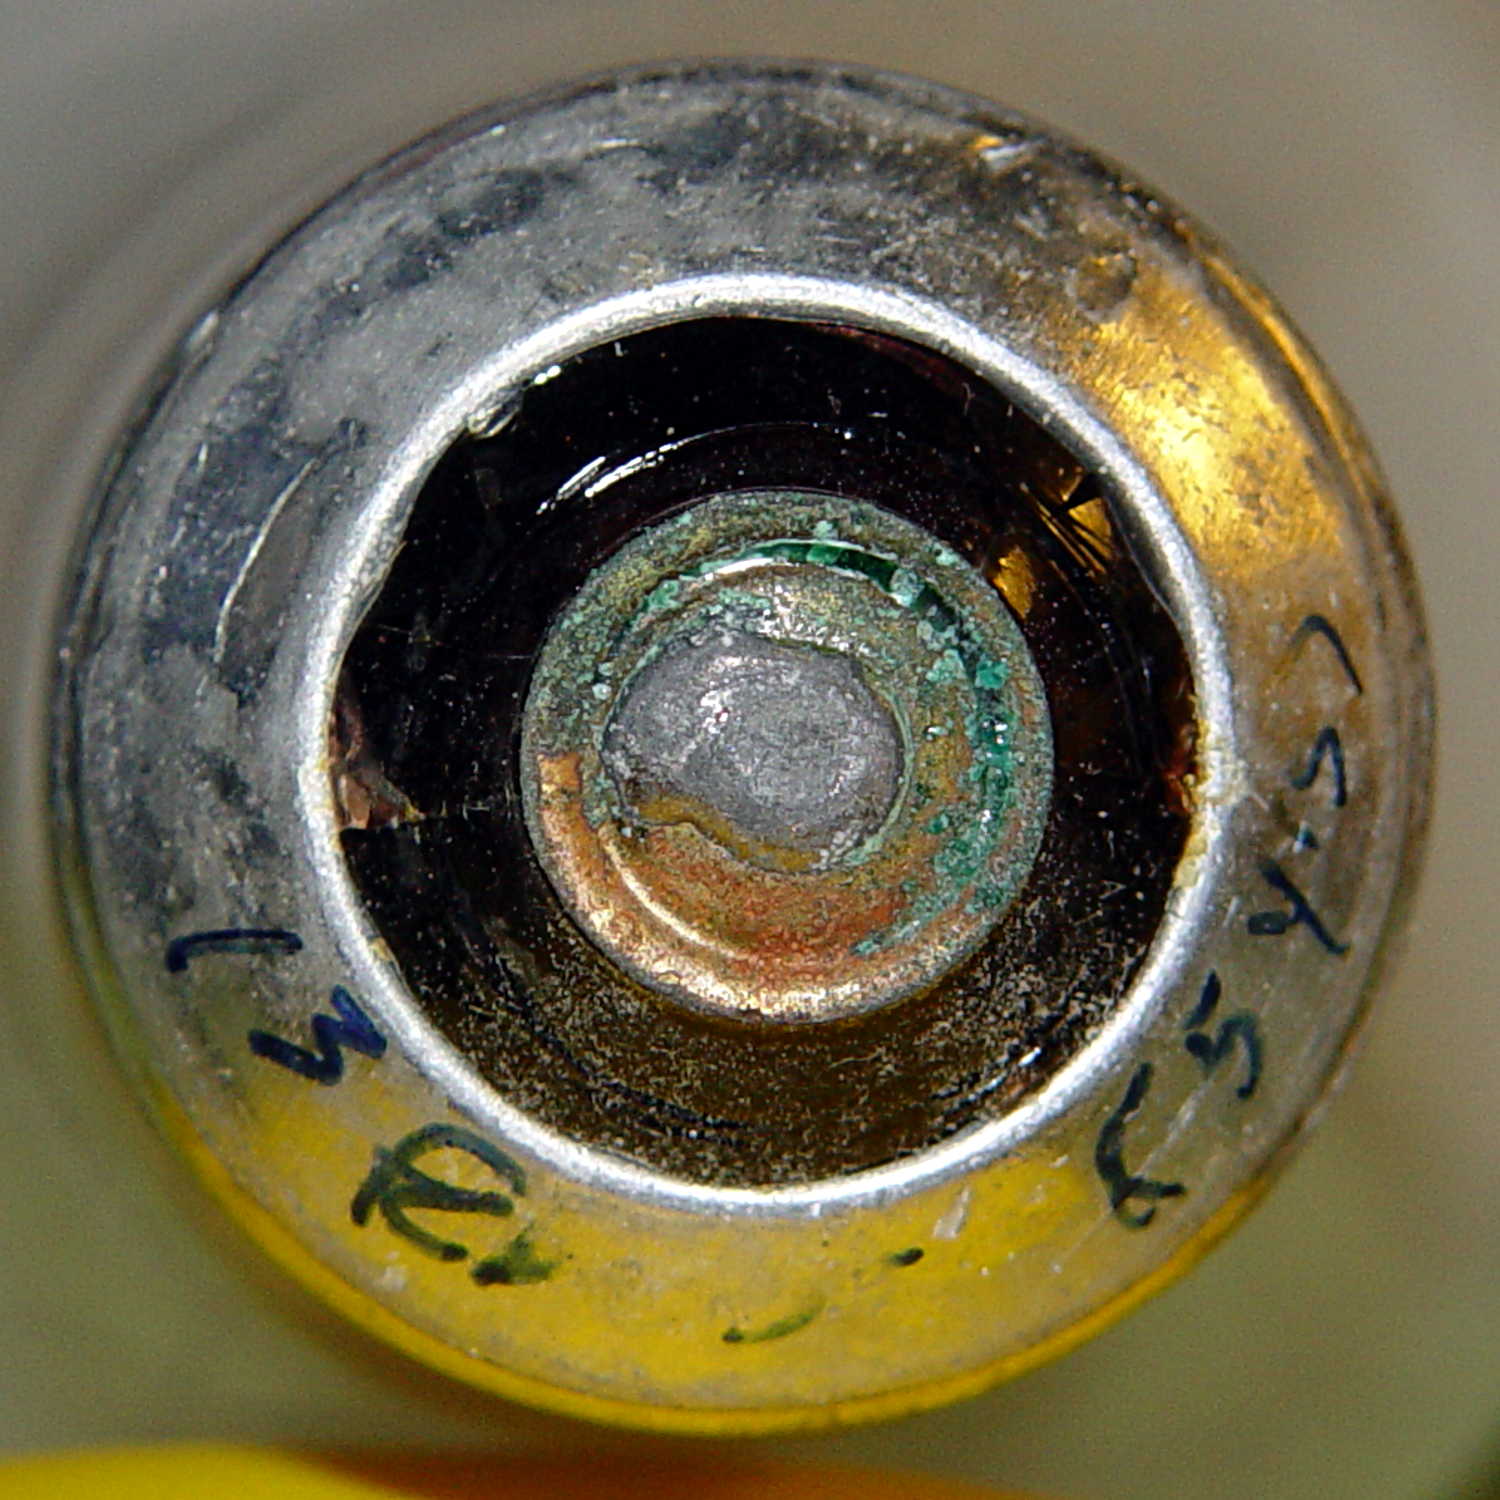
Two 40 W incandescent bulbs in the front bathroom burned out within a few days of each other. Being that type of guy, I know that I installed this bulb nine years ago:
Bulb base – install date
The date is easier to read with the bulb in hand: 13 Feb 05. The (5 yrs) indicates the previous bulb in that socket lasted five years.
The other bulb date went in during March 09, so it survived only five years; the previous bulb lasted 6 years.
Even though 40 W incandescent bulbs are history, maybe I have enough spares on the shelf that the next owner can replace ’em with cheap LEDs.
This may not be science, but it does have numbers…