Ed Nisley's Blog: Shop notes, electronics, firmware, machinery, 3D printing, laser cuttery, and curiosities. Contents: 100% human thinking, 0% AI slop.
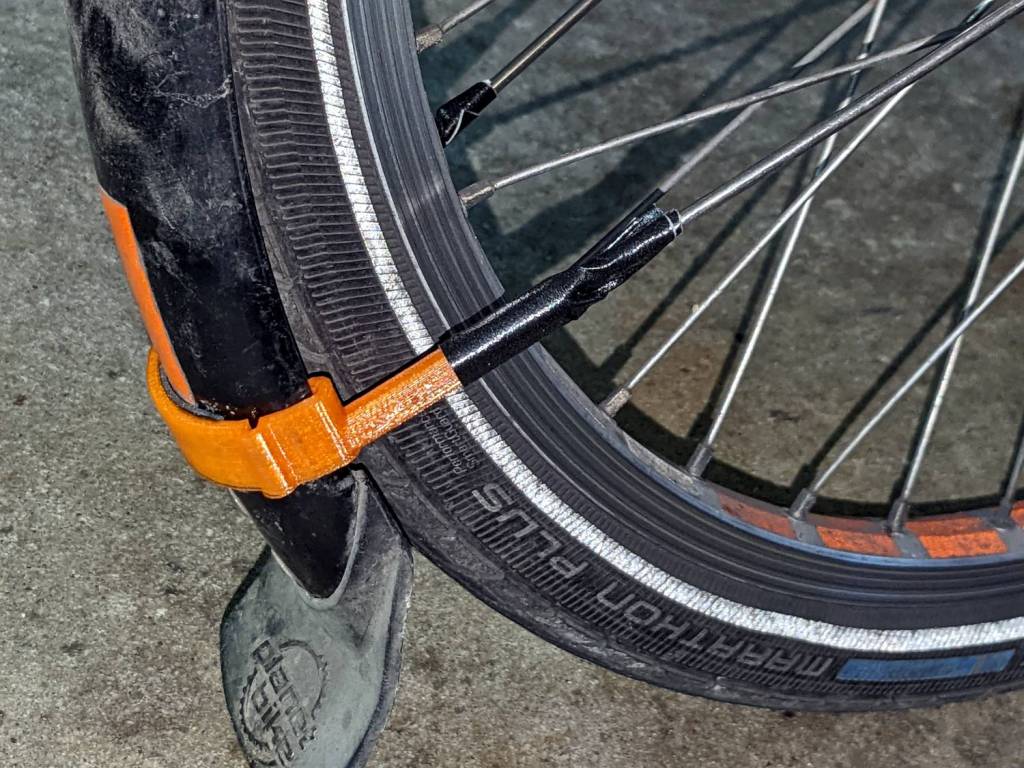
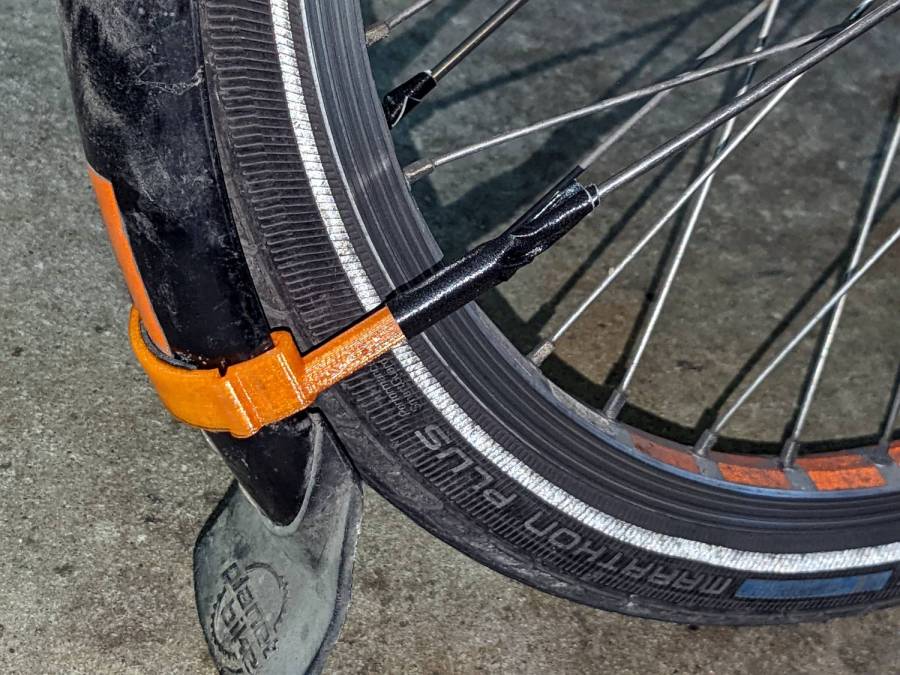
The mudflap on my front fender rides low enough to snag on obstacles and the most recent incident (about which more later) was a doozy, breaking the left strut ferrule and pulling the bracket off its double-sticky foam tape attachment. Fortunately, the repair kit now has plenty of duct tape.
Every now and again, an upshift to the large chainring on my Tour Easy would go awry and drop the chain off the outside, where it would sometimes jam between the pedal crank and the spider. In the worst case the flailing chain would also jam in the TerraCycle idler, but I fixed that a while ago.
Contemporary chainrings (i.e., anything made since the trailing decades of the last millennium) generally have a chain drop pin positioned against the crank specifically to prevent such chain jamming.
Making a chain drop pin is no big deal if you’ve got a lathe and an M4 tap:
Tour Easy – DIY Chain Drop pin
A closer look:
Tour Easy – DIY Chain Drop pin – detail
That’s a 10 mm length of 5/16 inch brass rod drilled with a recess to fit the head of a 10 mm M4 socket-head cap screw.
The pin should be a micro-smidgen shorter, as it just touches the crank, but, if anything, moving the chainring inward by one micro-smidgen improved the upshifts and I’m inclined to go with the flow.
A little more than two years after replacing its internal battery, the SJCAM M20 camera on my Tour Easy once again wouldn’t last to the end of the driveway if I forgot to turn on the external battery pack. This time around, the camera was so firmly jammed in the printed seat frame mount that I had to cut the mount apart.
Yup, that puppy is all swoll up:
SJCAM M20 swollen battery – side view
Poor thing looks like a tiny pillow:
SJCAM M20 swollen battery – pouch
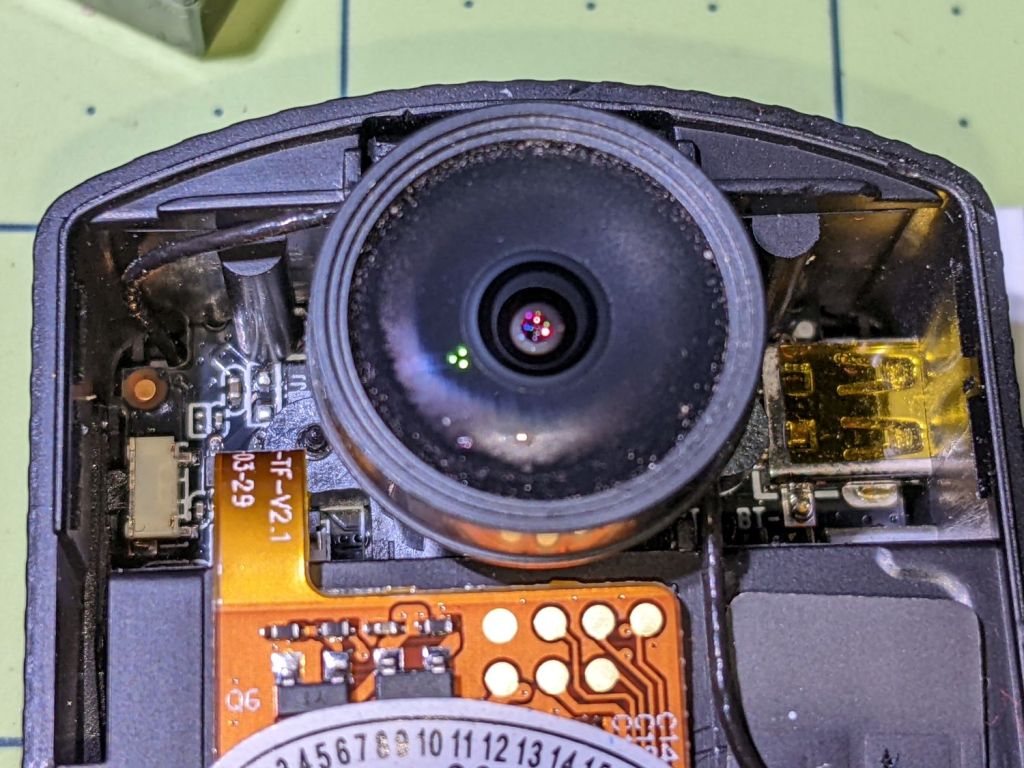
While I had it apart, I tried to clean / refurbish the button contacts on the top. Unfortunately, they’re pretty well buried in the camera frame and I was unwilling to dismantle the optics, remove the display, and gut the camera to find out if they were more accessible from the back surface:
SJCAM M20 – switch internals
While all that was going on, I ran off a new mount in white PETG:
SJCAM M20 – white case installed
I’m down to the last battery. The “4.35V” on the pillow indicates they’re special high-voltage lithium-polymer cells, so I can’t just drop a random lithium pouch cell in there and expect it to Just Work.
I think the “782633” is the cell size, so, if I were willing to have a few thousand on the shelf, a 552525 pouch might fit. The reduced capacity wouldn’t be a problem, as it must just keep the camera’s clock ticking between rides.
Over the course of a few days, my Tour Easy recumbent developed a slight squeak that turned into a definite creak, then the seat started shifting slightly under hill-climbing forces. Of course, no force I could apply in the garage caused the slightest squeak / creak / motion. A decade ago this was due to a sheared screw at the dropout, but everything seemed to be in good order.
So I applied a drop of penetrating oil to each of the many joints in the seat hardware, went on a few more rides, and eventually the seat started moving with normal pedaling forces.
The left strut clamp looked fine:
Tour Easy seat stay – left side
OK, it looks grubby. I’d rather ride than lick my bike clean.
The right clamp definitely showed signs of motion:
Tour Easy seat stay – right side slip
I extracted the strut assembly, degreased the clamps, reinstalled in reverse order, replaced the nuts, snugged everything down, and it’s all good again:
Tour Easy seat stay – renutted
Yeah, I should have replaced those screws, but I didn’t even have to take the wheel off, sooooo …
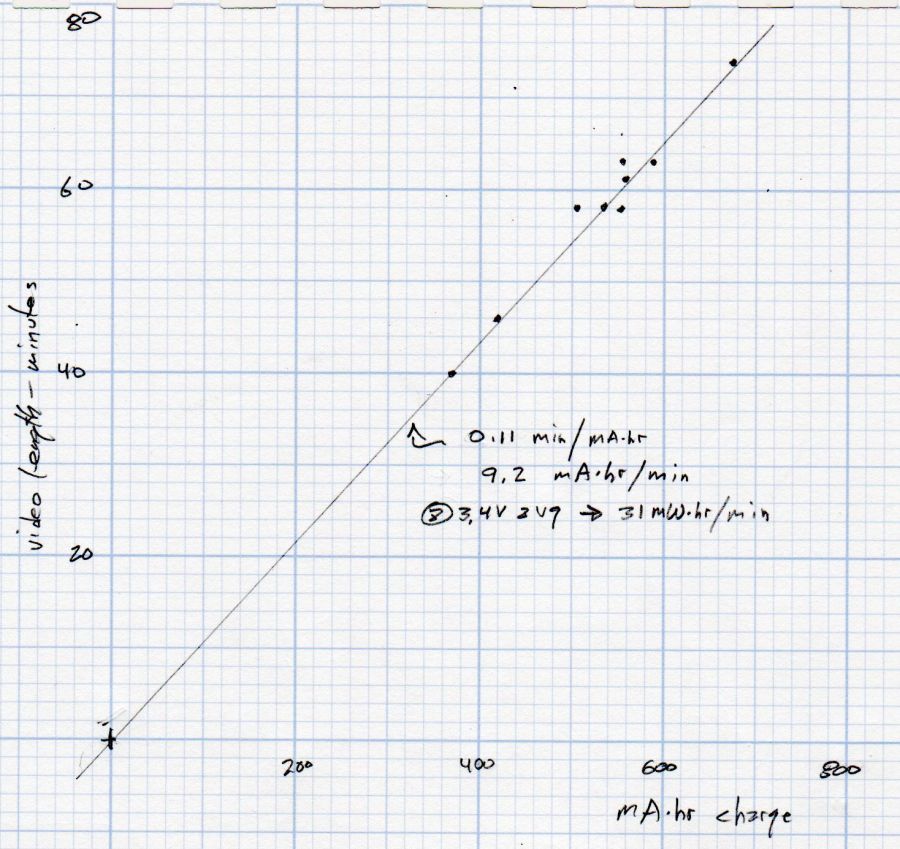
Having run the Newmowa NP-BX1 batteries through my old Sony HDR-AS30V helmet camera a few times, a plot seemed in order:
Newmowa NP-BX1 video duration vs charge
The cluster of dots shows most of our rides last about an hour.
The line is an eyeballometrical fit, slightly coerced to pass through the origin because that’s where it should go.
The 9.1 mA·hr/min slope is in reasonable agreement with past results, given different batteries and charger. The Keweisi meter emerged first from the box.
Straining the hr/min dimensional nonsense out of the slope suggests the camera averages 550 mA and 1.9 W. Derating those by a few percent to account for the recharge efficiency might be in order, but they’re surely in the right ballpark.
In round numbers, the total capacity declined from 3.25 W·hr to 2.5 W·hr, which means a single battery can’t quite power the camera for the duration of our normal hour-long rides. I do not know what voltage trips the camera’s decision, but the batteries definitely shut down sooner.
So, based on their previous track record, I bought another quartet of Batmax batteries. Being that type of guy, I tested both the old (2020) and new (2022) sets:
NP-BX1 – BatMax 2022 vs 2020 – used-new
The blue traces are the C/D batteries from the as-new tests back in early 2020, the green traces are C/D after two years of use, and the red traces are the “new” quartet after their first charge in the Official BatMax Charger.
It looks very much like BatMax is selling used batteries repackaged as new items, because they are indistinguishable from my used ones. They definitely are not the “Premium Grade A cells” touted in the description.
I returned them for a refund and sent the test results to BatMax; they sent “new replacements” even though I said I would not pay for any future shipments. The batteries had a slightly different wrapper, but the test results were still indistinguishable from used batteries. I offered to return the package and was told that would not be needed.
It seems three good batteries now cost about as much as four crap batteries, under the reasonable assumption chargers are essentially free.
Three batteries isn’t quite enough for my usual rotation and, for unknown reasons, one cannot buy only batteries, so in short order I will have two chargers and six batteries.
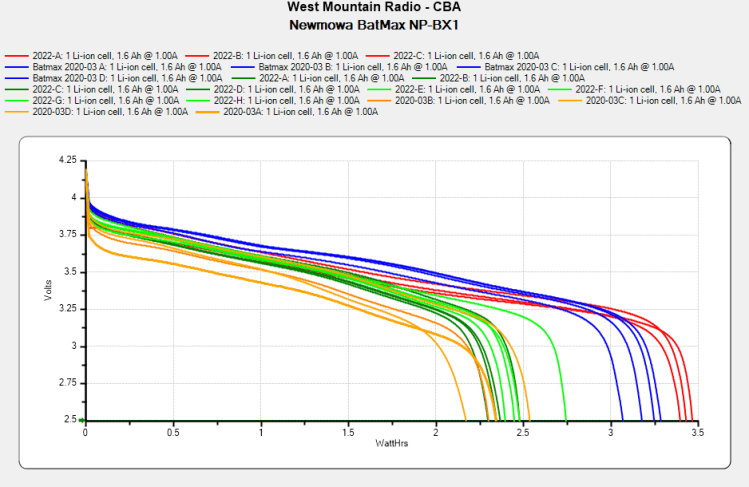
The consolidated test results:
NP-BX1 – Newmowa Batmax 2022 comparison
The color code:
Newmowa: red
BatMax 2020 new: blue
BatMax 2020 used: orange
BatMax 2022 new: green + lime
I stopped writing Amazon reviews after having a few detailed-writeups-with-graphs rejected for the usual unspecified reasons. As the Finn put it, “You wanna download, you know the access code already.”