Ed Nisley's Blog: Shop notes, electronics, firmware, machinery, 3D printing, laser cuttery, and curiosities. Contents: 100% human thinking, 0% AI slop.
My original idea for the APRS + voice gadget was a snap-in battery pack replacement holding the circuit boards and connected to an external battery pack. A trio of deadWouxun radios, plus the ready availability of 18650 lithium cells, suggested putting two cells in the backpack, along with the circuitry, and skipping the external pack.
The grid is parallel to the case body and centered left-to-right, with a Y grid line set at the front face of the pack, where it’s also flush with the lid surface. You can read off the coordinates of all the points, feed them into your CAD model, and maybe, with a bit of care, get something 3D-print-able.
Haven’t used it yet, but it’s bound to come in handy at some point.
Separately charging all four cells from the Baofeng BL-5 packs covered the Electronics Bench with wires:
Baofeng BL-5 cell charging
The cell sits on a ceramic tile as a nod to fire safety, although I doubt it makes any difference.
The discharge tests showed two nearly identical pairs:
Baofeng BL-5 Cells – Separate Charge – 2018-02-24
Surprisingly, cells A and B (upper traces) were deaders in the original packs. Cells C and D (lower traces) were more-or-less fully charged, but now have a lower terminal voltage and slightly lower capacity. I have no explanation for that, nor for the voltage undulations.
The rebuilt packs pair up A+B and C+D.
Reassembling pairs into the pack shell and resoldering all the leads produces a good pack:
Baofeng BL-5 battery rebuild
I later added a snippet of heavy manila paper under the nickel tape bent around the edge of the pack as a third level of insulation, in the interest of having the nickel tape not produce a dead short between the isolated – terminal and the + cell case.
Memo to Self: tape the long wiggly leads from the protection PCB to the radio contacts (at the left side) before soldering the PCB to the cell terminals, because an inadvertent short will convert the 8205A battery protection IC into a Light-Emitting IC, at least for a moment, and subsequently release the Acrid Smell of Electrical Death. A handful of charge PCBs are en route halfway around the planet, from which I intend to liberate one IC for this board; with luck, I didn’t incinerate anything else.
The pack works fine in the radio, as does the APRS interface:
APRS Coverage in Poughkeepsie – 2018-03-01
Unfortunately, two APRS iGates vanished in the last year, leaving poor coverage south of Poughkeepsie.
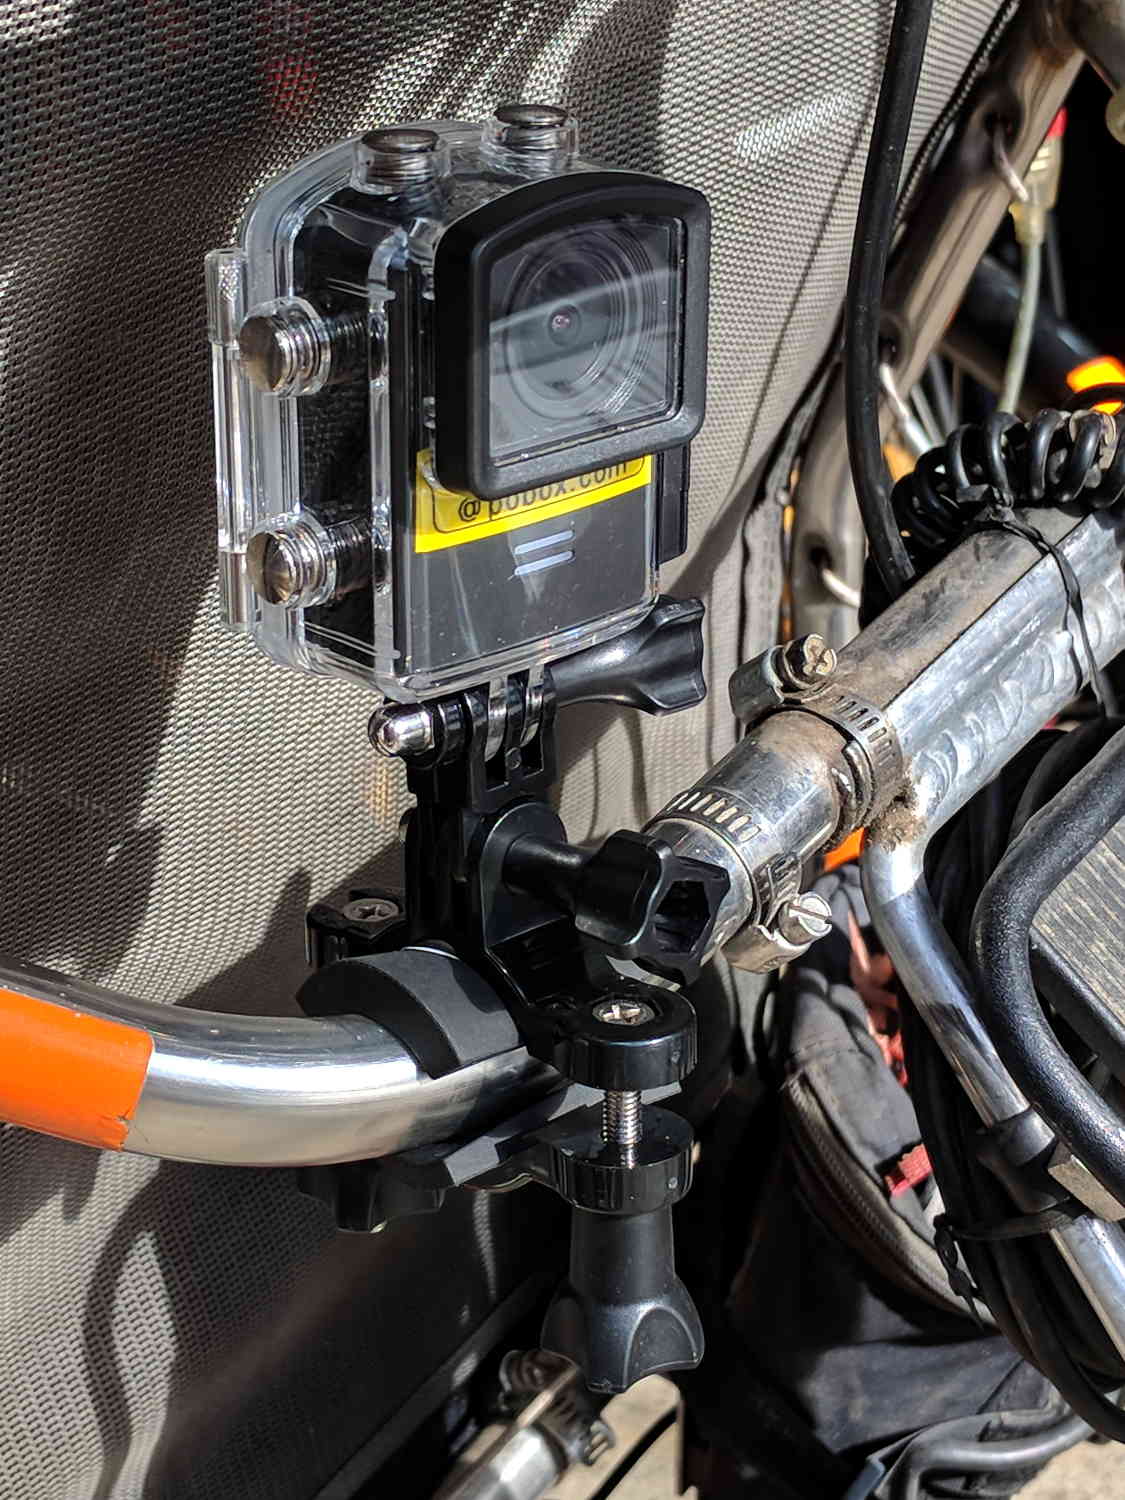
Including a waterproof case, some right-angle connectors, and a pipe clamp:
M20 in waterproof case – Tour Easy seat
The stack turns out to be about as flexy as one might imagine, definitely a Bad Thing for a bike-mounted camera, and a somewhat more rugged mount seems in order.
A diagram from the M20 manual shows the parts:
SJCAM M20 Overview – Manual pg 5
Some camera dimensions:
40.2 mm wide + 0.5 mm for the Up/Down buttons
21.8 mm thick + 1.0 mm cylindrical front curve + 1.0 mm rear screen
50.0 mm tall + 4.0 mm cylindrical top curve + buttons
21.7 mm OD × 6.0 mm long lens housing, 1.3 mm down from top center
All the edges have neat chamfers or radius rounding on the order of a few millimeters.
Applying the chord equation to the spans inside the rounding:
Front radius: 162.5 mm
Top radius: 42.5 mm
The new batteries survive for a bit over an hour, not quite enough for our usual rides. Rather than conjure a fake battery pack connected to an external 18650 cell with a wire chewed through the case, the least awful way to go may involve a relatively small battery pack (with internal 18650 cells, of course) plugged into the USB port with a right-angle cable and a rigid mount holding both the camera and the pack to the seat frame.
The Fly6 records 1280×720 @ 30 fps, with somewhat high contrast and weird color balance:
Fly6 – Backlit license
It works better with a stationary target in good light:
Fly6 – Stationary license
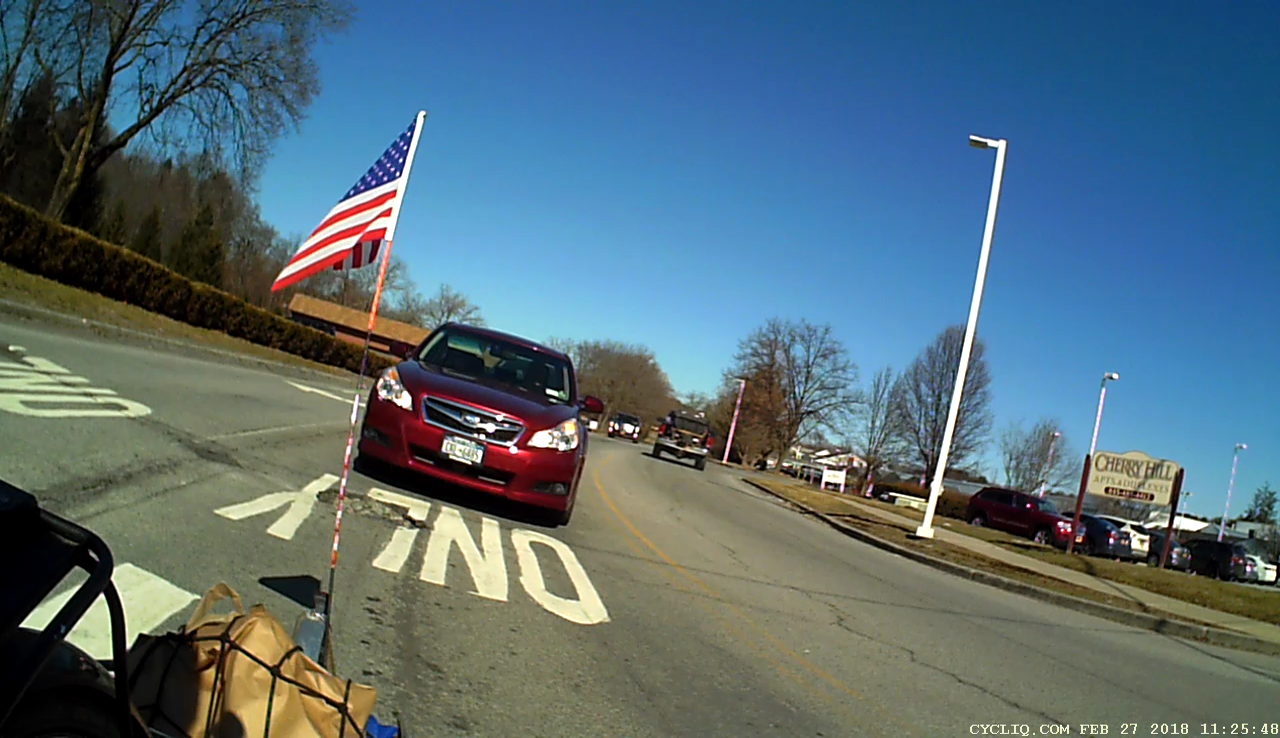
The M20 records 1920×1080 @60 fps (among many other choices), with reasonable contrast and coloring:
M20 – backlit license
Good lighting and no motion helps it along, too:
M20 – Stationary license
The original frames-grabbed-from-the-video aren’t visibly different from the JPGs you see here.
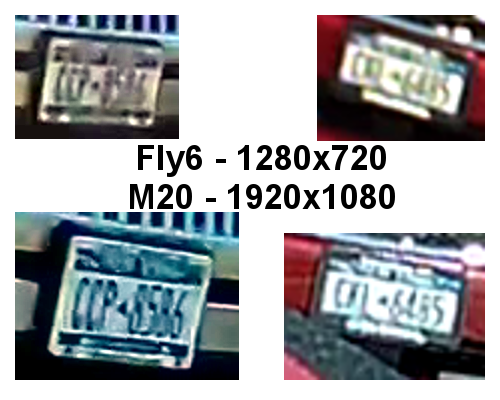
Collecting all the plates in one montage:
Fly6 vs M20 – License Plates
I enlarged the left pair by 200% and the right pair by 300%, using GIMP’s cubic interpolation, to make them large enough to see with the naked eye. The interpolation algorithm slightly smooths the edges, but the cameras put those weird compression artifacts / blobs in the original images.
The left pair also got auto-brightness adjustments to drag ’em out of the murk.
I saved the montage as a PNG, rather than a JPG, although JPG image compression made no difference.
All in all, the M20 has better image quality than the Fly6, but its 1.5× higher resolution isn’t a slam-dunk win and, IMO, video compression has more effect than image resolution. The Fly6 has no compression controls and I’ve set all the M20 controls to as good as they can be.
Both those license plates sport NYS’s now-obsolete high-contrast blue-on-white color scheme: the current blue-on-gold NYS plates have much lower contrast. In this age of ubiquitous license plate reading and storing, I cannot explain why this was allowed to happen.
The Fly6, now equipped with a high-quality 18650 lithium cell, should have more hours of run time than I can measure this early in the season. Perhaps six hours, with its red blinky LED at full throttle, according to the doc.
The M20 lasted 72 minutes with a freshly charged battery, which means it didn’t quite survive the trip. Performing battery maintenance in the middle of a ride for groceries isn’t appealing; I should conjure an external 18650 battery pack for the thing.
The longer traces show their original capacity, back in the day.
Whacking a chisel into the obvious split lines broke the solvent glue bonds holding the case sections together, after which some slow prying defeated the double sticky foam tape on the cells:
Baofeng BL-5 battery pack – innards
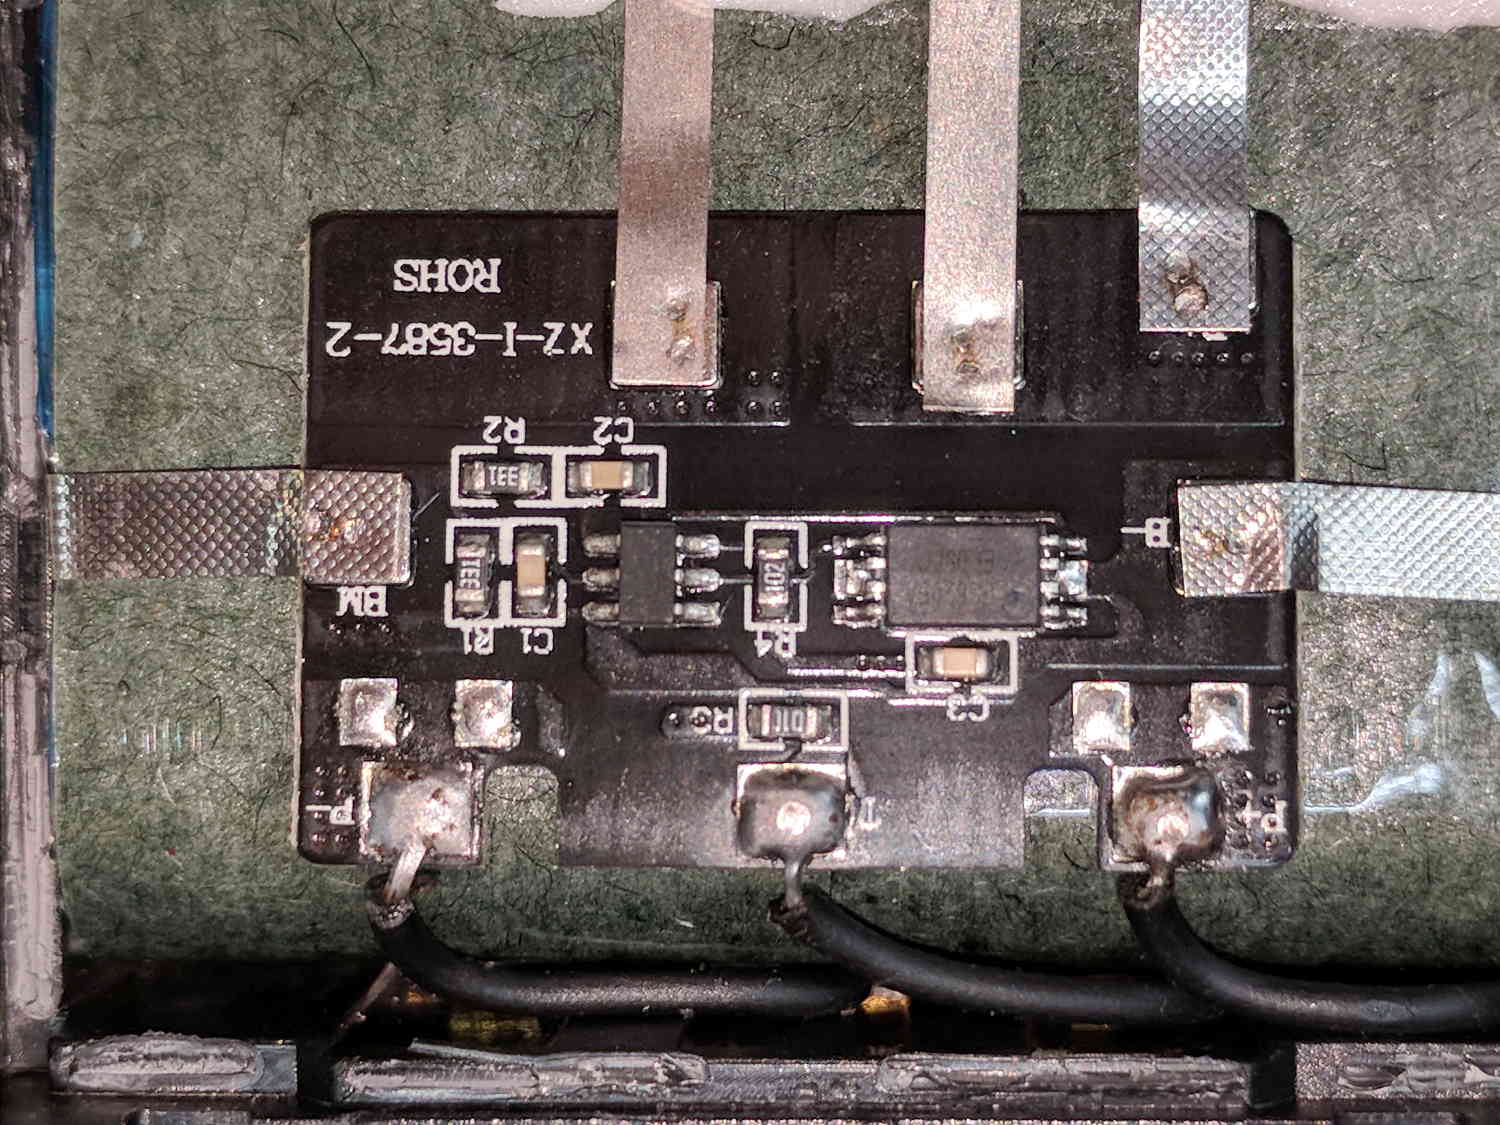
A closer look at the (dis)charge controller PCB:
Baofeng BL-5 battery pack – protection PCB
The other side of the PCB has no components, so what you see is what you get. The larger IC proclaims FS8205A EP050C, which may indicate a vague relation to an S8205 protection IC. The datasheet shows a 16 pin TSSOP package containing an IC for four or five cell batteries, completely unlike the 8 pin package on the PCB, but when you buy enough of anything, you can get anything you want.
In common with all cheap lithium batteries around here, the “thermistor” terminal connects to a 10 kΩ SMD resistor steadfastly maintaining its resistance in the face of all temperature variations.
Some probing shows one feeble cell in each pack. Perhaps a Frankenbattery built from the debris will have enough capacity for a standard ride around the block.
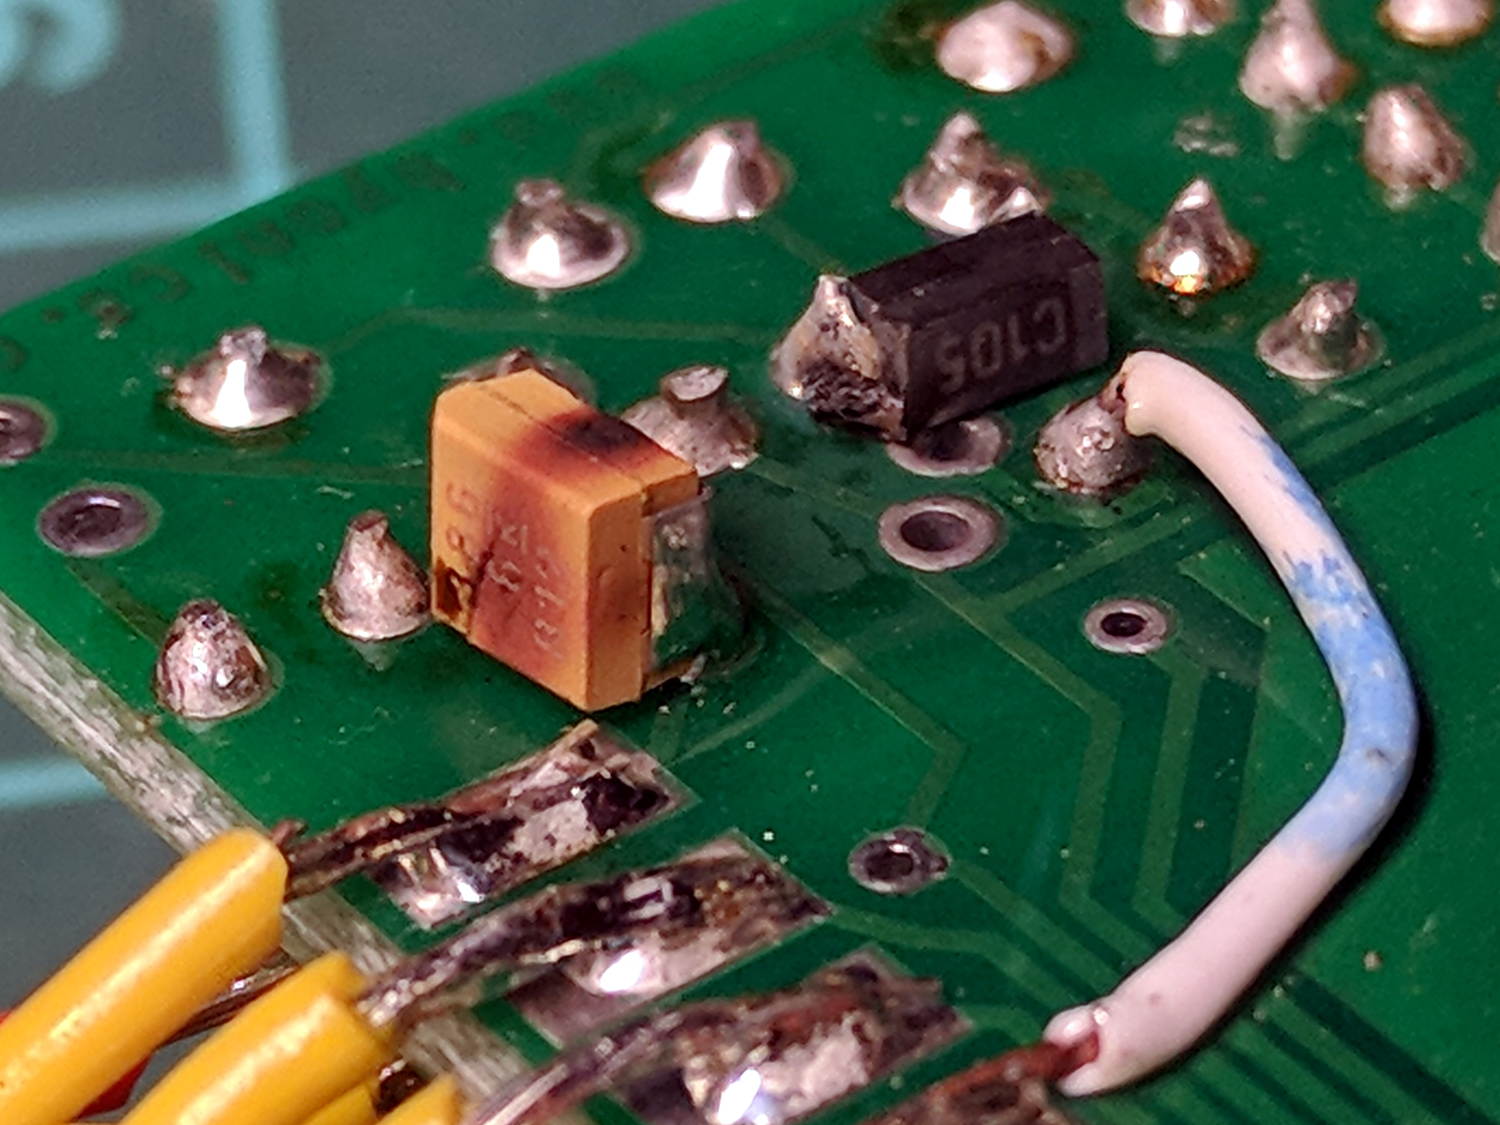
The TinyTrak3 on the Wouxun adapter wasn’t working, showing a dim red Power LED to indicate it wasn’t getting enough juice. A bit of tracing showed my adapter board provided just over 5 V to the poor thing, not the nearly 9 V it should be getting, which led me to believe the transistor switching the supply had failed. A bit more tracing, however, revealed the true problem:
Failed electrolytic cap
The schmutz on the black cap matches up with a crater in the rear of the (originally not so) brown cap.
The Little Box o’ SMD Caps revealed two nearly identical sets of 33 μF caps, one with a 6 V rating, the other with 16 V rating. Yup, when I added that cap in the hopes of reducing RFI troubles, I soldered the wrong one onto the PCB: it’s my fault!
The poor thing lasted for over six years with just under 9 V applied to it, so I can’t complain.
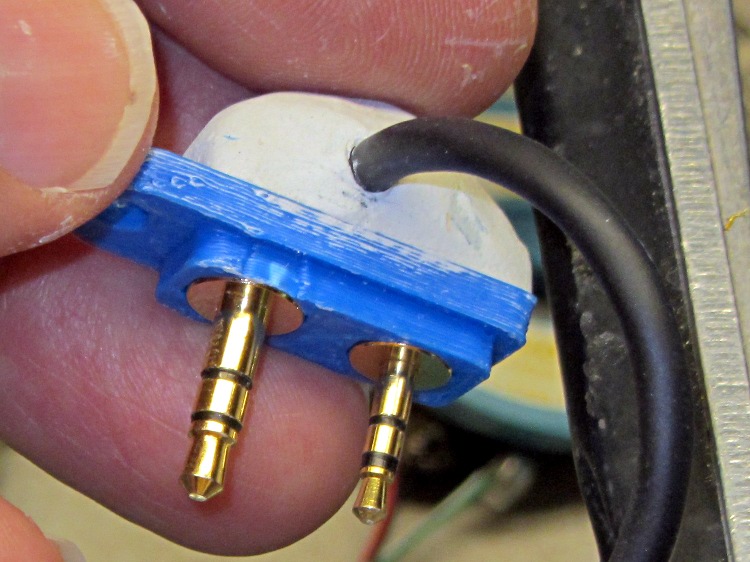
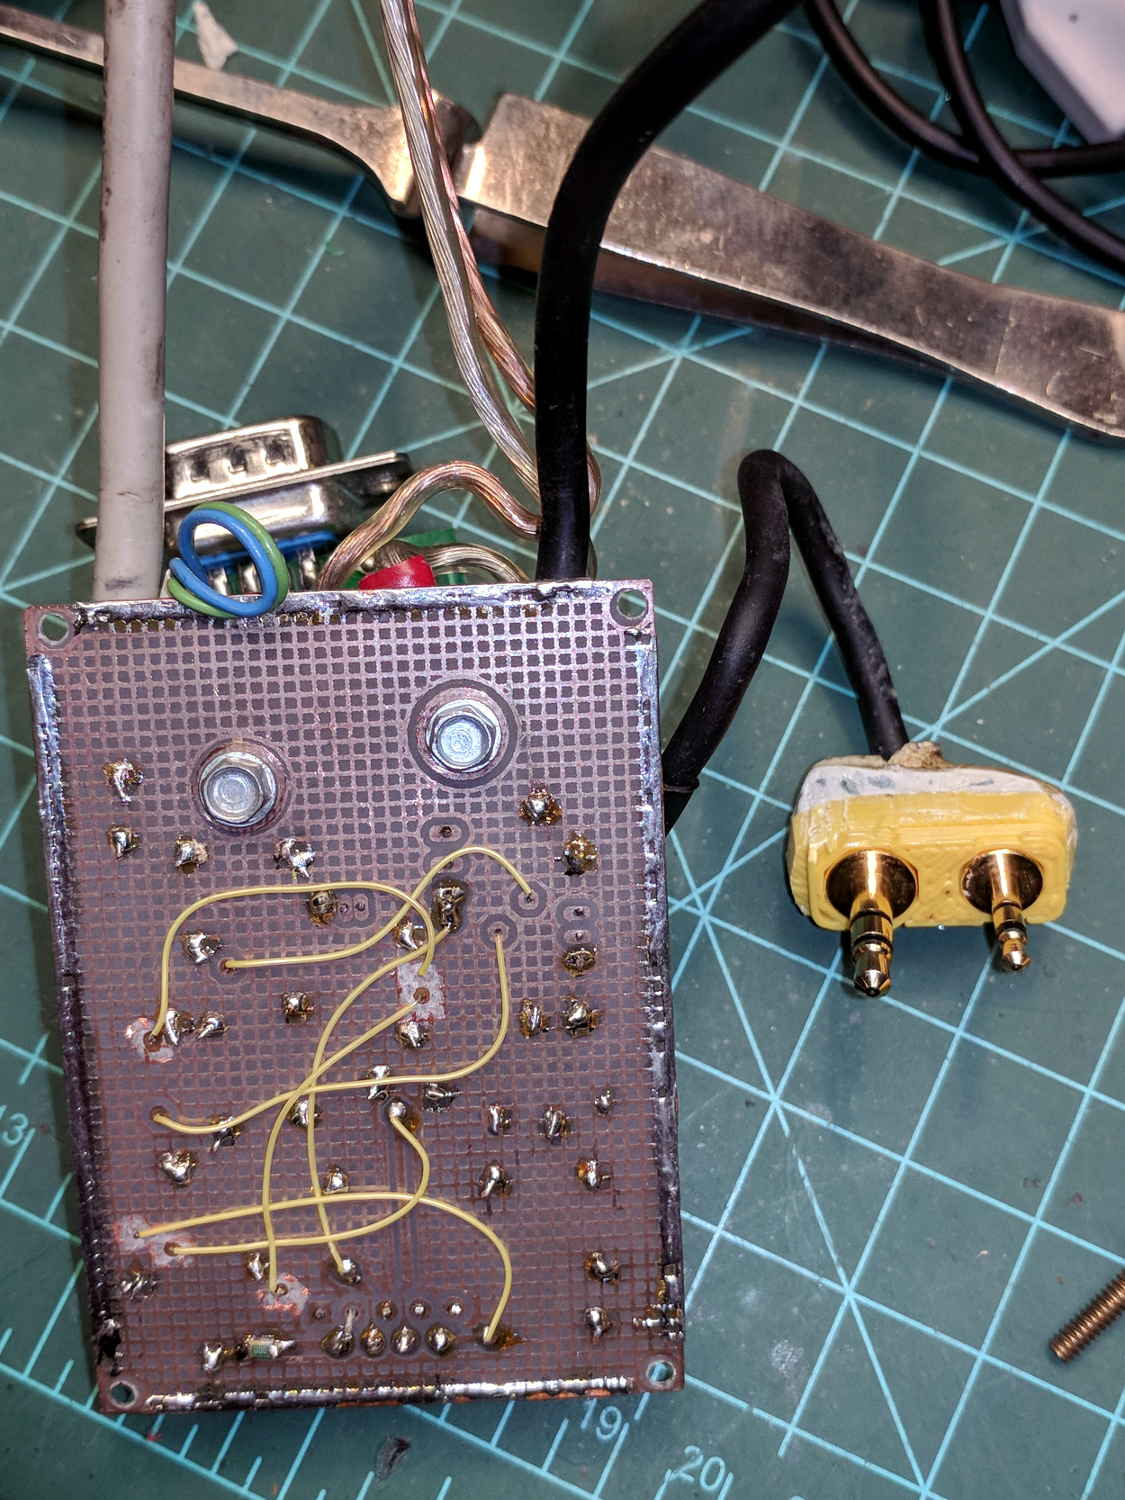
I removed the corpse and reassembled the box without the additional cap (and without the terminals contacting the back of the Wouxun, because reasons). If RFI turns out to be a problem, I’ll take another look at the situation.
… of course don’t fit the Baofeng radio. This being in the nature of a final fix, I chopped off enough protrusions to make the remainder fit snugly into the recess.
Based on one ride, both Baofeng batteries have very little capacity left after several years on the shelf, which comes as absolutely no surprise whatsoever.