The Smell of Molten Projects in the Morning

Ed Nisley's Blog: Shop notes, electronics, firmware, machinery, 3D printing, laser cuttery, and curiosities. Contents: 100% human thinking, 0% AI slop.

Category: Recumbent Bicycling

Cruisin’ the streets

  • Video-rated MicroSD Card Status Report

    Having just returned from the fourth ride of the season, it’s worthwhile to note how the MicroSD cards in the cameras are doing.

    The Sony HDR-AS30V helmet camera has been running a 64 GB Sandisk high-endurance video-rated card since late August 2017:

    Sandisk - 64 GB MicroSDXC cards
    Sandisk – 64 GB MicroSDXC cards

    In those 29 calendar months (maybe 20 riding months) I’ve ridden 4500-ish miles at perhaps 12 mph, so call it 375 hr = 22.5 k min. The camera fills a 4 GB file every 22.75 min, so it’s recorded 1000 files = 4 TB, which is 62× its capacity. This is better than the defunct Sandisk Extreme Pro card (3 TB & 50×) and much much better than the Sony cards (1 TB & 15×), although I have caught the camera in RCVR mode maybe twice, which means the card or camera occasionally coughs and reformats itself.

    The Cycliq Fly6 rear camera uses a Sandisk 32 GB card that’s been running flawlessly since late 2017:

    MicroSD 32 GB - Samsung EVO and SanDisk High Endurance
    MicroSD 32 GB – Samsung EVO and SanDisk High Endurance

    The new 16850 lithium cell continues to work fine, too.

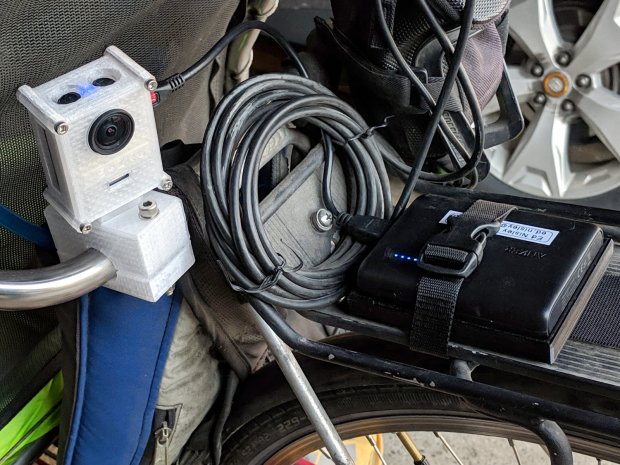
    The SJCam M20 rear camera also uses a Sandisk 32 GB high-endurance card and has worked fine since early 2018. An external battery eliminated all the hassle of its feeble internal batteries, although the one that’s been in there has faded to the point of just barely keeping the clock ticking over during winter weeks without rides:

    SJCAM M20 Mount - Tour Easy side view
    SJCAM M20 Mount – Tour Easy side view

    All in all, paying the premium for video-rated MicroSD cards has been worthwhile!

  • Anonymous Bike Taillight Current

    Along with the (defunct) Blackburn Flea, the bike pack also disgorged an anonymous taillight with a battery resistant to recharging through the USB port. Gentle suasion cracked the solvent-glued joint around the case:

    Bike taillight - cracking case
    Bike taillight – cracking case

    As with most modern electronics, a battery occupies most of the interior volume:

    Bike taillight - opening case
    Bike taillight – opening case

    For posterity, the connections:

    Bike taillight - connections
    Bike taillight – connections

    I unsoldered the cell and charged it from a bench supply:

    Bike taillight - external recharge
    Bike taillight – external recharge

    The voltage started out low with the current held to about 100 mA, eventually rose to 4.1 V, and stayed there while the current dropped to zero. Unlike the Blackburn cell, it appears not too much worse for the experience, although I haven’t measured the actual capacity.

    Clipping the Tek current probe around the LED supply wire produced this waveform for the “dim” setting:

    Anonymous Taillight - Low - 200 mA-div
    Anonymous Taillight – Low – 200 mA-div

    Adding a voltage probe across the LEDs and clicking to the “high” setting:

    Anonymous Taillight - High - 200 mA-div
    Anonymous Taillight – High – 200 mA-div

    The intense ringing at the start of the pulse seems an artifact of the measurement setup, but ya never know; these days, RFI can come from anywhere.

    In any event, the COB LED strip draws 800 mA from a fully charged battery, about 26 mA for each of the 30 LEDs. The 5% duty cycle in the “dim” setting is decently bright and 18% in “high” is entire adequate.

    A trio of blinks works for daytime rides, although the fastest one seems seizure-inducing.

    I’ve strapped it around a rack strut and run it at the slowest blink, on the principle you can never have too many blinky lights

  • Baofeng Bike Helmet Headset Wiring Repair

    The audio output wire from the Baofeng UV-5R to my bike helmet headset adapter broke after a year and a half, far longer than I expected:

    Baofeng - broken spkr wire
    Baofeng – broken spkr wire

    It’s the green one, over on the left, pulled out of the heatstink tubing that should have provided some strain relief, having broken at the solder joint to the resistor.

    A quick & easy fix, after which I reapplied even more tape to hold everything in place.

    Maybe it’ll last two years this time around …

  • Blackburn Flea Bike Headlight

    A Blackburn Flea bike headlight and its USB charger emerged from the packs on our Young Engineer’s Tour Easy, but the battery was completely defunct. With nothing to lose, I applied a small screwdriver to crack the case:

    Blackburn Flea - opening case
    Blackburn Flea – opening case

    The battery is a single cylindrical lithium cell:

    Blackburn Flea - battery
    Blackburn Flea – battery

    The USB charger seemed defunct, as it produced only a few dozen millivolts when connected and plugged into its wall wart. Cracking its case revealed a tiny buck power supply with no obvious damage, but also no output.

    So I manually charged the cell:

    Blackburn Flea - external recharge
    Blackburn Flea – external recharge

    Definitely not recommended practice, but a bench supply set to 4.1 V and current-limited to 100 mA gets the job done: the current stays at 100 mA while the voltage rises to 4.1 V, then the current drops to just about zero over the next few hours with cell held at 4.1 V.

    Unfortunately, the cell really was defunct, even after a few cycles, so I conjured a not-dead-yet lithium cell from the heap:

    Blackburn Flea - measurement setup
    Blackburn Flea – measurement setup

    Given a good supply, the Flea still works perfectly:

    Blackburn Headlight - Kyocera Li-ion - 50 mA-div
    Blackburn Headlight – Kyocera Li-ion – 50 mA-div

    The yellow trace shows the battery holding at 4 V while the LED current runs at 150 mA (3 div × 50 mA/div). You wouldn’t want to run ordinary 5 mm LEDs at nearly 40 mA, but Blackburn surely specified good parts.

    Replacing the Flea’s internal cell seems impossible, given its peculiar form factor, and grafting the PCB to an external cell makes no sense, given that it’d then need a custom bike mount.

    So another chunk of electronics goes in the e-waste box.

    Ride on!

  • Tour Easy: Fairing Strut Mounts, Redux

    Our Young Engineer’s Tour Easy followed us home, due to a non-survivable cycling commute and inadequate apartment storage space. What with its Zzipper fairing being off and having easy access to the strut, I conjured & installed another set of fairing mounting blocks:

    Tour Easy - Fairing Strut Mount Blocks
    Tour Easy – Fairing Strut Mount Blocks

    Should you be in need of a Tour Easy recumbent in good shape, well, have I got a deal for you. I’ll even conjure a Daytime Running Light mount, if that’s what it takes …

  • Wasabi NP-BX1 Teardown

    Thinking of strapping a big external cell next to my Sony HDR-AS30V helmet camera, I took a look inside a defunct NP-BX1 lithium batteries:

    Wasabi NP-BX1 - intact
    Wasabi NP-BX1 – intact

    It’s a scant 43 mm long, 9.5 mm thick, and 29.5 mm wide. You’ll find more grisly details in the solid models for the NP-BX1 battery test fixture and battery holders for blinky LEDs.

    Peeling off the wrapper holding the end caps in place reveals some ID on the cell:

    Wasabi NP-BX1 - cell data
    Wasabi NP-BX1 – cell data

    The bottom end cap is just a plastic bumper held on with glue and tape:

    Wasabi NP-BX1 - base bumper
    Wasabi NP-BX1 – base bumper

    The top end cap has keying indents, identifies the terminals, and falls off without the wrapper:

    Wasabi NP-BX1 - contact cover plate
    Wasabi NP-BX1 – contact cover plate

    The C and – terminals use the same PCB pad.

    The black plastic around the PCB pulls just far enough away from the cell to expose the tabs welded to the terminals:

    Wasabi NP-BX1 - cell to PCB tabs
    Wasabi NP-BX1 – cell to PCB tabs

    Snip ’em and it’s done:

    Wasabi NP-BX1 - bare cell tabs
    Wasabi NP-BX1 – bare cell tabs

    As with all lithium cells, the can is + and the isolated tab is -.

    Given that I have a stack of tabbed 18650 cells, I’m thinking of building a cell into a structure snapping into the AS30V’s helmet mount, along with a charge controller PCB. I normally remove the camera from the helmet and bring it inside and, since I must open the back to extract the MicroSD card, plugging a USB cable into the charger isn’t much of an imposition.

    More pondering is in order.

  • DOT-01 NP-BX1 Battery Status

    Back in February, a quartet of DOT-01 NP-BX1 lithium batteries for my Sony HDR-AS30V helmet camera had mediocre performance compared to an older Wasabi battery:

    Dot01 NP-BX1 - new 2019-02
    Dot01 NP-BX1 – new 2019-02

    After eight months of regular use, they’re even further into mediocre:

    Sony DOT-01 NP-BX1 - 2019-10-29
    Sony DOT-01 NP-BX1 – 2019-10-29

    In round numbers, they’re down from 2.8 W·h to 2.5 W·h and now run the camera for about 70 minutes, rather than 90+ when new. Our typical rides go for about an hour, which means I must swap batteries somewhere along the way.

    I still dislike the notion of sticking a 16850 cell next to the camera and powering it from the USB charger running the M20 rear camera requires another helmet cable, but it’s obvious NP-BX1 batteries lack enough active ingredient for the long haul.