The Smell of Molten Projects in the Morning

Ed Nisley's Blog: Shop notes, electronics, firmware, machinery, 3D printing, laser cuttery, and curiosities. Contents: 100% human thinking, 0% AI slop.

Category: Recumbent Bicycling

Cruisin’ the streets

  • Schwalbe Marathon Plus and Michelin Protek vs. Glass Chip

    The rear tire of my bike was flat before our morning ride and pumping it up produced a hissing sound with a spray of tube sealant:

    Marathon tire puncture - tread gash
    Marathon tire puncture – tread gash

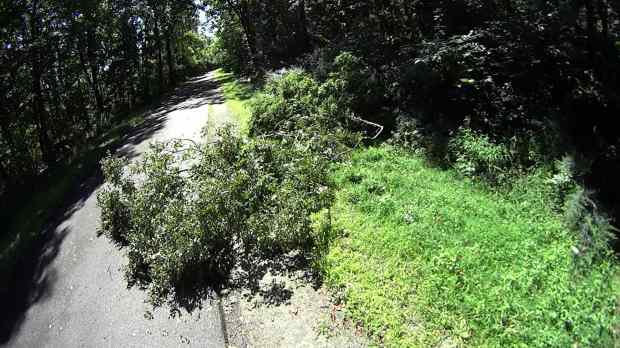
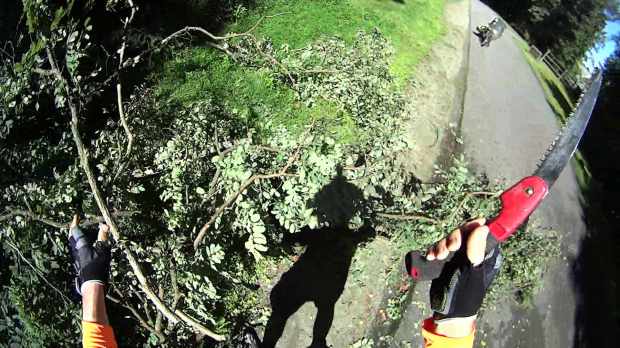
    We run Schwalbe Marathon Plus tires on the rear of our Tour Easy ‘bents, because otherwise I’d be spending far too many hours repairing flats by the side of the road. Searching the blog for the obvious keywords will produce many examples of what it’s like to ride a bike in Dutchess County NY.

    Schwalbe says the tires have 5 mm of “highly elastic special rubber” and claims “Even thumbtacks can’t puncture it.” They use the term “Flat-Less” in the sense of “flat less often”, rather than “not flatting”, which seems disingenuous at best.

    Flatting less often may be true, but they obviously haven’t tested against Dutchess County road debris:

    Marathon tire puncture - glass chip
    Marathon tire puncture – glass chip

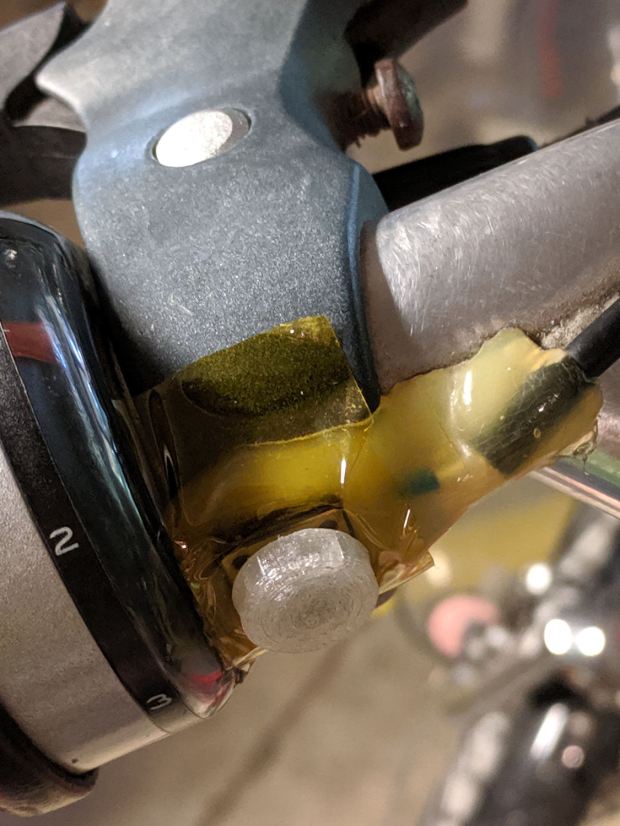
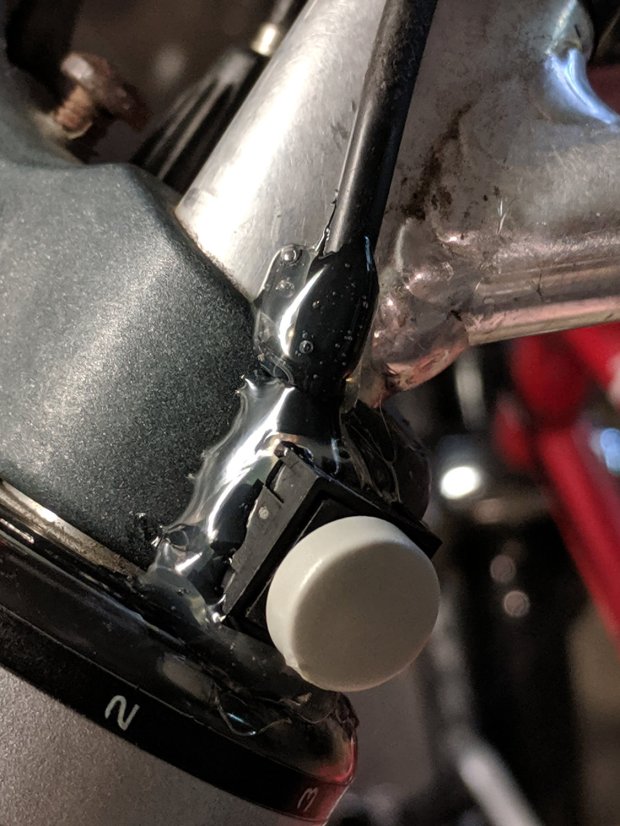
    It’s not quite 5 mm in the longest dimension, but it was embedded deep enough in the tire tread to cut through the armor belt and nick the Michelin Protek tube:

    Marathon tire puncture - tube damage
    Marathon tire puncture – tube damage

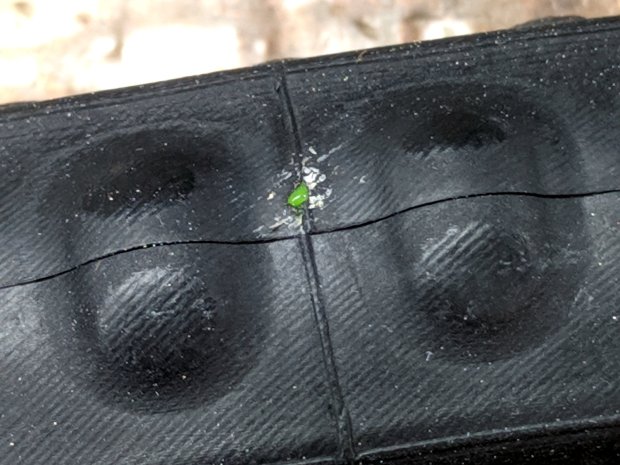
    Of course, the hole is dead-center between the two bumps that are supposed to compress around the puncture while the goo fills and seals the void.

    Before taking everything apart, I tried gently inflating the tire and putting the puncture at the bottom to let the sealant fill the hole overnight. In the morning, the tire was once again flat, although the floor wasn’t covered in goo. Pumping the tire up produced another spray of sealant.

    It’s likely the Protek tube got me home with a slow leak on the previous day’s ride, but it definitely didn’t solve the problem and, frankly, I’ve had ordinary tubes do the same thing. Given the trivial size of the puncture and the complete lack of permanent self-repair, I don’t know what kind of damage it’s supposed to cure.

    I’ve already discarded two Protek tubes with slow leaks through the valve stem and no punctures, so they’re definitely not worth the hassle. Michelin no longer lists the tubes on their bike tire site, so it seems they agree.

    I made up a boot by punching a 5 mm polypropylene disk, sticking it to a small tire patch, then sticking the patch over the puncture on the tire. With a bit of luck, nothing will line up with the gash and punch through the boot.

    I recently replaced all four tires on the Forester, slightly ahead of schedule for reasons not relevant here, and it’s worth noting that a Marathon Plus tire costs about a third of what I paid for a car tire; they’re not to be discarded lightly.

  • Tour Easy: PTT Switch Replacement

    The PTT switch on Mary’s Tour Easy became intermittent:

    Tour Easy - failed PTT switch
    Tour Easy – failed PTT switch

    It’s been sitting there for least five years, as witnessed by the sun-yellowed hot melt glue blob, which is pretty good service from a switch intended for indoor use. The 3D printed button never fell off and, in fact, was difficult to remove, so that worked well.

    I took it apart and cleaned the contacts, but to no avail, so her bike now sports a new switch with a similar rounded dome:

    Tour Easy - new PTT switch
    Tour Easy – new PTT switch

    I clipped the wires a bit beyond the terminals and soldered the new switch in place, so it’s the same cable as before.

    Now, to see how long this one lasts …

  • Rail Trail Tree Clearing

    Trees along the Dutchess Rail Trail fall over for no obvious reason and sometimes block the path:

    DCRT Fallen Tree - 1 - 2019-08-29
    DCRT Fallen Tree – 1 – 2019-08-29

    But my tool hand is strong:

    DCRT Fallen Tree - 2 - 2019-08-29
    DCRT Fallen Tree – 2 – 2019-08-29

    The DPW folks can haul off the trunk, as it’s more than I can move.

  • Rt 376: Clearcut From Red Oaks Mill to Maloney Rd

    NYS DOT Region 8 Dutchess South recently did enough over-the-rail clearcutting to make Rt 376 bicycle-able from Red Oaks Mill to Maloney Rd!

    To the best of our memories and judging from the tree stumps along the rail, it’s been a decade since DOT last clearcut that section; the Japanese Knotweed has definitely taken over since then.

    Here’s what the Knotweed looked like in June, just north of Maloney Rd, after a trimming in May:

    Rt 376 at Maloney - knotweed overgrowth - 2019-06-07
    Rt 376 at Maloney – knotweed overgrowth – 2019-06-07

    Now, it’s not nearly so snug out there:

    Rt 376 Clearcut - 20 - 2019-08-29
    Rt 376 Clearcut – 20 – 2019-08-29

    Here’s a slide show starting with Dutchess North’s routine grass mowing in Red Oaks Mill and ending with Dutchess South’s clearcut just north of Maloney Rd:

    The Wappinger Creek bridge seems to be a no man’s land between the two Residencies, but we can generally take the lane:

    Rt 376 Clearcut - 03 - 2019-08-29
    Rt 376 Clearcut – 03 – 2019-08-29

    We hope Dutchess South’s over-the-rail maintenance will become an annual event and prevent the brush from taking over again.

  • Tour Easy: Ruggedized Zzipper Fairing Mount

    After nigh onto 18 years, the pipe straps holding the Zzipper fairing struts to the handlebars of our Tour Easy recumbents finally shrugged off their plastic wraps:

    Tour Easy Zzipper Fairing - OEM mount
    Tour Easy Zzipper Fairing – OEM mount

    Although they still worked, riding over broken pavement produced distinct rattles; alas, the roads around here feature plenty of broken pavement.

    The solution is a rugged plastic block capped with aluminum plates to spread the clamping load:

    Tour Easy Zzipper Fairing - block mount
    Tour Easy Zzipper Fairing – block mount

    The solid model is straightforward:

    Zzipper Fairing - Strut Mount - solid model - Show view
    Zzipper Fairing – Strut Mount – solid model – Show view

    A slight bit of tinkering made the stack exactly the right height for 45 mm screws secured with nyloc nuts. No washers on either end, although that’s definitely in the nature of fine tuning.

    The three sections print without support:

    Zzipper Fairing - Strut Mount - solid model
    Zzipper Fairing – Strut Mount – solid model

    I reamed the smaller hole with a 3/8 inch drill to match the fairing strut rod. The as-printed larger hole fit the handlebar perfectly, although the first picture shows the tubing isn’t exactly round on the near side of the block, where it starts the outward bend toward the grips.

    The cap plates cried out for CNC, but I simply traced two outlines of the block on 1/8 inch aluminum sheet, bandsawed near the line, introduced them to Mr Disk Sander for finishing & corner rounding, transfer-punched the holes from the plastic blocks, and drilled to suit:

    Tour Easy Zzipper Fairing - clamp plates
    Tour Easy Zzipper Fairing – clamp plates

    Making two pairs of plates by hand counts as Quality Shop Time around here.

    The first few rides confirm the fix: no rattles!

    The OpenSCAD source code as a GitHub Gist:

    // Fairing strut mount for Tour Easy handlebars
    // Ed Nisley – KE4ZNU – 2019-08
    Layout = "Show"; // [Show,Build,Block]
    Support = false;
    /* [Hidden] */
    ThreadThick = 0.20;
    ThreadWidth = 0.40;
    HoleWindage = 0.2;
    Protrusion = 0.1; // make holes end cleanly
    function IntegerMultiple(Size,Unit) = Unit * ceil(Size / Unit);
    ID = 0;
    OD = 1;
    LENGTH = 2;
    inch = 25.4;
    //———————-
    // Dimensions
    // Handlebar along X axis, strut along Y, Z=0 at handlebar centerline
    HandlebarOD = 0.875 * inch + HoleWindage;
    StrutOD = 0.375 * inch + HoleWindage;
    PlateThick = 1.0 / 16.0 * inch;
    WallThick = 2.0;
    Screw = [3.0,6.8,4.0]; // M3 OD=washer, length=nut + washers
    RoundRadius = IntegerMultiple(Screw[OD]/2,0.5); // corner rounding
    ScrewOC = [IntegerMultiple(StrutOD + 2*WallThick + Screw[ID],0.5),
    IntegerMultiple(HandlebarOD + 2*WallThick + Screw[ID],0.5)];
    echo(str("Screw OC: ",ScrewOC));
    BlockSize = [ScrewOC.x + 2*RoundRadius,ScrewOC.y + 2*RoundRadius,HandlebarOD + StrutOD + 3*WallThick];
    echo(str("Block: ",BlockSize));
    HandleBarOffset = WallThick + HandlebarOD/2; // block bottom to centerline
    StrutOffset = HandlebarOD/2 + WallThick + StrutOD/2; // handlebar centerline to strut centerline
    echo(str("Screw length: ",BlockSize.z + 2*PlateThick + Screw[LENGTH]));
    NumSides = 2*3*4;
    //———————-
    // Useful routines
    module PolyCyl(Dia,Height,ForceSides=0) { // based on nophead's polyholes
    Sides = (ForceSides != 0) ? ForceSides : (ceil(Dia) + 2);
    FixDia = Dia / cos(180/Sides);
    cylinder(r=(FixDia + HoleWindage)/2,
    h=Height,
    $fn=Sides);
    }
    // Basic shapes
    // Block with handlebar along X axis
    module Block() {
    difference() {
    hull()
    for (i=[-1,1], j=[-1,1])
    translate([i*ScrewOC.x/2,j*ScrewOC.y/2,-HandleBarOffset])
    cylinder(r=RoundRadius,h=BlockSize.z,$fn=NumSides);
    for (i=[-1,1], j=[-1,1])
    translate([i*ScrewOC.x/2,j*ScrewOC.y/2,-(HandleBarOffset + Protrusion)])
    PolyCyl(Screw[ID],BlockSize.z + 2*Protrusion,8);
    translate([-BlockSize.x,0,0])
    rotate([0,90,0])
    cylinder(d=HandlebarOD,h=2*BlockSize.x,$fn=NumSides);
    translate([0,BlockSize.y,StrutOffset])
    rotate([90,0,0])
    cylinder(d=StrutOD,h=2*BlockSize.y,$fn=NumSides);
    }
    if (Support) { // totally ad-hoc
    color("Yellow")
    cube(1,center=true);
    }
    }
    //- Build it
    if (Layout == "Block")
    Block();
    if (Layout == "Show") {
    Block();
    color("Green",0.25)
    translate([-BlockSize.x,0,0])
    rotate([0,90,0])
    cylinder(d=HandlebarOD,h=2*BlockSize.x,$fn=NumSides);
    color("Green",0.25)
    translate([0,BlockSize.y,StrutOffset])
    rotate([90,0,0])
    cylinder(d=StrutOD,h=2*BlockSize.y,$fn=NumSides);
    }
    if (Layout == "Build") {
    translate([-1.2*BlockSize.x,0,HandleBarOffset])
    difference() {
    Block();
    translate([0,0,BlockSize.z])
    cube(2*BlockSize,center=true);
    }
    translate([1.2*BlockSize.x,0,StrutOD/2 + WallThick])
    difference() {
    rotate([180,0,0])
    translate([0,0,-StrutOffset])
    Block();
    translate([0,0,BlockSize.z])
    cube(2*BlockSize,center=true);
    }
    translate([0,0,StrutOffset])
    rotate([180,0,0])
    intersection() {
    Block();
    translate([0,0,StrutOffset/2])
    cube([2*BlockSize.x,2*BlockSize.y,StrutOffset],center=true);
    }
    }

  • Michelin Protek Tube: Another Slow Leak

    After a few days of topping off the rear tire on Mary’s bike, with no gashes or debris in the tire, I finally replaced the Michelin Protek tube and autopsied it:

    Michelin Protek tube autopsy
    Michelin Protek tube autopsy

    While it’s possible to extract the valve and perhaps even clean / replace it, I think that’s just delaying the inevitable. The rubber shreds may be necessary to fill large punctures, but they seem to wreck the valve seal.

    Her bike now has an ordinary (pronounced “cheap”) tube inside the Schwalbe Marathon Plus armored tire. We’ll see how long this lasts.

  • City of Poughkeepsie Police Armor

    Returning from a long ride, we spotted an unusual sign at the Vassar Farm entrance (clicky for more dots):

    Vassar Farm - Poughkeepsie Police Training sign - 2019-08-12
    Vassar Farm – Poughkeepsie Police Training sign – 2019-08-12

    Even more unusual was the sight of a matte black MRAP jouncing across the field:

    Vassar Farm - Poughkeepsie Police MRAP - 2019-08-12
    Vassar Farm – Poughkeepsie Police MRAP – 2019-08-12

    I hadn’t noticed an uptick of the insurgency around here, but I suppose it could happen.

    It looks like a Cougar HE 6×6 MRAP on loan from the DLA 1033 Program to the City of Poughkeepsie Police Department. The flat top suggests they dismounted the CROWS gun, which seems a definite step down in no-knock capability.

    Some poking around showed the Poughkeepsie Police Department acquired a 107 mm Mortar Carrier some years ago:

    Marshall Project - Poughkeepsie 107 mm Mortar Carrier
    Marshall Project – Poughkeepsie 107 mm Mortar Carrier

    The M106 is an impressive hunk of tracked armor, although it seems unsuited for urban warfare and would certainly scuff up the streets pretty badly. I don’t know if they scrapped the M106 in favor of the MRAP.

    I’m hoping they don’t collaborate with the Dutchess County Sheriff’s Department to patrol the Rail Trail, even within the City limits.