Ed Nisley's Blog: Shop notes, electronics, firmware, machinery, 3D printing, laser cuttery, and curiosities. Contents: 100% human thinking, 0% AI slop.
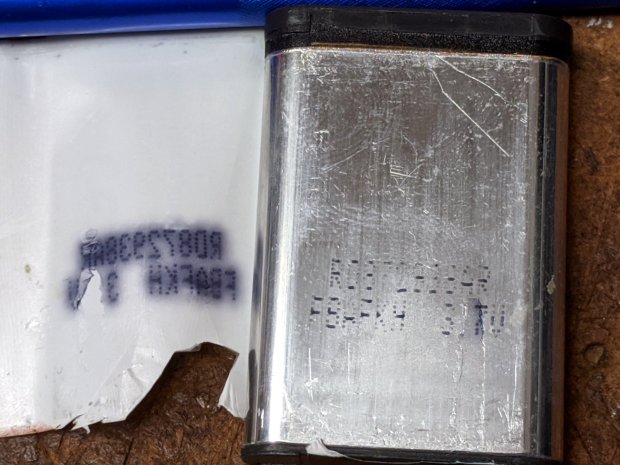
Peeling off the wrapper holding the end caps in place reveals some ID on the cell:
Wasabi NP-BX1 – cell data
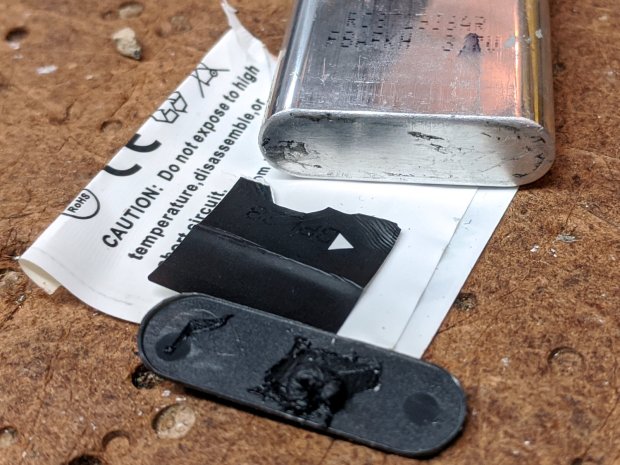
The bottom end cap is just a plastic bumper held on with glue and tape:
Wasabi NP-BX1 – base bumper
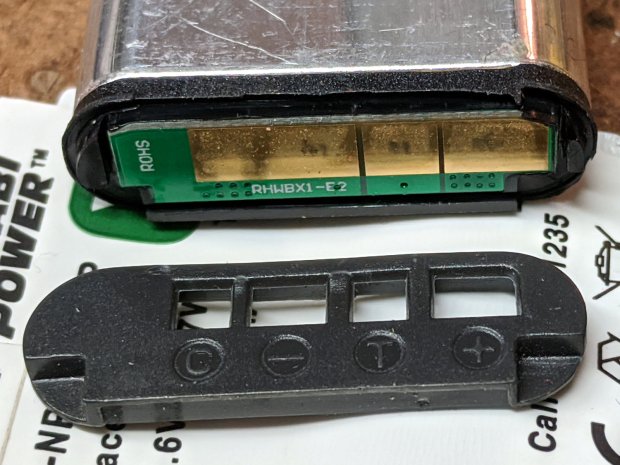
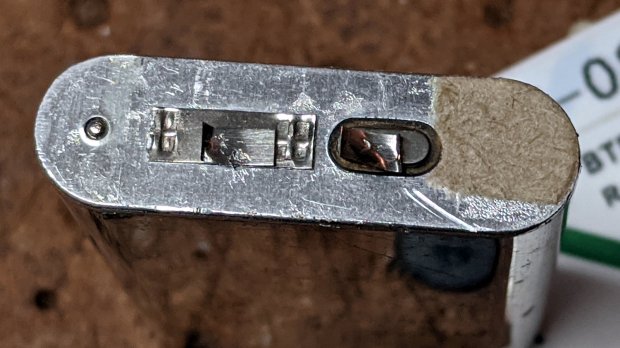
The top end cap has keying indents, identifies the terminals, and falls off without the wrapper:
Wasabi NP-BX1 – contact cover plate
The C and – terminals use the same PCB pad.
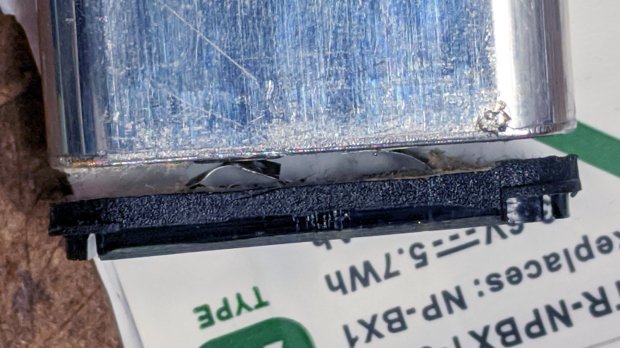
The black plastic around the PCB pulls just far enough away from the cell to expose the tabs welded to the terminals:
Wasabi NP-BX1 – cell to PCB tabs
Snip ’em and it’s done:
Wasabi NP-BX1 – bare cell tabs
As with all lithium cells, the can is + and the isolated tab is -.
Given that I have a stack of tabbed 18650 cells, I’m thinking of building a cell into a structure snapping into the AS30V’s helmet mount, along with a charge controller PCB. I normally remove the camera from the helmet and bring it inside and, since I must open the back to extract the MicroSD card, plugging a USB cable into the charger isn’t much of an imposition.
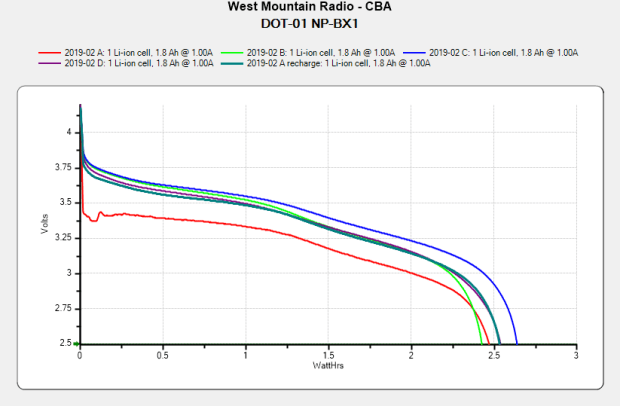
After eight months of regular use, they’re even further into mediocre:
Sony DOT-01 NP-BX1 – 2019-10-29
In round numbers, they’re down from 2.8 W·h to 2.5 W·h and now run the camera for about 70 minutes, rather than 90+ when new. Our typical rides go for about an hour, which means I must swap batteries somewhere along the way.
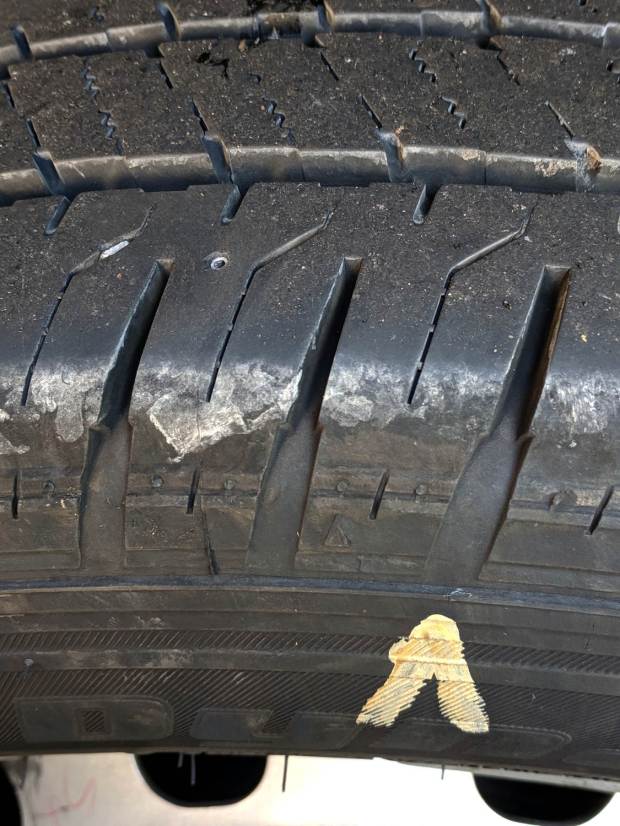
We rented a van to haul our bikes on a vacation trip, but the tire pressure warning alarm sounded when I turned into the driveway. Measuring the tire pressures showed the left rear tire was at 51 psi, far below the 72 psi shown on the doorframe sticker, and a quick check showed a possible problem:
Tire FOD – in place
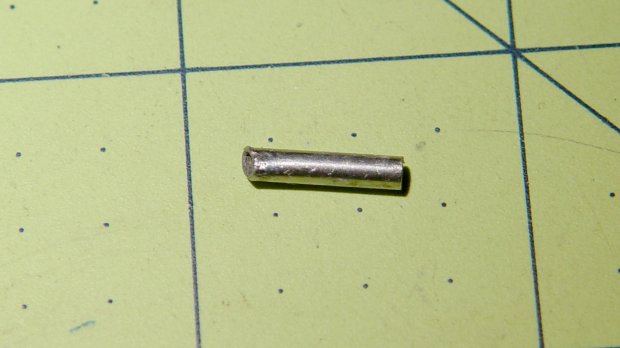
The small circle in the tread to the left of that mark turned out to be a metal tube:
Tire FOD object
Their tire contractor determined the tire wasn’t leaking, the metal tube hadn’t punctured the carcass, and all was right with the world. After, of course, two hours when we expected to be loading the van.
The rental company was good about it, perhaps because I reported they sent the van out with the other rear tire grossly overinflated to 86 psi (!); obviously, their prep didn’t include checking the tires. Somewhat to my surprise, the space under the passenger seat for a jack was empty.
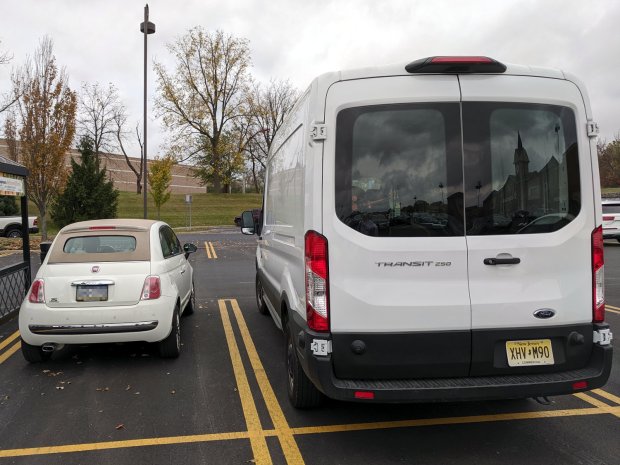
During the trip, the van laid an egg:
Transit Van with Egg
A good time was had by all, but our next bicycling vacation will definitely have much more bicycling and much less driving!
Riding south on Rt 376 takes us across the Mighty Wappinger Creek on a four-lane concrete bridge built about 1995. This Dutchess County Aerial Access photo shows it in 2016:
Rt 376 – Wappinger Bridge – 2016 overhead
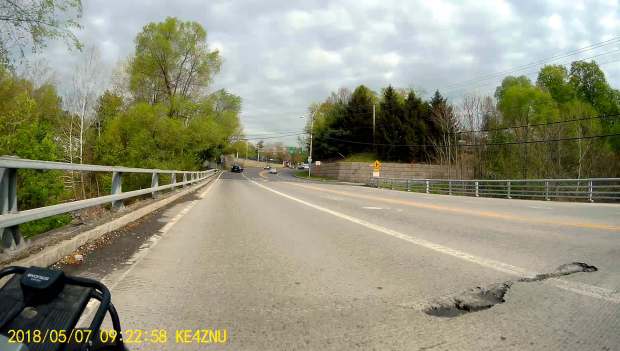
A pothole opened up on the south end of the span last year:
This year, we’ve been avoiding a new pothole opening on the north end:
Rt 376 – Wapp Bridge – 2019-09-11 – 0295
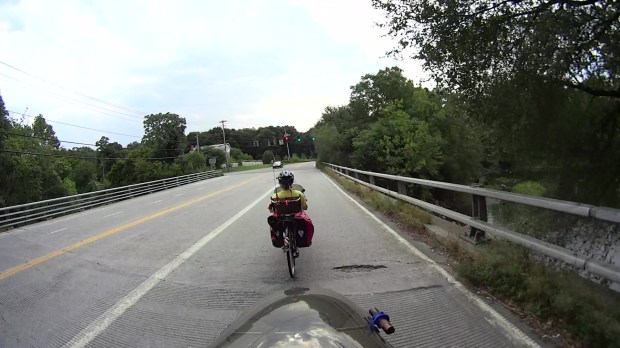
It’s difficult to ride between the right side of the hole and the weeds growing from the curb joint under the guide rail, so we take the lane whenever we can. The extensive vegetation growing in the bridge structure can’t possibly be a good thing.
The concrete seems to be failing by tension overload as the beams flex downward under traffic loading and pull the top surface apart. The surface has irregular transverse cracks across the deck width, not all of which look like control joints.
With potholes and surrounding cracks allowing brine into the deck, we expect much worse deterioration during the next few years.
My Professional Engineer license has long lapsed, not that I ever knew anything about bridge design, so this is mostly observational.
The display on Mary’s Cateye Astrale “Cyclocomputer” had once again faded to gray, so it’s time for a new CR2032 lithium cell:
Cateye Astrale – battery change 2019-09-22
The old cell read 2.5 V, well below what it should be.
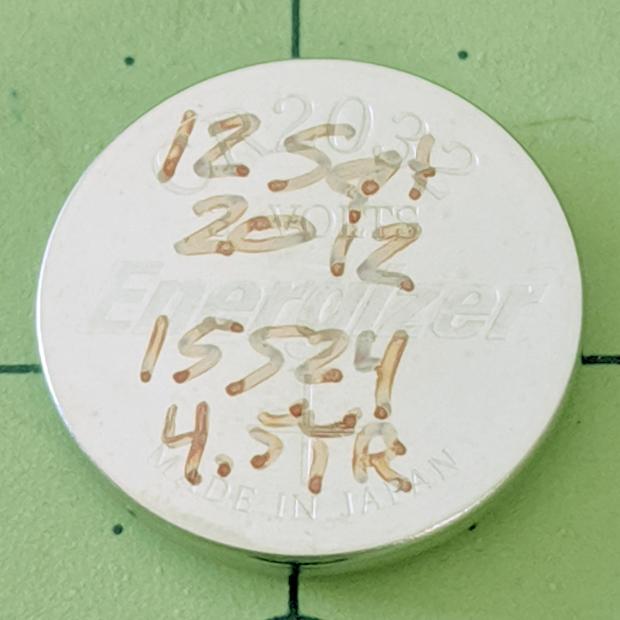
The notes scrawled on the cell become readable under better light:
Cateye Astrale – CR2032 life
Seven years (at 1942 mile/yr) ain’t bad at all!
To replace the cell fast enough to maintain the odometer reading, just unscrew & remove the battery cover, slam the back of the Astrale on the bench, and pop in the new cell.
Maybe I should replace the cell twice a decade, regardless of how feeble it might be?
The rear tire of my bike was flat before our morning ride and pumping it up produced a hissing sound with a spray of tube sealant:
Marathon tire puncture – tread gash
We run Schwalbe Marathon Plus tires on the rear of our Tour Easy ‘bents, because otherwise I’d be spending far too many hours repairing flats by the side of the road. Searching the blog for the obvious keywords will produce many examples of what it’s like to ride a bike in Dutchess County NY.
Schwalbe says the tires have 5 mm of “highly elastic special rubber” and claims “Even thumbtacks can’t puncture it.” They use the term “Flat-Less” in the sense of “flat less often”, rather than “not flatting”, which seems disingenuous at best.
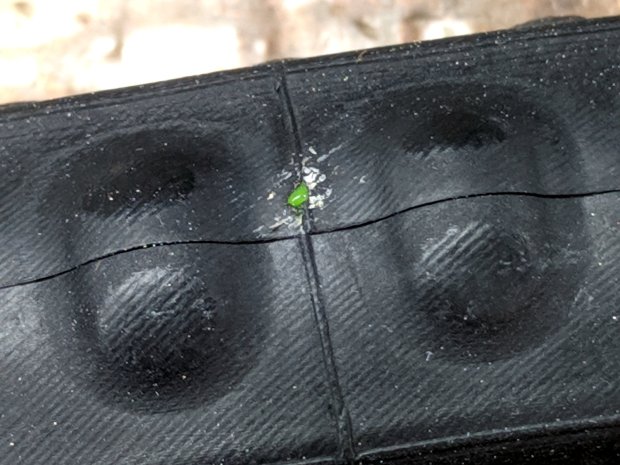
Flatting less often may be true, but they obviously haven’t tested against Dutchess County road debris:
Marathon tire puncture – glass chip
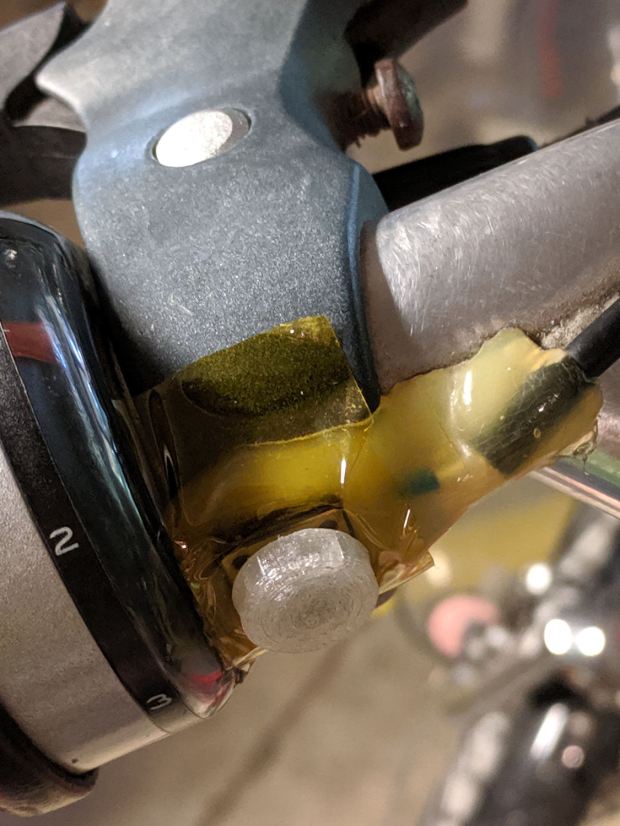
It’s not quite 5 mm in the longest dimension, but it was embedded deep enough in the tire tread to cut through the armor belt and nick the Michelin Protek tube:
Marathon tire puncture – tube damage
Of course, the hole is dead-center between the two bumps that are supposed to compress around the puncture while the goo fills and seals the void.
Before taking everything apart, I tried gently inflating the tire and putting the puncture at the bottom to let the sealant fill the hole overnight. In the morning, the tire was once again flat, although the floor wasn’t covered in goo. Pumping the tire up produced another spray of sealant.
It’s likely the Protek tube got me home with a slow leak on the previous day’s ride, but it definitely didn’t solve the problem and, frankly, I’ve had ordinary tubes do the same thing. Given the trivial size of the puncture and the complete lack of permanent self-repair, I don’t know what kind of damage it’s supposed to cure.
I’ve already discarded two Protek tubes with slow leaks through the valve stem and no punctures, so they’re definitely not worth the hassle. Michelin no longer lists the tubes on their bike tire site, so it seems they agree.
I made up a boot by punching a 5 mm polypropylene disk, sticking it to a small tire patch, then sticking the patch over the puncture on the tire. With a bit of luck, nothing will line up with the gash and punch through the boot.
I recently replaced all four tires on the Forester, slightly ahead of schedule for reasons not relevant here, and it’s worth noting that a Marathon Plus tire costs about a third of what I paid for a car tire; they’re not to be discarded lightly.
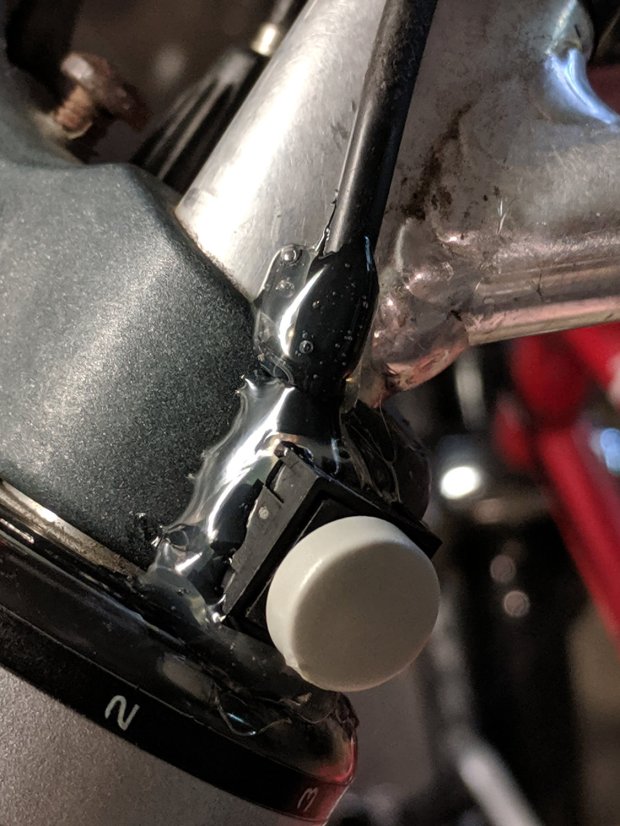
It’s been sitting there for least five years, as witnessed by the sun-yellowed hot melt glue blob, which is pretty good service from a switch intended for indoor use. The 3D printed button never fell off and, in fact, was difficult to remove, so that worked well.
I took it apart and cleaned the contacts, but to no avail, so her bike now sports a new switch with a similar rounded dome:
Tour Easy – new PTT switch
I clipped the wires a bit beyond the terminals and soldered the new switch in place, so it’s the same cable as before.