When the driveway runs yellow in the rain, it’s pine pollen season:

Our robot vacuum snuffles up quite a collection of dust:

Peeling a layer of the usual fuzz off the filter reveals the pollen:

This, too, shall pass and my eyes will rejoice.
The Smell of Molten Projects in the Morning
Ed Nisley's Blog: Shop notes, electronics, firmware, machinery, 3D printing, laser cuttery, and curiosities. Contents: 100% human thinking, 0% AI slop.
Who’d’a thunk it?

When the driveway runs yellow in the rain, it’s pine pollen season:
Our robot vacuum snuffles up quite a collection of dust:
Peeling a layer of the usual fuzz off the filter reveals the pollen:
This, too, shall pass and my eyes will rejoice.
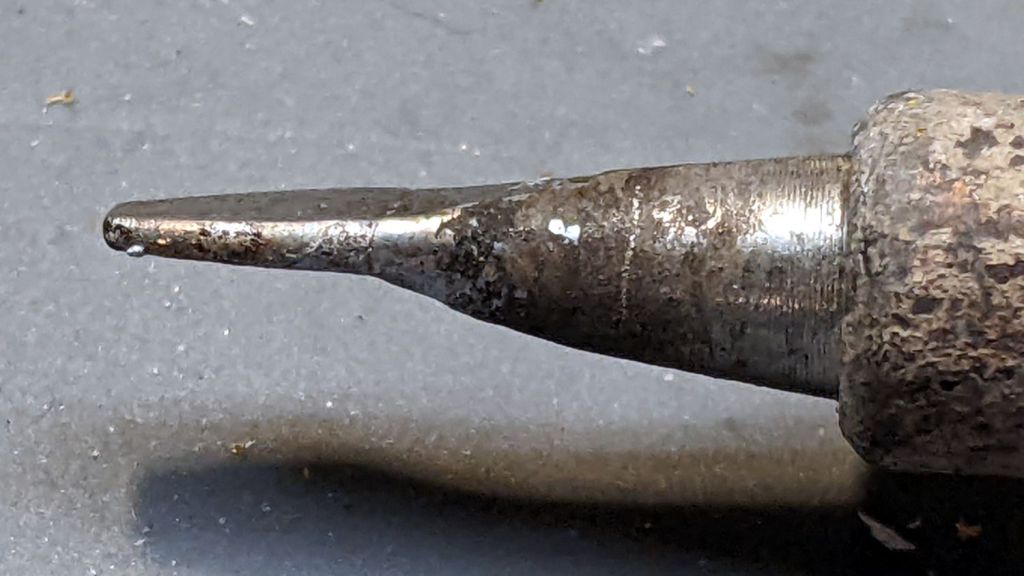
An upcoming project calls for cutting dozens of lengths from a spool of 550 (pound tensile strength) all-nylon paracord, which means I must also heat-seal the ends. Cold-cutting paracord always produces wildly fraying ends, so I got primal on an old soldering iron tip:

Bashed into a flattish blade, it does a Good Enough job of hot-cutting paracord and sealing the end in one operation:

Setting the iron to 425 °C = 800 °F quickly produces reasonably clean and thoroughly sealed cut ends.
Obviously, I need more practice.
Yes, I tried laser cutting the paracord. Yes, it works great, makes a perfectly flat cut, and heat-seals both ends, but it also makes no sense whatsoever without a fixture holding a dozen or so premeasured lengths in a straight line. No, I’m not doing that.

The OMTech laser manual specifically warns against allowing clutter to accumulate atop the cabinet:
It is highly recommended to have an extra work table nearby in order to avoid placing objects on or directly adjacent to the machine, which could become a fire or laser hazard.
OMTech USB570c Cabinet Laser Engraver User Manual
The Basement Shop lacks the floor space for their recommended “extra work table”, so the laser cabinet now sports a pair of wings:

They’re a pair of those battered maple shelves, cut to fit the length of the cabinet:
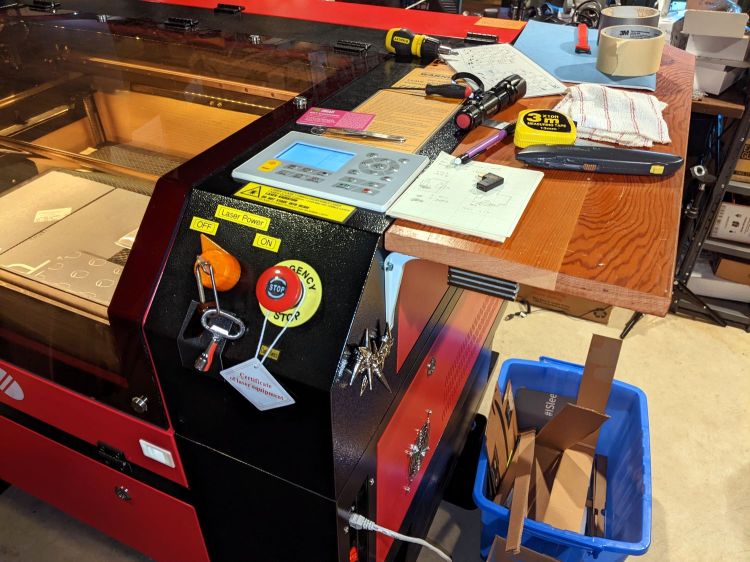
They’re a convenient 9 inches wide, just right for general clutter. That stubby screwdriver encroaching on the lid shows I haven’t been entirely successful.
Each white shelf bracket has three self-tapping machine screws driven into the wood and a single 4 mm SHCS through a hole drilled into the cabinet with a nyloc nut & washer on the inside. If I understand the somewhat abbreviated instruction sticker correctly, I installed them upside-down in order to put the longer end under the wood where it would do the most good; they’re entirely rigid enough for the purpose.
Some of the same indoor urethane finish I slobbered on the gate signs tidied the sawed ends.
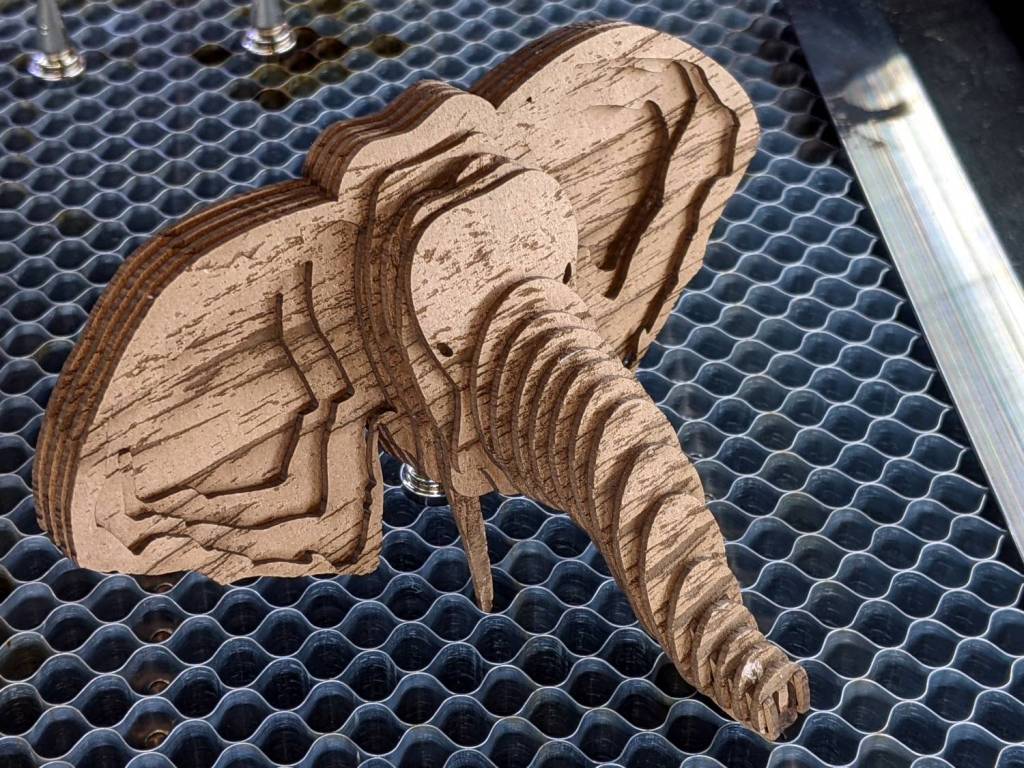
Sometimes you gotta make silly things:

It’s cut from 3 mm MDF, rather than the fancy Trotec Eco 1 mm cellulose sheet they recommend, which required embiggening the mounting slots in all the pieces.
It served as good, albeit tedious, practice for my atrophied GUI alignment and editing skilz.

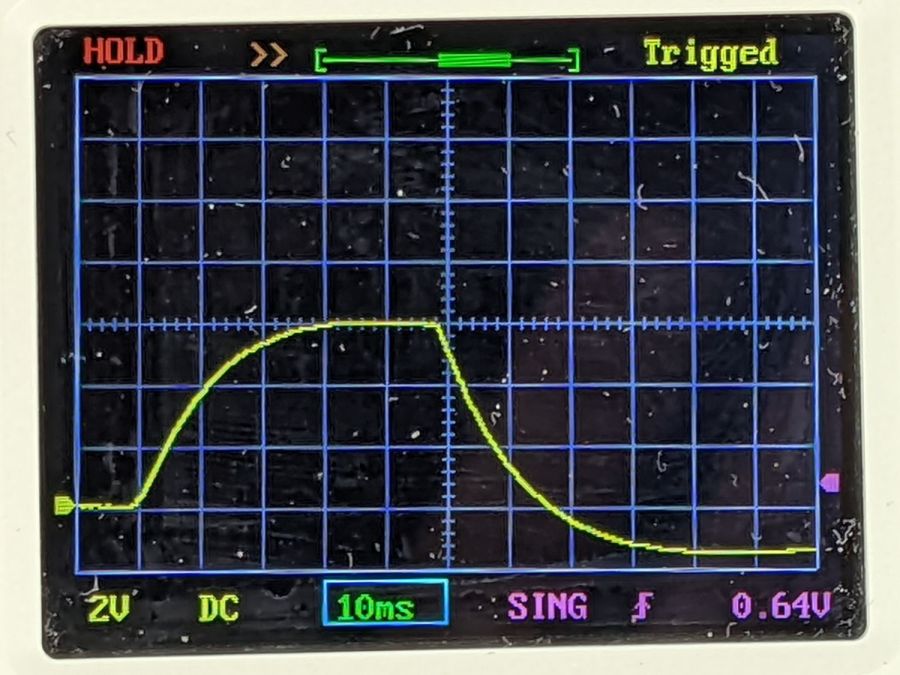
The little DSO-150 oscilloscope has a 1 MΩ || 20 pF input with a 200 kHz bandwidth that should be entirely adequate for the OMTech laser’s millisecond-scale modulation signals from the Gentec ED-200 Optical Joulemeter. There is, however, only one way to be sure:

The two scope inputs are in parallel, so the joulemeter over on the far right sees a 500 kΩ load, half of the specified 1 MΩ load, with at least twice the capacitance. If the two scopes display pretty much the same result, then it’s good enough.
A 50 ms pulse at half power looks the same on both scopes:
A 50 ms pulse at full power doesn’t quite top out:
Given that the pulse duration should be less than the detector’s 1.5 ms risetime, using a 50 ms pulse is absurd. Right now I’m just looking at the overall waveform and detector range, not trying to get useful numbers out of the poor thing.
All in all, the DSO-150 will do just fine.
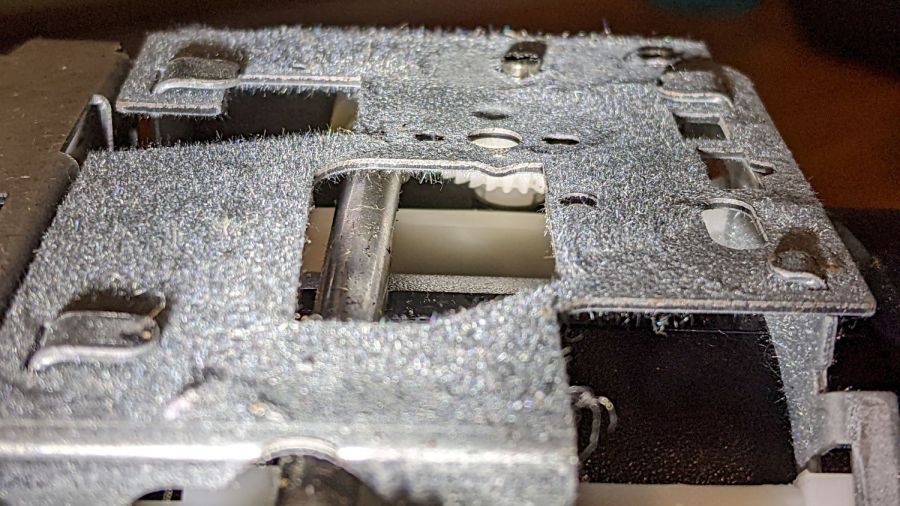
Mary’s folks asked me to figure out why the carousel on their Kodak 750H projector no longer turned. Some initial poking around suggested a problem with the solenoid, which only clunked when the projector was upside-down on the desk. I thought it might just have gummed up after all those years, but disassembling the thing (per the Service Manual and the usual Youtube videos) produced the root cause:
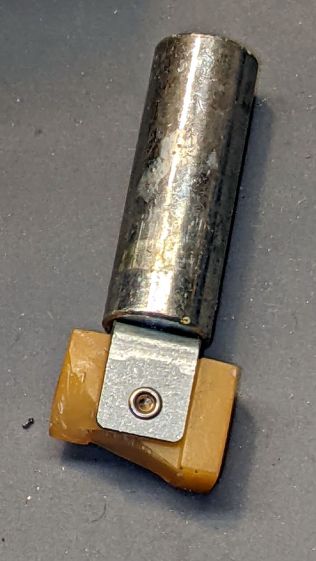
That explained the yellowish plastic fragments rattling around inside.
As predicted, it’s impossible to remove the solenoid without breaking the equally brittle focus gear in the process:
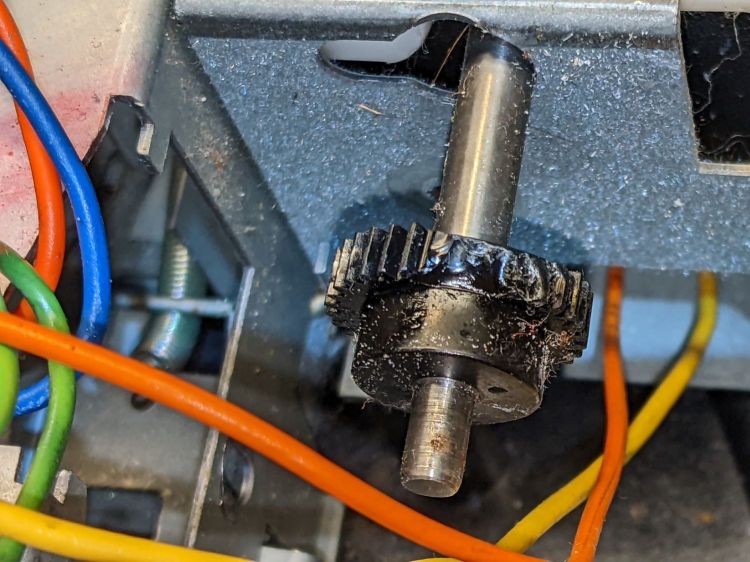
This is a sufficiently common projector to make repair parts cheap and readily available, at least for now.
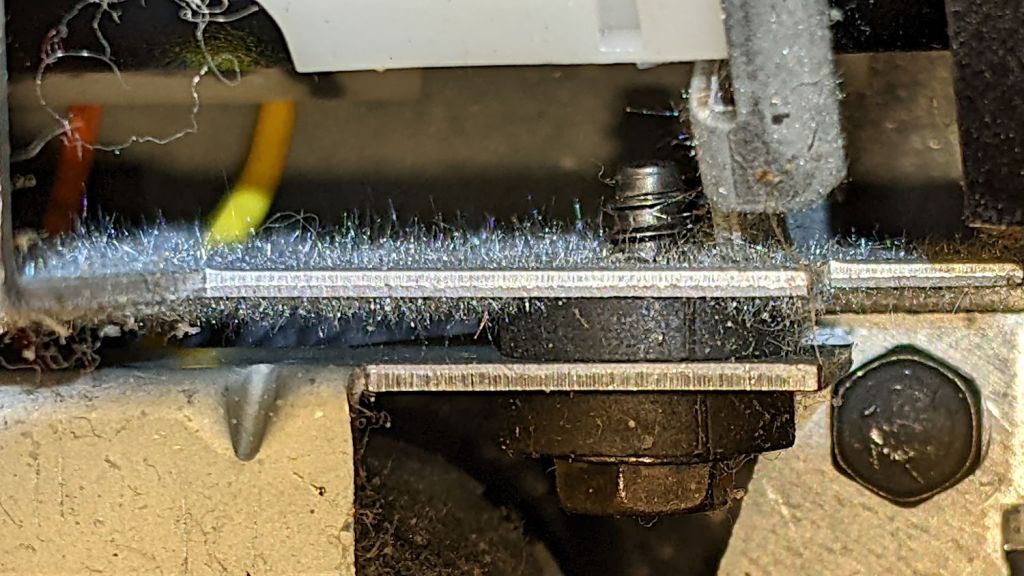
Some of the interior sheet metal has a dark surface, likely heavy tin plating, covered with a thick coat of whiskers:
Touching a whiskered surface with masking tape captures the culprits, whereupon zooming the microscope and camera all the way in makes them just barely visible: they’re a few millimeters long and a few atoms wide:
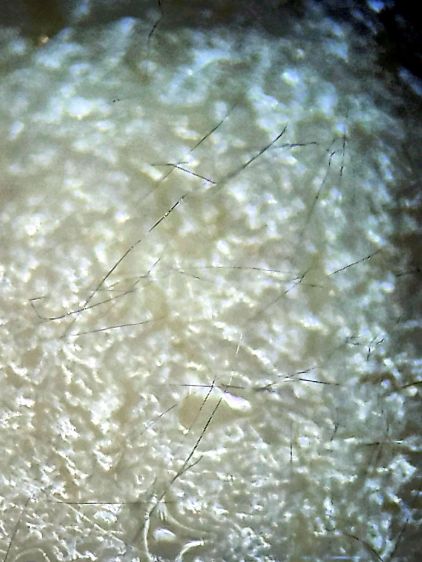
I have surely contaminated the entire Basement Laboratory with tin whiskers. Makes me itchy just thinking about them …

These seem appropriate for the day.
Whoever composed this wall of text knew the next person in line would update the placeholder:

As you can tell from the prices, this dates back to late last year. Since then, the two red LED panels on each side had at least one pinball panic and were replaced with much dimmer units:

And a friend pointed me at this bit of innocently twisted signage from a Twitter thread:

Meanwhile, back in the Basement Laboratory …