|
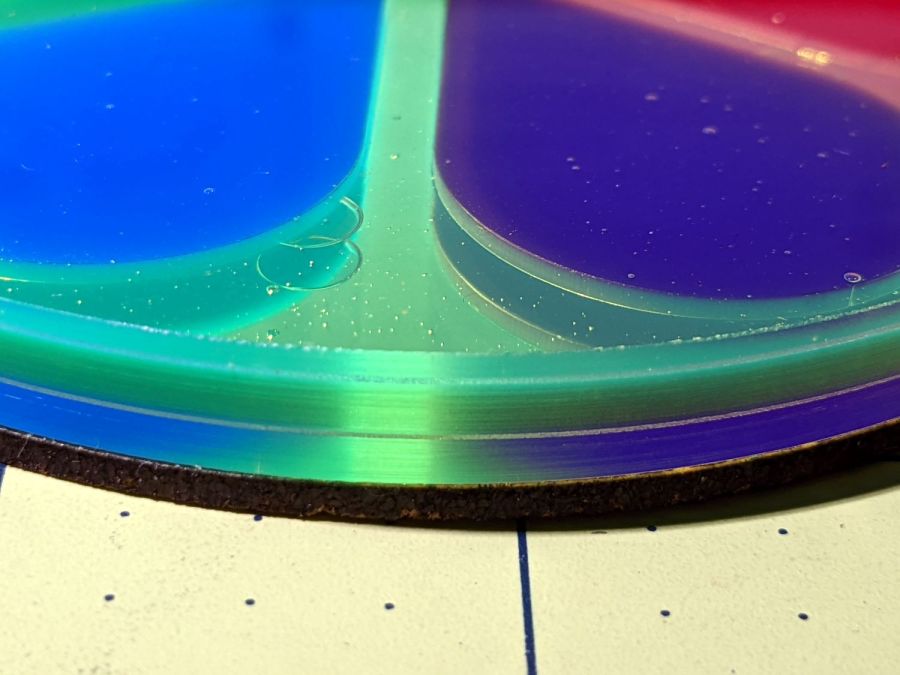
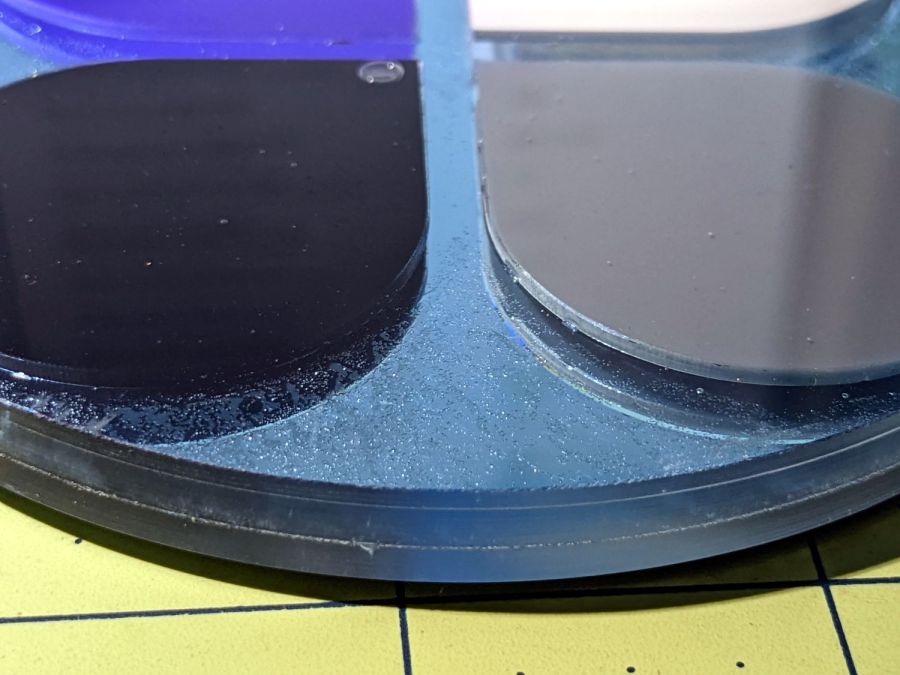
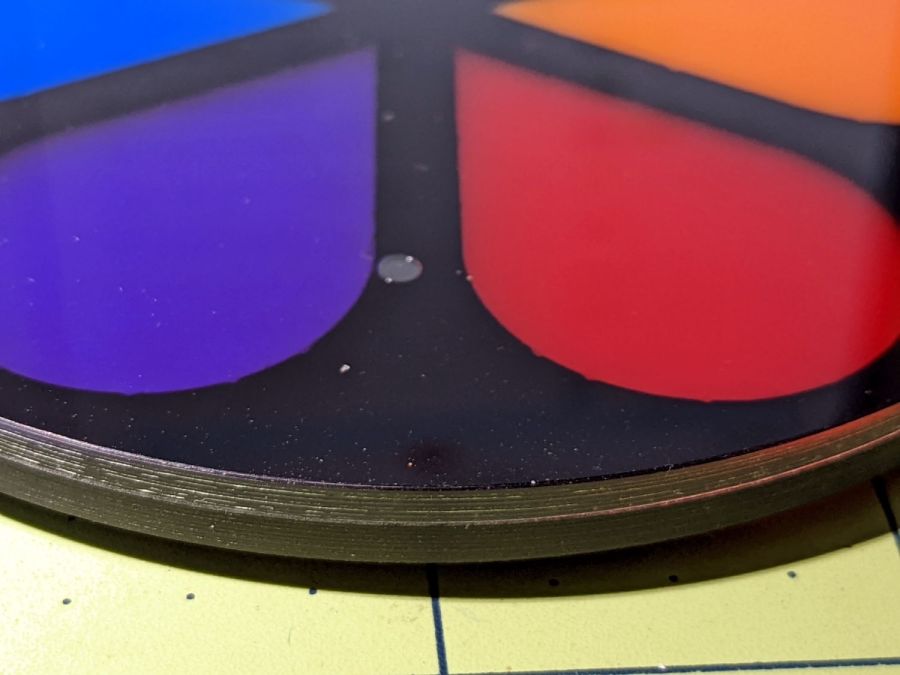
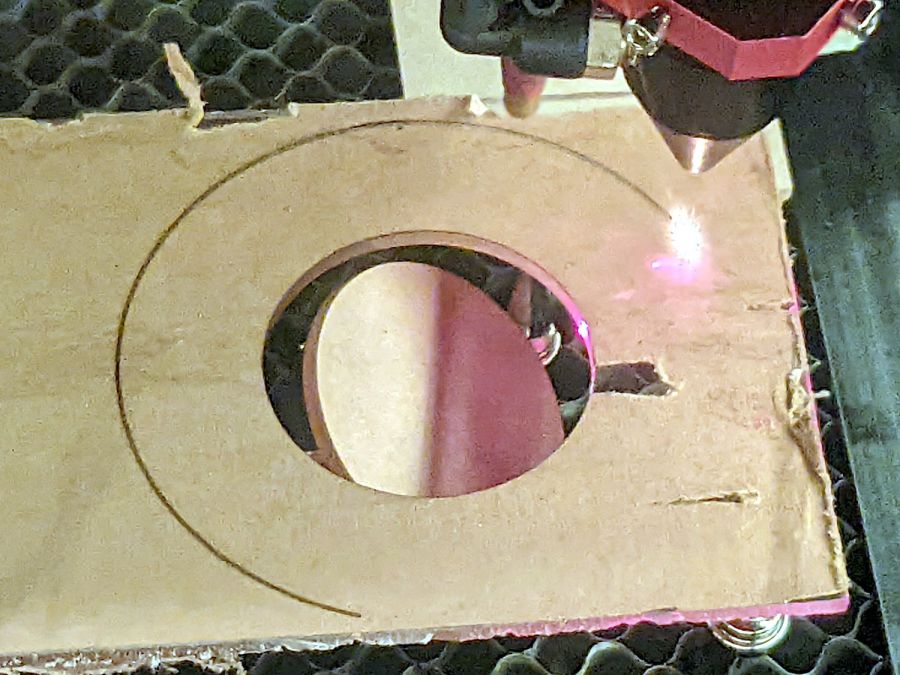
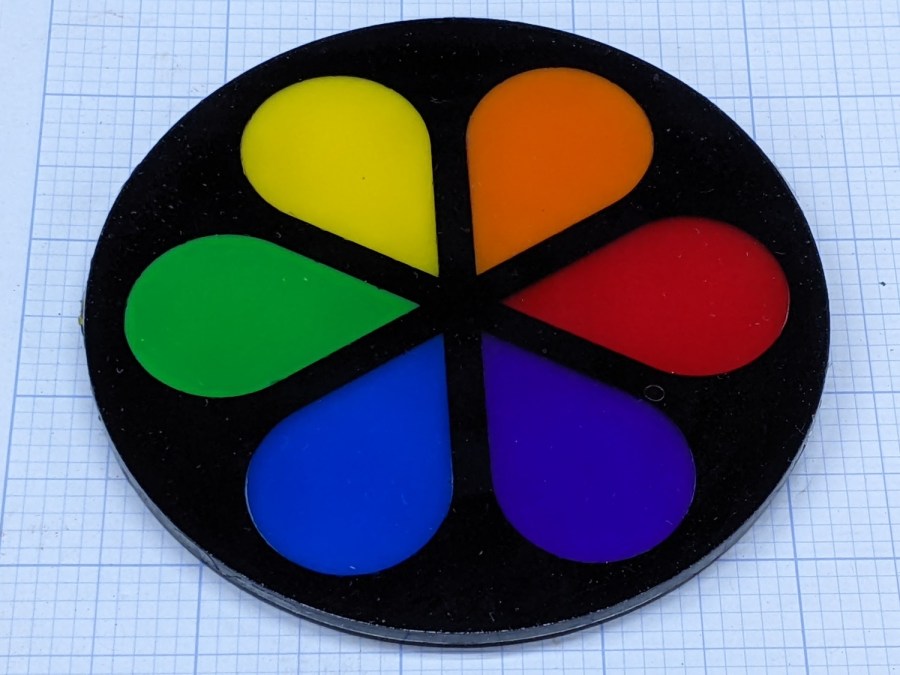
// Marquetry Layers |
|
// Ed Nisley KE4ZNU |
|
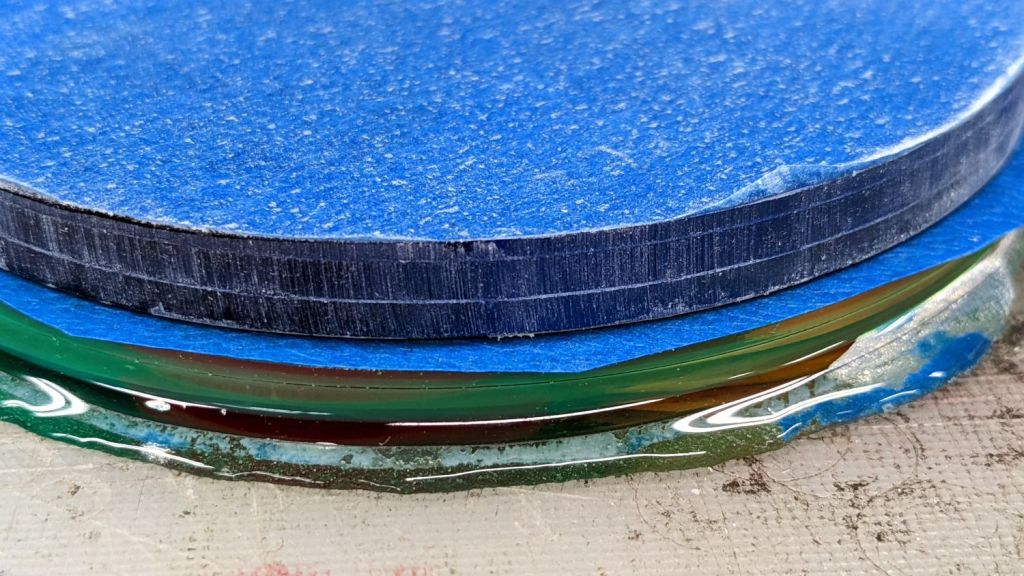
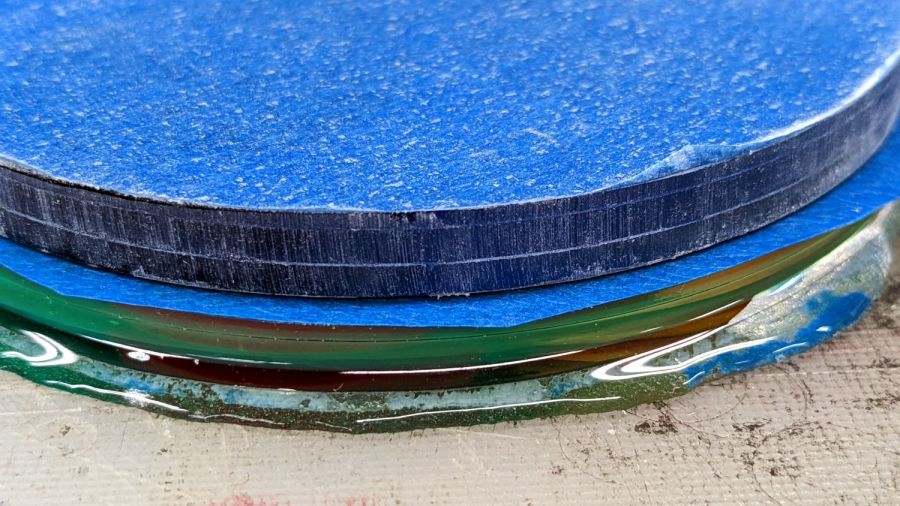
// 2022-08-21 layered paper test piece |
|
|
|
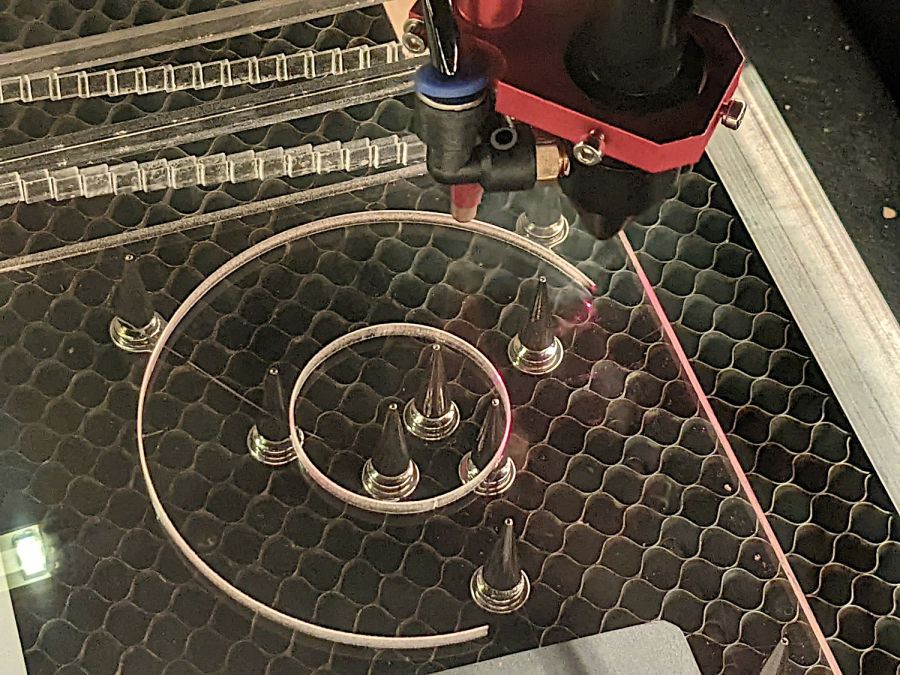
layerstack("Frame","Leaves","Rim","Base","Center","Tool1"); // SVG layers map to LightBurn colors |
|
|
|
//—– |
|
// Library routines |
|
|
|
include("tracepath.inc.gcmc"); |
|
include("varcs.inc.gcmc"); |
|
|
|
FALSE = 0; |
|
TRUE = !FALSE; |
|
|
|
//—– |
|
// Command line parameters |
|
|
|
// -D various useful tidbits |
|
// add unit to speeds and depths: 2000mm / -3.00mm / etc |
|
|
|
if (!isdefined("OuterDia")) { |
|
OuterDia = 120.0mm; |
|
} |
|
|
|
if (!isdefined("CenterDia")) { |
|
CenterDia = 20.0mm; |
|
} |
|
|
|
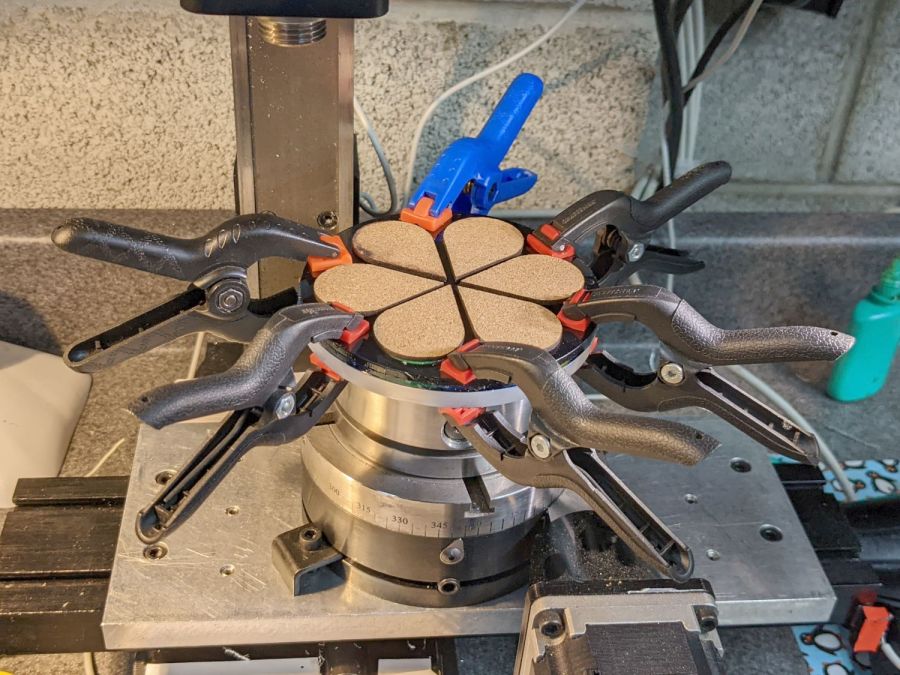
if (!isdefined("NumLeaves")) { |
|
NumLeaves = 8; |
|
} |
|
|
|
if (!isdefined("Sash")) { |
|
Sash = 4.0mm; |
|
} |
|
|
|
if (!isdefined("LeafAspect")) { |
|
LeafAspect = 0.50; |
|
} |
|
|
|
// Leaf values |
|
|
|
LeafStemAngle = 360.0deg/NumLeaves; // subtended by inner sides |
|
LeafStemHA = LeafStemAngle/2; |
|
|
|
LeafOAL = OuterDia/2 – Sash – (Sash/2)/sin(LeafStemHA); |
|
|
|
LeafWidth = LeafAspect*LeafOAL; |
|
L1 = (LeafWidth/2)/tan(LeafStemHA); |
|
L2 = LeafOAL – L1; |
|
// message("Len: ",LeafOAL," L1: ",L1," L2: ",L2); |
|
|
|
LeafTipHA = to_deg(atan(LeafWidth/2,L2)); // subtended by outer sides |
|
LeafTipAngle = 2*LeafTipHA; |
|
|
|
// message("Width: ",LeafWidth); |
|
// message("Tip HA: ",LeafTipHA); |
|
|
|
LeafID = CenterDia + 2*Sash; |
|
LeafOD = LeafID + LeafOAL; |
|
|
|
// message("ID: ",LeafID," OD: ",LeafOD); |
|
|
|
// Find leaf and rim vertices |
|
|
|
P0 = [(Sash/2) / sin(LeafStemHA),0.0mm]; |
|
|
|
m = tan(LeafStemHA); |
|
y0 = -(Sash/2) / cos(LeafStemHA); |
|
|
|
if (CenterDia) { // one sash width around center spot |
|
a = 1 + pow(m,2); |
|
b = 2 * m * y0; |
|
c = pow(y0,2) – pow(LeafID/2,2); |
|
xp = (-b + sqrt(pow(b,2) – 4*a*c))/(2*a); |
|
xn = (-b – sqrt(pow(b,2) – 4*a*c))/(2*a); |
|
y = xp*tan(LeafStemHA) – (Sash/2) / cos(LeafStemHA); |
|
P1 = [xp,y]; |
|
if (FALSE) { |
|
message("a: ",a); |
|
message("b: ",b); |
|
message("c: ",c); |
|
message("p: ",xp," n: ",xn," y: ",y); |
|
} |
|
} |
|
else { // force sharp point without center spot |
|
P1 = P0; |
|
} |
|
|
|
P2 = P0 + [L1,LeafWidth/2]; |
|
P3 = P0 + [LeafOAL,0mm]; |
|
|
|
P4 = P3 + [Sash/sin(LeafTipHA),0.0mm]; |
|
P5r = P4.x * sin(LeafTipHA) / sin(180deg – LeafStemHA – LeafTipHA); |
|
P5 = rotate_xy([P5r,0.0mm],LeafStemHA); |
|
P6 = rotate_xy(P4,LeafStemAngle); |
|
|
|
t2 = pow(tan(-LeafTipHA),2); |
|
a = 1 + t2; |
|
b = -2 * t2 * P4.x; |
|
c = t2 * pow(P4.x,2) – pow(P3.x,2); |
|
|
|
xp = (-b + sqrt(pow(b,2) – 4*a*c))/(2*a); |
|
xn = (-b – sqrt(pow(b,2) – 4*a*c))/(2*a); |
|
y = (xp – P4.x)*tan(-LeafTipHA); |
|
// message("p: ",xp," n: ",xn," y: ",y); |
|
|
|
P4a = [xp,y]; |
|
P6a = rotate_xy(P4a,LeafStemAngle – 2*atan(P4a.y,P4a.x)); |
|
|
|
if (FALSE) { |
|
message("P0: ",P0); |
|
message("P1: ",P1); |
|
message("P2: ",P2); |
|
message("P3: ",P3); |
|
message("P4: ",P4); |
|
message("P4a: ",P4a); |
|
message("P5: ",P5); |
|
message("P6: ",P6); |
|
message("P6a: ",P6a); |
|
} |
|
|
|
// Construct paths |
|
|
|
LeafPoints = {P1,P2,P3,[P2.x,-P2.y],[P1.x,-P1.y]}; |
|
|
|
if (P0 != P1) { |
|
StemArc = varc_ccw(P1 – [P1.x,-P1.y],LeafID/2); |
|
StemArc += [P1.x,-P1.y]; |
|
LeafPoints += StemArc; |
|
} |
|
|
|
RimChord = length(P4a – P6a); |
|
RimThick = OuterDia/2 – Sash – length(P5); |
|
|
|
RimPoints = {P4a,P5,P6a}; |
|
RimArc = varc_cw(P4a – P6a,P4a.x); |
|
RimArc += P6a; |
|
RimPoints += RimArc; |
|
|
|
//— Lay out the frame |
|
|
|
linecolor(0xff0000); |
|
|
|
layer("Frame"); |
|
|
|
if (CenterDia) { |
|
goto([CenterDia/2,0mm]); |
|
circle_cw([0mm,0mm]); |
|
} |
|
|
|
repeat(NumLeaves;i) { |
|
a = (i-1)*LeafStemAngle; |
|
tracepath(rotate_xy(LeafPoints,a)); |
|
} |
|
|
|
repeat(NumLeaves;i) { |
|
a = (i-1)*LeafStemAngle; |
|
tracepath(rotate_xy(RimPoints,a)); |
|
} |
|
|
|
linecolor(0xff0000); |
|
|
|
goto([OuterDia/2,0]); |
|
circle_cw([0mm,0mm]); |
|
|