The bandsaw now sports a chunky mount for its gooseneck light:
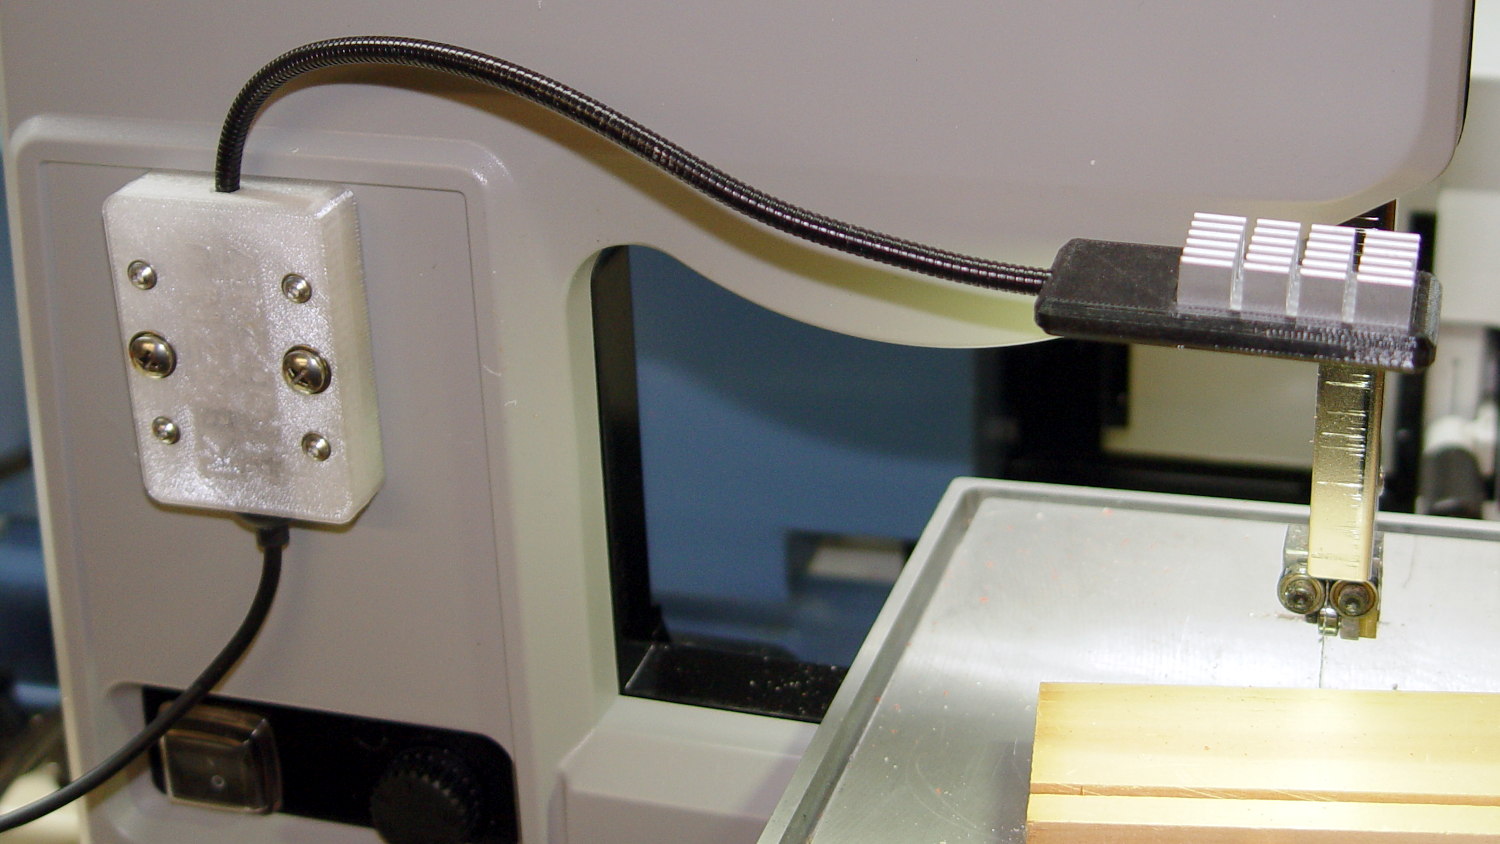
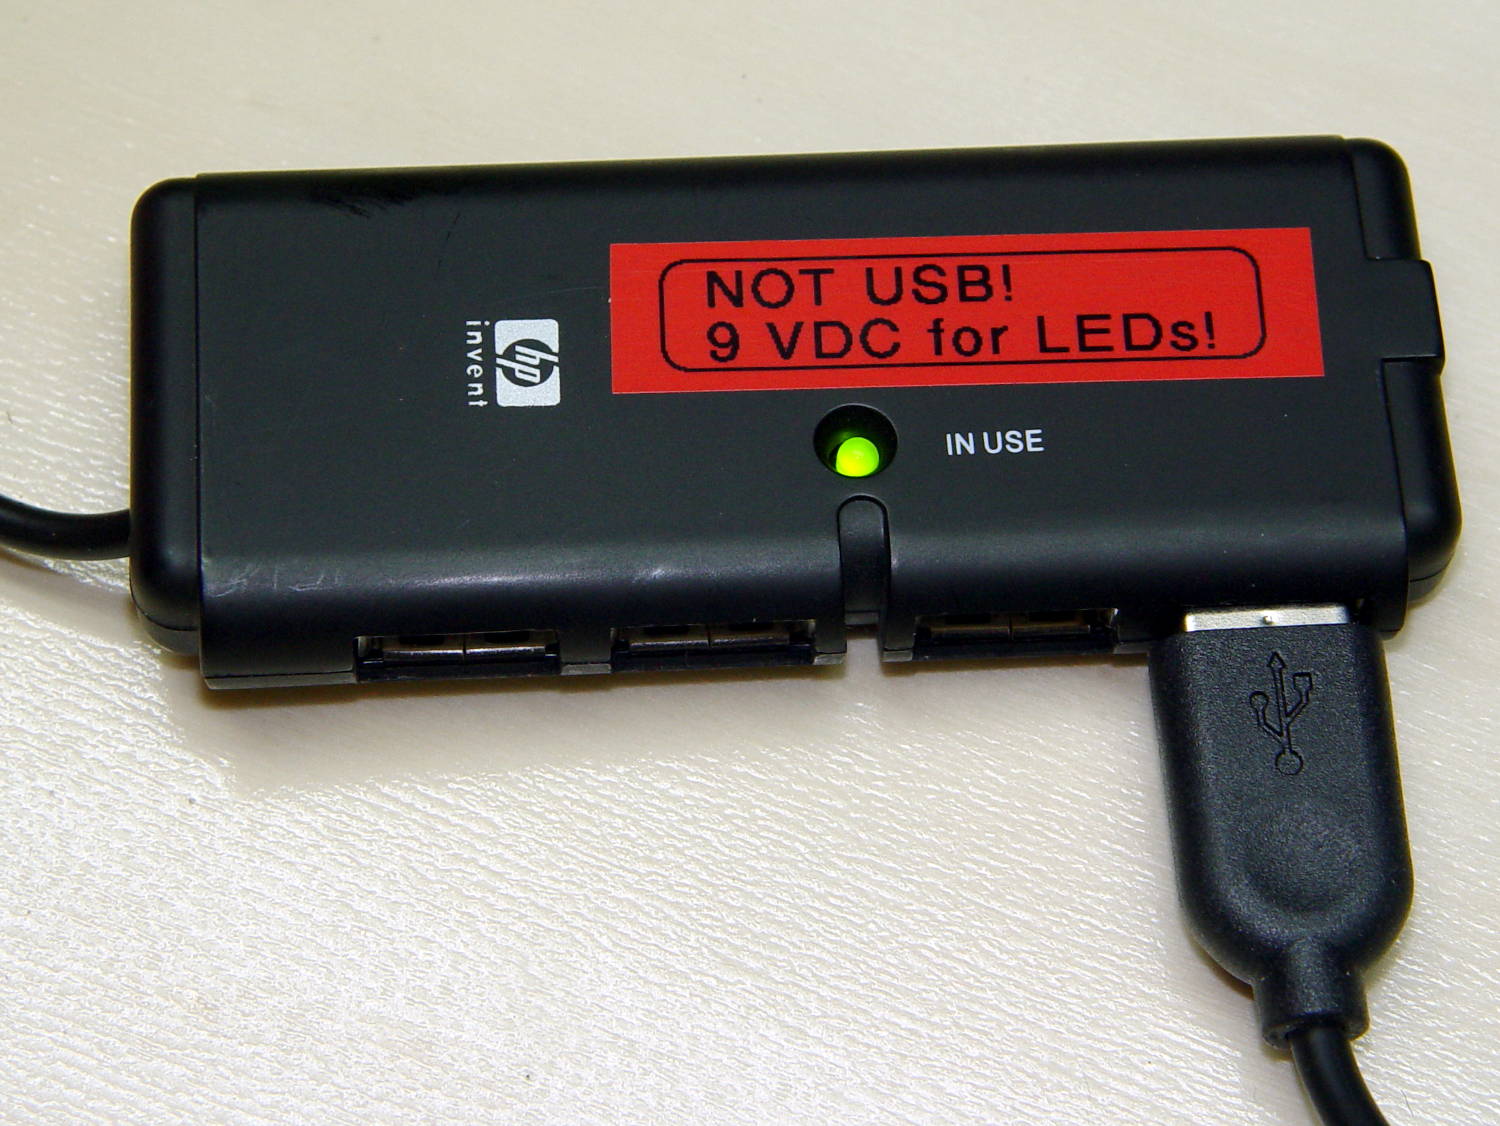
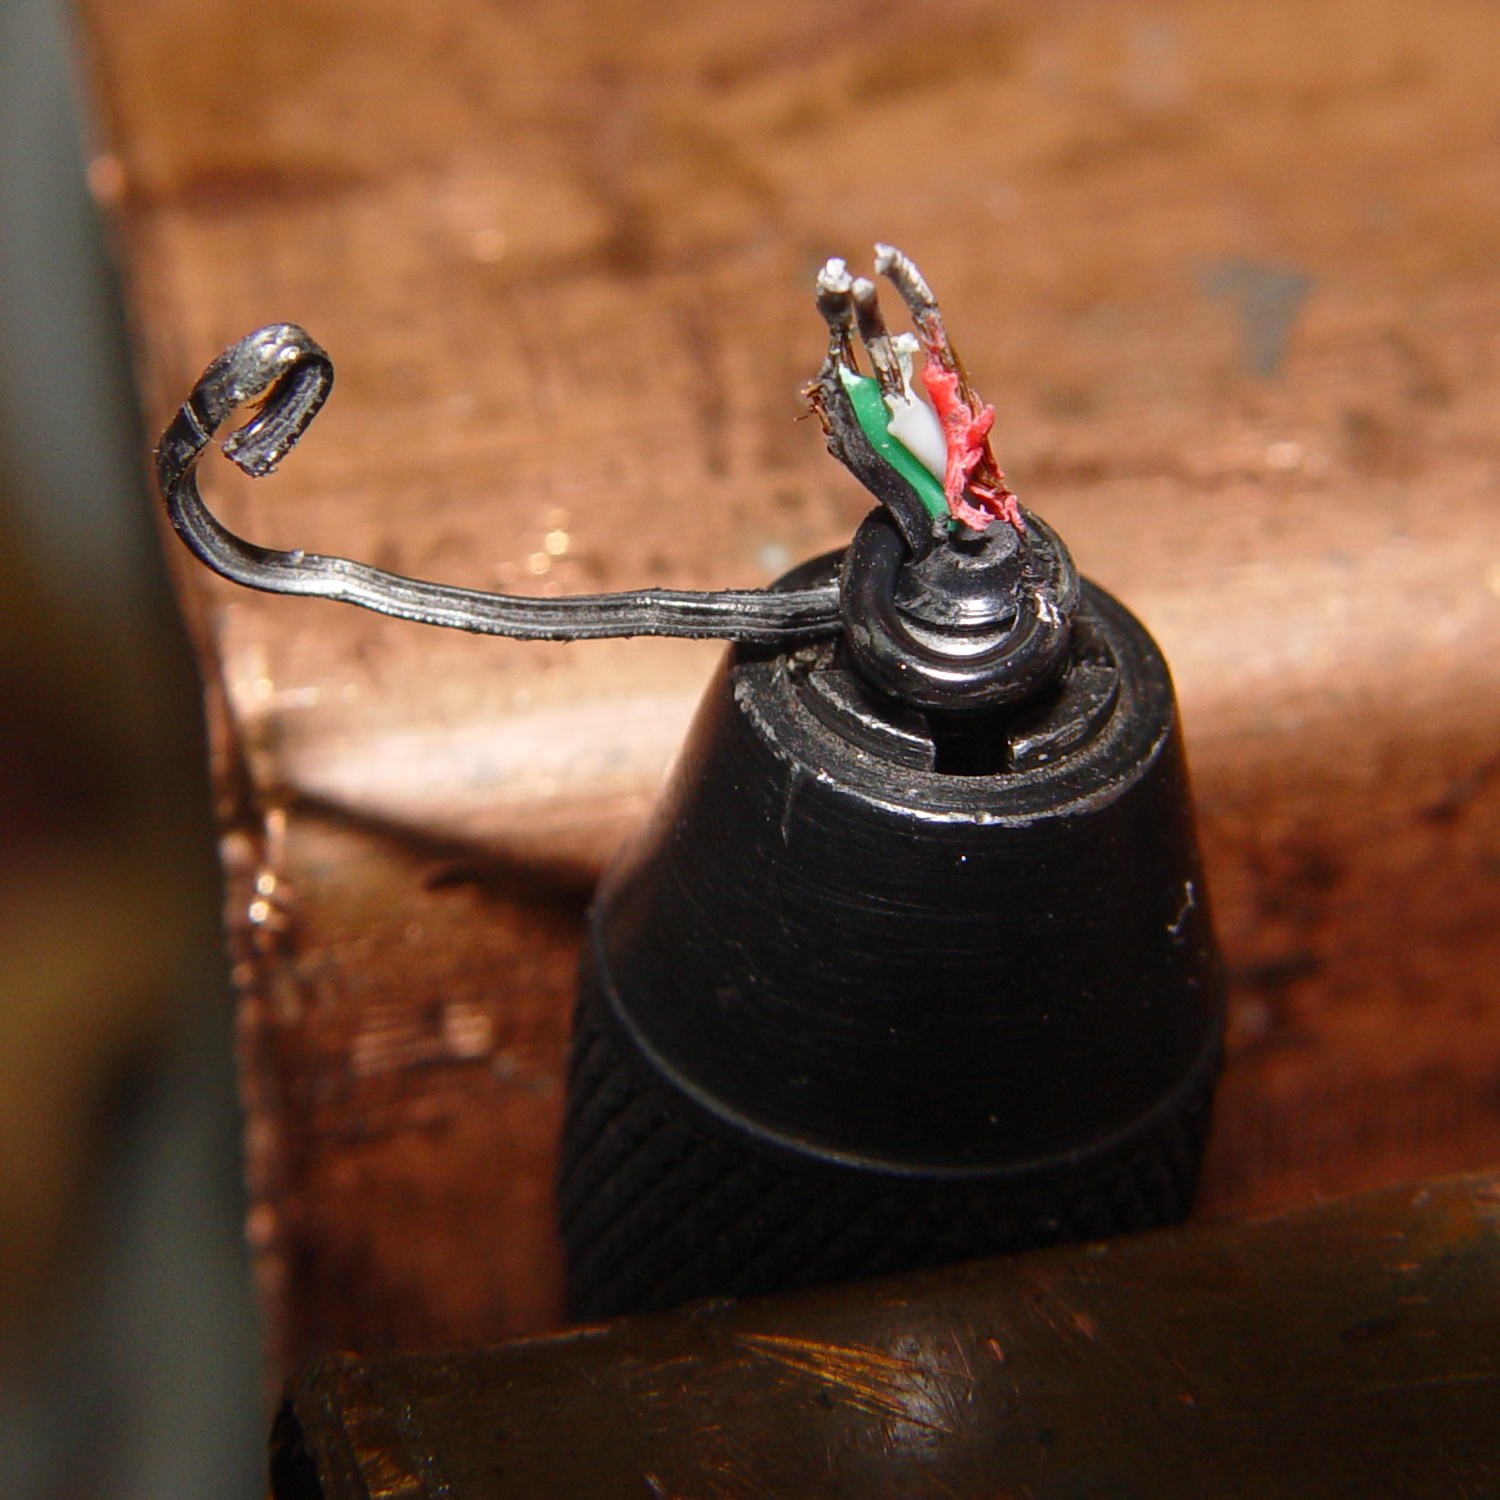
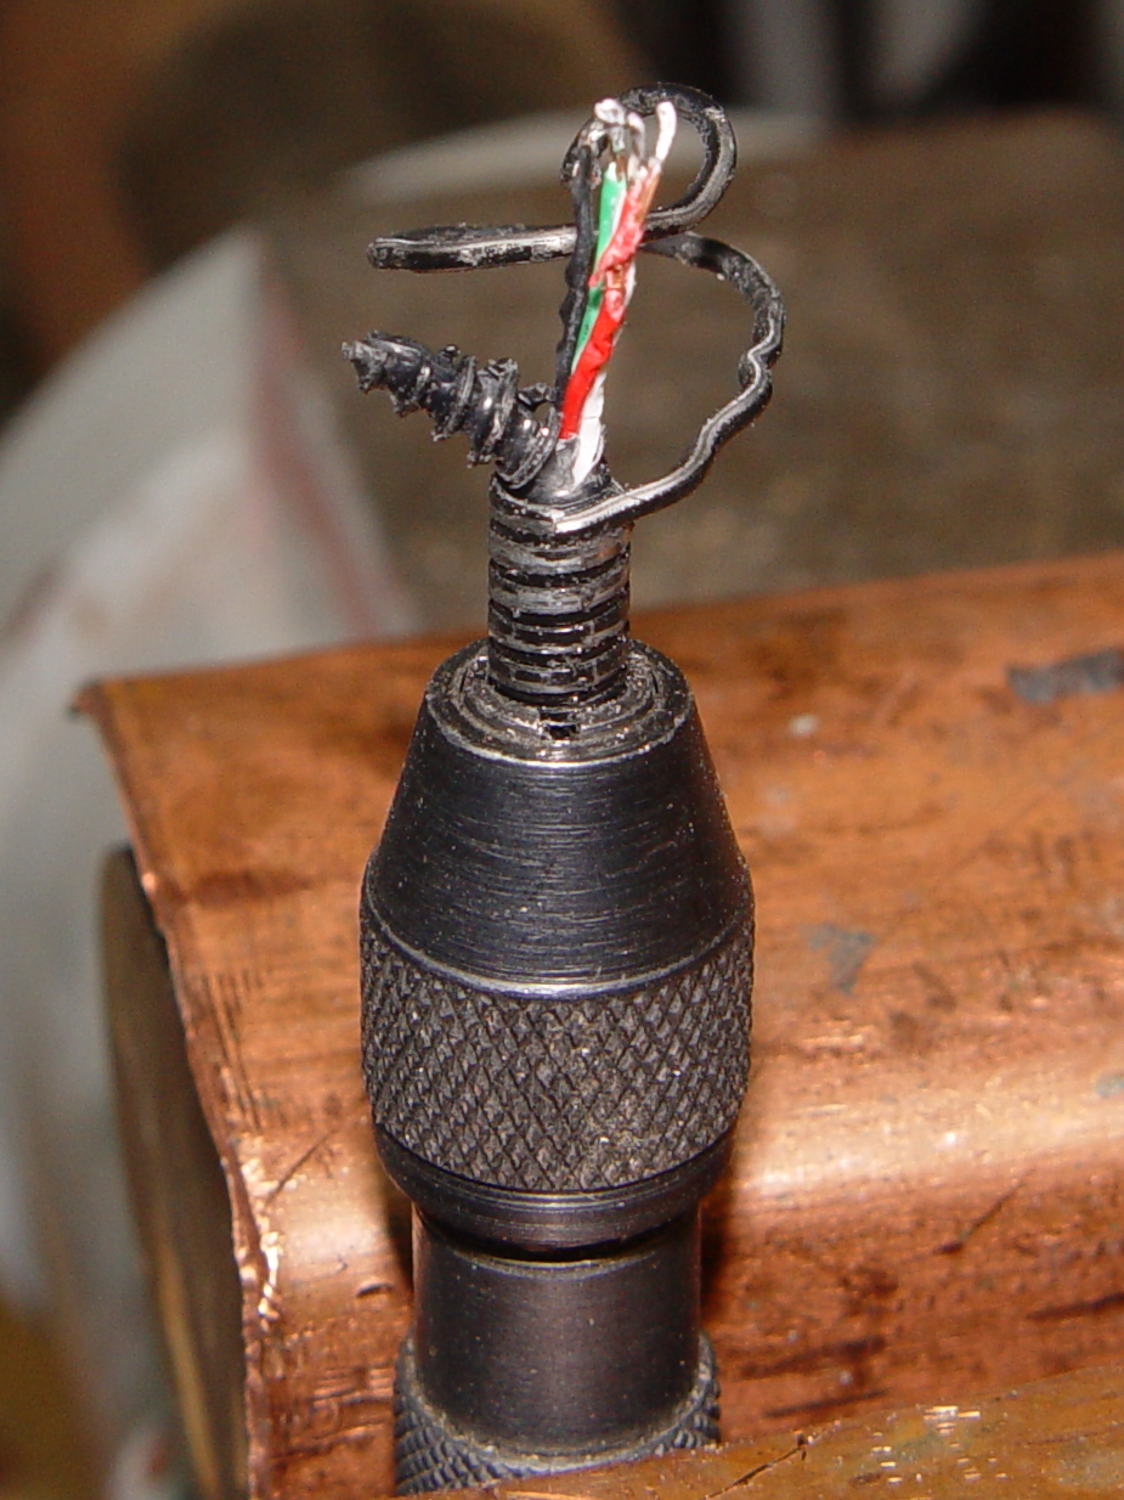
The gooseneck ends in a USB Type-A plug, so an ordinary USB extension cable can connect it to the hacked hub supplying 9 VDC:

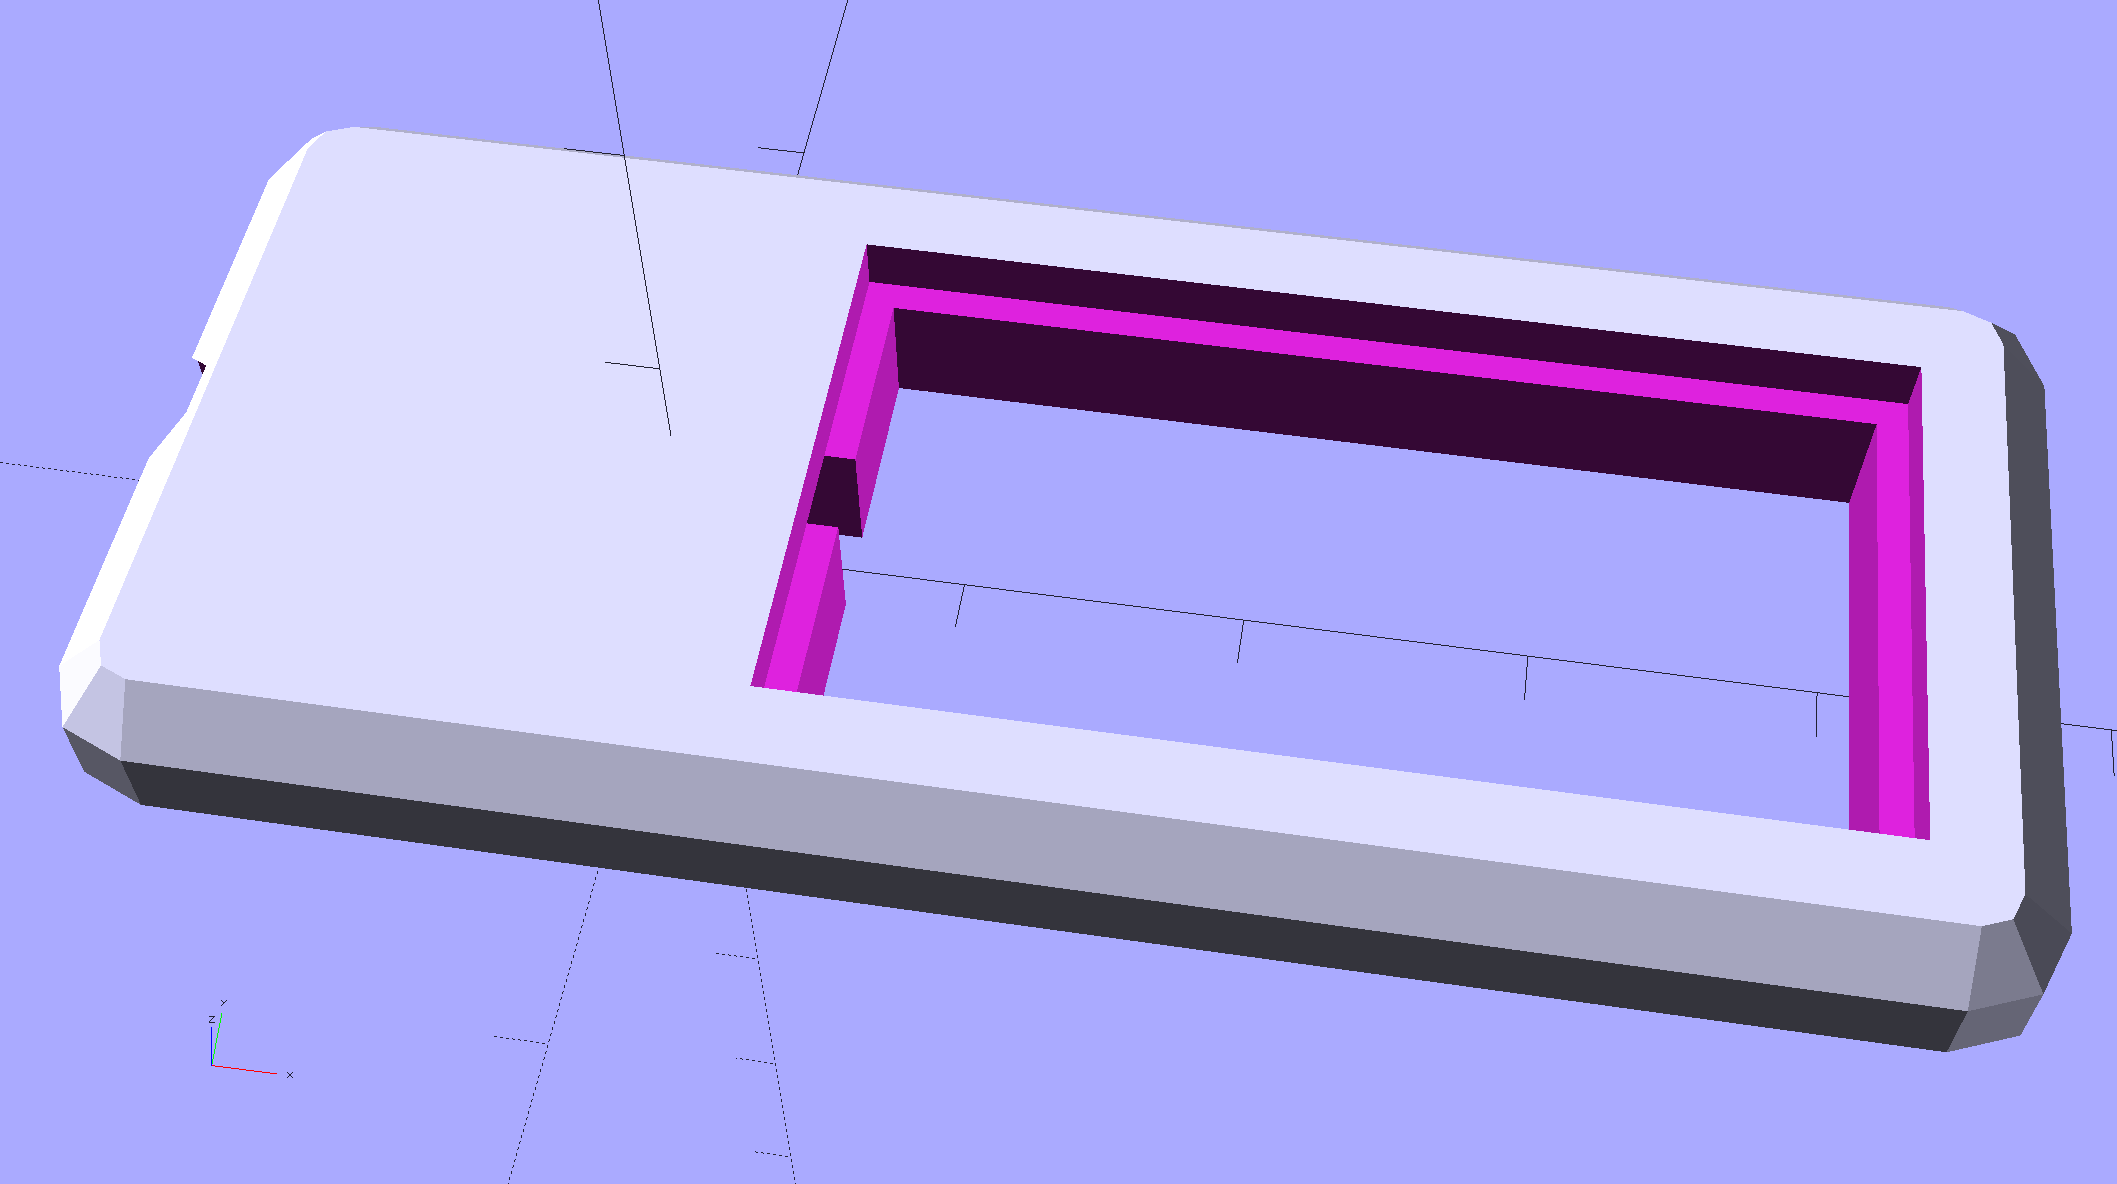
The plastic came from a slightly earlier version of the solid model, with one foam pad under the gooseneck’s USB plug to soak up the clearance. The four smaller holes, with M3 brass inserts visible in the bottom half (on the right), clamp the gooseneck connector in place against the foam; you could push it out if you were really determined, but you’d have to be really determined.
If I ever build another one, it’ll sandwich the plug between opposing pads:

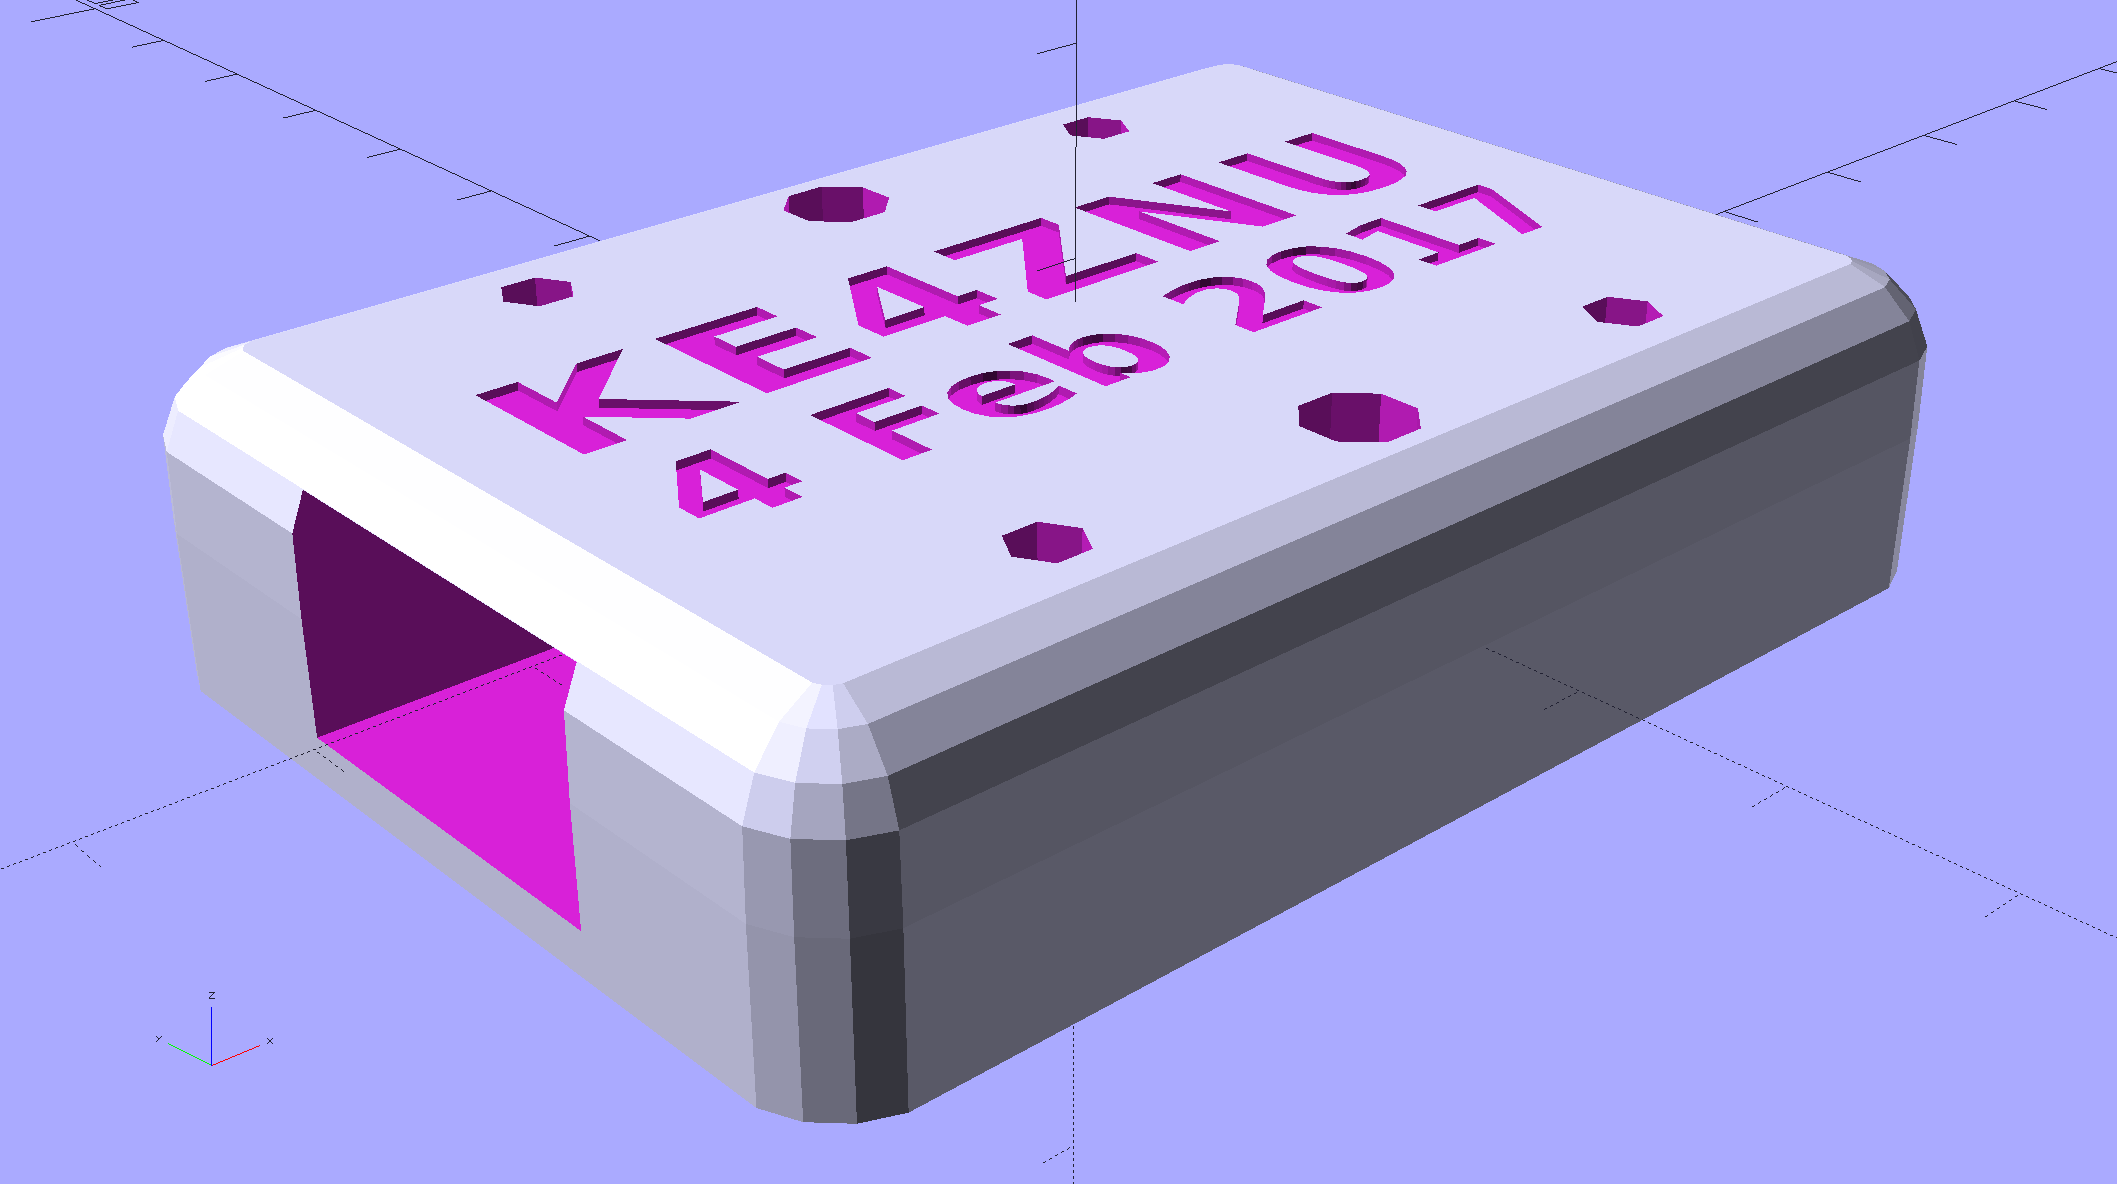
The lettering on the block stands out much better in the solid model:

Obviously, I need help with the stylin’ thing. This looks better, but with terrible overhangs for printing in the obvious no-support orientation:
Anyhow, the USB extension cable (on the left) has plenty of clearance and pulls straight out of the housing, so I can remove the bandsaw cover without unwiring:

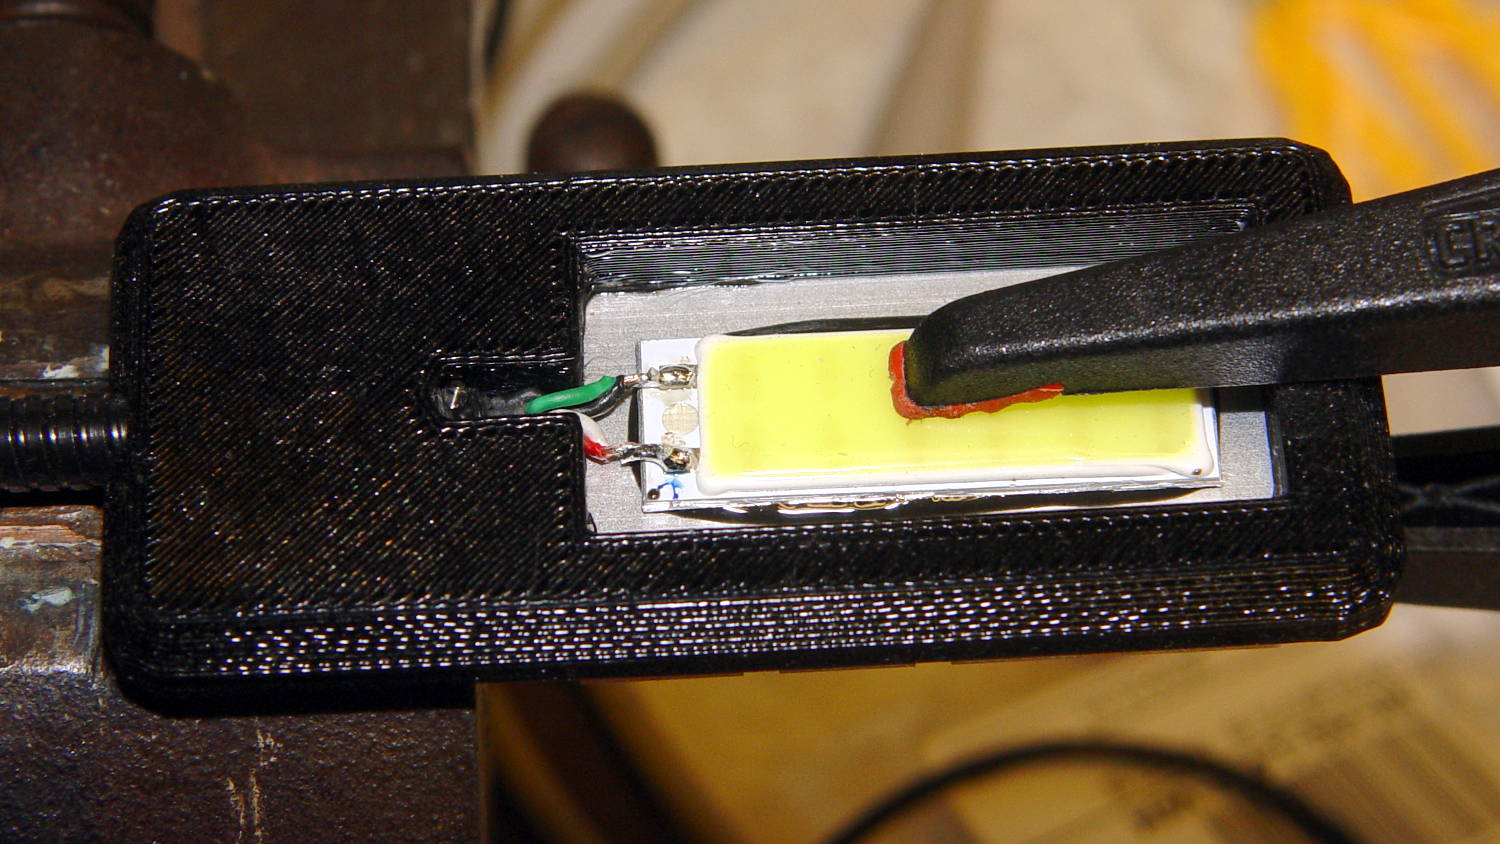
The LED ticks along at 40 °C in a 14 °C basement, suggesting a thermal coefficient around 14 °C/W. Even in the summer months, with the basement around 25 °C, there’s no risk of PETG softening at 50 °C.
I’ll epoxy a similar 1.8 W COB LED onto the curve of the bandsaw frame where it can shine on the left and rear part of the table; it doesn’t even need a case.
The OpenSCAD source code as a GitHub Gist:
| // Gooseneck lamp for MicroMark bandsaw | |
| // Ed Nisley KE4ZNU | |
| // February 2017 | |
| Layout = "Mount"; // Mount Show Build | |
| Gap = 5; // distance between halves for Show | |
| //- Extrusion parameters must match reality! | |
| ThreadThick = 0.25; | |
| ThreadWidth = 0.40; | |
| HoleWindage = 0.2; | |
| Protrusion = 0.1; // make holes end cleanly | |
| inch = 25.4; | |
| function IntegerMultiple(Size,Unit) = Unit * ceil(Size / Unit); | |
| //———————- | |
| // Dimensions | |
| Tap10_32 = 0.159 * inch; | |
| Clear10_32 = 0.190 * inch; | |
| Head10_32 = 0.373 * inch; | |
| Head10_32Thick = 0.110 * inch; | |
| Nut10_32Dia = 0.433 * inch; | |
| Nut10_32Thick = 0.130 * inch; | |
| Washer10_32OD = 0.381 * inch; | |
| Washer10_32ID = 0.204 * inch; | |
| ID = 0; // for round things | |
| OD = 1; | |
| LENGTH = 2; | |
| Insert = [3.0,4.9,2*ThreadThick + IntegerMultiple(4.2,ThreadThick)]; // M3 short brass insert | |
| CornerRadius = 5.0; // rounded mount block corners for pretty | |
| CornerSides = 4*4; | |
| RoundedTop = true; // true for fancy smooth top edges | |
| USBPlug = [39.0,16.0,8.3]; // plug, X from base of plug | |
| USBSocket = [28.0,20.0,11.5]; // USB extension, X from tip of socket | |
| USBMating = [-12.0,0,0]; // offset of plug base relative to block center | |
| Foam = [35.0,10.0,2.0 – 1.0]; // foam pad to secure USB plug (Z = thickness – compression) | |
| GooseneckOD = 5.0; // flexy gooseneck diameter | |
| MountScrewOC = 35.0; // make simple screw hole spacing for bandsaw case | |
| MountBlock = [10*round((USBPlug[0] + USBSocket[0] + 5.0)/10), | |
| 10*round((MountScrewOC + Washer10_32OD + 5.0)/10), | |
| // 2*6*ThreadThick + IntegerMultiple(max(USBPlug[2],USBSocket[2]),ThreadThick)]; | |
| 16.0]; // thickness = 16 mm M3x0.5 button head screw | |
| echo(str("Block size: ",MountBlock)); | |
| LegendDepth = 2*ThreadThick; // lettering depth | |
| //———————- | |
| // Useful routines | |
| module PolyCyl(Dia,Height,ForceSides=0) { // based on nophead's polyholes | |
| Sides = (ForceSides != 0) ? ForceSides : (ceil(Dia) + 2); | |
| FixDia = Dia / cos(180/Sides); | |
| cylinder(r=(FixDia + HoleWindage)/2, | |
| h=Height, | |
| $fn=Sides); | |
| } | |
| //– Mount | |
| module Mount() { | |
| difference() { | |
| hull() | |
| if (RoundedTop) { | |
| for (i=[-1,1], j=[-1,1]) | |
| translate([i*(MountBlock[0]/2 – CornerRadius),j*(MountBlock[1]/2 – CornerRadius),0]) { | |
| translate([0,0,-MountBlock[2]/2]) | |
| rotate(180/CornerSides) | |
| cylinder(r=CornerRadius,h=MountBlock[2]/2,$fn=CornerSides,center=false); | |
| translate([0,0,MountBlock[2]/2 – CornerRadius]) | |
| rotate(180/CornerSides) | |
| sphere(r=CornerRadius,$fn=CornerSides,center=true); | |
| } | |
| } | |
| else { | |
| for (i=[-1,1], j=[-1,1]) | |
| translate([i*(MountBlock[0]/2 – CornerRadius),j*(MountBlock[1]/2 – CornerRadius),0]) | |
| rotate(180/CornerSides) | |
| cylinder(r=CornerRadius,h=MountBlock[2],$fn=CornerSides,center=true); | |
| } | |
| for (j=[-1,1]) // screws into bandsaw case | |
| translate([0,j*MountScrewOC/2,-(MountBlock[2]/2 + Protrusion)]) | |
| rotate(180/8) | |
| PolyCyl(Clear10_32,(MountBlock[2] + 2*Protrusion),8); | |
| for (i=[-1,1], j=[-1,1]) { // clamp screws | |
| translate([i*MountBlock[0]/4,j*MountScrewOC/2,-MountBlock[2]]) | |
| PolyCyl(Insert[ID],2*MountBlock[2],6); // clearance | |
| translate([i*MountBlock[0]/4,j*MountScrewOC/2,-(MountBlock[2]/2 + Protrusion)]) | |
| PolyCyl(Insert[OD],Insert[LENGTH] + Protrusion,6); // inserts | |
| } | |
| rotate([0,90,0]) // gooseneck flexy cable | |
| rotate(180/6) | |
| PolyCyl(GooseneckOD,MountBlock[0],6); | |
| translate([USBPlug[0]/2,0,0] + USBMating – [Protrusion/2,0,0]) // USB plug outline | |
| cube(USBPlug + [Protrusion,0,0],center=true); | |
| translate([-USBSocket[0]/2,0,0] + USBMating) // USB socket outline | |
| cube(USBSocket,center=true); | |
| translate([(Foam[0]/2 + 5*ThreadWidth),0,-(Foam[2]/2 + USBPlug[2]/2)] + USBMating – [Protrusion,0,-Protrusion]/2) // foam padding recess | |
| cube(Foam + [Protrusion,0,Protrusion],center=true); // foam packing | |
| translate([(Foam[0]/2 + 5*ThreadWidth),0, (Foam[2]/2 + USBPlug[2]/2)] + USBMating – [Protrusion,0, Protrusion]/2) // foam padding recess | |
| cube(Foam + [Protrusion,0,Protrusion],center=true); | |
| render(convexity=5) | |
| translate([0,0,MountBlock[2]/2 – LegendDepth]) | |
| linear_extrude(height=LegendDepth + Protrusion) { | |
| translate([0,5,0]) | |
| text(text="KE4ZNU",size=8,spacing=1.10,font="Bitstream Vera Sans:style=Bold",valign="center",halign="center"); | |
| translate([0,-5,0]) | |
| text(text="4 Feb 2017",size=6,spacing=1.05,font="Bitstream Vera Sans:style=Bold",valign="center",halign="center"); | |
| } | |
| } | |
| } | |
| //———————- | |
| // Build it | |
| if (Layout == "Mount") { | |
| Mount(); | |
| } | |
| if (Layout == "Show") { | |
| translate([0,0,-Gap/2]) | |
| difference() { | |
| Mount(); | |
| translate([0,0,MountBlock[2]]) | |
| cube(2*MountBlock,center=true); | |
| } | |
| translate([0,0,Gap/2]) | |
| difference() { | |
| Mount(); | |
| translate([0,0,-MountBlock[2]]) | |
| cube(2*MountBlock,center=true); | |
| } | |
| } | |
| if (Layout == "Build") { | |
| translate([0,0.6*MountBlock[1],MountBlock[2]/2]) | |
| difference() { | |
| Mount(); | |
| translate([0,0,MountBlock[2]]) | |
| cube(2*MountBlock,center=true); | |
| } | |
| translate([0,-0.6*MountBlock[1],MountBlock[2]/2]) | |
| rotate([180,0,0]) | |
| difference() { | |
| Mount(); | |
| translate([0,0,-MountBlock[2]]) | |
| cube(2*MountBlock,center=true); | |
| } | |
| } |