The Smell of Molten Projects in the Morning

Ed Nisley's Blog: Shop notes, electronics, firmware, machinery, 3D printing, laser cuttery, and curiosities. Contents: 100% human thinking, 0% AI slop.

Category: Machine Shop

Mechanical widgetry

  • Homage Tek CC Cursor: Pivot Milling

    A test to mill the pivot hole in 0.5 mm PETG sheet worked perfectly:

    Tek CC - cursor pivot hole milling
    Tek CC – cursor pivot hole milling

    The cutter is a 3.175 mm = 1/8 inch router bit, one of a ten-pack that came with the CNC 3018 and to which I have no deep emotional attachment, held in a collet in the Sherline. The hole is 5.5 mm to fit an eyelet. The PETG is taped to a thin plywood scrap.

    The hole happened by feeding G-Code manually into LinuxCNC, after touching off XYZ=0 at the center of the pivot and jogging up a bit:

    g0 y-1.1625
    f1000
    g0 z0.5
    g2 p5 z-1.5 i0 j1.1625

    Yes, I engraved the hairline using a diamond drag tool on the CNC 3018, cut the cursor outline with a drag knife on the MPCNC, then milled the pivot hole on the Sherline. This seems way over the top, even to me, but that’s just how the tooling worked out right now.

    In actual practice, I’d probably mill a stack of cursors and pivot holes on the Sherline in one setup, then engrave the hairlines in a suitable fixture. I think I know enough to fit a spring-loaded diamond drag bit into the Sherline’s 10 mm ID spindle or, worst case, conjure a block for the Z-axis carrier in place of the entire spindle mount.

    At least now I can remember what I did to make the hole.

  • MPCNC Drag Knife Holder: Lock Screw

    While calibrating the MPCNC’s probe camera offset for the drag knife holder, this happened:

    Drag Knife - vertical escape
    Drag Knife – vertical escape

    Well, at least it’s centered on the target:

    Drag Knife - vertical escape - detail
    Drag Knife – vertical escape – detail

    This happened a few times before, because my fingers don’t fit neatly inside the drag knife holder to tighten the lock ring:

    Drag Knife - LM12UU ground shaft - assembled
    Drag Knife – LM12UU ground shaft – assembled

    [Update: The lock ring keeps the holder at a fixed position inside the 12 mm shaft and doesn’t affect the blade directly. When the ring works loose, the threaded holder can rotate to expose more blade and, in this case, stab deeper into the target. ]

    So I turned & knurled an aluminum ring, then tapped a 3×0.5 mm hole for a lock screw plucked from the Drawer o’ Random M3 Screws:

    Drag Knife - lock screw - side
    Drag Knife – lock screw – side

    A view looking along the screw shows a bit more detail around the spring:

    Drag Knife - lock screw - front
    Drag Knife – lock screw – front

    The general idea is to set the blade extension, then tighten the lock screw to hold it in place, without relying on the original brass lock ring, shown here while cutting a boss for the spring:

    Drag Knife - turning spring recess
    Drag Knife – turning spring recess

    The lock screw’s knurled handle just barely kisses the NPCNC’s black tool holder ring, so my guesstimated measurements were a bit off. Clamping the knife holder one itsy higher in the tool holder solved the problem.

    I cranked on 300 g of spring preload and, squashed like that, the spring’s rate is now 75 g/mm. Cutting at Z=-1 mm should suffice for laminated paper slide rule decks.

    The original sizing doodle:

    Drag Knife Holder - lock screw ring doodle
    Drag Knife Holder – lock screw ring doodle

    The short 18 mm section clears the inside of the LM12UU bearing, although it could be a millimeter shorter. The 19 mm section comes from the 3/4 inch aluminum rod I used, skim-cut to clean it up.

    If I ever remake this thing, it needs a major re-think to get all the dimensions flying in formation again.

  • Photo Lamp Mount: Moah Plastic!

    One of the cold shoe mounts I made for the photo lamps cracked:

    Photo Lamp Mount - fractured
    Photo Lamp Mount – fractured

    It’s done in PETG with my more-or-less standard two perimeter threads and 15% 3D honeycomb infill, which is Good Enough™ for most of my parts. In this case, there’s obviously not nearly enough plastic in there!

    Redoing it with three perimeters and 50% infill should improve the situation, even though it looks identical on the outside:

    Photo Lamp Mount - reinstalled
    Photo Lamp Mount – reinstalled

    I didn’t replace the other mount. If it breaks, it’ll get the same 50% infill as this one. If this one breaks, I’ll try 75%.

    An easy fix!

  • Eyelet Punch Reshaping

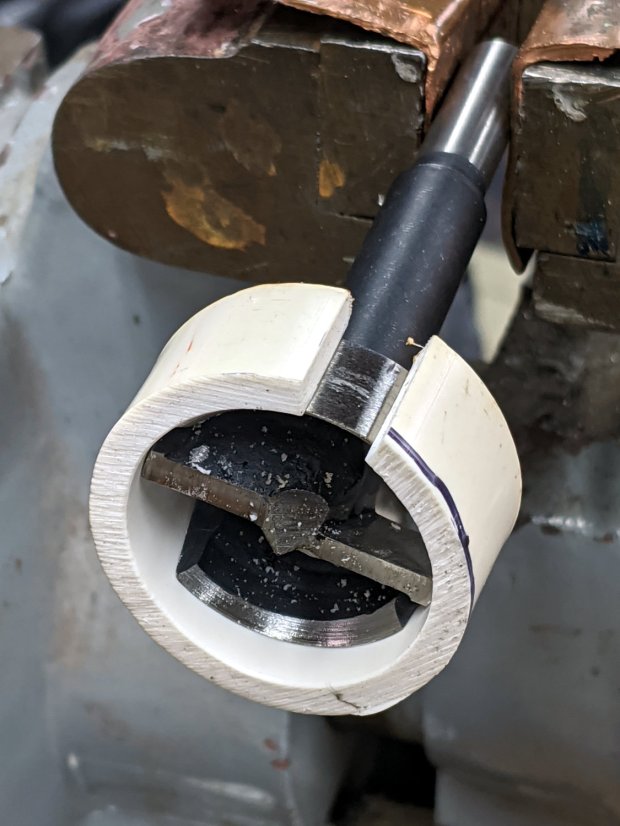
    The hollow punch included with the 5.5 mm eyelet / grommet set had a rather blunt cutting edge:

    Eyelet punch - OEM taper
    Eyelet punch – OEM taper

    The rainbow colors along the tapered cut suggested at least token hardening of the edge, so I mounted it in the lathe chuck, deployed a rag over the bed ways to collect the dust, and spun it at a few hundred RPM while freehanding the edge with a Dremel heavy-duty slitting wheel resting on the compound:

    Eyelet punch - reshaped
    Eyelet punch – reshaped

    It’s not what you’d call “hollow ground”, but at least the edge doesn’t force the outside of the cut surface quite so far outward.

    The Tek Circuit Computer decks get their pivot holes cut with a drag knife on the MPCNC, but I won’t be too embarrassed the next time I deploy this thing.

  • Monthly Image: Digital Machinist 14.4 Cover

    I ain’t getting richer, but I did get mah pitcher onna cover of th’ Digital Machinist:

    Digital Machinist Cover DM14.4 - Winter 2019
    Digital Machinist Cover DM14.4 – Winter 2019

    I just caught George Bulliss in a weak moment. [grin]

    It’s the diamond drag holder on the CNC 3018-Pro, before the XL axis extension hackage., with the probe camera stuck to the left side.

    You can say you knew me before …

  • Needle Case Repair

    A needle case emerged from the bottom of a drawer in need of repair:

    Needle Case - unglued
    Needle Case – unglued

    The original joint used solvent glue and I suppose I could refresh it with acetone, but two blobs of hot melt glue seemed easier and, IMO, more durable.

    In any event, it’s once more ready for use:

    Needle Case - repaired
    Needle Case – repaired

    Hooray for another zero-dollar repair, although you can see why nobody else does them these days.

  • HP 7475A Plotter: Ceramic Pen Tip Wear

    An upcoming show-n-tell prompted me to make sure the HP 7475A plotter still worked and verify the pen stash. One of the ceramic pens expired during the first test plot and a refill didn’t improve its disposition, so I pulled a new-old-stock pen from its wrapper.

    As expected, the defunct pen’s ink supply core had worn down to the surrounding ceramic nib:

    HP 7475A Ceramic-tip pen - worn core
    HP 7475A Ceramic-tip pen – worn core

    The new pen looks like it has a brush sticking out:

    HP 7475A Ceramic-tip pen - fresh core
    HP 7475A Ceramic-tip pen – fresh core

    The new pen’s core looks slightly larger and, in fact, it’s labeled as 0.4 mm rather than 0.3 mm. The new-old-stock pen stash includes a few 0.2 mm ceramic pens; I should think of something requiring hairline detail.

    It passed the manual scribble test and promptly ran out of ink during its first plot. I injected some blue ink and it’s now plotting happily for the first time in its life.