Ed Nisley's Blog: Shop notes, electronics, firmware, machinery, 3D printing, laser cuttery, and curiosities. Contents: 100% human thinking, 0% AI slop.
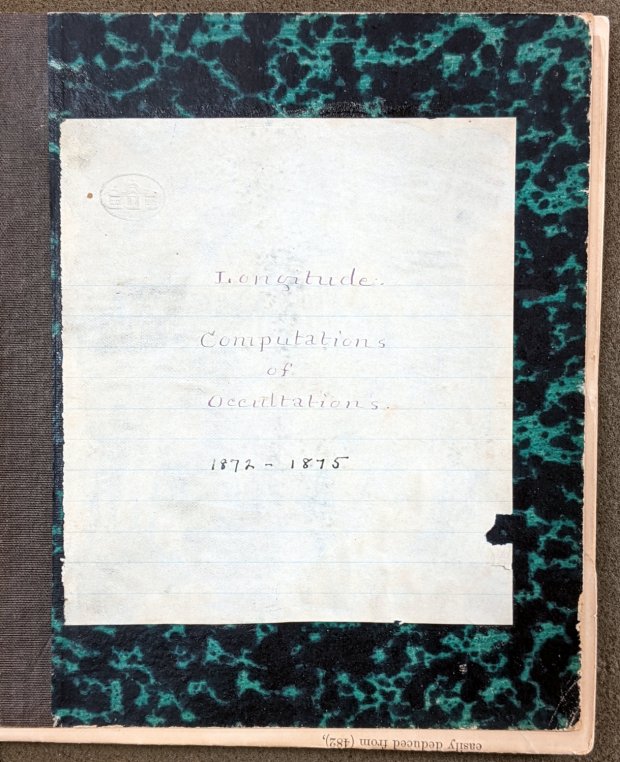
Mitchell 8.6 – Longitude computations of occultations 1872-1875
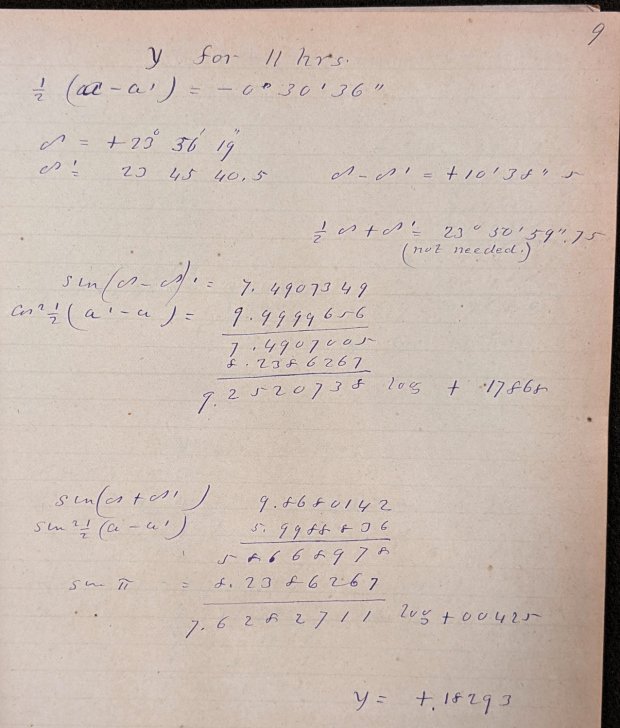
Here’s what “calculations” looked like in 1872:
Mitchell 8.6 p9 – Occultation of 1253 BAC at 11 hrs – calculation
Yeah, grinding out trigonometry by hand using seven-place logarithms:
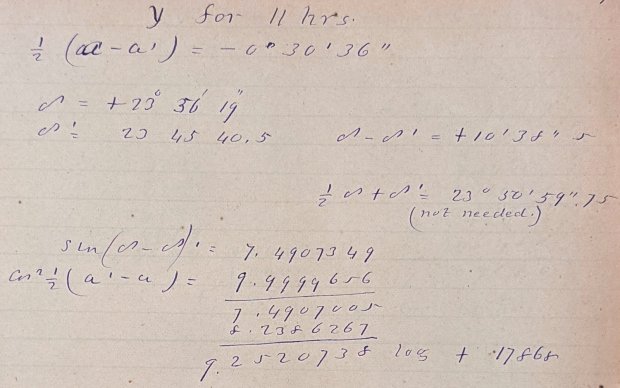
Mitchell 8.6 p9 – Occultation of 1253 BAC at 11 hrs – calculation detail 1
Not just by hand, but by hand with pen and ink:
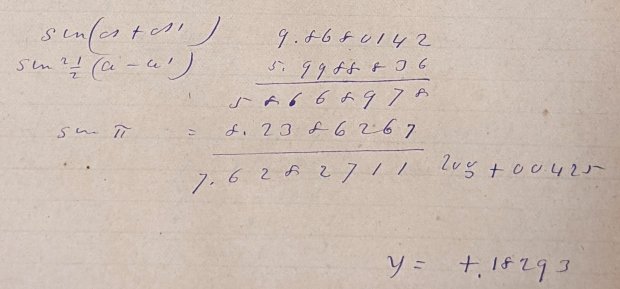
Mitchell 8.6 p9 – Occultation of 1253 BAC at 11 hrs – calculation detail 2
Although you’ll find an occasional ink blot, she was probably using a fountain pen, rather than a dip pen, and made very few mistakes along the way. She often recorded direct instrument observations in pencil.
The next time you start pissing & moaning about how hard solid modeling is, suck it up.
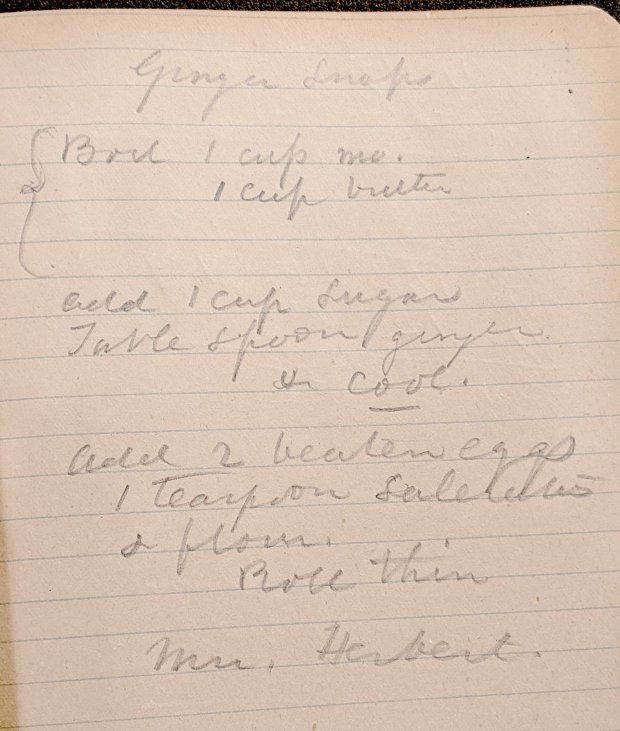
Bonus: a Ginger Snap recipe suggesting it wasn’t all toil & trouble in the observatory:
Mitchell 7.5 – Ginger Snap recipe
The mystery ingredient is saleratus, “aerated salt”, now known as baking soda; they used potassium bicarbonate before today’s sodium bicarbonate.
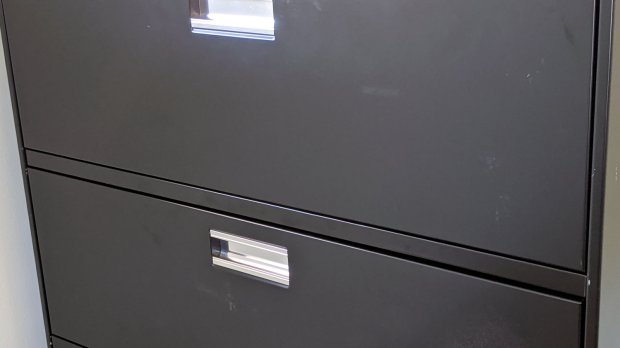
Somewhat to our surprise, our “new” HON Lateral File Cabinets include a pop-out shelf:
HON Lateral File – shelf – closed
The trick: push the bar inward against fairly stiff spring pressure, release it suddenly, watch it pop out maybe half an inch, get some fingers under the front edge, then pull it outward:
HON Lateral File – shelf – extended
Obviously, opening the drawer above the shelf will sweep whatever you put there onto the floor and opening the drawer below seems futile. I suppose it produced a bullet item on the features list.
Note that the topmost “drawer” is also called a “shelf”, because the front cover slides up-and-inward to reveal the contents. Should you stand eight feet tall, you might be able to look down on that shelf, but we mere mortals barely see its contents at eye level.
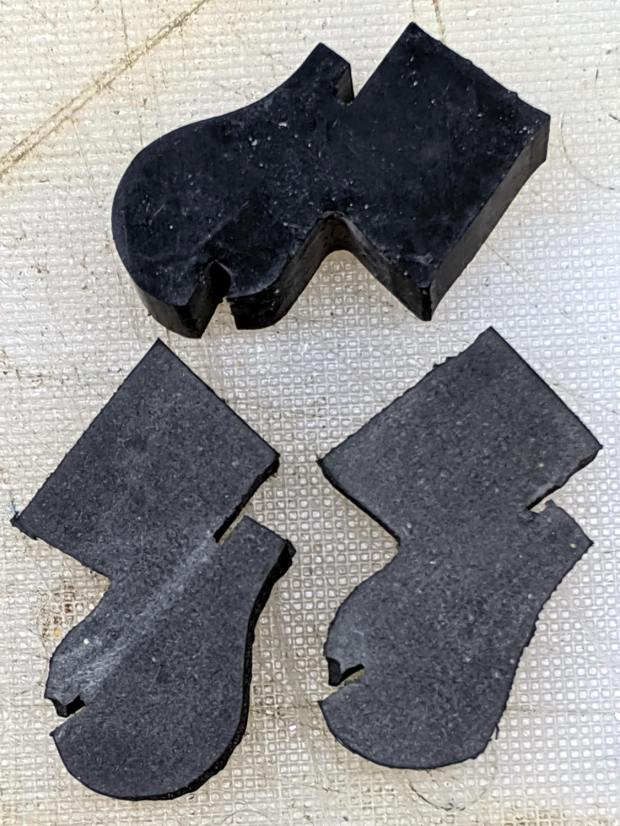
Dismantling the cabinets preparatory to deep cleaning revealed a pair of rubber bumpers along the rear edge of the shelf:
HON Lateral File – shelf bumper – installed
The slightly angled front side of the bumper (on the right) collides with a crossbar below the drawer just above it, preventing you from pulling the shelf entirely out of the cabinet.
Remove the bumper by pressing down and rearward (to the left), shoving the protruding lip into the slot with a thumb / screwdriver, then pull it upward through the slot:
HON Lateral File – shelf bumper – removed
The second cabinet had only one bumper, so I traced it twice onto a rubber sheet half as thick as the OEM bumper, bandsawed the shapes, and introduced them to Mr Belt Sander for cleanup:
HON Lateral File – replacement shelf bumper
Jammed side-by-side into the slot, they’ll serve the purpose:
HON Lateral File – replacement shelf bumper – installed
As with the replacement foot on the first cabinet, they’re not the prettiest things you’ve ever seen, but Mary doesn’t expect to use the shelf and they’ll never actually bump into anything.
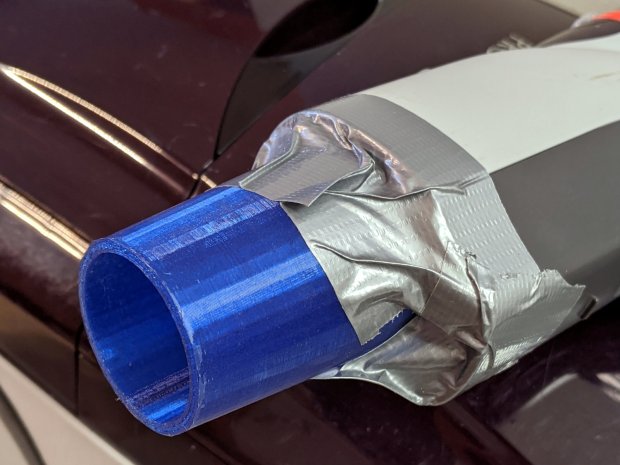
Even the Pixel phone’s HDR image processing has trouble dealing with dark gray objects on a black background in dim light …
A better fix required a few minutes of OpenSCAD tweakage and a few hours of hands-off build time:
Refrigerator Coil Wand Adapter – Slic3r preview
The fitting ID is now 2 mm smaller, the 3D honeycomb infill is 25%, and (contrary to the picture) it now has 4 perimeter threads. It’s a two-line change from the last time:
We bought the best-looking (pronounced “least bashed”) pair of hulking five-drawer industrial-strength HON Brigade Lateral File Cabinets from the local ReStore outlet’s assortment for Mary’s quilting fabric stash. They came with a steep discount, barely fit inside the Forester, caused minor interior trim damage, and should organize her entire stash.
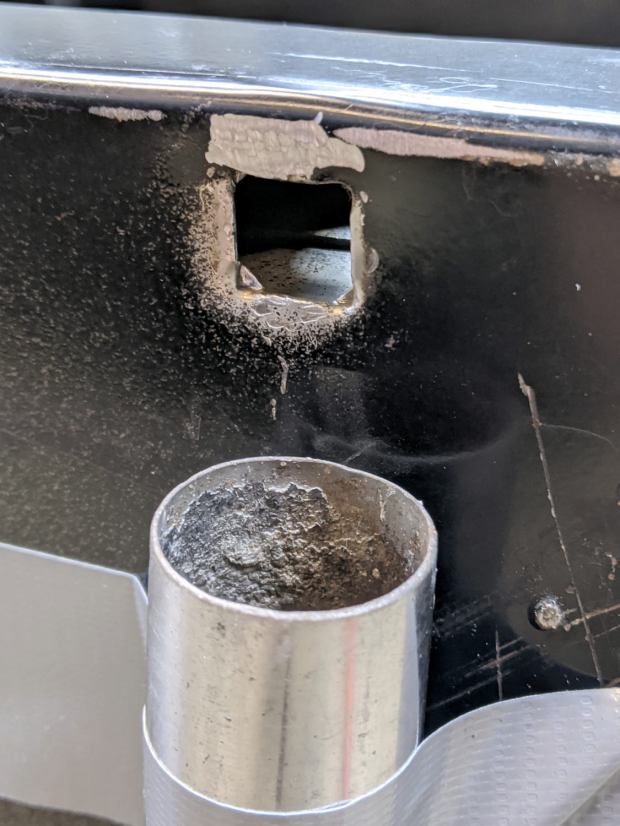
One cabinet lost a foot nut at some point in its 16 year history:
HON Lateral File – foot hole – weld nugget filed
The surviving foot nuts sported two weld nuggets apiece:
HON Lateral File – OEM front foot
The hole had the remains of one nugget at the top left and looks like a manufacturing defect to me. Of course, we’re (at least) the second owners and the usual lifetime warranty no longer applies.
I can fix that.
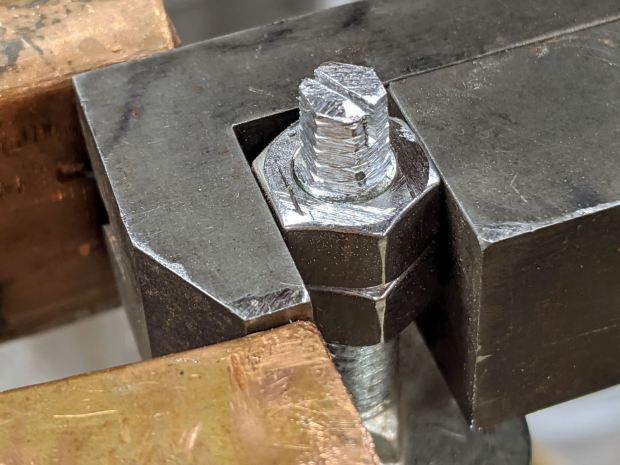
Bandsaw a 1×¾ inch rectangle from 3/8 inch aluminum plate to match the surviving foot nut (which is steel, but aluminum will suffice for our needs). Break the edges, clamp in the Sherline, and mill a square protrusion to match the square-ish hole:
HON Lateral File – square nut – rough cut
Drill a 17/64 inch hole (looser than the nominal F drill, because I’m a sissy) for a flat-head bolt from the Drawer o’ 3/8-16 Bolts, tap, and clean up.
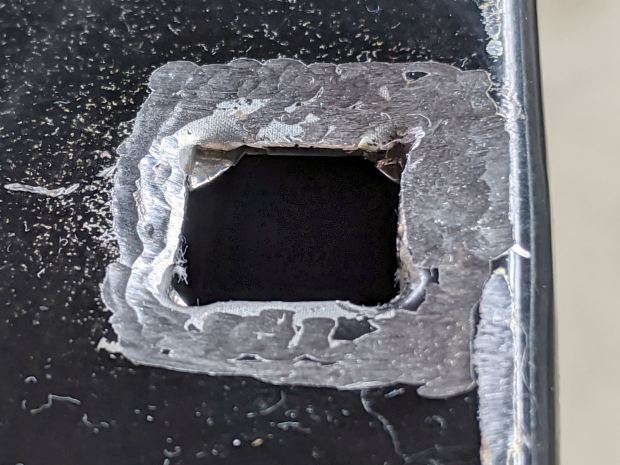
A trial fit showed the nugget had to go before the nut would come even close to fitting flat into the hole:
HON Lateral File – foot hole – grinding
The sheet metal around the hole had absorbed at least one mighty blow pushing the entire surface inward behind the front edge. To compensate, recess the nut’s front edge and slope the sides with a Dremel wheel to let the bottom face sit level:
HON Lateral File – square nut – taper grinding
Another trial fit showed the need for more recess:
HON Lateral File – square nut – deeper cut
Another spate of grinding made it sit mostly level on the decidedly non-level surface around the hole:
HON Lateral File – square nut – ready to install
The beveled corners fit inside the swaged hole corners.
Grind paint / crud off the sheet metal and roughen the surface for good epoxy griptivity:
HON Lateral File – foot hole – ready for install
Stand the cabinet top-side-down to make the bottom level. I wish the basement had one more course of block, but it’s not to be.
Butter the nut with JB Weld epoxy, plunk it in place, apply excess epoxy to make a fillet around the edges, apply duct tape to guy the top of the bolt level-ish, and let it cure:
HON Lateral File – square nut – epoxy curing
After the epoxy stiffened enough to hold its position, remove the bolt, file a crude ¼ inch hex, and saw a screwdriver slot to make it match the other feet:
HON Lateral File – new foot hex head
Not the fanciest job I’ve ever done, but it now behaves just like the other ones and it’s all good. The HON Storage Files FAQ points to a Troubleshooting Guide showing how to level the thing with a hex socket from inside the bottom drawer.
The flat heads on those bolts are basically 25 mm OD steel plates calling for fuzzy felt bumpers on the Sewing Room’s wood floors. When properly leveled, the front will be ⅛ inch higher than the rear. Although they suggest a pencil should roll toward the back, the top sheet metal on this one may be sufficiently warped to confuse the issue; I have a long level well suited to the task.
The original dimension doodle includes metric offsets for cutting with a ¼ inch end mill:
HON Foot nut – dimension doodles
All in all, a satisfying day in the Basement Shop …
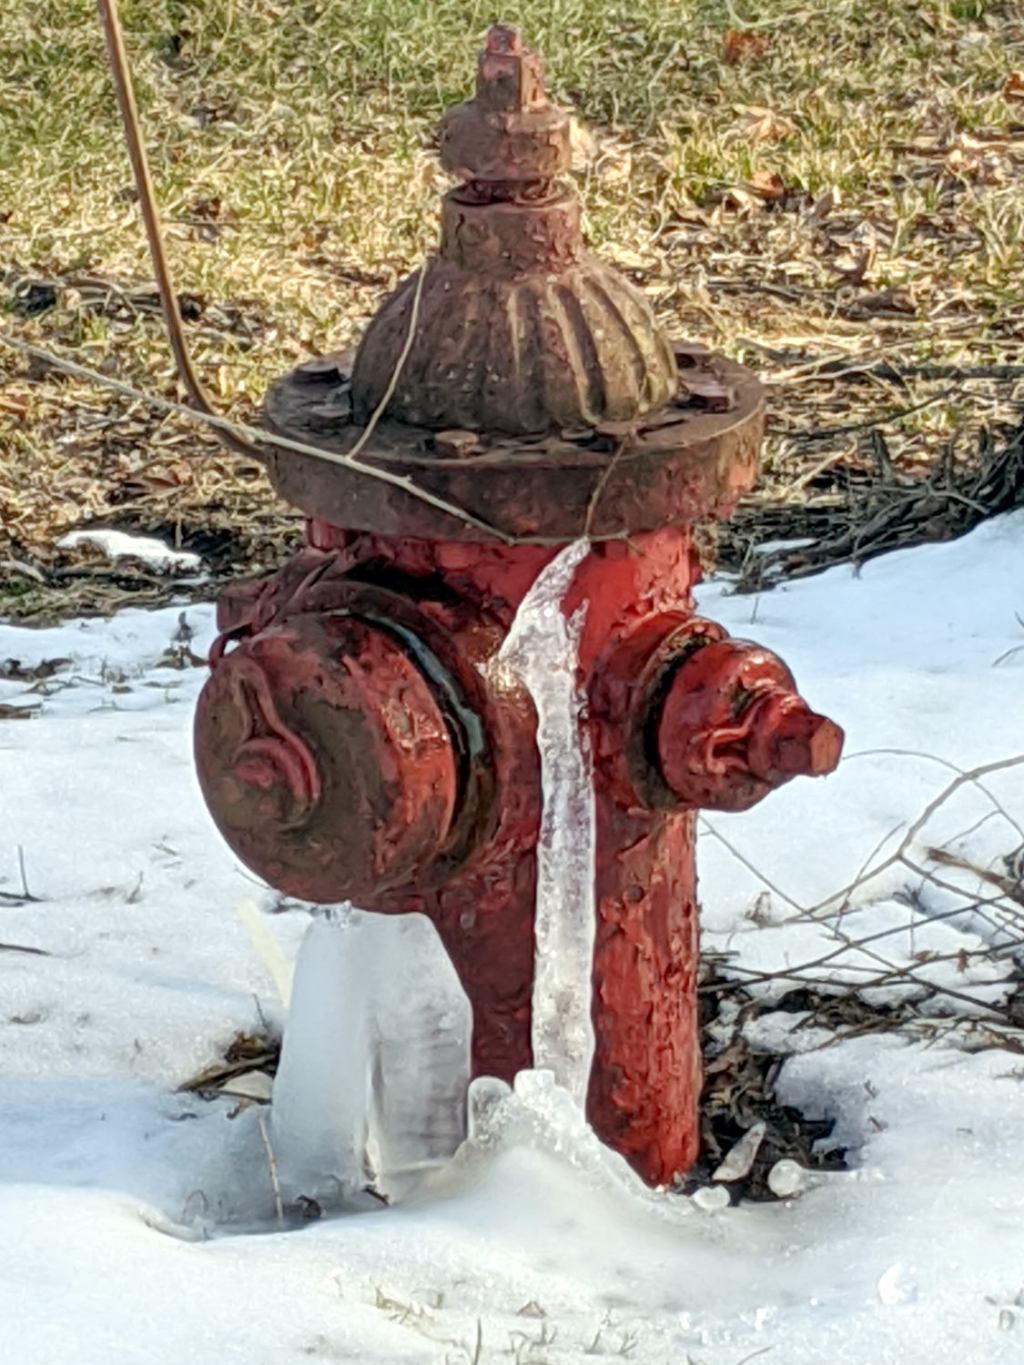
We didn’t have any fires in the neighborhood where it might have been a problem, but I’ll try the water department this year …
Oddly, the water department repainted most of the fire hydrants along most of the roads last year. This one apparently didn’t qualify, for whatever reason, despite being only slightly off Rt 376 on Sheldon:
Frozen hydrant – Sheldon at Rt 376 – Google Streetview
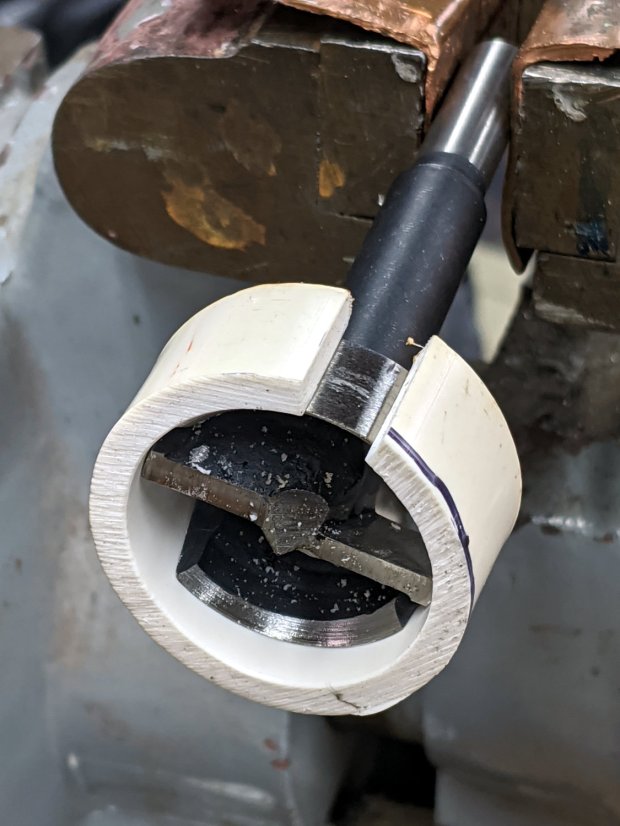
Another reducer had gone missing over the years, so I made one from a length of PVC pipe:
Bird Box – PVC pipe reducer – shaping
It started as 1-½ PVC pipe, 1-⅞ inch actual OD and should fit into a 1-½ hole, so I measured 1.5 × 3.15 around the circumference, bandsawed out the excess, draped it over a 1-½ Forstner bit, toasted it with a heat gun, and squashed it so it’s just a little bit bigger than the (enlarged!) hole in the box.
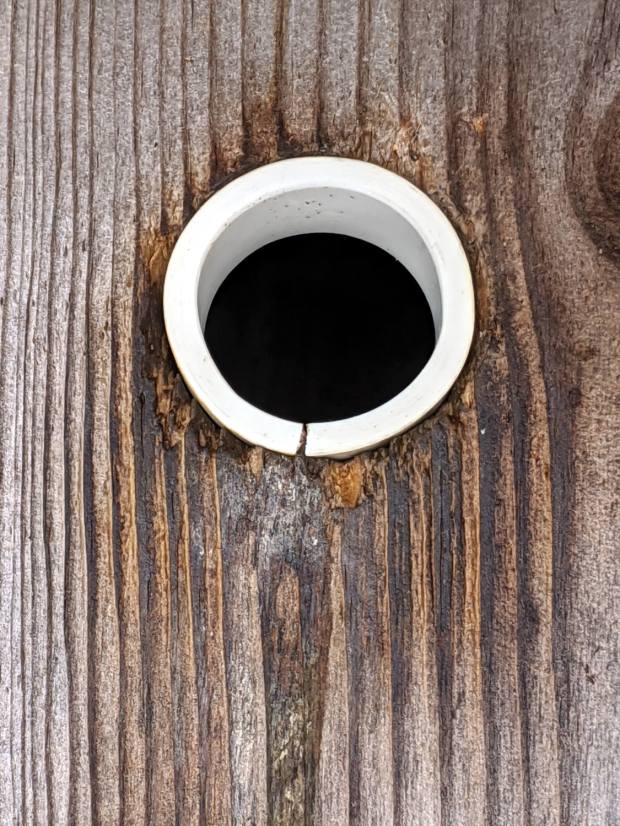
Now the entrance is 1-¼ (-ish), just like it should be:
Bird Box – PVC pipe reducer – installed
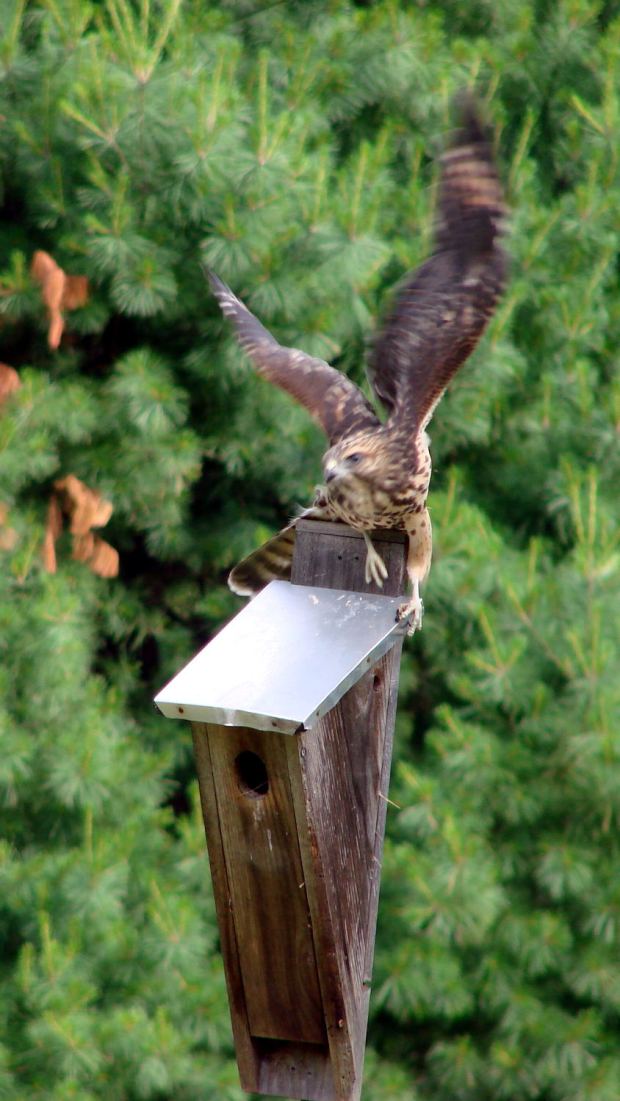
The bird box in the front yard has been attracting starlings, in addition to serving as a hawkperch:
New Coopers Hawks – bird box takeoff whoops
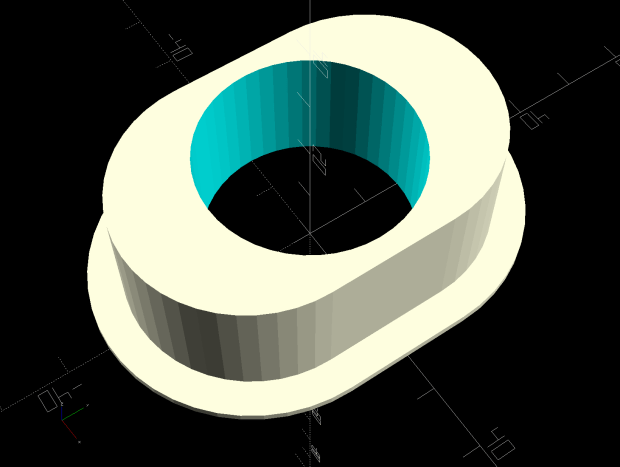
The oblong hole required advanced manufacturing techniques:
Oval Entrance Reducer
The front face should be too slick for larger birds and the little ones will zip right into the hole:
Bird Box – 3D printed entrance reducer
The two starlings who’d been evaluating the box seem to have moved on; we doubt they’re now homeless.
This file contains hidden or bidirectional Unicode text that may be interpreted or compiled differently than what appears below. To review, open the file in an editor that reveals hidden Unicode characters.
Learn more about bidirectional Unicode characters