The Smell of Molten Projects in the Morning

Ed Nisley's Blog: Shop notes, electronics, firmware, machinery, 3D printing, laser cuttery, and curiosities. Contents: 100% human thinking, 0% AI slop.

Author: Ed

  • Tour Easy: Another SJCAM C100+ Mount

    Tour Easy: Another SJCAM C100+ Mount

    Eight years of progress in the action camera world gets you from a rather expensive Cycliq Fly6:

    Tour Easy - Fly6 image
    Tour Easy – Fly6 image

    To an SJCAM C100+ camera costing the better part of fifty bucks on closeout:

    Tour Easy - C100 image
    Tour Easy – C100 image

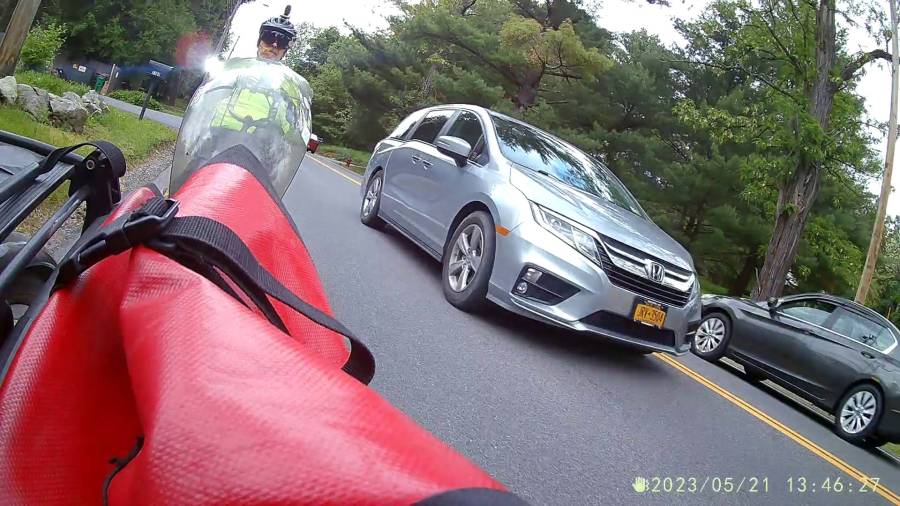
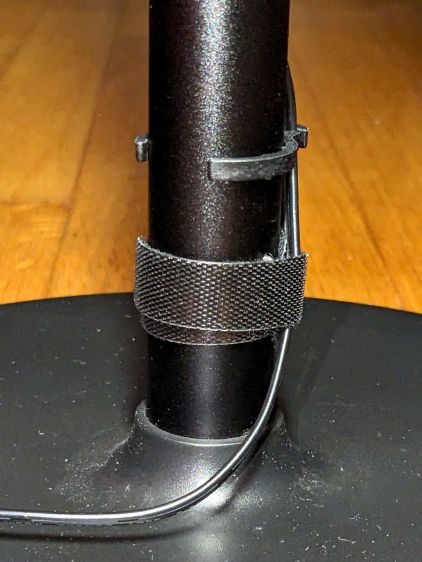
    The camera is mounted on the side of the seat frame on Mary’s Tour Easy:

    Tour Easy C100 mount - side rail
    Tour Easy C100 mount – side rail

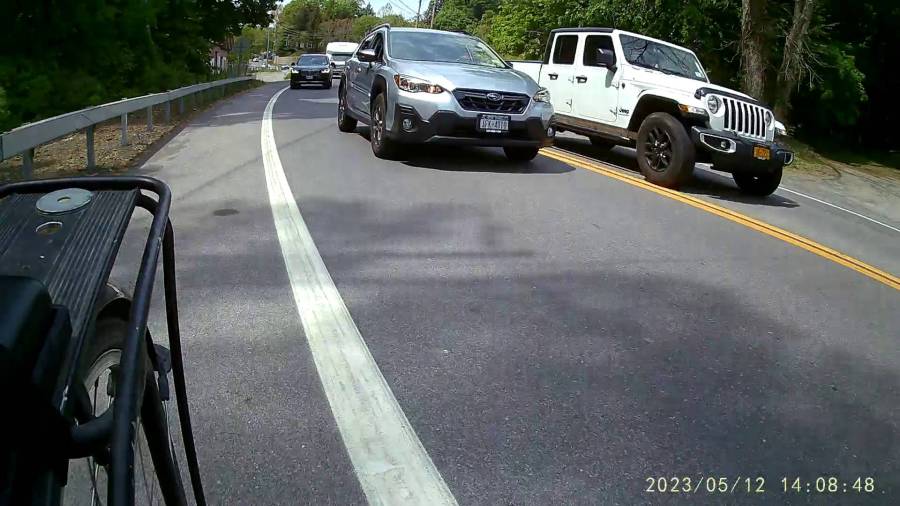
    The slightly tilted picture comes from the frame rail’s incline. My C100+ camera mounts on the horizontal part of the rail:

    Tour Easy C100 mount - rear rail
    Tour Easy C100 mount – rear rail

    As expected, the internal battery does not last for our usual hour-long rides, so the cameras now operate in “car mode”: recording starts when we plug in the USB battery pack and stops shortly after unplugging.

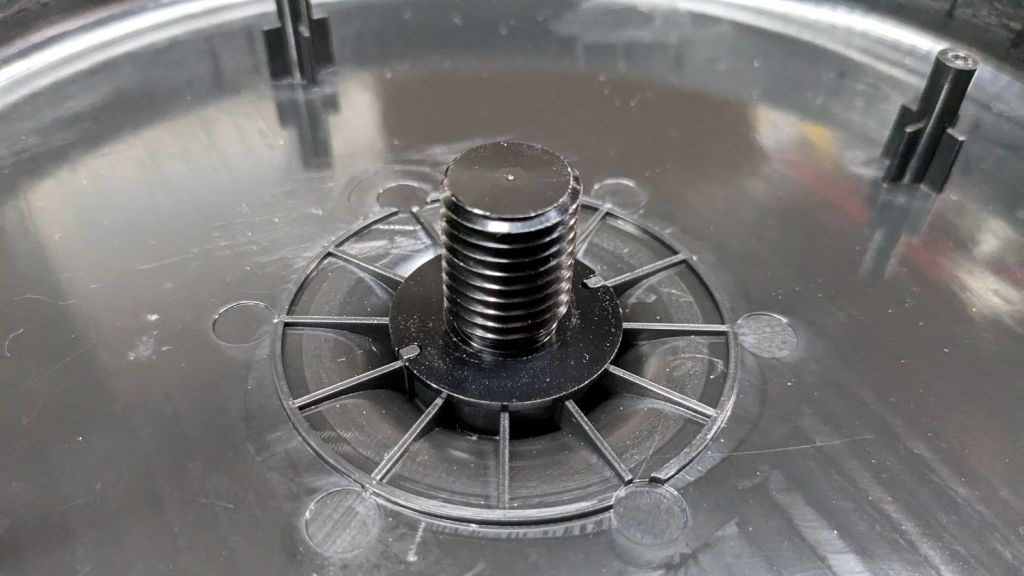
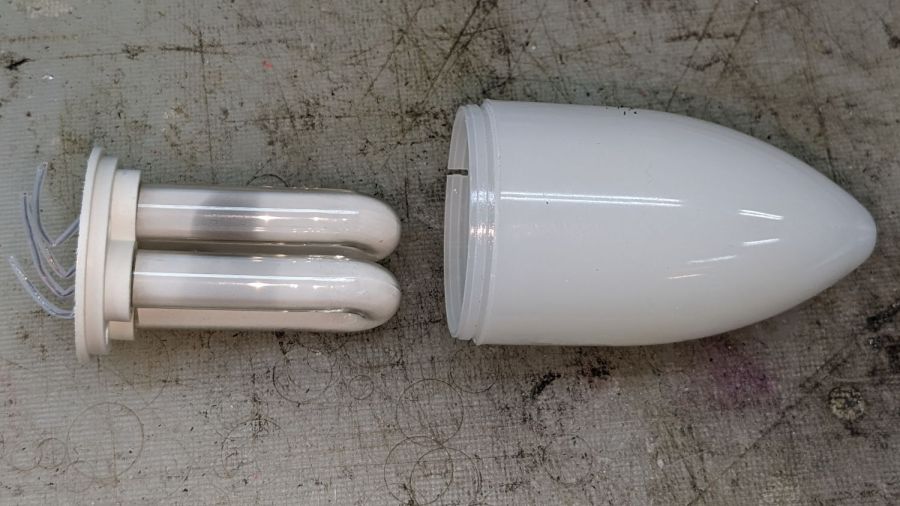
    I started with the waterproof case on my bike:

    Tour Easy - SJCAM C100 mount - installed
    Tour Easy – SJCAM C100 mount – installed

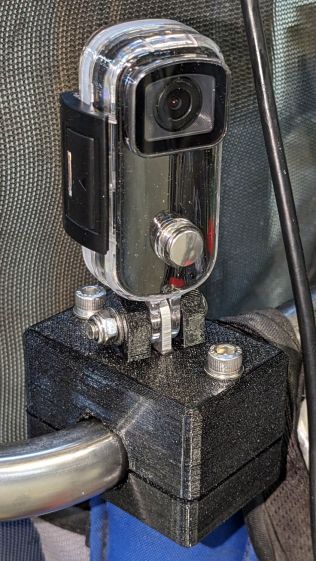
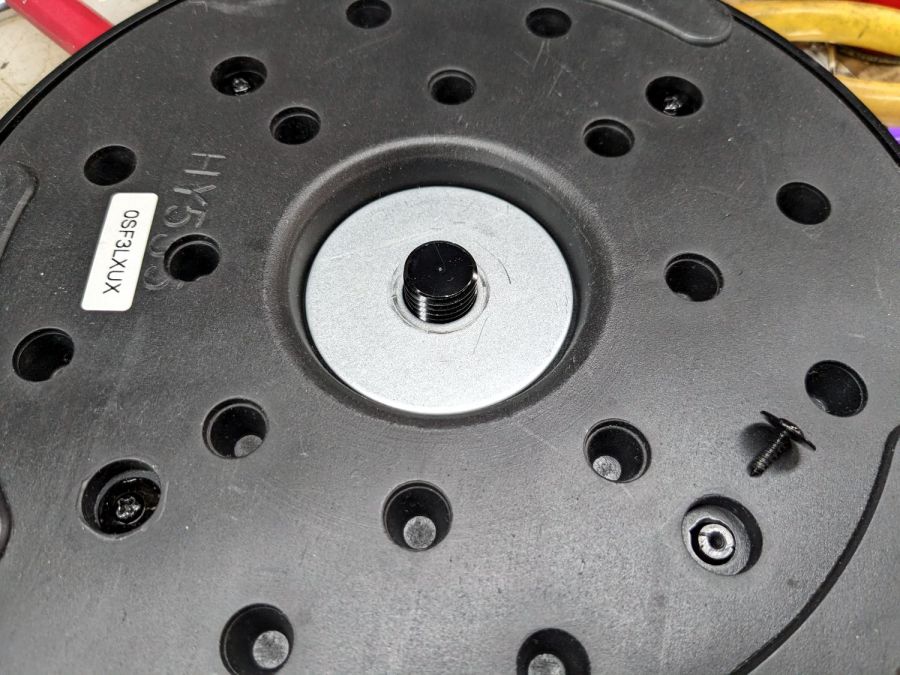
    Which (obviously) does not allow for an external battery, so they’re now in the “frame” mount. The hatch covering the MicroSD card and USB Micro-B connector (and a Reset button!) is on the bottom of the camera, but (fortunately) the whole affair mounts up-side-down and the settings include an image flip mode.

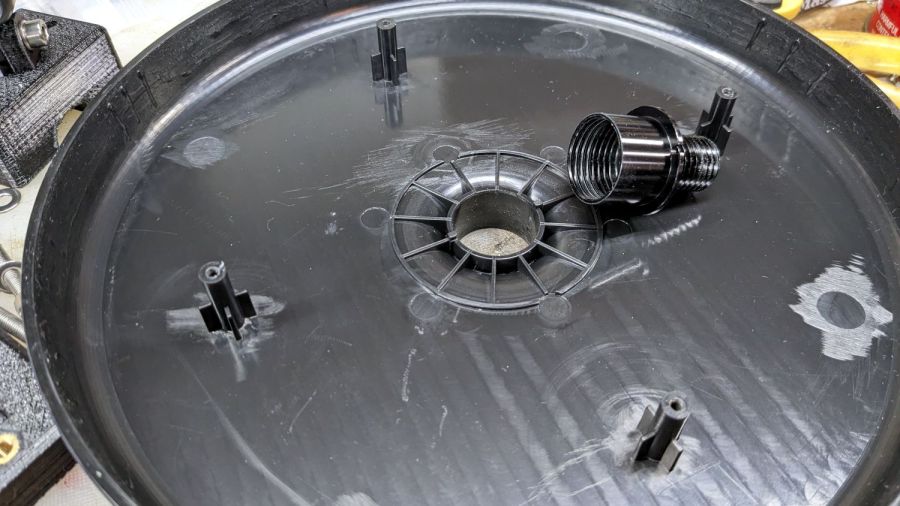
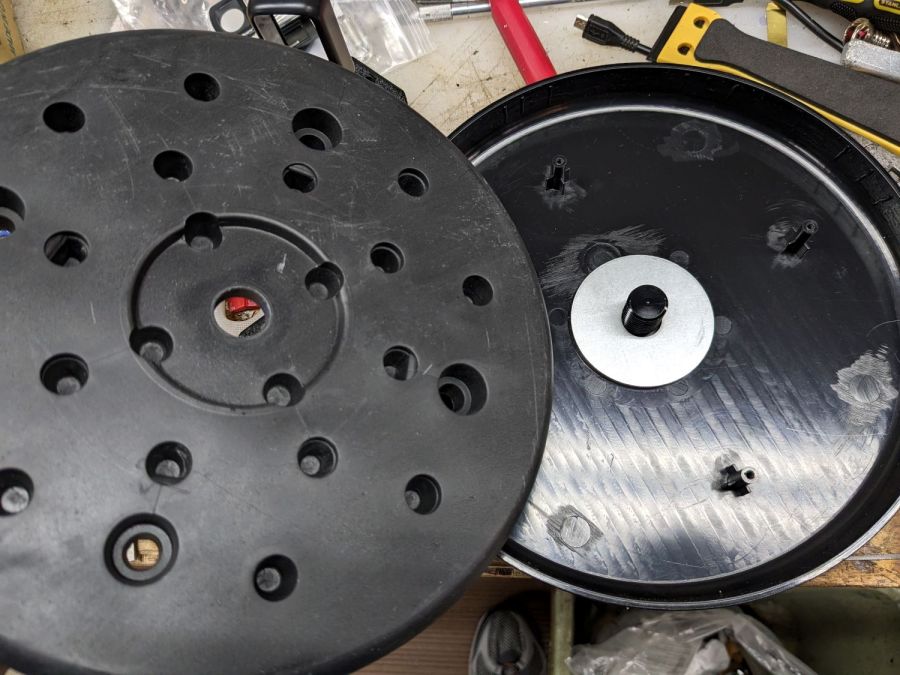
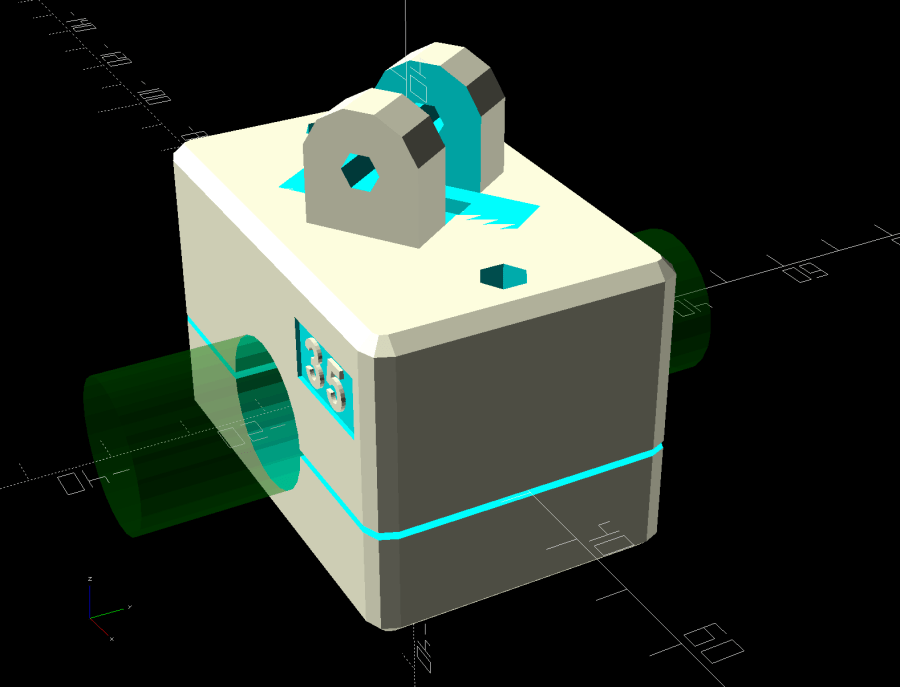
    Putting the camera on the side required changing the mount angle from -20° to +35°:

    SJCAM C100 Mount - 35 degree solid model
    SJCAM C100 Mount – 35 degree solid model

    The ergonomics / user interface of this whole setup is terrible:

    • The camera’s flexible hatch is recessed inside the frame far enough that it cannot be opened without using a small & sharp screwdriver
    • The USB jack is slightly off-center, so lining the plug up with the camera body doesn’t align it with the jack
    • The MicroSD card is in a push-to-release socket, but its raised ridge faces the hatch flap and cannot be reached by a fingernail. I added a small tab that helps, but it’s difficult to grasp.

    Extracting the video files from the camera through the app is an exercise in frustration. Having already figured out how to do this for the other cameras in the fleet, it’s easier to fumble with the MicroSD card.

    I devoutly hope we never really need any of the videos.

  • Miroco Floor Lamp Base Details

    Miroco Floor Lamp Base Details

    The pole of our much-repaired Miroco floor lamp screws into a weighted base:

    Miroco floor lamp base - assembled
    Miroco floor lamp base – assembled

    Because the lamp has a big nut apparently holding the pole socket to the base, I figured a dab of threadlock on the pole or the base would solve the problem: lock the pole to the socket, then remove the nut to disassemble when needed. That turned out to be a Bad Idea™.

    The socket is a plastic part separate from the base cover plate:

    Miroco floor lamp base - socket
    Miroco floor lamp base – socket

    A pair of keys prevent the socket from rotating in the hole:

    Miroco floor lamp base - socket in place
    Miroco floor lamp base – socket in place

    Four threaded bosses (two visible there) hold the rim of the cover to the weight, with the socket doing the hard work.

    A fender washer atop the weight distributes stress from the pole:

    Miroco floor lamp base - weight top washer
    Miroco floor lamp base – weight top washer

    Another fender washer on the bottom of the weight lets the nut jam against steel, rather than soft plastic:

    Miroco floor lamp base - weight bottom washer
    Miroco floor lamp base – weight bottom washer

    FWIW, the nut is either a perfect 15/16 inch or, more likely, a sloppy 24 mm.

    In any event, permanently locking the pole to that socket will also lock the pole to the base, with no way to dismantle the lamp when I must once again repair it.

    Perhaps a wrap of PTFE tape on the threads will stiffen it enough?

    Certain better looking than black duct tape …

  • They’re Paying for This?

    They’re Paying for This?

    Another problem with the same monitor as before:

    Broken image link
    Broken image link

    This one looks like an ordinary broken link:

    Broken image link - detail
    Broken image link – detail

    Mary has some opinions on their software testing process, but AFAICT that entire department is missing in action.

    Having spent entirely too much time on the road and not nearly enough time in the shop, things will be quiet around here for a few days.

    Drive to stay alive …

  • New Jeep, Reckless Driver

    New Jeep, Reckless Driver

    Some drivers give us absurd amounts of clearance, which is what we thought the driver of the white Jeep was doing:

    New Jeep Reckless Driving - Jeep passing
    New Jeep Reckless Driving – Jeep passing

    Some drivers give us very little clearance, either deliberately or though negligence, which is what I thought the driver of the silver Subaru was doing:

    New Jeep Reckless Driving - Subaru close pass
    New Jeep Reckless Driving – Subaru close pass

    Reviewing the videos revealed a different story that could have ended very badly for everyone involved.

    Moving back in time, we crossed the bridge over the Wappingers creek, which has two southbound lanes. The left lane is dedicated to left turns onto Red Oaks Mill Road and the right lane is for through traffic southbound on Rt 376:

    New Jeep Reckless Driving - Red Oaks Mill bridge
    New Jeep Reckless Driving – Red Oaks Mill bridge

    I had noticed oncoming drivers in the northbound lane were moving far over to the fog line, but (unseen by me) they were definitely swerving off the road:

    New Jeep Reckless Driving - swerve 1
    New Jeep Reckless Driving – swerve 1

    It seems the Jeep driver crossed the bridge in the left lane and continued straight through, passing the solid line of vehicles in the right lane behind us. You can see the top of the Jeep’s windshield peeking out behind the Subaru, with minimal clearance to the black car swerving out of the way:

    New Jeep Reckless Driving - swerve 1 clearance
    New Jeep Reckless Driving – swerve 1 clearance

    There’s not much shoulder on that side of the road, but the driver of the white Honda is using it all:

    New Jeep Reckless Driving - swerve 2
    New Jeep Reckless Driving – swerve 2

    With all the oncoming traffic out of the way, the Jeep driver now accelerates in the wrong lane:

    New Jeep Reckless Driving - passing 1
    New Jeep Reckless Driving – passing 1

    And passes the Subaru just behind us:

    New Jeep Reckless Driving - passing 2
    New Jeep Reckless Driving – passing 2

    The license plate looks like JAE-7751, early in the “J” plate series, so that’s a shiny new Jeep.

    Being passed at close range in an obviously no-passing zone caused the Subaru driver to flinch in our direction:

    New Jeep Reckless Driving - Subaru clearance
    New Jeep Reckless Driving – Subaru clearance

    Unsurprisingly, the Jeep driver ran the red light at the top of the hill, presumably to avoid being stopped directly in front of us.

    Never a dull moment out there on the road …

  • Air Conditioner Lightning Protection

    Air Conditioner Lightning Protection

    Spotted outside a second-floor window:

    Air conditioner lightning rods
    Air conditioner lightning rods

    Each air conditioning unit has a pair of lightning rods atop it, with their aluminum grounding cables securely clamped to the steel frame underneath.

    The rod reclining on its side caught my eye. Perhaps its fat cable wasn’t relaxed enough during installation, although I thought those wide bases would be firmly screwed to the unit’s steel top. Of course, that could be the only one without screws.

    The building extends another three stories upward from that roof, but our experience suggests lightning strikes where it will.

  • MaxLite Candelabra CFL: FAIL

    MaxLite Candelabra CFL: FAIL

    The bathroom ceiling fixture has a nightlight position that we use occasionally, but eventually the little 7 W Christmas Tree bulb failed and I installed this hulk from a box of CFL bulbs a friend scrapped out after switching to LED bulbs:

    MaxLite CFL - overview
    MaxLite CFL – overview

    I never tested whether it actually drew 3 W, but, hey I could feel good. Right? Right?

    Anyhow, this one failed after a few years, too. The “bulb” envelope looked like it might make an attractive blinkie or glowie, so I decided to harvest it.

    The candelabra screw base felt loose and popped off with a push:

    MaxLite CFL - overflow cap
    MaxLite CFL – overflow cap

    Perhaps they chose the envelope before finalizing the circuitry?

    This is why you need a lathe in your shop:

    MaxLite CFL - lathe cutting
    MaxLite CFL – lathe cutting

    It wasn’t particularly well centered, so that was done dead slow and finished with a few hand turns of the chuck. Obviously, I need a crank for the spindle.

    The rest of the circuitry is pretty well packed under that tall cap:

    MaxLite CFL - circuitry
    MaxLite CFL – circuitry

    Pulling the PCB out revealed the tube wiring:

    MaxLite CFL - tube wires
    MaxLite CFL – tube wires

    Cut the wires and chuck it up again:

    MaxLite CFL - envelope turning setup
    MaxLite CFL – envelope turning setup

    Turn dead slow again until it breaks through:

    MaxLite CFL - envelope breakthrough
    MaxLite CFL – envelope breakthrough

    Then finish by hand:

    MaxLite CFL - tube and envelope
    MaxLite CFL – tube and envelope

    It’s too cute to throw out, but … sheesh you can see why recycling this stuff is so difficult.

    For whatever it’s worth, I replaced it with a 3 W LED candelabra bulb that is way too bright.

  • HW Bucked Lithium AA Cells

    HW Bucked Lithium AA Cells

    The trail camera uses two parallel banks of four series AA cells to get enough oomph for its IR floodlight. I’m not convinced using bucked lithium AA cells in that configuration is a Good Idea, but it’s worth investigating.

    These are labeled HW, rather than Fuvaly, because it seems one cannot swim twice in the same river:

    HW bucked Li AA cells
    HW bucked Li AA cells

    In any event, they come close to their claimed 2.8 W·hr capacity:

    HW bucked Li AA - 2023-05
    HW bucked Li AA – 2023-05

    The lower pair of traces (red & black) are single cells at 2.7-ish W·hr, the blue trace is a pair at 5.4 W·hr, and the green trace is a quartet at 9.8 W·hr. Surprisingly close, given some previous results in this field.

    Recharging the cells after those tests shows they all take 3 hours ± a few minutes to soak up 730 mA·hr ± a few mA·hr, so they’re decently matched.

    Measuring the terminal voltage with a 10 mA load after that charge lets me match a pair of quartets to 1 mV, which is obviously absurd:

    HW bucked Li cells - initial charge 2023-05-05
    HW bucked Li cells – initial charge 2023-05-05

    The numbers in the upper left corner show the initial charge of four cells at a time required the same time within a minute and the same energy within 4%.

    Sticking them in the trail camera must await using up the current set of alkaline AA cells.

    Bonus: a lithium fire in a trail camera won’t burn down the house.

    After all, pictures like this are definitely worth the hassle:

    Young Buck in velvet - 2023-05-03
    Young Buck in velvet – 2023-05-03

    Looks like a pair of WiFi antennas …