Ed Nisley's Blog: Shop notes, electronics, firmware, machinery, 3D printing, laser cuttery, and curiosities. Contents: 100% human thinking, 0% AI slop.
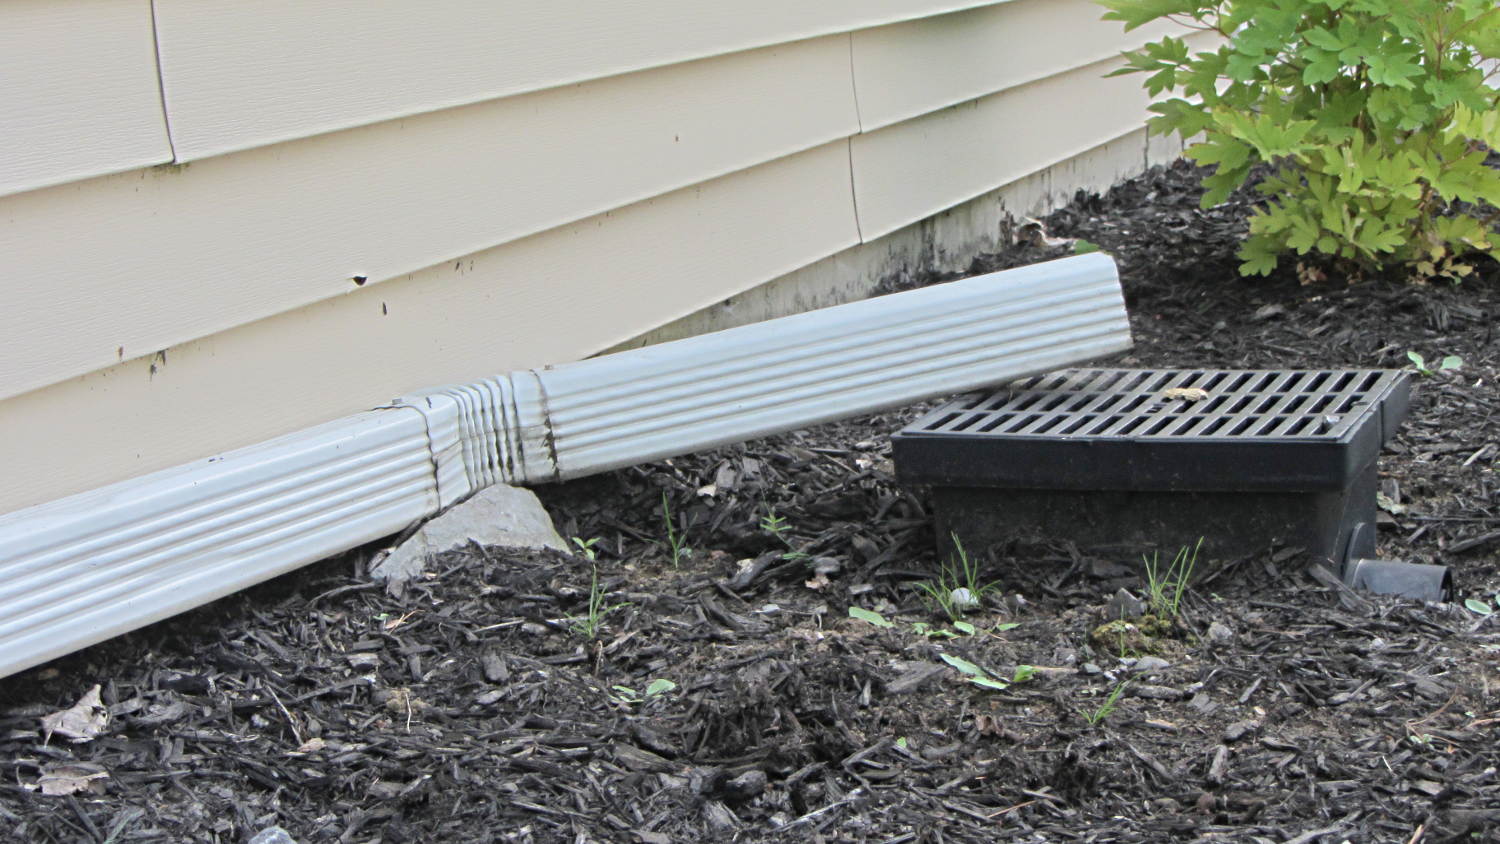
As nearly as I could tell, the vertical downspout along the edge of the building ends level with the top of the drain grate. If that convenient rock were high enough to level the last length of pipe, the elbow would be above the end of the downspout.
The architectural drawings for the apartment complex surely didn’t look like that.
The motor winding resistance limits the peak current to about 200 V / 40 Ω = 5 A, in the absence of the transistor current limiter, and, if it gets above that, things have gone very, very wrong. Mostly, I expect currents under 1 A and it may be useful to reduce the full scale appropriately.
The cheap eBay “SS49” Hall effect sensors I’m using produce anywhere between 0.9 and 1.8 mV/G; I’ll use 1.4 mV/G, which is at least close to the original Honeywell spec. That allows a bit over ±1000 G around the sensor’s VCC/2 bias within its output voltage range (the original datasheet says minimum ±650 G), so I’ll use B = 1000 G as the maximum magnetic flux density. The overall calibration will be output voltage / input current and I’m not above doing a one-off calibration run and baking the constant into the firmware.
The effective mean path length turns out to be a useful value for a slit toroid:
effective MPL = (toroid MPL - air gap length) + (µ · air gap length)
The SS49 style sensor spec says they’re 1.6 mm thick, and the saw-cut gaps run a bit more, but 1.5 mm will be close enough for now.
The relation between all those values:
B = 0.4 π µ NI / (effective MPL)
Solving for NI:
NI = B · (eff MPL) / (0.4 π µ)
Solving for N:
N = B · (eff MPL) / (0.4 π µ I)
You always round up the result for N, because fractional turns aren’t a thing you can do with a toroid.
The saturation flux density seems to be measured at H = 10 Oe, but that applies to the intact toroids. The air gap dramatically reduces the effective µ, so you must apply a higher H to get the same B in the ferrite at saturation. At least, I think that’s the way it should work.
H = 0.4 π NI / (geometric MPL)
Then:
FT50-61: H = 58 Oe
FT82-43: H = 30 Oe
I’m surely missing some second-order effect that invalidates all those numbers.
Figuring the wire size for the windings:
FT50:
ID = 0.281 inch
Circumference = 0.882 inch
28 turns → wire OD = 0.882/28 = 31 mil
20 AWG without insulation
FT82:
ID = 0.520 inch
Circumference = 1.63 inch
25 turns → wire OD = 1.63/25 = 65 mil
14 AWG without insulation
Of course, the wire needs insulation, but, even so, the FT82 allows a more rational wire size.
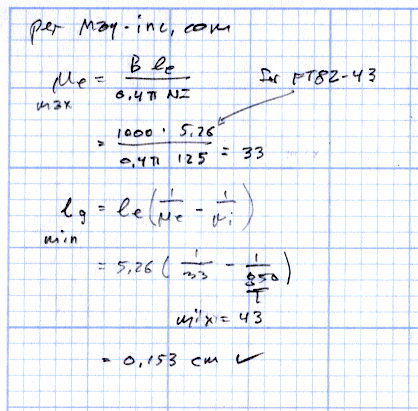
Page 4.12 of the writeup from Magnetics Inc has equations and a helpful chart. They suggest water cooling a diamond-bonded wheel during the slitting operation; my slapdash technique worked only because I took candy-ass cuts.
Once again, the black bathroom sink drain stopper stopped popping up. Having had this happen once before, I knew what I would find:
Corroded bathroom sink drain lever
The lever arm to the left of the ball should be about twice that long, minus the jagged end.
I slid the ball rightward to expose more rod, introduced both ends to Mr. Bench Grinder to round them off, scuffed up the short end with sandpaper to improve its griptivity, then slobbered on enough JB KwikWeld to cover the entire length of rod that will live inside the drain:
Epoxy-coated bathroom sink drain lever
The first failure took 9 years, this one took 4…
Memo to Self: Next time, replace the rod with something that doesn’t corrode.
Mulling over how to add a 1/rev sensor to the sewing machine motor, it occurred to me that simply drilling a hole through the pulley would provide a clean optical path and a convenient 2/rev output signal.
However, the OEM pulley doesn’t extend beyond the end of the shaft:
Kenmore 158 – AC drive motor – overview
Rather than drill a hole in the shaft or (attempt to) affix something onto a pulley that spins at 10 kRPM, I figured I should make another pulley and mutilate that.
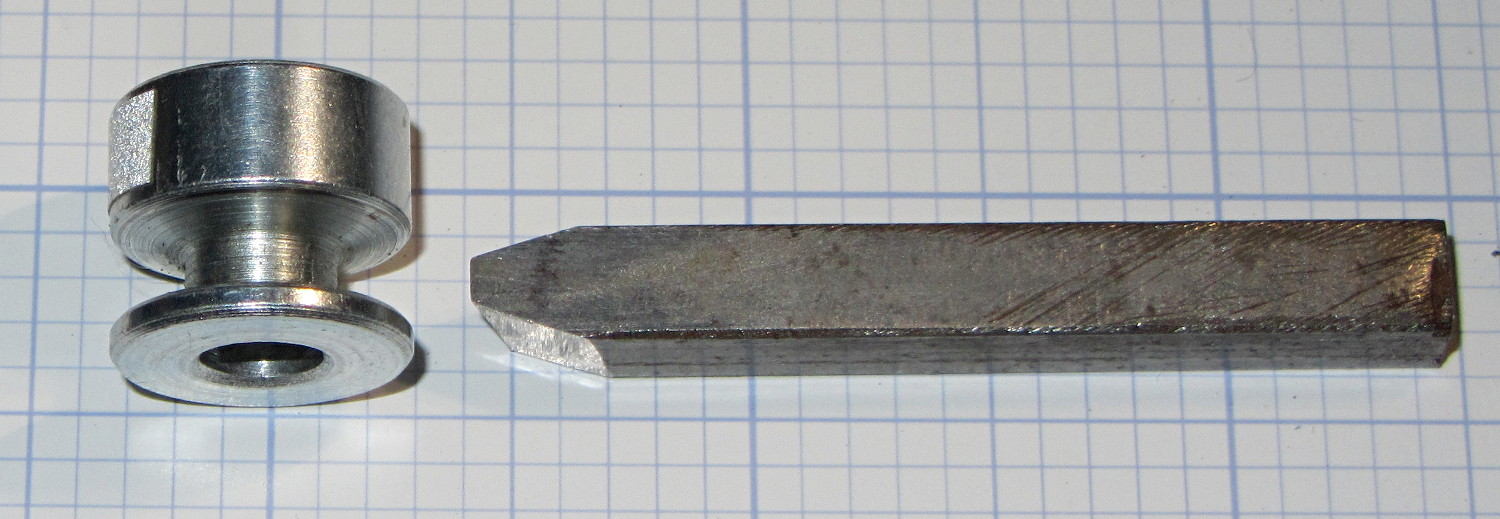
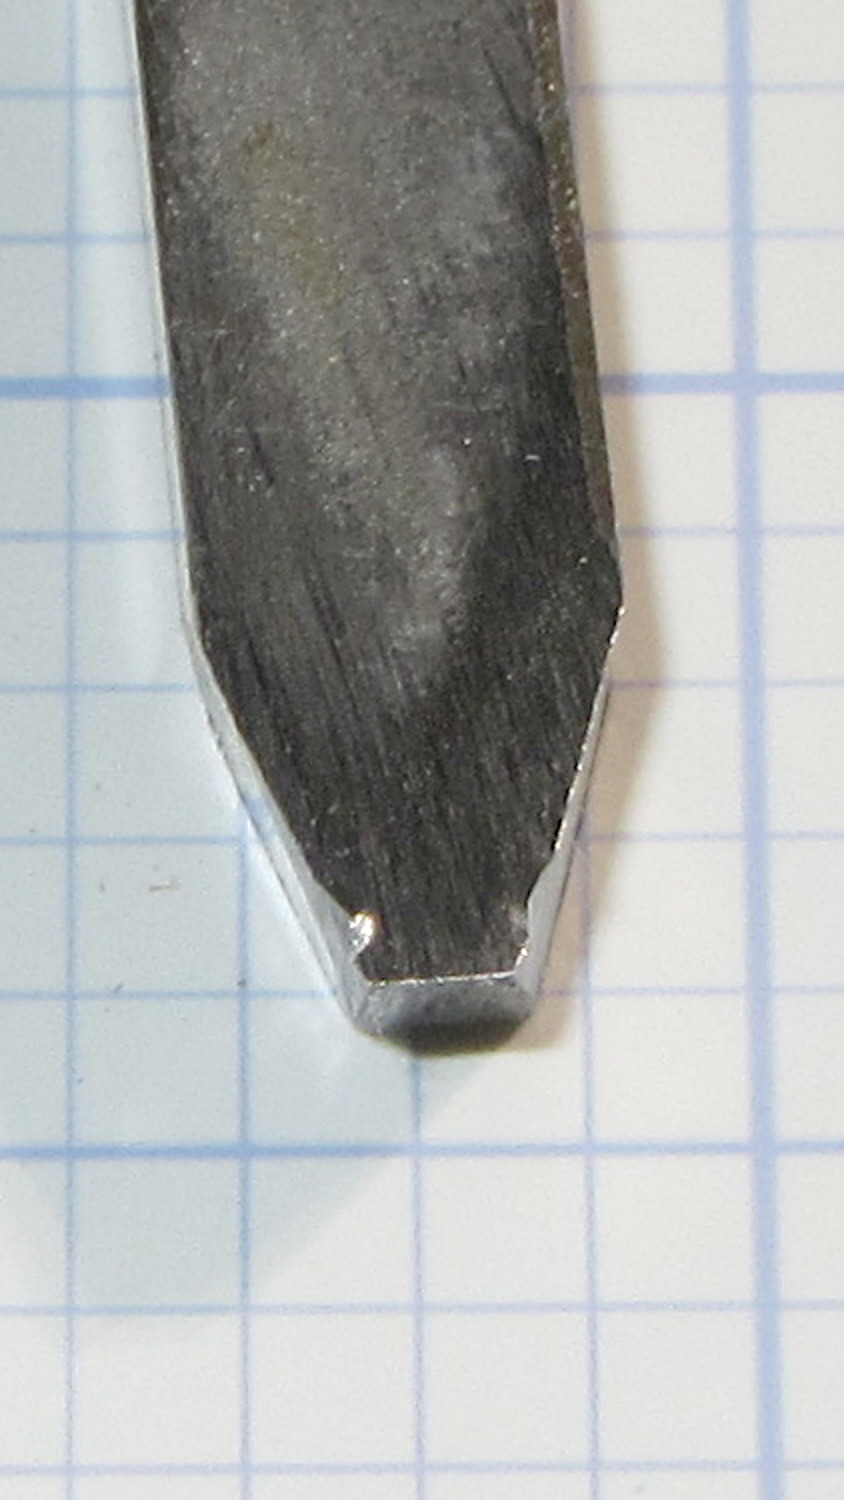
Because this will surely call for more than one new pulley before I get everything right, a lathe form tool seemed in order. Introducing a suitable blank from the Bin o’ 1/4 Inch Bits to Mr. Bench Grinder produced a likely looking candidate, with an included angle of about 35° (a skosh over 17° on each side) and sized just a wee bit narrower than the pulley groove.
From the top:
Pulley form tool – top
From the side:
Pulley form tool – side
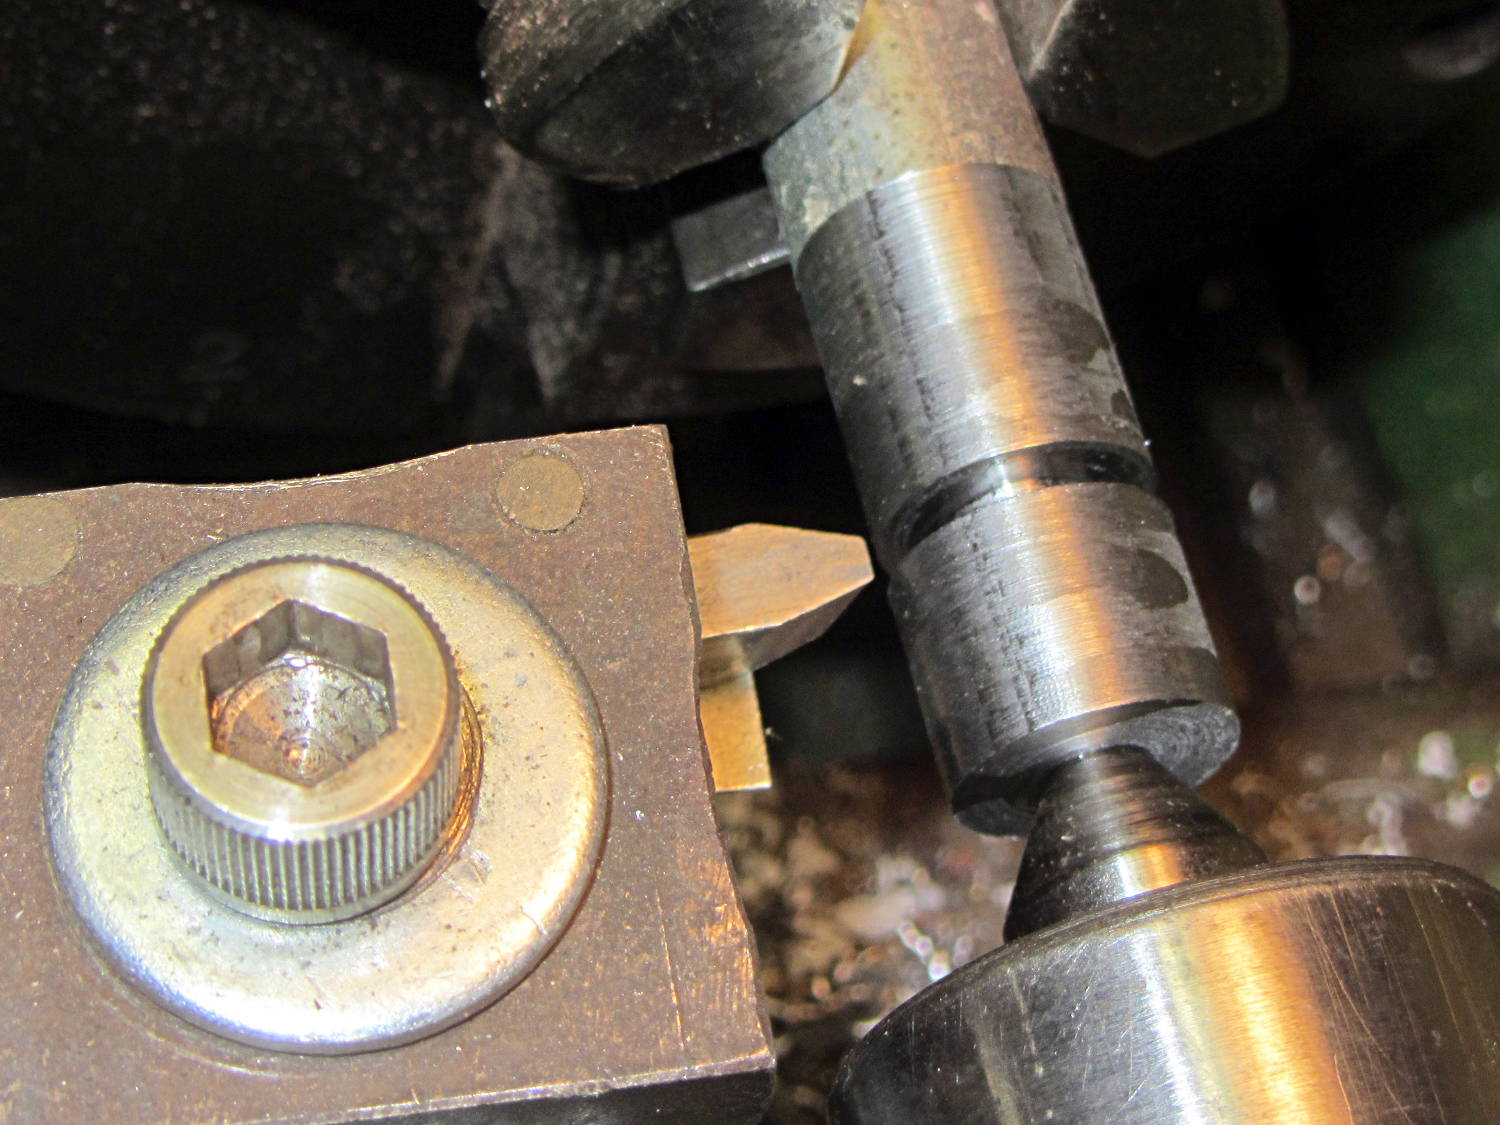
Skim the surface of a 5/8 inch rod to match the pulley OD, plunge a cutoff tool to make most of the cut, insert bit in holder, align perpendicular to workpiece, line up to center of cut, slobber on more cutting lube:
Pulley form tool – prepared blank
Plunging the tool slowly into the cut produces … no chips … nothing … smoke?
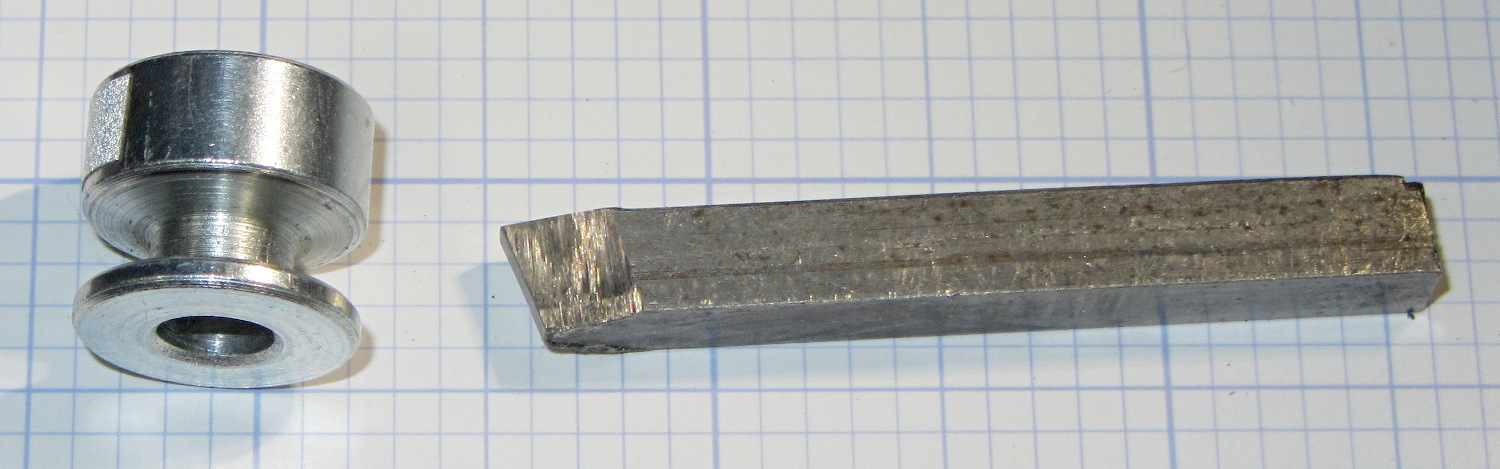
Come to find out that the Bin o’ 1/4 Inch Bits contained not just lathe tool bits & blanks made from tool steel, but one length of 1/4 inch square key stock made from ordinary soft steel:
Pulley form tool – damage
I should have known that from the type of sparks flying off the grinding wheel, right?
You knew that just from looking at the first picture, because a real lathe bit blank wouldn’t be all beat to shit…
Having just acquired a pair of 64 GB MicroSD cards for the HDR-AS30V camera, I found that I don’t have enough free disk space for 64 GB of white noise and, thus, can’t use the same technique as for the 32 GB card. I now, however, have a stockpile of helmet camera video files that are close enough to white noise for my purposes and come in convenient chunks.
Start by copying enough big video files to nearly fill the card:
sudo mount /dev/sdb1 /mnt/backup
sudo mount -o uid=ed /dev/sdc1 /mnt/part
FUSE exfat 1.0.1
cd /mnt/backup/Video
find -iname MAH*MP4 -size +3G | head -16 | xargs -I{} rsync -vrt --progress {} /mnt/part
sending incremental file list
MAH00122.MP4
  4,275,755,727 100%   11.94MB/s    0:05:41 (xfr#1, to-chk=0/1)

sent 4,276,799,695 bytes  received 35 bytes  12,487,006.51 bytes/sec
total size is 4,275,755,727  speedup is 1.00
... snippage ...
The head -16 ensures that you won’t waste a lot of time copying too many files. The card has about 59 GB free, so 16 x 4 GB is about right.
The -vrt adds verbosity and omits permission settings that ExFAT doesn’t understand; otherwise, you’d just use -va and be done with it.
Then tuck some smaller files into the remaining nooks and crannies:
Some fiddling with the -size -400M and head -16 values may be in order, depending on how many snippets of video data you may have.
Compare the copies with the original files:
cd /mnt/part
for f in * ; do find /mnt/backup/Video/ -name $f | xargs diff $f ; done
If you don’t see anything, then they’re all good!
There’s probably an algorithmic solution that would eliminate the guesstimation, but very nearly all of the time goes to copying and comparing, so it can’t make much difference.