Ed Nisley's Blog: Shop notes, electronics, firmware, machinery, 3D printing, laser cuttery, and curiosities. Contents: 100% human thinking, 0% AI slop.
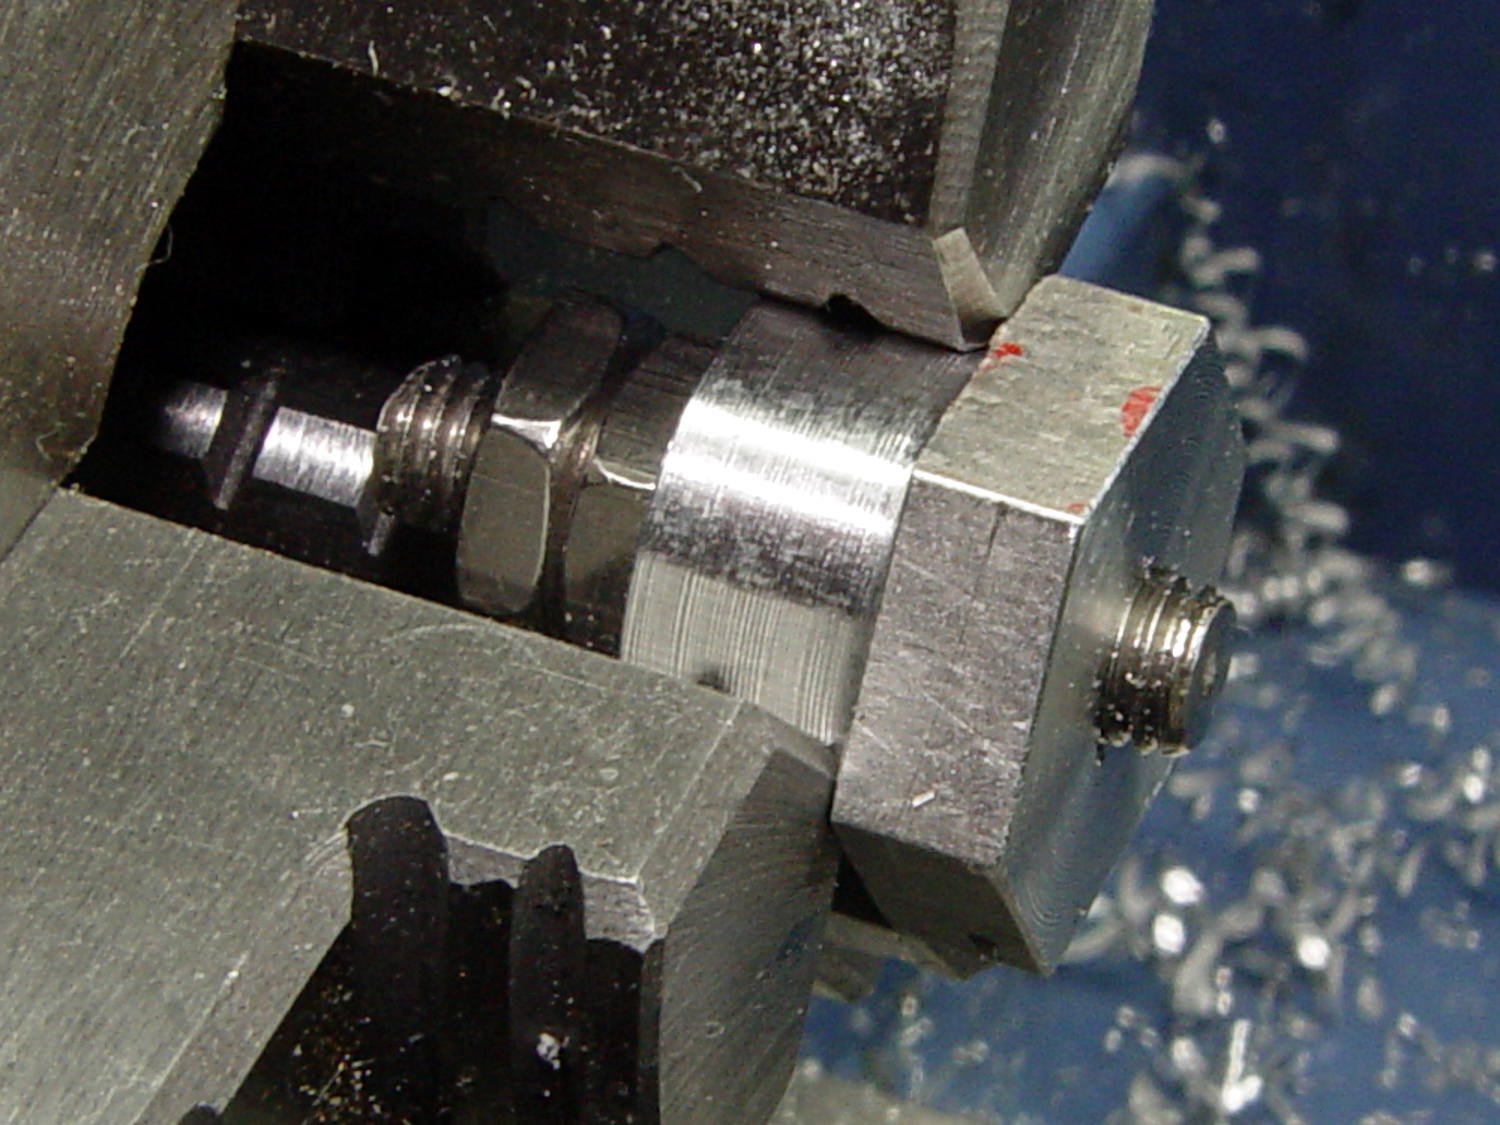
A length of aluminum hex bar became a nice 10-32 screw trimmer:
Screw cutting fixture – 10-32 – first cut
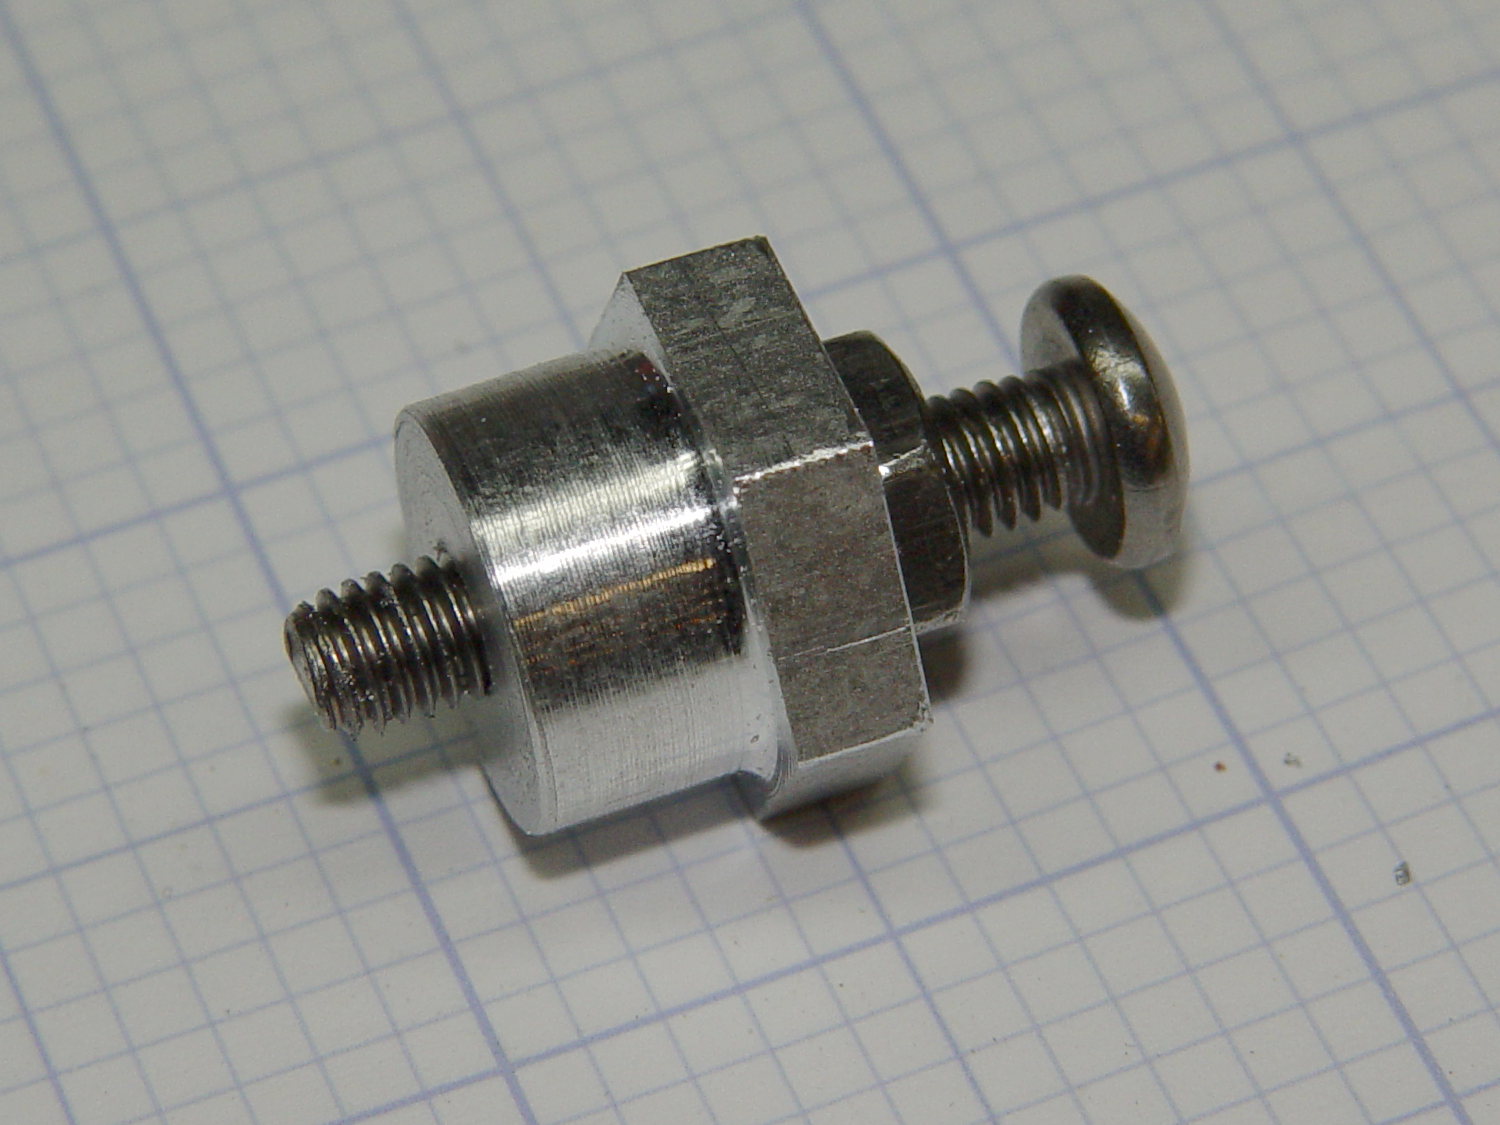
The hex neatly fits a 5/8 inch wrench, so I can tighten the jam nuts enough to run the lathe forward, part off the screw, and clean up the end just fine.
Unfortunately, the second test cut didn’t work nearly so well:
Screw cutting fixture – 10-32 – wrecked
With the cross-slide gib adjusted to the snug side of easy, the cut put enough pressure on the parting tool to lift the way on the tailstock side about 4 mil = 0.1 mm. The parting tool submarined under the cut, dislodged the fixture, and didn’t quite stall the motor while the chuck jaws ate into the aluminum.
Well, that was a learning experience.
After tightening the cross-slide gib to the far side of hard-to-turn:
Put a longer screw in the fixture
Grab it in the tailstock drill chuck
Crunch the hex end of the fixture in the spindle chuck
Remove the screw through the spindle (*)
Put a slight taper on the end of the fixture threads with a center drill
Deploy the live center to support the fixture
Like this:
Screw cutting fixture – 10-32 – rechucked
Turns out that angling the bit by 10° dramatically reduces chatter. If I had BR and BL turning tools, I’d be using them with the QCTP set to 0°, but they weren’t included in the set that came with the lathe.
It’s a good thing I’m not fussy about the diameter of that cylindrical section:
Which suggested the square version needed some softening:
LED Cable Clips – square – solid model
Apart from the base plate thickness, all the dimensions scale from the cable OD; I’ll be unsurprised to discover small cables don’t produce enough base area for good long-term foam tape adhesion. Maybe the base must have a minimum size or area?
I won’t replace the ones already on the saw, but these will look better on the next project…
This file contains hidden or bidirectional Unicode text that may be interpreted or compiled differently than what appears below. To review, open the file in an editor that reveals hidden Unicode characters.
Learn more about bidirectional Unicode characters
A turkey flock forages through the bottomlands along the Wappinger Creek and, at night, roosts in the trees at the far end of our driveway:
Roosting Turkeys – visible
I’m a sucker for that moon:
Roosting Turkeys – visible
It’s rising into the eastward-bound cloud cover bringing a light snowfall, so we missed the penumbral eclipse.
If you’re counting turkeys, it’s easier with a contrasty IR image:
Roosting Turkeys – infra-red mode
Mary recently counted forty turkeys on the ground, so that’s just part of their flock. I think their air boss assigns one turkey per branch for safety; they weigh upwards of 10 pounds each!
Taken with the DSC-H5 and DSC-F717, both the the 1.7× teleadapter, hand-held in cold weather.
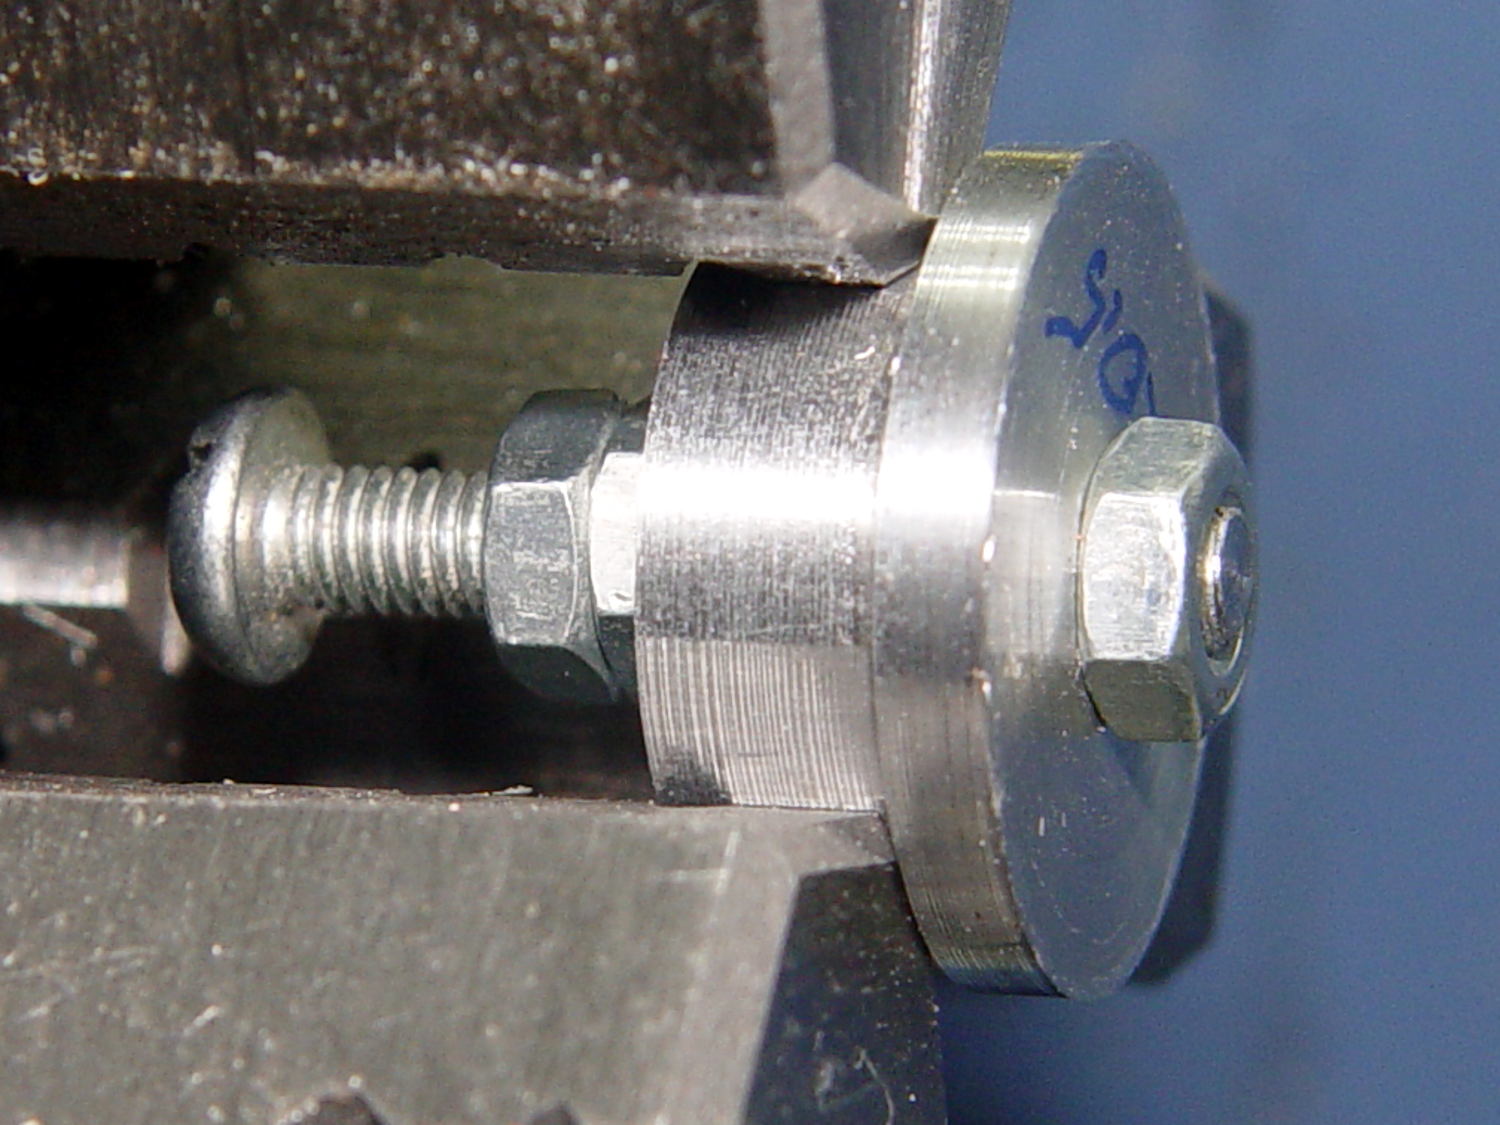
By and large, when you follow the recipe, you get the expected result:
Screw cutting fixture – M3x0.5 aluminum – side view
That’s another length of the same aluminum rod, this time with a full-length M3x0.5 thread down the middle, and a screw with a neatly trimmed end.
Running the lathe spindle in reverse prevents the screw from loosening the jam nuts on the left:
Screw cutting fixture – M3x0.5 aluminum – in lathe chuck
Running the spindle forward does move the screw enough to loosen the nuts. Perhaps I should put wrench flats on the big end of the fixture so I can really torque the nuts.
That front nut was mostly decorative, rather than tight, because I didn’t expect the first attempt to work nearly as well as it did. A bit of filing to taper the end of the thread and it was all good.
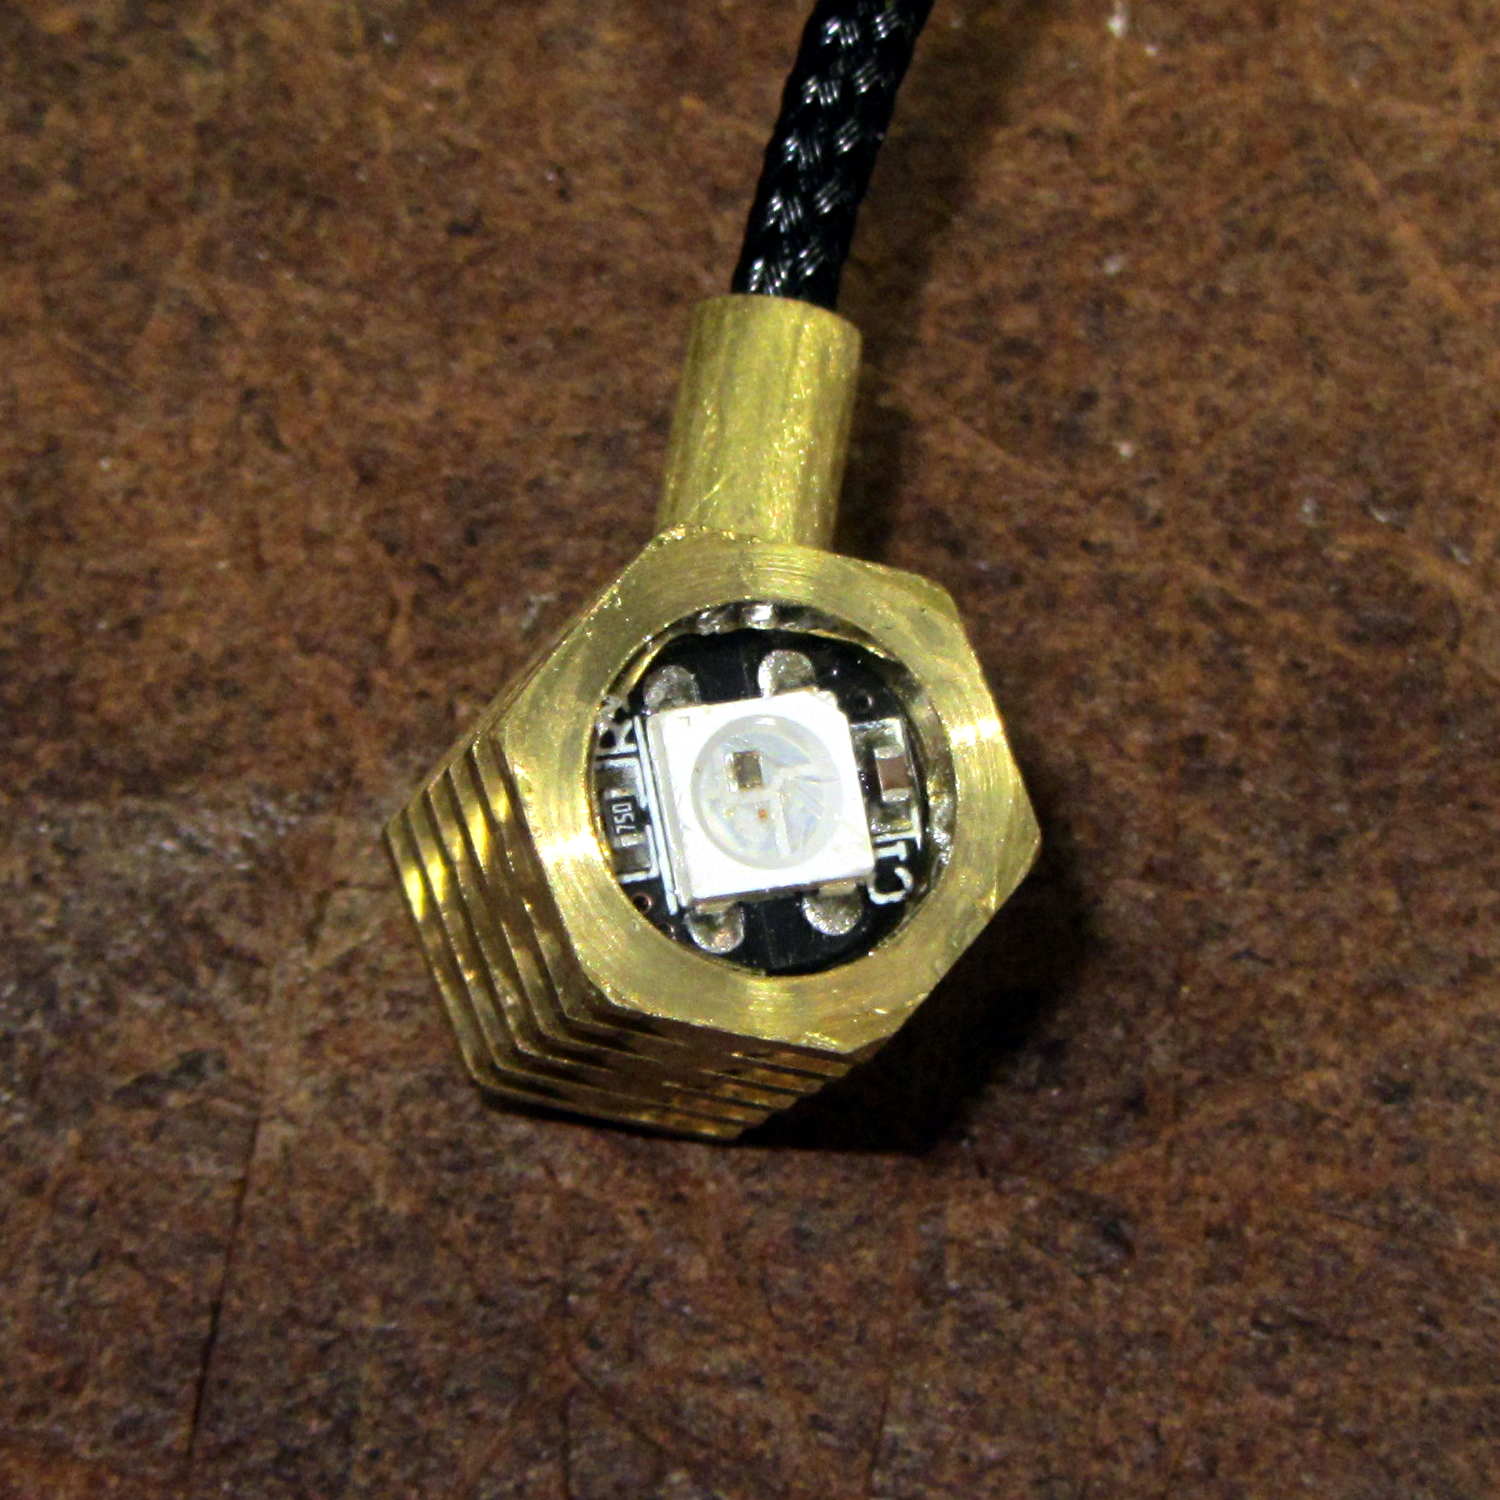
I wrapped the halogen bulb in a shop towel, laid the ersatz heatsink against an anvil (actually, it was a microwave transformer on the Squidwrench operating table), whacked a chisel into the epoxy joint, and met with complete success:
Failed WS2812 LED – ersatz heatsink
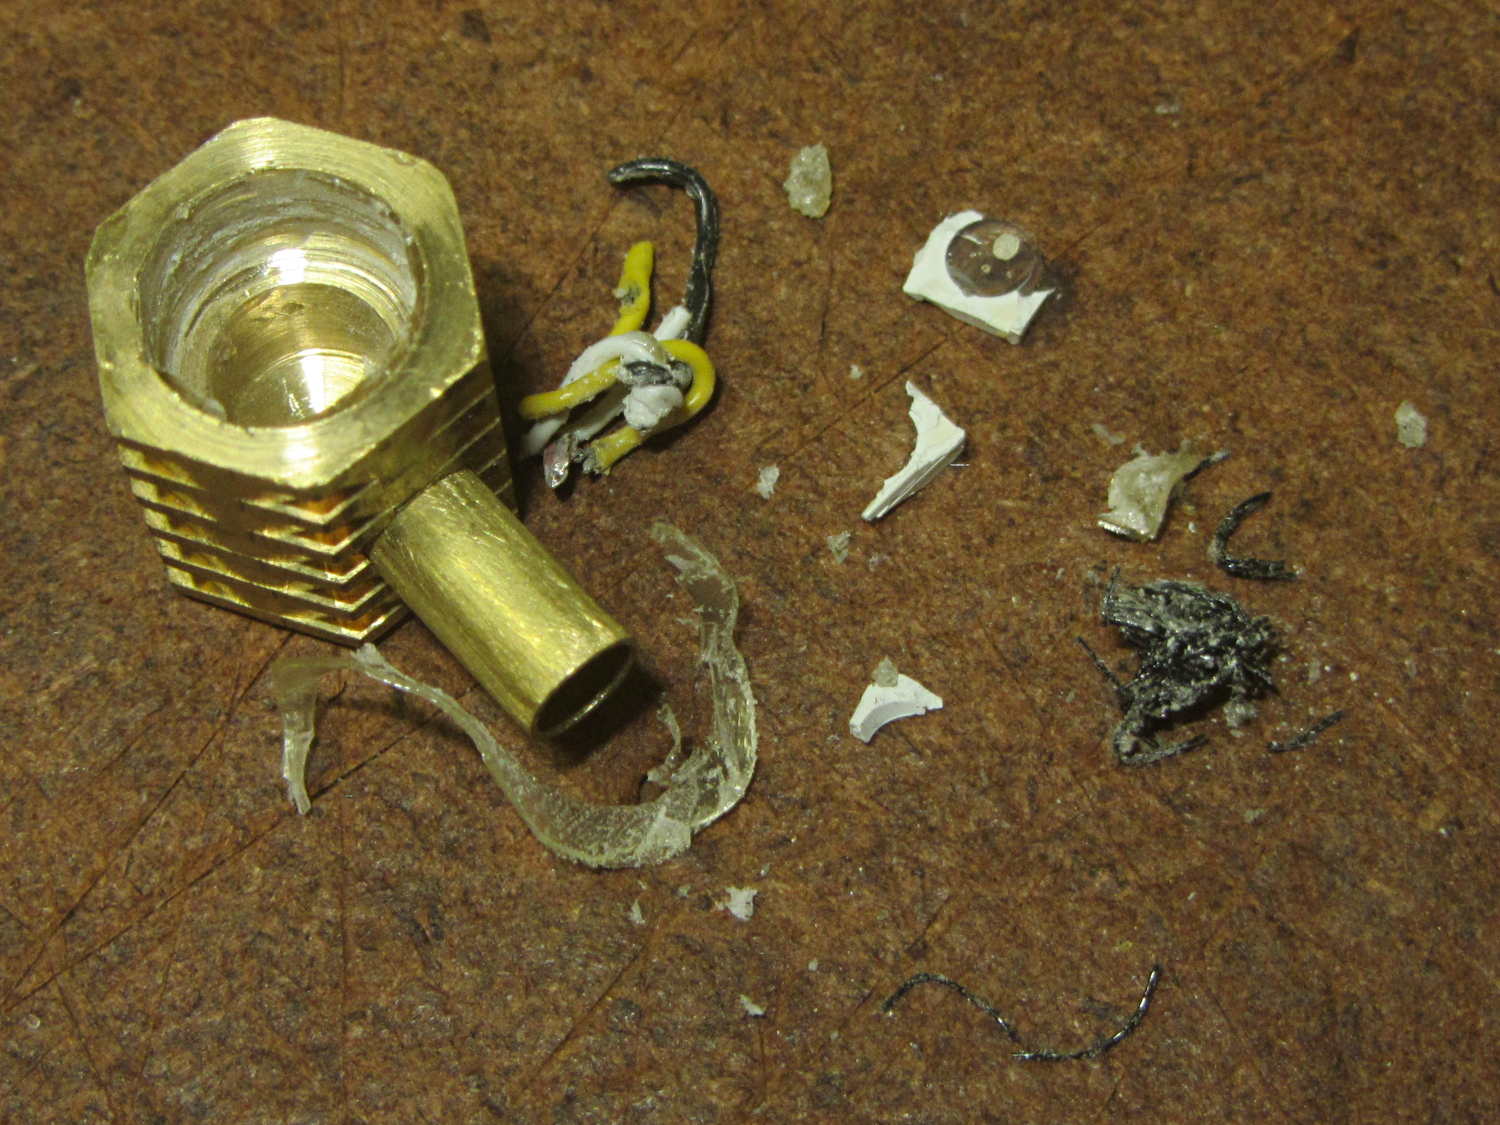
Having epoxied the PCB and braid in place, there was nothing for it but to drill the guts out of the brass cap:
Failed WS2812 LED – drilling
Which produced a pile of debris in addition to the swarf:
Failed WS2812 LED – debris
The brass cap emerged unscathed, which was just about as good as I could possibly hope for.
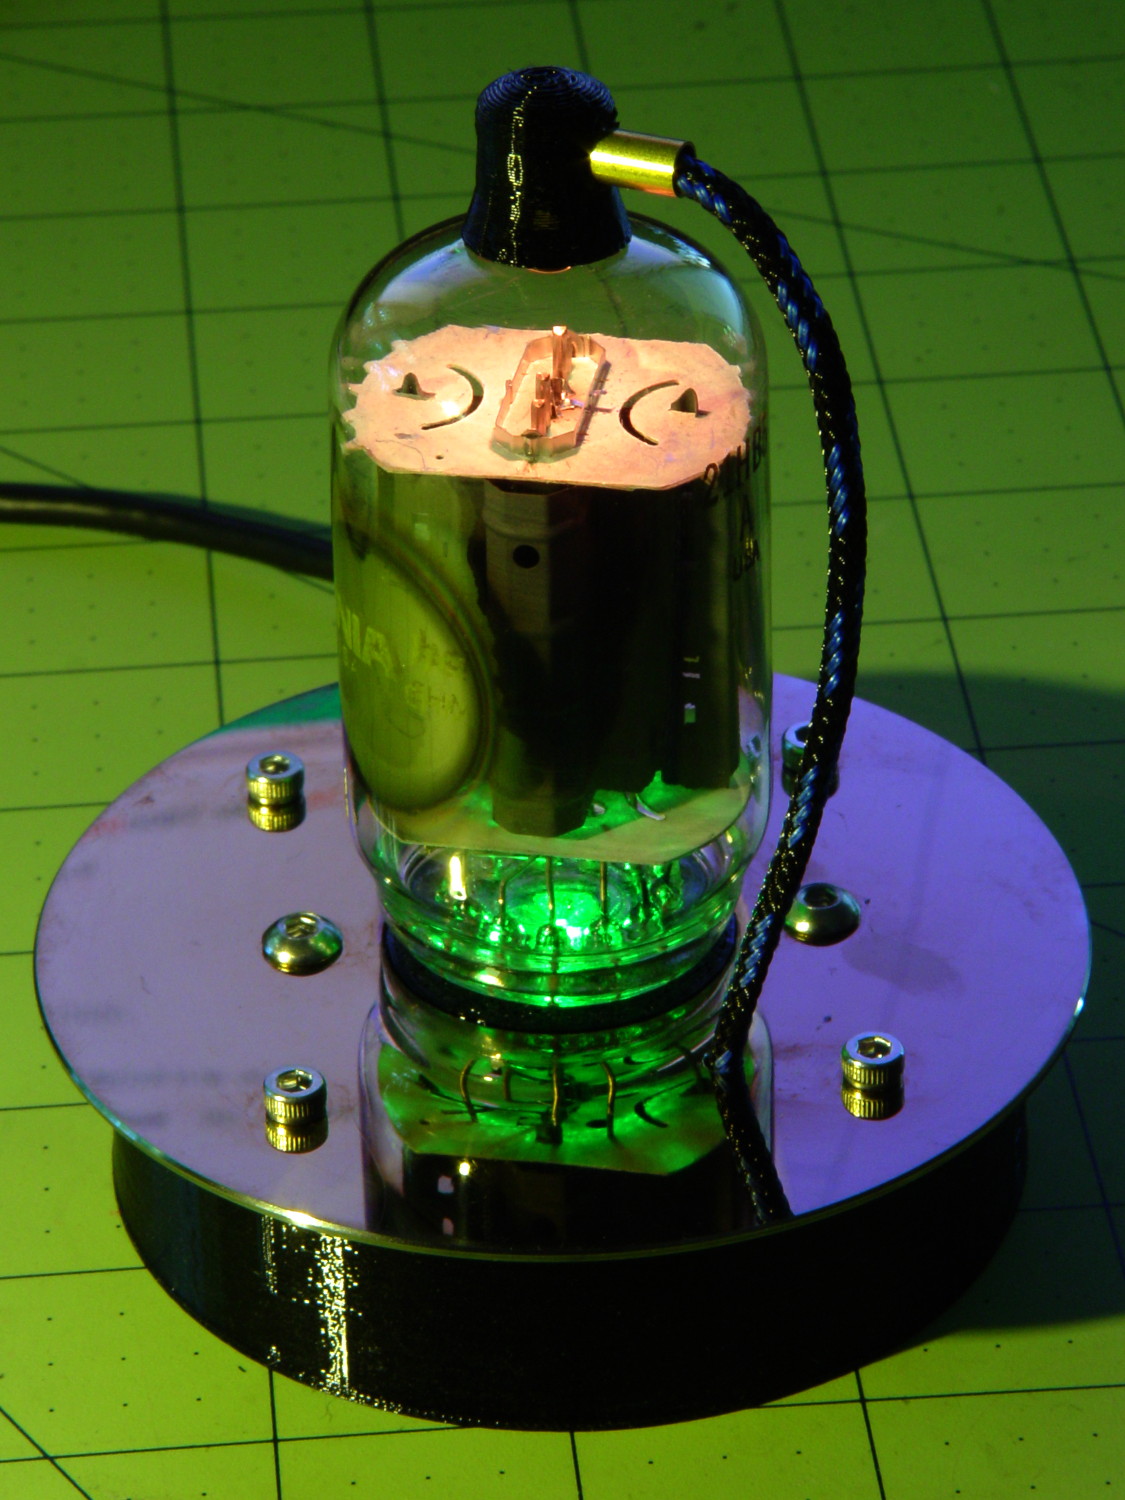
The base LED in this 21HB5A also failed:
21HB5A on platter – orange green
Soooo I had to unsolder the plate lead and Arduino connections to extract the bottom PCB; fortunately, that was just a press-fit into the base.
I should mount a 3.5 mm stereo jack on the platter and run the plate lead into a nice, albeit cheap, knurled metal plug, so I can dismount both the tube and the plate lead without any hassle. Right now, the tube can come out of the socket, but the plate lead passes through the platter.
For whatever it’s worth, all of the dead WS2812 LEDs pass the Josh Sharpie Test, so these failures don’t (seem to) involve poor encapsulation.