The Smell of Molten Projects in the Morning

Ed Nisley's Blog: Shop notes, electronics, firmware, machinery, 3D printing, laser cuttery, and curiosities. Contents: 100% human thinking, 0% AI slop.

Author: Ed

  • Tube Turning Adapters

    Tube Turning Adapters

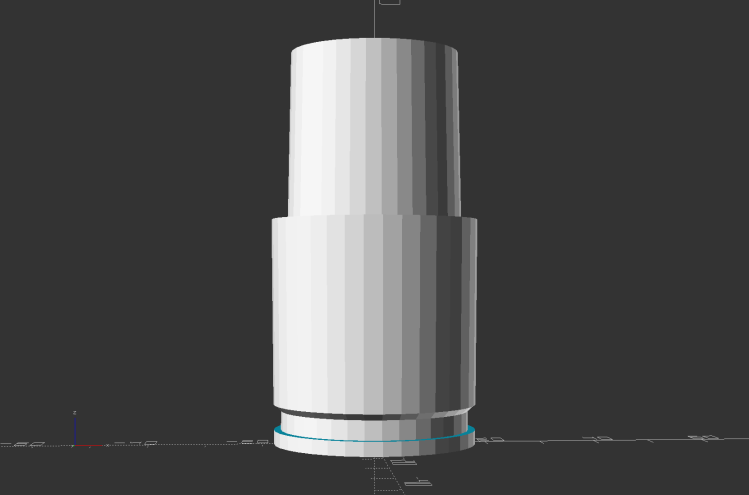
    Finishing the PVC tubes reinforcing the vacuum cleaner adapters required fixtures on each end:

    Dirt Devil adapter - pipe turning
    Dirt Devil adapter – pipe turning

    Because the tubes get epoxied into the adapters, there’s no particular need for a smooth surface finish and, in fact, some surface roughness makes for a good epoxy bond. The interior of a 3D printed adapter is nothing if not rough; the epoxy in between will be perfectly happy.

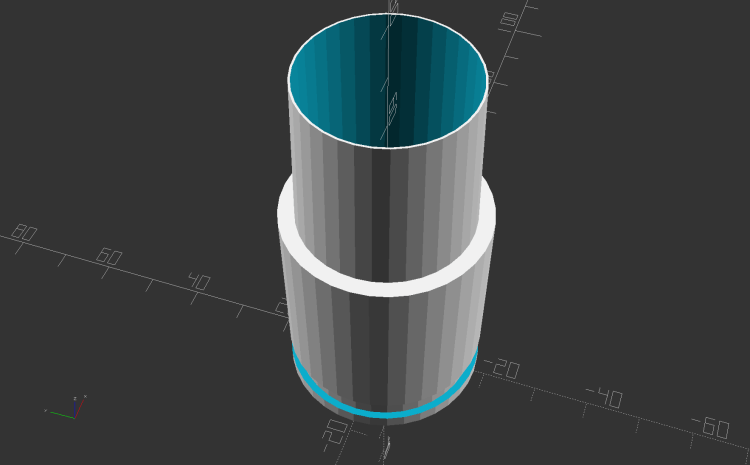
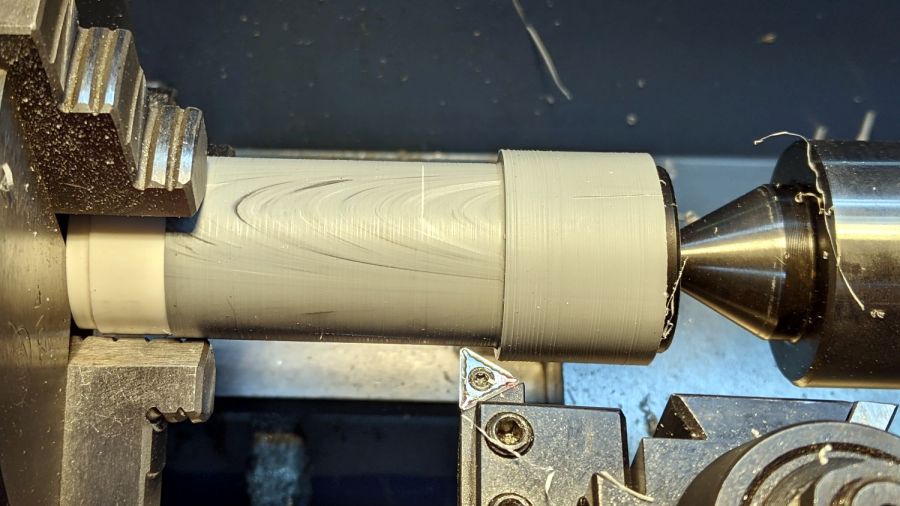
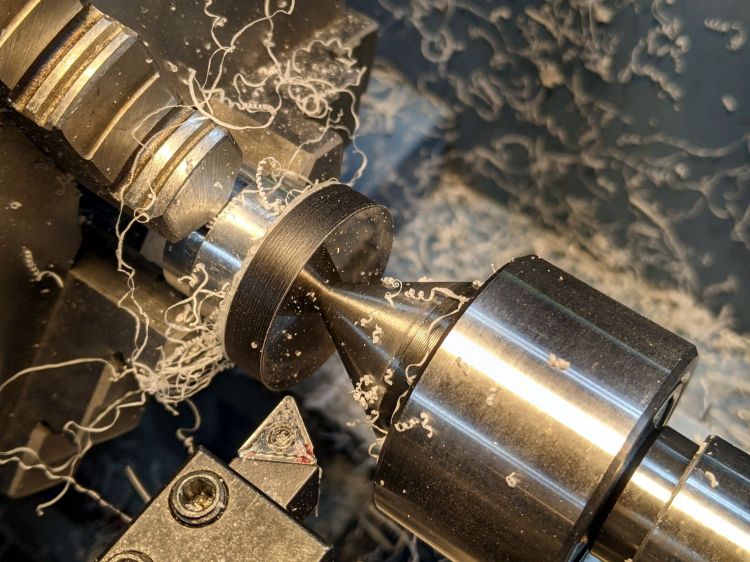
    Turning the tubes started by just grabbing the conduit in the chuck and peeling the end that stuck out down to the finished diameter, because the conduit was thick-walled enough to let that work.

    The remaining wall was so thin that the chuck would crunch it into a three-lobed shape, so the white ring in the chuck is a scrap of PVC pipe turned to fit the tube ID and provide enough reinforcement to keep the tube round.

    The conduit ID isn’t a controlled dimension and was, in point of fact, not particularly round. It was, however, smooth, which counts for more than anything inside a tube carrying airborne fuzzy debris; polishing the interior of a lathe-bored pipe simply wasn’t going to happen.

    The fixture on the other end started as a scrap of polycarbonate bandsawed into a disk with a hole center-drilled in the middle:

    Pipe end lathe fixture - center drilling
    Pipe end lathe fixture – center drilling

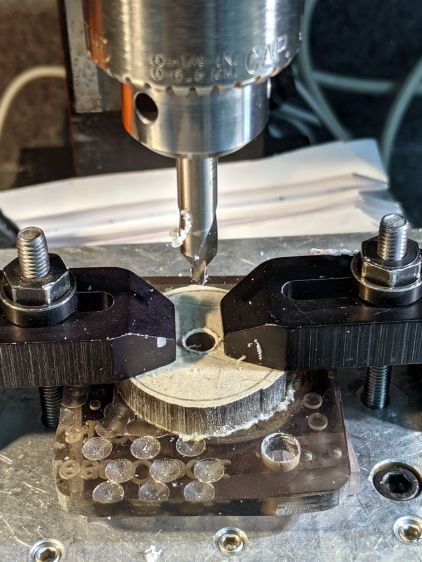
    Stick it onto a disk turning fixture and sissy-cut the OD down a little smaller than the eventual tube OD:

    Pipe end lathe fixture - turning OD
    Pipe end lathe fixture – turning OD

    Turn the end down to fit the tube ID, flip it around to center-drill the other side, stick it into the tube, and finally finish the job:

    Dirt Devil adapter - pipe fixture
    Dirt Devil adapter – pipe fixture

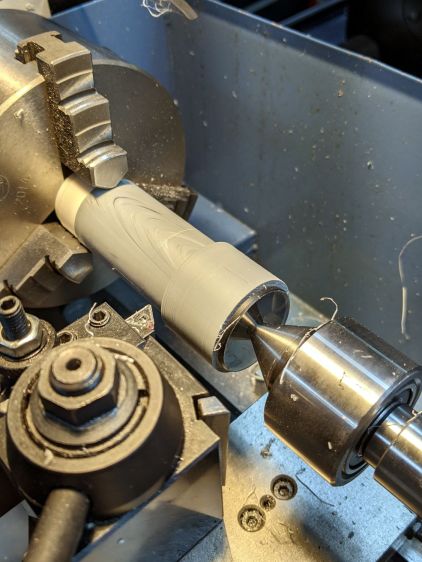
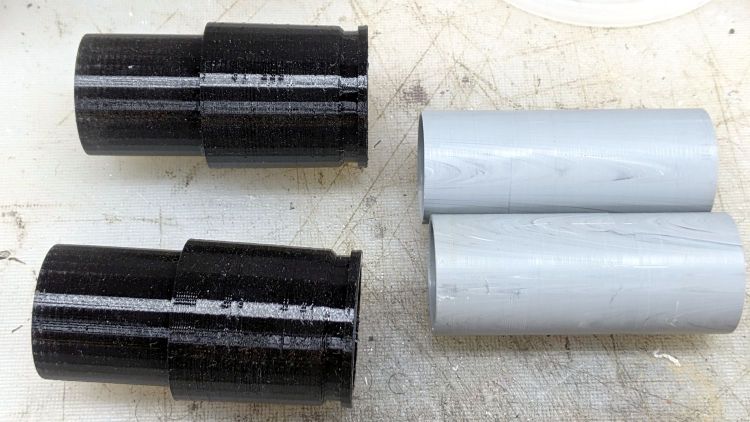
    The nice layering effect along the tube probably comes from molding the conduit from recycled PVC with no particular concern for color matching.

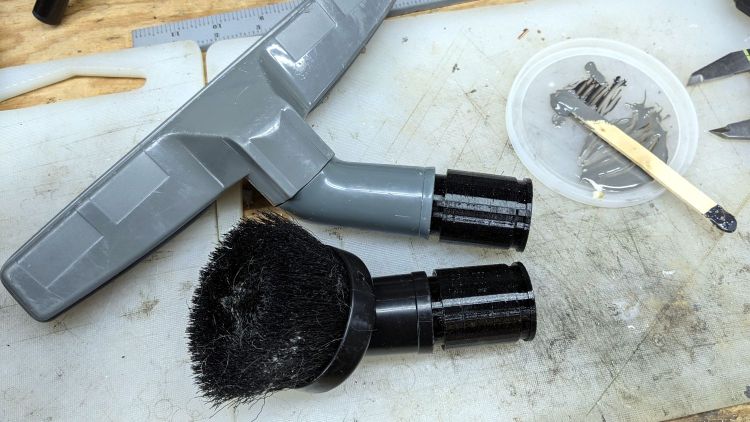
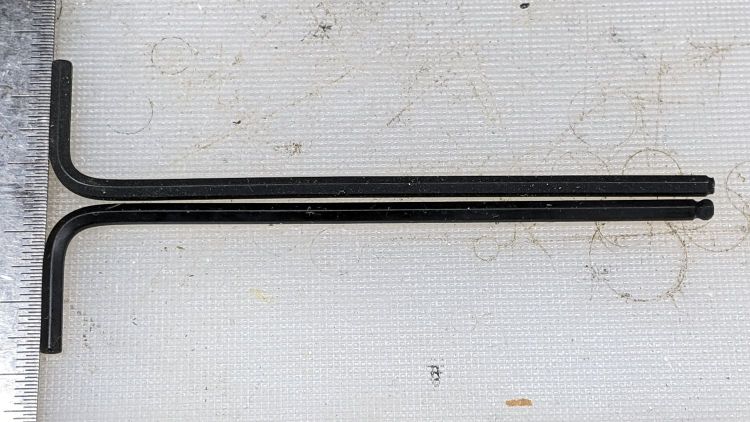
    A family portrait of the fixtures with a finished adapter:

    Dirt Devil adapter - fixtures
    Dirt Devil adapter – fixtures

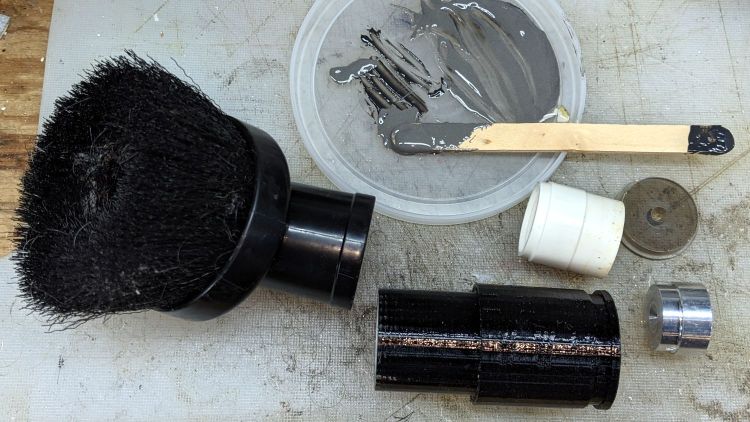
    A fine chunk of Quality Shop Time: solid modeling, 3D printing, mini-lathe turning, and even some coordinate drilling on the Sherline.

  • Dirt Devil Vacuum Tool Adapters

    Dirt Devil Vacuum Tool Adapters

    Being the domain expert for adapters between a new vacuum cleaner and old tools, this made sense (even though it’s not our vacuum):

    Dirt Devil Nozzle Bushing - solid model
    Dirt Devil Nozzle Bushing – solid model

    The notch snaps into a Dirt Devil Power Stick vacuum cleaner and the tapered end fits a variety of old tools for other vacuum cleaners:

    Dirt Devil Nozzle Bushing top view - solid model
    Dirt Devil Nozzle Bushing top view – solid model

    Having some experience breaking thin-walled adapters, these have reinforcement from a PVC tube:

    Dirt Devil adapter - parts
    Dirt Devil adapter – parts

    A smear of epoxy around the interior holds the tube in place:

    Dirt Devil adapters - assembled
    Dirt Devil adapters – assembled

    Building the critical dimensions with a 3D printed part simplified the project, because I could (and did!) tweak the OpenSCAD code to match the tapers to the tools. Turning four of those tubes from a chunk of PVC conduit, however, makes a story for another day.

    The OpenSCAD source code as a GitHub Gist:

    // Dirt Devil nozzle adapter
    // Ed Nisley KE4ZNU 2021-10
    // Tool taper shift
    Finesse = -0.1; // [-0.5:0.1:0.5]
    // PVC pipe liner
    PipeOD = 28.5;
    /* [Hidden] */
    //- Extrusion parameters
    ThreadThick = 0.25;
    ThreadWidth = 0.40;
    HoleWindage = 0.2;
    function IntegerMultiple(Size,Unit) = Unit * ceil(Size / Unit);
    Protrusion = 0.1; // make holes end cleanly
    //———————-
    // Dimensions
    TAPER_MIN = 0;
    TAPER_MAX = 1;
    TAPER_LENGTH = 2;
    Socket = [36.0,37.0,40.0];
    LockringDia = 33.5;
    LockringWidth = 4.5;
    LockringOffset = 2.5;
    Tool = [Finesse,Finesse,0] + [30.0,31.1,30.0];
    AdapterOAL = Socket[TAPER_LENGTH] + Tool[TAPER_LENGTH];
    NumSides = 36;
    $fn = NumSides;
    //———————-
    // Useful routines
    module PolyCyl(Dia,Height,ForceSides=0) { // based on nophead's polyholes
    Sides = (ForceSides != 0) ? ForceSides : (ceil(Dia) + 2);
    FixDia = Dia / cos(180/Sides);
    cylinder(r=(FixDia + HoleWindage)/2,h=Height,$fn=Sides);
    }
    //——————-
    // Define it!
    module Adapter() {
    difference() {
    union() {
    difference() {
    cylinder(d1=Socket[TAPER_MIN],d2=Socket[TAPER_MAX],h=Socket[TAPER_LENGTH]);
    translate([0,0,LockringOffset])
    cylinder(d=2*Socket[TAPER_MAX],h=LockringWidth);
    }
    cylinder(d=LockringDia,h=Socket[TAPER_LENGTH]);
    translate([0,0,LockringOffset + 0.75*LockringWidth])
    cylinder(d1=LockringDia,d2=Socket[TAPER_MIN],h=0.25*LockringWidth);
    translate([0,0,Socket[TAPER_LENGTH]])
    cylinder(d1=Tool[TAPER_MAX],d2=Tool[TAPER_MIN],h=Tool[TAPER_LENGTH]);
    }
    translate([0,0,-Protrusion])
    PolyCyl(PipeOD,AdapterOAL + 2*Protrusion,NumSides);
    }
    }
    //———————-
    // Build it!
    Adapter();

    The taper in the code almost certainly won’t fit whatever tool you have: measure thrice, print twice, and maybe fit once …

  • Running Light Waveforms: A Closer Look

    Running Light Waveforms: A Closer Look

    A test setup on the bench allows a bit more room for probes:

    1 W Amber LED - MP1584 pulse setup
    1 W Amber LED – MP1584 pulse setup

    Some heatsink tape holds the LED to the far side of that oversize heatsink.

    The input signal (top trace) arrives from a function generator set to blip the MP1584 regulator’s Enable input at 4 Hz with a 7 ms pulse:

    Amber 1 w LED - pulse 200 mA-div
    Amber 1 w LED – pulse 200 mA-div

    The purple trace is the voltage across the 2 Ω sense resistor. The MP1584 datasheet says the regulator soft-starts for (typically) 1.5 ms, during which the output ramps upward at 600 mV/ms to 800 mV , whereupon the actual regulation commences. The amber LED forward drop adds 2.5 V to the sense voltage, so the regulator produces 3.3 V from the 6.3 V bench supply input.

    The cyan trace is the output current through the LED and sense resistor, also ramping up to 800 mV/2 Ω = 400 mA to drive the LED at 1 W.

    The furry section shows when the regulator is actively regulating, with the output voltage rising and falling over a small range to maintain the average current (via the sense voltage). Successive Enable pulses may have longer, shorter, or completely missing fur, with no predictable pattern. Increasing the duty cycle doesn’t affect the results, with the fur sometimes extending for the entire pulse and sometimes being completely missing.

    I think the regulator can settle in one of two metastable states. The best case has a constant voltage producing a constant LED current, with the sense voltage remaining within whatever deadband keeps the error amplifier happy. When something knocks the sense voltage out of the deadband, the error amp starts the usual regulation cycle, which will stop when the minimum or maximum voltage of a cycle remains within the deadband:

    Amber 1 w LED - pulse - detail - 200 mA-div
    Amber 1 w LED – pulse – detail – 200 mA-div

    The ripple shows the regulator running at three cycles per 20 µs division = 150 kHz, far lower then the MP1584 datasheet’s maximum 1.5 MHz and the typical 500 kHz in the test circuits. Perhaps a low frequency lets the designers use a cheap PCB and not worry about pesky EMI issues.

    In any event, during this pulse the ripple amplitude gradually decreased as the output voltage settled at the point where the error voltage variation stayed within the deadband. The typical amp gain is only 200 V/V, so it’s definitely less fussy than something build around an op amp.

    For whatever it’s worth, a 7 ms flash from a 1 W amber LED at 4 Hz is way attention-getting in a dim Basement Laboratory. You wouldn’t need an Arduino to produce that signal, even though I like the Morse capability.

  • Another Snapper

    Another Snapper

    An approaching cyclist warned to watch out for the snapping turtle:

    Snapping Turtle - DCRT near Page Park - front - 2021-09-24
    Snapping Turtle – DCRT near Page Park – front – 2021-09-24

    This one claims the pond near Page Industrial Park along the Dutchess Rail Trail:

    Snapping Turtle - DCRT near Page Park - rear - 2021-09-24
    Snapping Turtle – DCRT near Page Park – rear – 2021-09-24

    We’ll not dispute any snapper’s territory!

    I’m hauling PYO apples from Prospect Hill Orchards in the hills on the west side of the Hudson; it was a lovely fall day for a 25 mile ride!

  • BatMax NP-BX1 Status

    BatMax NP-BX1 Status

    The Sony HDR-AX30V helmet camera puts far more demands on its battery than the Planet Bike Superflash:

    Batmax NP-BX1 - 2021-09 vs 2020-03
    Batmax NP-BX1 – 2021-09 vs 2020-03

    The four traces on the right show the BatMax NP-BX1 lithium batteries (cells, really) originally stored about 3 W·h when they arrived in March 2020. The four solid traces to their left show the capacity dropped to a little over 2 W·h after two riding seasons. Batteries B and C started out above average and are now below, for whatever that means.

    The red dotted trace shows the effect of not using the NP-BX1 test holder for that length of time; those homebrew contact pins apparently needed some exercise.

  • Panasonic Eneloop AAA NiMH: Four Years of Blinking

    Panasonic Eneloop AAA NiMH: Four Years of Blinking

    Having replaced the Planet Bike Superflash on Mary’s Tour Easy with a 1 W red LED, testing the eight Panasonic Eneloop AAA cells that have been powering it (and the one on my bike) for the last four years seemed useful:

    Panasonic Eneloop AAA - 2021-09 vs 2017-04
    Panasonic Eneloop AAA – 2021-09 vs 2017-04

    The sheaf of curves over on the right came from the first full charge, with the untidy collection below them show the current state after a full charge. This is at an unreasonably high 500 mA discharge.

    The overall capacity has dropped by 10%, which isn’t all that bad, but the 10% voltage reduction toward the end of the curves is a Bad Thing for an LED flasher intended to run from 1.5 V alkaline cells. In practice, I recharge the batteries once a week while they are still going strong, but the difference between alkalines and NiMH cells is obvious even at full charge.

    Now I can run four pairs through the aging Superflash on my bike …

  • Bondhus Wrench Replacement

    Bondhus Wrench Replacement

    The Bondhus Lifetime Guarantee works, as a replacement wrench just arrived:

    Bondhus hex wrenches - 7-64 ball end - replacement
    Bondhus hex wrenches – 7-64 ball end – replacement

    A close look at the aligned tips suggests the defective wrench blank was mis-chucked in the machine cutting the ball end:

    Bondhus hex wrenches - 7-64 ball end - replacement - detail
    Bondhus hex wrenches – 7-64 ball end – replacement – detail

    All’s well that ends well: thank you, Bondhus!