Ed Nisley's Blog: Shop notes, electronics, firmware, machinery, 3D printing, laser cuttery, and curiosities. Contents: 100% human thinking, 0% AI slop.
It’s cut from 3 mm MDF, rather than the fancy Trotec Eco 1 mm cellulose sheet they recommend, which required embiggening the mounting slots in all the pieces.
It served as good, albeit tedious, practice for my atrophied GUI alignment and editing skilz.
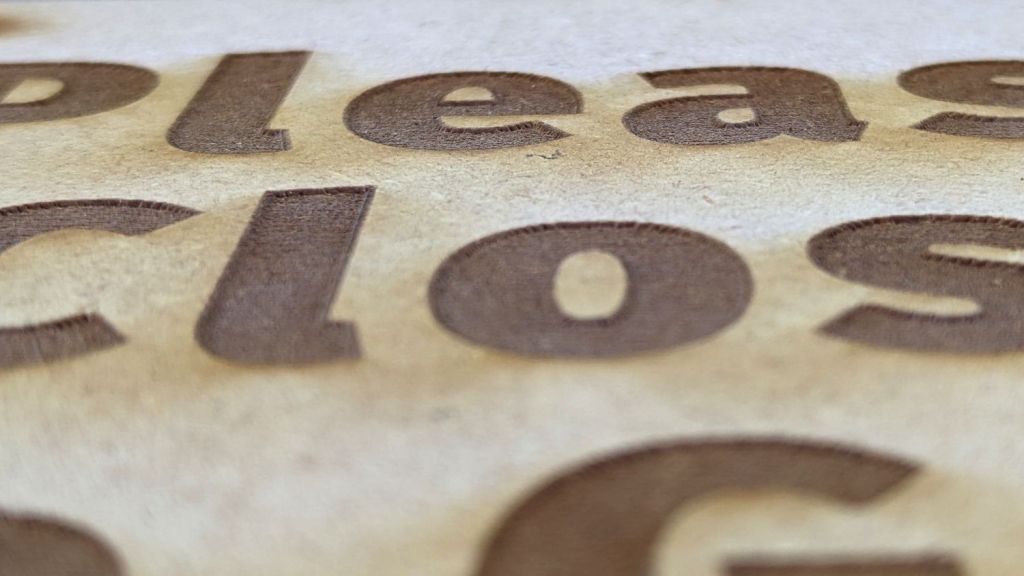
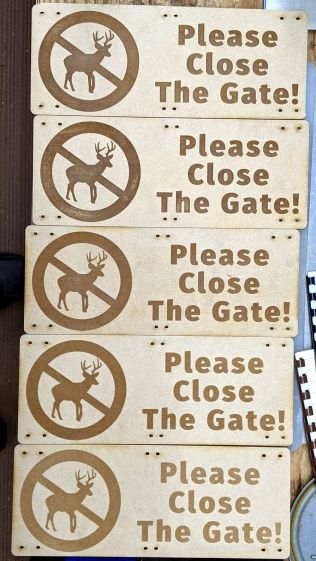
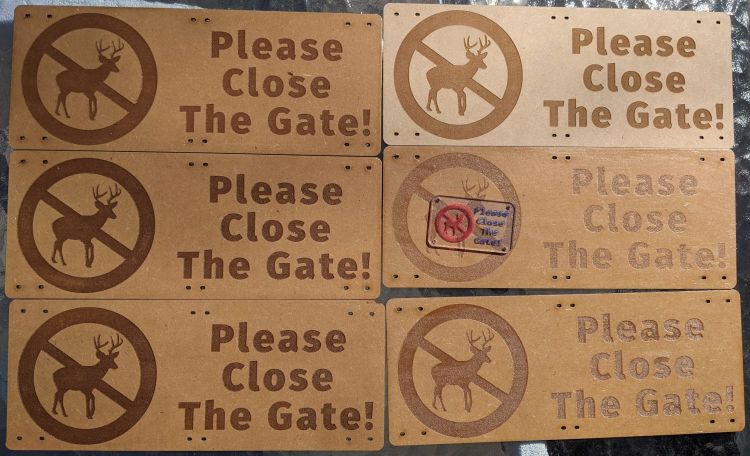
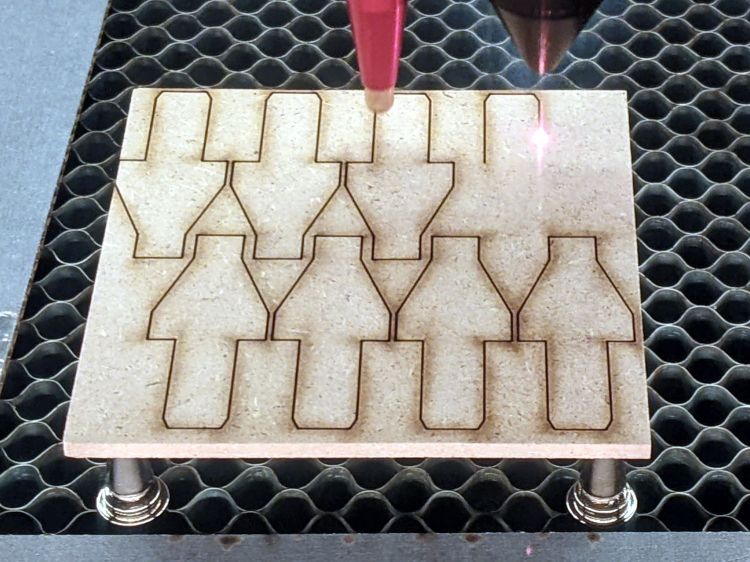
Making signs for the gates surrounding the Vassar Community Gardens provided an opportunity to test laser engraving power on MDF:
Please Close The Gate – 60 to 20 pct engraving – raw
The alert reader will observe MDF is totally the wrong material for outdoor signage, which is correct. I’ll be producing different signs as these disintegrate, with an emphasis on engraving different materials and applying different finishes along the way; nobody pays attention to signs, anyway.
With that in mind, the engraving power ranged from 60% on the top sign to 20% at the bottom, perhaps 40 W to 10 W, with a scanning speed of 500 mm/s. The highest power punched the engraving about 0.5 mm below the surface:
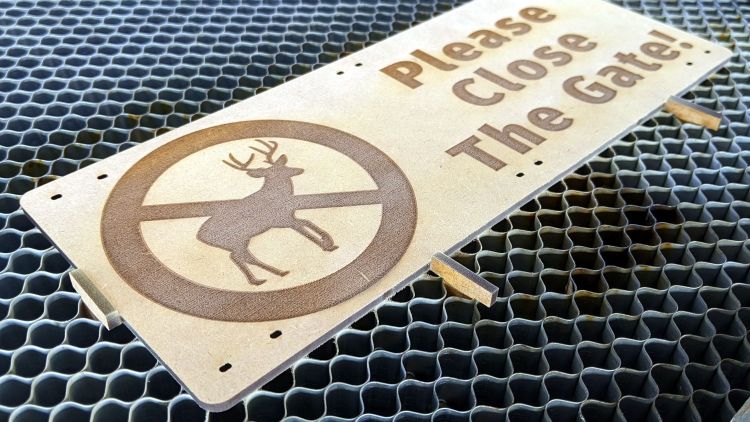
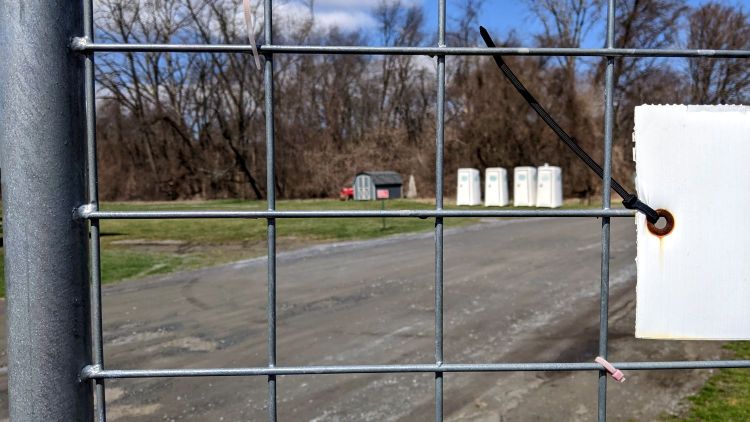
The MDF signs fit inside one vertical space of the “four inch” wire mesh on the gates, where they rest on the lower wire, and span three wires horizontally, so I could attempt to control the inevitable warping:
VCCG perimeter gate wire mesh
The mesh wire spacing is not mmmm a closely controlled manufacturing parameter, so the next iteration must be a few millimeters shorter to fit the smallest openings.
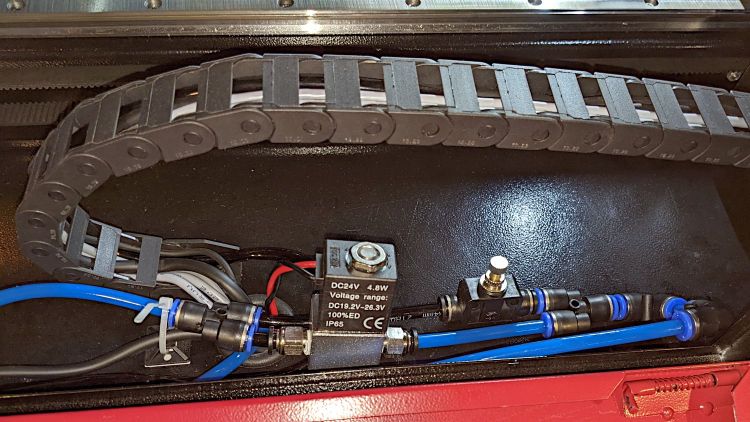
A tweak to the air assist plumbing of my OMTech 60 W laser produces much the same result as Russ Sadler’s Super Ultimate Air Assist, with somewhat less plumbing and cheaper Amazon parts:
OMTech Laser – air assist – plumbing
The overall doodle shows the electrical wiring and pneumatic plumbing:
Dual-path air assist diagram
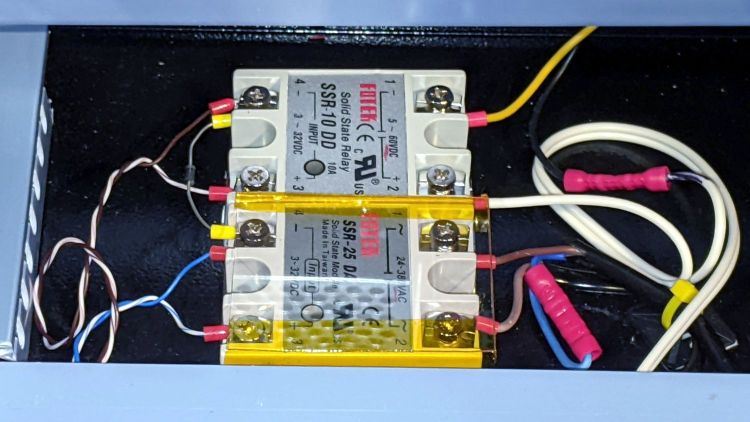
The electronics bay now has two solid state relays:
OMTech Laser – air assist SSRs
The front SSR turns on the air pump when the controller activates the STATUS or AUX AIR outputs; the diode between the (-) terminals acts as wired-OR.
The rear SSR turns on the solenoid valve whenever the AUX AIR output is active. The diode turns on the other SSR to start the pump.
When the laser cutter is idle, both the STATUS and AUX AIR outputs are inactive, so the pump doesn’t run and the solenoid is closed.
The controller has a front-panel AUX AIR button that turns on its eponymous output, which turns on both the solenoid and the pump. I have turned it on to verify the circuitry works, but don’t do any manual cutting. I never was very good with an Etch-a-Sketch and the laser’s UI is much worse.
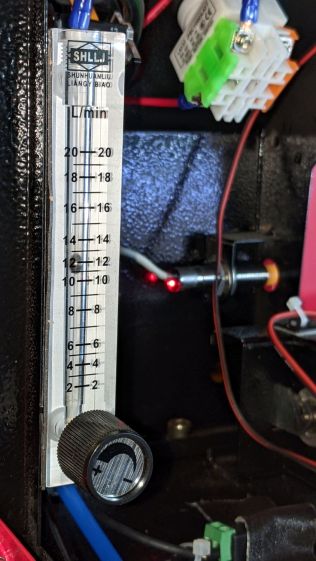
The solenoid valve must be a “direct acting solenoid valve“, as the air pump produces about 3 psi and cannot activate a “self piloted” solenoid valve. When the valve is open, the pump can push about 12 l/min through the plumbing to the nozzle:
The flow control valve is a manually adjusted needle valve to restrict the engraving air flow to maybe 2 l/min, just enough to keep the smoke / fumes out of the nozzle and away from the lens, when the solenoid valve is closed.
I set the controller to delay for 1 s after activating the air pump to let it get up to speed. There’s an audible (even to my deflicted ears) rattle from the flowmeter when the air assist solenoid opens.
The paltry 12 l/min seems to promote clean cuts and 2 l/min doesn’t push much smoke into the surface around the engraved area.
It took several iterations to convince me I can’t quite pull it off yet, but the idea shows promise; the GitHub repo includes useful links to other variations and techniques.
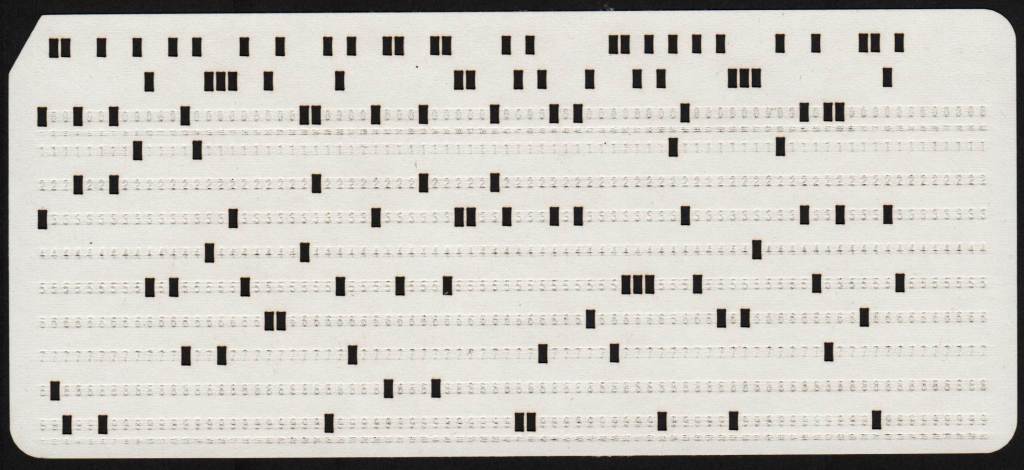
The top card starts with hole locations / column numbers preprinted by the inkjet, then (nearly but not exactly) aligned in the laser cutter for “engraving” the variable text and “punching” the corresponding holes. The other cards represent various steps along the way, all of which demonstrate why a 60 W laser is the wrong way to print text on cardstock:
Laser cutter – engraved punched card
Aligning a preprinted sheet in the laser cutter with sufficient accuracy to hit all the holes turns out to be a significant challenge: the red dot laser pointer hangs off the rear of the nozzle with the beam at a steep angle:
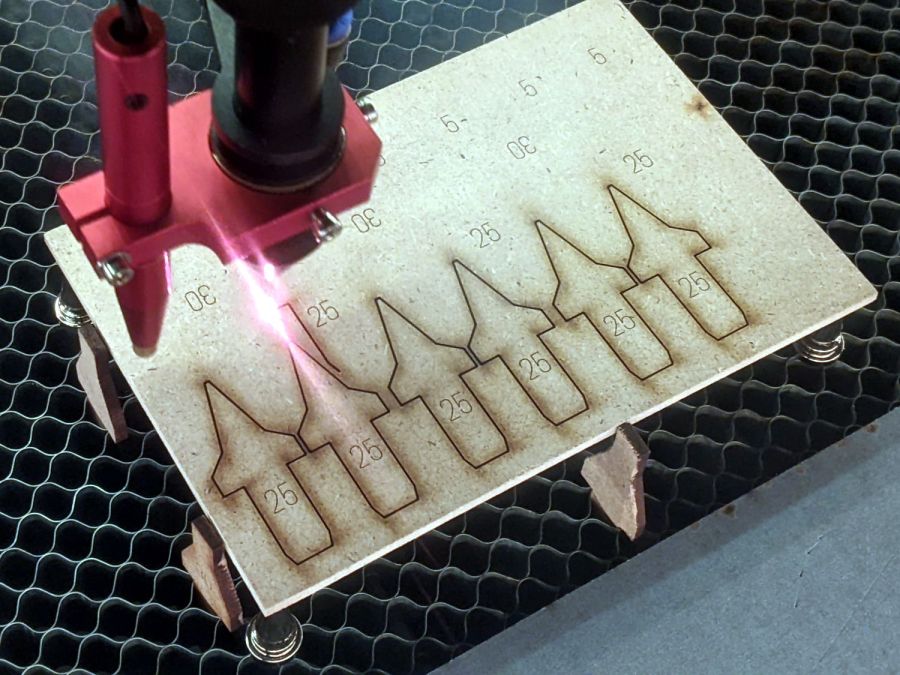
Magnetic Honeycomb Spikes – MDF
Which means the red dot coincides with the main laser beam only at the exact focal distance below the nozzle after painstaking (and easily disrupted) alignment. A red dot laser coaxial with the CO₂ tube / beam should produce much better results, but that’s not what I have.
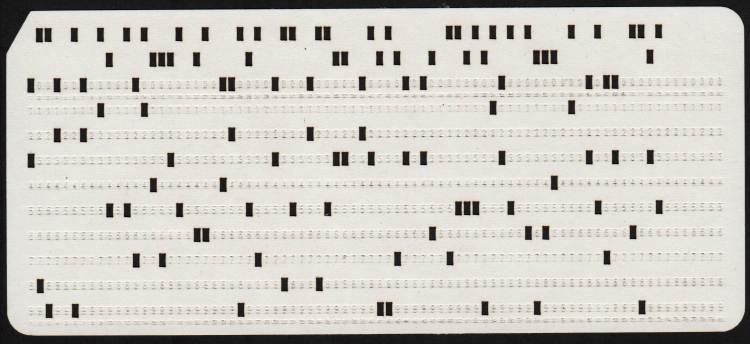
It Would Be Nice If™ I could cut the card outlines with the laser, print the hole positions on the inkjet, then align the “blanks” for “punching”, but I have yet to find any combination of parameters amid the unsteady ziggurat of Linux / CUPS printing configurations to produce properly aligned results on a custom paper size:
Misaligned punched card printing
You might think telling the printer it’s handling a #10 envelope with the image of the text carefully positioned to land at the proper spot on the actual card should work. You (well, I) would be wrong.
I’m pretty sure this can be coerced into working, but it must marinate on the to-do list for a while.
I cut new shades from vintage clear acrylic sheet, with more aluminized mylar attached to the lower surface: you can barely see the COB LED strip through the reflecting surface.
Depending on how you arrange all the hardware hanging on the nozzle, the shades can collide with something at the home position in the far right corner:
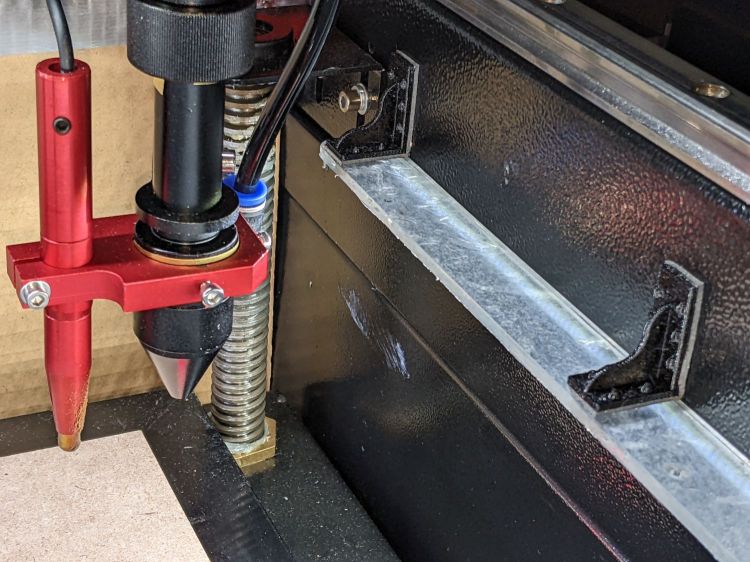
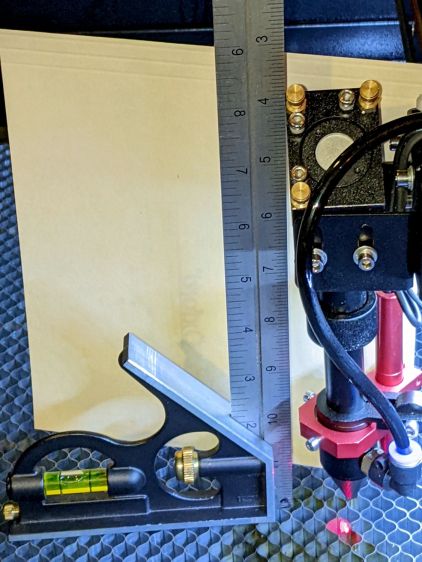
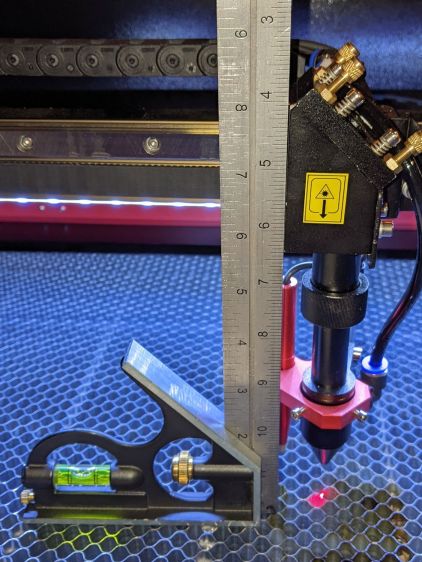
The mirror 3 + lens tube has a distinct tilt when seen from the +X direction (the right side of the machine, so it’s in the YZ plane, I suppose).
This is not matched when seen from the -Y direction (front):
OMTech 60W beam alignment – head Y plane
The tilt does not seen to correct for a misalignment in the X axis rail or the brackets attaching the head to the linear bearing.
The beam seems properly centered on the lens and nozzle, so I’m loath to twiddle the alignment just to see what happens. One of these days, for sure, that must happen …
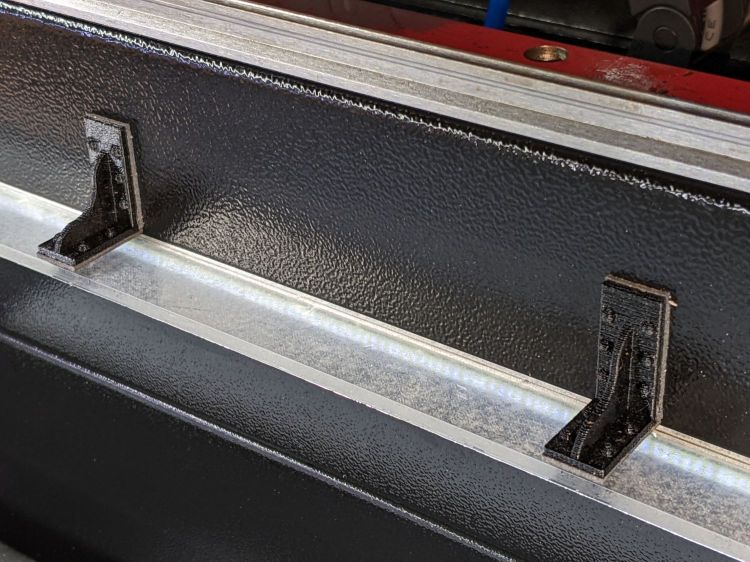
A bit of tinkering suggested I needed a way to repeatably position stock sheets on the honeycomb, so I conjured stops that would be slightly taller than the magnetic spikes:
Improved MDF Honeycomb Spikes – first pass
Three of those form a corner into which you can tuck victims of the same general size:
Improved MDF Honeycomb Spikes – stock alignment
Those pointy MDF spikes should start with slightly rounded tops, because that’s what they’ll look like after a few uses:
Improved MDF Honeycomb Spikes – alignment stops
I also made a low-profile stop for victims lying directly on the honeycomb for engraving:
Please Close The Gate – engraved
The SVG images include a nested version to tile across random MDF leftovers.


