The switch on the Anker LC-40 flashlight serving as a running light on my Tour Easy became slightly intermittent before I replaced it with a 1 W amber LED, but it was still good enough to become the troubleshooting flashlight in the tray next to the Prusa Mk 4 printer. Eventually, of course, it failed completely and Something Had To Be Done.
Although I knew an exact replacement switch had to be available from the usual sources, I could not come up with a set of keywords capable of pulling them out of the chaff.
That was not a problem, because the assortment of SMD switches I used to replace the handlebar control caps on Mary’s Handi-Quilter HQ Sixteen contained push-on / push-off switches that were almost the right size:

Having recently convinced the MakerGear M2 3D printer to use TPU filament, all I had to do was produce a suitable cap to fit over the new switch in the flashlight’s tail:
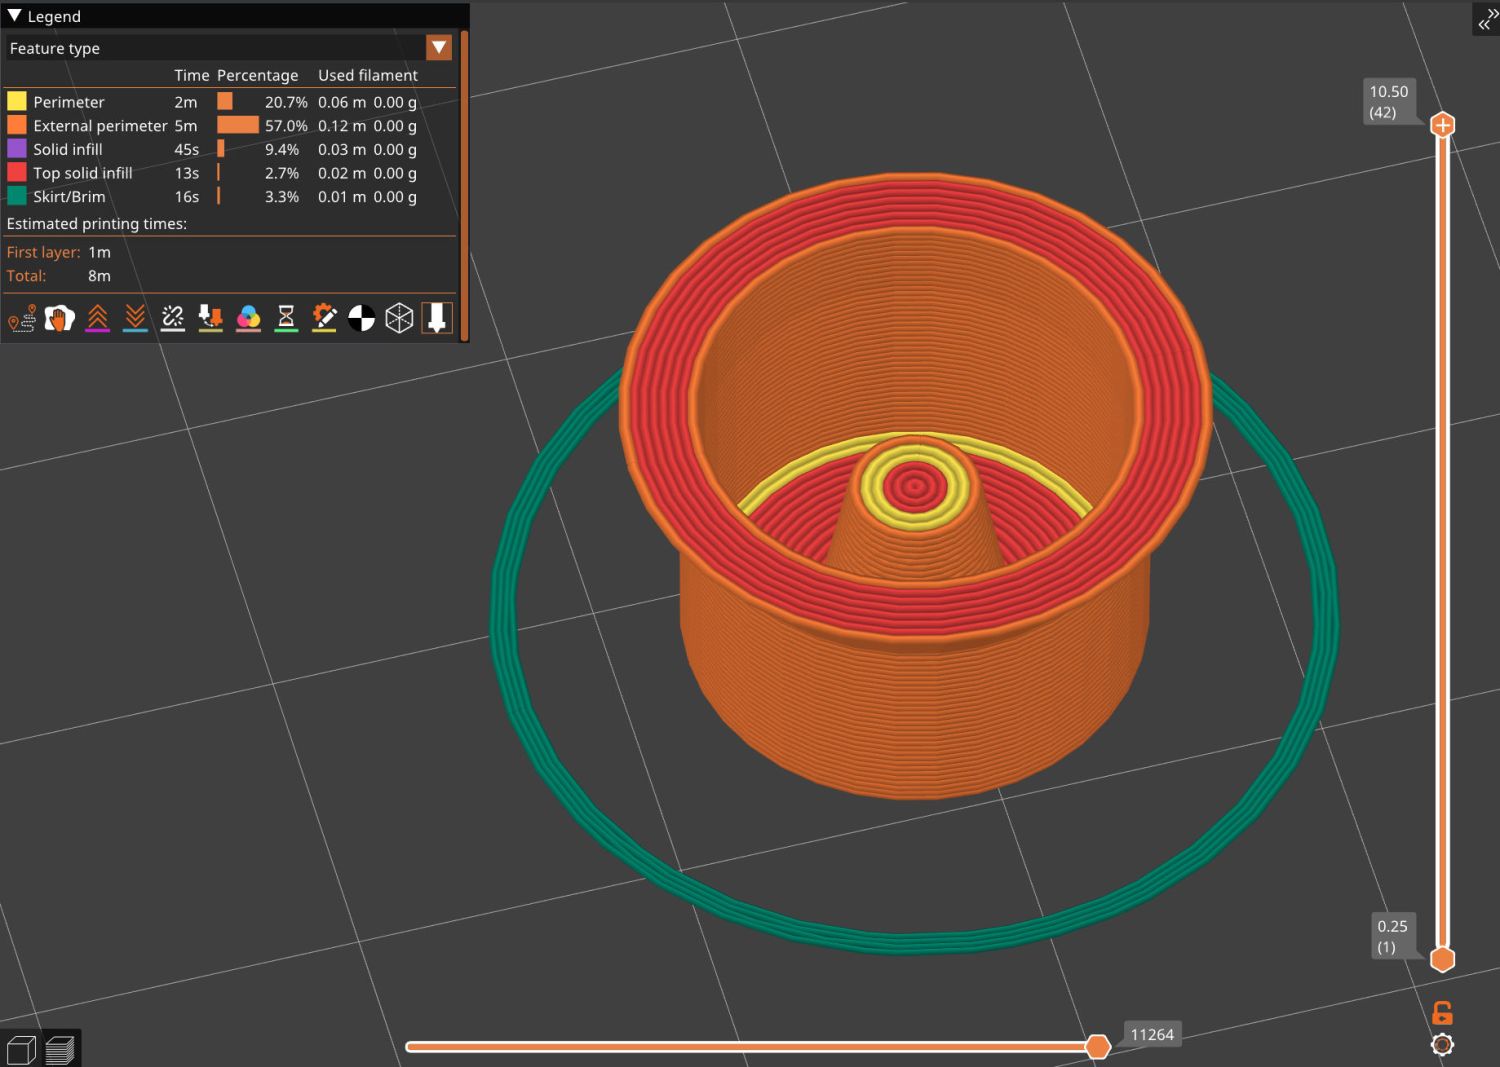
Which turned into a multi-dimensional search over cap geometry, TPU extrusion speeds & feeds, and various impossible-to-directly-measure sizes:
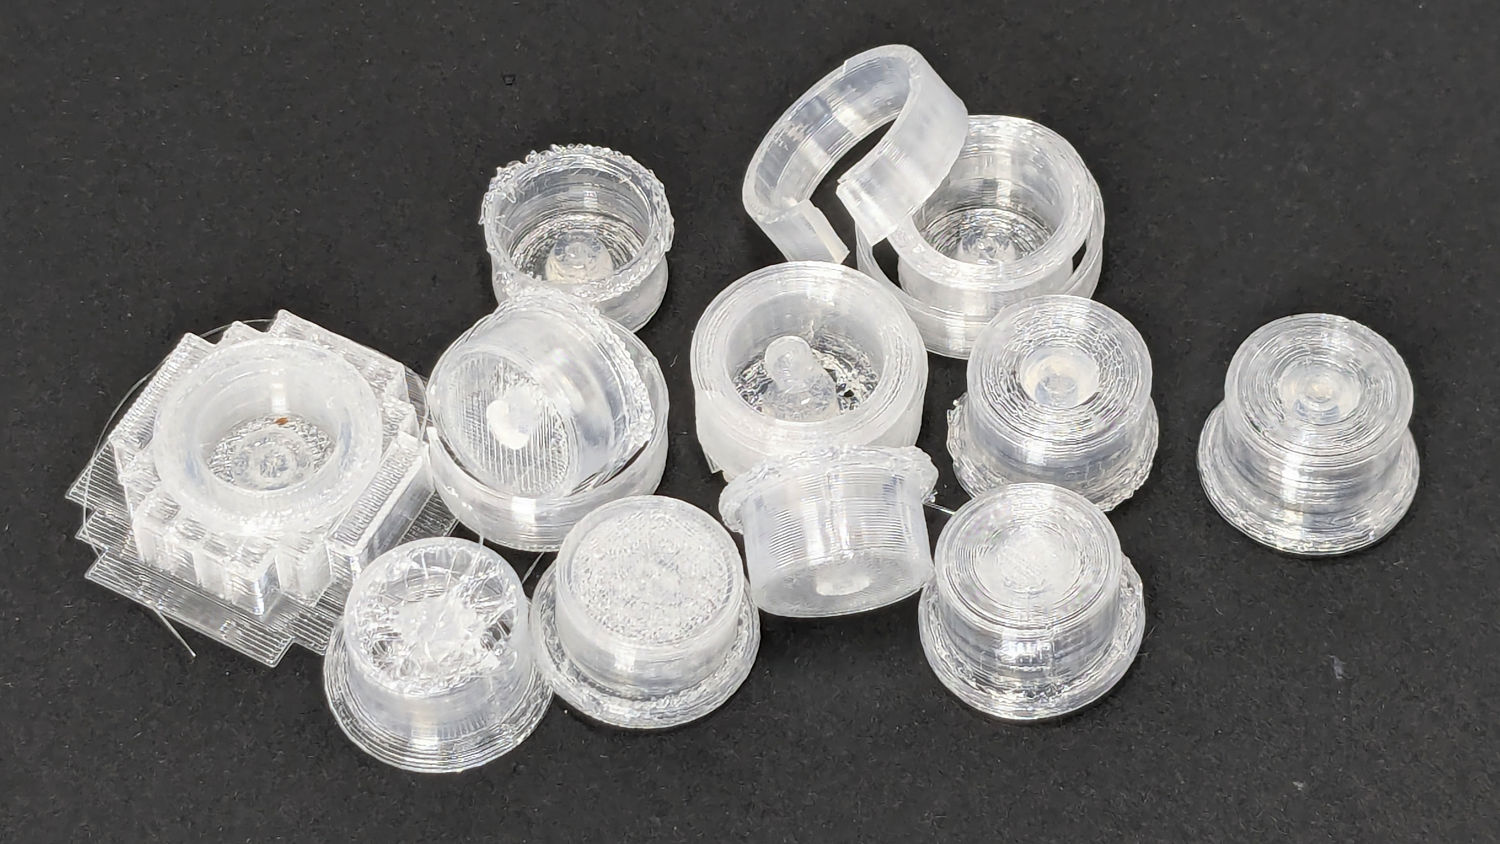
The squarish block over on the left is PrusaSlicer’s version of a support structure wrapped around the first cap version; if human lives depended on it, I could surely extract the cap, but it would take a while.
The remaining debris samples occured while discovering:
- An extruder temperature of 230 °C, not 250 °C, works well
- A conical shape of the lip around the open end to eliminate the support structure
- TPU doesn’t bridge well, so the closed end must be down
- Length of the central pillar to barely touch the switch stem when released
- Cap length and wall thickness so the TPU shell can collapse enough to actuate and release the switch stem
- And so on and so on and scooby dooby dooby
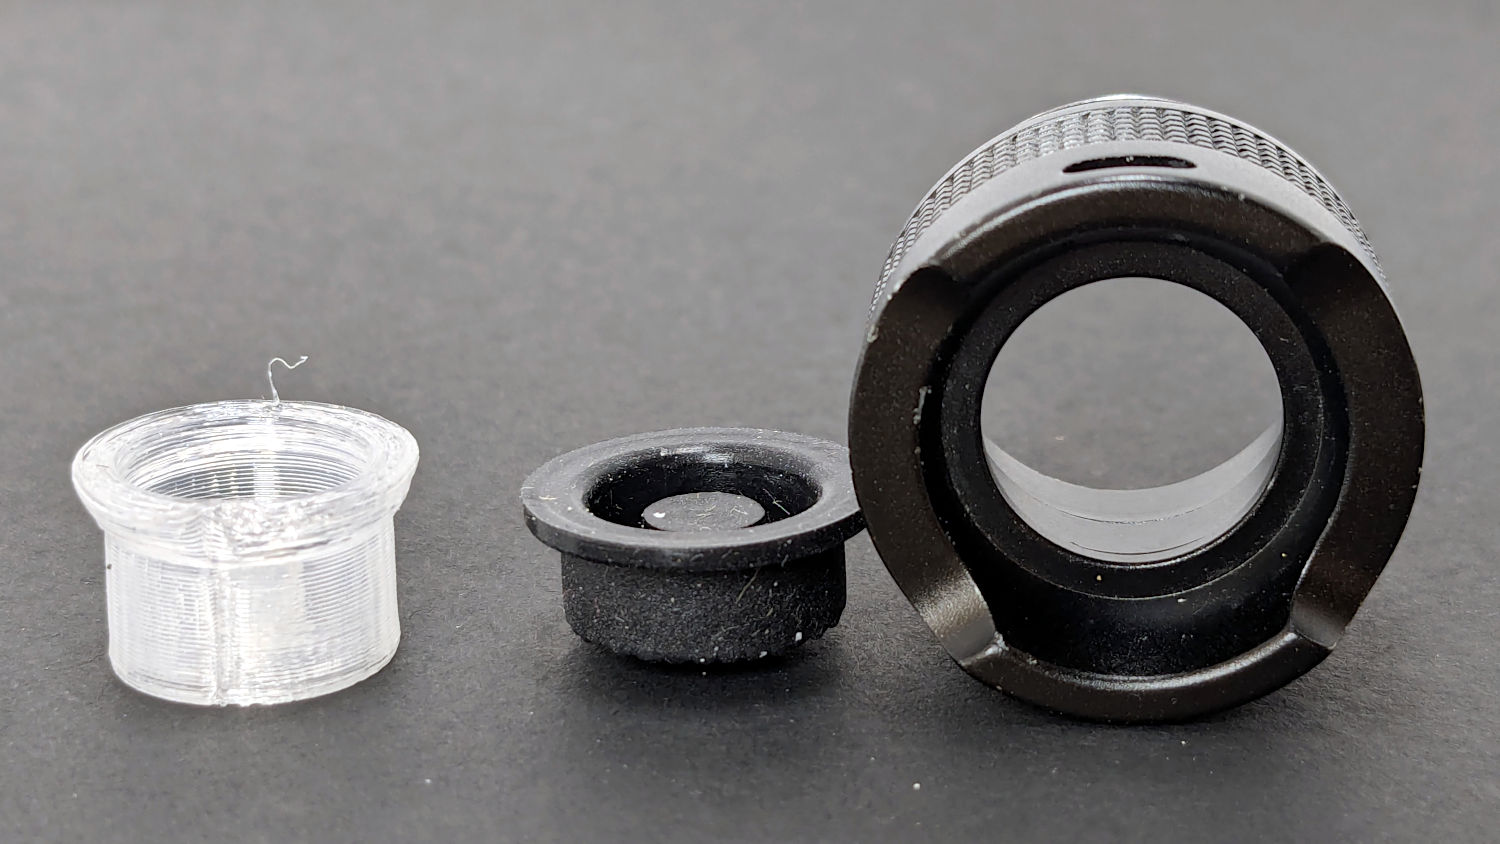
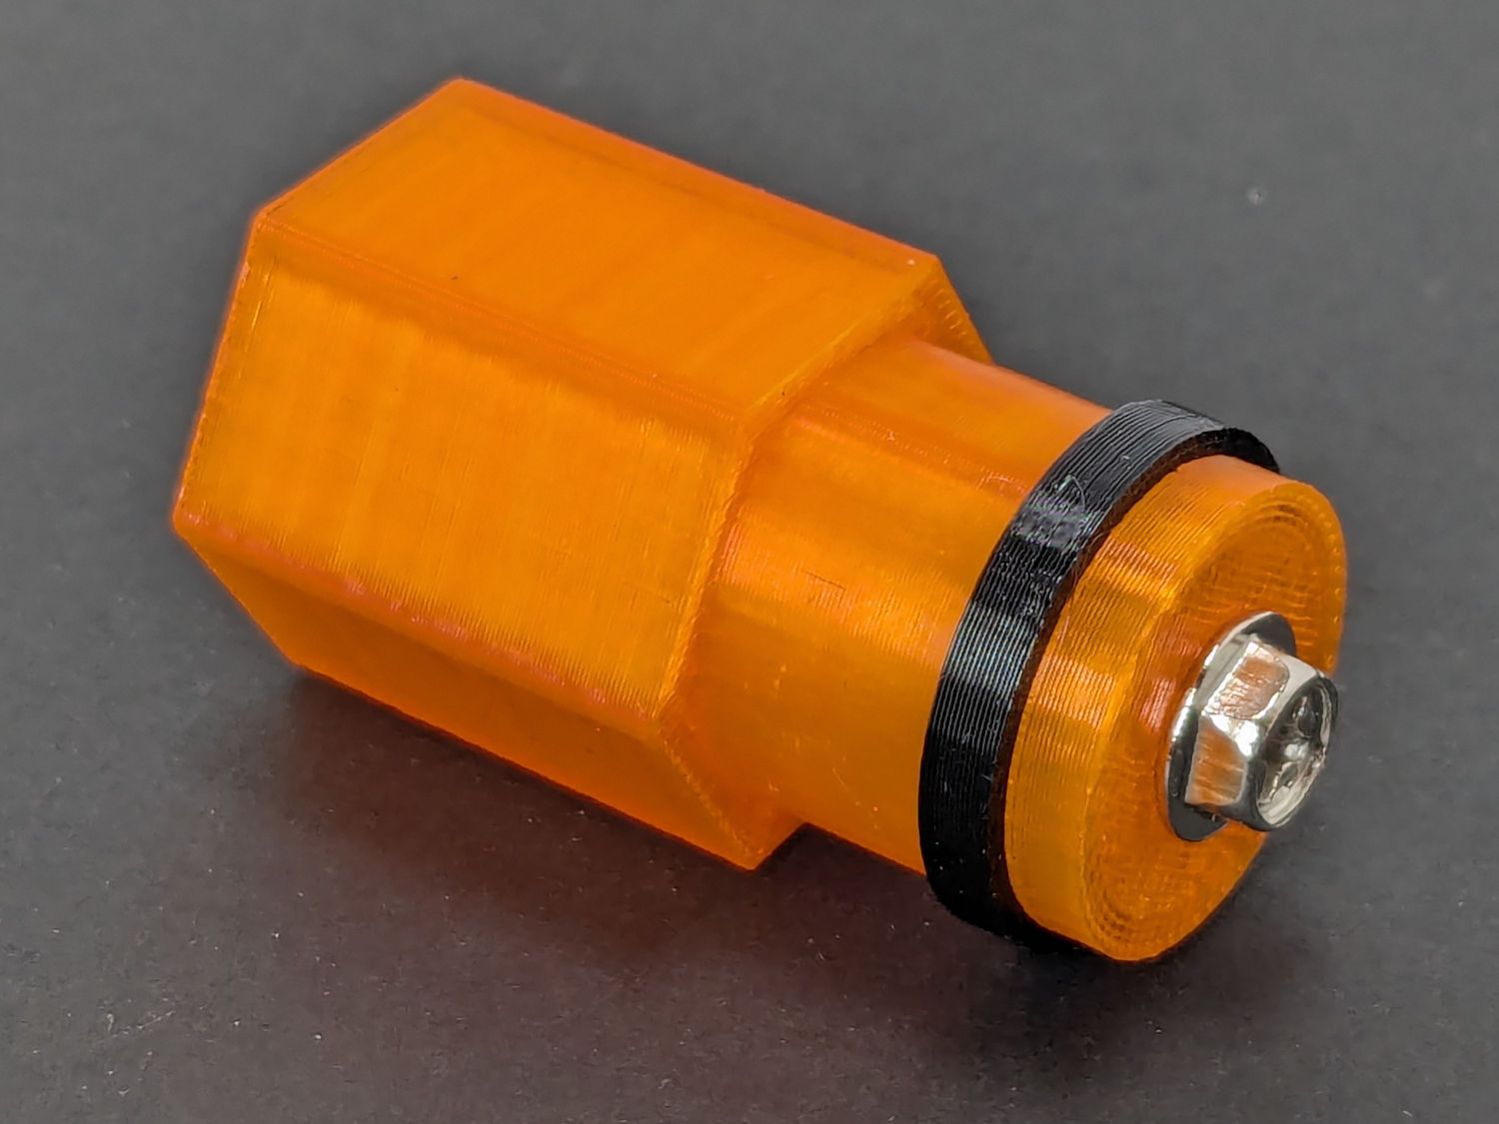
Eventually I came up with a suitable combination:
Because I expected this would be an easy job, I used snap ring pliers to unscrew and rescrew the threaded retaining ring holding the switch PCB in place. Because the pliers didn’t have a stable grip on the ring, the threads eventually became just a bit goobered.
This was not a problem, because I have a(nother) 3D printer:
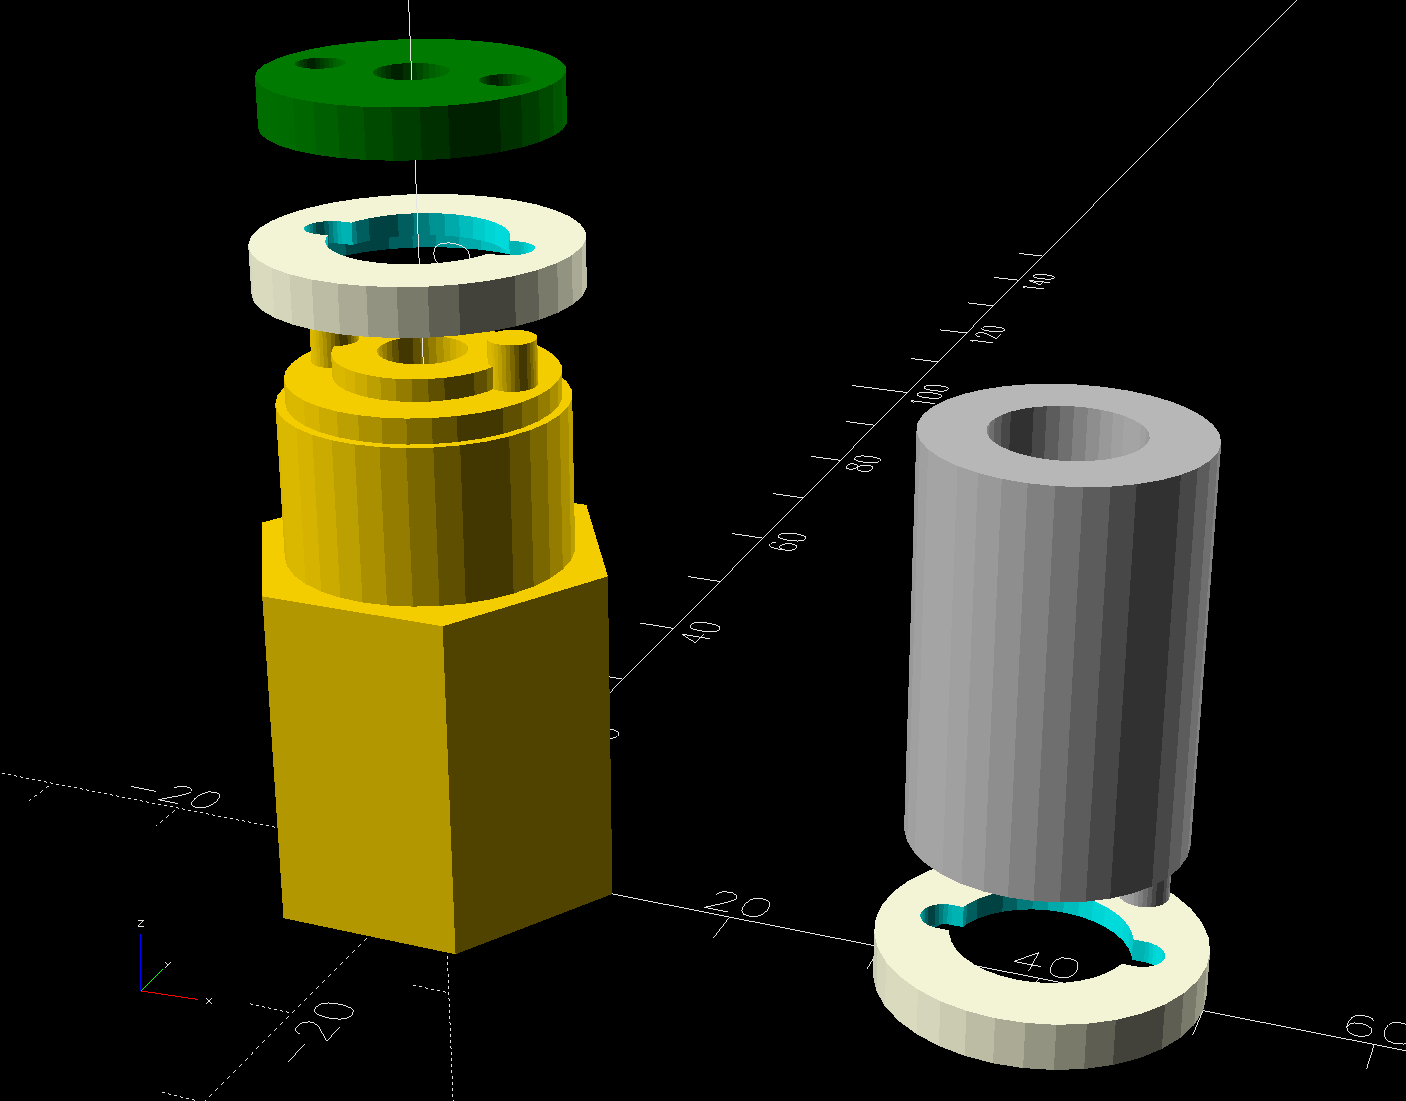
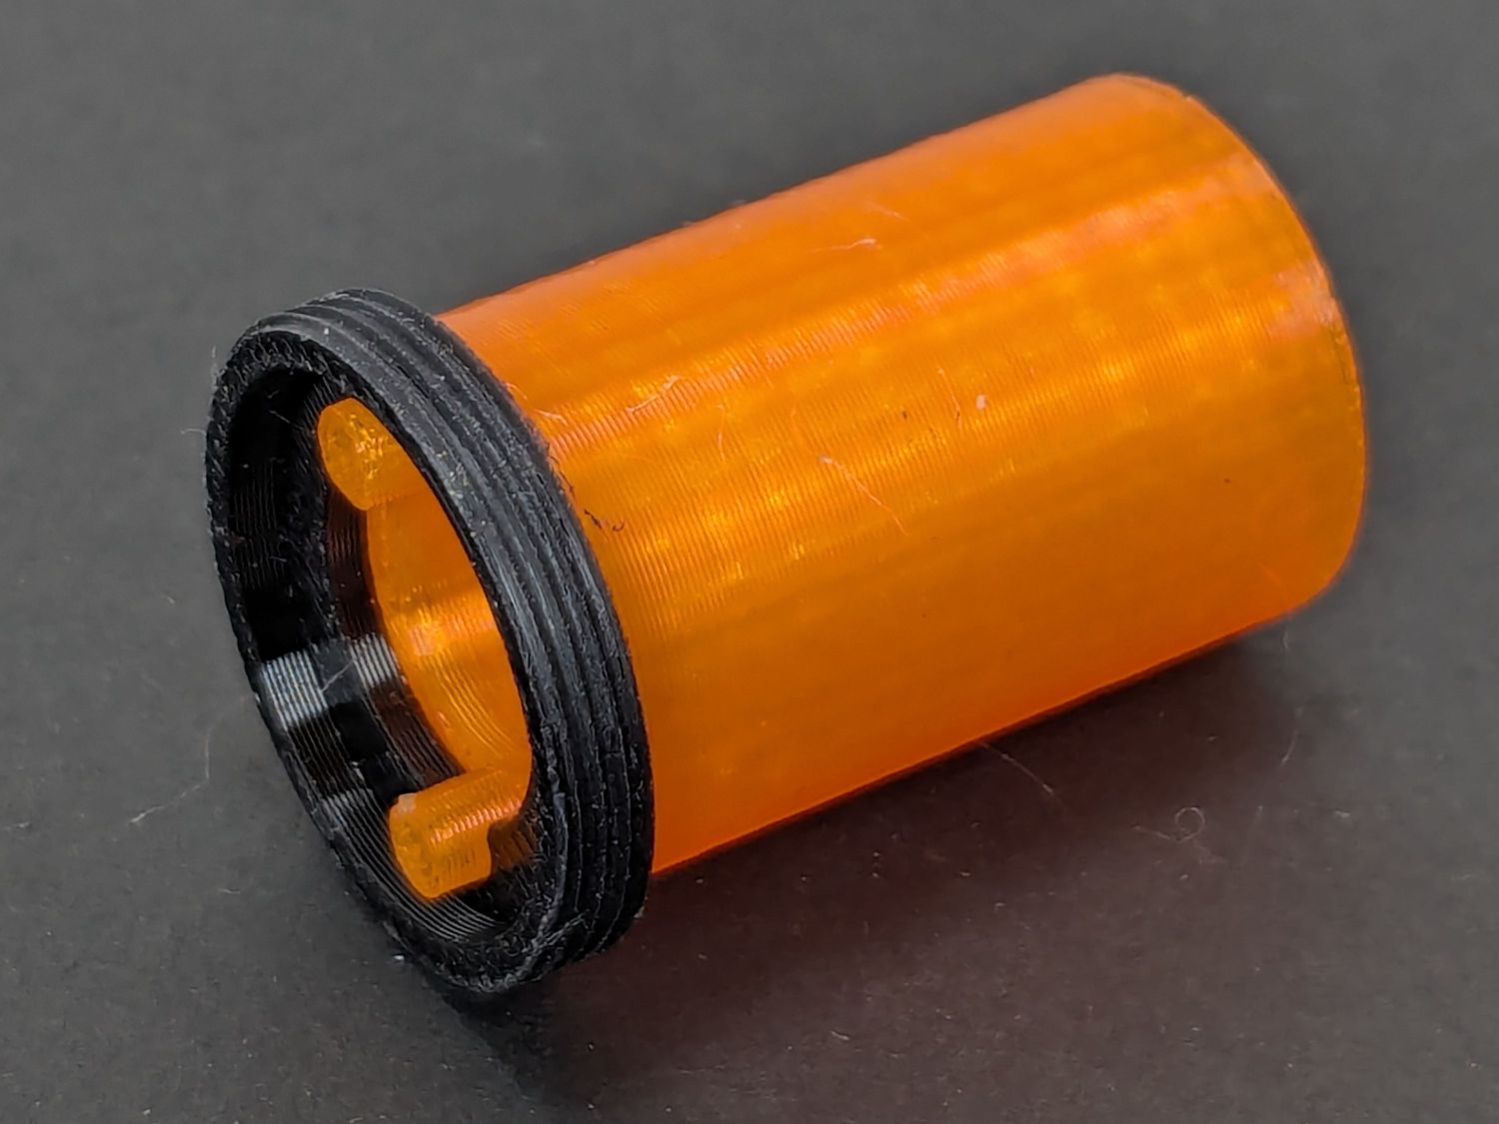
The gray thing on the right is a simple pin wrench fitting both the original and the replacement retaining rings, so I can orient the rings properly while unscrewing & rescrewing:
The threads have a 0.75 mm pitch and, while it’s possible to print screw threads, even a tedious 0.1 mm layer height would define each turn of the thread with only 7-½ layers.
This was not a problem, because I have a mini-lathe:

The yellow & green things on the left of those solid models are the fixture holding a retaining ring for threading and the washer applying pressure to keep the ring in place:
The alert reader will note that washer lacks holes for the alignment pins I added after seeing the washer sit not quite concentric on the fixture. I could call it continuous product improvement, although I doubt I’ll print another one.
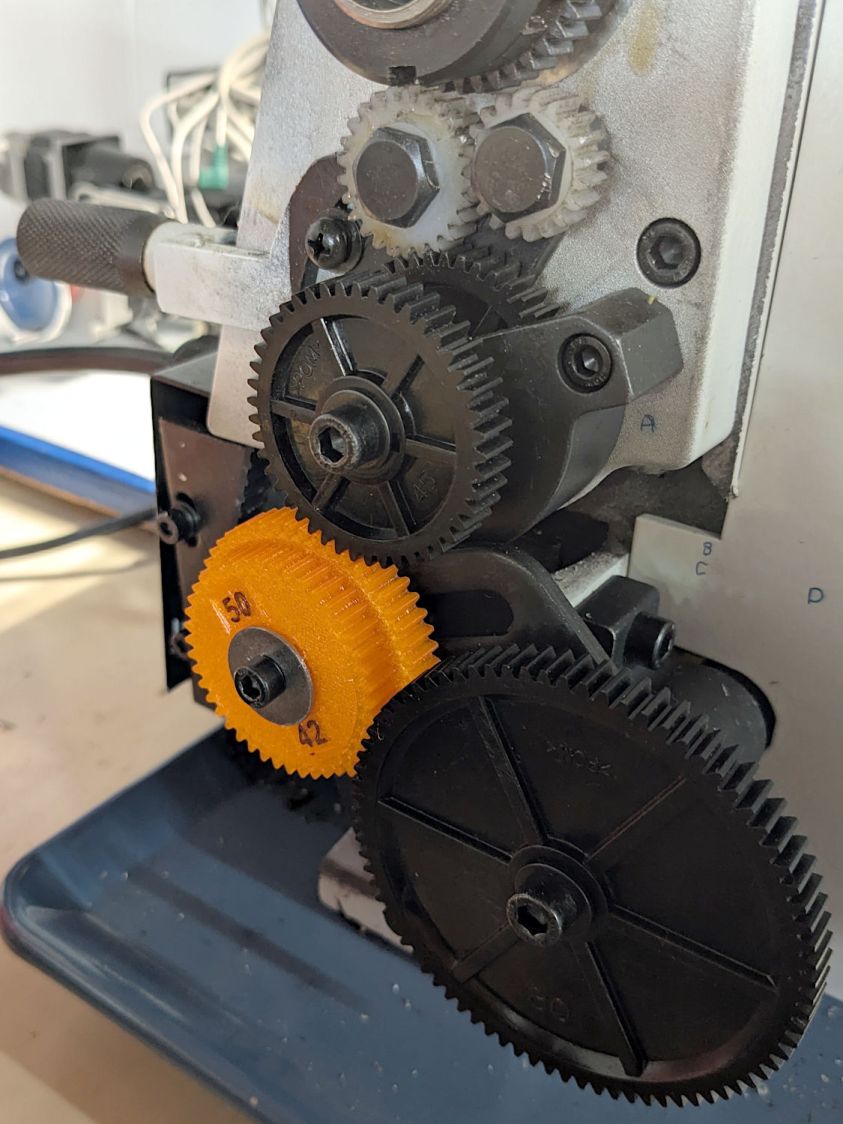
Setting up the lathe involved finding the proper set of change gears, including the vital 42-50 stacked gear I made a while ago to print metric threads on a hard-inch lathe:
Although you’re supposed to measure the thread spacing on a skim pass, I find it’s easier to just measure the carriage movement for one spindle rotation:
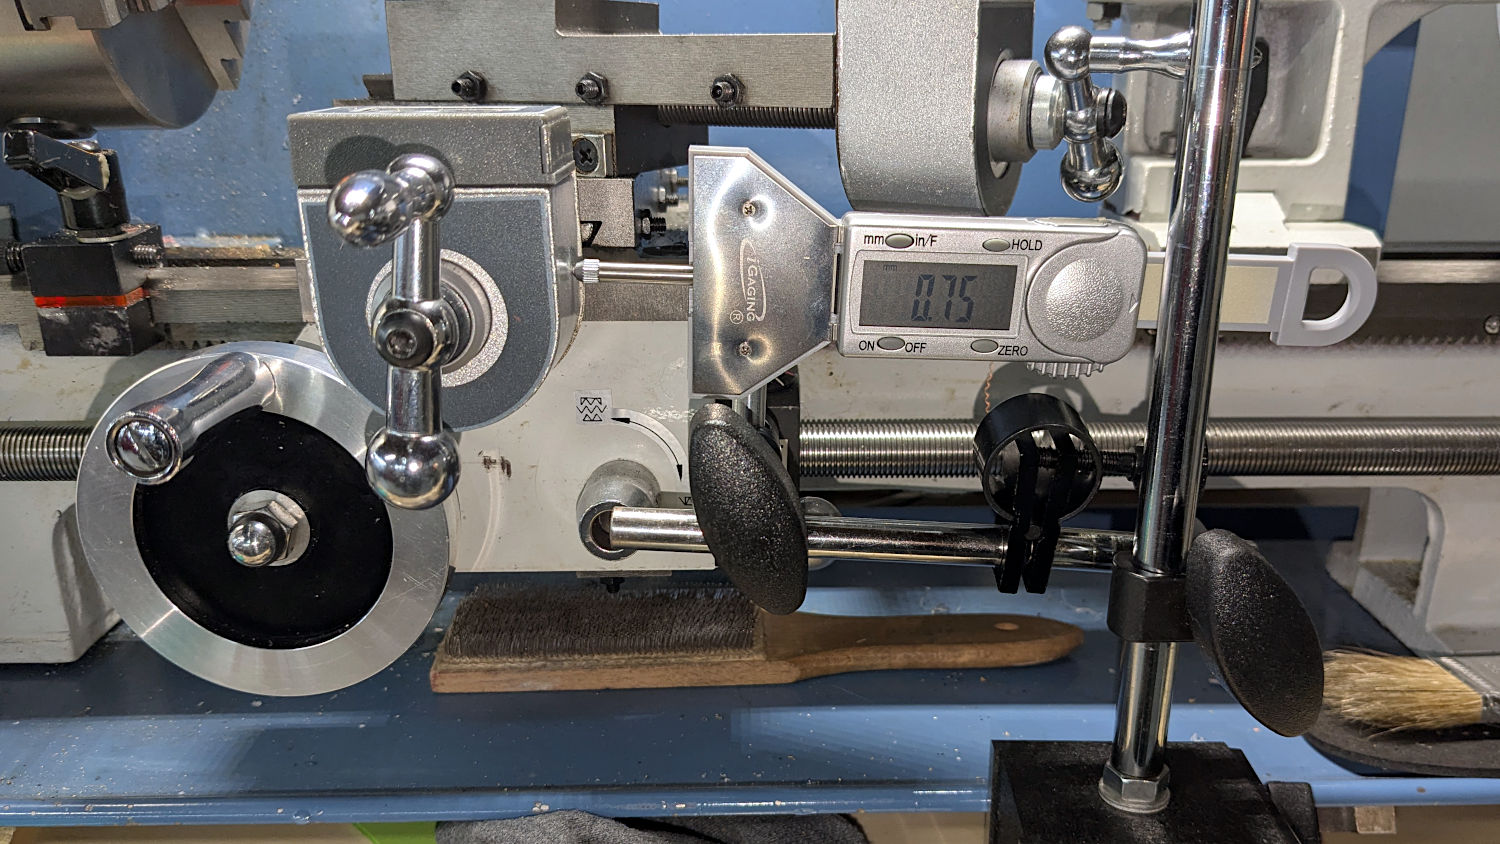
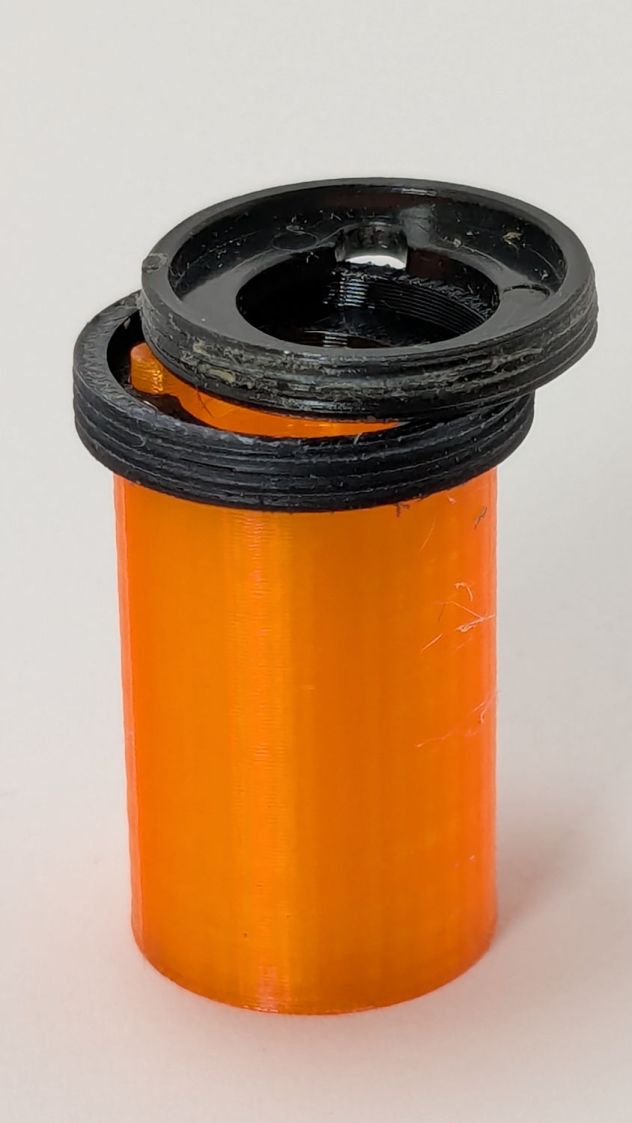
A few passes produced a fine retaining ring:
Sporting much nicer looking threads than the goobered original:
The original switch had a stabilizing ring around the body to prevent it from wobbling under the original rubber cap.
This was not a problem, because I have a laser cutter:
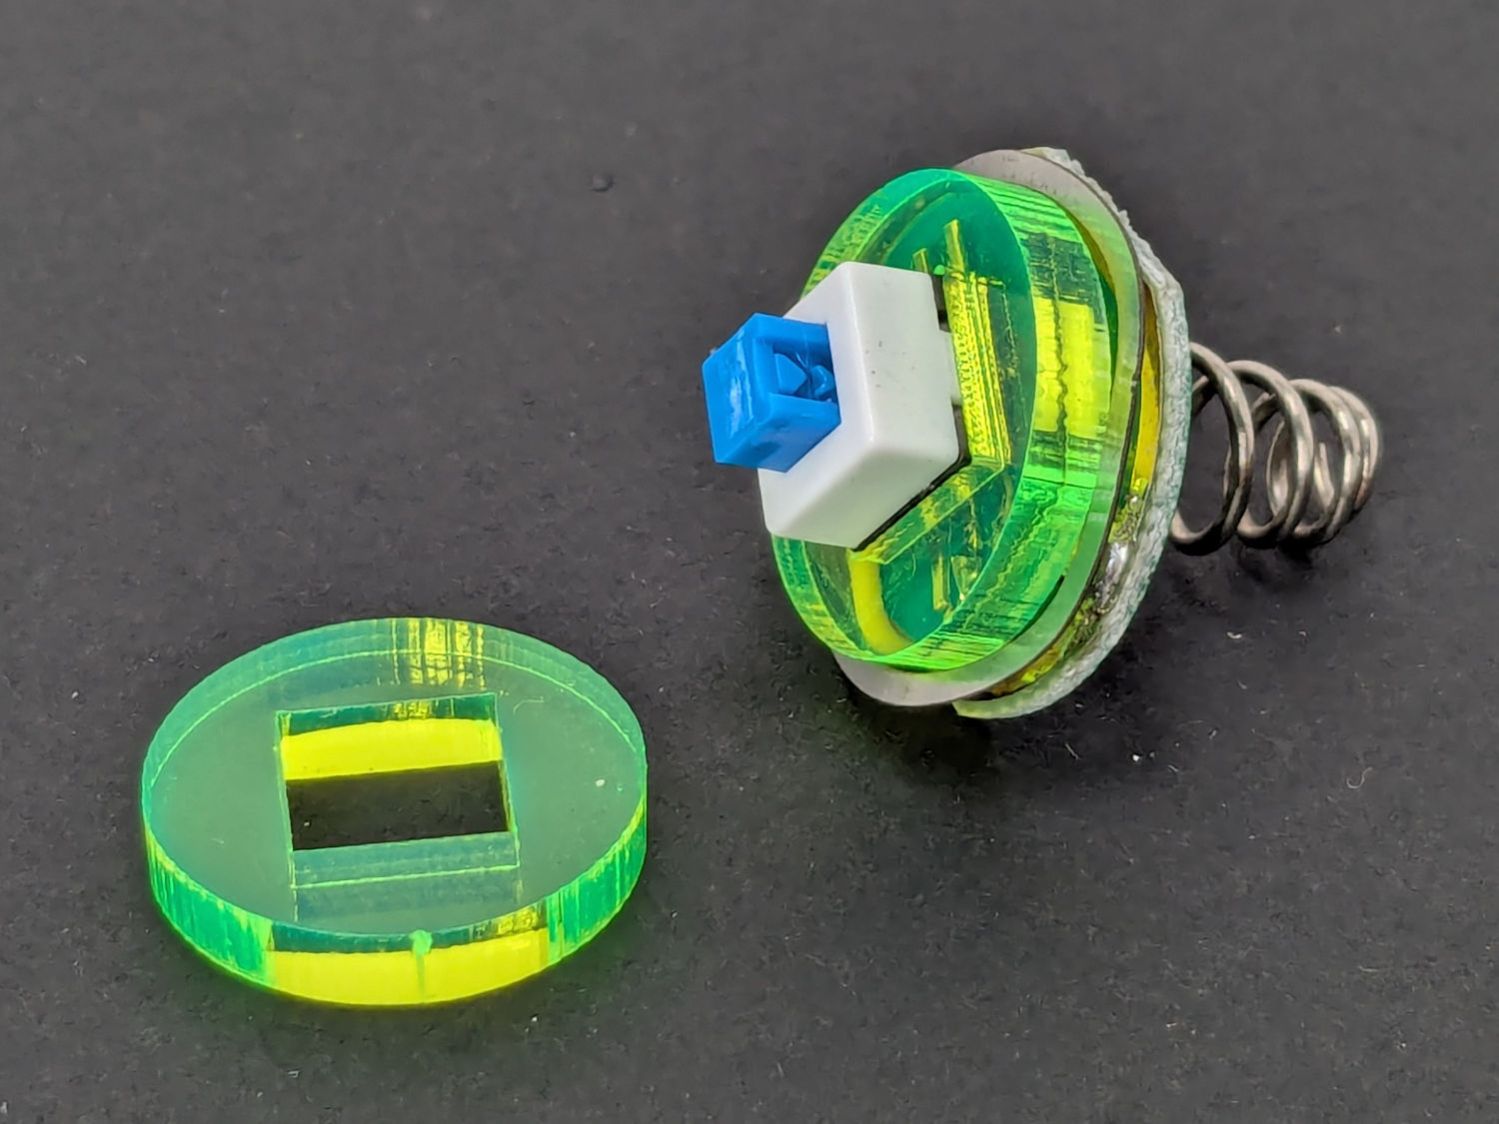
Those came from a scrap of fluorescent acrylic.
The wave washer behind the acrylic stabilizer improves the contact between the PCB trace around the rim and the flashlight tailcap, with the current passing through the body to the “light engine” up front. The retaining ring provides enough pressure to compress the wave washer, which is why it’s so easily goobered without a close-fitting pin wrench.
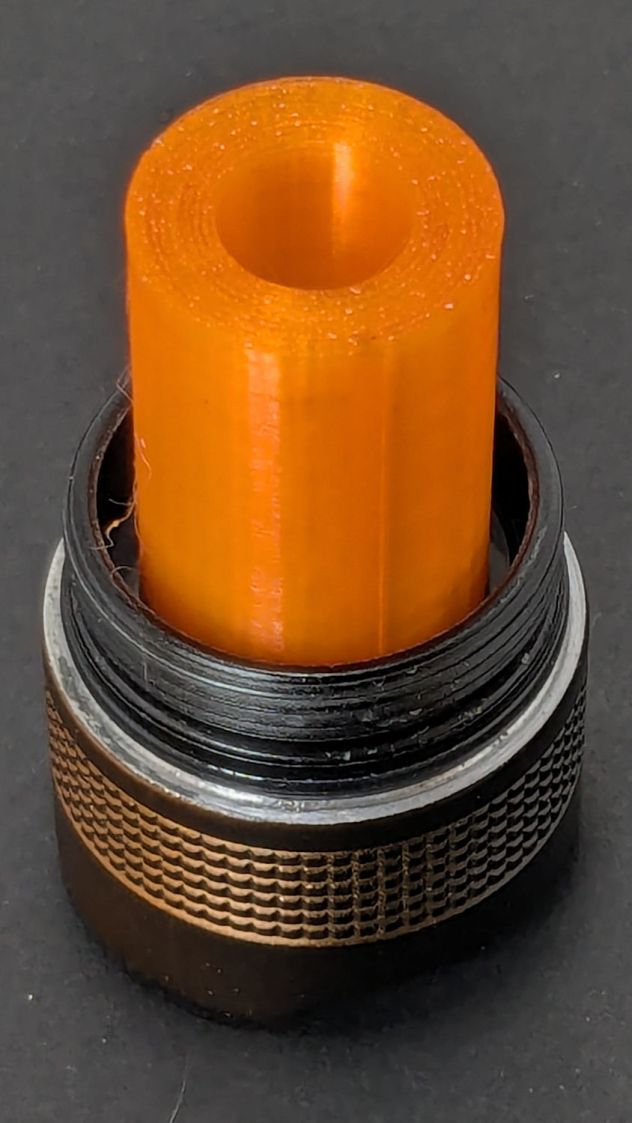
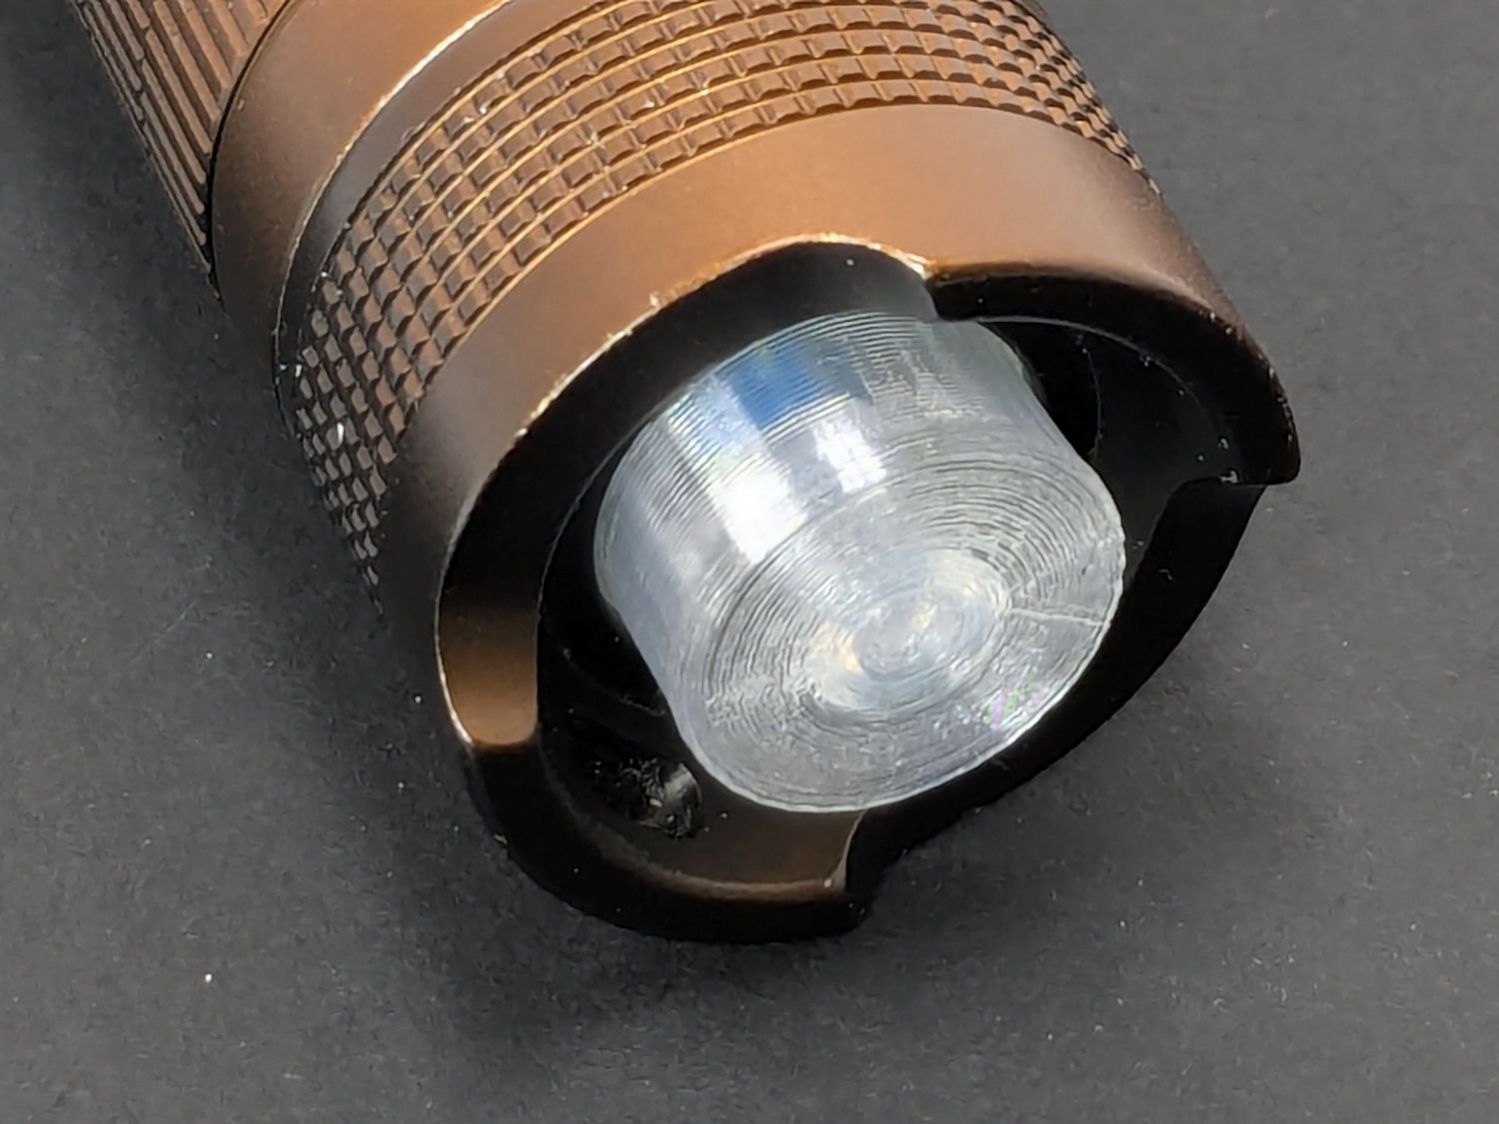
With everything assembled in reverse order, the flashlight worked pretty much as it did back when it was new:
However, after describing this during a recent SquidWrench meeting, I discovered that adding “latching” to my keywords surfaced a bodacious assortment of flashlight switches, so (a few days later) I removed the not-quite-right switch and replaced it with an identical twin of the OEM switch requiring just a little lead forming to fit the PCB.
Even better, using the 3D printed pin wrench to screw the original retaining ring into the flashlight’s aluminum threads a few times re-formed (unrelated to recent electrolytic capacitor reforming) its goobered threads well enough to fit and work perfectly again.
So I have:
- … reassembled the flashlight with more-or-less original components
- … a repair tool kit ready when another LC-40 fails
- … re-learned the lesson that any time spent making a fixture or a special tool is not deducted from one’s allotment
And I loves me a happy ending or two!
The OpenSCAD source code as a GitHub Gist:
| // Anker LC-40 flashlight switch retainer | |
| // Ed Nisley – KE4ZNU | |
| // 2025-05-05 | |
| include <BOSL2/std.scad> | |
| Layout = "Show"; // [Show,Build,Retainer,Fixture,Washer,Wrench] | |
| Gap = 5; // [0:10] | |
| /* [Hidden] */ | |
| HoleWindage = 0.2; | |
| Protrusion = 0.1; | |
| NumSides = 3*3*4; | |
| ID = 0; | |
| OD = 1; | |
| LENGTH = 2; | |
| $fn=3*3*4; | |
| Plate = [16.8,20.0,3.0]; // retainer plate, OD allows for lathe threading | |
| PlateRecessDepth = 1.6; | |
| PlateInnerThick = Plate[LENGTH] – PlateRecessDepth; | |
| ClearID = 11.0; | |
| PinOD = 3.0; | |
| PinOC = 12.0; | |
| WrenchLength = 25.0; // handle on wrench | |
| JawLength = 22.0; // lathe jaw | |
| ThreaderOverrun = 10.0; // stick-out for threading tool clearance | |
| ThreadAllowance = 2*1.0; // clearance for thread depth | |
| //———- | |
| // Define Shapes | |
| module Retainer() { | |
| difference() { | |
| tube(Plate[LENGTH],od=Plate[OD],id=ClearID,anchor=BOTTOM); | |
| up(Plate[LENGTH] + Protrusion) | |
| cyl(PlateRecessDepth + Protrusion,d=Plate[ID],anchor=TOP); | |
| down(Protrusion) | |
| hull() | |
| for (i = [-1,1]) | |
| right(i*PinOC/2) down(Protrusion) | |
| cyl(Plate[LENGTH] + Protrusion,d=PinOD,anchor=BOTTOM); | |
| } | |
| } | |
| module Fixture() { | |
| difference() { | |
| regular_prism(6,h=JawLength,d=1.2*Plate[OD],anchor=BOTTOM) position(TOP) { | |
| cyl(PlateRecessDepth + ThreaderOverrun,d=Plate[ID],anchor=BOTTOM); | |
| cyl(Plate[LENGTH] + ThreaderOverrun,d=ClearID,anchor=BOTTOM); | |
| // hull() | |
| for (i = [-1,1]) | |
| right(i*PinOC/2) | |
| cyl(Plate[LENGTH] + ThreaderOverrun + Plate[LENGTH]/2,d=PinOD,anchor=BOTTOM); | |
| cyl(ThreaderOverrun,d=Plate[OD] – ThreadAllowance,anchor=BOTTOM); | |
| } | |
| up(JawLength + ThreaderOverrun + Plate[LENGTH] + Protrusion) // M4 burly insert | |
| cyl(10.0 + 5,d=5.5,anchor=TOP); | |
| } | |
| } | |
| module Washer() { | |
| difference() { | |
| tube(Plate[LENGTH],od=Plate[OD] – ThreadAllowance,id=4.5,anchor=BOTTOM); | |
| down(Protrusion) | |
| for (i = [-1,1]) | |
| right(i*PinOC/2) | |
| cyl(2*Plate[LENGTH],d=PinOD,anchor=BOTTOM); | |
| } | |
| } | |
| module Wrench() { | |
| difference() { | |
| union() { | |
| cyl(WrenchLength,d=Plate[ID],anchor=BOTTOM); | |
| for (i = [-1,1]) | |
| right(i*PinOC/2) | |
| cyl(WrenchLength + Plate[LENGTH],d=PinOD,anchor=BOTTOM); | |
| } | |
| down(Protrusion) | |
| cyl(2*WrenchLength,d=ClearID – 2.0,anchor=BOTTOM); | |
| } | |
| } | |
| //———- | |
| // Build things | |
| if (Layout == "Retainer") | |
| Retainer(); | |
| if (Layout == "Fixture") | |
| Fixture(); | |
| if (Layout == "Washer") | |
| Washer(); | |
| if (Layout == "Wrench") | |
| Wrench(); | |
| if (Layout == "Show") { | |
| color("Gold") | |
| Fixture(); | |
| up(JawLength + ThreaderOverrun + Gap) | |
| zflip(z=Plate[LENGTH]/2) | |
| Retainer(); | |
| color("Green") | |
| up(JawLength + ThreaderOverrun + Plate[LENGTH] + 2*Gap) | |
| Washer(); | |
| right(40) { | |
| zflip(z=Plate[LENGTH]/2) | |
| Retainer(); | |
| color("Silver") | |
| up(Plate[LENGTH] + Gap) | |
| zflip(z=WrenchLength/2) | |
| Wrench(); | |
| } | |
| } | |
| if (Layout == "Build") { | |
| Fixture(); | |
| right(1.5*Plate[OD]) { | |
| Retainer(); | |
| fwd(1.5*Plate[OD]) | |
| Retainer(); | |
| } | |
| left(1.5*Plate[OD]) | |
| Washer(); | |
| fwd(1.5*Plate[OD]) | |
| Wrench(); | |
| } | |

Comments
2 responses to “Anker LC-40 Flashlight Switch Repair”
Mildly off topic, but I can highly recommend installing an electronic leadscrew – this is a) a fun and interesting installation and b) means that cutting threads becomes a couple of button presses, rather than delving into change wheels.
Mine (on a bigger Chinese lathe than yours) came via Clough42 (keyword is ELS with his name) and ‘Just Worked’ :-). There are now a selection of others available these days, no connections with any of them.
Simon
If I cut enough threads to matter, an ELS would make some sense, but I’m willing to do almost anything to avoid threading.
Besides, this is the lathe that can’t put the compound at the correct angle for thread cutting, because the DRO gets in the way. Apparently they fixed that in the newer versions …