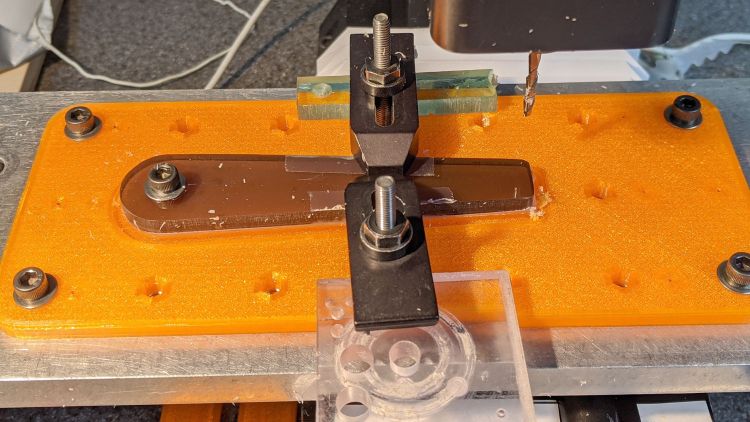
Unlike the adhesive fixture, this setup requires a pause while milling the cursor outline to reclamp it from the front:

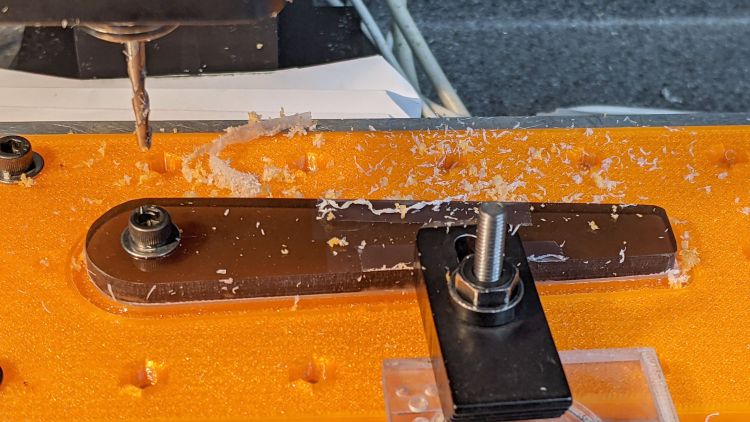
The trick is applying the front clamp before releasing the rear clamp:
Then continue the mission:
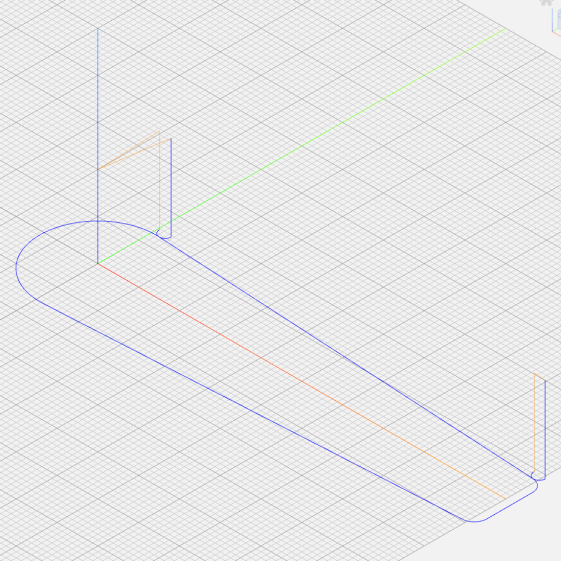
Because the tool path includes cutter compensation, GCMC adds entry and exit arcs to ensure a smooth transition:
The pix show a single cursor in the fixture while verifying the setup worked the way it should. Obviously, milling a stack of cursors eliminates a whole bunch of fiddling.
The tweaked MillCursor function from the mostly otherwise unchanged GCMC code:
    comment("Clamp on rear half of cursor!");

    local cp = {p0};                                             // enter at hub tangent point
    cp += varc_ccw([0mm,-2*p0.y,-],-hr,0,0.2mm,5deg) + p0;       // arc to tangent at hub bottom

    cp += {[p1.x,-p1.y,-]};                                      // lower tip entry point
    cp += varc_ccw([p2.x-p1.x,-(p2.y-p1.y),-],CursorTipRadius,0,0.2mm,5deg) + [p1.x,-p1.y,-];  // arc to tip exit at p2

    cp += varc_ccw([p1.x-p2.x,p1.y-p2.y,-],CursorTipRadius,0,0.2mm,5deg) + p2;  // arc to tip exit at p1

    goto([-,-,CursorSafeZ]);
    goto([0,0,-]);
    feedrate(MillSpeed);
    tracepath_comp(cp,CutterOD/2,TPC_OLDZ + TPC_RIGHT + TPC_ARCIN + TPC_ARCOUT);

    comment("Clamp on front half of cursor!");
    pause();                                      // wait for reclamping

    p1.z = MillZ;                                //  ... set milling depth
    cp = {p1};
    cp += {p0};
                                                 // exit at hub tangent
    tracepath_comp(cp,CutterOD/2,TPC_OLDZ + TPC_RIGHT + TPC_ARCIN + TPC_ARCOUT);

<<< snippage >>>

  goto([-,-,CursorSafeZ]);
  goto([0,0,-]);
Next, scribing a nice hairline with the new fixture.

Comments
One response to “Tek Circuit Computer: Cursor Milling Toolpath”
[…] a machined cursor blank, clamp it into […]