A surplus haul of 24 V / 150 mA white LED panels arrived:
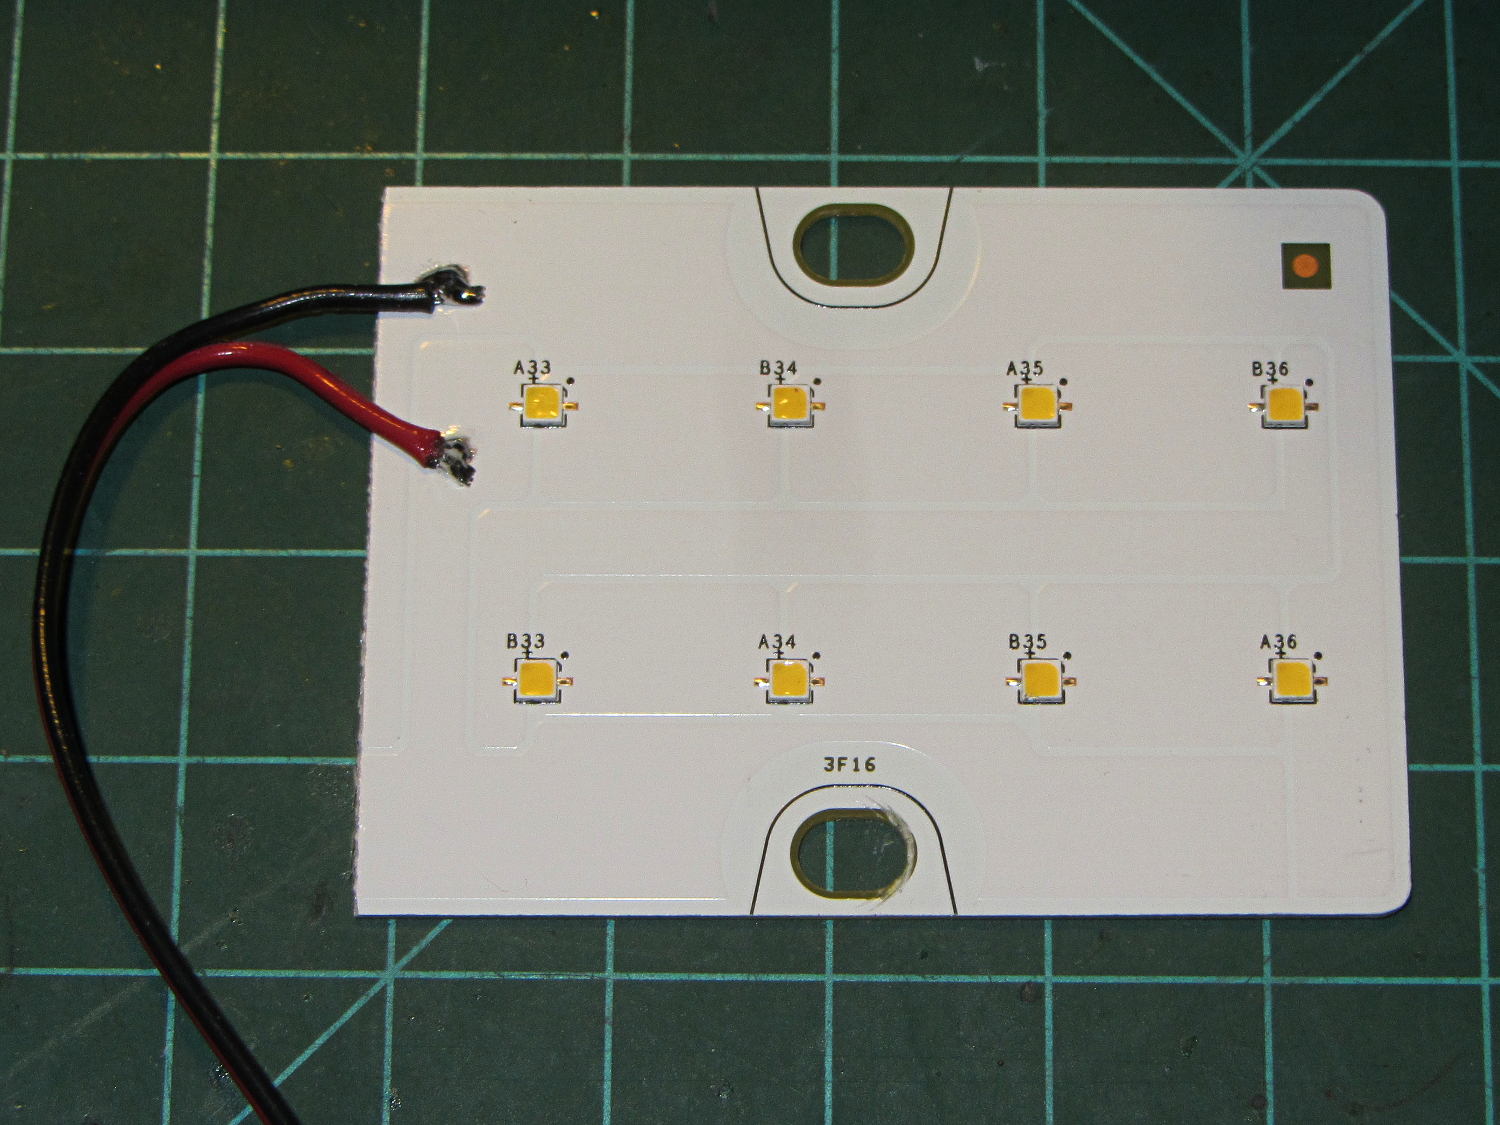
I wired a pair to a 24 V wall wart and stuck them under the M2’s bridge supporting the X stage:
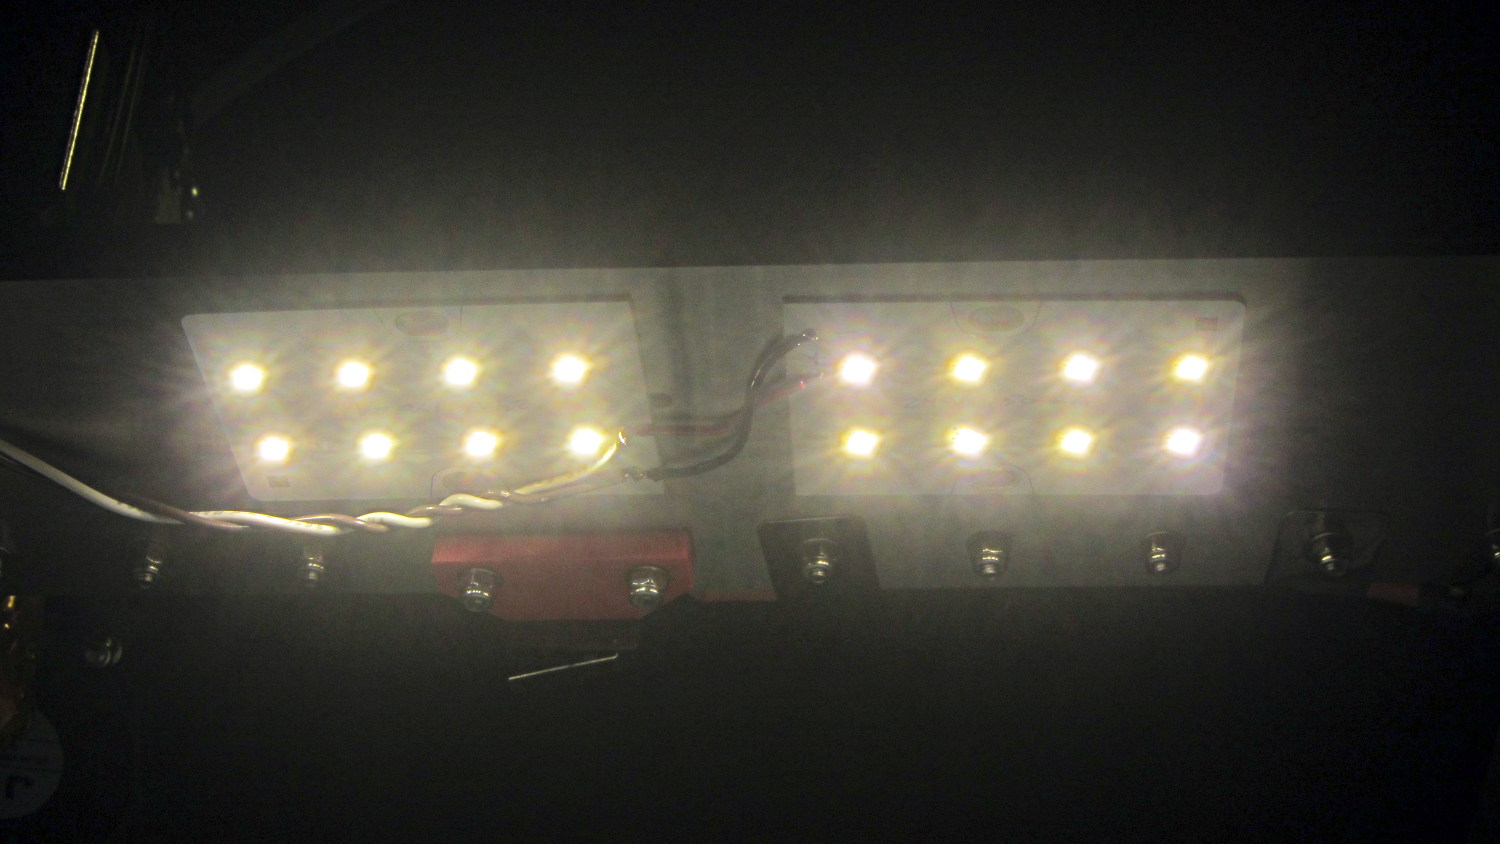
I thought about epoxying them in place to get better heatsinking to the metal bridge. The ever-trustworthy description said the big copper baseplate meant the panels didn’t need any heatsinking, so I used tapeless sticky and will hope for the best. Should the sticky give out, then I’ll use epoxy.
They’re much better than the previous white LED strip, although it’s tough to tell in the pictures. The chain mail armor appears under the new lights; some older pictures will creep in from time to time.

Comments
5 responses to “MakerGear M2: Better Lighting, Redux”
I’m quite impressed with the LEDs now. We put some in fixtures that are hard to swap (bedrooms, mostly), but we’re still working off the huge supply of CFLs before we go all the way. I did a PV lighting system in the garage, and to keep the power load down, all the lights are LEDs. Full lighting (8 “bulbs”) costs 60W, which means I can get away with a 140W panel and a group 24 deep cycle battery–at least when we don’t get a week’s worth of cloud cover. [sigh]
Still need to do a remote switch for the inverter to drop the standby load to near zero, but first light was promising.
Those emitters knock the socks off the cheap LED strip from the usual eBay suspects, which isn’t surprising: they dissipate nearly half a watt each. That big copper PCB gets pleasantly warm against the M2’s steel frame.
A set of 12 V / 300 mA panels (same LEDs in 4×2 series-parallel, not 8×1 series) will brighten up the Forester’s rear cargo area. Right now, it has one crappy incandescent bulb behind a stylin’ smoke-gray plastic lens that’s got to go. I’m still pondering how to mount ’em with a bit of heatsink sticking out..
[…] horrible color balance comes from using a preset tuned for the M2’s new LED lights, rather than letting the camera figure things out on its own, then fighting it down after […]
[…] hot end reduced the clearance under the X-axis gantry to the point where a bight of wire from the white LED panels drooped onto the platform during homing. A bit of snipping, drilling, and filing produced a clip […]
[…] installed the 24 V white LED panels under the M2’s X-axis gantry, connected it to a 24 V wall wart, and all was […]