Ed Nisley's Blog: Shop notes, electronics, firmware, machinery, 3D printing, laser cuttery, and curiosities. Contents: 100% human thinking, 0% AI slop.
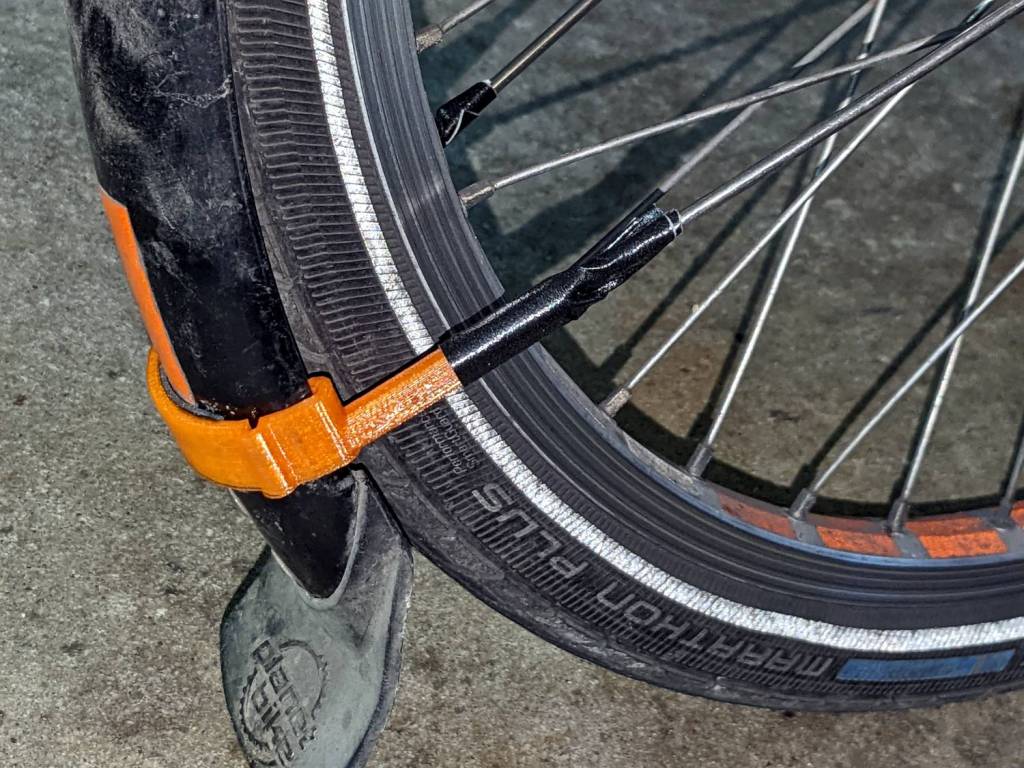
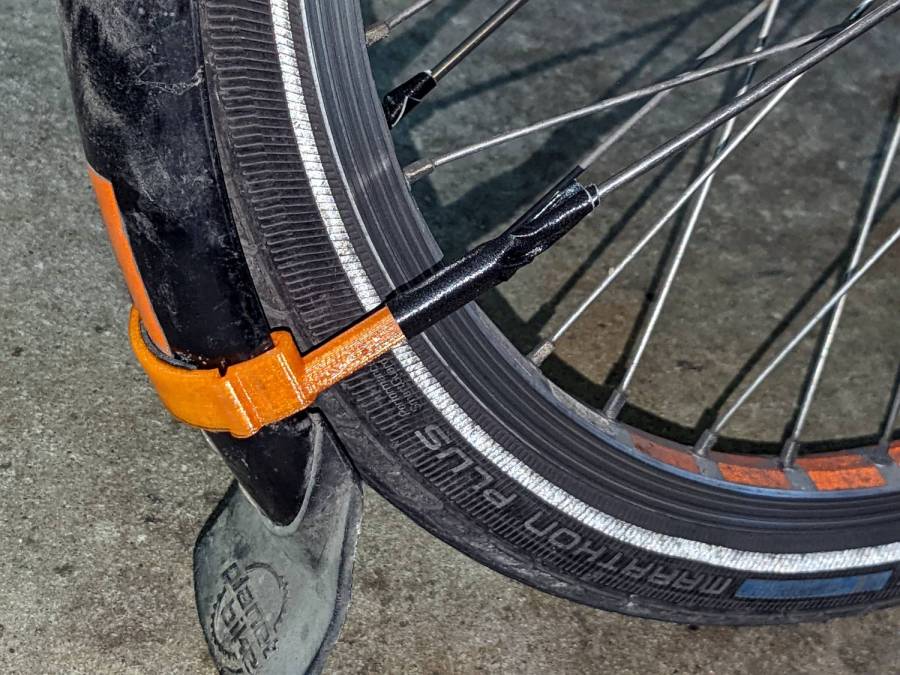
The mudflap on my front fender rides low enough to snag on obstacles and the most recent incident (about which more later) was a doozy, breaking the left strut ferrule and pulling the bracket off its double-sticky foam tape attachment. Fortunately, the repair kit now has plenty of duct tape.
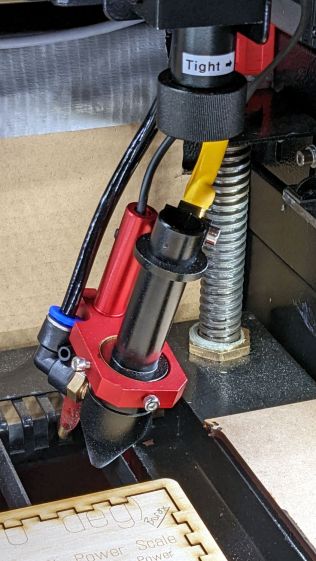
While running some finger-joint test pieces, this happened:
Detached laser lens holder
The knurled ring just below the Tight→ label worked its way loose and released the lens holder tube collet, whereupon the whole affair fell out and dangled on the air hose & wires as the gantry continued to zigzag along the finger pattern.
As is my custom, I was watching the proceedings and managed to poke the controller’s STOP button, which was a mistake. What I should have done was slap the EMERGENCY STOP mushroom switch, because the STOP button just tells the controller to cancel the current action and return to the home position, which resulted in dragging the lens holder across the plywood and platform.
The more typical laser cutter failure seems to be having the controller execute the Halt and Catch Fire instruction, resulting in at least a ruined workpiece, sometimes a ruined laser, and occasionally a serious conflagration.
Lesson learned: practice slapping the Big Red Switch every now and then.
Although the blurb for the Epson ET-3830 All-In-One scanner / printer says “up to 2 years of ink in the box”, the black ink hit the bottom line of the tank near the end of August:
Being that type of guy, I keep track of ink vs. time:
Epson ET-3830 – ink status
In round numbers, it looks like we use nearly all of a 127 ml bottle of black ink and a bit more than half of an 70 ml bottle of color ink every eight months.
I find it much easier to read long articles and tech documents while slumped in the Power Chair than to scroll through them on big or little screens, so we go through much more ink and paper than most folks.
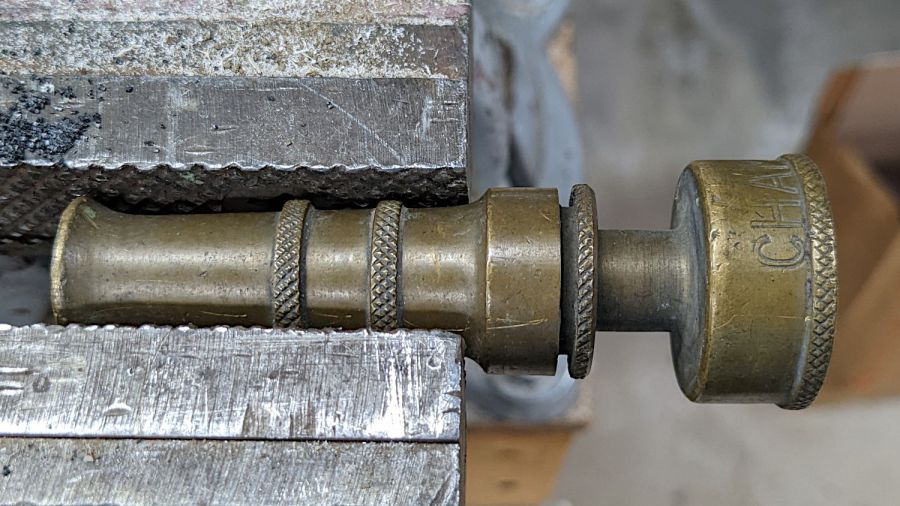
An old brass hose nozzle emerged from my garden hydraulics toolbox when a much newer plastic nozzle failed. Unfortunately, this one leaked a bit too much to serve as a replacement, so I grabbed it in the vise while pondering how to disassemble it:
Champion brass hose nozzle – disassembly
It turns out the knurled ring is threaded into the nozzle and, even at this late date, responds well to gentle persuasion with a Vise-Grip:
Champion brass hose nozzle – parts
The washer is a lost cause, but I managed to find an O-ring that fit perfectly in the space available. Clearing some crud around the nozzle hole and buffing up the matching conical section improved its sealing ability, so I’ll call it a win.
The word ITALY stamped opposite CHAMPION suggests this thing might be as old as I am; it’s been a while since either brass or Italy was competitive in the world of cheap manufactured goods.
I set up my pobox.com account set up with two-factor authentication through my Yubikey, so logging in requires my user ID, password, and a Time-based One-time Password generated through the Yubikey Authenticator program. A few weeks ago, pobox occasionally rejected the TOTP and it eventually became a hard failure. Oddly, other sites I’ve set up with TOTP 2FA continued to work fine.
My initial trouble report:
The last couple of times I’ve tried to sign in, the usual TOTP copy-n-paste from my Yubikey authenticator has failed.
Up to that point, it worked flawlessly.
Manually typing the TOTP also fails.
I have reset my (complex!) password to no avail; I use Firefox’s password manager to fill it in.
I do have a set of lockout codes, but they’re a solution to a different problem.
Given the constant updates to Firefox (102.0.3), it’s almost certain the hole is in my end of the boat. I have disabled all the usual ad blocking for pobox.com, although there may be other domains I’ve overlooked.
Other than that, my email seems to be working just fine …
Any suggestions on how to proceed? (Obviously, I’m not going to be able to sign on to look at the ticket.)
Thanks …
This is the fastest I’ve ever reached Tier 2:
We’re happy to help you with this. I’ve escalated your ticket to our Tier 2 agents, as they are best suited to assist with this issue.
There is nothing like a good new problem to take your mind off all your old problems:
I’ve had a chat with our Tier 2 agents about this and they’ve suggested I escalate it to our developers to have a look at.
Somewhat later:
I am afraid to say that our developers were unable to find any clear reason as to why your Yubikey failed.
Yubikey devices verify by connecting with Yubikey’s server, and it is possible that this connection failed.
Can you please try using the Yubikey again to see if the issue is still occurring?
If it’s still failing, can you please try adding a new Yubikey device to see if it works?
Of course, the problem didn’t magically Go Away, but I did more experimentation and figured out where the hole was in my end of the boat:
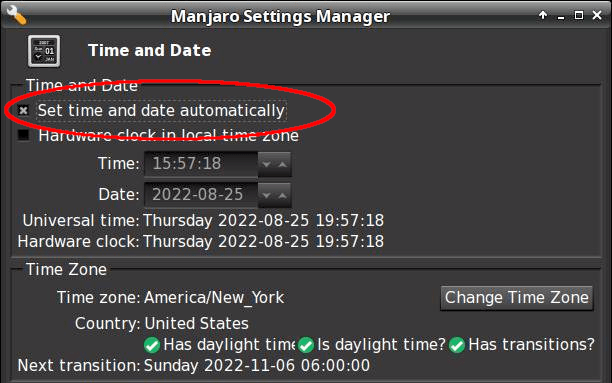
Ah-HA! It’s a PEBKAC error!
For unknown reasons, this PC was not set for automatic NTP time updates(*). Its time had drifted (presumably since I installed it back in June 2021) and was now 58 seconds behind real time, exceeding pobox’s tolerance.
Other websites apparently allow a few more seconds of slop before disallowing a TOTP, so I had not yet run afoul of their limit.
Some lesser-used sites threw me out, however, but I had not looked beyond the most common sites.
The default TOTP interval is 30 seconds, so perhaps pobox allows only ±1 interval and the other sites allow ±2? Frankly, I think pobox has it right: everybody else prioritizes customer sat over security.
Got the clock set correctly and, gosh, TOTP works fine.
Mark it solved, but definitely add “Soooo, is your PC’s clock set for automatic updates?” to the debugging protocol.
Thanks …
(*) I’ve installed all of the boxen here and would not ever have picked “Yeah, sure, I want to dink with the clock.”
How you make sure time synchronization is enabled goes like this:
$ systemctl status systemd-timesyncd.service
● systemd-timesyncd.service - Network Time Synchronization
     Loaded: loaded (/usr/lib/systemd/system/systemd-timesyncd.service; enabled; preset: enabled)
     Active: active (running) since Thu 2022-08-25 06:49:31 EDT; 10h ago
       Docs: man:systemd-timesyncd.service(8)
   Main PID: 355 (systemd-timesyn)
     Status: "Contacted time server 23.157.160.168:123 (2.manjaro.pool.ntp.org)."
      Tasks: 2 (limit: 19063)
     Memory: 2.2M
        CPU: 188ms
     CGroup: /system.slice/systemd-timesyncd.service
             └─355 /usr/lib/systemd/systemd-timesyncd

Aug 25 06:49:31 shiitake systemd[1]: Starting Network Time Synchronization...
Aug 25 06:49:31 shiitake systemd[1]: Started Network Time Synchronization.
Aug 25 06:50:12 shiitake systemd-timesyncd[355]: Timed out waiting for reply from 162.159.200.123:123 (2.manjaro.pool.ntp.org).
Aug 25 06:50:12 shiitake systemd-timesyncd[355]: Contacted time server 23.157.160.168:123 (2.manjaro.pool.ntp.org).
Aug 25 06:50:12 shiitake systemd-timesyncd[355]: Initial clock synchronization to Thu 2022-08-25 06:50:12.850444 EDT.
If it’s enabled and running, then it’s all good.
Whereupon all my TOTP passwords began working again.
I checked two other Manjaro systems: one had auto updates enabled, one didn’t. I have no explanation.
A little more than two years after replacing its internal battery, the SJCAM M20 camera on my Tour Easy once again wouldn’t last to the end of the driveway if I forgot to turn on the external battery pack. This time around, the camera was so firmly jammed in the printed seat frame mount that I had to cut the mount apart.
Yup, that puppy is all swoll up:
SJCAM M20 swollen battery – side view
Poor thing looks like a tiny pillow:
SJCAM M20 swollen battery – pouch
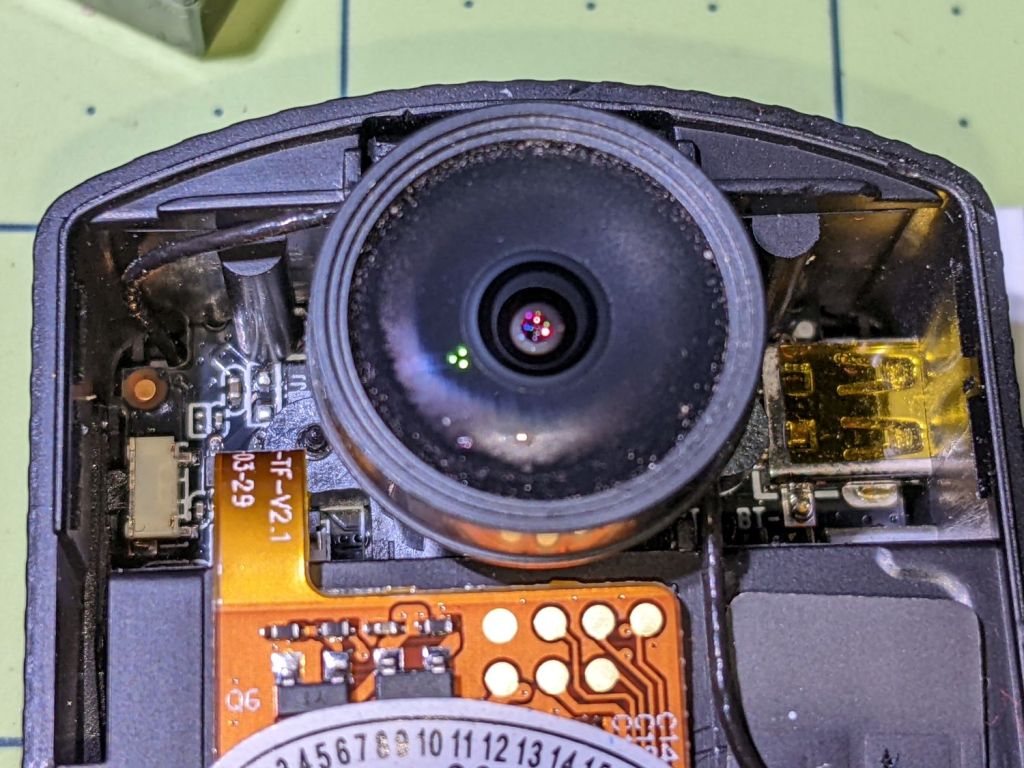
While I had it apart, I tried to clean / refurbish the button contacts on the top. Unfortunately, they’re pretty well buried in the camera frame and I was unwilling to dismantle the optics, remove the display, and gut the camera to find out if they were more accessible from the back surface:
SJCAM M20 – switch internals
While all that was going on, I ran off a new mount in white PETG:
SJCAM M20 – white case installed
I’m down to the last battery. The “4.35V” on the pillow indicates they’re special high-voltage lithium-polymer cells, so I can’t just drop a random lithium pouch cell in there and expect it to Just Work.
I think the “782633” is the cell size, so, if I were willing to have a few thousand on the shelf, a 552525 pouch might fit. The reduced capacity wouldn’t be a problem, as it must just keep the camera’s clock ticking between rides.
Over the course of a few days, my Tour Easy recumbent developed a slight squeak that turned into a definite creak, then the seat started shifting slightly under hill-climbing forces. Of course, no force I could apply in the garage caused the slightest squeak / creak / motion. A decade ago this was due to a sheared screw at the dropout, but everything seemed to be in good order.
So I applied a drop of penetrating oil to each of the many joints in the seat hardware, went on a few more rides, and eventually the seat started moving with normal pedaling forces.
The left strut clamp looked fine:
Tour Easy seat stay – left side
OK, it looks grubby. I’d rather ride than lick my bike clean.
The right clamp definitely showed signs of motion:
Tour Easy seat stay – right side slip
I extracted the strut assembly, degreased the clamps, reinstalled in reverse order, replaced the nuts, snugged everything down, and it’s all good again:
Tour Easy seat stay – renutted
Yeah, I should have replaced those screws, but I didn’t even have to take the wheel off, sooooo …