Ed Nisley's Blog: Shop notes, electronics, firmware, machinery, 3D printing, laser cuttery, and curiosities. Contents: 100% human thinking, 0% AI slop.
The Power Wheels Racer taking shape at SquidWrench let out The Big Stink at the Mini Maker Faire a few weeks ago, so I brought some test equipment to the regular Weekly Doing and helped with the autopsy.
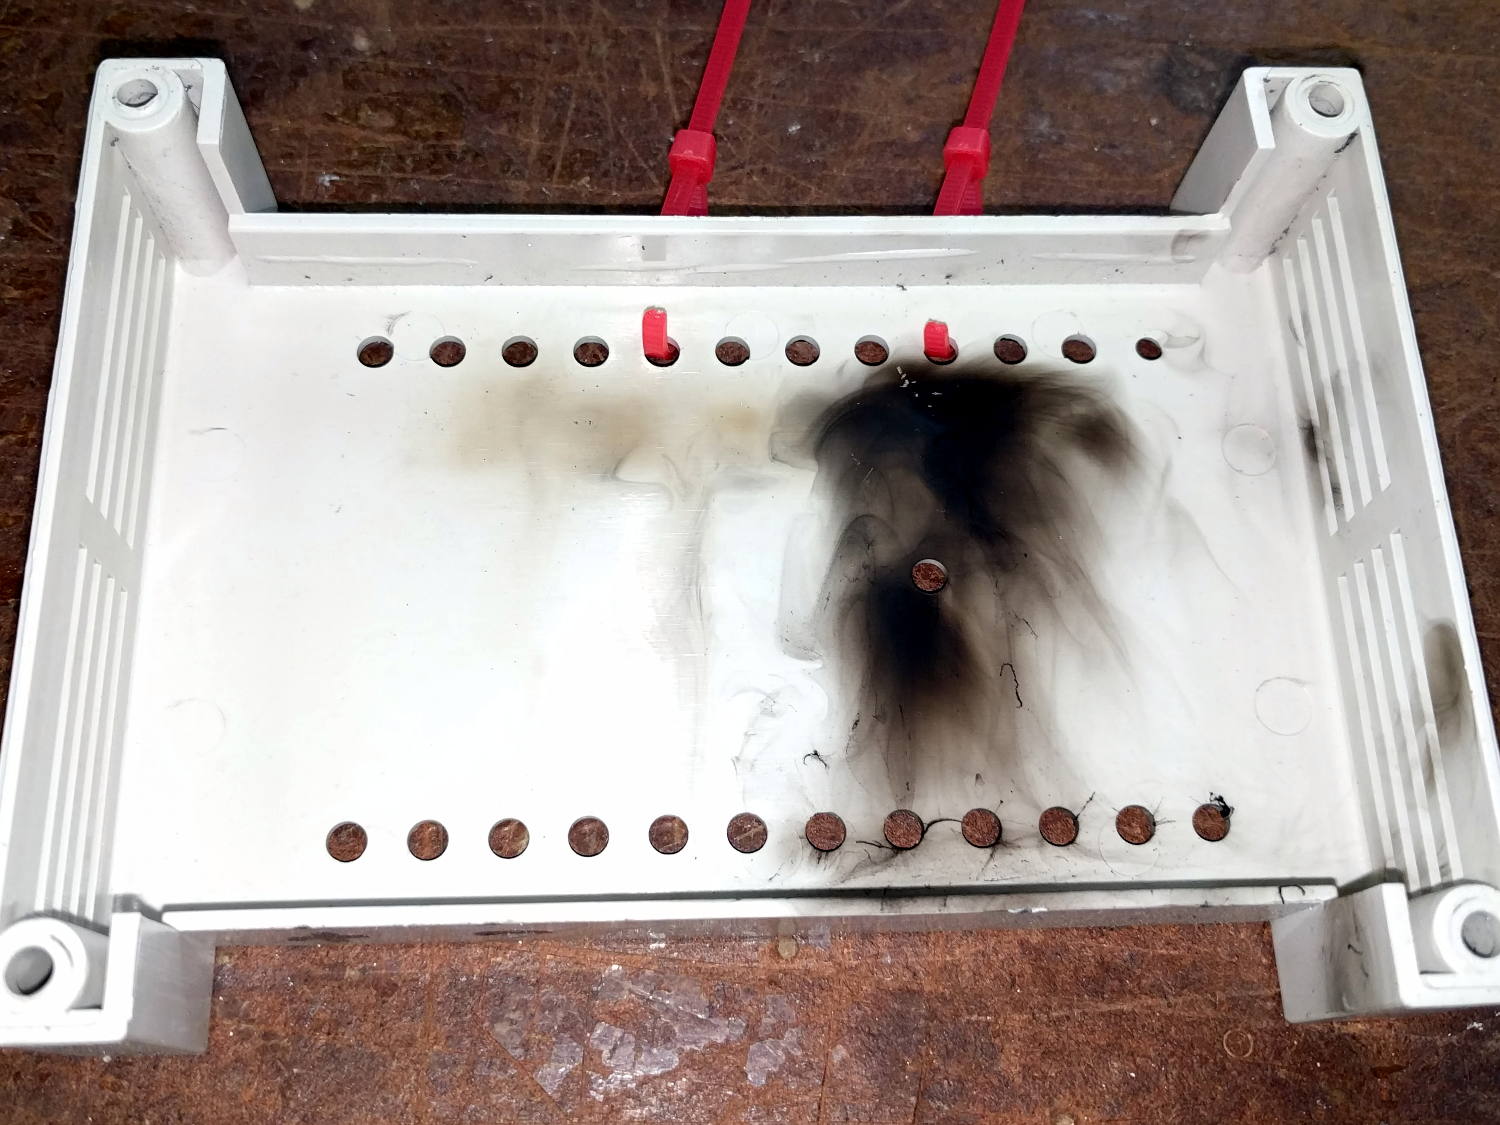
The PWM motor controller purports to do 60 A at up to 50 V, but removing the cover showed it wasn’t going to do any more controlling:
Motor Controller – smoked housing
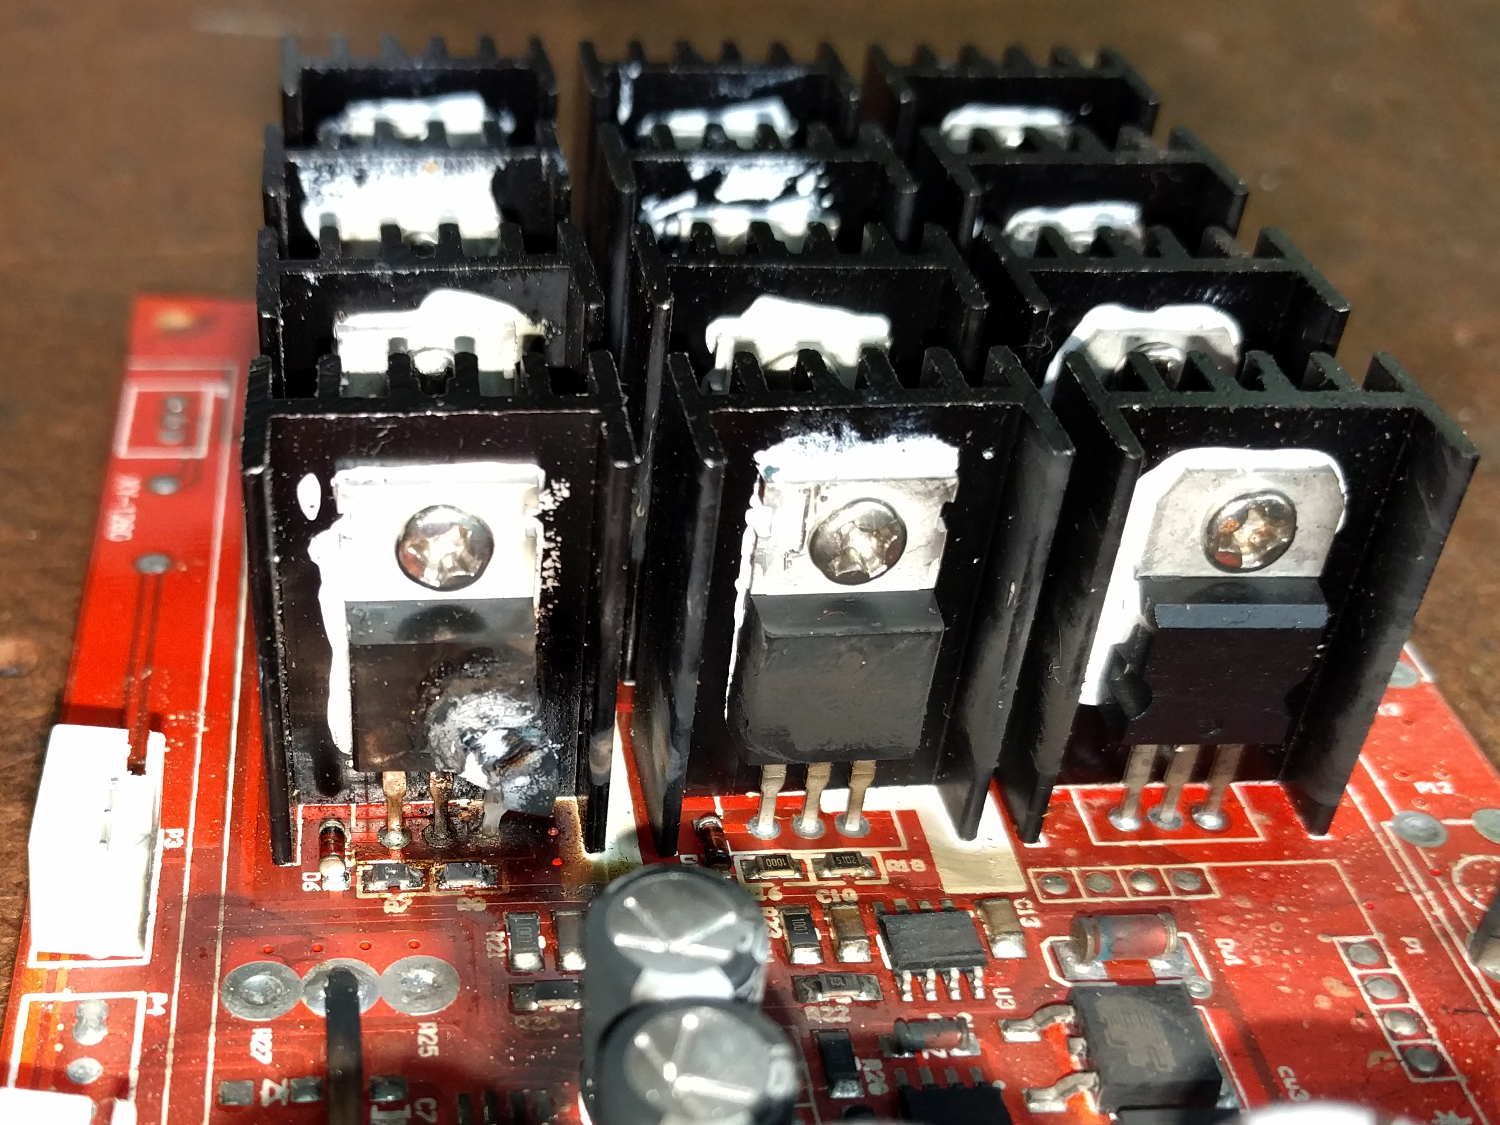
That smudge came from a rank of detonated MOSFETs:
Motor Controller – exploded MOSFET
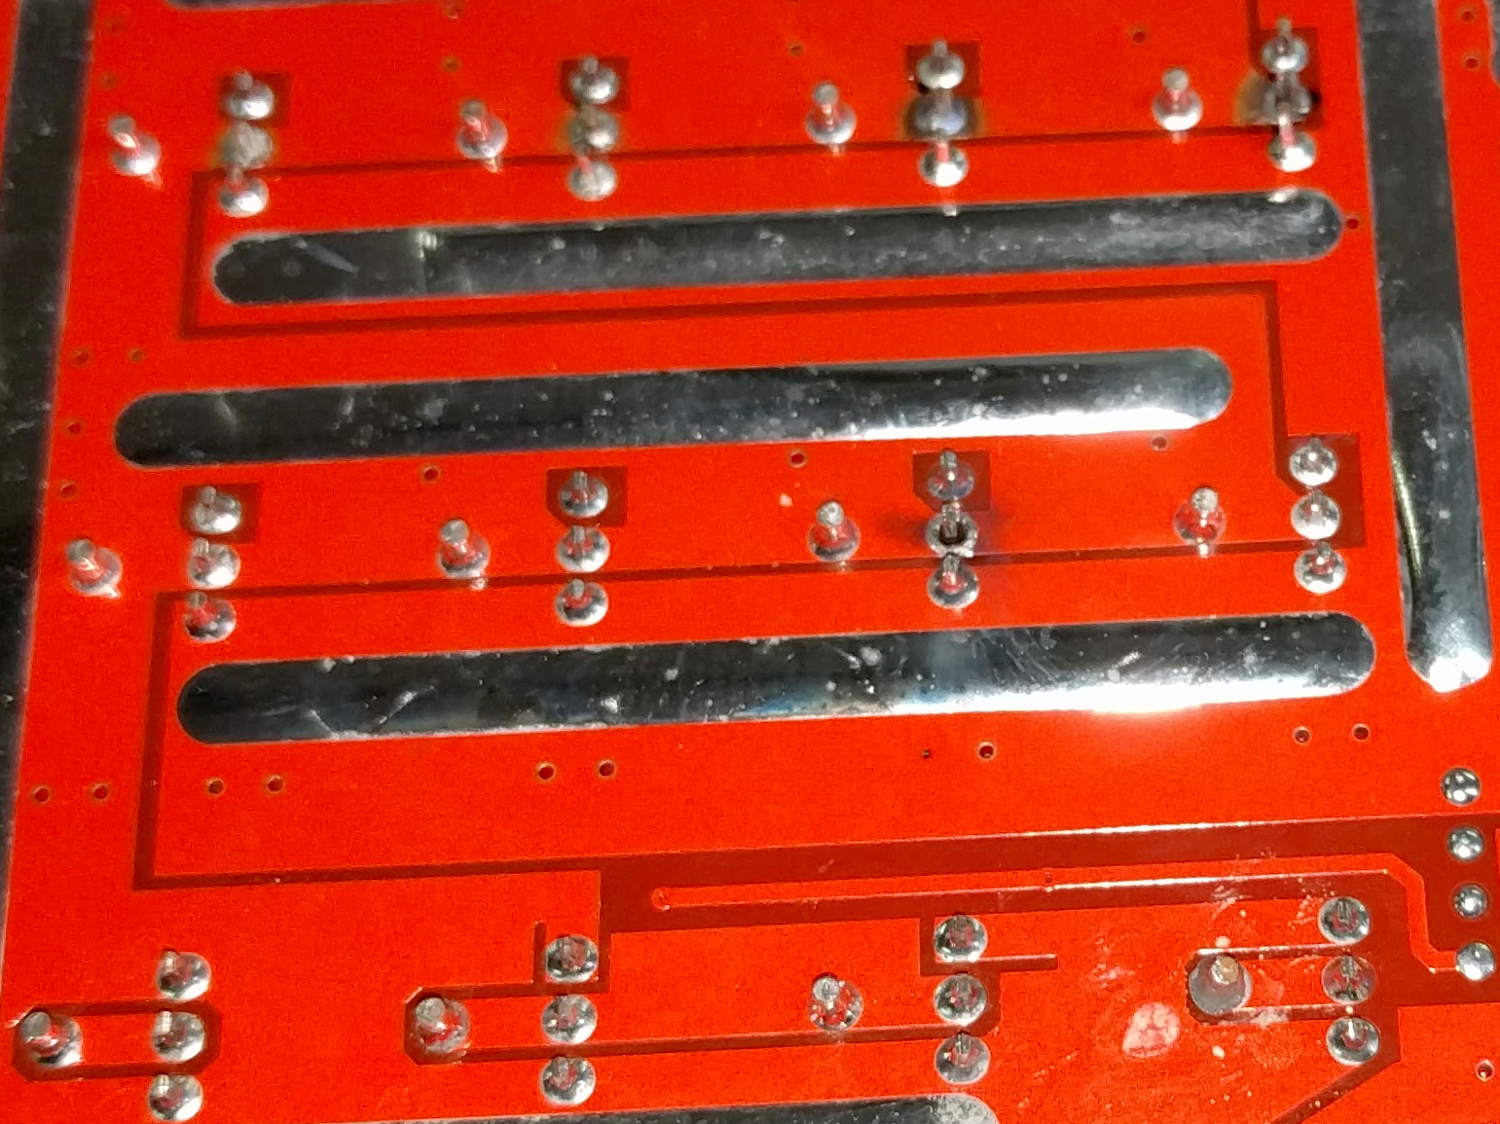
Other MOSFETs had unsoldered themselves:
Motor Controller – unsoldered MOSFETs
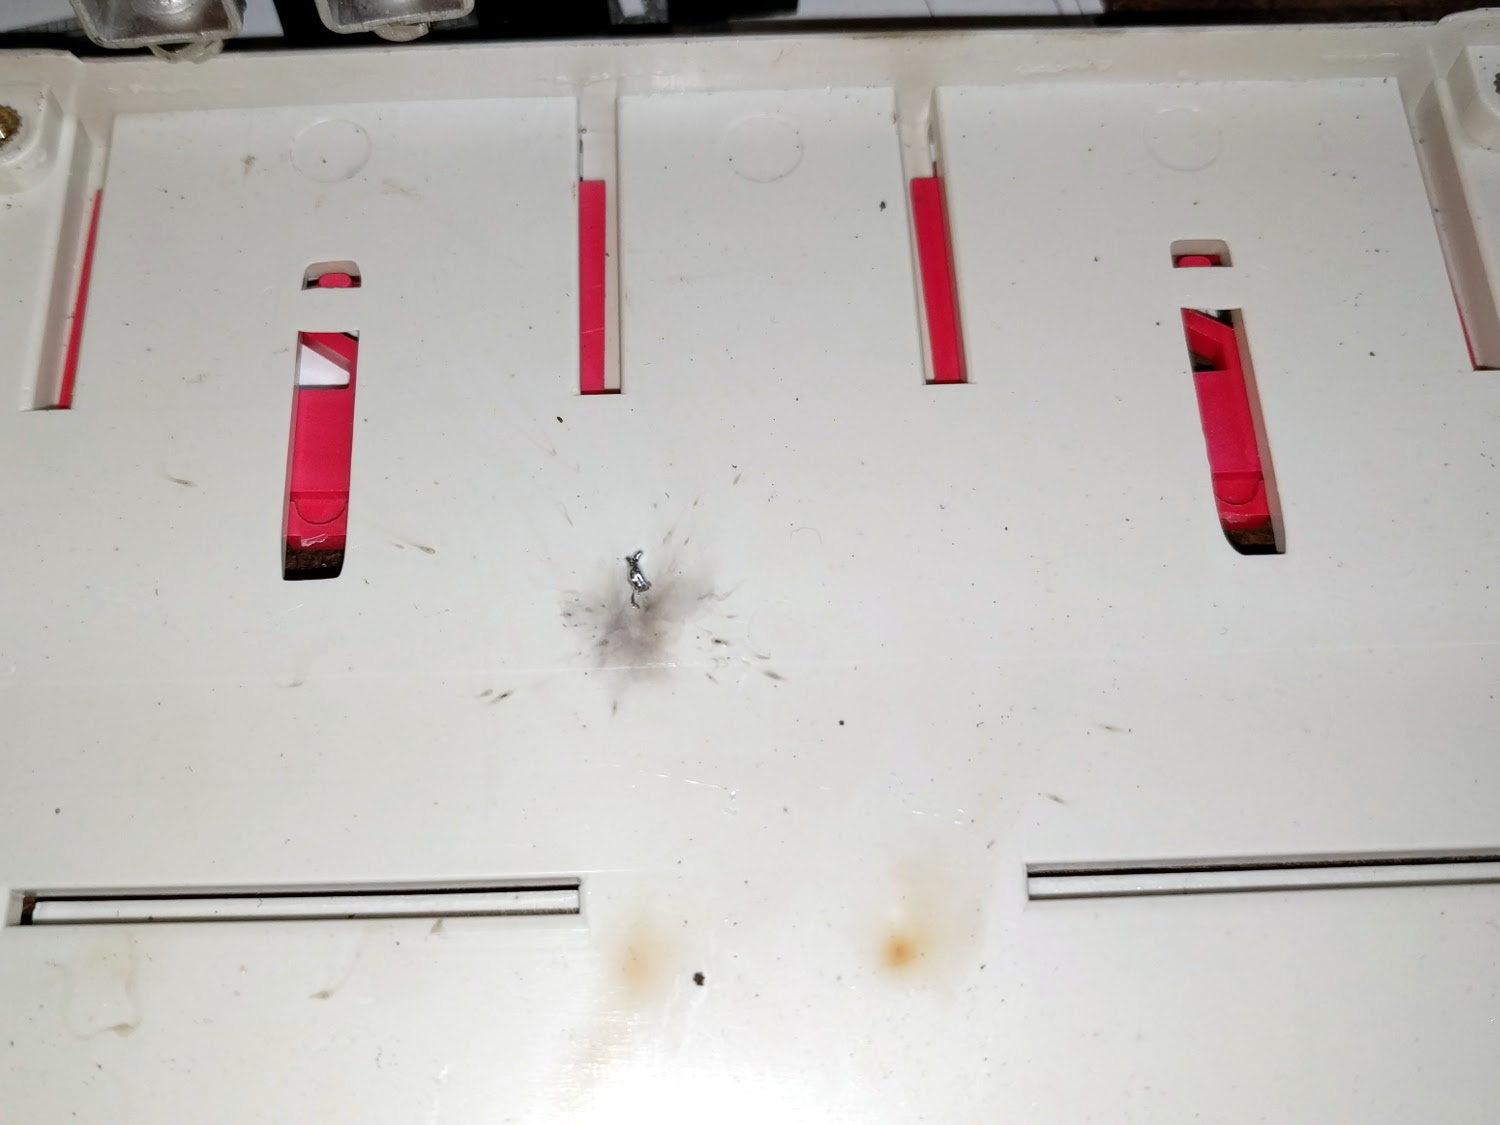
Explosively:
Motor Controller – solder ejecta
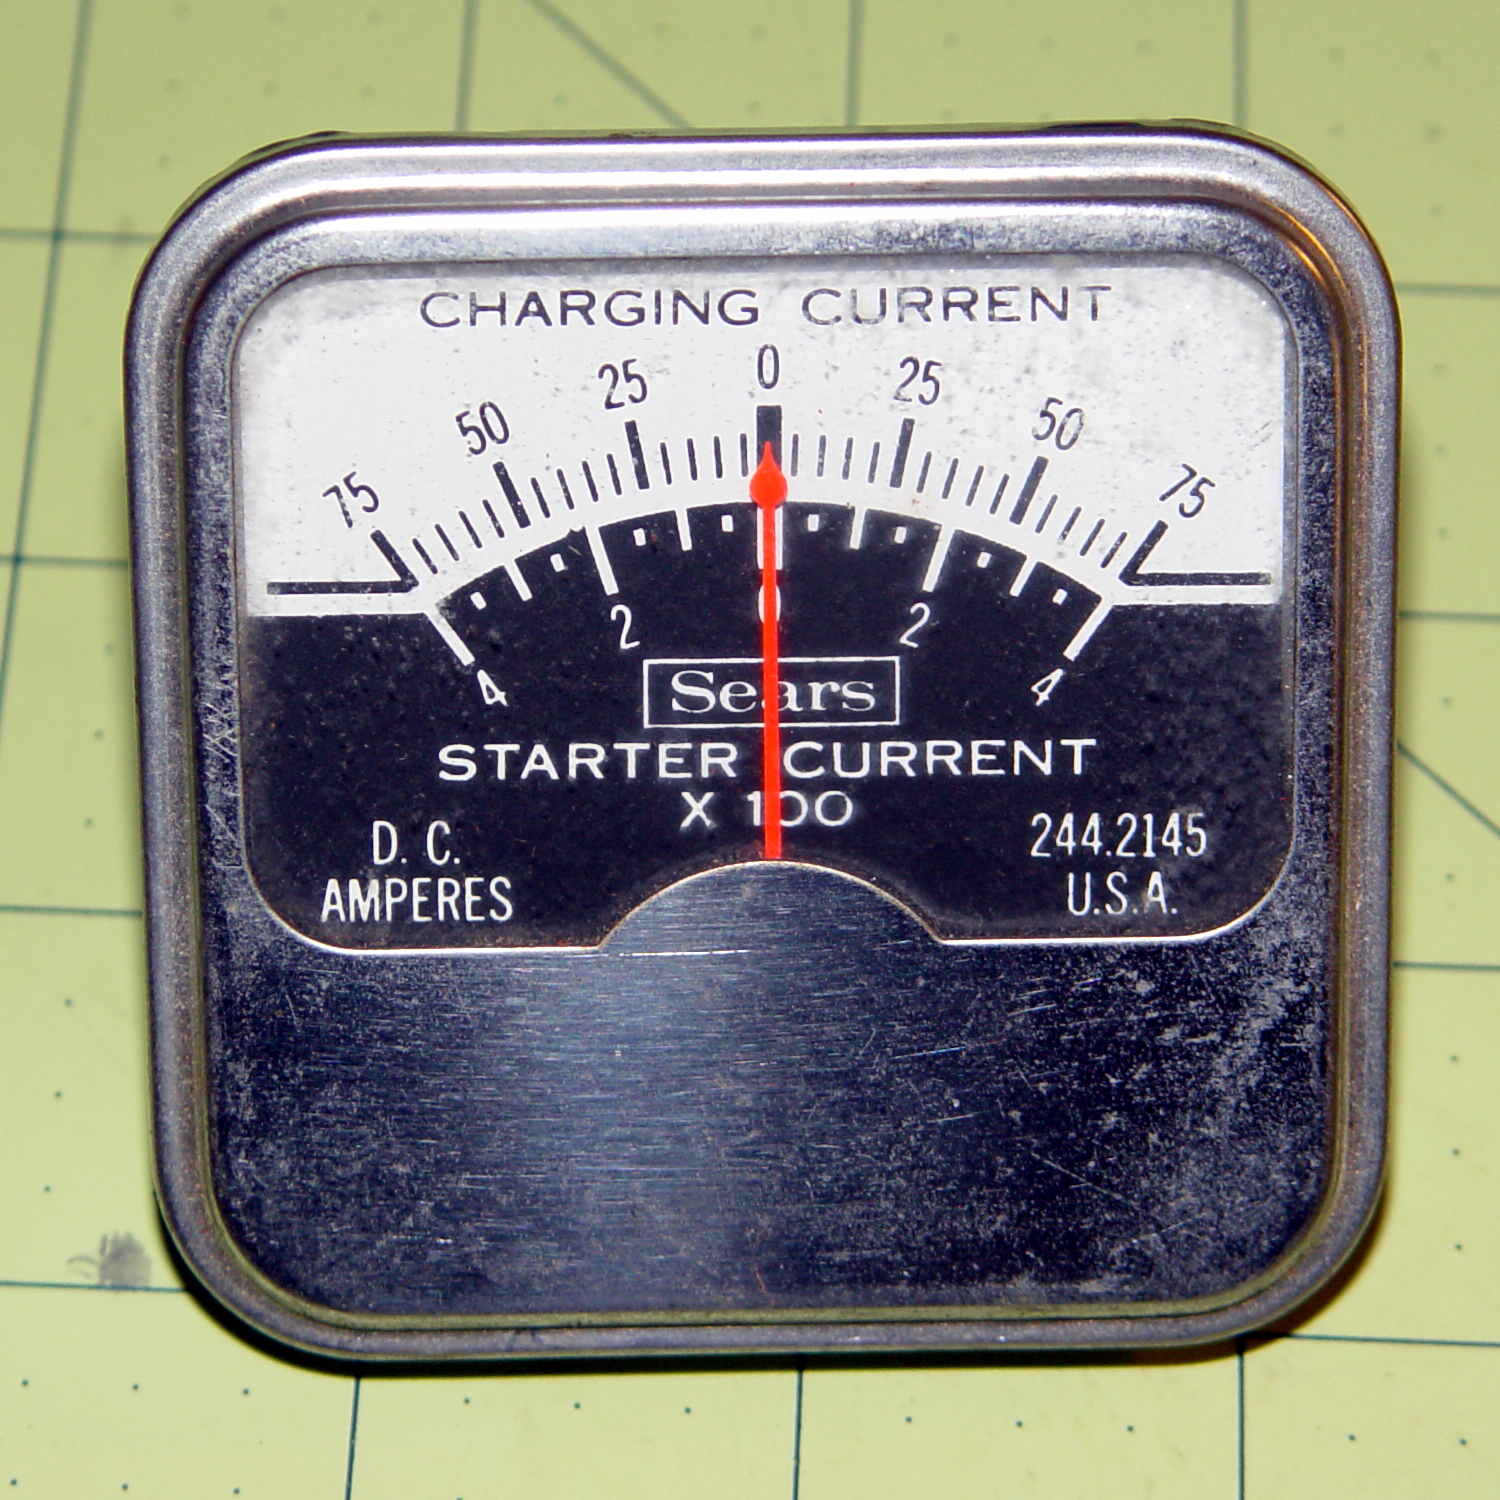
I brought along an ancient Sears starter-motor ammeter to measure the motor current:
Sears 244-2145 Starter Ammeter – front
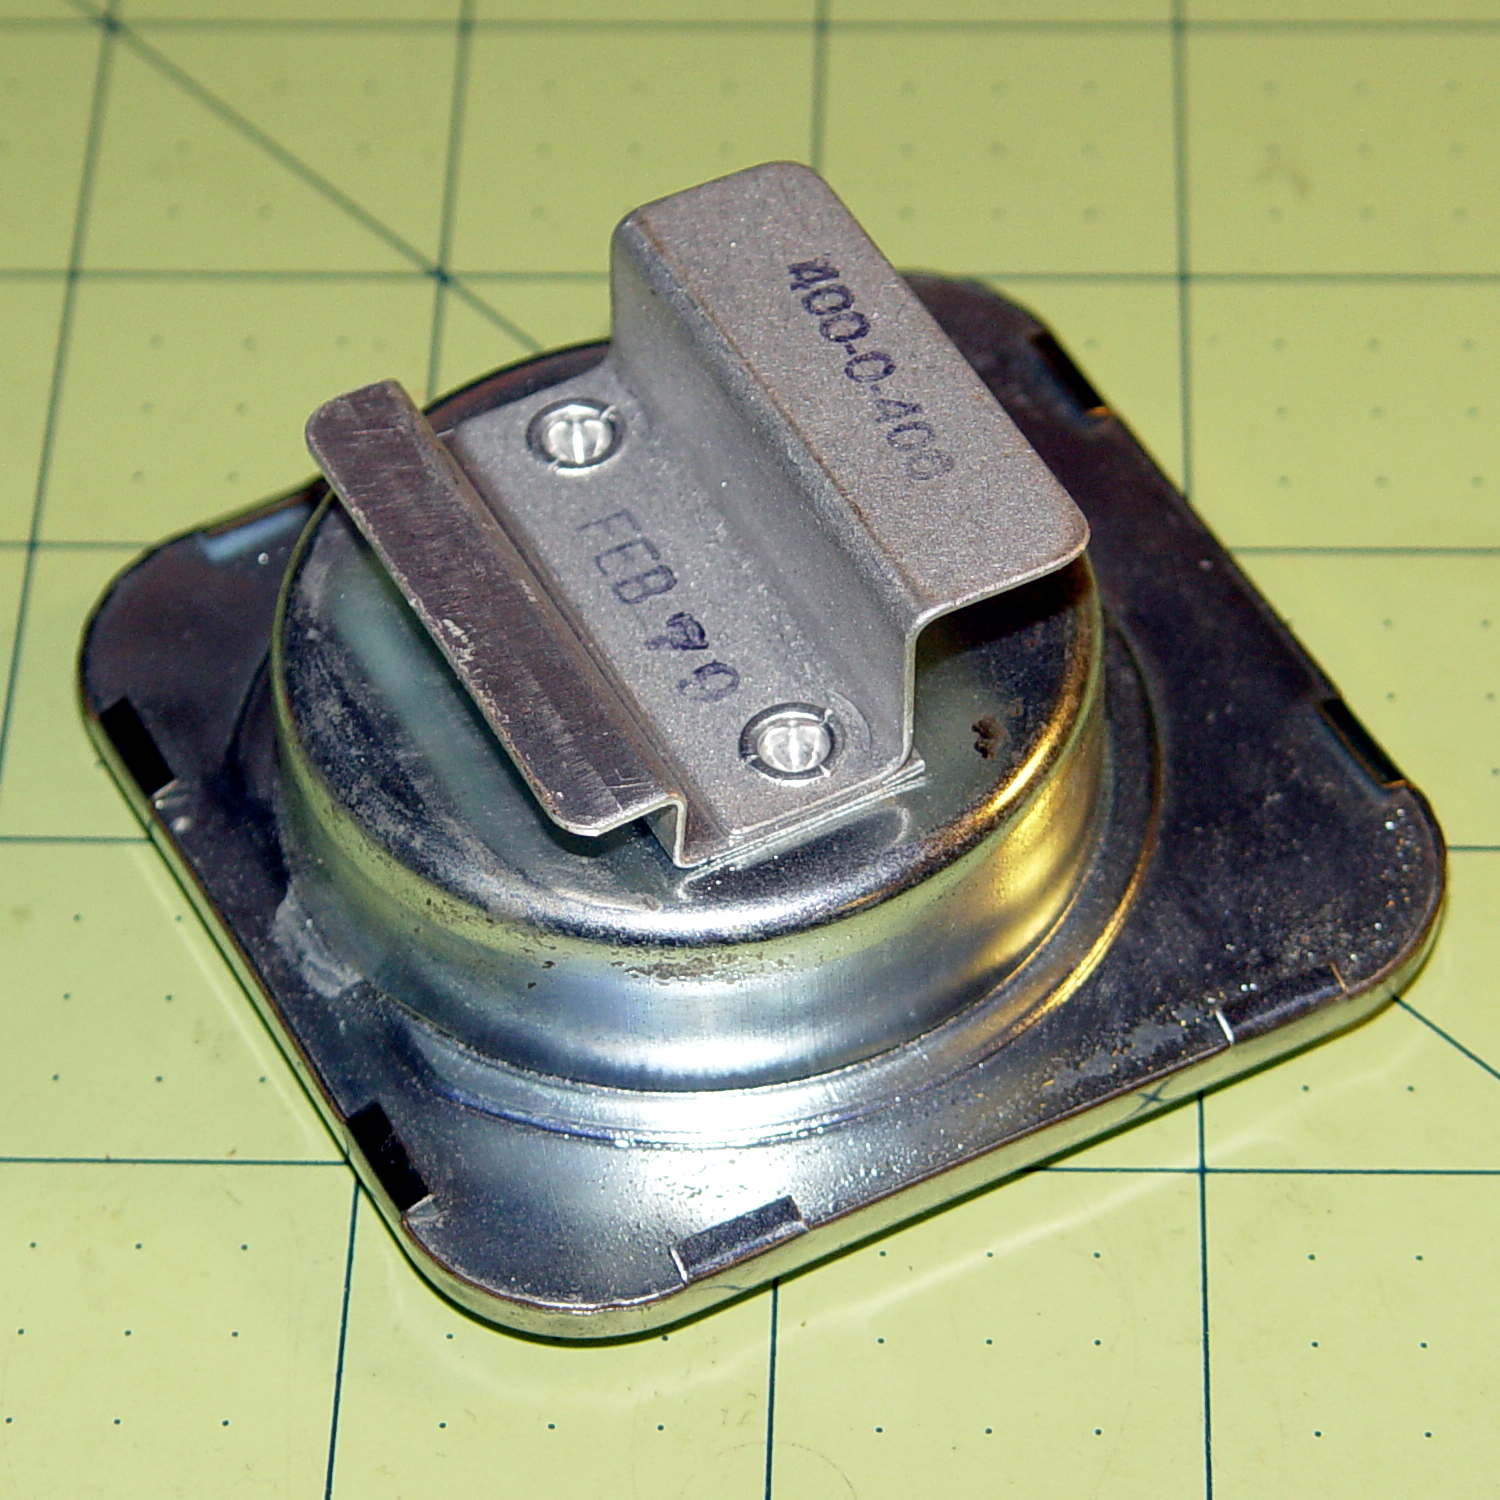
The magnetic field around the wire directly drives the meter movement, with two guides for the 75 A and 400 A ranges, and none of that newfangled Hall effect nonsense to contend with:
Sears 244-2145 Starter Ammeter – wire guides
Yeah, that says FEB 79; I’ve been collecting tools for quite a while…
I slapped the motor connectors directly on the battery terminals, holding them with small locking pliers after discovering that the wires got way too hot, way too fast. A snippet of retroreflective tape on the motor sprocket and a laser tach gave us the speed:
12 V: 1600 RPM @ 40 A
24 V: 2400 RPM @ > 100 A
The AmpFlow E30-400 motor data sheet confirmed that those numbers were grossly wrong. Unloaded, it should spin at 5700 RPM at 24 V while drawing 3.2 A (thus, 2800 RPM at 12 V & 1.6 A).
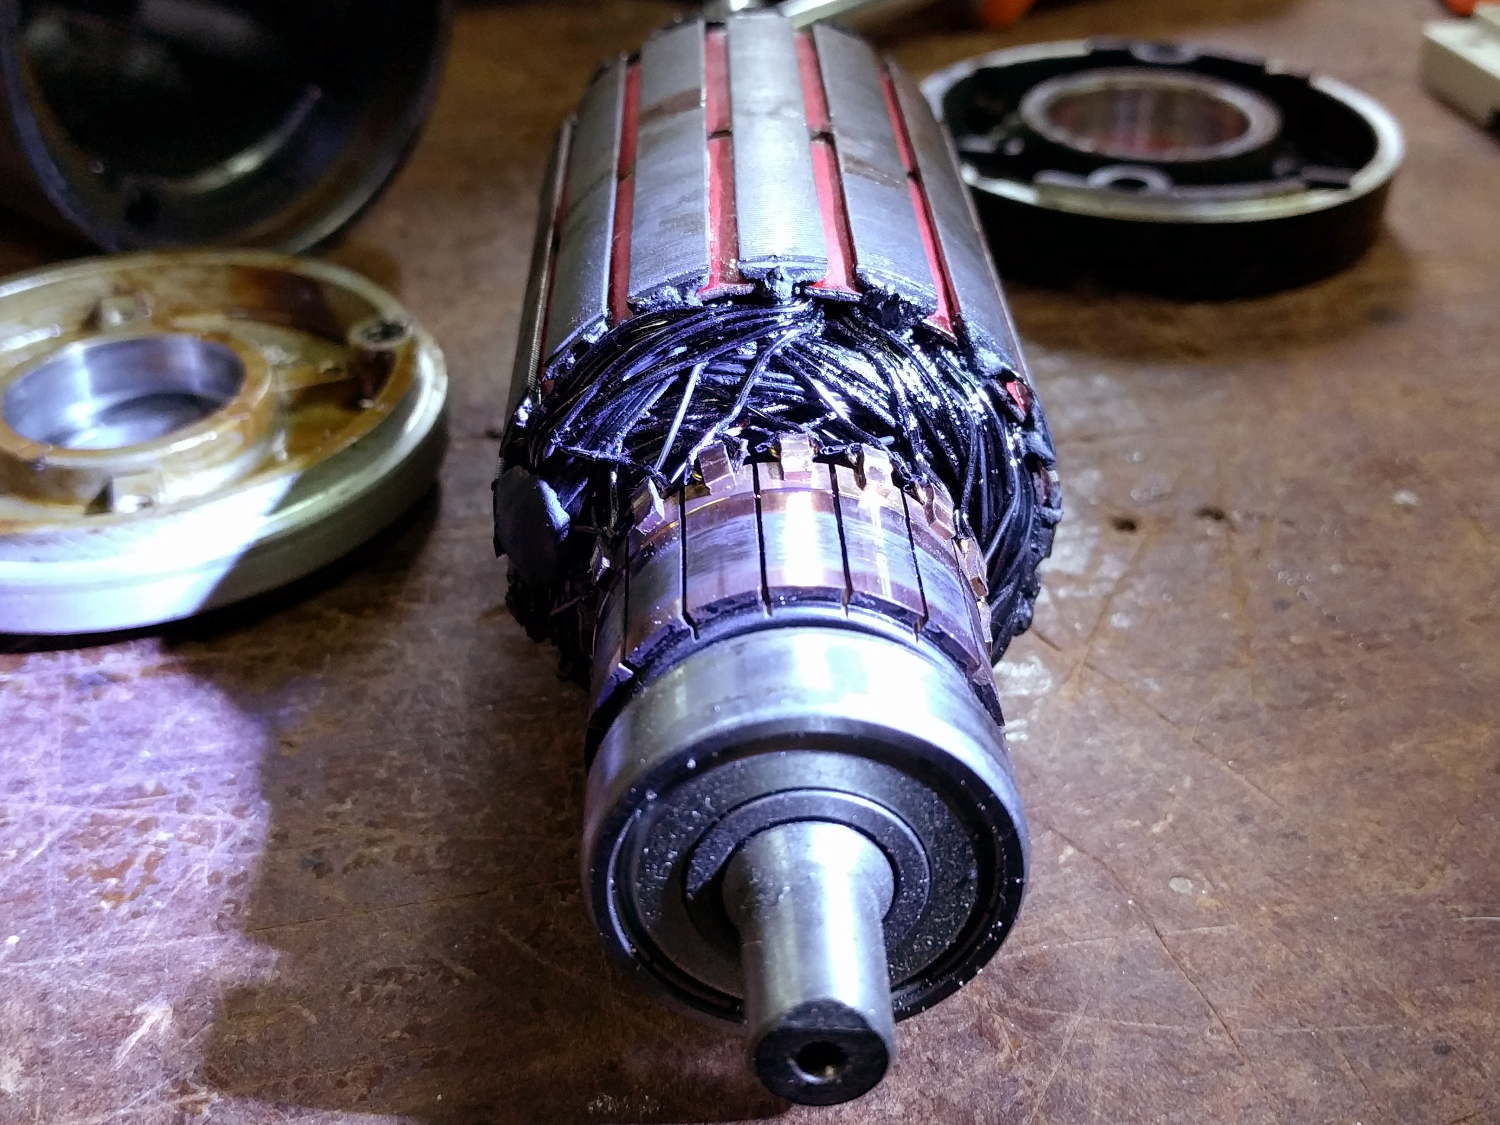
Diassembling the motor showed it hadn’t escaped the carnage:
Motor – charred windings
Those windings should be the usual amber enamel-over-copper, not charred black. The excessive current and reduced speed suggests many shorted turns inside the rotor.
Protip: never disassemble a working DC motor, because you’ll demagnetize the stator. The motor should still run when you put it back together, but the reduced magnetic field will wreck the performance.
As nearly as we could tell, one of the motor wires shorted to the frame when it got pinched under the seat; that’s an easy mistake to make and shows why compulsive wire neatness pays off big time. Shorting the controller output blew the transistors and, after raising the seat to look underneath, the motor would cook itself without generating much torque while you figure out what happened.
As far as I’m concerned, if you’ve never blown up anything that severely, you’re not building interesting stuff and definitely not trying hard enough.
The next iteration should work better!
Thanks to Dragorn of Kismet for stepping into the stench with phone camera in hand…
The Epson R380 started making an odd thwapping noise, which turned out to be the ink tubes from the Continuous Ink Supply System slapping the overly complex interior of the printer. They seemed a bit loose, but it took some searching before I found the top of the clamp that holds them in place:
Epson R380 CISS hose clamp – broken
It’s the white rectangle nestled in front of the ink cartridges, where it fits perfectly into a convenient slot and looks like it grew there.
I briefly considered 3D printing a replacement, but came to my senses:
Epson R380 CISS hose clamp – fixed
That should be good until the silicone rubber tubes finally break after a bazillion flex cycles…
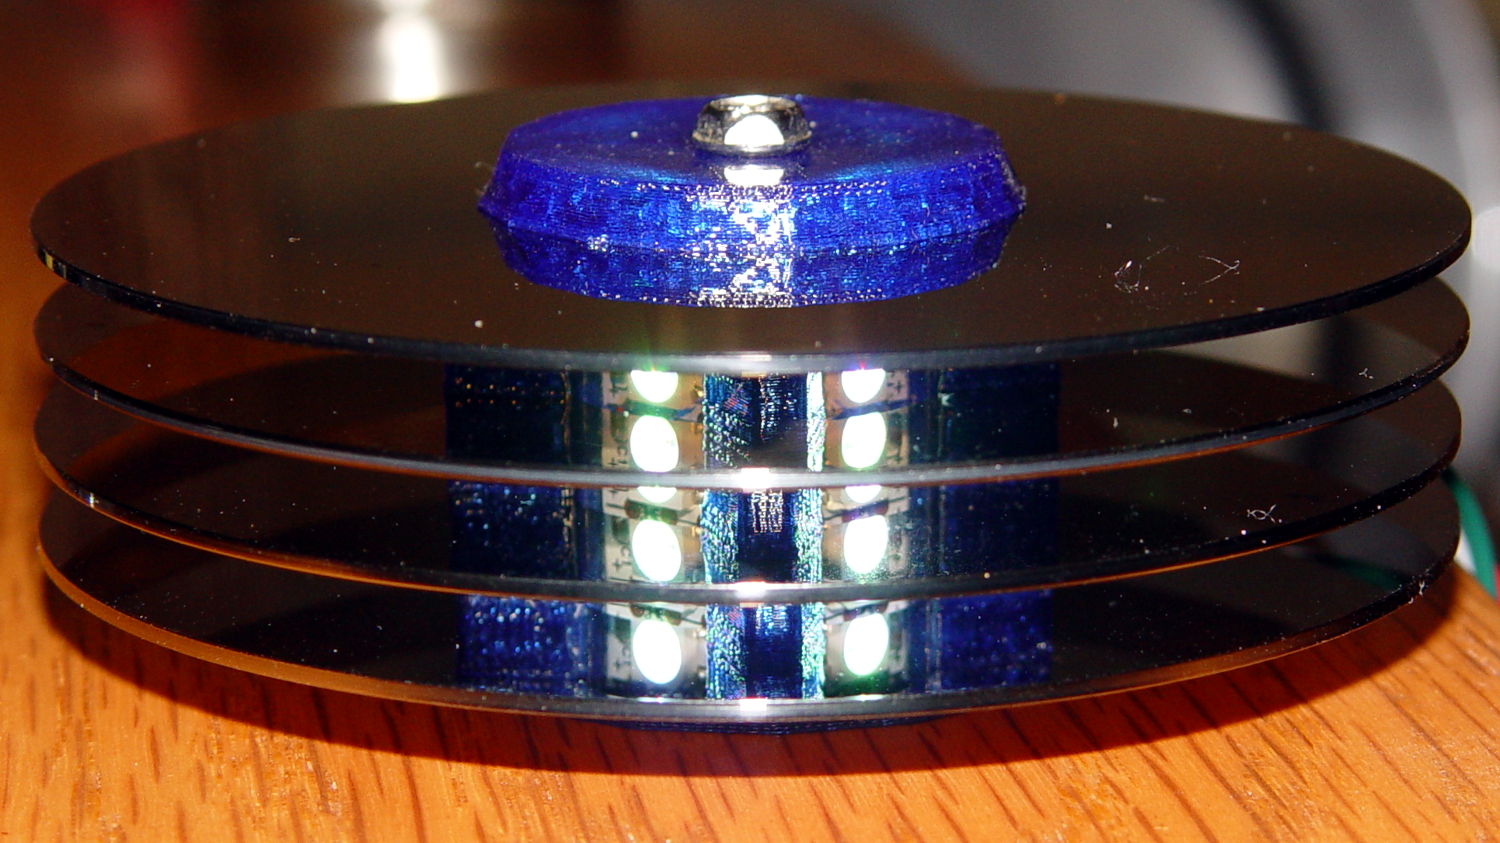
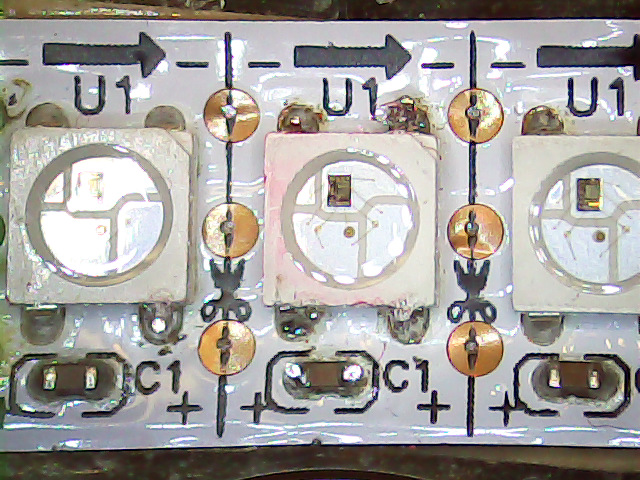
About a week after First Light, one of the knockoff Neopixels (not a Genuine Adafruit Product) suffered an intermittent failure: it worked fine after being off for an hour or two, but eventually stalled at a fixed color, with all downstream pixels equally dead. Of course, it was the middle package in the string of three, buried in the hub (this is before the failure):
Hard Drive Mood Light – low angle
Spraying circuit cooler on the package brought it back to life for a few minutes, confirming the diagnosis. Reducing the maximum intensity to PWM 32 reduced the average power dissipation enough to let it run for as long as I was willing to let it, although it might not survive a hot summer day.
Not having glued the spacers onto the hub simplified extracting the strip, although warranty repair is always a nuisance. I daubed red Sharpie on the failing LED to avoid losing track of it, then resoldered the LED and capacitor connections to no avail:
Knockoff Neopixel Failure – overview
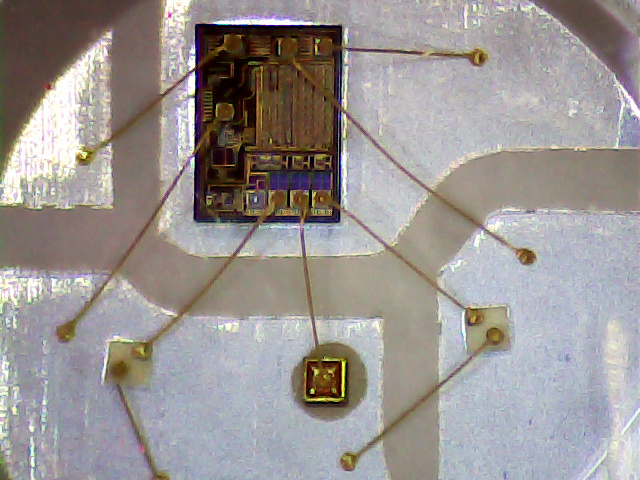
There’s nothing obviously wrong inside:
Knockoff Neopixel Failure – detail
The fine details of the WS2812B controller produce a horrible Moiré blur with the camera’s low-res image, but you get the general idea.
Most likely, one of those flying wires isn’t quite bonded, but we’ll never know…
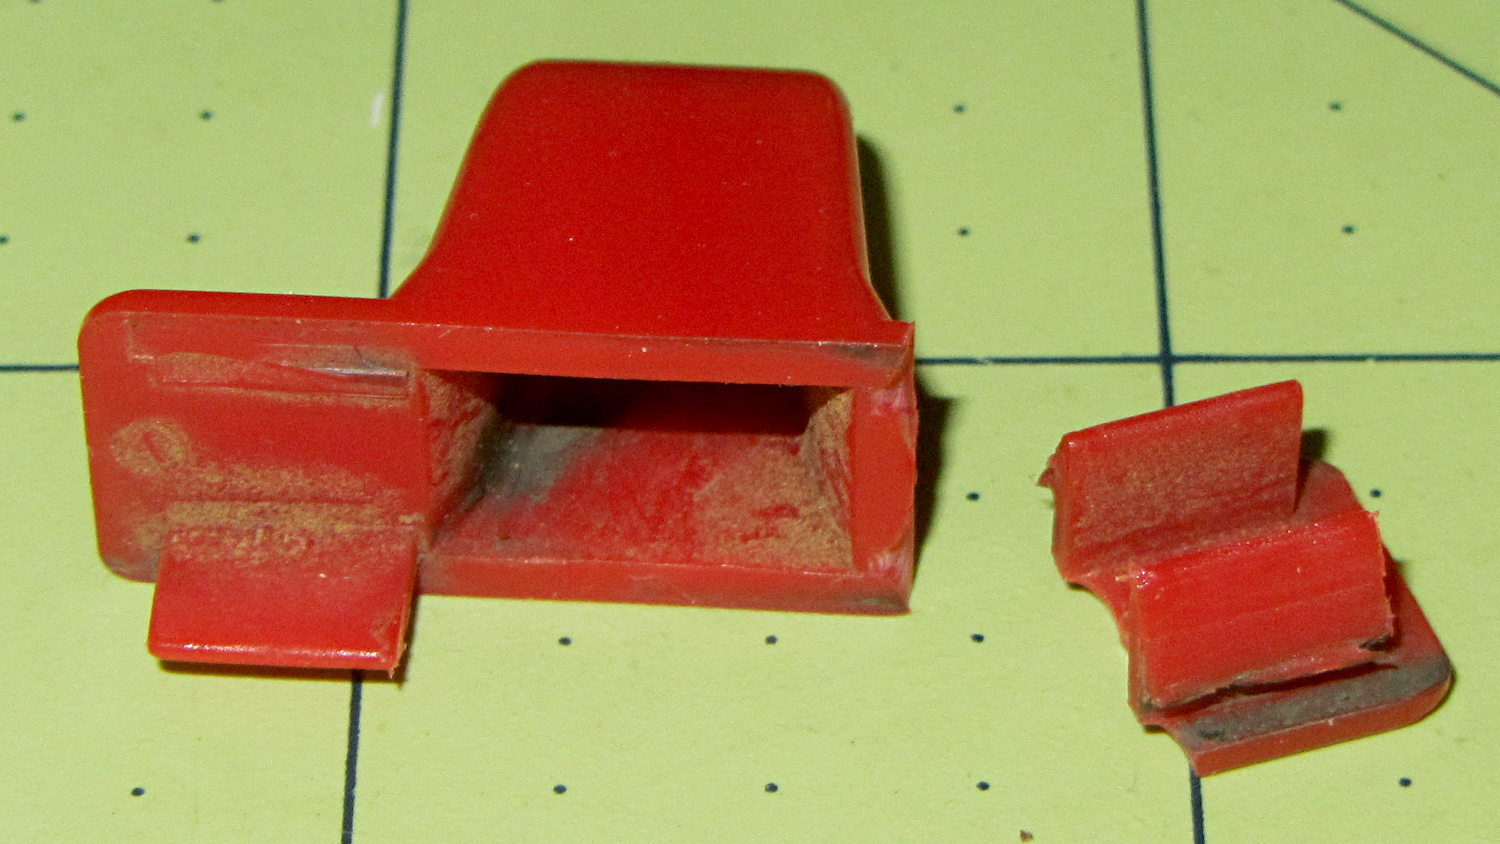
The upper-left tab broke off this “knob” shortly after we got the leaf shredder:
Throttle knob – broken original
But it worked well enough that, following my usual course of action, I could ignore the problem. Until a few days ago, that is, when the remaining tab on that end pulled out of the slot on the engine and the whole affair bent into uselessness.
It’s a $10 item from eBay (with free shipping), $8 from Amazon ($4, not eligible for Prime, so plus $4 shipping), out of stock at my usual online small engine source, and not worth biking a few dozen miles here & there to see if anybody has one. I know better than to look for repair parts at Lowe’s / Home Depot. It’s Tecumseh Part 36638, which may come in handy some day.
So, we begin…
It’s one of those pesky injection-molded miracle plastic doodads that can’t be printed in one piece, so I designed the tabs as separate parts and glued them in place. The solid model shows the intended assembly, with a bit of clearance around the tabs for tolerance and glue slop:
Tecumseh Throttle Knob – solid model – show view
External clearances aren’t an issue, so I made the base plate longer, wider, and thicker, which gave the tabs something to grab onto. The half-round knob is bigger, more angular, and uglier than the OEM knob, because I had trouble holding onto the original while wearing work gloves.
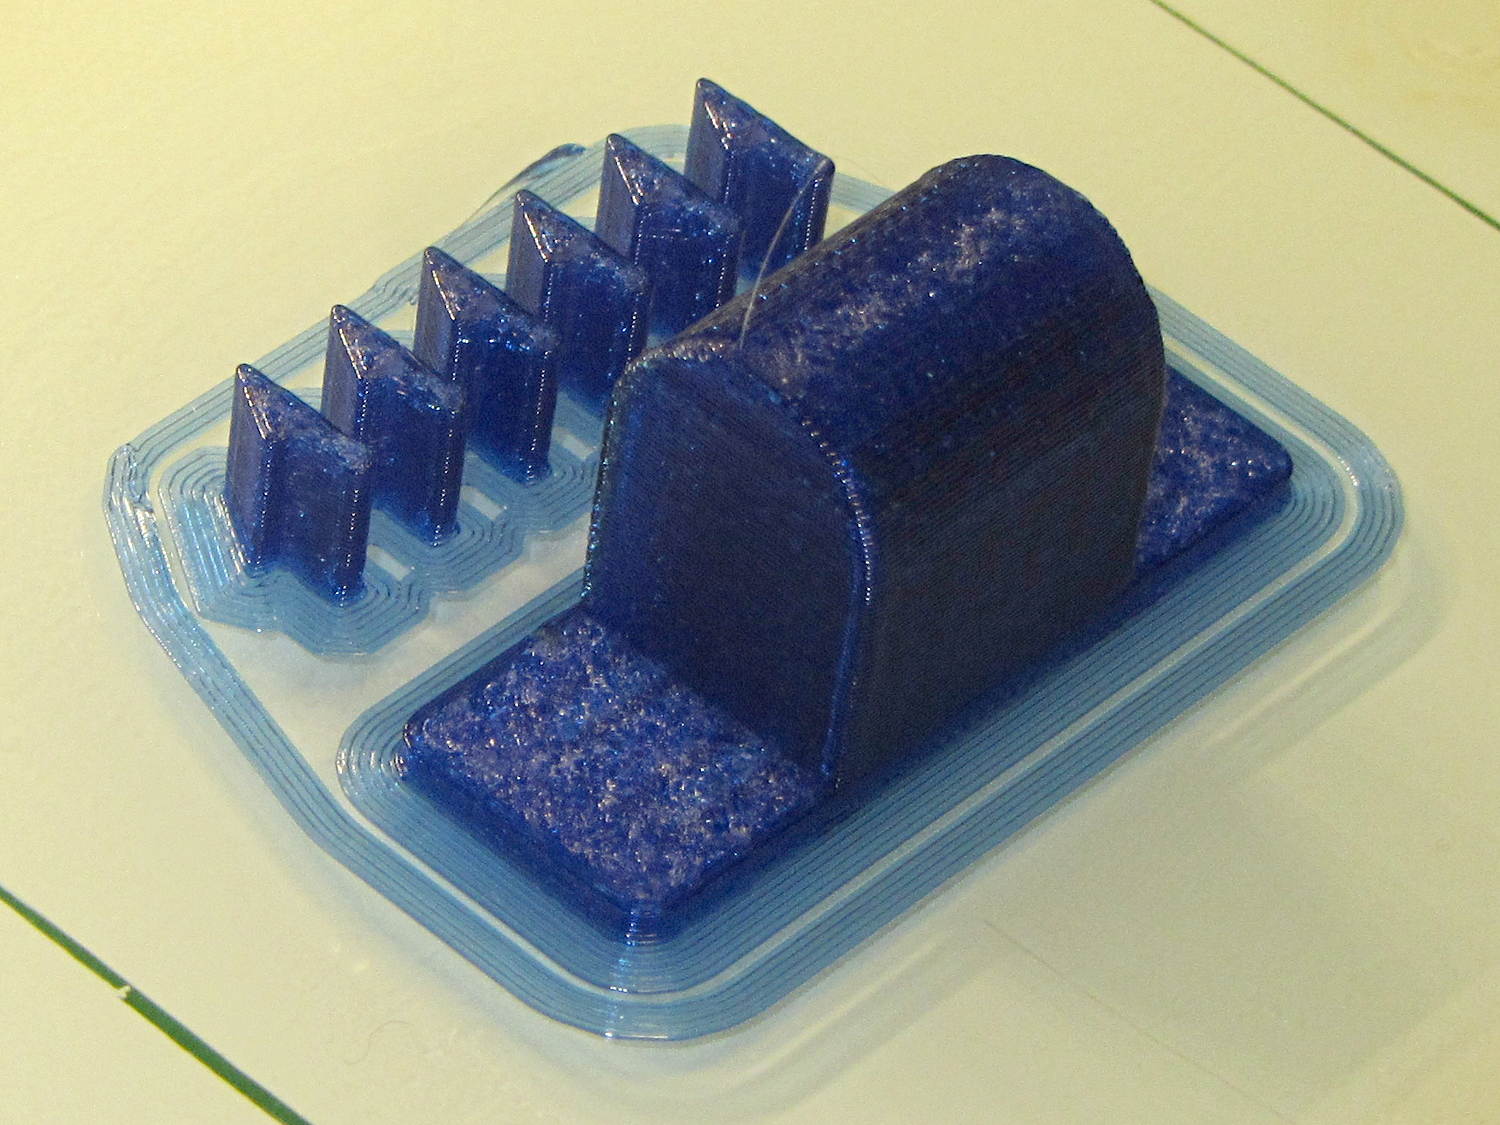
Printing a few extra tabs allows the inevitable finger fumble:
Throttle knob – on platform
The tabs stand on edge to properly orient the printed threads around the perimeter: a great force will try to rip that triangular feature right off the tab, so wrapping the thread as shown maximizes the strength. Laying them flat on their backs would put the force in shear, exactly parallel to thread-to-thread bonds; I wouldn’t bet on the strength of those layers.
The brim provides enough platform footprint around the tabs to keep them upright, but obviously isn’t needed around the knob. Although you could wrap a modifier mesh around one or the other, trimming the brim off the knob with a precision scissors seemed more straightforward.
Slobbering generous drops of of IPS #4 solvent adhesive into the slots and over the tabs softened the PETG enough that I could ram the tabs into place, using a big pliers to overcome their feeble resistance:
Throttle knob – glued latches
With the plastic still dazed from the fumes, I force-fit the knob into the slot on the engine:
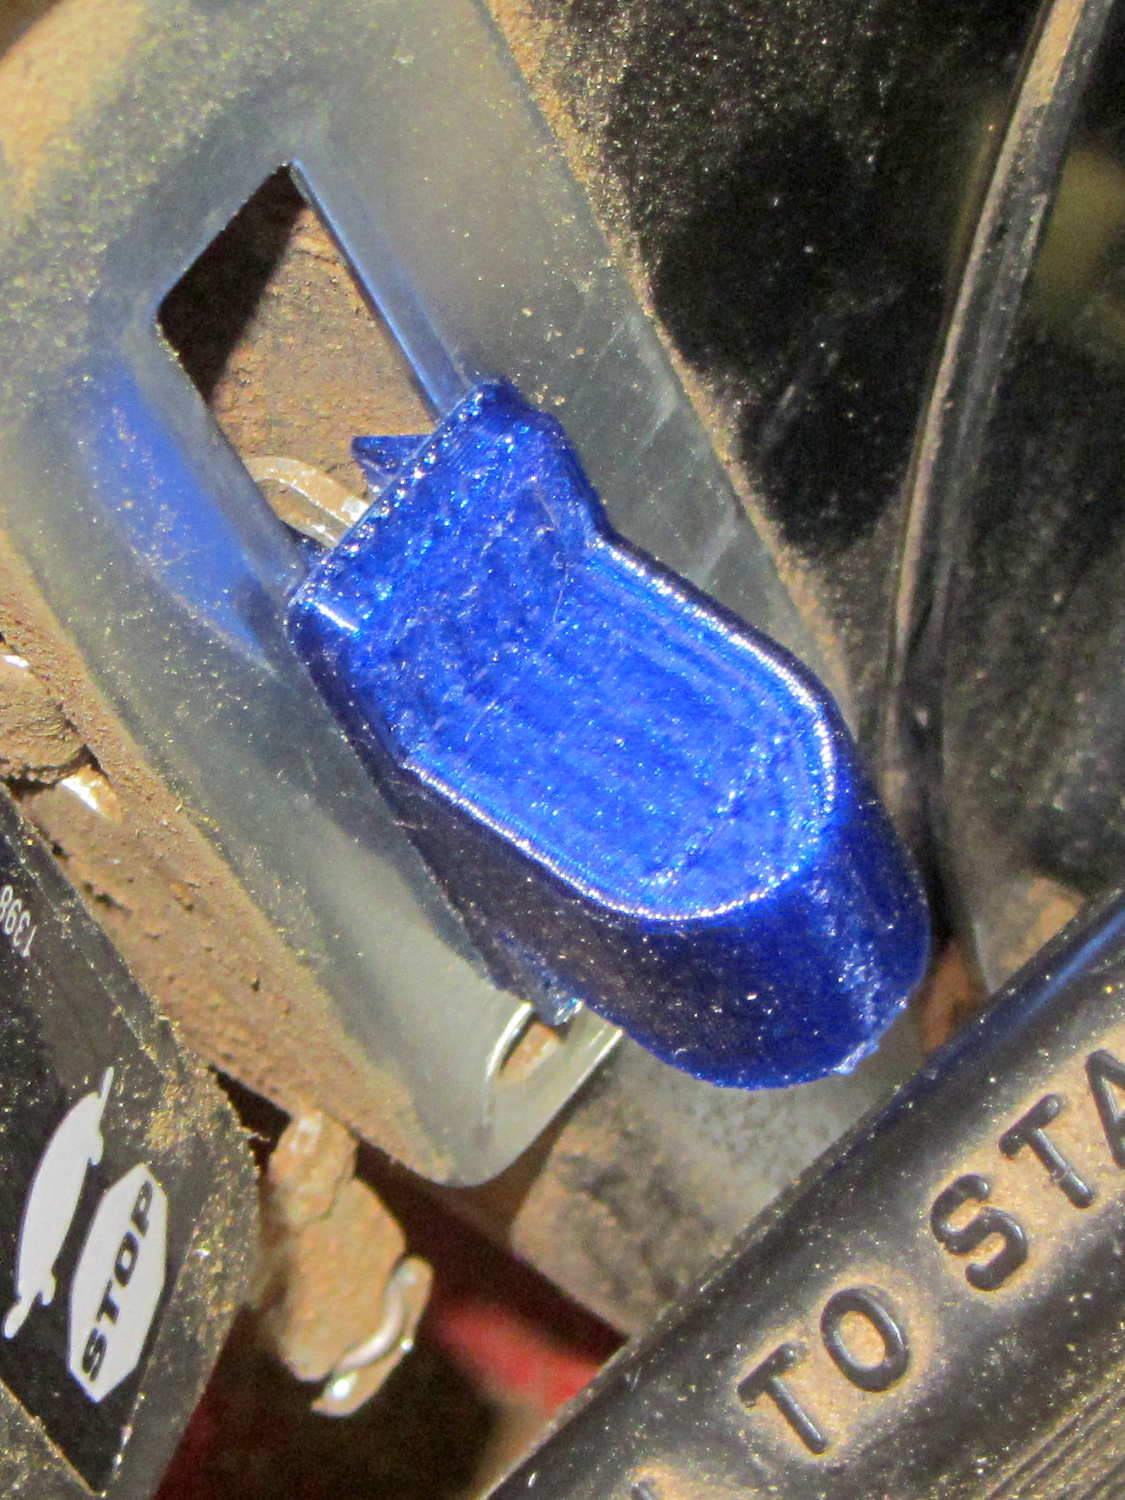
Throttle knob – installed
The tabs eased back into position and seem to be holding the knob in place. Worst case: make a new knob, butter up the tabs with slow epoxy, ram knob into slot, then poke a screwdriver inside to realign the tabs against the slot edges.
The solvent had a few cloudy days to evaporate before the next shredding session, whereupon the throttle once again worked exactly the way it should.
The OpenSCAD source code:
// Tecumseh 36638 Throttle Knob
// Ed Nisley KE4ZNU November 2015

Layout = "Build";					// Build Show Tab Base

//- Extrusion parameters must match reality!

ThreadThick = 0.25;
ThreadWidth = 0.40;

HoleWindage = 0.2;

Protrusion = 0.1;			// make holes end cleanly

inch = 25.4;

function IntegerMultiple(Size,Unit) = Unit * ceil(Size / Unit);

//----------------------
// Dimensions

BaseSize = [40,14,3.0];							// overall base plate outside engine controller slot

Knob = [18,BaseSize[1],17];

TabSize = [7.5,1.6,6.0];						// ovarall length, minimum width, overall height
TabSocket = [8.0,2.0,BaseSize[2] - 2*ThreadThick];				// recess in base plate for tab

TabOuterSpace = 30.0;							// end-to-end length over tabs - sets travel distance
SlotWidth = 7.75;								// engine controller slot width
SlotThick = 1.5;								// engine controller slot thickness

TabShape = [
	[0,0],
	[BaseSize[2] + TabSize[2],0],
	[BaseSize[2] + TabSize[2],ThreadWidth],
	[BaseSize[2] + SlotThick,2*TabSize[1]],
	[BaseSize[2] + SlotThick,TabSize[1]],
	[0,TabSize[1]]
];

CapBaseOpening = [11,7.5,15];			// opening in base plate, Z = clearance from controller plate

//----------------------
// Useful routines

module PolyCyl(Dia,Height,ForceSides=0) {			// based on nophead's polyholes

  Sides = (ForceSides != 0) ? ForceSides : (ceil(Dia) + 2);

  FixDia = Dia / cos(180/Sides);

  cylinder(r=(FixDia + HoleWindage)/2,
		h=Height,
	$fn=Sides);
}

//----------------------
// Pieces

module Tab() {

	linear_extrude(height=TabSize[0]) {
		polygon(points=TabShape);
	}
}


module Base() {

	CornerRad = BaseSize[1]/8;

	difference() {
		union() {
			linear_extrude(height=BaseSize[2])
				hull()
					for (i=[-1,1], j=[-1,1])
						translate([i*(BaseSize[0]/2- CornerRad),j*(BaseSize[1]/2 - CornerRad)])
							circle(r=CornerRad,$fn=4*4);
			translate([Knob[0]/2,0,BaseSize[2] - Protrusion])
				rotate([0,-90,0])
					linear_extrude(height=Knob[0])
						hull() {
							translate([Knob[2] - Knob[1]/2,0])
								circle(d=Knob[1],$fn=8*4);
							translate([0,-Knob[1]/2,0])
								square([Protrusion,Knob[1]]);
						}
		}

		translate([-CapBaseOpening[0]/2,-CapBaseOpening[1]/2,-Protrusion])
			cube(CapBaseOpening + [0,0,-CapBaseOpening[1]/2 + Protrusion],center=false);

		translate([0,0,CapBaseOpening[2] - CapBaseOpening[1]/2])
			rotate([0,90,0]) rotate(180/8)
				cylinder(d=CapBaseOpening[1]/cos(180/8),h=CapBaseOpening[0],center=true,$fn=8);

		for (i=[-1,1], j=[-1,1])
			translate([i*(TabOuterSpace/2 - TabSocket[0]/2),j*(SlotWidth/2 - TabSocket[1]/2),TabSocket[2]/2 - Protrusion])
				cube(TabSocket + [0,0,Protrusion],center=true);
	}
}


//----------------------
// Build it

if (Layout == "Base")
	Base();

if (Layout == "Tab")
	Tab();

if (Layout == "Show") {
	Base();

		for (i=[-1,1], j=[-1,1])
			translate([i*(TabOuterSpace/2 - TabSocket[0]/2),j*(SlotWidth/2 - TabSocket[1]/2),0])
				translate([j < 0 ? TabSize[0]/2 : -TabSize[0]/2,j < 0 ? TabSize[1]/2 : -TabSize[1]/2,BaseSize[2] - 2*ThreadThick])
					rotate([0,90,j < 0 ? -180 : 0])
					Tab();
}

if (Layout == "Build") {
	Base();

	for (i=[0:5])					// build a few spares
		translate([-7*TabSocket[1] + i*3*TabSocket[1],BaseSize[1],0])
			rotate(90)
				Tab();
}
The original doodle showing the OEM knob dimensions and some failed attempts at fancy features:
The south- and snowplow-facing numbers on the mailbox weren’t up to the challenge:
Mailbox – faded numbers
I wiped the crud off the reflective labels with denatured alcohol before painting, but that was the extent of the surface preparation.
I’m not getting graded on my ability to paint within the lines using a foam brush and that’s a Good Thing:
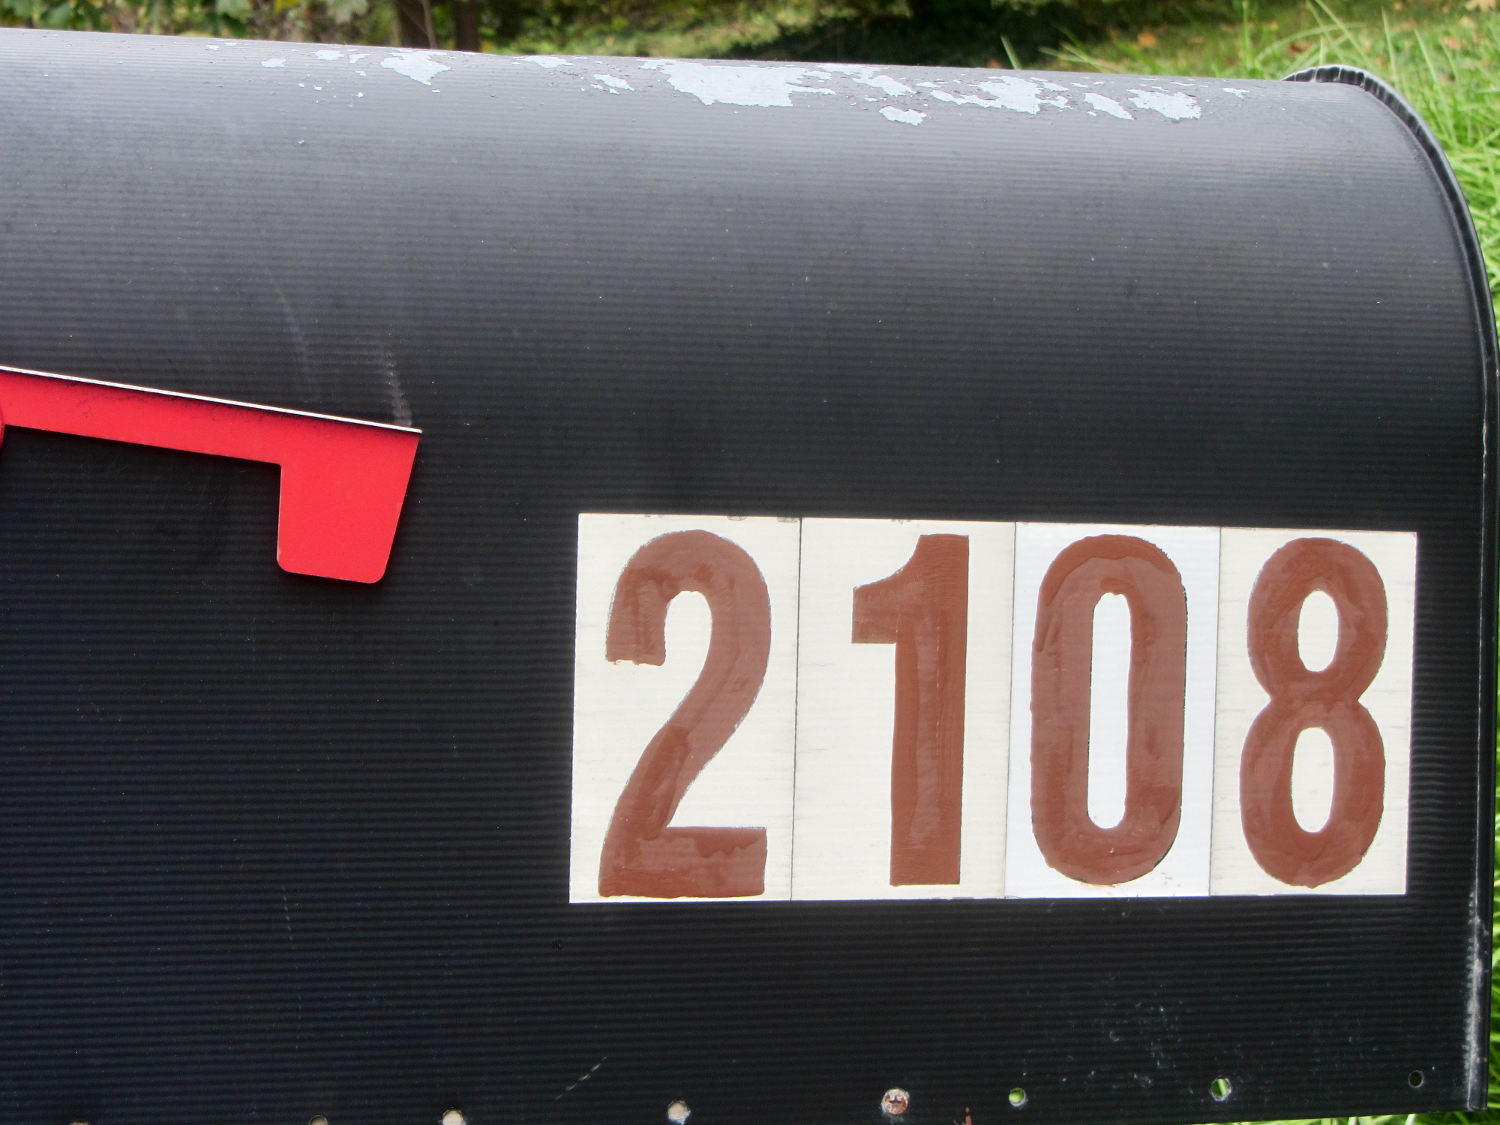
Mailbox – repainted numbers
That’s Rustoleum Rusty Metal Primer, chosen entirely because it was oil-based, outdoor-rated, and near the front of the shelf. I’m not going to topcoat it; that stuff is on its own. The slight color variations show still-wet primer here & there.
The north-facing numbers were in better shape, so a few dabs covered the obvious problems.
Hey, I wiped that peeling paint off the top of the box, too…
Restocking the AA and AAA alkaline cell supply delivered this example of underprotection from Amazon:
Amazon Packaging – alkaline batteries
I think that scrap of plastic was once an air pillow, but it sure didn’t last long and definitely didn’t fill the entire space around the boxes.
Allowing that much mass to thrash around inside the box can’t possibly be a Good Thing, even if the cells weren’t damaged. One would hope they’d do a better job with lithium cells.
The shelf that collects old hard drives filled up, so I’ve been wiping the data before recycling them. This takes a while, but we know what happens when your hardware falls into unexpected hands. The routine goes a little something like this…
Set the drive’s jumper to Master, plug the drive into the USB adapter, plug the adapter directly into a USB port on the PC (because outboard hubs tend to be flaky), make sure there’s no valuable data, unmount.
time sudo dd if=/dev/urandom of=/dev/sdc bs=4096
[sudo] password for ed:
dd: error writing ‘/dev/sdc’: No space left on device
73259047+0 records in
73259046+0 records out
300069052416 bytes (300 GB) copied, 22276.7 s, 13.5 MB/s

real	371m19.003s
user	0m22.884s
sys		370m34.906s
Good old dd works for me; the only trick is not obliterating the system’s main hard drive with a simple finger fumble. Numbers from /dev/urandom suffice for this purpose; that’s where most of the packaged programs get their data, too. I do hardcore style, just because.
Ordinary desktop drives, at least those from long ago, can write at a bit over 12 MB/s → 40 GB/h on the average, with the higher peak rates that generally appear in the drive descriptions remaining an occasional sight. They won’t go much faster, even when plugged directly into the system board, but it’s not as if I sit there waiting until it’s done. USB 2.0 “high speed” transfers can hit 60 MB/s, including all the overhead, so that’s not the limiting factor; I’d expect the adapter’s firmware to throttle the data long before the bus strangles.
Use gparted to write a fresh partition table with a single NTFS (because the next user will probably run Windows) partition labeled Scrubbed spanning the entire drive.
Then stack the drive neatly on the outbound heap:
Scrubbed hard drives
That cardboard box isn’t quite as full of unscrubbed drives as it was a few weeks ago.
The stack in the back contains all those worthless 30 to 80 GB 5400 RPM drives from old Dells, plus a few 1.5 and 2.0 (!) GB drives from who knows where. I have a plan for those platters…