When the driveway runs yellow in the rain, it’s pine pollen season:
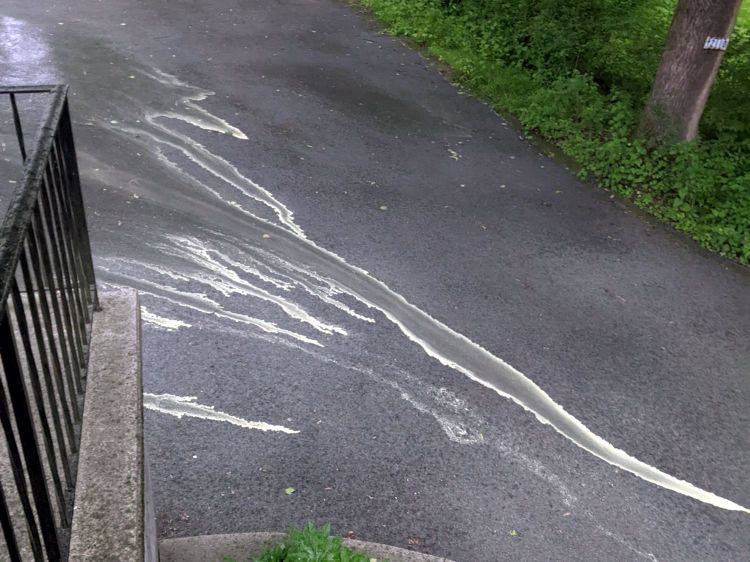
Our robot vacuum snuffles up quite a collection of dust:

Peeling a layer of the usual fuzz off the filter reveals the pollen:

This, too, shall pass and my eyes will rejoice.
The Smell of Molten Projects in the Morning
Ed Nisley's Blog: Shop notes, electronics, firmware, machinery, 3D printing, laser cuttery, and curiosities. Contents: 100% human thinking, 0% AI slop.
Growing and sometimes fixing

When the driveway runs yellow in the rain, it’s pine pollen season:
Our robot vacuum snuffles up quite a collection of dust:
Peeling a layer of the usual fuzz off the filter reveals the pollen:
This, too, shall pass and my eyes will rejoice.

This is the season for erecting the structures upon which the pole beans will climb:

They’re made from a dozen small trees and branches of larger trees harvested around the yard. They last for a few years, just long enough for the next crop to reach useful lengths.
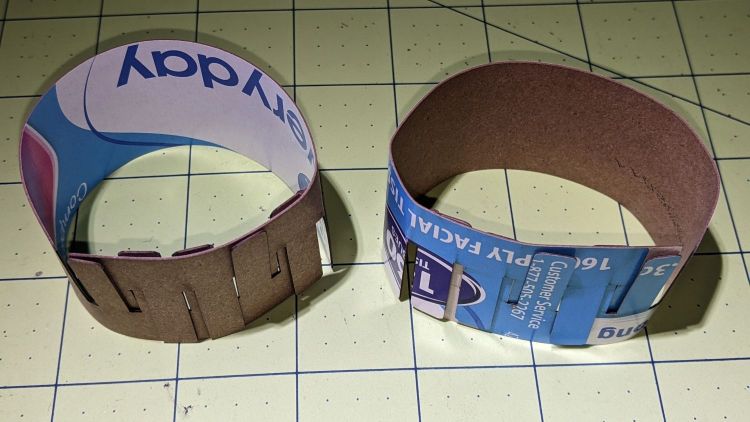
We lash them together with fabric strips:

My knot hand is weak, but seems sufficient to the task.
Mary formerly tore the strips from old jeans / pants / whatever, which required considerable effort, produced ragged edges, and filled the air with fabric dust. This year, I proposed an alternative:
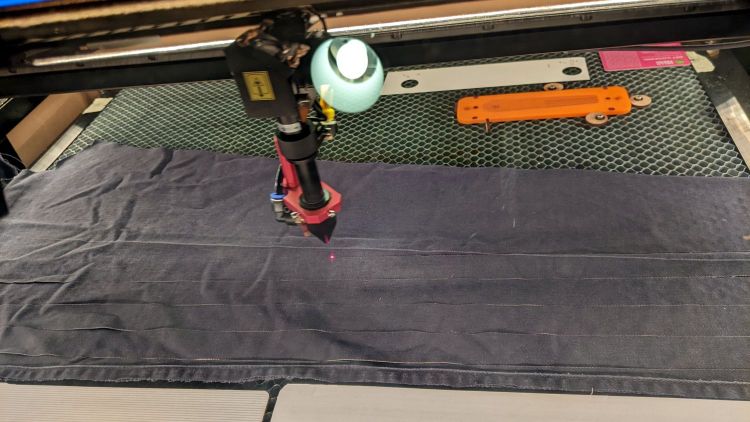
The weird thing in the middle is a reflection of an overhead can light in the laser cabinet’s polycarb lid.
From starting the LightBurn layout to presenting the strips for final inspection required the better part of ten minutes. I scissors-cut along the main seams to get single fabric layers, with everything above the crotch seam wadded off the platform to the left.
As with my shop raglets, the layout depends on LightBurn’s overhead camera view to align the cuts with the fabric on the platform:

It’d be easier to see with lighter fabric, but that’s what came to hand in the scrap box and the beans won’t care. We do not anticipate complaints about the odor of charred fabric when they reach the top of the poles, either.
The strips must align with the fabric’s grain to put the warp threads along their length, which makes the main side seam parallel to the X-axis. Even I can handle that layout!
Yes, the strips have rounded corners and, no, it doesn’t matter.
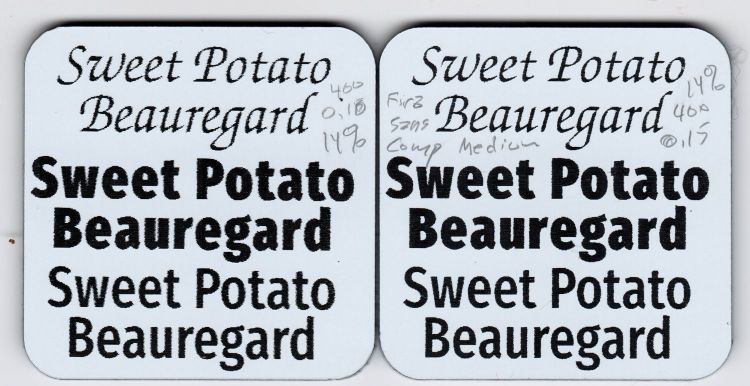
While calibrating the laser’s scan offset, I also tried various fonts:
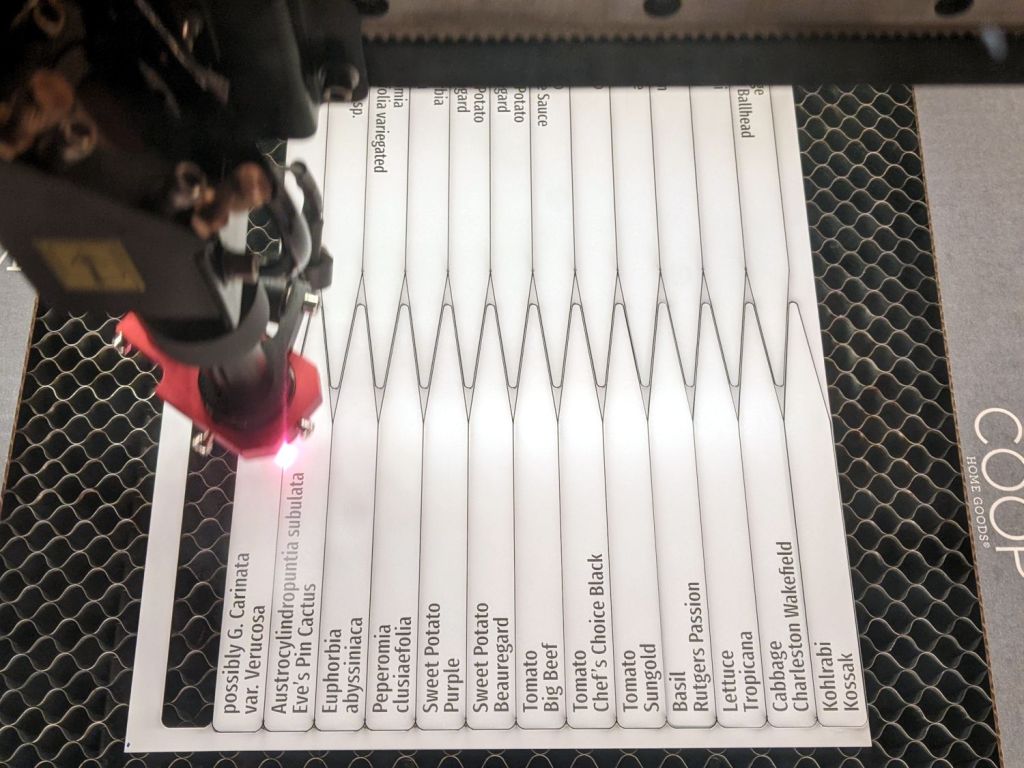
Putting two lines of the most-readable font inside an outline reverse-engineered from a few handwritten samples let me cut out a bunch of plant markers from white-on-black Trolase acrylic:

Which look downright dignified in real life:

Admittedly, sweet potato slips don’t require such extensive documentation:

Cutting the sheet flat on the honeycomb platform worked well, modulo Sadler’s warning about cutting acrylic, and a few smudges on the back of the markers will go unnoticed.
This was actually an excuse to use LightBurn’s Variable Text feature, so the tags contain formatting codes:

The codes give the position and format for text fields in a CSV file containing one line for each tag:
Austrocylindropuntia subulata,Eve’s Pin Cactus
Euphorbia,abyssiniaca
possibly G. Carinata,var. Verucosa
African Violet,Maui
Sansevieria trifasciata,Mother in law’s tongue
Plectranthus,'Mona Lavender'
The rules governing quoted strings and suchlike remain to be explored, but single quotes in the CSV file pass through unchanged.
Putting a tab at the point of the marker will prevent it from falling free when cut out, should you want to try raising the sheet above the platform to reduce the amount of crud accumulating on the back side.

For reasons not relevant here, I was tapped to replace the plastic parts attaching the handle to a garden cart:
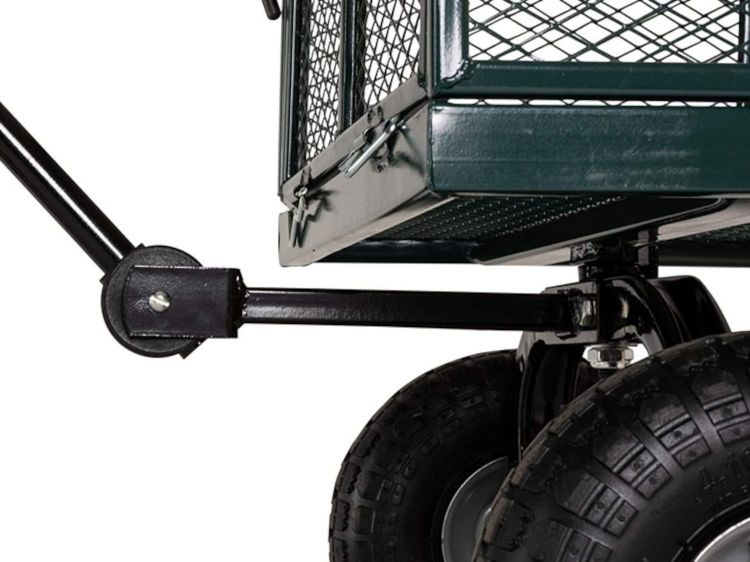
The owner tried to contact the “manufacturer” to no avail; repair parts are simply not available, even if the name painted on the cart had a meaningful relationship to anything else.
Well, I can fix that:
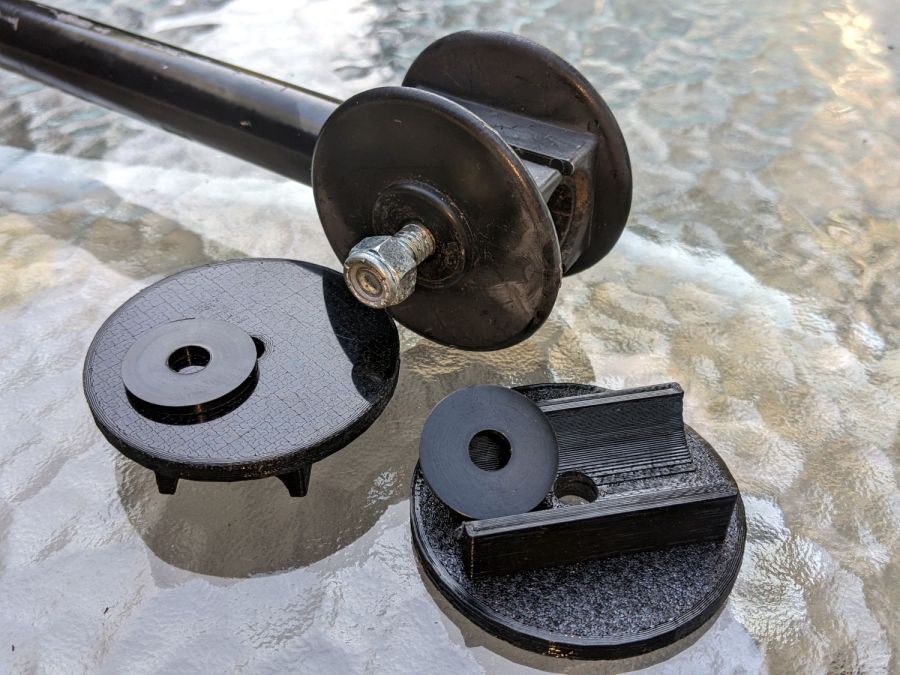
Fortunately, another cart in the fleet provided the missing bits so I could reverse-engineer their measurements.
The solid model looks about like you’d expect:
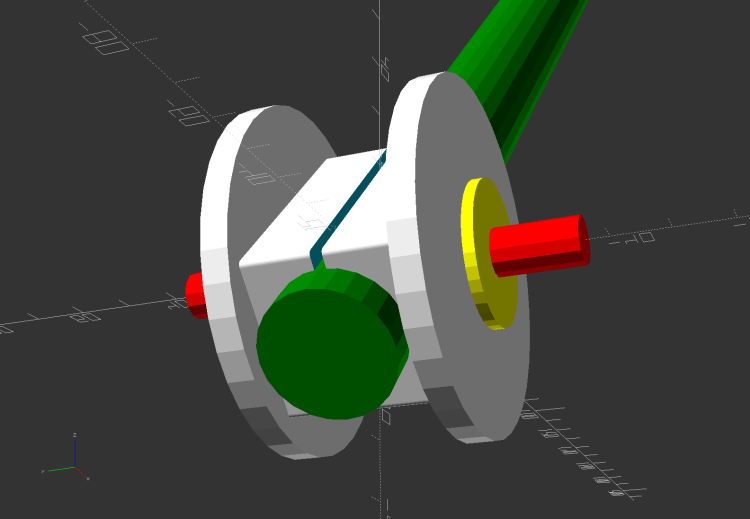
Printing the two halves with those nice (yellow) bosses in place wasn’t feasible. They were exactly 1 inch in diameter, so I just parted two cookies from the end of a stout acetal rod after drilling a hole for the 2-¼ inch 5/16-18 bolt.
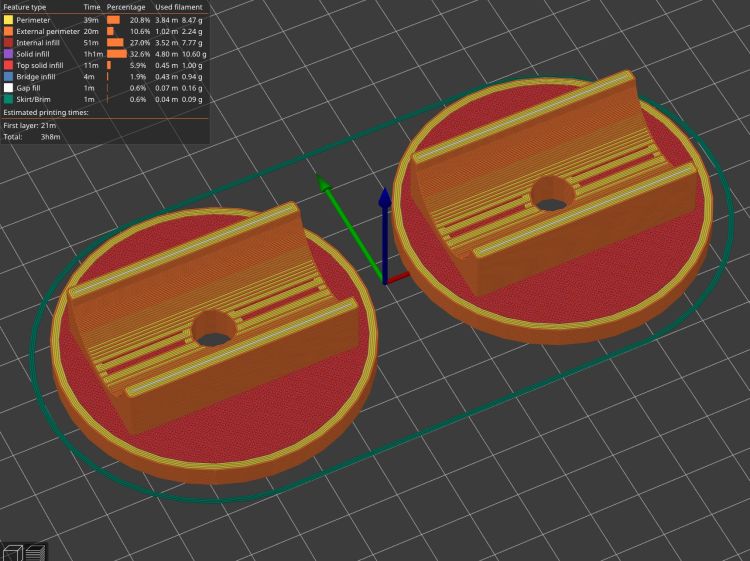
The two pieces took nigh onto three hours with five perimeters and 50% infill:
While delivering and installing the parts, I got volunteered to haul plants to cars with one of the carts during the upcoming Spring Plant Sale. That’ll teach me to stay in the Basement Shop …
The OpenSCAD source code as a GitHub Gist:
| // Garden Cart Handle Pivot | |
| // Ed Nisley KE4ZNU 2022-05 | |
| Layout = "Show"; // [Show,Build] | |
| /* [Hidden] */ | |
| ThreadThick = 0.25; | |
| ThreadWidth = 0.40; | |
| HoleWindage = 0.2; | |
| Protrusion = 0.1; // make holes end cleanly | |
| inch = 25.4; | |
| function IntegerMultiple(Size,Unit) = Unit * ceil(Size / Unit); | |
| ID = 0; | |
| OD = 1; | |
| LENGTH = 2; | |
| //———- | |
| // Dimensions | |
| // Handle lies along X axis | |
| HandleOD = (7/8) * inch; | |
| BoltOD = (5/16) * inch; | |
| Washer = [BoltOD,1.0 * inch,2.0]; // just for Show | |
| Disk = [BoltOD,62.0,(3/16) * inch]; | |
| ClampBase = [(1 + 7/8)*inch,(1 + 1/8)*inch,2.0]; | |
| Kerf = 2.0; | |
| CornerRadius = 1.0; | |
| PivotOA = [Disk[OD],Disk[OD],HandleOD + 2*ClampBase.z + 2*Disk[LENGTH]]; | |
| //———————- | |
| // Useful routines | |
| module PolyCyl(Dia,Height,ForceSides=0) { // based on nophead's polyholes | |
| Sides = (ForceSides != 0) ? ForceSides : (ceil(Dia) + 2); | |
| FixDia = Dia / cos(180/Sides); | |
| cylinder(d=(FixDia + HoleWindage),h=Height,$fn=Sides); | |
| } | |
| //———————- | |
| // Set up parts | |
| module Handle() { | |
| translate([-2*PivotOA.x,0,0]) | |
| rotate([0,90,0]) | |
| PolyCyl(HandleOD,4*PivotOA.x,24); | |
| } | |
| module Bolt() { | |
| translate([0,0,-PivotOA.z]) | |
| PolyCyl(BoltOD,2*PivotOA.z,12); | |
| } | |
| module Pivot() { | |
| difference() { | |
| union() { | |
| hull() | |
| for (i=[-1,1], j=[-1,1]) // rounded block | |
| translate([i*(ClampBase.x/2 – CornerRadius),j*(ClampBase.y/2 – CornerRadius),-PivotOA.z/2]) | |
| cylinder(r=CornerRadius,h=PivotOA.z,$fn=4*8); | |
| for (k=[-1,1]) | |
| translate([0,0,k*(PivotOA.z/2 – Disk[LENGTH]/2)]) | |
| rotate(180/36) | |
| cylinder(d=Disk[OD],h=Disk[LENGTH],$fn=36,center=true); | |
| } | |
| Handle(); | |
| Bolt(); | |
| cube([2*ClampBase.x,2*ClampBase.y,Kerf],center=true); // slice through center | |
| } | |
| } | |
| //———- | |
| // Build them | |
| if (Layout == "Show") { | |
| rotate([90,-45,0]) { | |
| Pivot(); | |
| color("Green") | |
| translate([2*PivotOA.x – PivotOA.x/2,0,0]) | |
| Handle(); | |
| color("Red") | |
| Bolt(); | |
| color("Yellow") | |
| for (k=[-1,1]) | |
| translate([0,0,k*(PivotOA.z/2 + Washer[LENGTH])]) | |
| rotate(180/36) | |
| cylinder(d=Washer[OD],h=Washer[LENGTH],$fn=36,center=true); | |
| } | |
| } | |
| if (Layout == "Build") { | |
| Offset = 5.0; | |
| intersection() { | |
| translate([-(PivotOA.x/2 + Offset),0,PivotOA.z/2]) | |
| Pivot(); | |
| translate([-2*PivotOA.x,-2*PivotOA.y,0]) | |
| cube([4*PivotOA.x,4*PivotOA.y,PivotOA.z/2],center=false); | |
| } | |
| intersection() { | |
| translate([(PivotOA.x/2 + Offset),0,PivotOA.z/2]) | |
| rotate([180,0,0]) | |
| Pivot(); | |
| translate([-2*PivotOA.x,-2*PivotOA.y,0]) | |
| cube([4*PivotOA.x,4*PivotOA.y,PivotOA.z/2],center=false); | |
| } | |
| } | |
Mary, having had considerable trouble with cutworms in her gardens, routinely deploys cardboard collars around new plants:
It seems cutworms trundle around until they find an edible plant, chew through the stem and topple the plant, then trundle off without taking another bite. A small cardboard barrier prevents them from sensing the plant: apparently, motivation to climb a short wall hasn’t yet evolved.
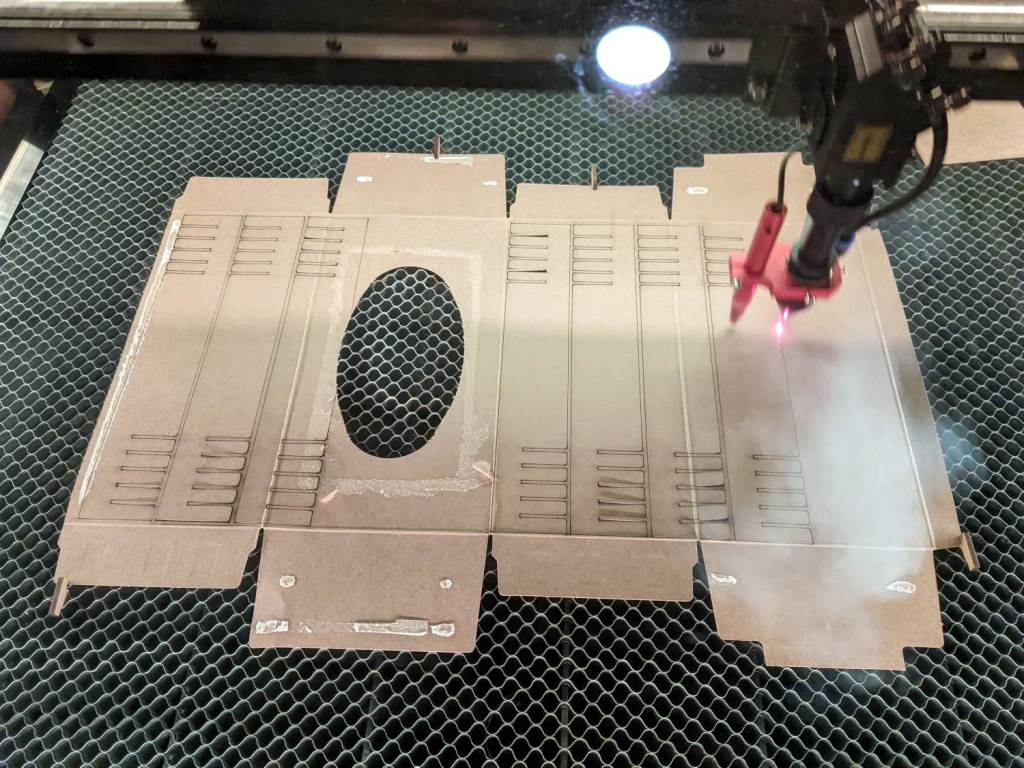
Up to this point, Mary applied scissors to tissue boxes, but I proposed an alternative with an adjustable fit to any plant:

A splayed cardboard box rarely lays flat, a condition enforced by a few MDF stops used as clamps.
Come to find out no two tissue boxes have identical dimensions, even boxes from the same brand / retailer, so lay out duplicates of the collar template to match your stockpile.
That was fun!
The SVG image as a GitHub Gist:
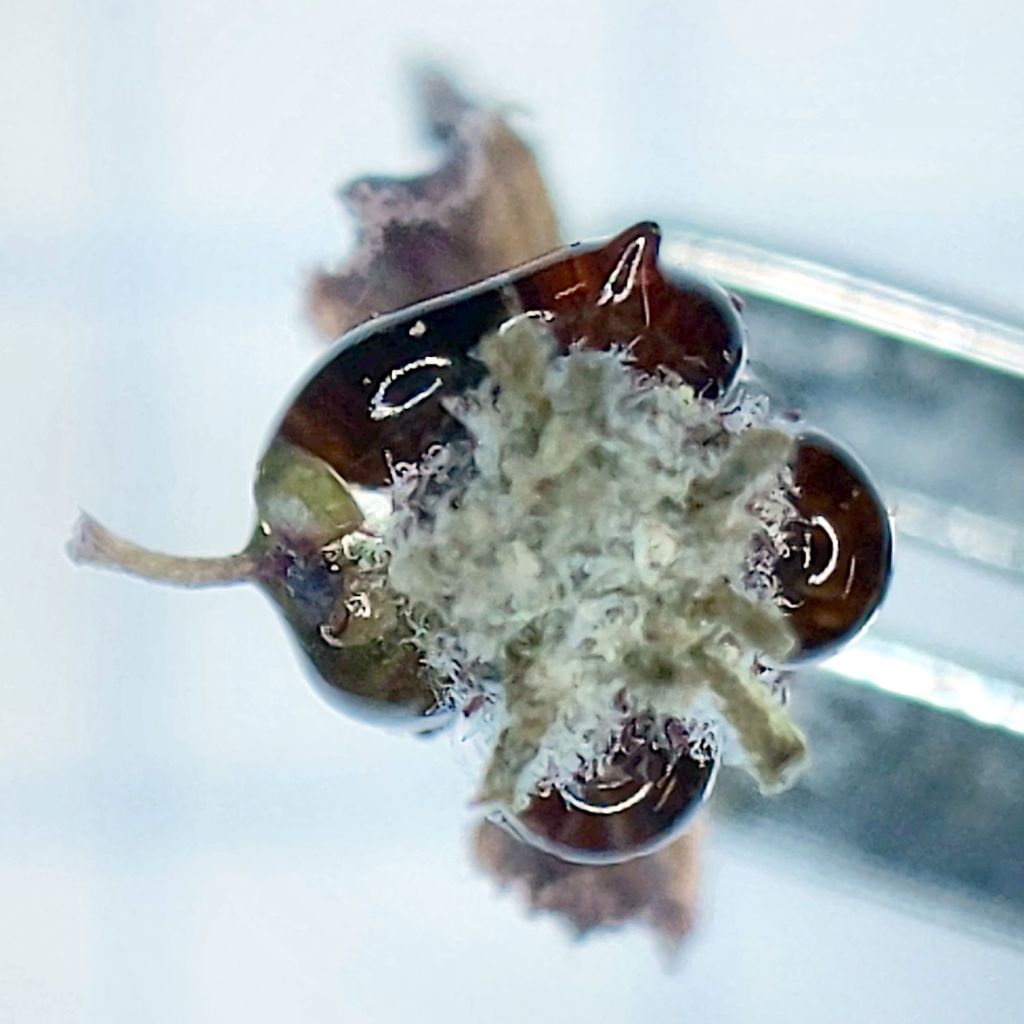
A Euphorbia horrida (one of the prickly plants) on the shelves just inside the front window burst into bloom:

The flowery part looks unappetizing, but some critter must find the blooms attractive:

The small reddish balls look like the desert equivalent of nectar, as they’re viscous to the point of solidity:

I’m unwilling to experiment, but the resin ought to very sweet, lethally toxic, or wildly hallucinogenic. Maybe all three at once?
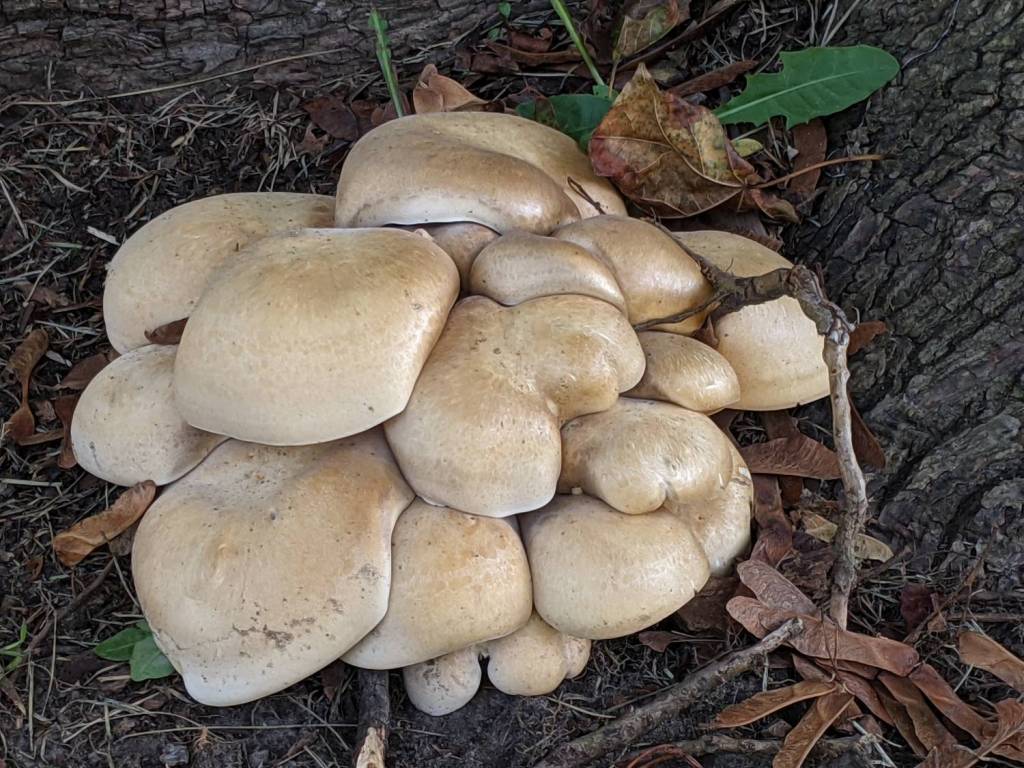
We spotted a plump mushroom cluster nestled at the base of a neighbor’s tree:

Eight days later they’d started curling:

Mushrooms growing on tree roots generally mean the tree is in trouble and, indeed, it’s a battered Black Locust.
