Ed Nisley's Blog: Shop notes, electronics, firmware, machinery, 3D printing, laser cuttery, and curiosities. Contents: 100% human thinking, 0% AI slop.
They’re not fancy marquetry, but they look pretty good:
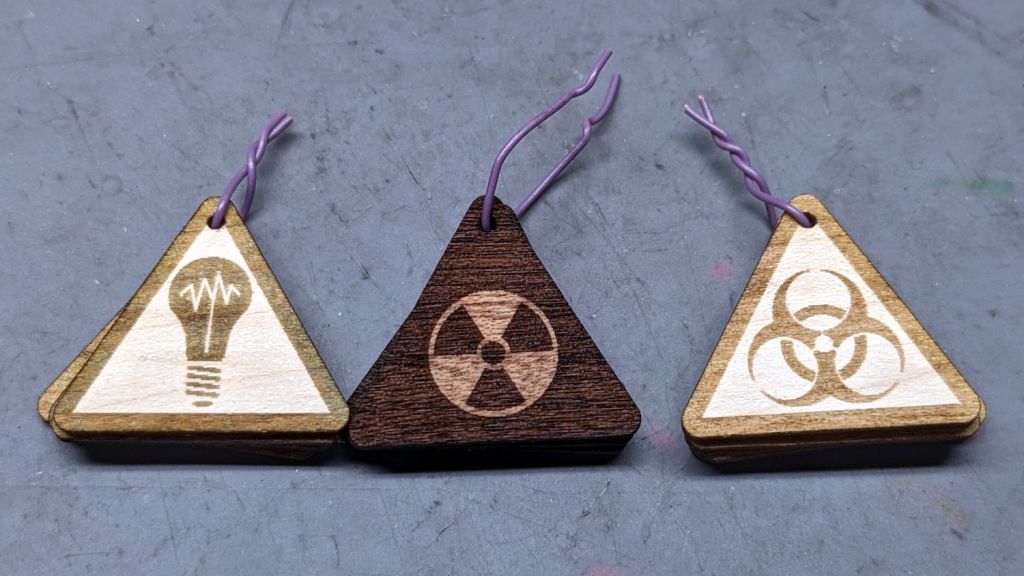
SCP Earrings – wood veneer
The darker areas are laser-engraved with the usual SCP warning label geometry.
The left set was engraved through blue masking tape, which increased the exposure, added no benefit, and required fiddly cleanup. Won’t make that mistake again.
The middle one has the darkest wood of the set with the lighter part not exposed to the laser.
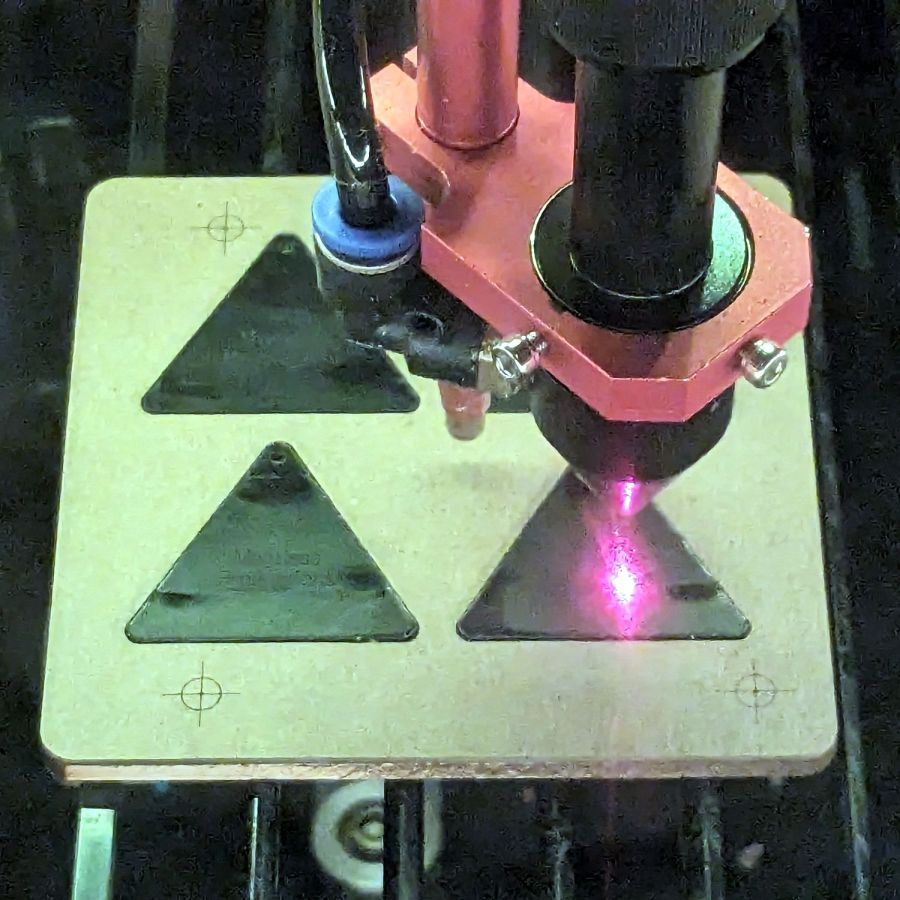
Rather than make another fixture for the backside branding, I cut adapters using the two outlines and dropped the hollow triangles into the fixture:
SCP Earrings – wood cutting fixture
Two layers of veneer feel about right, although the layers should not have their grains oriented in parallel as these do. The PSA sheet on the back veneer holds them together, but they’re too flexy for confidence.
The contrast between gentle natural wood (using a generous interpretation of “natural” for veneer with a PSA layer) and the SFnal SCP warning label symbology is definitely amusing.
A chance encounter in the acrylic scrap box led to a radioactive einstein:
SCP Earrings – Radioactive einstein
That was so easy it’s gotta be either criminal or sinful.
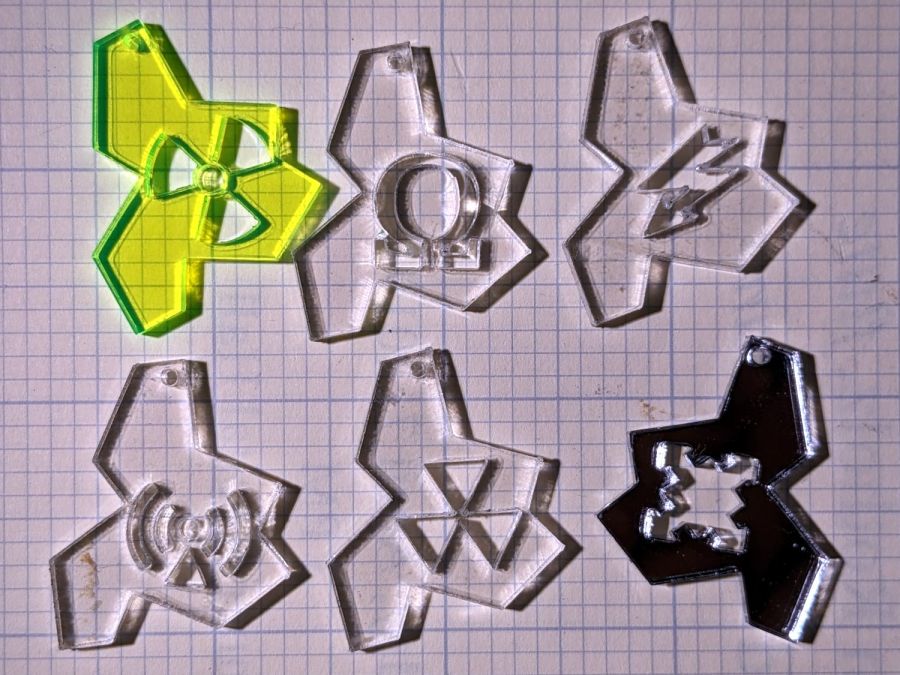
A few test on scrap acrylic while tweaking the SCP warning label geometry showed only a few work well at such a small scale:
SCP Earrings – einsteins
The mirror in the lower right got cut from the back side, making it the mmmm mirror image of the others.
IMO these would look and cut better in 1.5 mm acrylic, but it seems edge-lit acrylic only comes in 3 mm sheets.
They are absurdly fragile across the waist, but my admittedly limited exposure to fine jewelry suggests durability ranks low in the selection checklist.
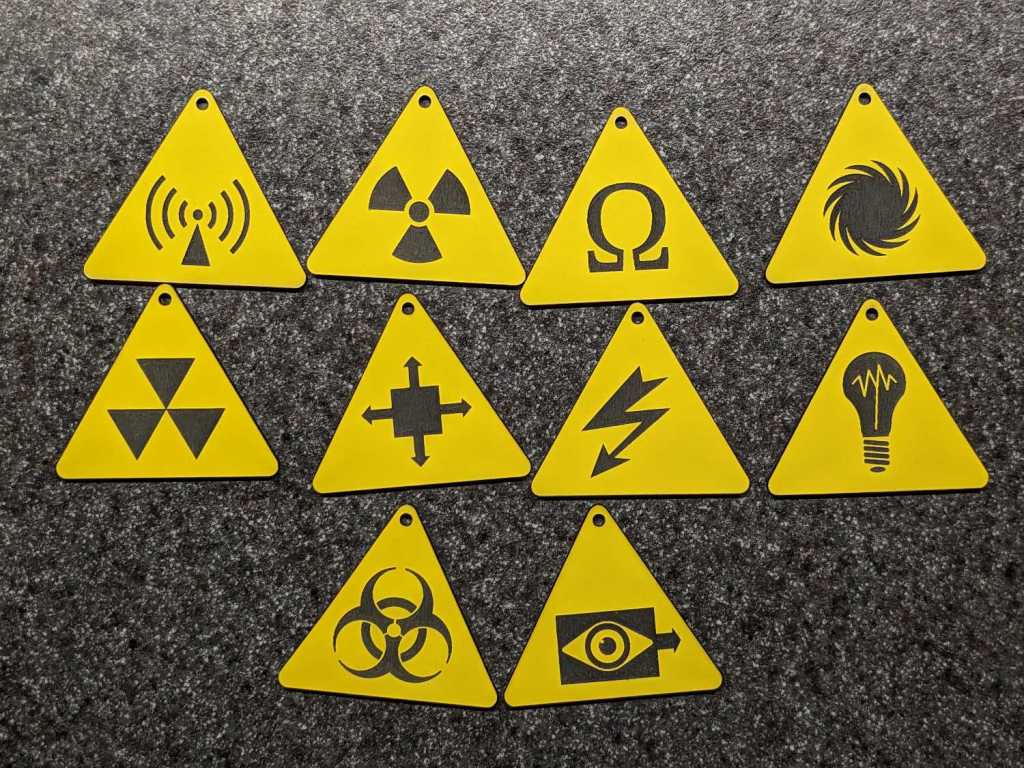
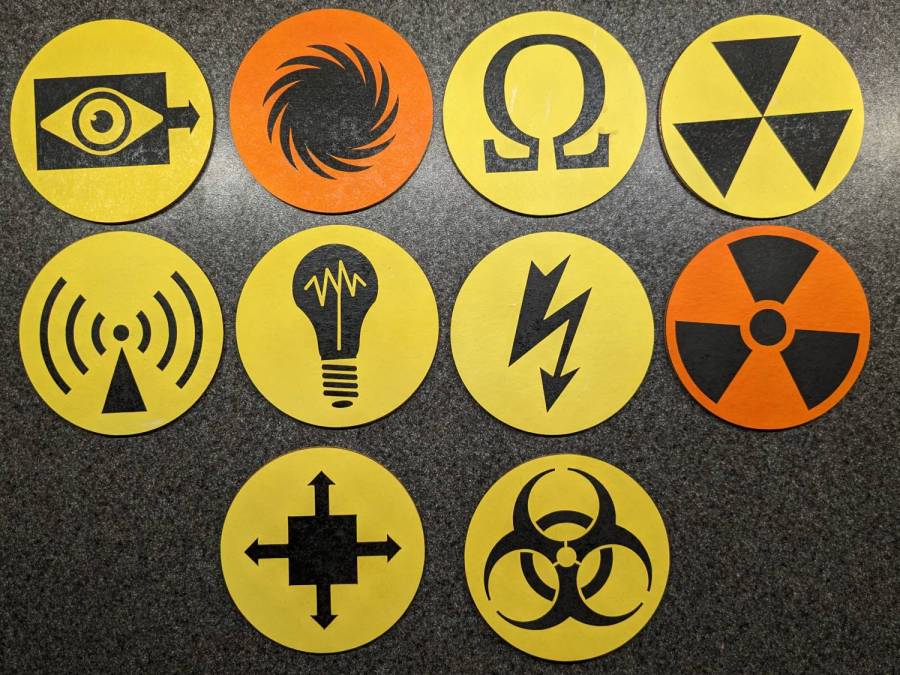
The alert reader will note two missing holes due to an unfortunate oversight while rearranging the layout. One can adroitly fix such errors if the cut shapes don’t move, which is how it worked out:
SCP Earrings – Trolase
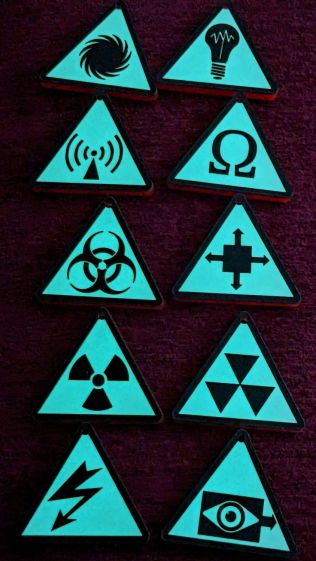
With the obverse done, another fixture aligns them for a branding pass on the reverse:
SCP Earrings – Trolase – branding
This is starting to make sense in a peculiar sort of way …
I particularly like the Cognitohazard and Autonomous Object symbols. The Nonstandard Spacetime symbol comes in dead last; if you make one, use very little kerf offset.
Come to find out yellow is utterly unforgiving of smudges / smoke stains; orange is better, albeit non-canon. I cut them face-up through a layer of blue masking tape, which worked surprisingly well, except for a few areas where I didn’t apply enough paint: the chipboard fibers became one with the tape.
The cork disks arrive pre-cut with a PSA sheet, so using a jig for better alignment with the assembled chipboard layer would be a Good Idea™. These were assembled by feel, which is good for about half a millimeter.
A better process: cut an array of the shapes from a large yellow sheet, fit the black inlays from the back, stick the whole affair to a large cork sheet, then cut the circular outlines where small misalignments wouldn’t matter.
In production, it would make more sense to cut all the pieces from blank white chipboard, paint them in groups, then assemble everything.
Best: having me realize nobody else wants coasters.
The black-on-white look come from vinyl PS atop GITD tape atop some transparent red acrylic, which looks a whole lot better in its natural environment:
SCP Earrings – GITD in action
Making those ten samples requires 15 minutes of laser time (mostly kiss-cutting the patterns at maybe 5 mm/s) and another 25 minutes of weeding and primping. I’m not convinced this is an economically feasible activity, but I really like the results.
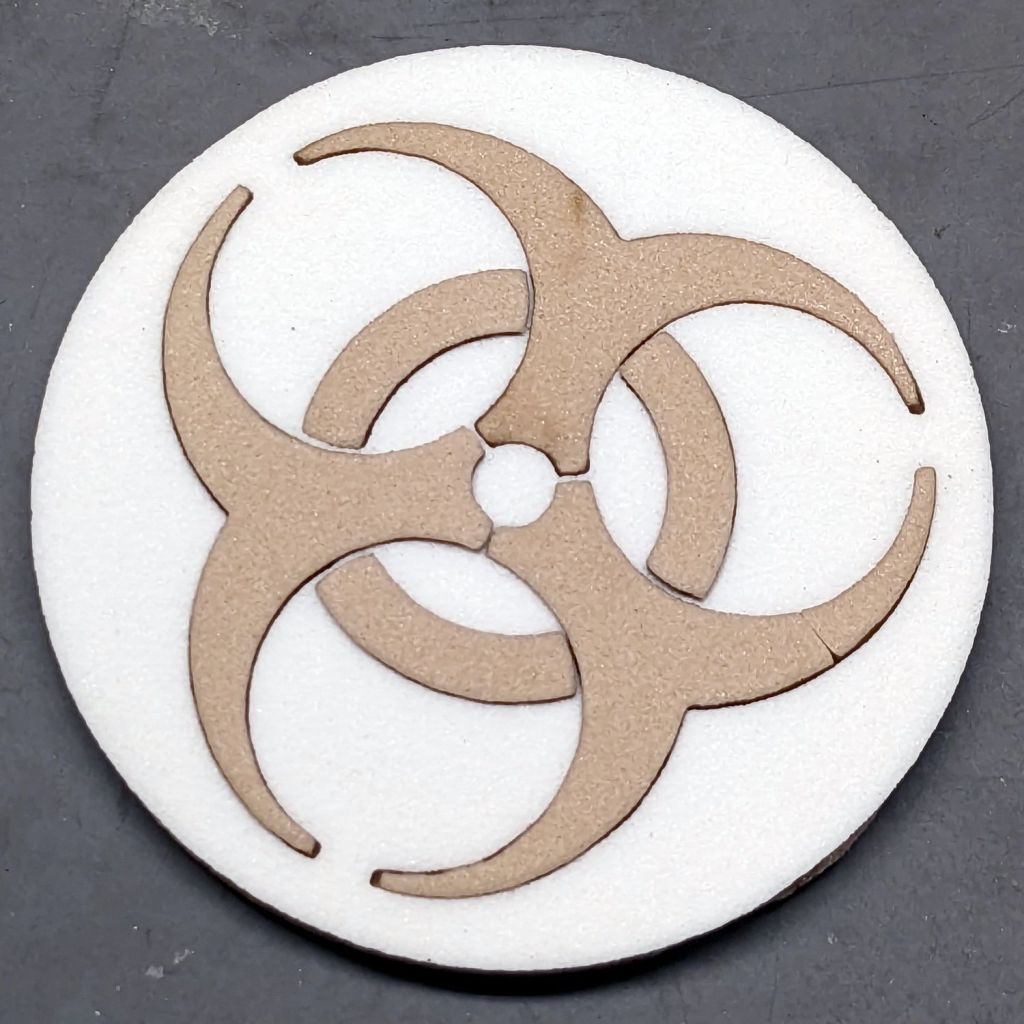
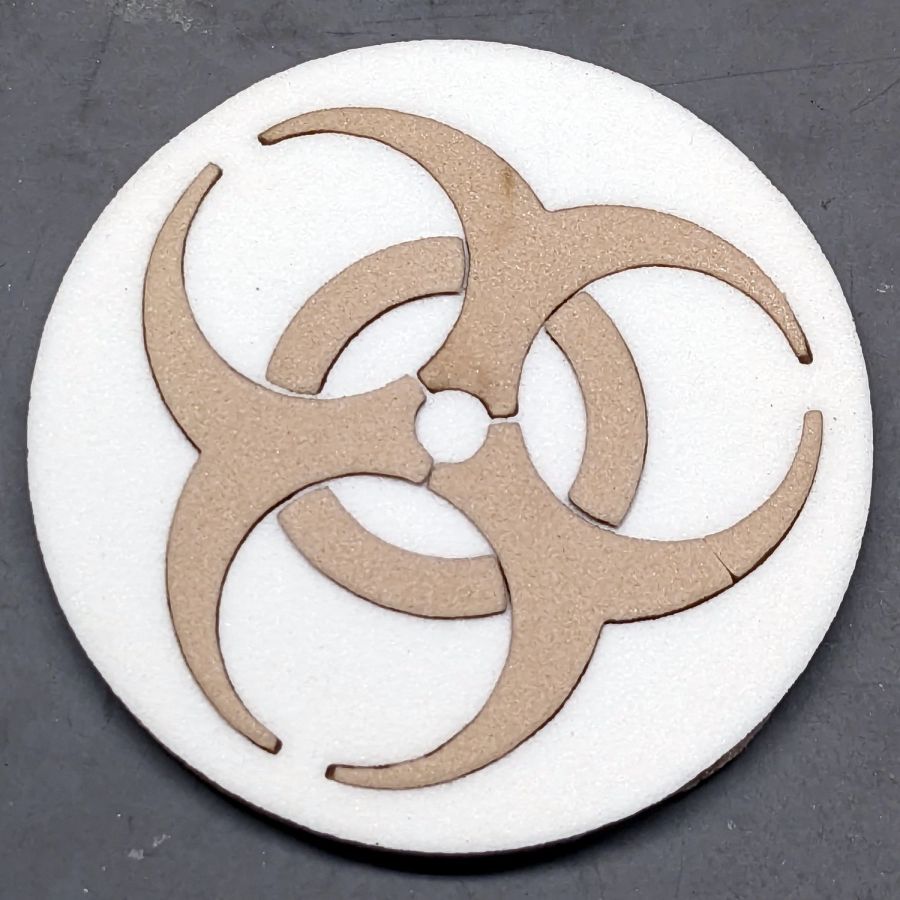
A small coaster laser-cut from scraps of EVA craft foam:
Biohazard foam coaster
It’s all of 60 mm OD, so not particularly practical, but it (and its predecessor, a complete botch) helped show the laser kerf in EVA foam is an astonishing 0.6 mm, when cut at 125 mm/s with maybe 30 W.
The white outer shape is the nominal size, so holes are 0.3 mm larger on all sides than the pattern. The tan inner shapes get a 0.6 mm outset (!) to make them larger, which definitely squared up the horn tips. The fit is snug, but another 0.1 mm might be even better.
The pieces stick to a 60 mm circle cut from cork with a PSA layer, which makes it entirely too bendy.
If you wanted to do this for real, all the patterns would require tweakage to make the smallest features about 2 mm. The huge kerf ate the 1 mm struts around the central white disk and the tan circles should clear the horn stems by 1 mm, so that’s just barely enough.