Ed Nisley's Blog: Shop notes, electronics, firmware, machinery, 3D printing, laser cuttery, and curiosities. Contents: 100% human thinking, 0% AI slop.
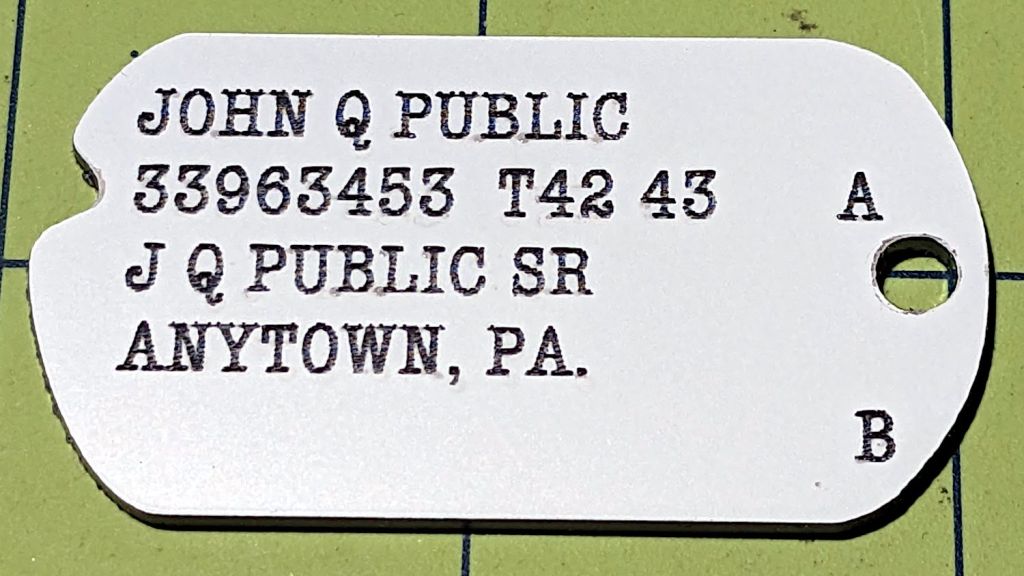
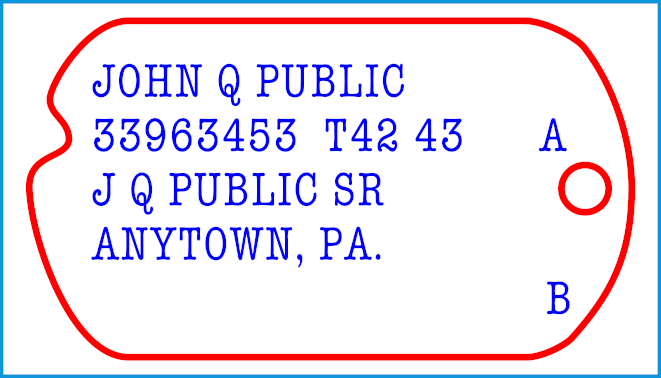
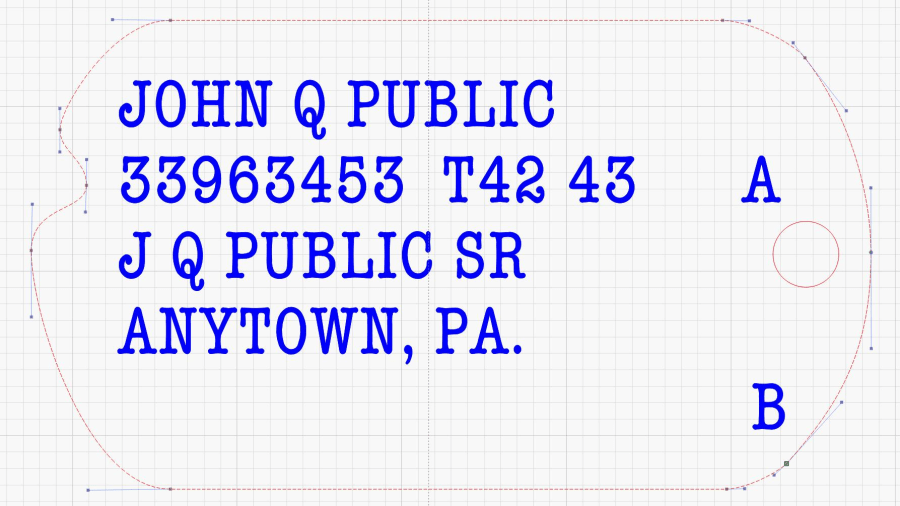
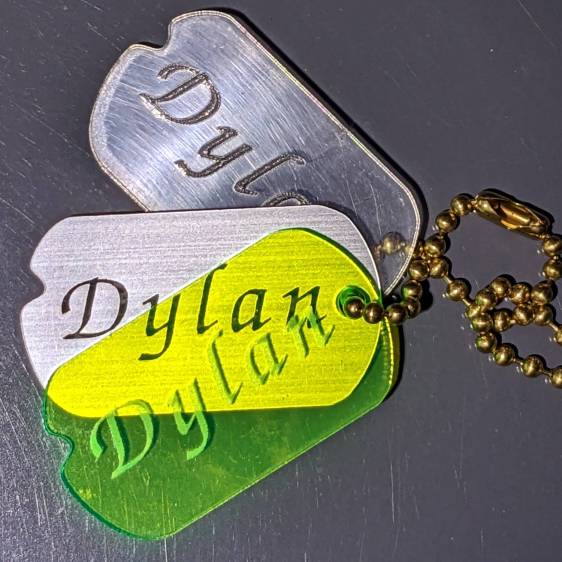
The outline traces a scanned image of my father’s tag, fitting a few hand-laid splines around the curves:
John Q Public – WWII dog tag – spline curves
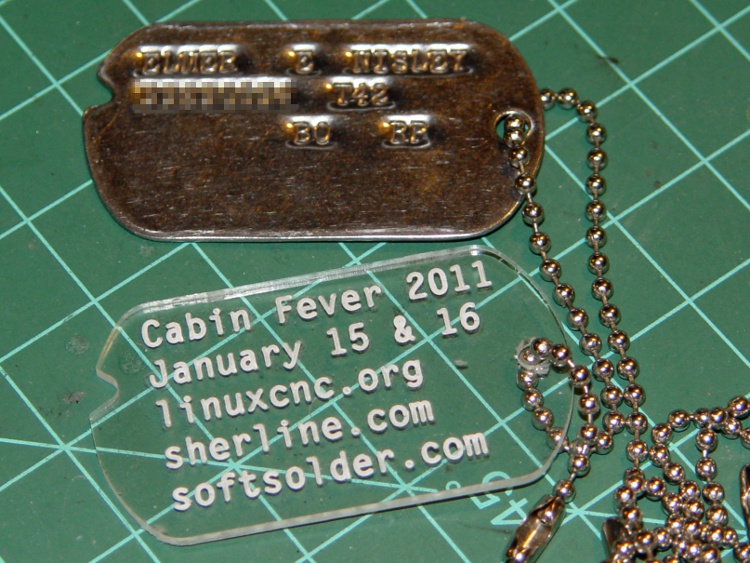
I generated a random serial number based on my father’s draftee status (he was in his early 30s during his South Sea Island tour) and state of residence; my apologies to anyone carrying it for real. His blood type was A and (I think) the religion code marks him as “Brethren”, a common group in my ancestry.
Given the outline, various plastics, and a laser, other effects become possible:
Other than demonstrating that it’s possible to laser-engrave a 3 mm deep pocket in a ¼ inch thick piece of scrap paneling, the process didn’t have much to recommend it:
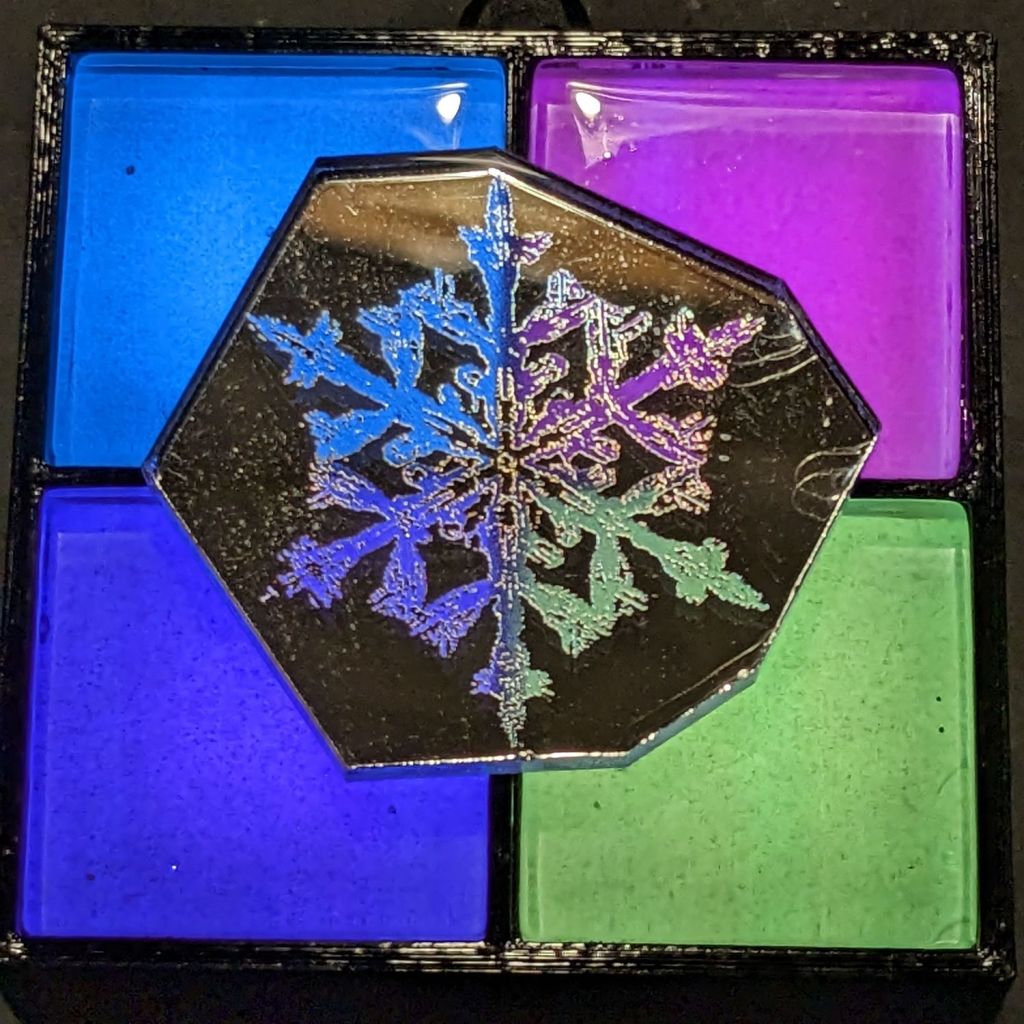
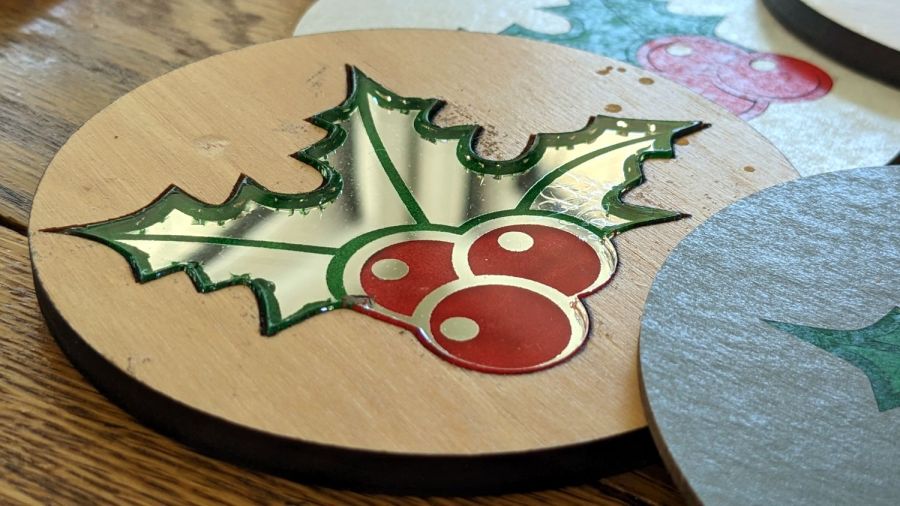
Holly Coaster – mirror flaws
So I re-did the layout to put the 3 mm mirror in 3 mm thick plywood:
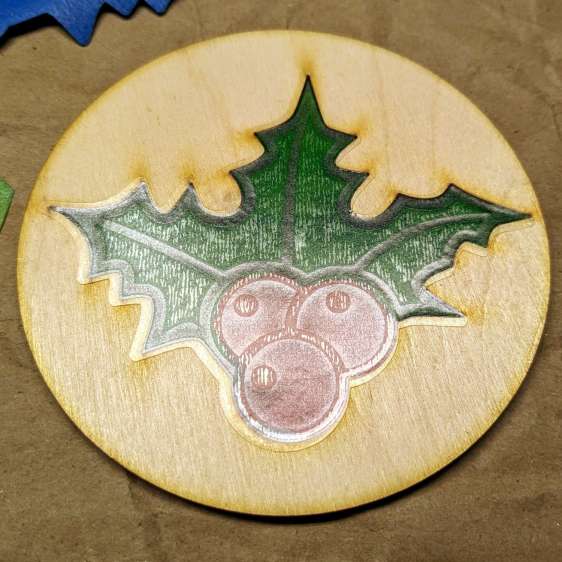
Holly Coaster – overview
The coaster has a self-adhesive cork pad on the bottom, which required an intermediate adhesive layer holding the aluminized Mylar reflector on the bottom of the mirror to brighten the colored areas.
The LightBurn layout shows all the pieces:
Holly Mirror Coaster – LB layout
The plywood cuts with the good side down, although “good” is certainly a judgement call with B/BB grade plywood. I cover the good side with blue painter’s tape to reduce scorch marks. In a real application, you’d do some sanding and finishing, probably before cutting; in this case, I want to see what happens to bare wood in coaster duty.
Engrave and cut the mirror with the backing upward:
I colored the engraved areas with fat-tip permanent markers, despite knowing the alcohol will crack the acrylic. In real life, you’d use spray paint, probably with laser-cut tape masks.
The adhesive layer extends 2 mm beyond the mirror perimeter to stick onto the bottom face of the plywood:
Holly Coaster – adhesive placement
Peeling off the paper reveals the adhesive tape stuck to the back side of the mirror:
Holly Coaster – adhesive exposed
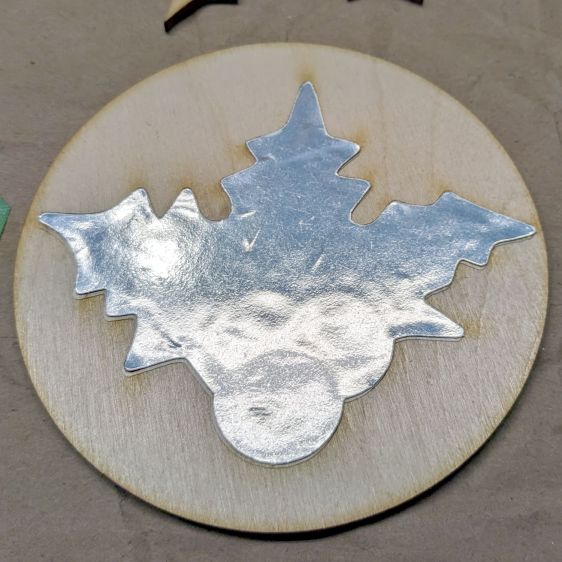
Apply the similarly embiggened aluminized Mylar to the adhesive:
Holly Coaster – mylar placed
Cutting the holly shape directly from the original foot-square adhesive sheet lets me tuck smaller shapes into the remaining uncut areas. In a production environment, however, joining the Mylar and adhesive (perhaps using pre-cut squares), then cutting them as one sheet would definitely simplify the process.
Then peel-n-stick a cork disk (thus explaining why the plywood is exactly 4 inch OD) on the bottom:
Holly Coaster – edge view
I’ve been aligning the cork by feel, which explains the half-millimeter overhang along the right side. Inexplicably, I have yet to justify an alignment fixture.
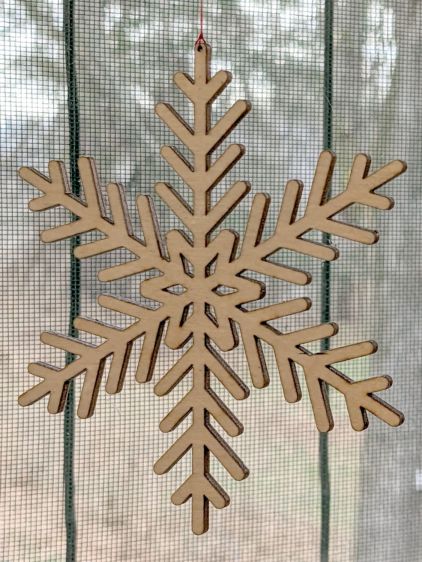
After the first two snowflake coasters, it finally penetrated my thick skill that putting a 1 mm hole in the flake cut from the center of the plywood would convert it into a decorative window hanging:
Snowflake Hanger – plywood
Admittedly, I may be using the word “decorative” in a manner you had not previously encountered, but work with me on this.
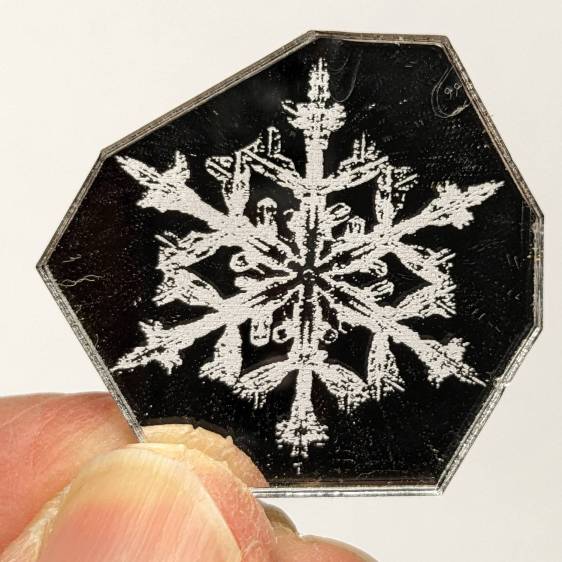
Cutting a similar flake from transparent acrylic looks better:
Snowflake Hanger – blue acrylic
Transparent acrylic turned out to be, well, too transparent, so I set up a LightBurn layout to “engrave” a light frosting on the flake before cutting it out:
Snowflake Hangers – engraving in situ
That worked for all subsequent flakes, but I had to do something about the first few flakes. After realizing that the time to engrave an object depends only on its width, I set up a rectangle with the proper parameters, snugged two forlorn flakes next to each other, and fired the laser:
Snowflake Hangers – retroactive engraving
I thought using cardboard was a Good Idea™ for a stable backing, but lightly vaporizing the top layer produced an unbelievable amount of filth:
Snowflake Hangers – frosted
I had to scrub those poor flakes with dish detergent and a toothbrush to get them even close to their former pristine state; the blue one may never recover.
Anyhow, frosted flakes look good if you don’t look closely:
Snowflake Hangers – frosted
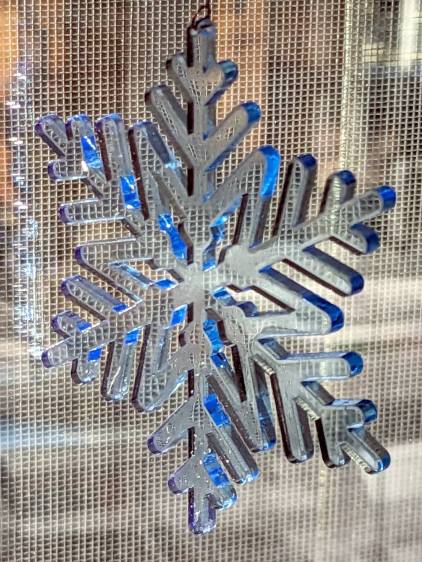
The grid pattern comes from the window screen in direct sunlight; the vertical bars are DIY BirdSavers.
The LightBurn layout produces 120 mm coasters to fit my 20 ounce mugs:
Snowflake Coaster 120 mm – LB Layout
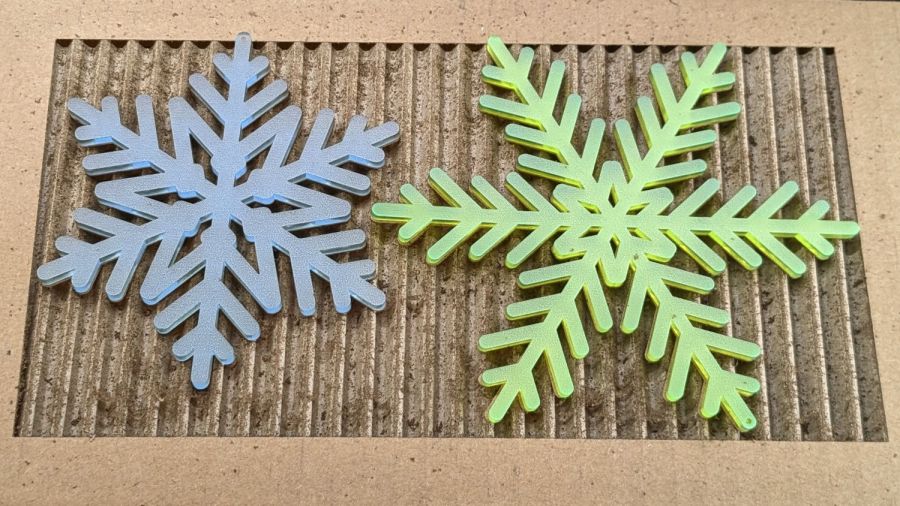
You get two hanging flakes: one plain plywood and one frosted acrylic!
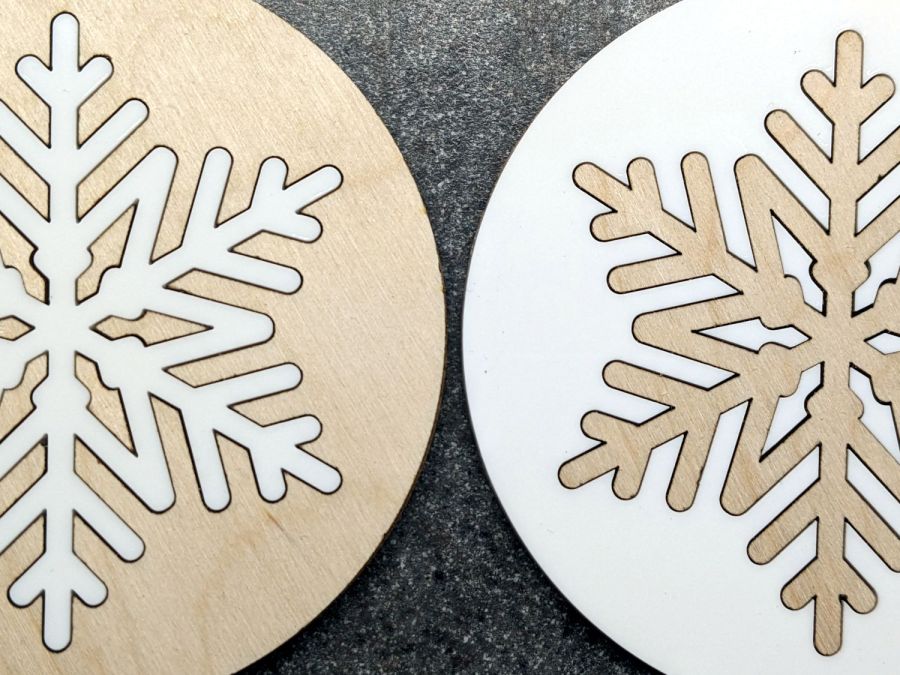
The two on the left are the original snowflakes with interchanged innards and, perforce, no kerf compensation.
The upper-left coaster has a wood flake surrounded by acrylic, which makes a sharp clack when you set a glass down on it. The wood surrounds emit a much more pleasing clunk.
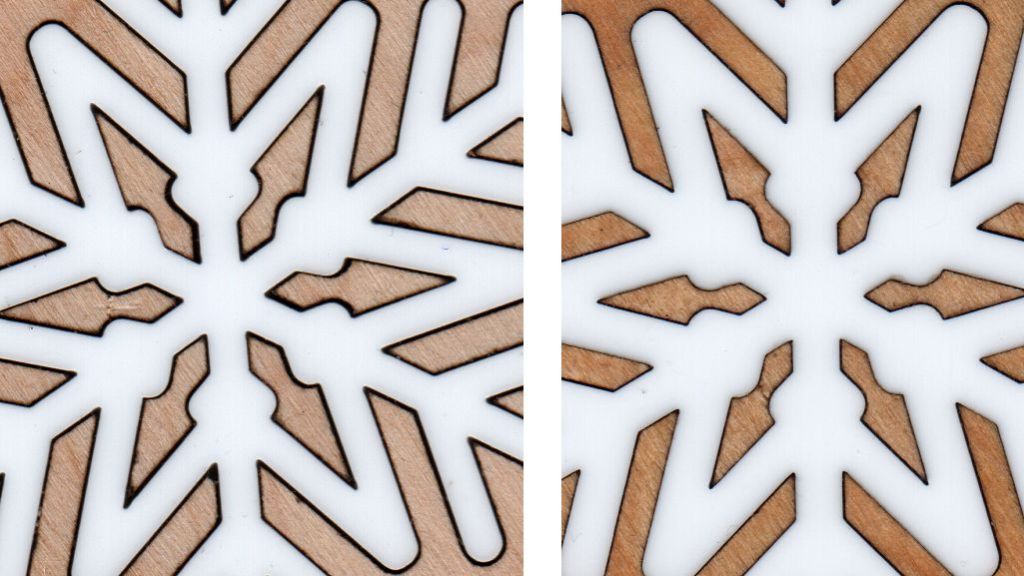
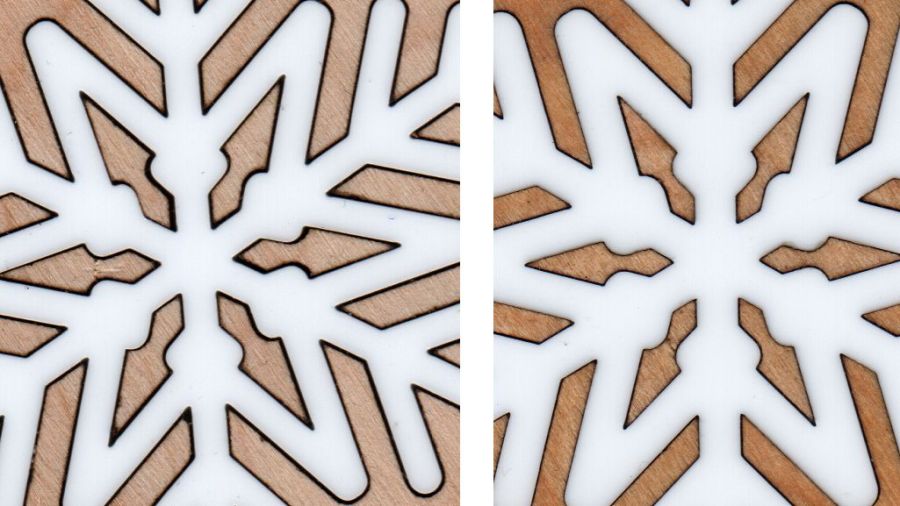
The next two have 0.1 mm compensation applied to their acrylic snowflakes, which produces snug fit (original on the left, compensated on the right):
Snowflake Coasters – kerf corr 0.0 vs 0.1 mm
Applying 0.2 mm compensation makes the flakes impossible to push in, so the true compensation is somewhere just over 0.1 mm. I think you could optimize for a specific wood and acrylic combination, but, as with 3D printing, any change requires something different.
The little arrowhead shapes tend to get lost, so collecting them on a strip of tape while you’re hunting in the chip tray helps:
Snowflake Coasters – plywood cutouts
The dark flake on the right got a coat of walnut stain, as did the two darker coasters in the first picture. It looks better in person than in the photo, although Mary still thinks the lighter wood sets off the white acrylic just fine.
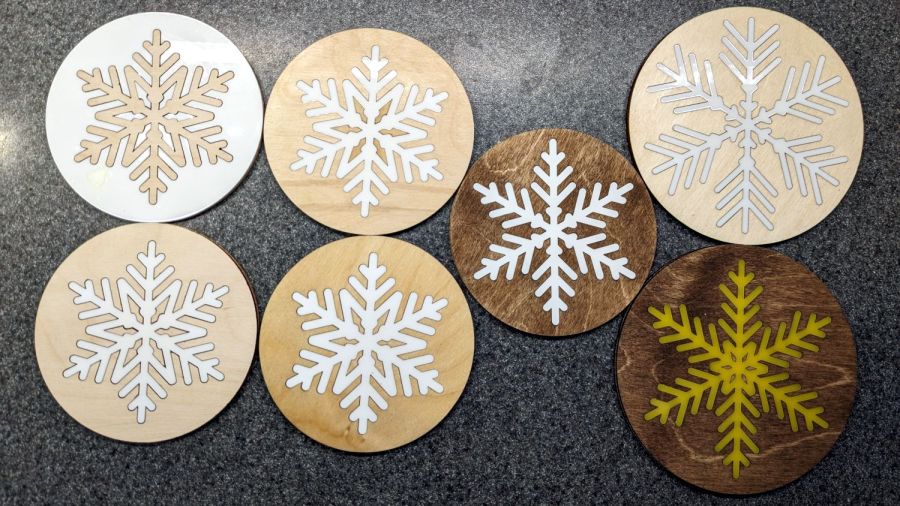
The two large (120 mm OD) coasters fit my 20 ounce mugs, with the Nanook Memorial Coaster in the lower right.
The rattlecan chipboard coasters having passed their Best Used By dates, I figured a more durable seasonal version was in order:
Snowflake Coasters – overview
I laid out the design with the intent of cutting an acrylic snowflake with a bit of compensation to fit snugly into a plywood background:
Snowflake Coaster – LB layout
At the last moment I realized I could just cut two of the patterns on the left, swap the snowflakes, and get two coasters with very little scrap:
Snowflake Coasters – detail
Mary thinks the gap between the snowflake and the background looks OK. I’m not convinced, but studying the results suggests applying enough kerf compensation to close the largest gaps would results in the rest of the flake not fitting into its socket. Plus, of course, you’d have more scrap.
Embiggening the small dagger-shaped pieces around the center would be an improvement. Perhaps cutting those as a separate operation after arranging them in a corner would work.
Protip: Align the grain in those daggers with the rest of the plywood, because It Will Be Very Obvious if you don’t.
Applying a nice wood stain / finish to the plywood, perhaps before cutting it out, would certainly improve the result.
Invisible on the bottom: self-adhesive cork disks eliminating the need to glue the pieces to something else. I had thought of a blank plywood or MDF disk, but came to my senses just in time.
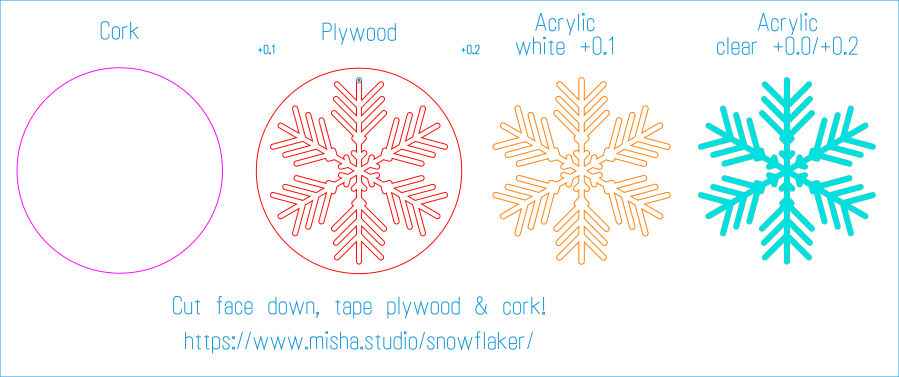
The original SVG fell with a blizzard from one of the many SVG snowflake generators out there. Because LightBurn uses only the stroke centerlines of SVG images and ignores the stroke width, it required some tweakage before becoming a coaster.
After saving an SVG flake from the blizzard, fire up Inkscape:
Import the SVG file
Center it in whatever page you’re using
Ungroup the flake from the frame (if it has one)
Delete the frame to leave only the flake
Select the flake
Invoke Path → Stroke to Path
Save as an SVG image under a new file name
Then fire up LightBurn:
Import the tweaked SVG file
Assign a layer with line (rather than fill) parameters


