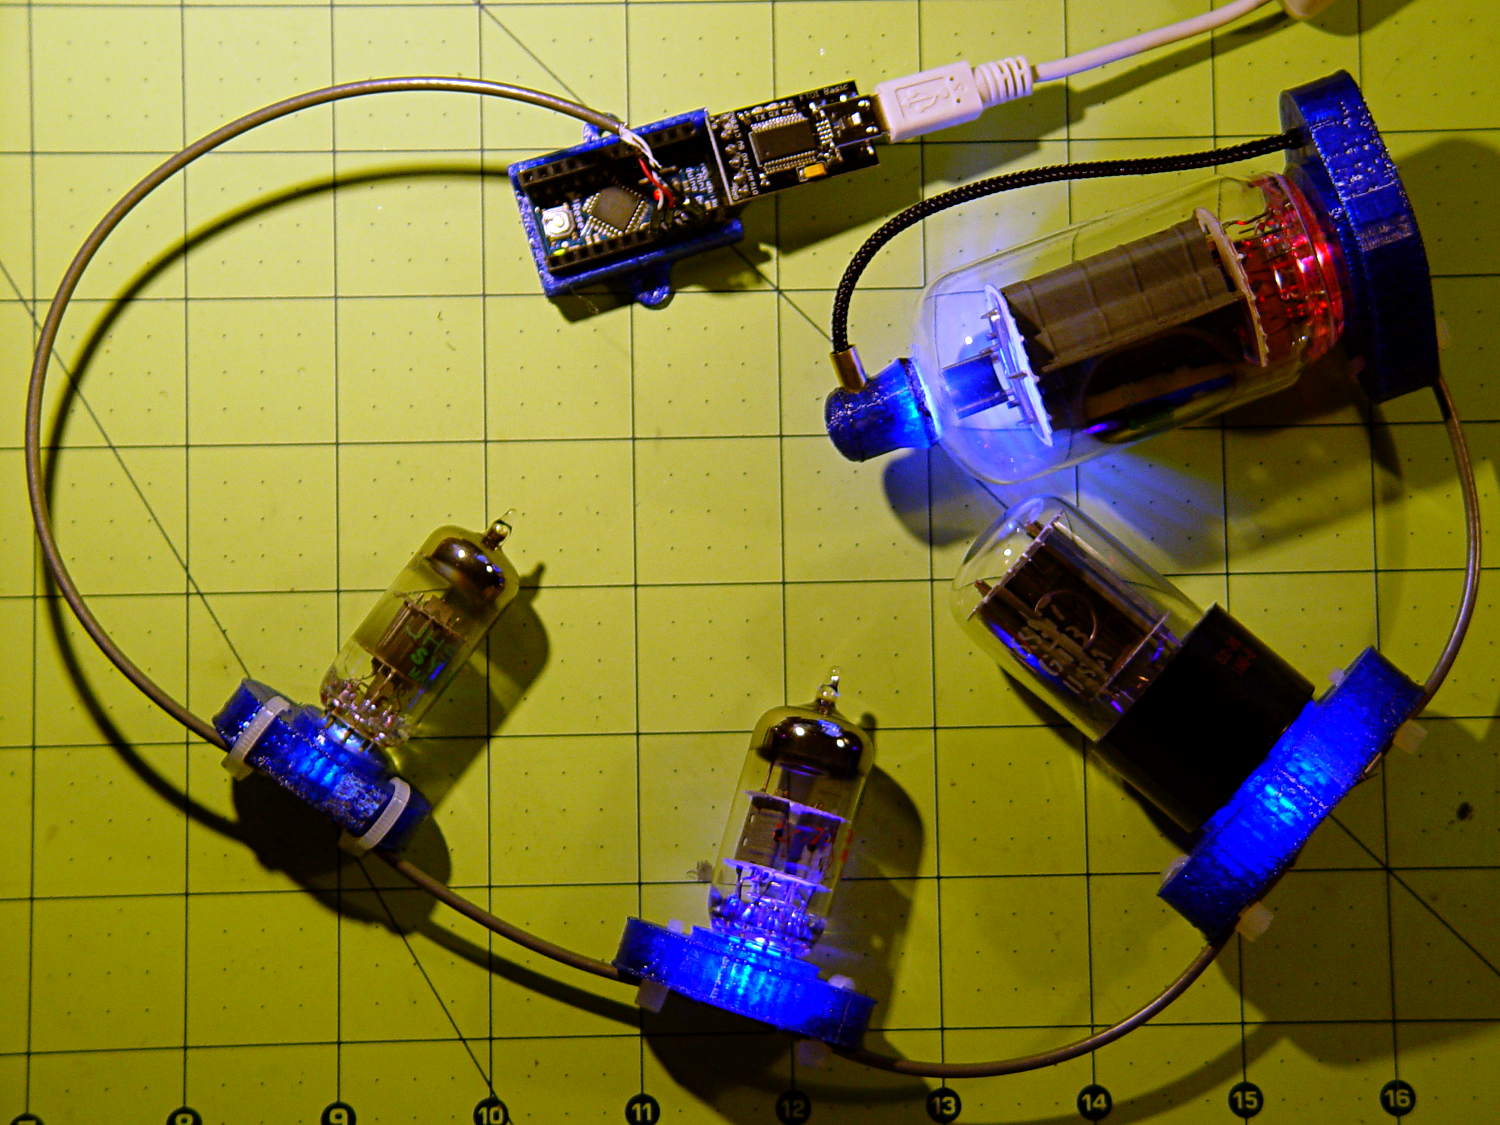
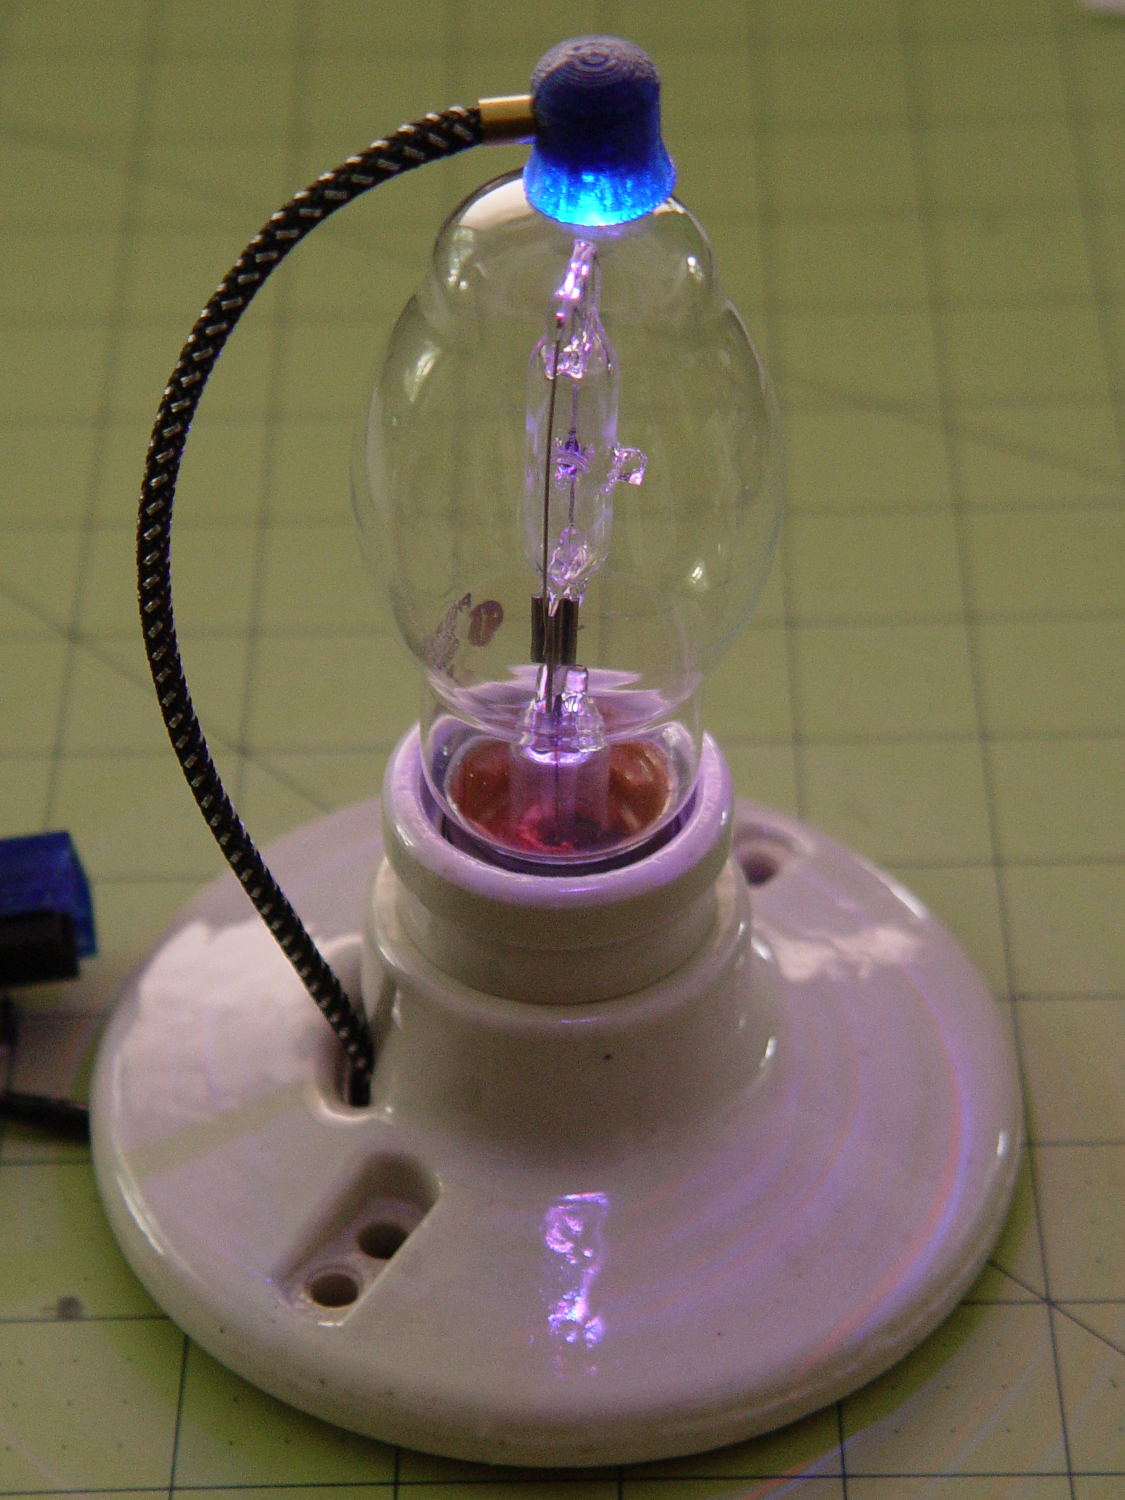
I wanted a slightly larger “plate cap” to fit a big incandescent bulb and it seemed a fake heatsink might add gravitas to the proceedings:

Yeah, that antique ceramic socket holds the bulb at a rakish angle. Worse, even though I painstakingly laid out the position of the heatsink atop the bulb, it’s visibly off-center. Which wouldn’t be so bad, had I not epoxied the damn thing in place.
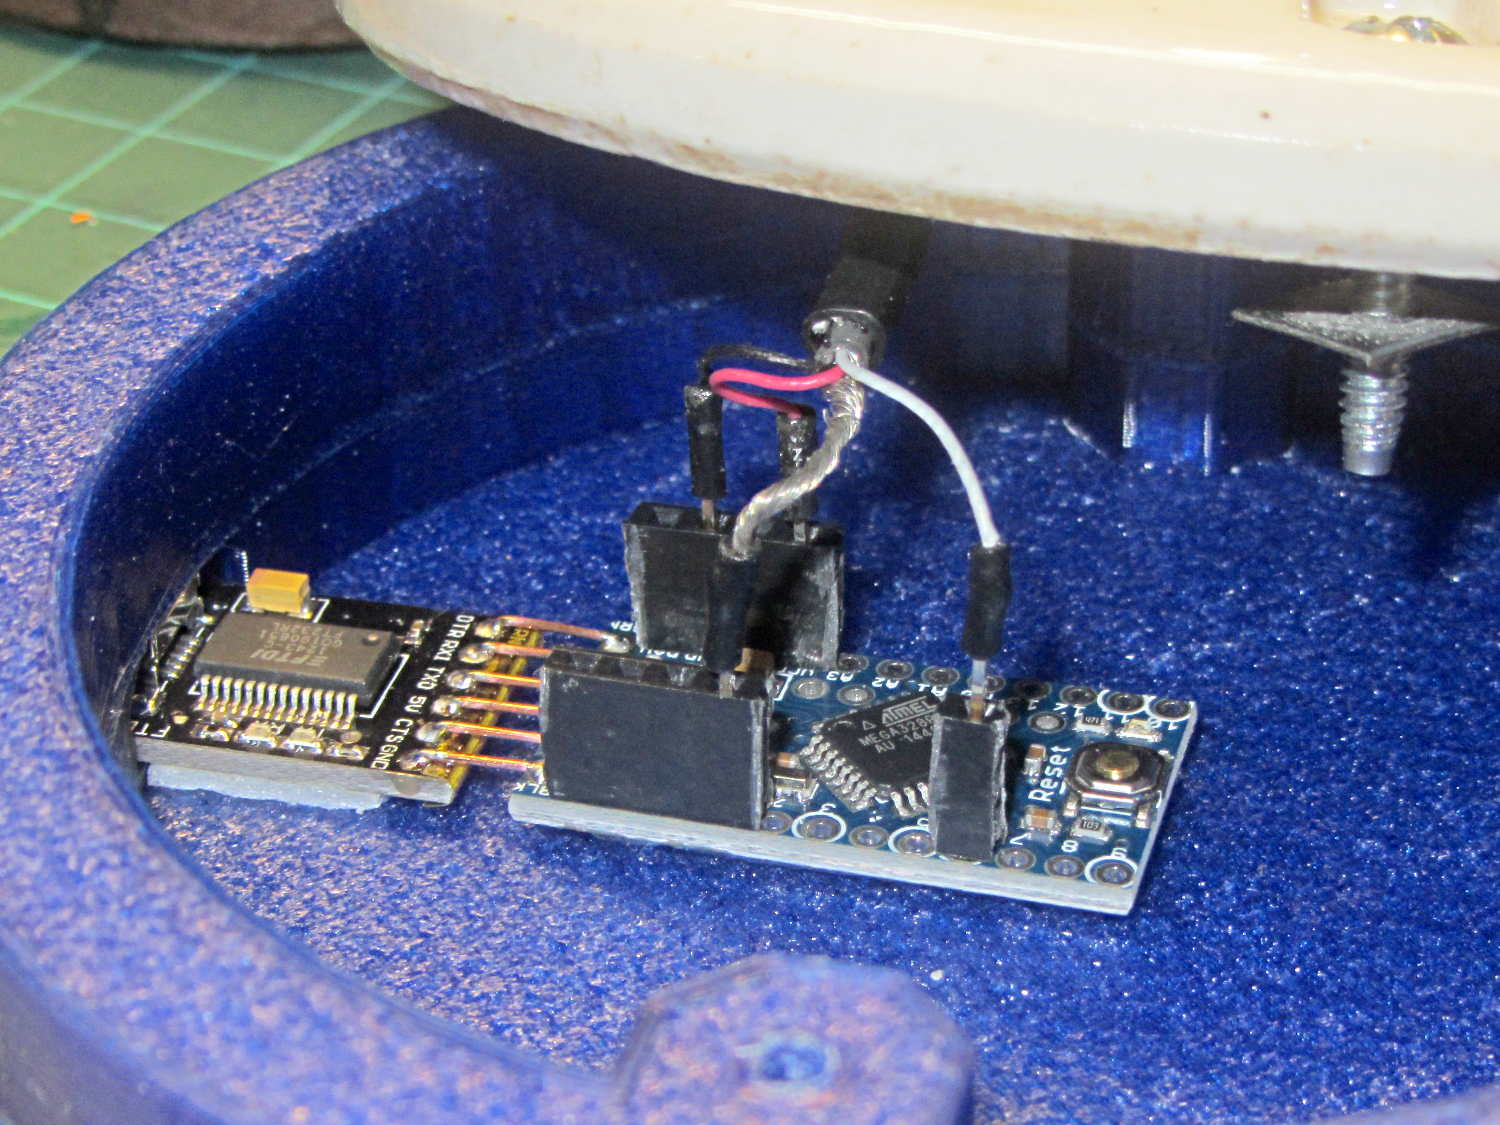
After reaming out the M2’s filament drive, the entire blue base printed without incident.
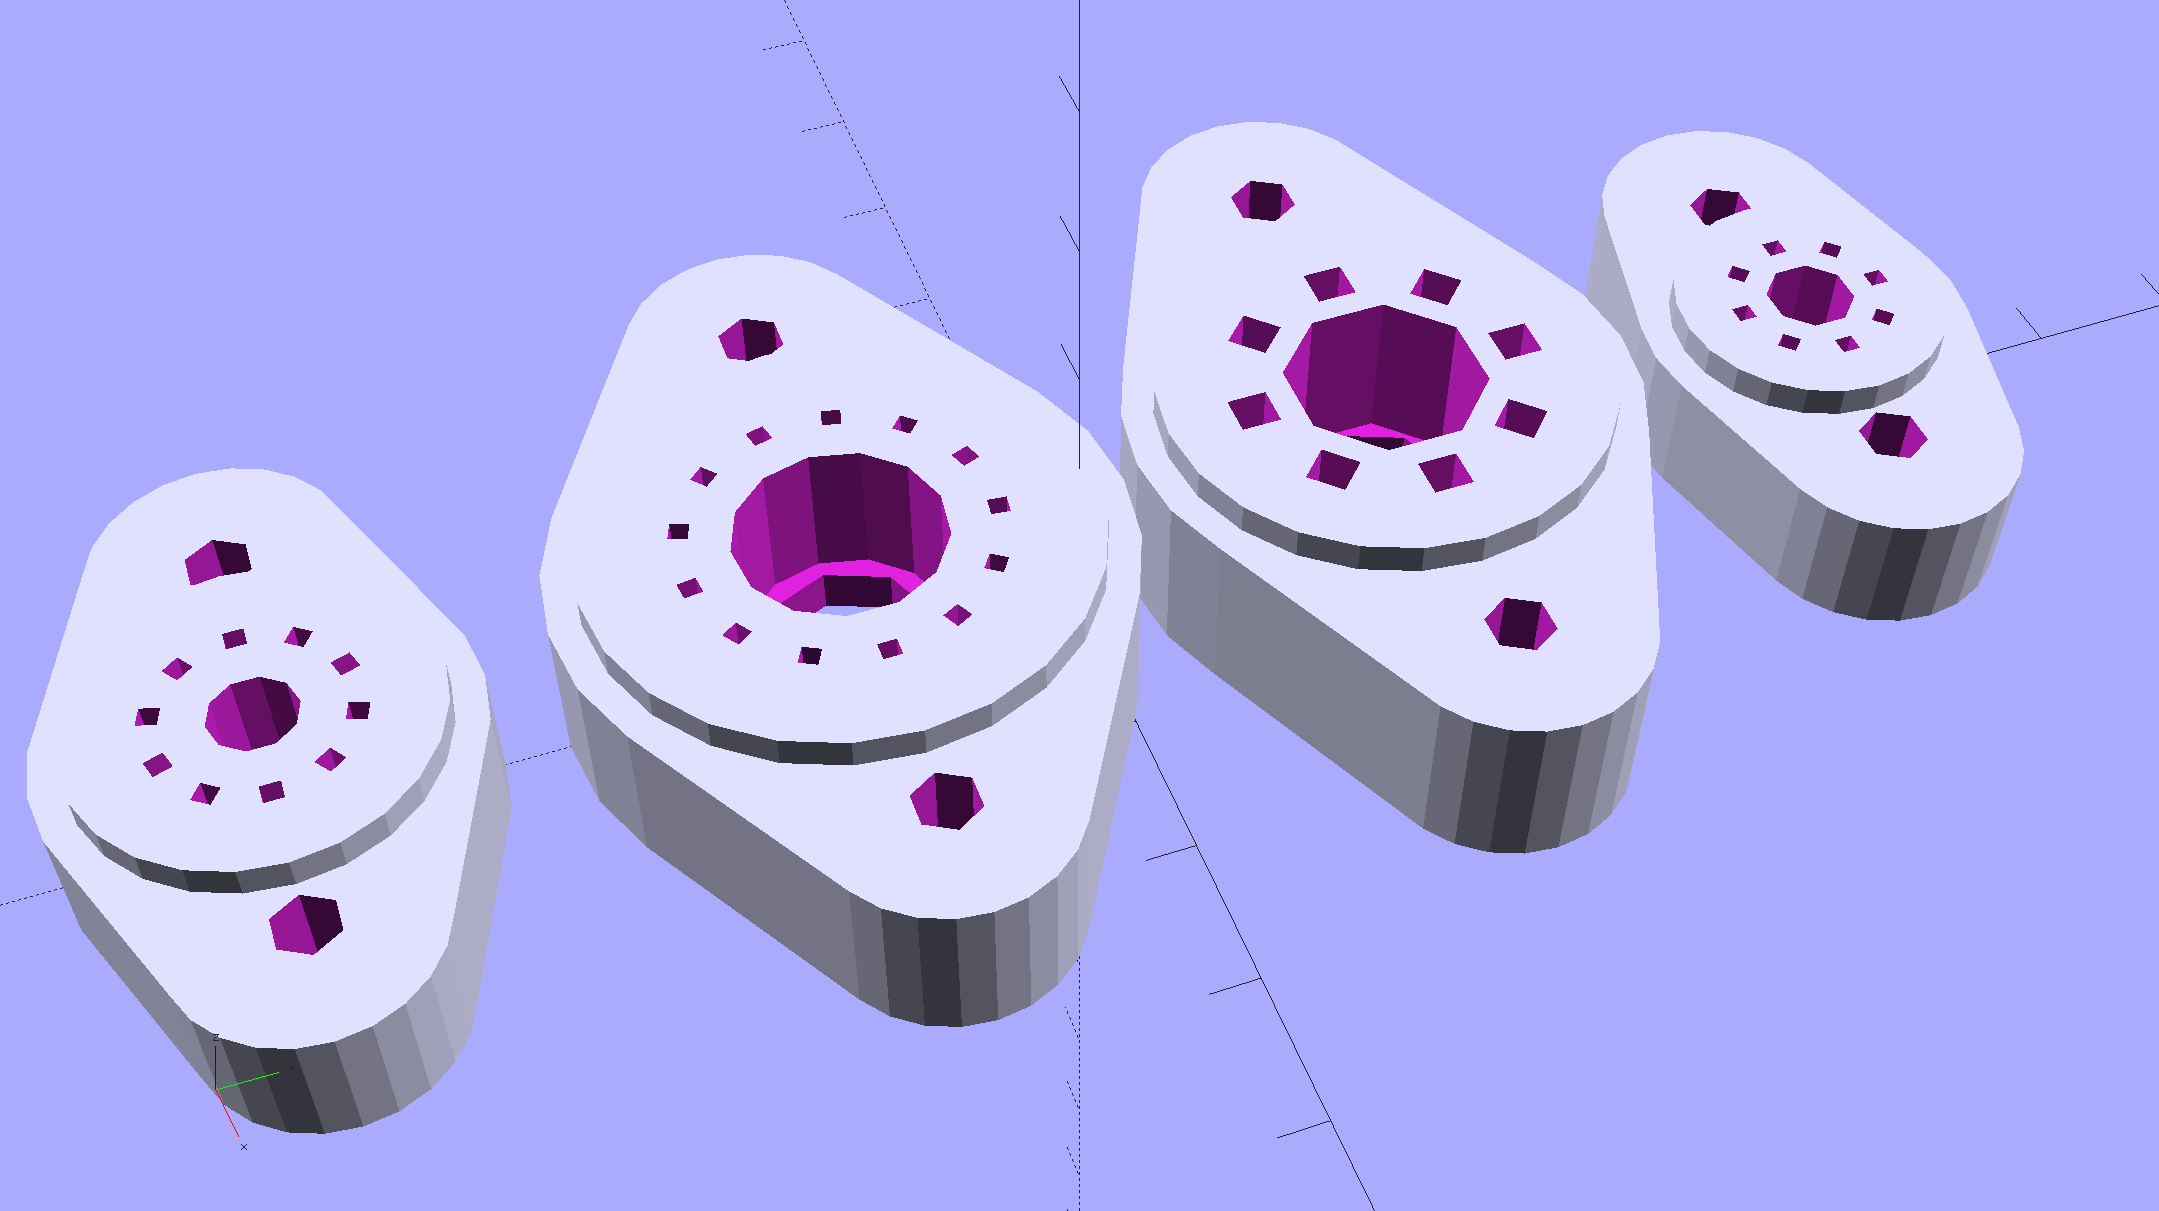
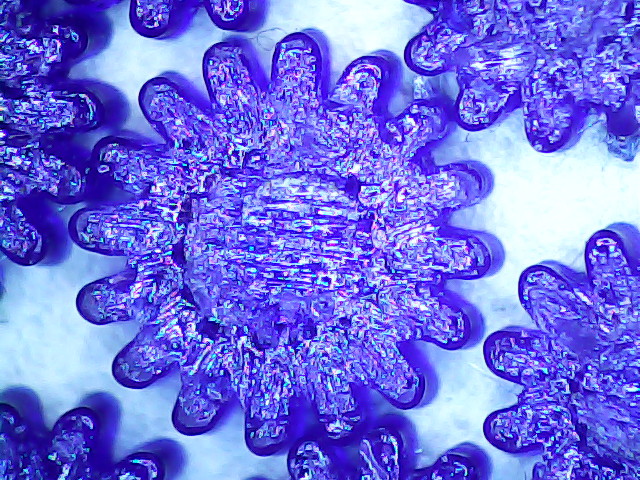
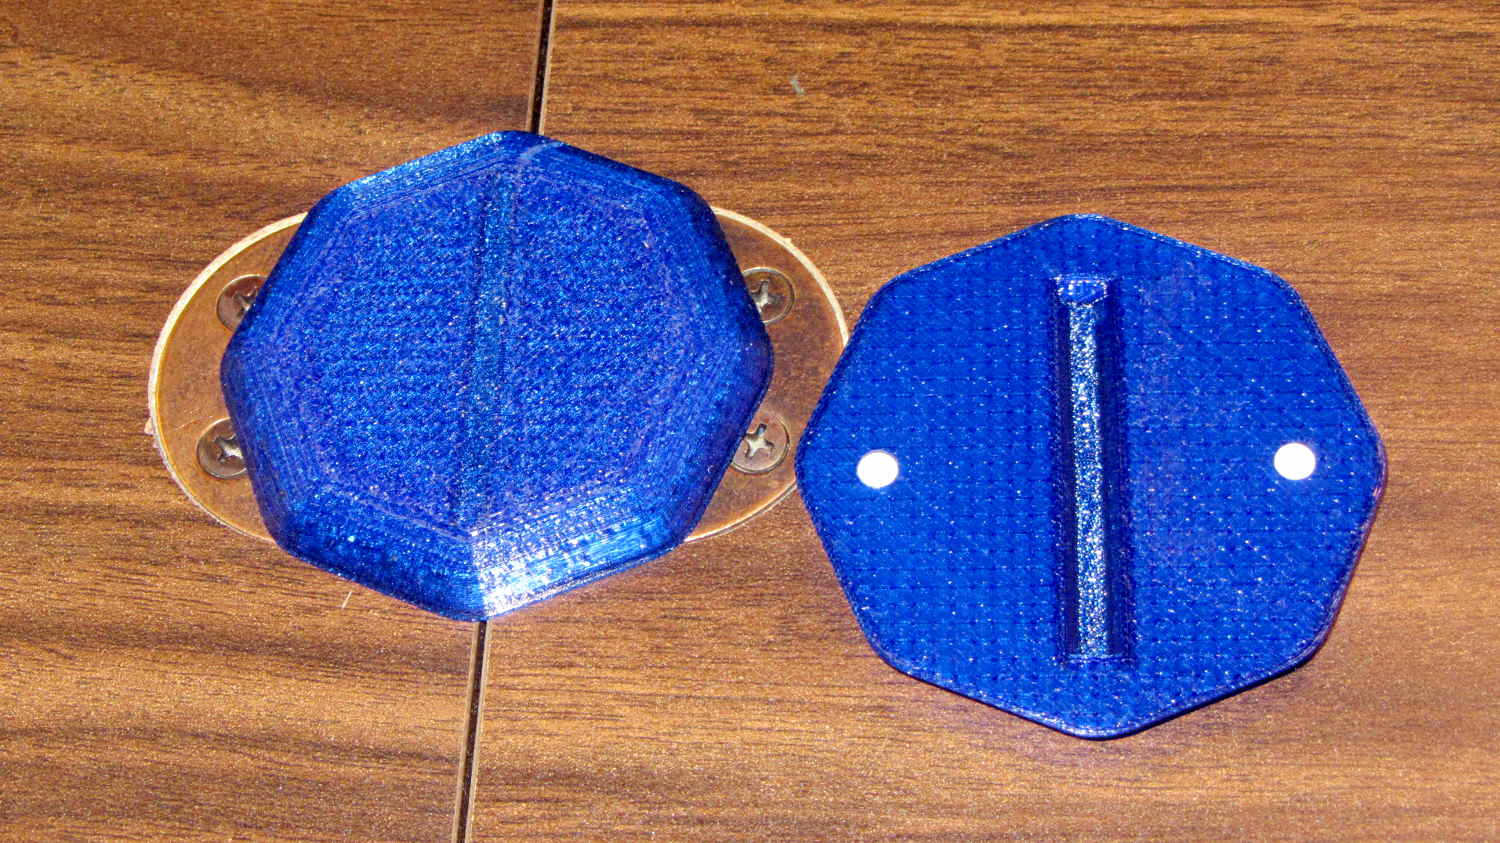
A closer look at the cap:

Memo to Self: Next time, line it up with the vertical glass support inside the bulb and ignore the external evidence.
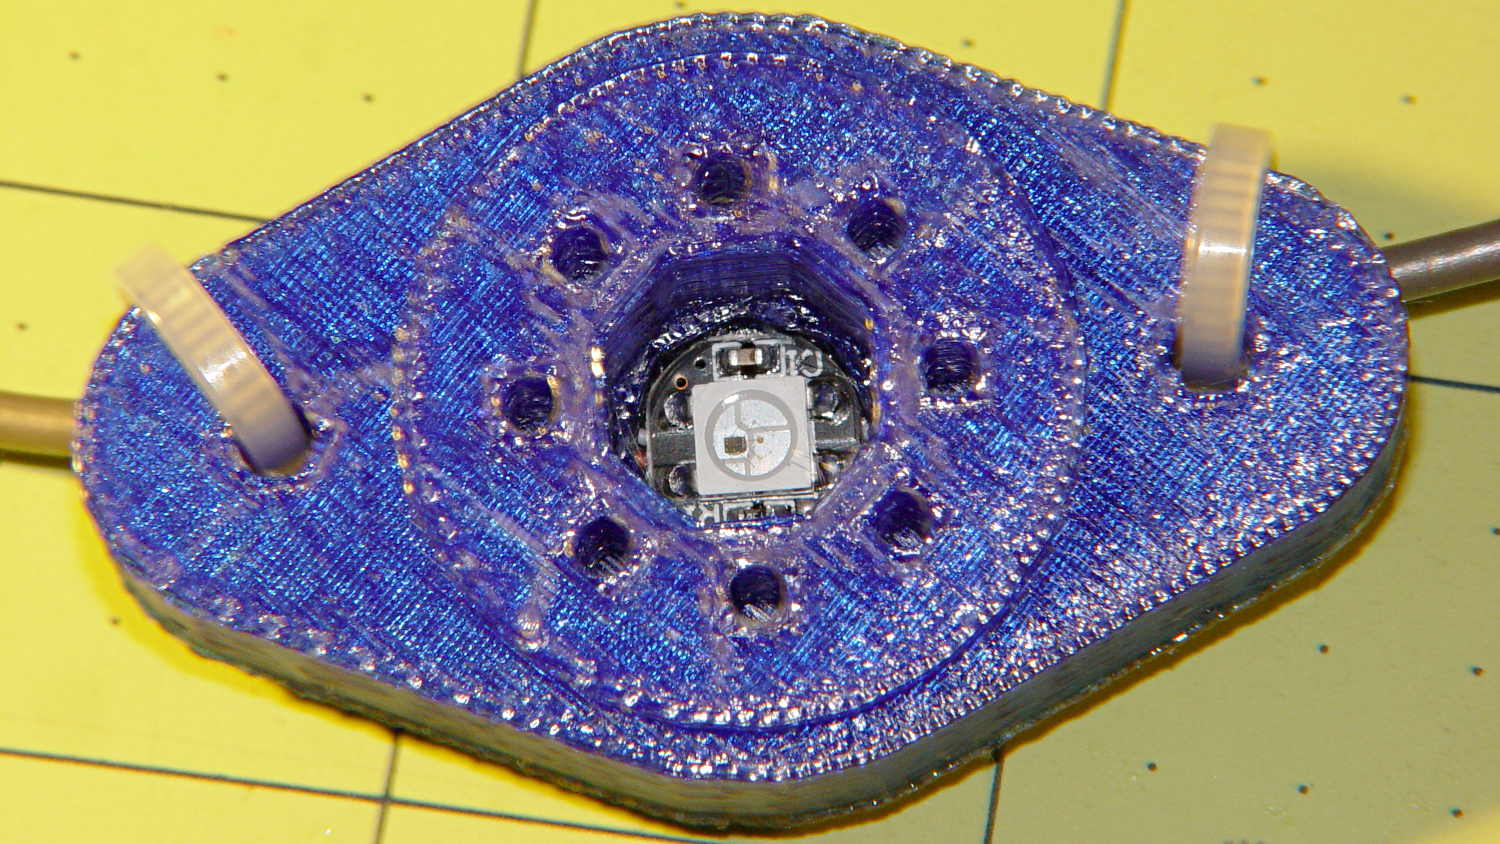
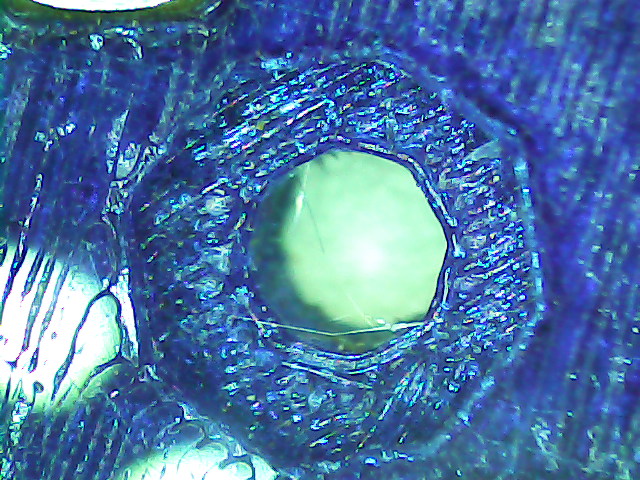
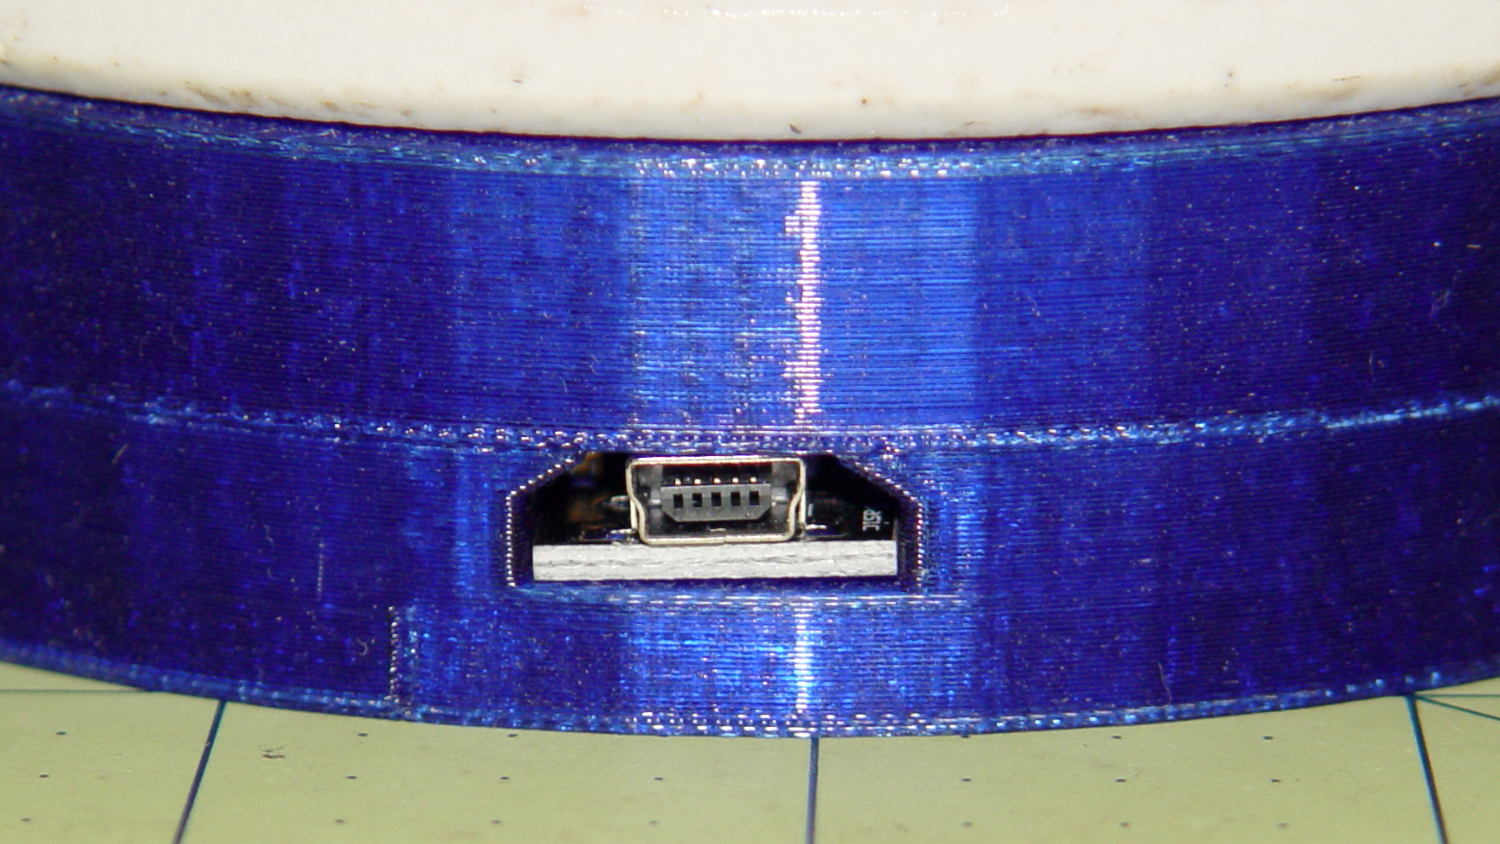
The boss has a hole for the braid-enclosed cable to the knockoff Neopixel:

The cupped surface perfectly fits the bulb’s 3.75 inch diameter. While you wouldn’t mill out a real heatsink, it definitely looks better this way and (alas) gives the epoxy more footprint for a better grip.
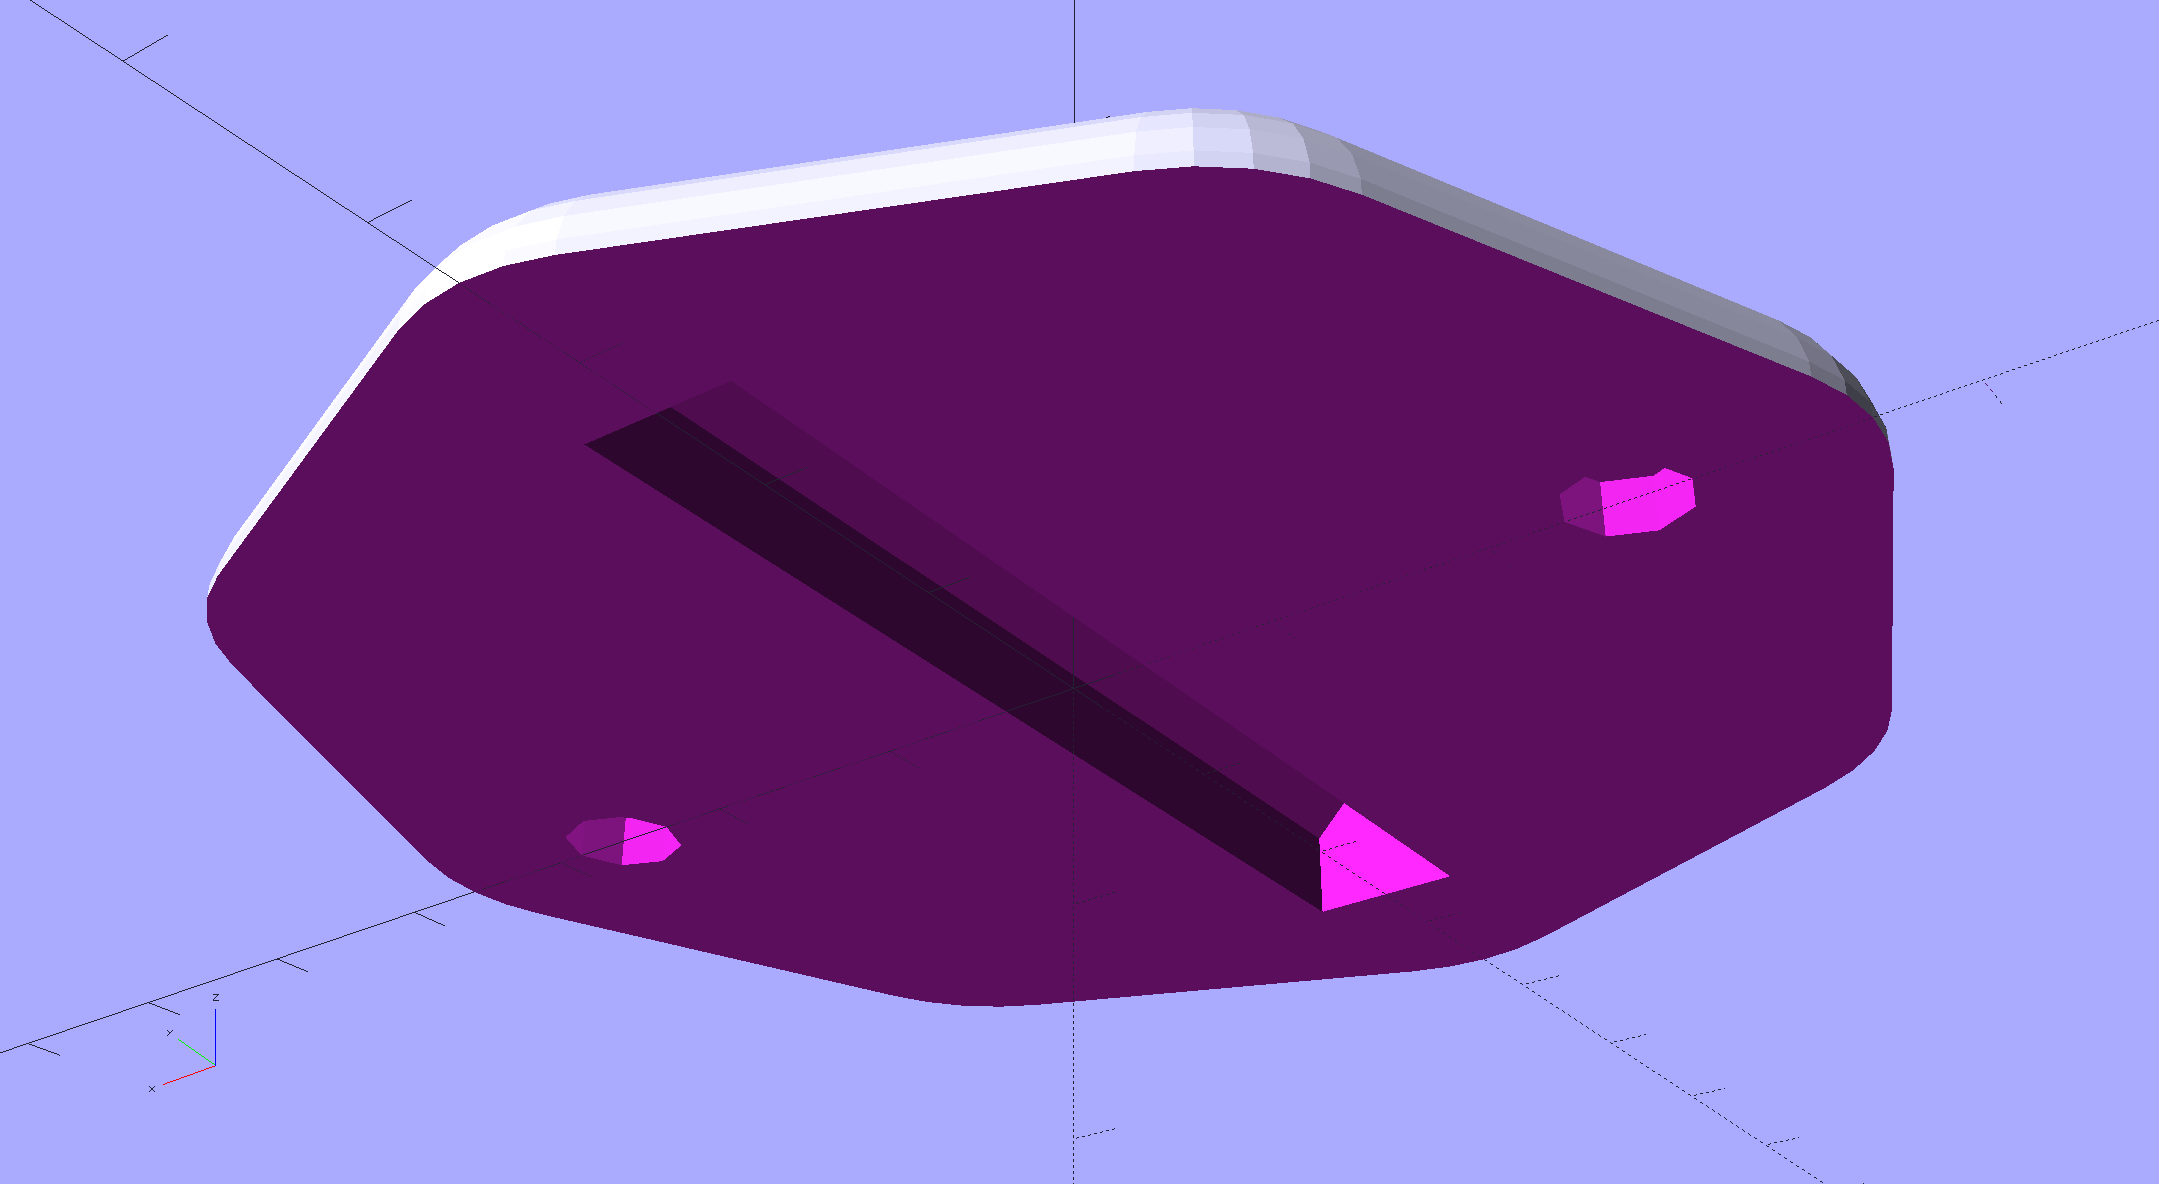
I built the fins with a 1/8 inch cutter in mind, so the fin root radius allows for a G3/G3 arc without gouging. I doubt machining a fake heatsink from aluminum makes any sense, but the cheap extruded heatsinks on eBay don’t look very good. Plus, they sport completely unnecessary tapped holes for LED mounts and suchlike.
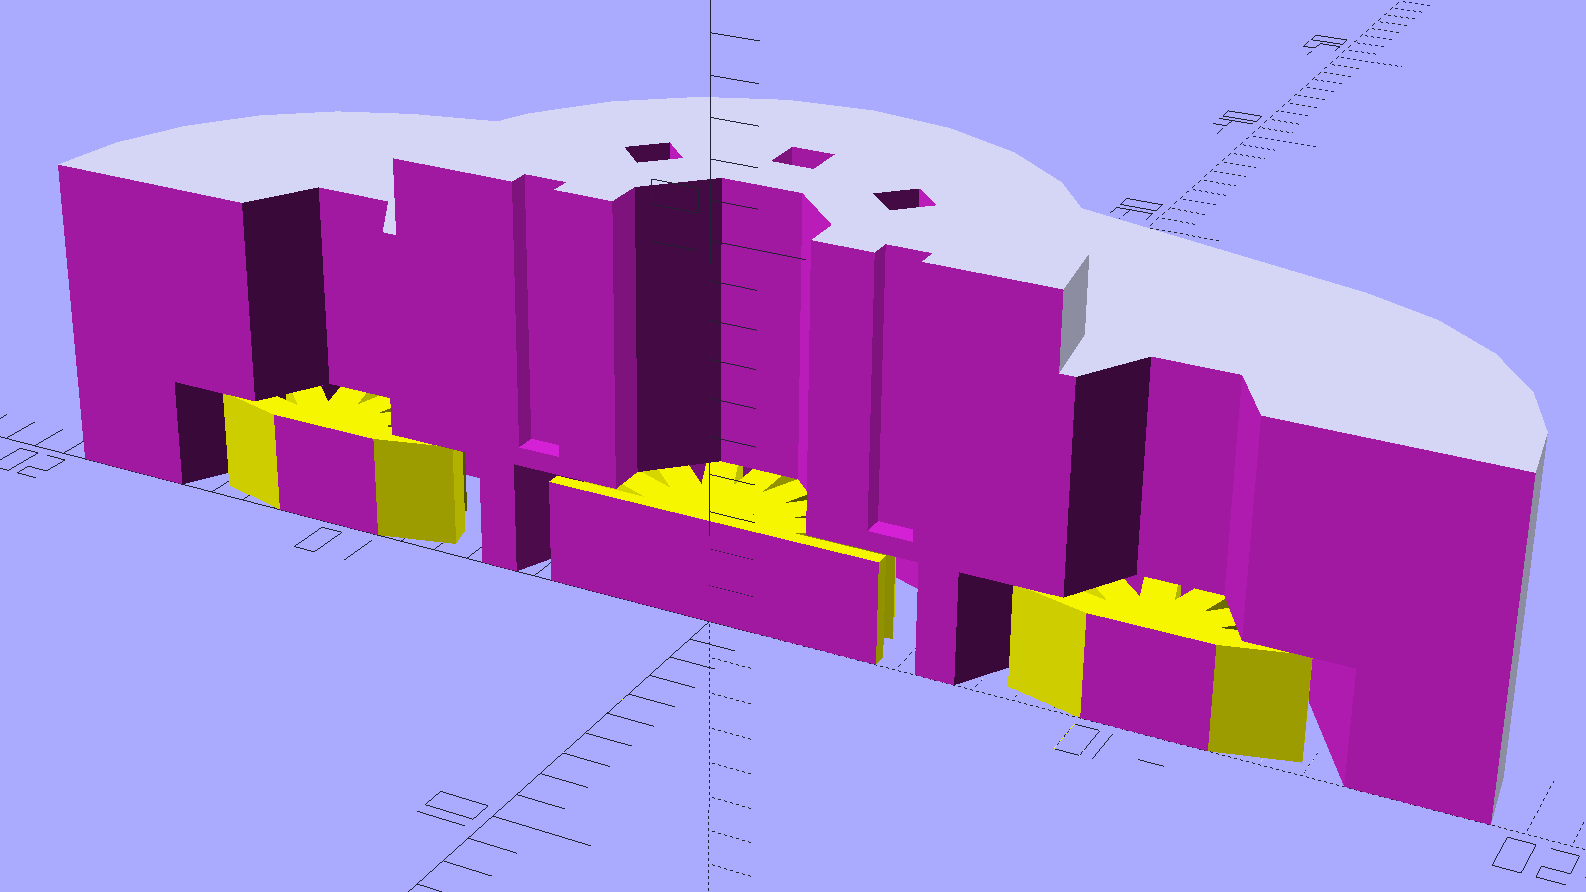
A cross-section shows the wiring channel and cable entry:

I epoxied the Neopixel in place, applied double-sided carpet tape to the whole thing, then painstakingly trimmed around the fins with an Xacto knife:

That looked better from the top side (where it was completely hidden) and came heartbreakingly close to working, but after about a day the cable + braid put enough torque on the cap to peel it off the bulb. Obviously, the tape holds much less enthusiastically after that.
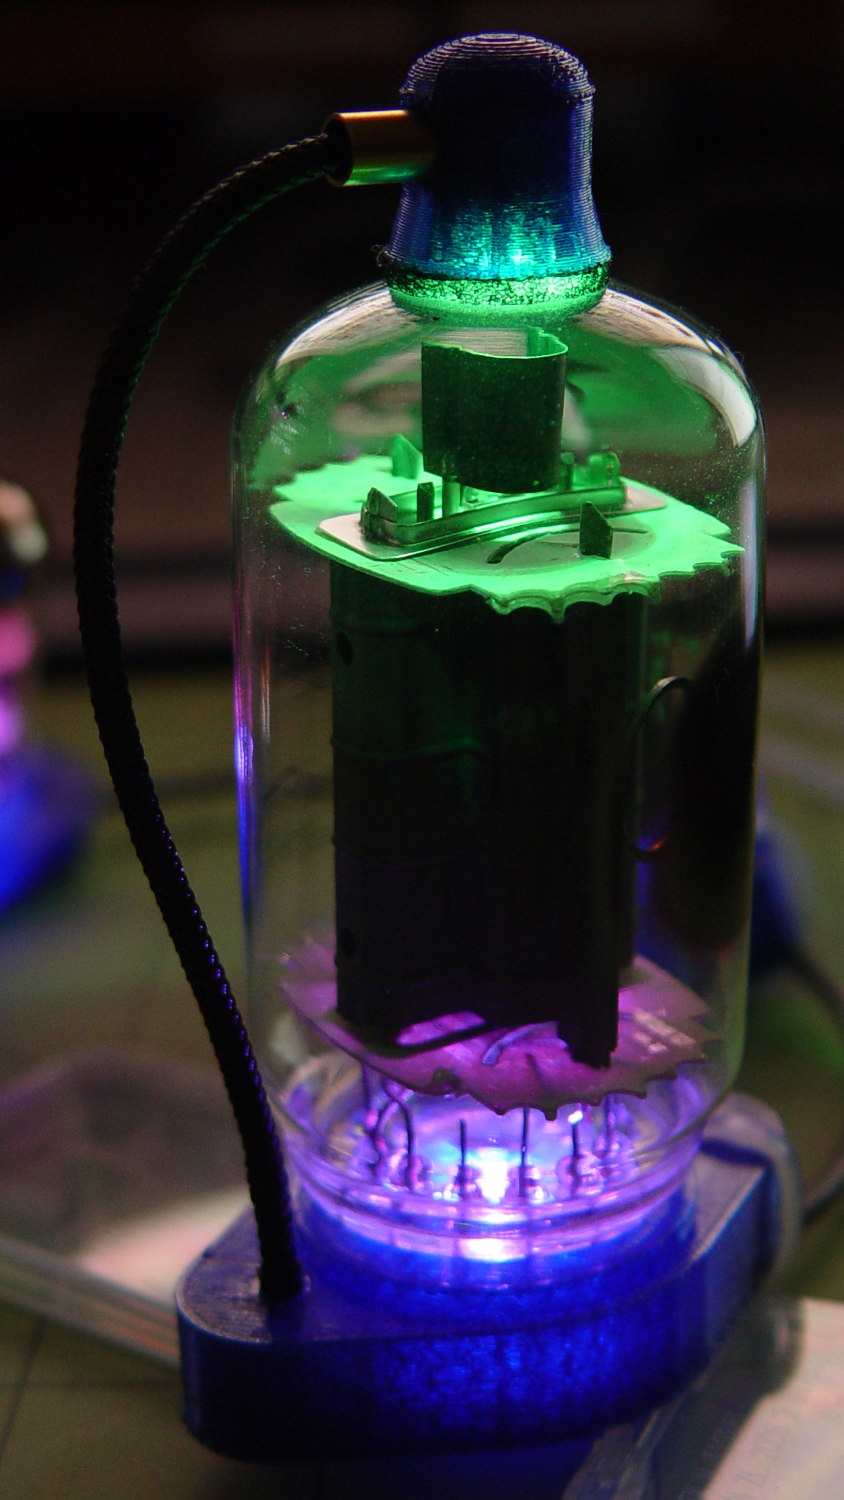
Part of the problem came from the cable’s rather sharp angle just outside the cap:
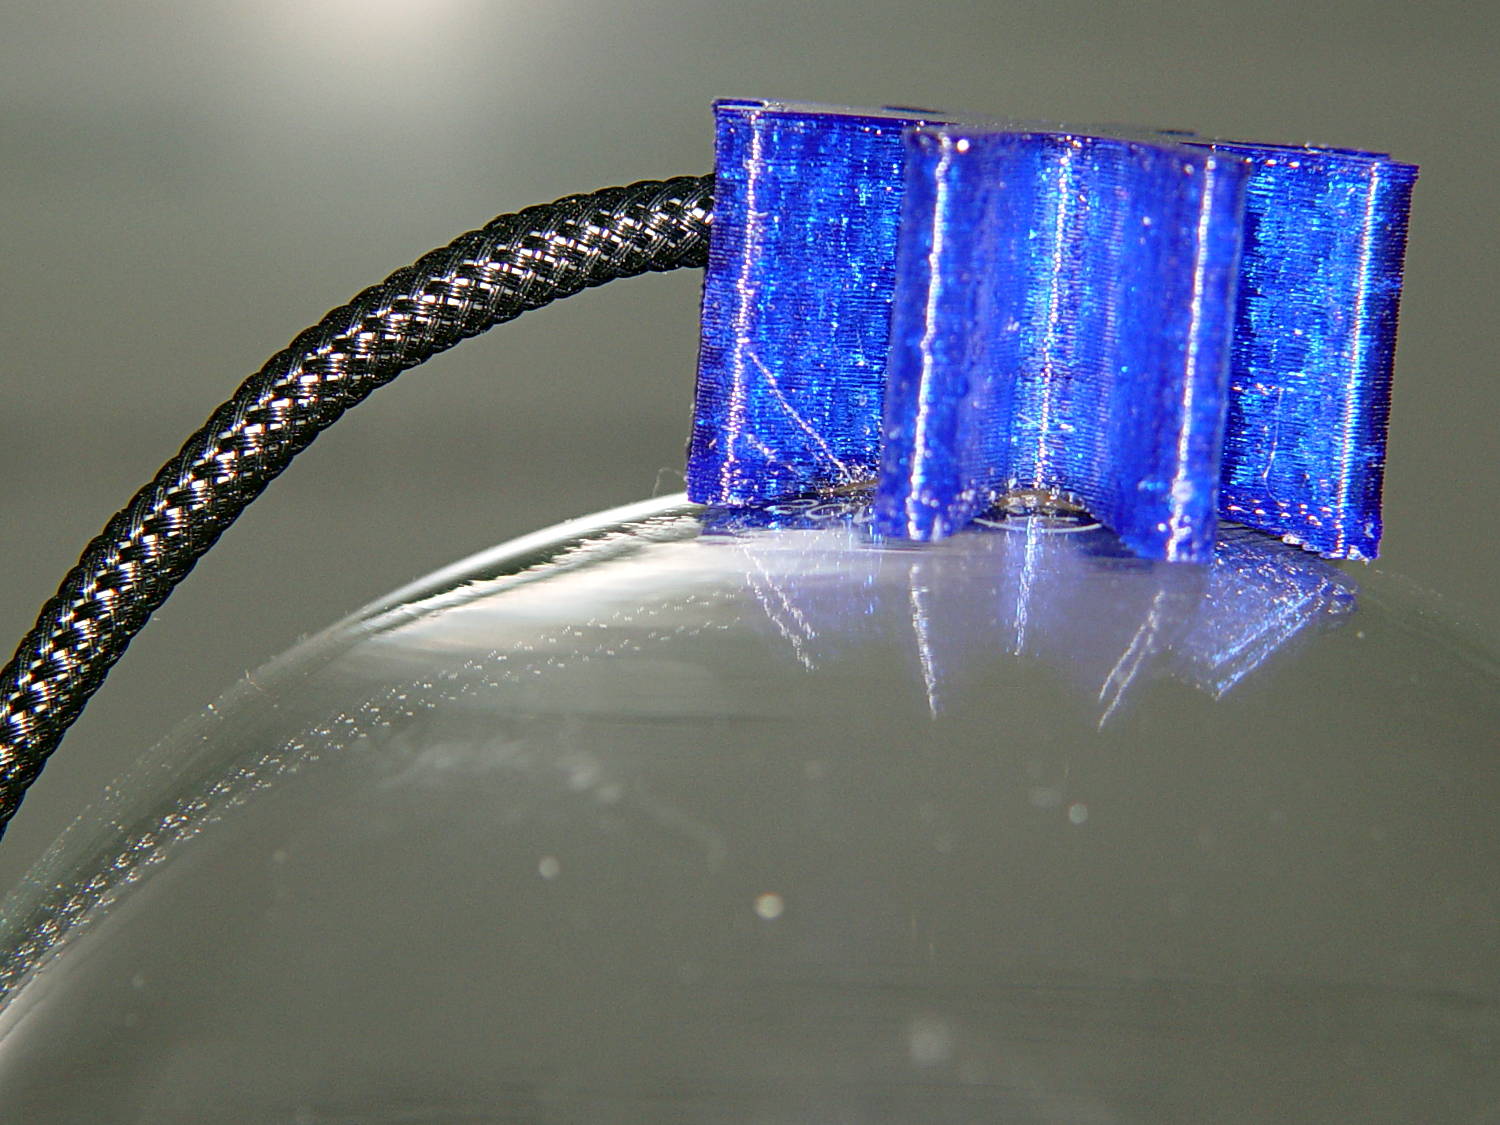
Rakish angle, indeed. Two of ’em, in fact.
Unlike the smaller cap on the halogen bulb, this time I didn’t bother with a brass tube ferrule, mostly to see how it looks. I think it came out OK and the black braid looks striking in person. Conversely, a touch of brass never detracts from the appearance.
Obviously, the cable wasn’t long enough, either. Part of that problem came from underestimating the braid length: it shortens dramatically when slipped over the cable, even when you expect shortening. Somehow I managed to overlook that, despite cutting the cable quite long enough, thankyouverymuch. There’s a tradeoff between gentle angles and having the cable stick out too far for comfort.
Memo to Self: Use a cable at least four inches longer than necessary, measure the combined cable + braid assembly after screwing the bulb in the socket, and don’t epoxy anything before all the parts are ready for assembly.
That’s why it’s a prototype made out of blue PETG…
Protip: running old ceramic sockets through the dishwasher greatly simplifies their subsequent cleanup.
All in all, I like it.
The OpenSCAD source code as a GitHub gist:
| // Vacuum Tube LED Lights | |
| // Ed Nisley KE4ZNU January 2016 | |
| Layout = "FinCap"; // Cap LampBase USBPort Socket(s) (Build)FinCap | |
| Section = true; // cross-section the object | |
| Support = true; | |
| //- Extrusion parameters must match reality! | |
| ThreadThick = 0.25; | |
| ThreadWidth = 0.40; | |
| HoleWindage = 0.2; | |
| Protrusion = 0.1; // make holes end cleanly | |
| inch = 25.4; | |
| function IntegerMultiple(Size,Unit) = Unit * ceil(Size / Unit); | |
| //———————- | |
| // Dimensions | |
| // https://en.wikipedia.org/wiki/Tube_socket#Summary_of_Base_Details | |
| T_NAME = 0; // common name | |
| T_NUMPINS = 1; // total, with no allowance for keying | |
| T_PINBCD = 2; // tube pin circle diameter | |
| T_PINOD = 3; // … diameter | |
| T_PINLEN = 4; // … length (overestimate) | |
| T_HOLEOD = 5; // nominal panel hole from various sources | |
| T_PUNCHOD = 6; // panel hole optimized for inch-size Greenlee punches | |
| T_TUBEOD = 7; // envelope or base diameter | |
| T_PIPEOD = 8; // light pipe from LED to tube base | |
| T_SCREWOC = 9; // mounting screw holes | |
| // Name pins BCD dia length hole punch env pipe screw | |
| TubeData = [ | |
| ["Mini7", 8, 9.53, 1.016, 7.0, 16.0, 11/16 * inch, 18.0, 5.0, 22.5], | |
| ["Octal", 8, 17.45, 2.36, 10.0, 36.2, (8 + 1)/8 * inch, 32.0, 11.5, 39.0], | |
| ["Noval", 10, 11.89, 1.1016, 7.0, 22.0, 7/8 * inch, 21.0, 5.0, 28.0], | |
| ["Duodecar", 13, 19.10, 1.05, 9.0, 32.0, 1.25 * inch, 38.0, 12.5, 39.0], | |
| ]; | |
| ID = 0; | |
| OD = 1; | |
| LENGTH = 2; | |
| Pixel = [7.0,10.0,3.0]; // ID = contact patch, OD = PCB dia, LENGTH = overall thickness | |
| Nut = [3.5,8.0,3.0]; // socket mounting nut recess | |
| BaseShim = 2*ThreadThick; // between pin holes and pixel top | |
| SocketFlange = 2.0; // rim around socket below punchout | |
| PanelThick = 2.0; // socket extension through punchout | |
| //———————- | |
| // Useful routines | |
| module PolyCyl(Dia,Height,ForceSides=0) { // based on nophead's polyholes | |
| Sides = (ForceSides != 0) ? ForceSides : (ceil(Dia) + 2); | |
| FixDia = Dia / cos(180/Sides); | |
| cylinder(r=(FixDia + HoleWindage)/2,h=Height,$fn=Sides); | |
| } | |
| //———————- | |
| // Tube cap | |
| CapTube = [4.0,3/16 * inch,10.0]; // brass tube for flying lead to cap LED | |
| CapSize = [Pixel[ID],(Pixel[OD] + 3.0),(CapTube[OD] + 2*Pixel[LENGTH])]; | |
| CapSides = 6*4; | |
| module Cap() { | |
| difference() { | |
| union() { | |
| cylinder(d=CapSize[OD],h=(CapSize[LENGTH]),$fn=CapSides); // main cap body | |
| translate([0,0,CapSize[LENGTH]]) // rounded top | |
| scale([1.0,1.0,0.65]) | |
| sphere(d=CapSize[OD]/cos(180/CapSides),$fn=CapSides); // cos() fixes slight undersize vs cylinder | |
| cylinder(d1=(CapSize[OD] + 2*3*ThreadWidth),d2=CapSize[OD],h=1.5*Pixel[LENGTH],$fn=CapSides); // skirt | |
| } | |
| translate([0,0,-Protrusion]) // bore for wiring to LED | |
| PolyCyl(CapSize[ID],(CapSize[LENGTH] + 3*ThreadThick + Protrusion),CapSides); | |
| translate([0,0,-Protrusion]) // PCB recess with clearance for tube dome | |
| PolyCyl(Pixel[OD],(1.5*Pixel[LENGTH] + Protrusion),CapSides); | |
| translate([0,0,(1.5*Pixel[LENGTH] – Protrusion)]) // small step + cone to retain PCB | |
| cylinder(d1=(Pixel[OD]/cos(180/CapSides)),d2=Pixel[ID],h=(Pixel[LENGTH] + Protrusion),$fn=CapSides); | |
| translate([0,0,(CapSize[LENGTH] – CapTube[OD]/(2*cos(180/8)))]) // hole for brass tube holding wire loom | |
| rotate([90,0,0]) rotate(180/8) | |
| PolyCyl(CapTube[OD],CapSize[OD],8); | |
| } | |
| } | |
| //———————- | |
| // Heatsink tube cap | |
| CableOD = 3.5; // cable + braid diameter | |
| BulbOD = 3.75 * inch; // bulb OD; use 10 inches for flat | |
| FinCutterOD = 1/8 * inch; | |
| echo(str("Fin Cutter: ",FinCutterOD)); | |
| FinSides = 2*4; | |
| FinCapSize = [(Pixel[OD] + 2*FinCutterOD),30.0,(10.0 + 2*Pixel[LENGTH])]; | |
| BulbRadius = BulbOD / 2; | |
| BulbDepth = BulbRadius – sqrt(pow(BulbRadius,2) – pow(FinCapSize[OD],2)/4); | |
| echo(str("Bulb OD: ",BulbOD," recess: ",BulbDepth)); | |
| module FinCap() { | |
| NumFins = floor(PI*FinCapSize[ID] / (2*FinCutterOD)); | |
| FinAngle = 360 / NumFins; | |
| echo(str("NumFins: ",NumFins," angle: ",FinAngle," deg")); | |
| difference() { | |
| union() { | |
| cylinder(d=FinCapSize[ID],h=FinCapSize[LENGTH],$fn=2*NumFins); // main body | |
| for (i = [0:NumFins – 1]) // fins | |
| rotate(i * FinAngle) | |
| hull() { | |
| translate([FinCapSize[ID]/2,0,0]) | |
| rotate(180/FinSides) | |
| cylinder(d=FinCutterOD,h=FinCapSize[LENGTH],$fn=FinSides); | |
| translate([(FinCapSize[OD] – FinCutterOD)/2,0,0]) | |
| rotate(180/FinSides) | |
| cylinder(d=FinCutterOD,h=FinCapSize[LENGTH],$fn=FinSides); | |
| } | |
| rotate(FinAngle/2) // cable entry boss | |
| translate([FinCapSize[ID]/2,0,FinCapSize[LENGTH]/2]) | |
| cube([FinCapSize[OD]/4,FinCapSize[OD]/4,FinCapSize[LENGTH]],center=true); | |
| } | |
| for (i = [1:NumFins – 1]) // fin inner gullets, omit cable entry side | |
| rotate(i * FinAngle + FinAngle/2) // joint isn't quite perfect, but OK | |
| translate([FinCapSize[ID]/2,0,-Protrusion]) | |
| rotate(0*180/FinSides) | |
| cylinder(d=FinCutterOD/cos(180/FinSides),h=(FinCapSize[LENGTH] + 2*Protrusion),$fn=FinSides); | |
| translate([0,0,-Protrusion]) // PCB recess | |
| PolyCyl(Pixel[OD],(1.5*Pixel[LENGTH] + Protrusion),FinSides); | |
| PolyCyl(Pixel[ID],(FinCapSize[LENGTH] – 3*ThreadThick),FinSides); // bore for LED wiring | |
| translate([0,0,(FinCapSize[LENGTH] – 3*ThreadThick – 2*CableOD/(2*cos(180/8)))]) // cable inlet | |
| rotate(FinAngle/2) rotate([0,90,0]) rotate(180/8) | |
| PolyCyl(CableOD,FinCapSize[OD],8); | |
| if (BulbOD <= 10.0 * inch) // curve for top of bulb | |
| translate([0,0,-(BulbRadius – BulbDepth + 2*ThreadThick)]) // … slightly flatten tips | |
| sphere(d=BulbOD,$fn=16*FinSides); | |
| } | |
| } | |
| //———————- | |
| // Aperture for USB-to-serial adapter snout | |
| // These are all magic numbers, of course | |
| module USBPort() { | |
| translate([0,28.0]) | |
| rotate([90,0,0]) | |
| linear_extrude(height=28.0) | |
| polygon(points=[ | |
| [0,0], | |
| [8.0,0], | |
| [8.0,4.0], | |
| // [4.0,4.0], | |
| [4.0,6.5], | |
| [-4.0,6.5], | |
| // [-4.0,4.0], | |
| [-8.0,4.0], | |
| [-8.0,0], | |
| ]); | |
| } | |
| //———————- | |
| // Box for Leviton ceramic lamp base | |
| module LampBase() { | |
| Bottom = 3.0; | |
| Base = [4.0*inch,4.5*inch,20.0 + Bottom]; | |
| Sides = 12*4; | |
| Retainer = [3.5,11.0,1.0]; // flat fiber washer holding lamp base screws in place | |
| StudSides = 8; | |
| StudOC = 3.5 * inch; | |
| Stud = [0.107 * inch, // 6-32 mounting screws | |
| min(15.0,1.5*(Base[ID] – StudOC)/cos(180/StudSides)), // OD = big enough to merge with walls | |
| (Base[LENGTH] – Retainer[LENGTH])]; // leave room for retainer | |
| union() { | |
| difference() { | |
| rotate(180/Sides) | |
| cylinder(d=Base[OD],h=Base[LENGTH],$fn=Sides); | |
| rotate(180/Sides) | |
| translate([0,0,Bottom]) | |
| cylinder(d=Base[ID],h=Base[LENGTH],$fn=Sides); | |
| translate([0,-Base[OD]/2,Bottom + 1.2]) // mount on double-sided foam tape | |
| rotate(0) | |
| USBPort(); | |
| } | |
| for (i = [-1,1]) | |
| translate([i*StudOC/2,0,0]) | |
| rotate(180/StudSides) | |
| difference() { | |
| # cylinder(d=Stud[OD],h=Stud[LENGTH],$fn=StudSides); | |
| translate([0,0,Bottom]) | |
| PolyCyl(Stud[ID],(Stud[LENGTH] – (Bottom – Protrusion)),6); | |
| } | |
| } | |
| } | |
| //———————- | |
| // Tube Socket | |
| module Socket(Name = "Mini7") { | |
| NumSides = 6*4; | |
| Tube = search([Name],TubeData,1,0)[0]; | |
| echo(str("Building ",TubeData[Tube][0]," socket")); | |
| echo(str(" Punch: ",TubeData[ID][T_PUNCHOD]," mm = ",TubeData[ID][T_PUNCHOD]/inch," inch")); | |
| echo(str(" Screws: ",TubeData[ID][T_SCREWOC]," mm =",TubeData[ID][T_SCREWOC]/inch," inch OC")); | |
| OAH = Pixel[LENGTH] + BaseShim + TubeData[Tube][T_PINLEN]; | |
| BaseHeight = OAH – PanelThick; | |
| difference() { | |
| union() { | |
| linear_extrude(height=BaseHeight) | |
| hull() { | |
| circle(d=(TubeData[Tube][T_PUNCHOD] + 2*SocketFlange),$fn=NumSides); | |
| for (i=[-1,1]) | |
| translate([i*TubeData[Tube][T_SCREWOC]/2,0]) | |
| circle(d=2*Nut[OD],$fn=NumSides); | |
| } | |
| cylinder(d=TubeData[Tube][T_PUNCHOD],h=OAH,$fn=NumSides); | |
| } | |
| for (i=[0:(TubeData[Tube][T_NUMPINS] – 1)]) // tube pins | |
| rotate(i*360/TubeData[Tube][T_NUMPINS]) | |
| translate([TubeData[Tube][T_PINBCD]/2,0,(OAH – TubeData[Tube][T_PINLEN])]) | |
| rotate(180/4) | |
| PolyCyl(TubeData[Tube][T_PINOD],(TubeData[Tube][T_PINLEN] + Protrusion),4); | |
| for (i=[-1,1]) // mounting screw holes & nut traps | |
| translate([i*TubeData[Tube][T_SCREWOC]/2,0,-Protrusion]) { | |
| PolyCyl(Nut[OD],(Nut[LENGTH] + Protrusion),6); | |
| PolyCyl(Nut[ID],(OAH + 2*Protrusion),6); | |
| } | |
| translate([0,0,-Protrusion]) { // LED recess | |
| PolyCyl(Pixel[OD],(Pixel[LENGTH] + Protrusion),8); | |
| } | |
| translate([0,0,(Pixel[LENGTH] – Protrusion)]) { // light pipe | |
| rotate(180/TubeData[Tube][T_NUMPINS]) | |
| PolyCyl(TubeData[Tube][T_PIPEOD],(OAH + 2*Protrusion),TubeData[Tube][T_NUMPINS]); | |
| } | |
| } | |
| // Totally ad-hoc support structures … | |
| if (Support) { | |
| color("Yellow") { | |
| for (i=[-1,1]) // nut traps | |
| translate([i*TubeData[Tube][T_SCREWOC]/2,0,(Nut[LENGTH] – ThreadThick)/2]) | |
| for (a=[0:5]) | |
| rotate(a*30 + 15) | |
| cube([2*ThreadWidth,0.9*Nut[OD],(Nut[LENGTH] – ThreadThick)],center=true); | |
| if (Pixel[OD] > TubeData[Tube][T_PIPEOD]) // support pipe only if needed | |
| translate([0,0,(Pixel[LENGTH] – ThreadThick)/2]) | |
| for (a=[0:7]) | |
| rotate(a*22.5) | |
| cube([2*ThreadWidth,0.9*Pixel[OD],(Pixel[LENGTH] – ThreadThick)],center=true); | |
| } | |
| } | |
| } | |
| //———————- | |
| // Build it | |
| if (Layout == "Cap") { | |
| if (Section) | |
| difference() { | |
| Cap(); | |
| translate([-CapSize[OD],0,CapSize[LENGTH]]) | |
| cube([2*CapSize[OD],2*CapSize[OD],3*CapSize[LENGTH]],center=true); | |
| } | |
| else | |
| Cap(); | |
| } | |
| if (Layout == "FinCap") { | |
| if (Section) render(convexity=5) | |
| difference() { | |
| FinCap(); | |
| // translate([0,-FinCapSize[OD],FinCapSize[LENGTH]]) | |
| // cube([2*FinCapSize[OD],2*FinCapSize[OD],3*FinCapSize[LENGTH]],center=true); | |
| translate([-FinCapSize[OD],0,FinCapSize[LENGTH]]) | |
| cube([2*FinCapSize[OD],2*FinCapSize[OD],3*FinCapSize[LENGTH]],center=true); | |
| } | |
| else | |
| FinCap(); | |
| } | |
| if (Layout == "BuildFinCap") | |
| translate([0,0,FinCapSize[LENGTH]]) | |
| rotate([180,0,0]) | |
| FinCap(); | |
| if (Layout == "LampBase") | |
| LampBase(); | |
| if (Layout == "USBPort") | |
| USBPort(); | |
| if (Layout == "Socket") | |
| if (Section) { | |
| difference() { | |
| Socket(); | |
| translate([-100/2,0,-Protrusion]) | |
| cube([100,50,50],center=false); | |
| } | |
| } | |
| else | |
| Socket(); | |
| if (Layout == "Sockets") { | |
| translate([0,50,0]) | |
| Socket("Mini7"); | |
| translate([0,20,0]) | |
| Socket("Octal"); | |
| translate([0,-15,0]) | |
| Socket("Duodecar"); | |
| translate([0,-50,0]) | |
| Socket("Noval"); | |
| } |