Ed Nisley's Blog: Shop notes, electronics, firmware, machinery, 3D printing, laser cuttery, and curiosities. Contents: 100% human thinking, 0% AI slop.
Category: Science
If you measure something often enough, it becomes science
In 1991 we lived in Tolland CT, where I took one picture of a maple twig every week:
This slideshow requires JavaScript.
That was with a film camera, of course, with negatives. I assembled the printed images into a poster and eventually (perhaps in 2001) scanned / digitally photographed them four-at-a-time, saved the result as a 330 MB Photoshop file with one 2×2 group in each of 13 layers (there are 50 images, probably because vacations), and burned that to a CD.
All I can say: it must have made sense at the time.
Anyhow, here in the future, I found that CD in a pile destined for the shredder, which shouldn’t ought to happen without some attention.
Here’s how I extracted the separate images from that file into standalone JPEGs, cropped them to a uniform size, and smushed them to suitably low quality:
convert A\ Year\ in\ the\ Life\ of\ Tolland\ CT\ -\ 1991.psd -quality 95 Tolland-1991-%02d.jpg
for f in {01..13} ; do convert Tolland-1991-$f.jpg -crop "1212x1775+0+0" img-$f-0.jpg ; done
for f in {01..13} ; do convert Tolland-1991-$f.jpg -crop "1212x1775+1212+0" img-$f-1.jpg ; done
for f in {01..13} ; do convert Tolland-1991-$f.jpg -crop "1212x1775+0+1775" img-$f-2.jpg ; done
for f in {01..13} ; do convert Tolland-1991-$f.jpg -crop "1212x1775+1212+1775" img-$f-3.jpg ; done
for f in {01..13} ; do for g in {0..3} ; do convert img-$f-$g.jpg -crop "1100x1650+50+50" out-$f-$g.jpg ; done ; done
sn=1 ; for f in {01..13} ; do for g in {0..3} ; do printf -v dn 'Tolland-1991-Maple-%02d.jpg' "$(( sn++ ))" ; convert img-$f-$g.jpg -crop "1100x1650+50+50" +repage -rotate 90 -define jpeg:extent=200KB $dn ; done ; done
Then WordPress assembles the 50 images into a slide show.
Of course, it didn’t go quite as smoothly as all that, but it took maybe half an hour of fiddling to get it right by iterating on the commands until I liked the results. One might tweak the exposures and suchlike, but that’s in the nature of fine tuning.
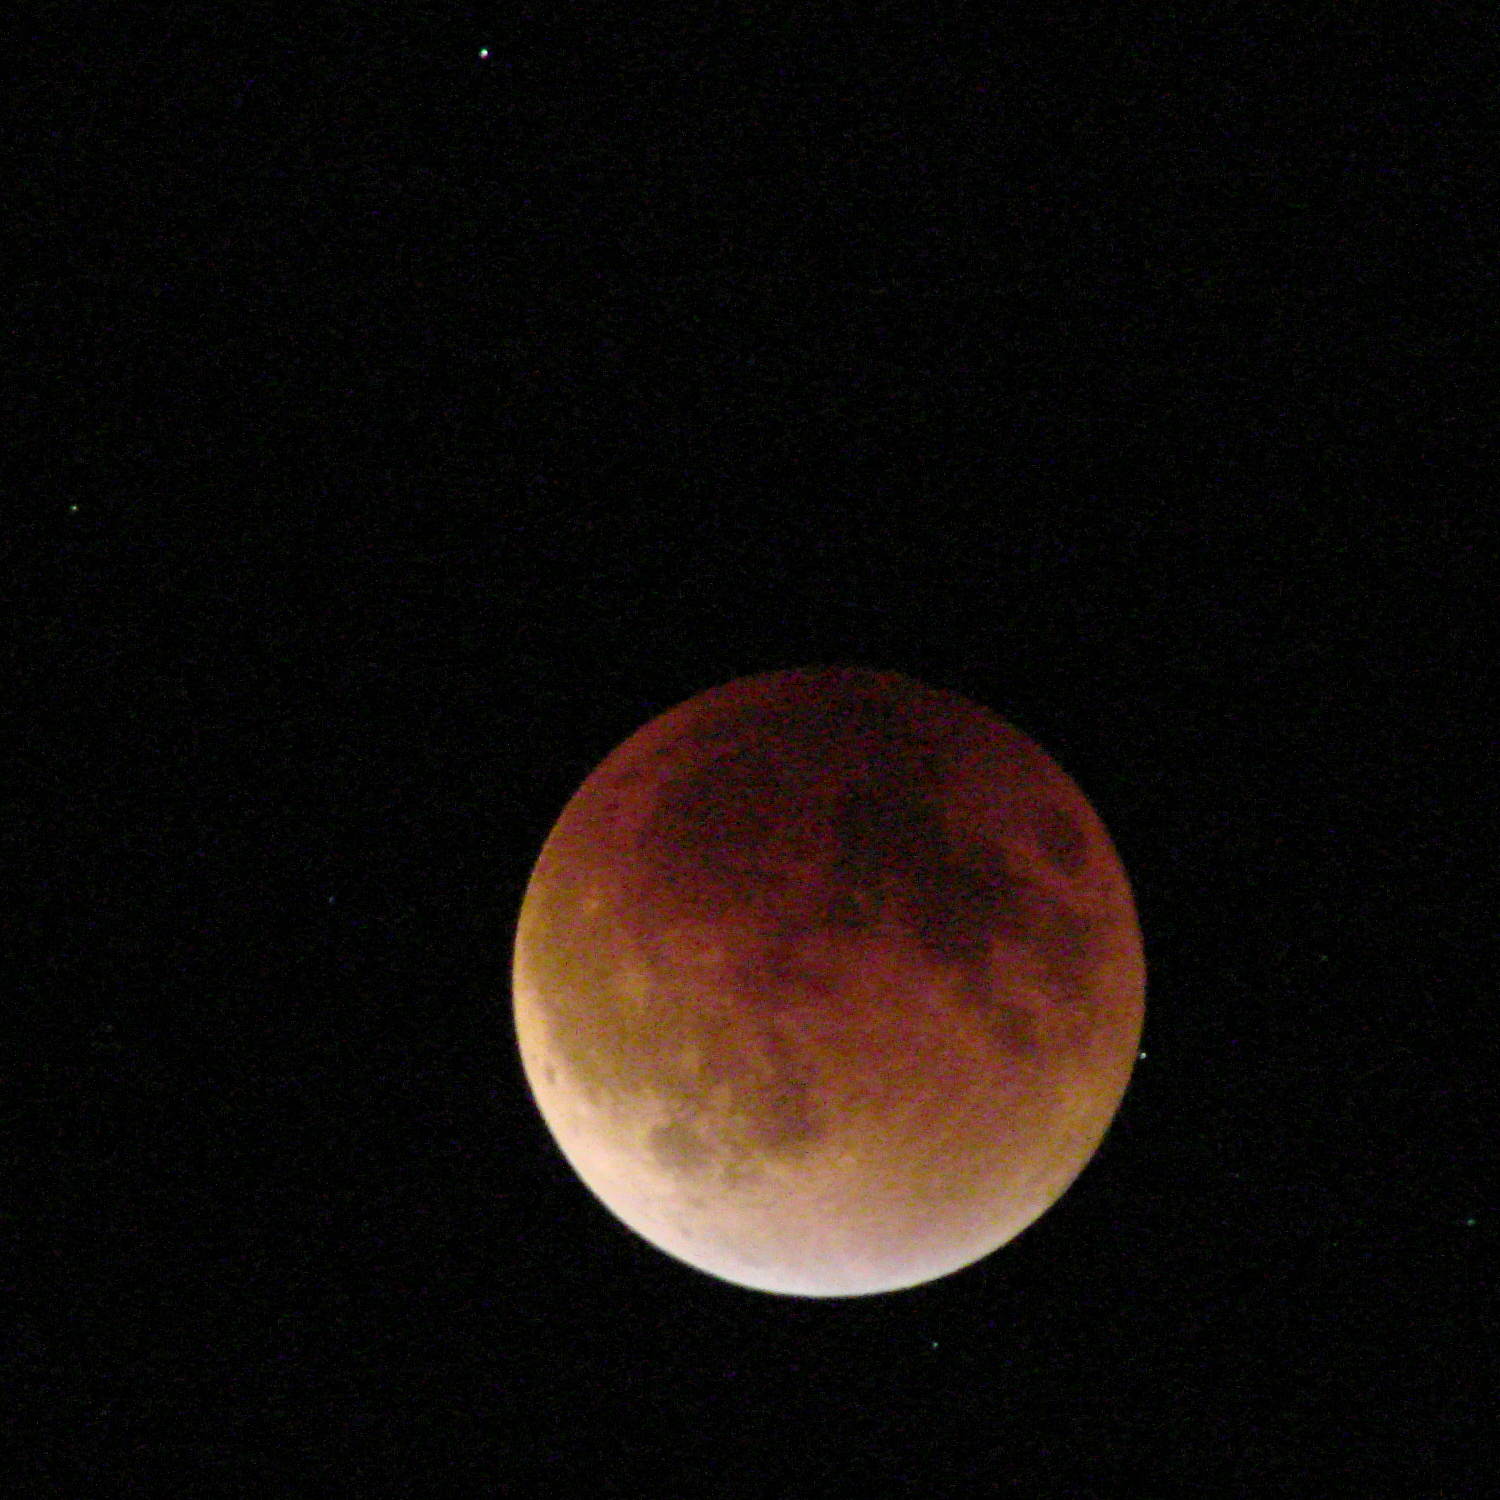
Lunar eclipses happens so rarely it’s worth going outdoors into the dark:
Supermoon eclipse 2015-09-27 2250 – ISO 125 2 s
That’s at the camera’s automatic ISO 125 setting. Forcing the camera to ISO 1000 boosts the grain and brings out the stars to show just how fast the universe rotates around the earth…
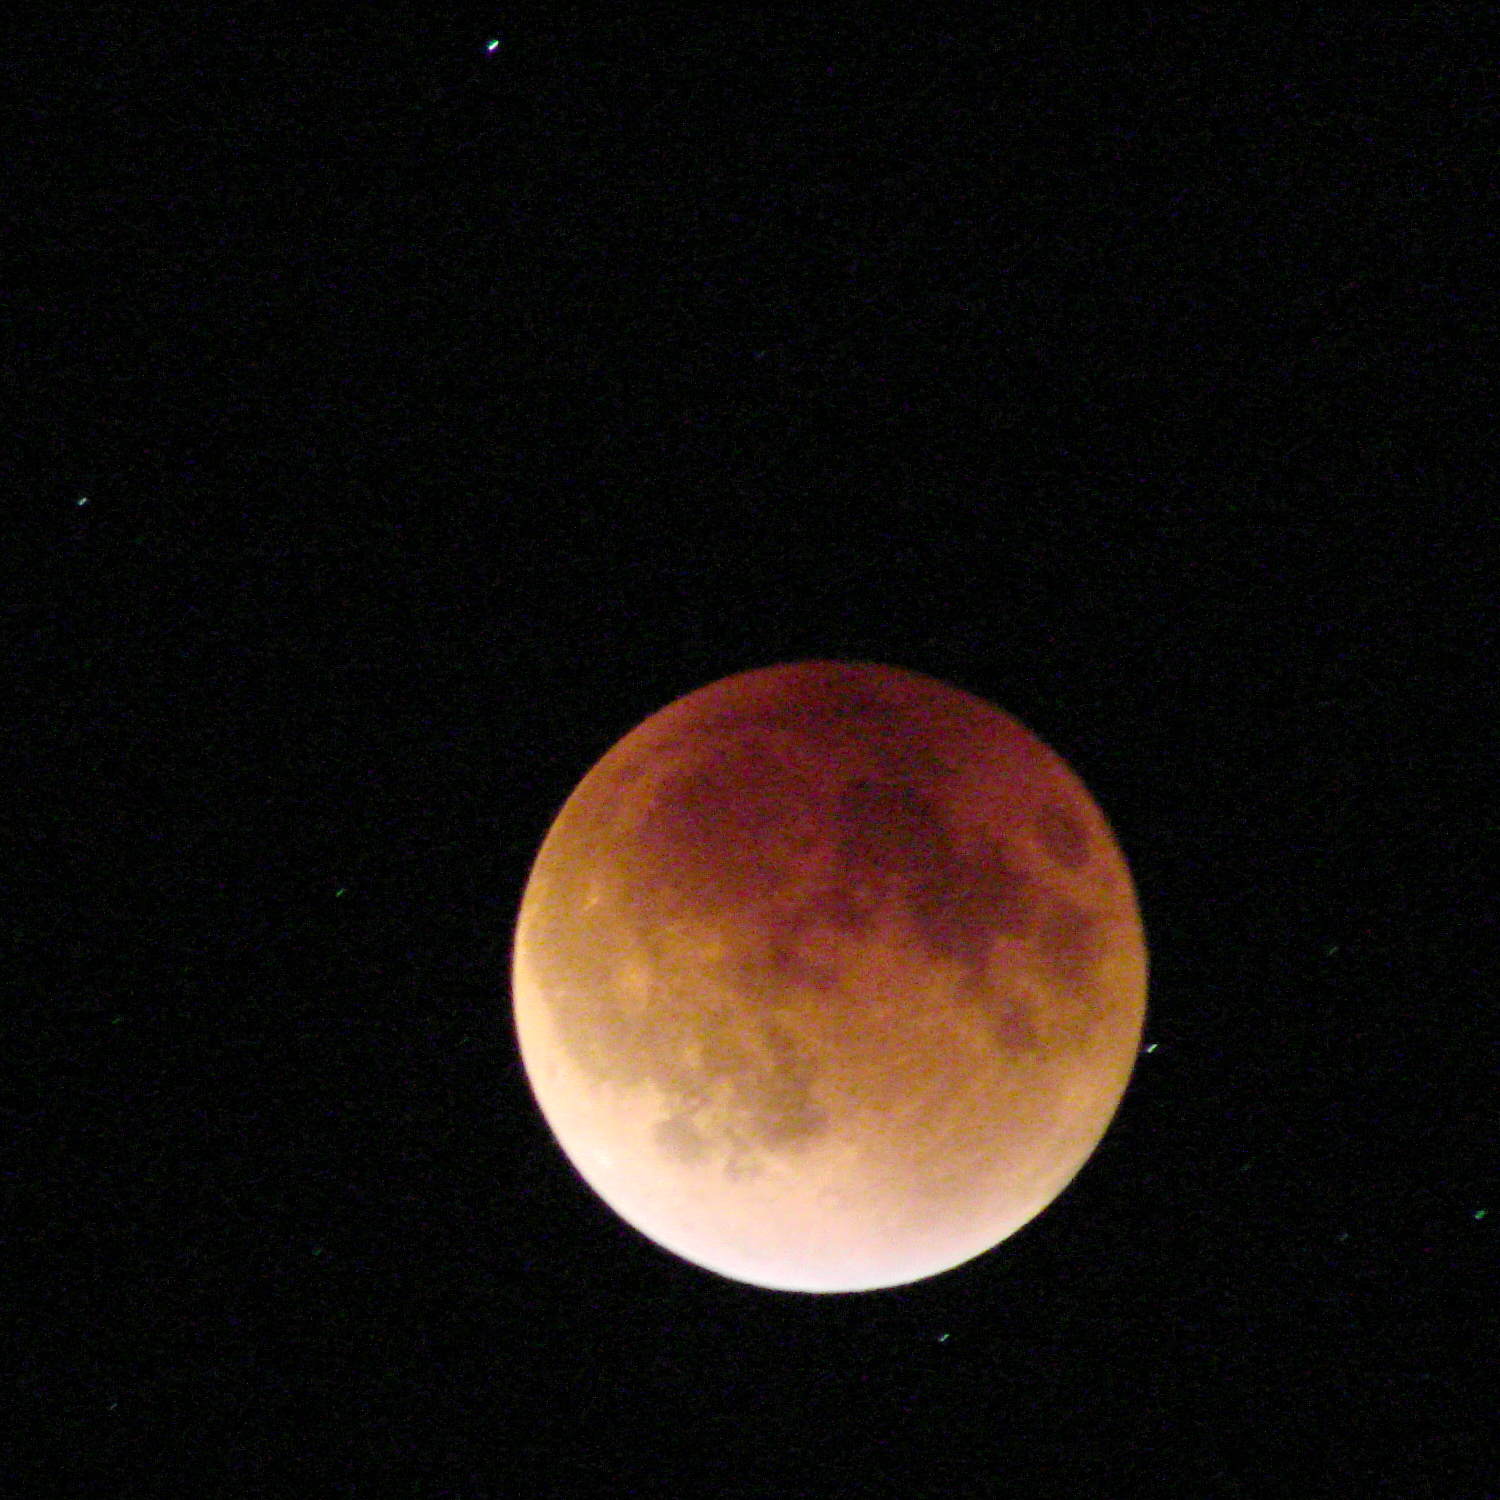
One second:
Supermoon eclipse 2015-09-27 2308 – ISO 1000 1 s
Two seconds:
Supermoon eclipse 2015-09-27 2308 – ISO 1000 2 s
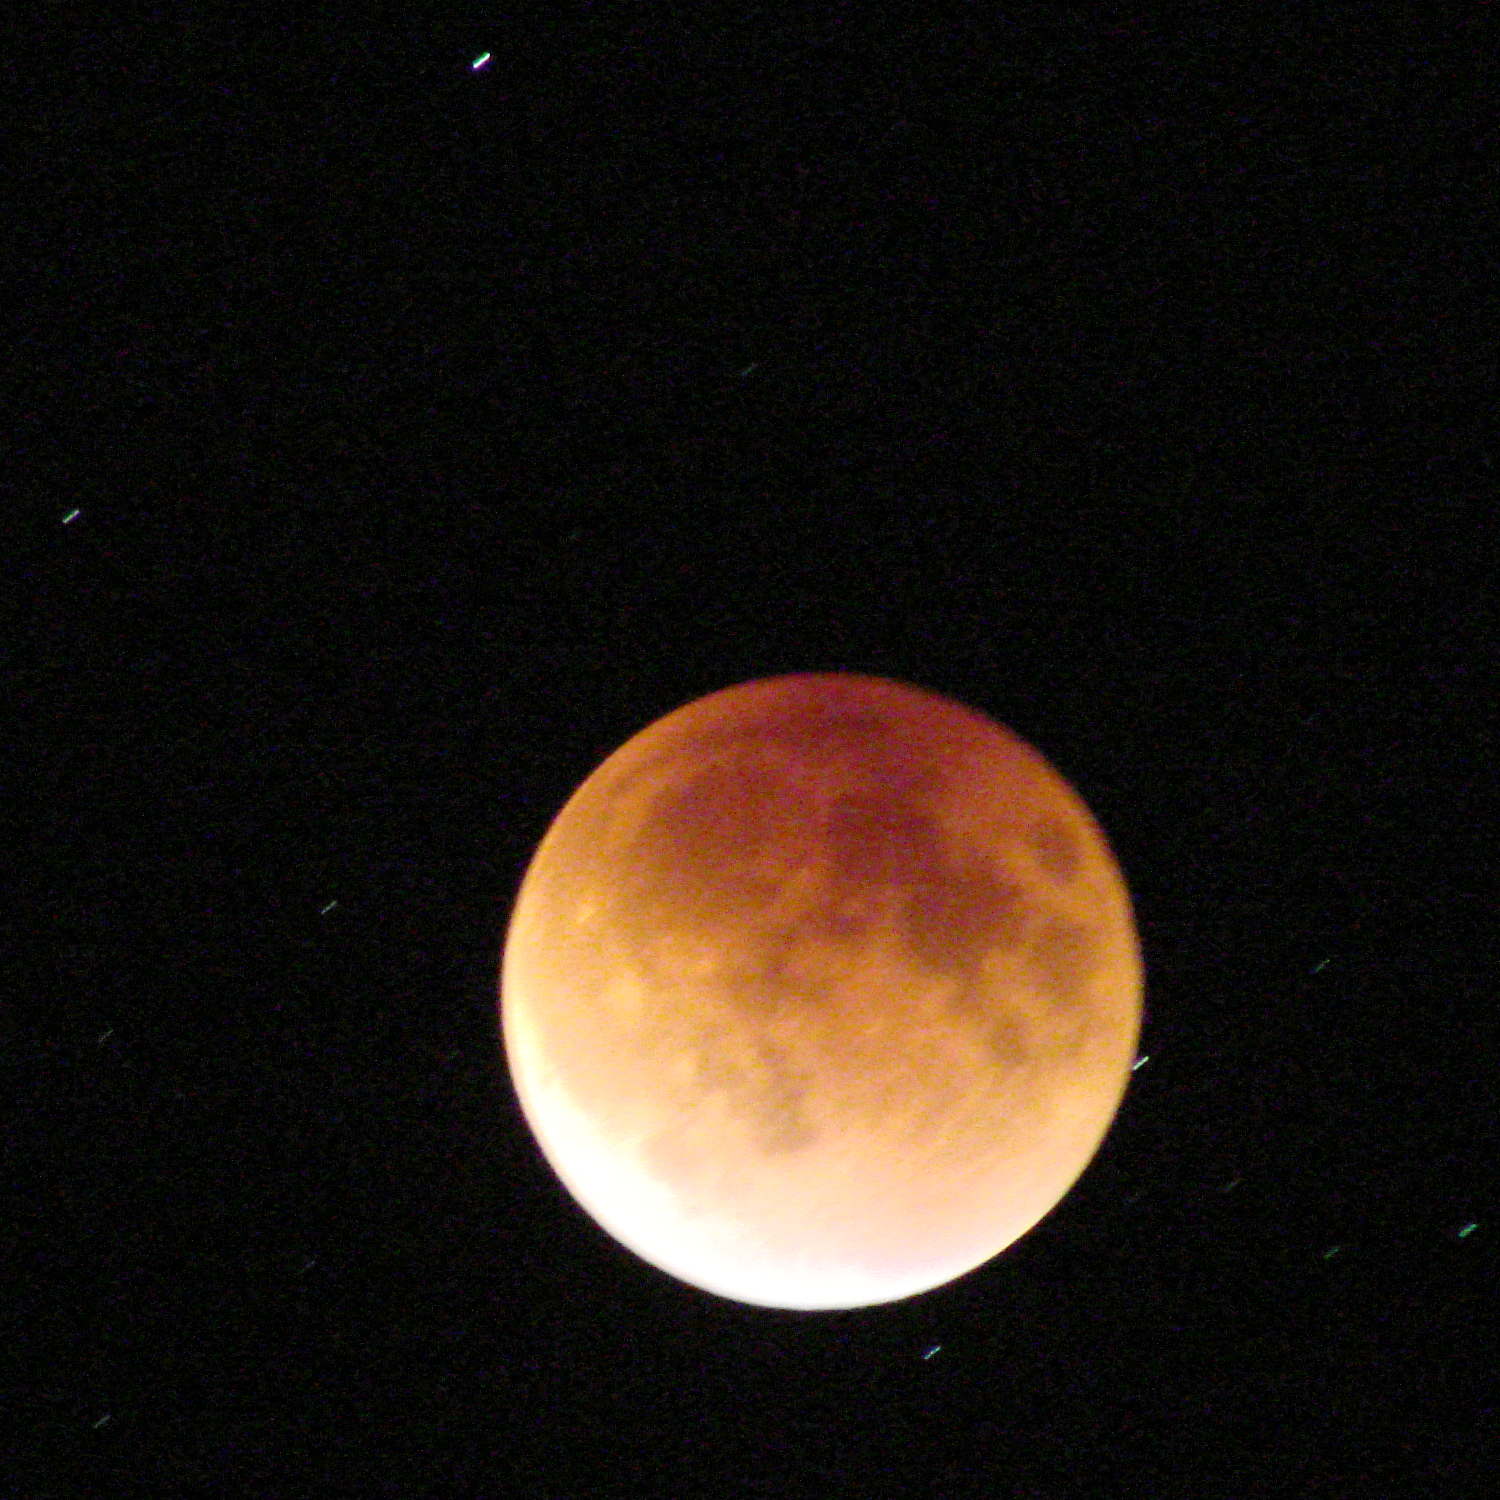
Four seconds:
Supermoon eclipse 2015-09-27 2308 – ISO 1000 4 s
Taken with the Sony DSC-H5 and the 1.7 teleadapter atop an ordinary camera tripod, full manual mode, wide open aperture at f/3.5, infinity focus, zoomed to the optical limit, 2 second shutter delay. Worked surprisingly well, all things considered.
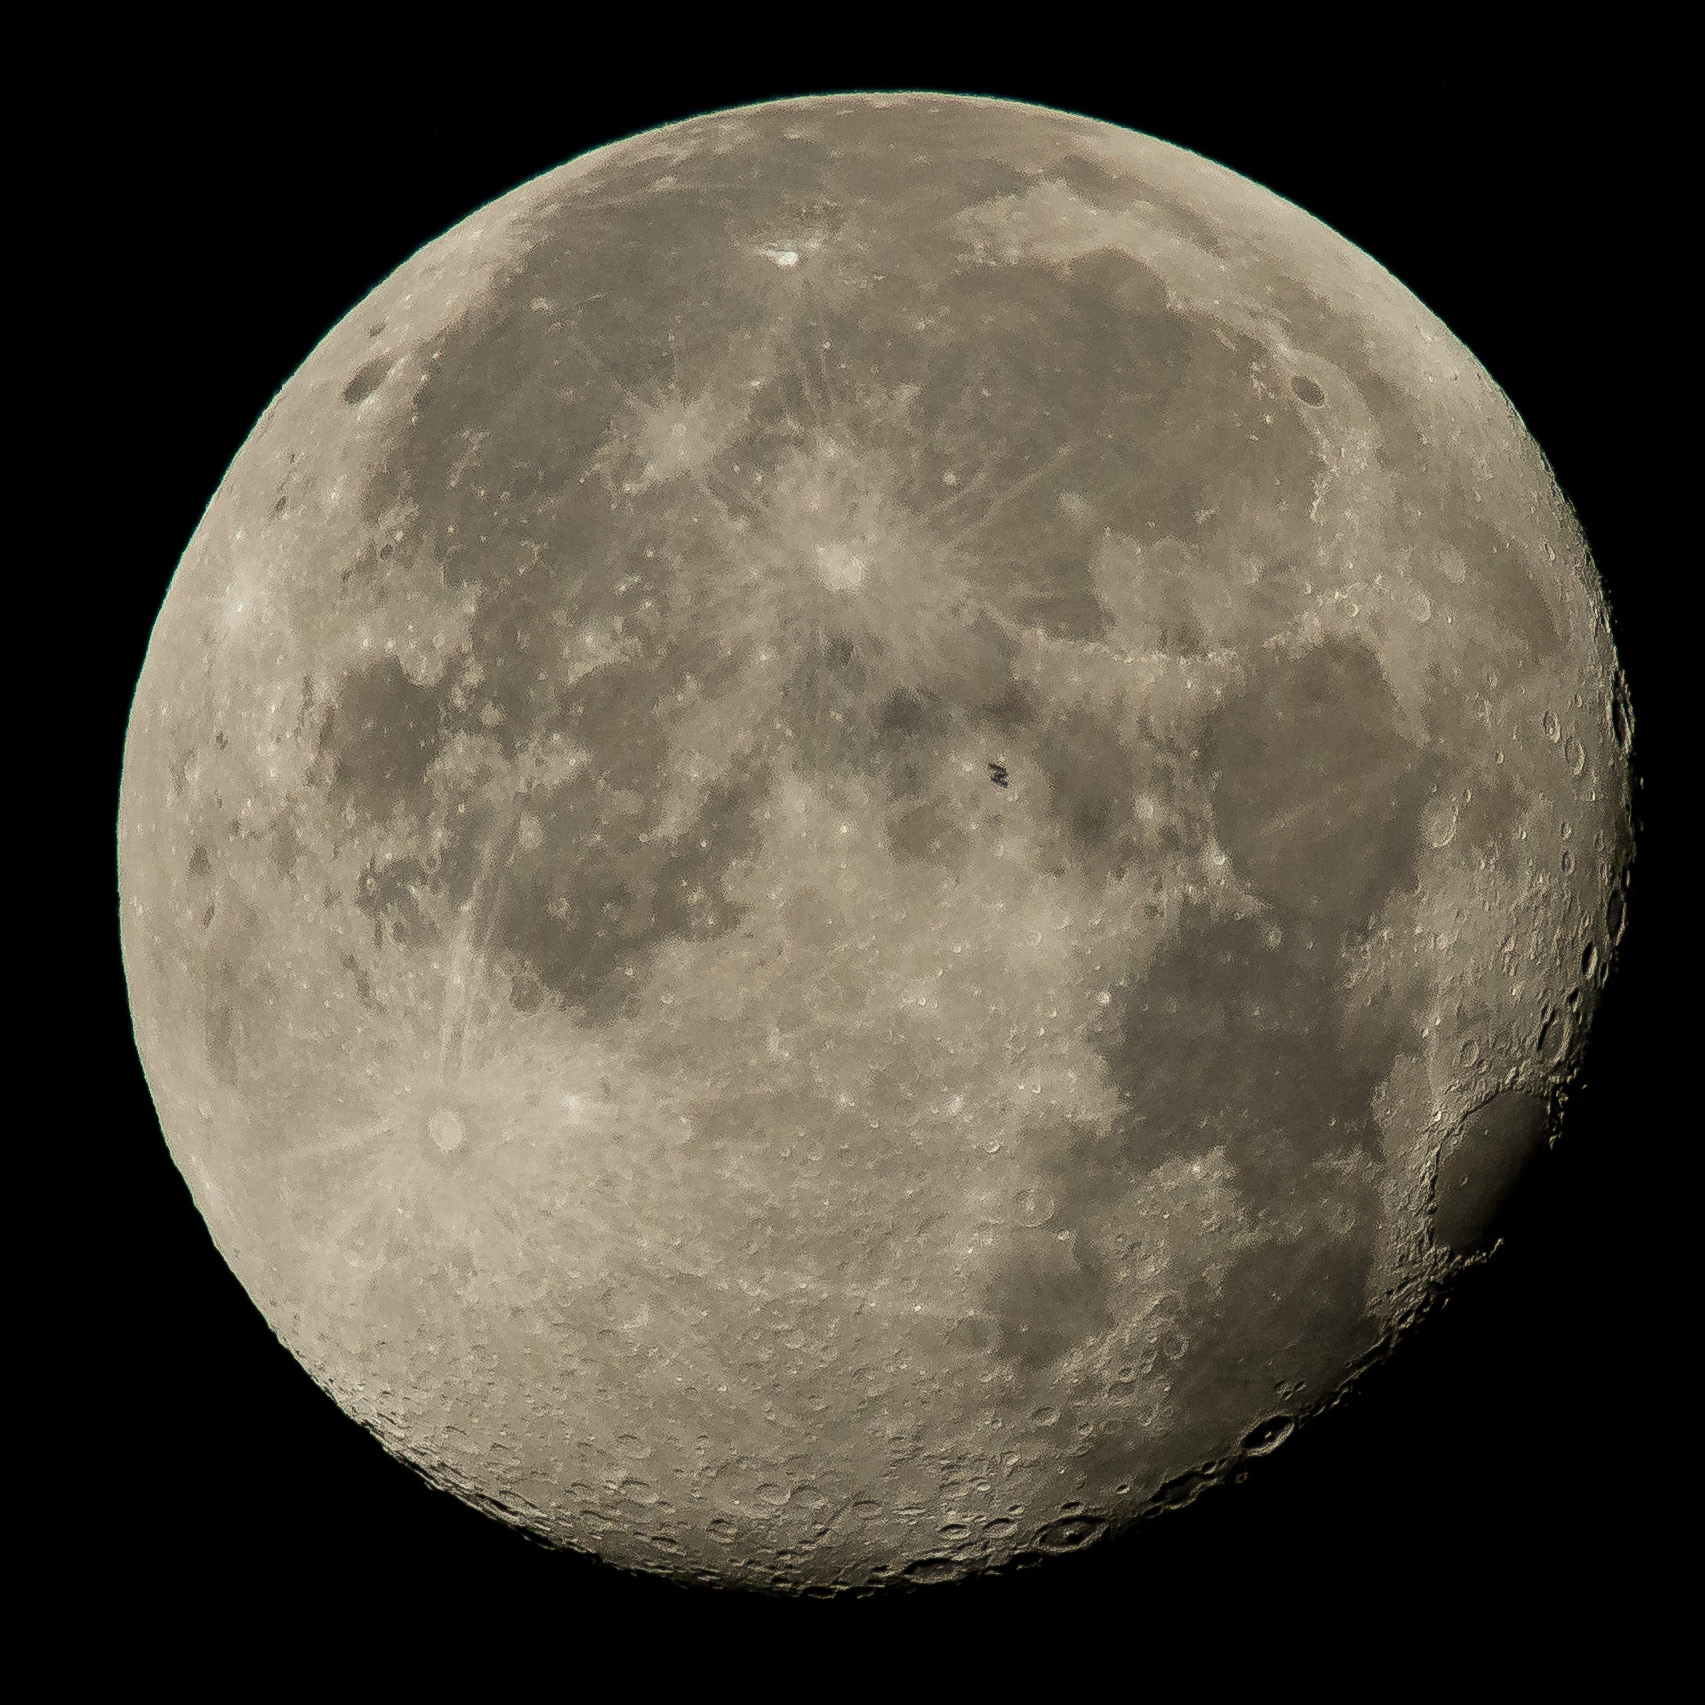
Mad props to the folks who worked out orbital mechanics from first principles, based on observations with state-of-the-art hardware consisting of dials and pointers and small glass, in a time when religion claimed the answers and brooked no competition.
ISS Moon Transit – 2015-08-02 – NASA 19599509214_68eb2ae39f_o
The next eclipse tetrad starting in 2032 won’t be visible from North America and, alas, we surely won’t be around for the ones after that. Astronomy introduces you to deep time and deep space.
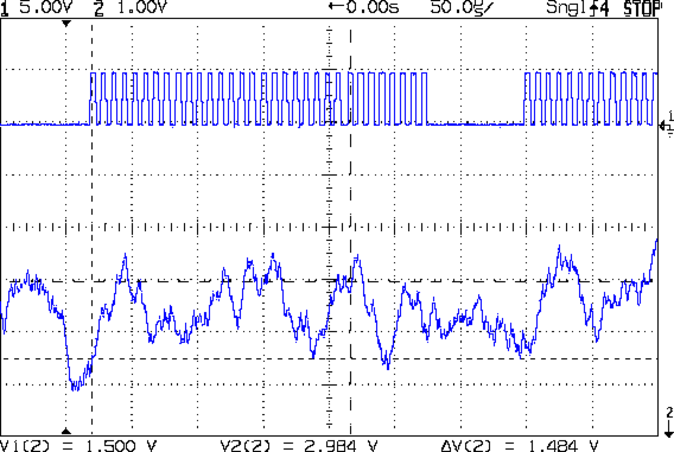
The relatively low bandwidth of the amplified noise means two successive samples (measured in Arduino time) will be highly correlated. Rather than putz around with variable delays between the samples, I stuffed the noise directly into the Arduino’s MISO pin and collected four bytes of data while displaying a single row:
unsigned long UpdateLEDs(byte i) {

unsigned long NoiseData = 0ul;

	NoiseData |= (unsigned long) SendRecSPI(~LEDs[i].ColB);				// correct for low-active outputs
	NoiseData |= ((unsigned long) SendRecSPI(~LEDs[i].ColG)) << 8;
	NoiseData |= ((unsigned long) SendRecSPI(~LEDs[i].ColR)) << 16;
	NoiseData |= ((unsigned long) SendRecSPI(~LEDs[i].Row))  << 24;

	analogWrite(PIN_DIMMING,LEDS_OFF);			// turn off LED to quench current
	PulsePin(PIN_LATCH);						// make new shift reg contents visible
	analogWrite(PIN_DIMMING,LEDS_ON);

	return NoiseData;
}
The bit timing looks like this:
SPI Sample – noise data – 01
The vertical cursors mark the LSB position in the first and last bytes of the SPI clock. The horizontal cursors mark the minimum VIH and maximum VIL, so the sampled noise should produce 0 and 1 bits at the vertical cursors. Note that there’s no shift register on the input: MISO just samples the noise signal at each rising clock edge.
I picked those two bit positions because they produce more-or-less equally spaced samples during successive rows; you can obviously tune the second bit position for best picture as you see fit.
Given a pair of sequential samples, a von Neumann extractor whitens the noise and returns at most one random bit:
#define VNMASK_A 0x00000001
#define VNMASK_B 0x01000000

enum sample_t {VN_00,VN_01,VN_10,VN_11};

typedef struct {
	byte BitCount;					// number of bits accumulated so far
	unsigned Bits;					// random bits filled from low order upward
	int Bias;						// tallies 00 and 11 sequences to measure analog offset
   unsigned SampleCount[4];	// number of samples in each bin
} random_t;

random_t RandomData;

... snippage ...

byte ExtractRandomBit(unsigned long RawSample) {

byte RetVal;

	switch (RawSample & (VNMASK_A | VNMASK_B)) {
	case 0:							// 00 - discard
		RetVal = VN_00;
		RandomData.Bias--;
		break;
	case VNMASK_A:					// 10 - true
		RetVal = VN_10;
		RandomData.BitCount++;
		RandomData.Bits = (RandomData.Bits << 1) | 1;
		break;
	case VNMASK_B:					// 01 - false
		RetVal = VN_01;
		RandomData.BitCount++;
		RandomData.Bits  = RandomData.Bits << 1;
		break;
	case (VNMASK_A | VNMASK_B):		// 11 - discard
		RetVal = VN_11;
		RandomData.Bias++;
		break;
	}

	RandomData.Bias = constrain(RandomData.Bias,-9999,9999);
	RandomData.SampleCount[RetVal]++;
	RandomData.SampleCount[RetVal] = constrain(RandomData.SampleCount[RetVal],0,63999);

	return RetVal;
}
The counters at the bottom track some useful statistics.
You could certainly use something more complex, along the lines of a hash function or CRC equation, to whiten the noise, although that would eat more bits every time.
The main loop blips a pin to show when the extractor discards a pair of identical bits, as in this 11 sequence:
SPI Sample – noise flag – 11
That should happen about half the time, which it pretty much does:
SPI Sample – noise flag – 1 refresh
The cursors mark the same voltages and times; note the slower sweep. The middle trace blips at the start of the Row 0 refresh.
On the average, the main loop collects half a random bit during each row refresh and four random bits during each complete array refresh. Eventually, RandomData.Bits will contain nine random bits, whereupon the main loop updates the color of a single LED, which, as before, won’t change 1/8 of the time.
The Arduino trundles around the main loop every 330 µs and refreshes the entire display every 2.6 ms = 375 Hz. Collecting nine random bits requires 9 x 330 µs = 3 ms, so the array changes slightly less often than every refresh. It won’t completely change every 64 x 8/7 x 3 ms = 220 ms, because dupes, but it’s way sparkly.
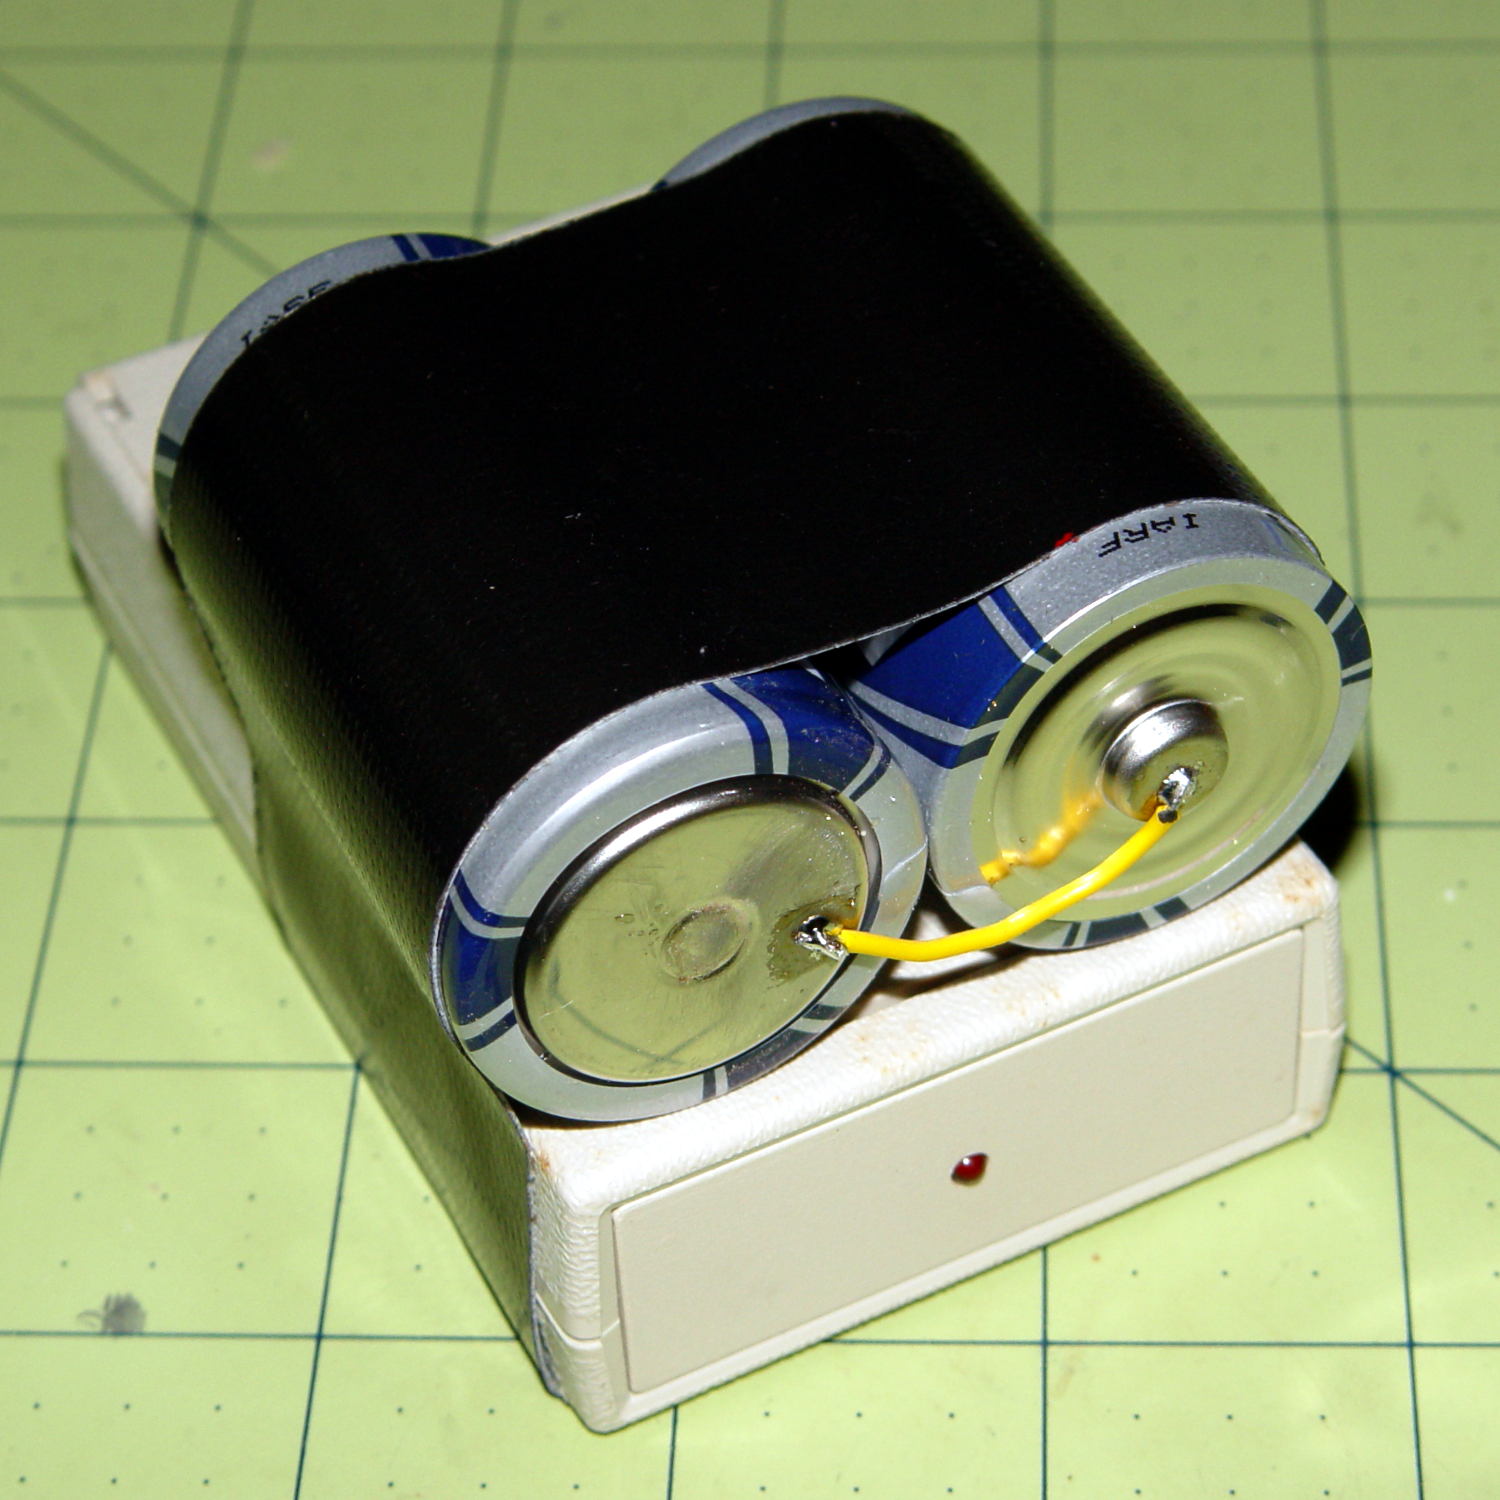
I duct-taped a pair of D cells onto the case and returned it to the bedroom shelf. According to the date scrawled on the tape, that was five years ago: 26 November 2010.
Over the last few months, the LED gradually faded from a blink to a steady glow as the battery voltage dropped below 2 V and the WWVB receiver output no longer reached the MOSFET’s threshold.
We’ll see how long these last:
Alpha Geek Clock – new batteries
Yeah, I should probably do something involving 3D printing…
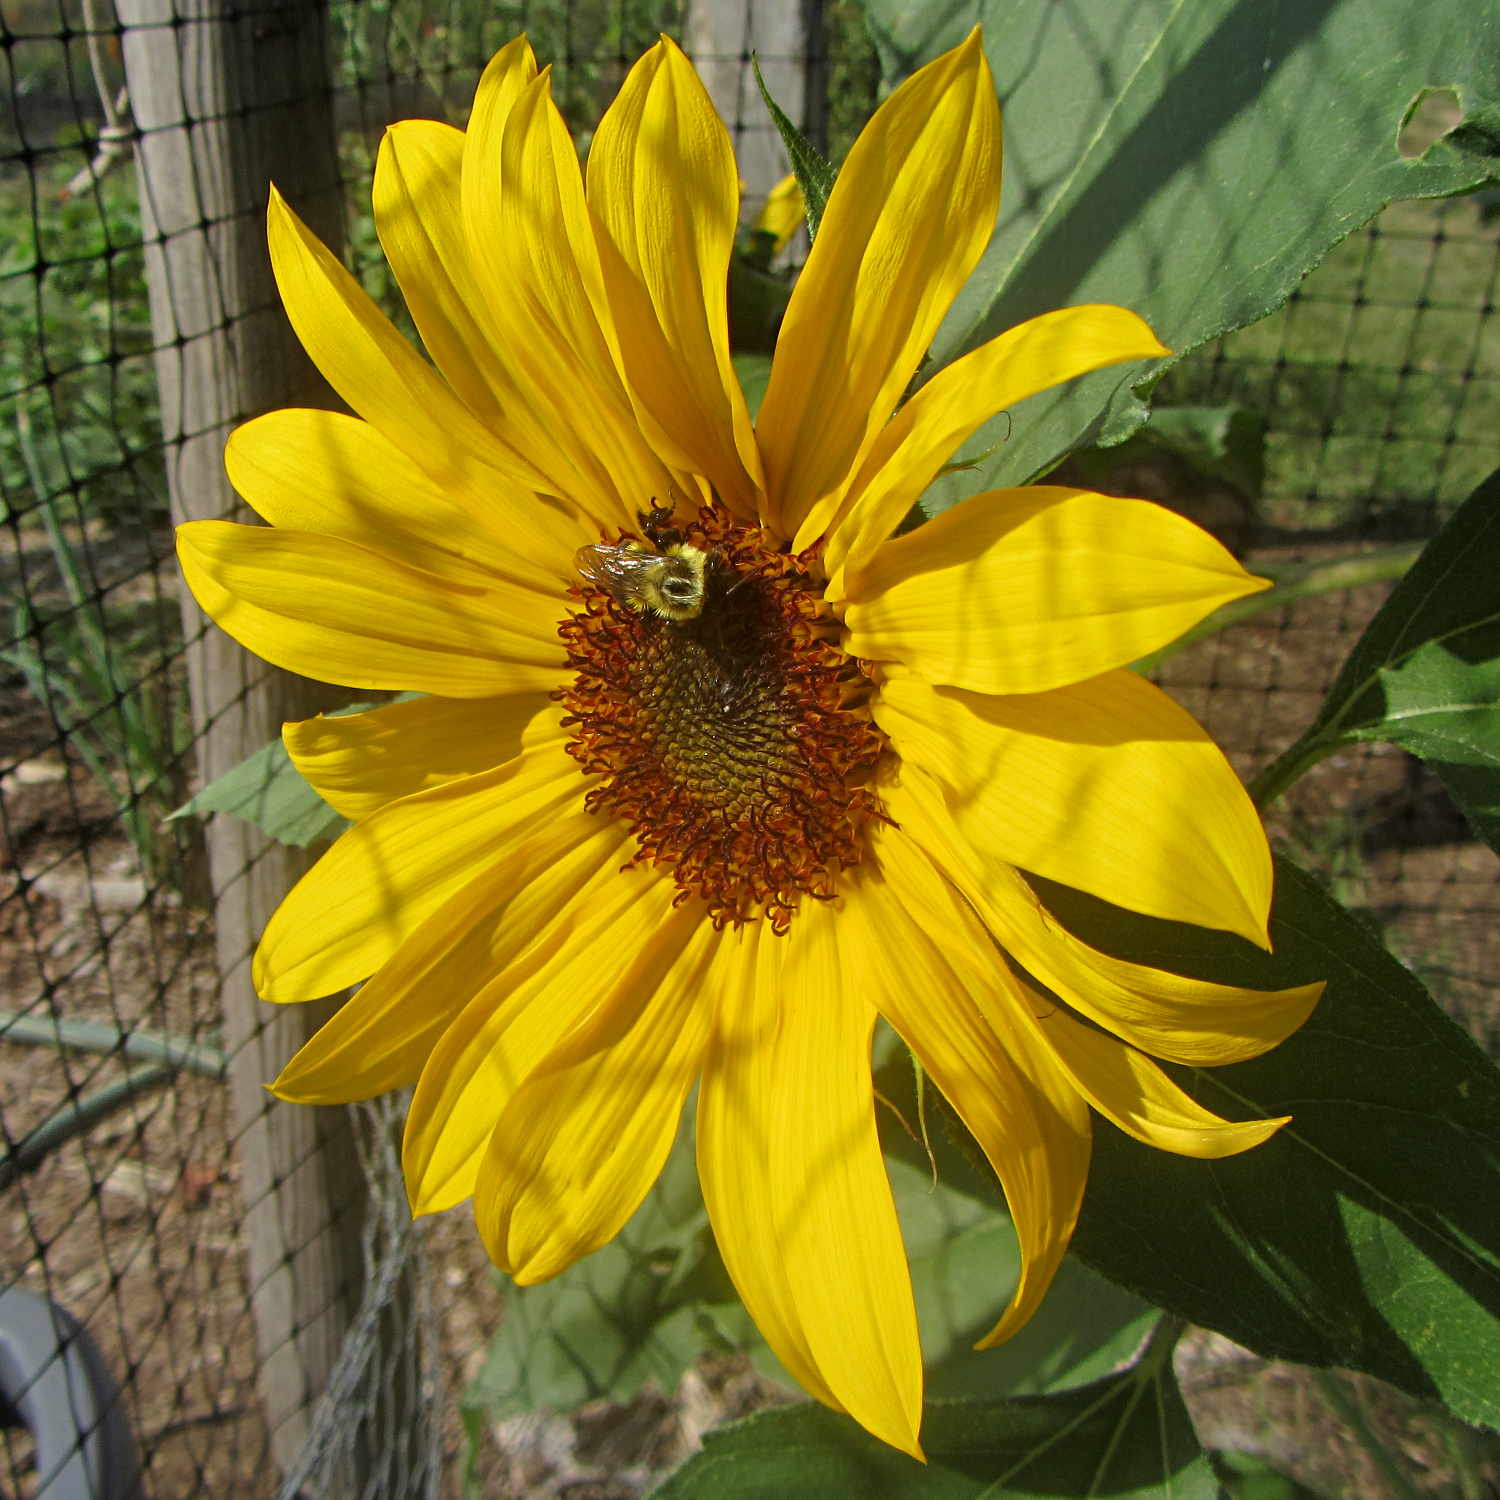
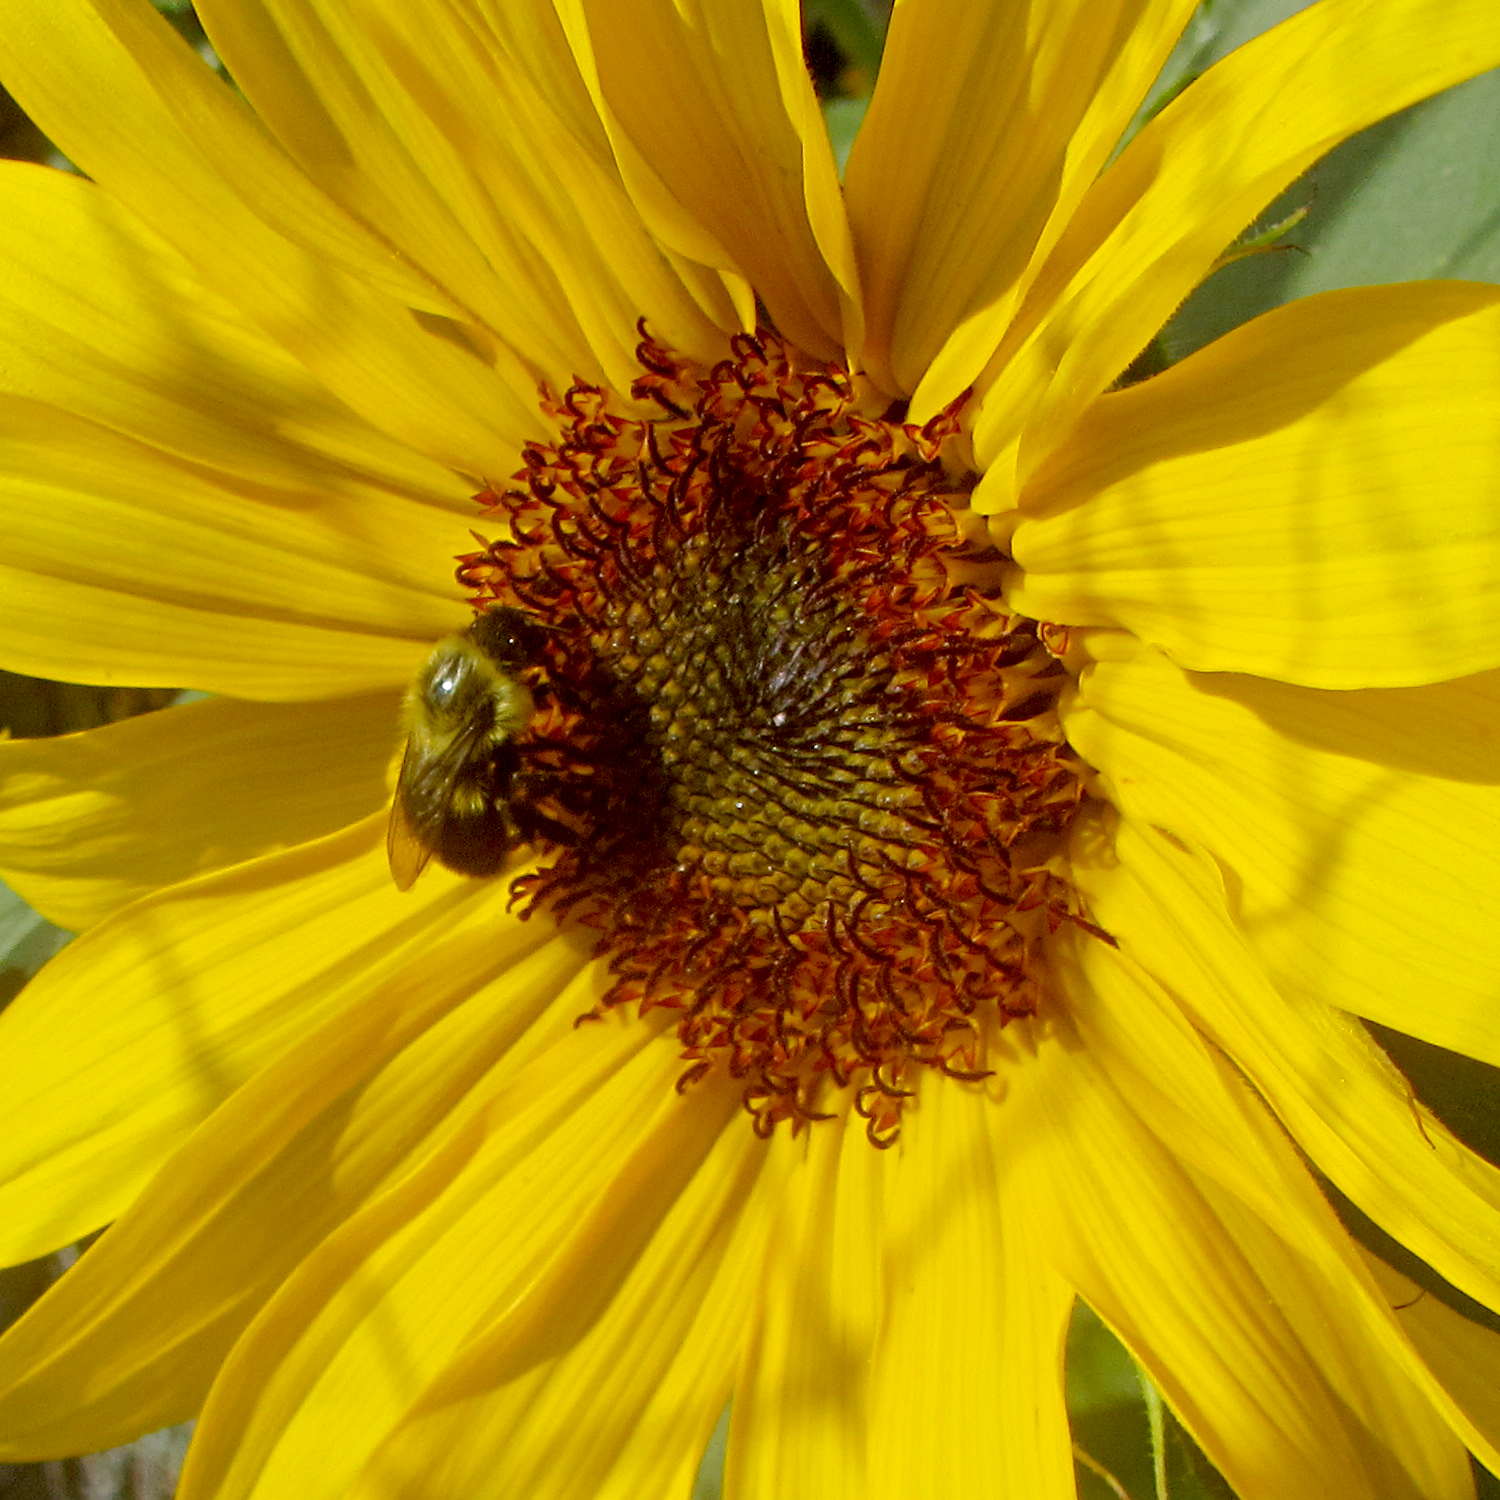
A stray sunflower seed decided that the spot just outside the garden gate was perfect and gave Mary’s garden an attractive marker. It will eventually have a dozen blossoms, each one serving as a buffet for the local bumblebees:
Sunflower with bumblebee
Each bee makes several complete circuits of the florets, draining the nectar and collecting pollen as she goes:
Sunflower with bumblebee – detail
Mary tucks the open gate inside the garden to avoid disturbing the pollinators, as wasps tend to have short fuses and multiple-strike stingers:
Sunflower with wasp
The bumblebee traveled clockwise and the wasp went counterclockwise, but I don’t know if that’s the general rule. I certainly won’t dispute their choices!
In a few weeks, long after the petals fall away, a myriad small birds will harvest the dried seeds…
After replacing that washer, the last step in the platform alignment required 1/6 turn on the front screw between the top two sets of measurements:
M2 Alignment measurements – 2015-08-09 – 2
The last two sets show the sample-to-sample variation with no adjustments, which didn’t amount to much.
Without changing anything else, I then switched from magenta PETG filament to cyan and ran off two more sets of thinwall hollow boxes (in addition to other doodads) over the next two days:
M2 Alignment measurements – 2015-08-10
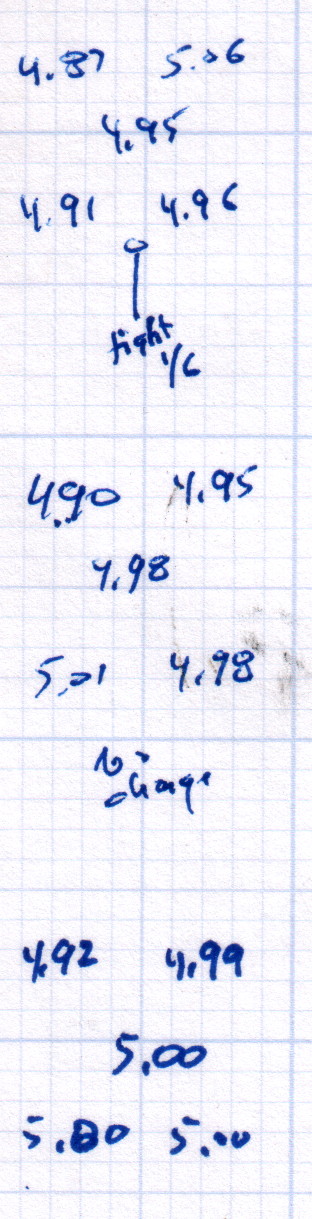
A bit less than a month later, after producing several iterations of unrelateddoodads:
M2 Alignment measurements – 2015-09-07
The variation in the center box height from 4.94 mm to 5.00 mm shows that sensing the platform Z-axis position directly on the glass surface actually works the way it should: ±0.03 mm is as good as it gets. Given that my measurement error / eyeballometric averaging on any given box runs around ±0.02 mm, the far corners also seem rock-stable and certainly don’t justify automatic alignment probing and adjustment.
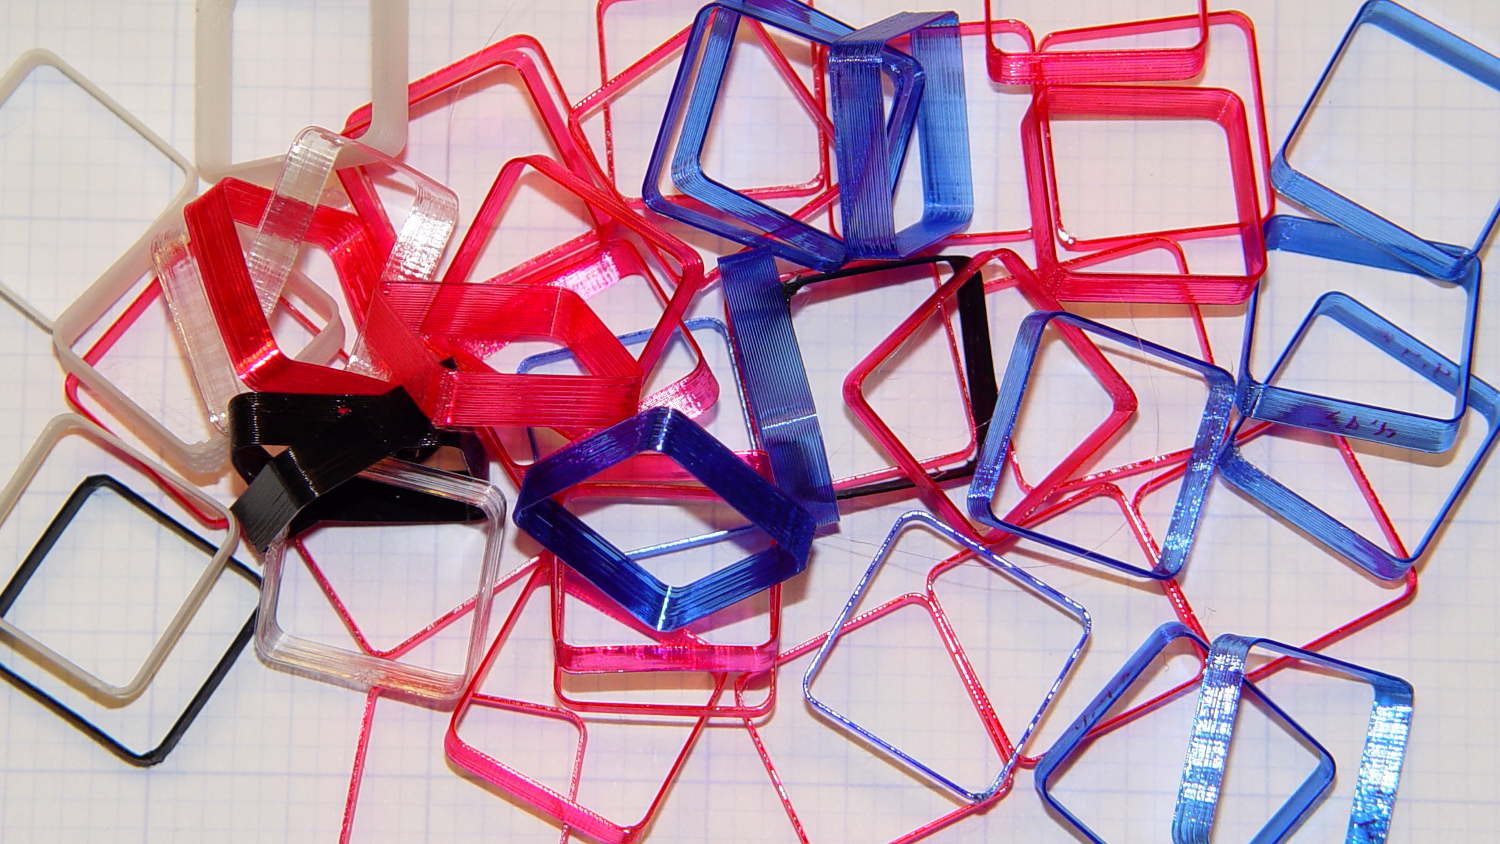
Thinwall hollow boxes make good handouts at 3D printing presentations…
Last month’s basement safe log showed the humidity (blue trace) relentlessly rising:
Basement Safe – 2015-08-09
Replacing that bag emptied the dried silica gel stash, so I piled six saturated bags in the oven for an overnight regeneration with the oven set to “Warm”, which the IR thermometer reported as 140 °F or so at the bag surface. They sat on cooling racks atop cookie sheets that pretty much filled two oven shelves, with good air flow across their tops and minimal flow between bags and cookie sheet.
The last time around, I spread the beads directly on the cookie sheets. That seemed like a lot of effort, so I wanted to see how the low-labor alternative worked.
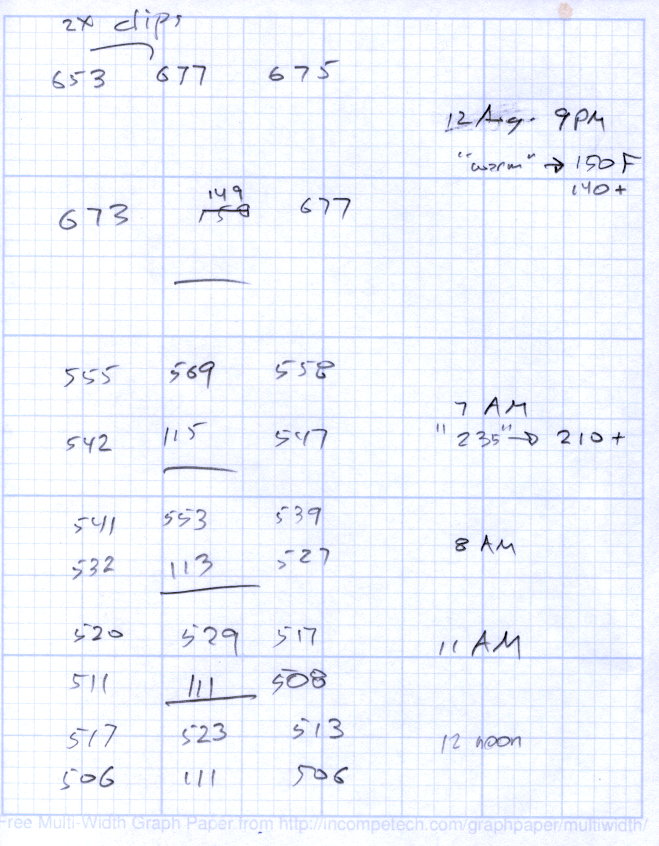
The two upper-left bags in each group had a pair of bulldog clips holding them closed. The larger bags hold 500 g of “dry” silica gel and the center bag in the lower row was a smaller mesh bag:
Silica Gel drying – 2015-08-12
The big bags lost a bit under 130 g during 10 hours, call it 12 g/h, and felt slightly damp on their lower surface.
I cranked the oven to 230 °F, the lowest actual heat setting, for 210 °F on the bag surface. That got rid of the last 30 g in three hours; another hour brought them to pretty nearly their dry weight of 507 g (gross, with bag / staples / clips).
Drying being an exponential process, it looks like an overnight bake at “230 °F” will do the trick without melting the bags; the lower temperature doesn’t quite get the job done.