Ed Nisley's Blog: Shop notes, electronics, firmware, machinery, 3D printing, laser cuttery, and curiosities. Contents: 100% human thinking, 0% AI slop.
Category: Science
If you measure something often enough, it becomes science
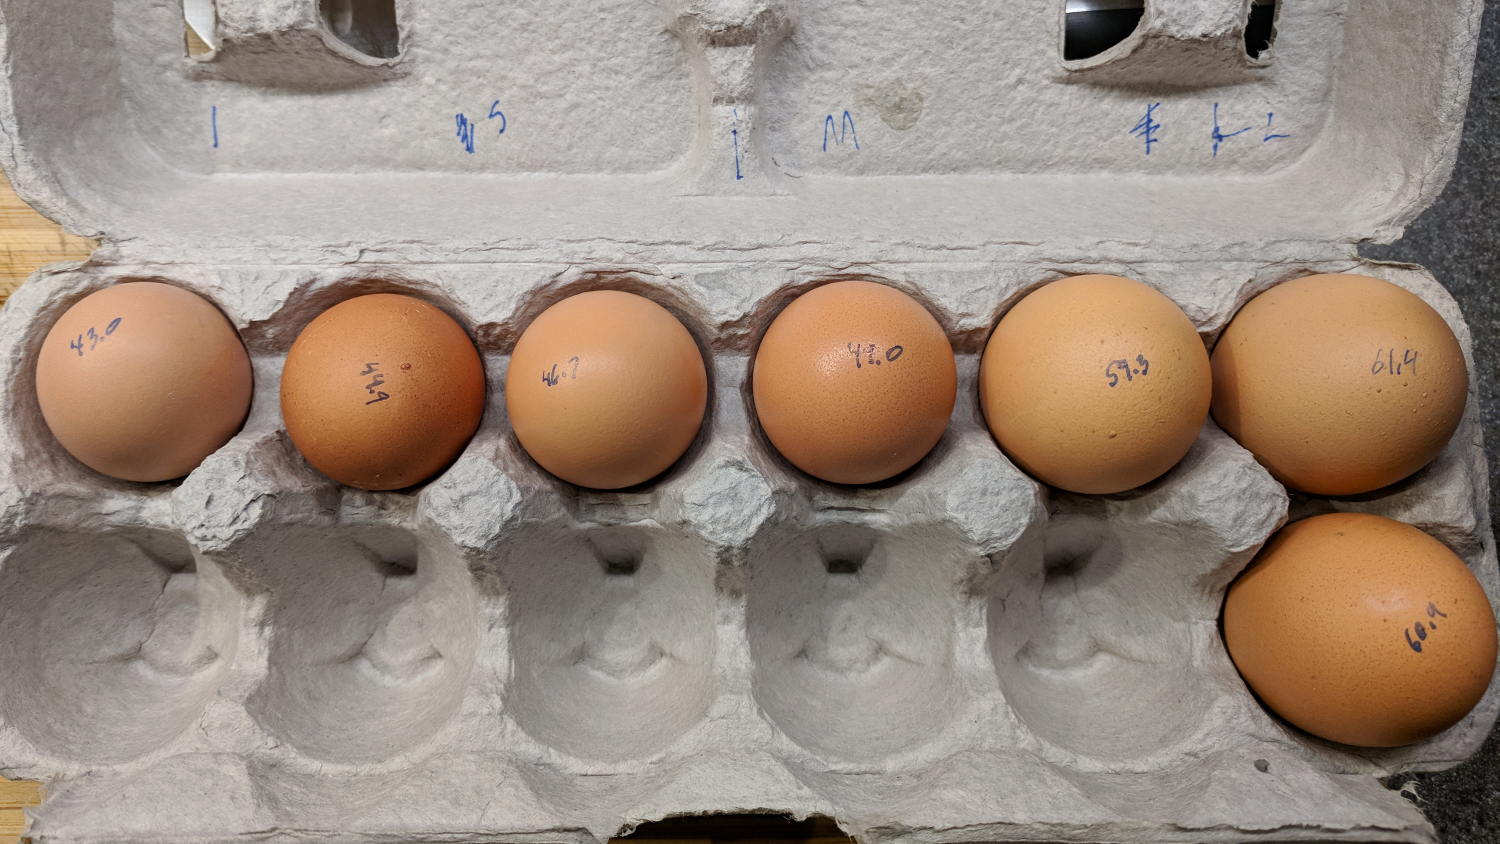
We got several cartons of “medium” brown eggs with what seemed like an unusually wide size distribution, so I picked out and weighed an assortment for future reference:
We occasionally get huge eggs, tiny eggs, eggs with two yolks, no yolks, or blood-spotted yolks, all of which turn out to be no big deal. I admit to not previously encountering the term “fart egg”, however …
Although I repaired the spout a while ago, those water bottles were never satisfactory and saw very little use. A recent cabinet cleanout showed the “stainless steel” has passed beyond its best-used-by date:
Stainless steel water bottle – rust
With no regard for whether the patient would survive the operation, I peeled off its rubber foot and applied the Lesser Hammer:
Stainless steel water bottle – insulation
The “insulation” seems to be a rigid urethane-like foam disk few millimeters thick on the bottom of the interior flask, with good old air around the sides.
The bottles never worked very well and now we know why.
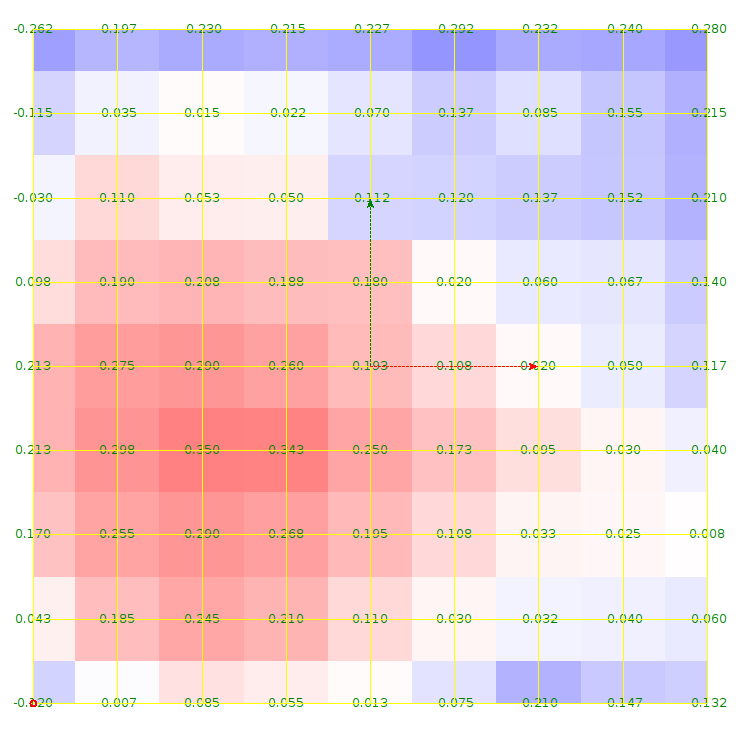
The first height map looks like a mountain sproinged right up through the glass:
ProbeArray-Glass-50
More red-ish means increasing height, more blue-ish means increasing depth, although you can only see the negative signs along the left edge.
The Z axis leadscrew produces 400 step/mm for a “resolution” of 0.0025 mm. The bCNC map rounds to three places, which makes perfect sense to me; I doubt the absolute accuracy is any better than 0.1 mm on a good day with fair skies and a tailwind.
The peak of the mountain rises 0.35 mm above the terrain around it, so it barely counts as a minor distortion in the glass sheet. Overall, however, there’s a 0.6 mm difference from peak to valley, which would be enough to mess up a rigidly held pen tip pretty badly if you assumed the glass was perfectly flat and precisely aligned.
Rotating the glass around the X axis shows a matching, albeit shallower, dent on the other side:
ProbeArray-Glass-flip-50-2018-01-05
For all its crudity, the probe seems to be returning reasonable results.
The obvious question: does it return consistent results?
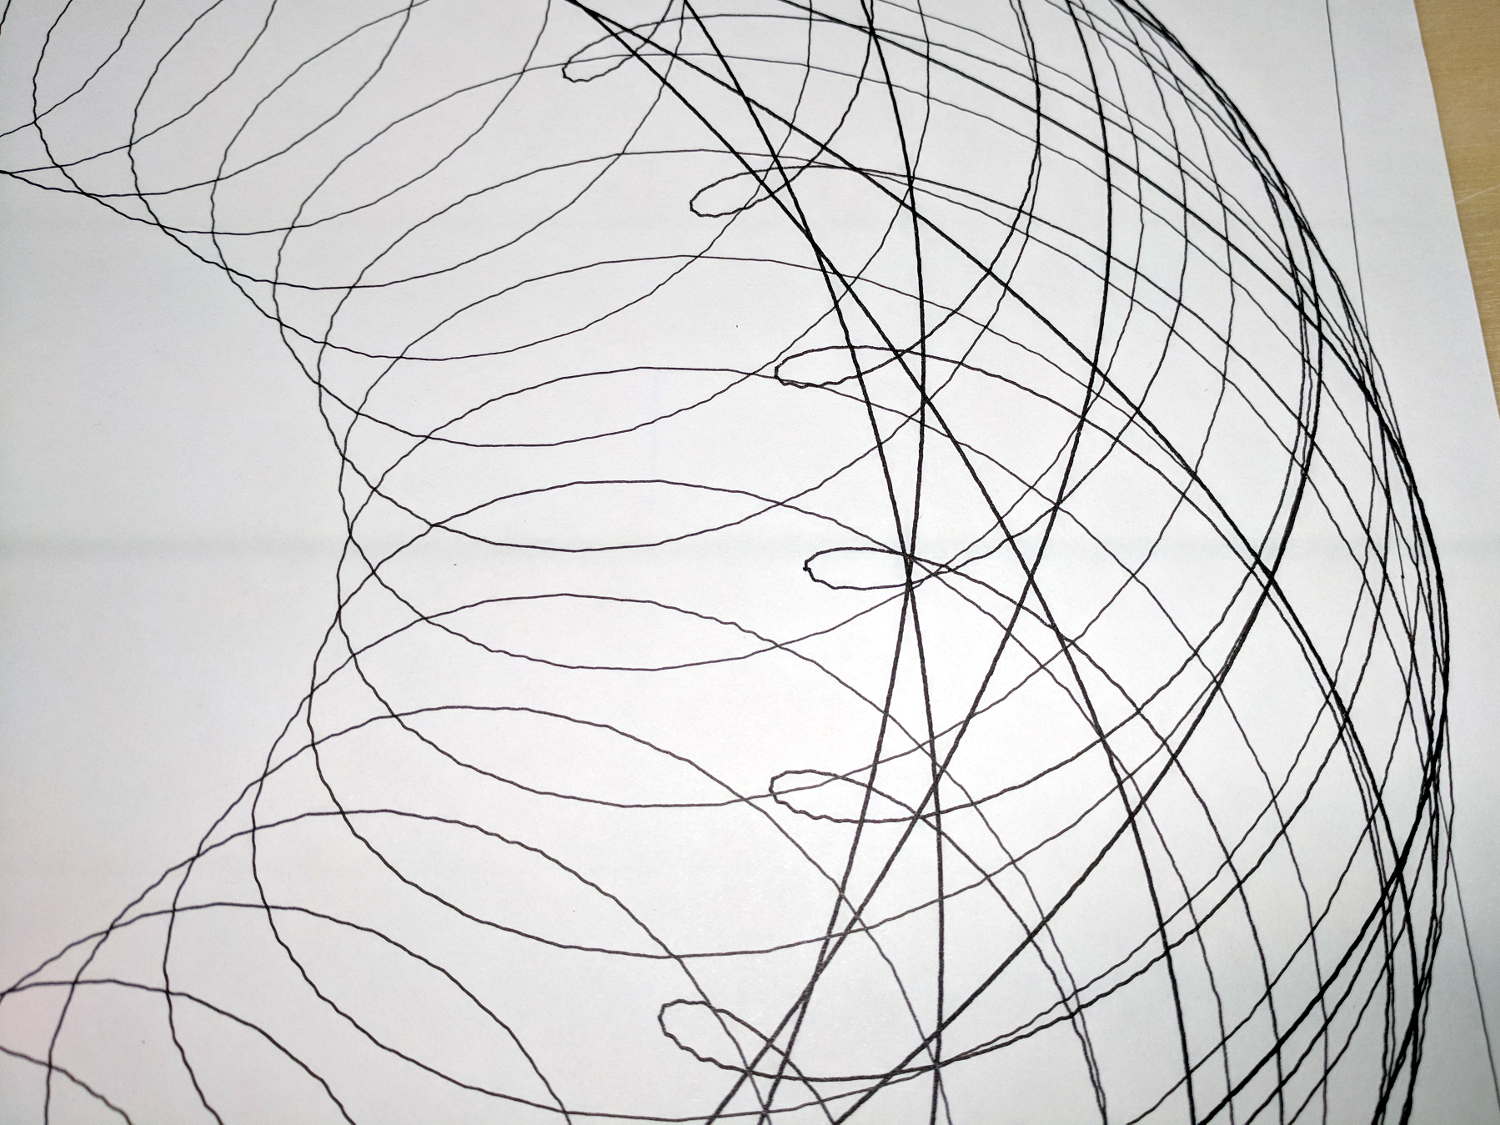
They’re all 01 size pens, with a nominal 0.25 mm line.
Just for fun, a plot done with four sizes of black Sakura pens at Z=-1.0 before the Great Leveling:
MPCNC – Sakura Micron black pen widths
The 005 pen made a nearly rectangular single-pass tour around the perimeter of the plot, so you’ll see it passing through every legend.
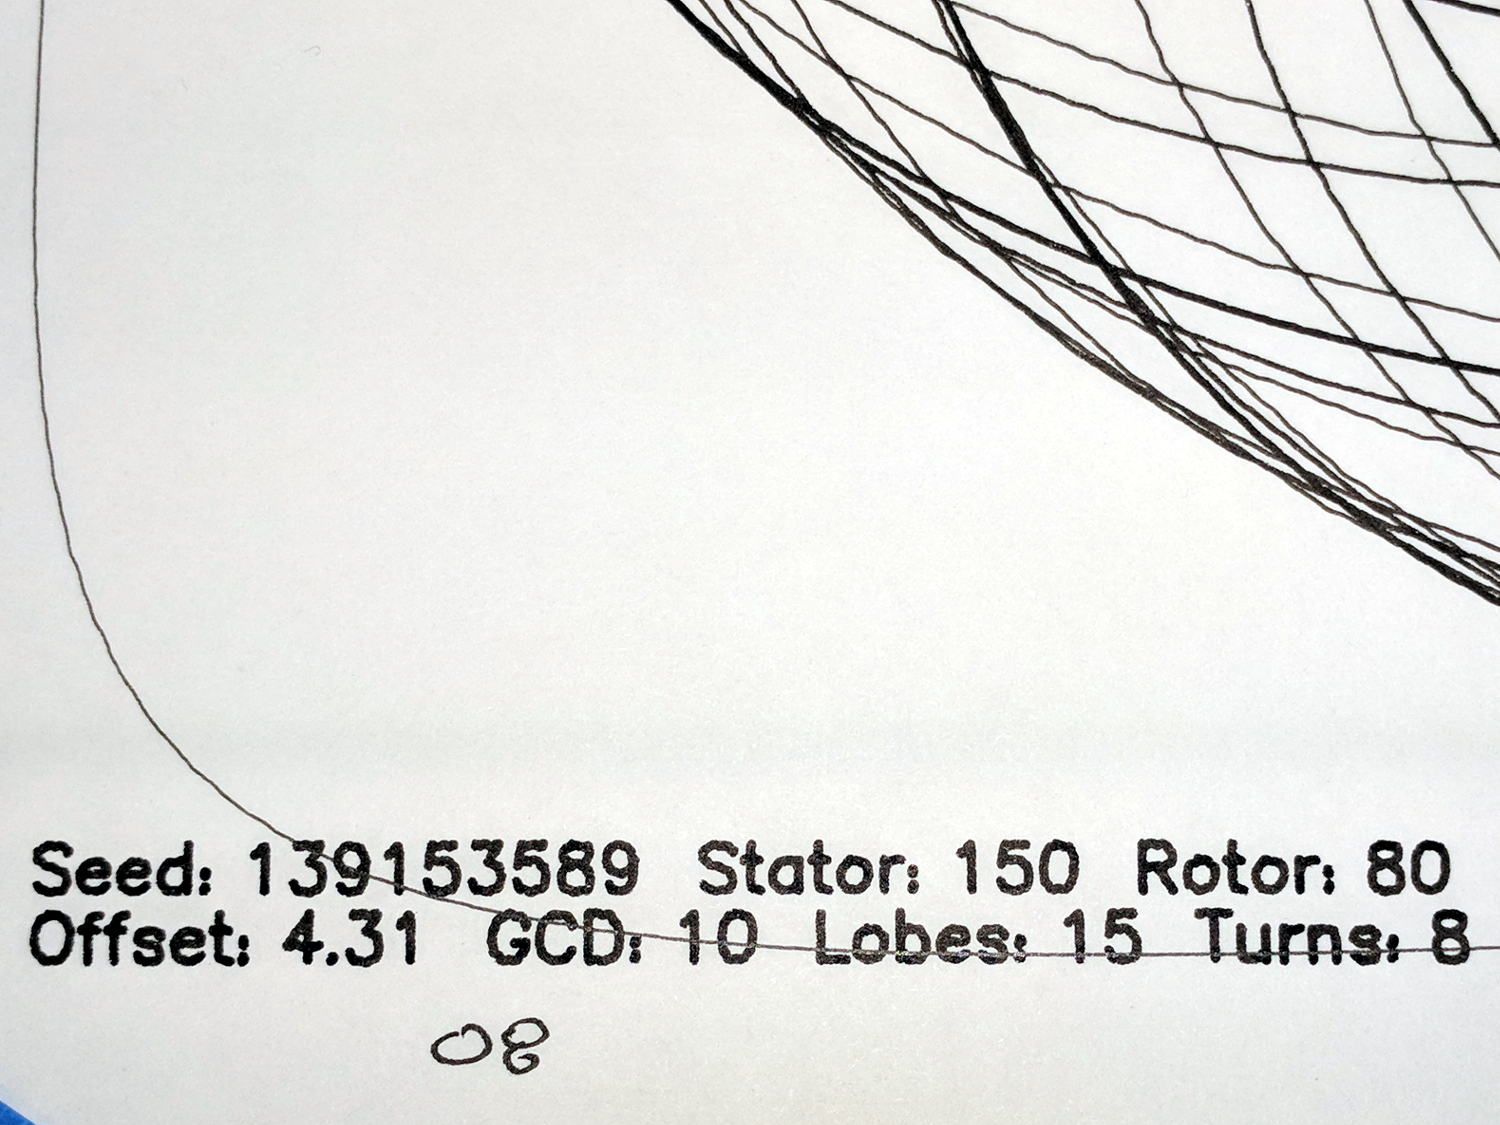
The chunky-by-comparison 08 pen = 0.50 mm:
MPCNC – Sakura Micron 08 Black – detail
The 05 pen = 0.45 mm looks much crisper:
MPCNC – Sakura Micron 05 Black – detail
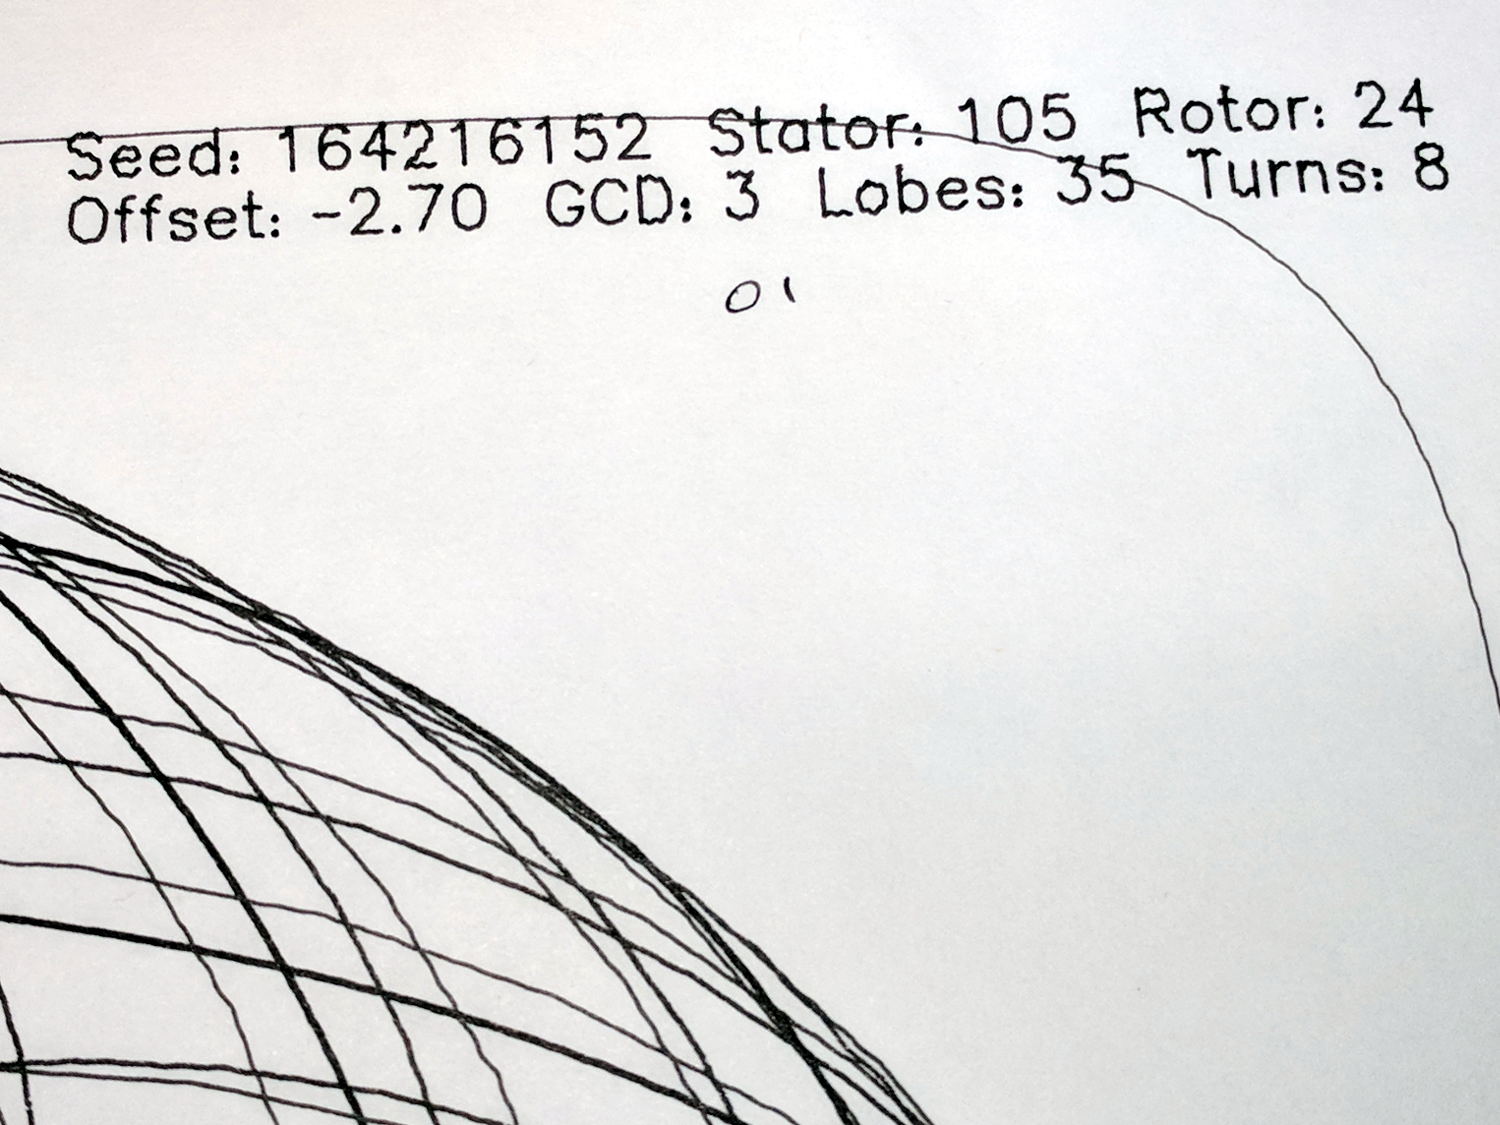
The 01 pen = 0.25 mm:
MPCNC – Sakura Micron 01 Black – detail
The almost-can’t-see-it 005 pen = 0.20 mm:
MPCNC – Sakura Micron 005 Black – detail
If you were doing this for a living, you’d probably use 05 pens, because plotter pens are hard to find.
Original HP plotter pens produced a 0.3 mm trace (with a hard to find un-worn tip) roughly equal to Sakura 03 pens, but I haven’t seen anything other than black at Amazon. There’s apparently a 003 pen with a 0.15 mm line; that’s just crazy talk.
Jamming Sakura pens into a plotter pen adapter for the MPCNC makes little sense, so I should gimmick up a specialized holder with some thumbscrew action to keep them from crawling upward out of the holder.
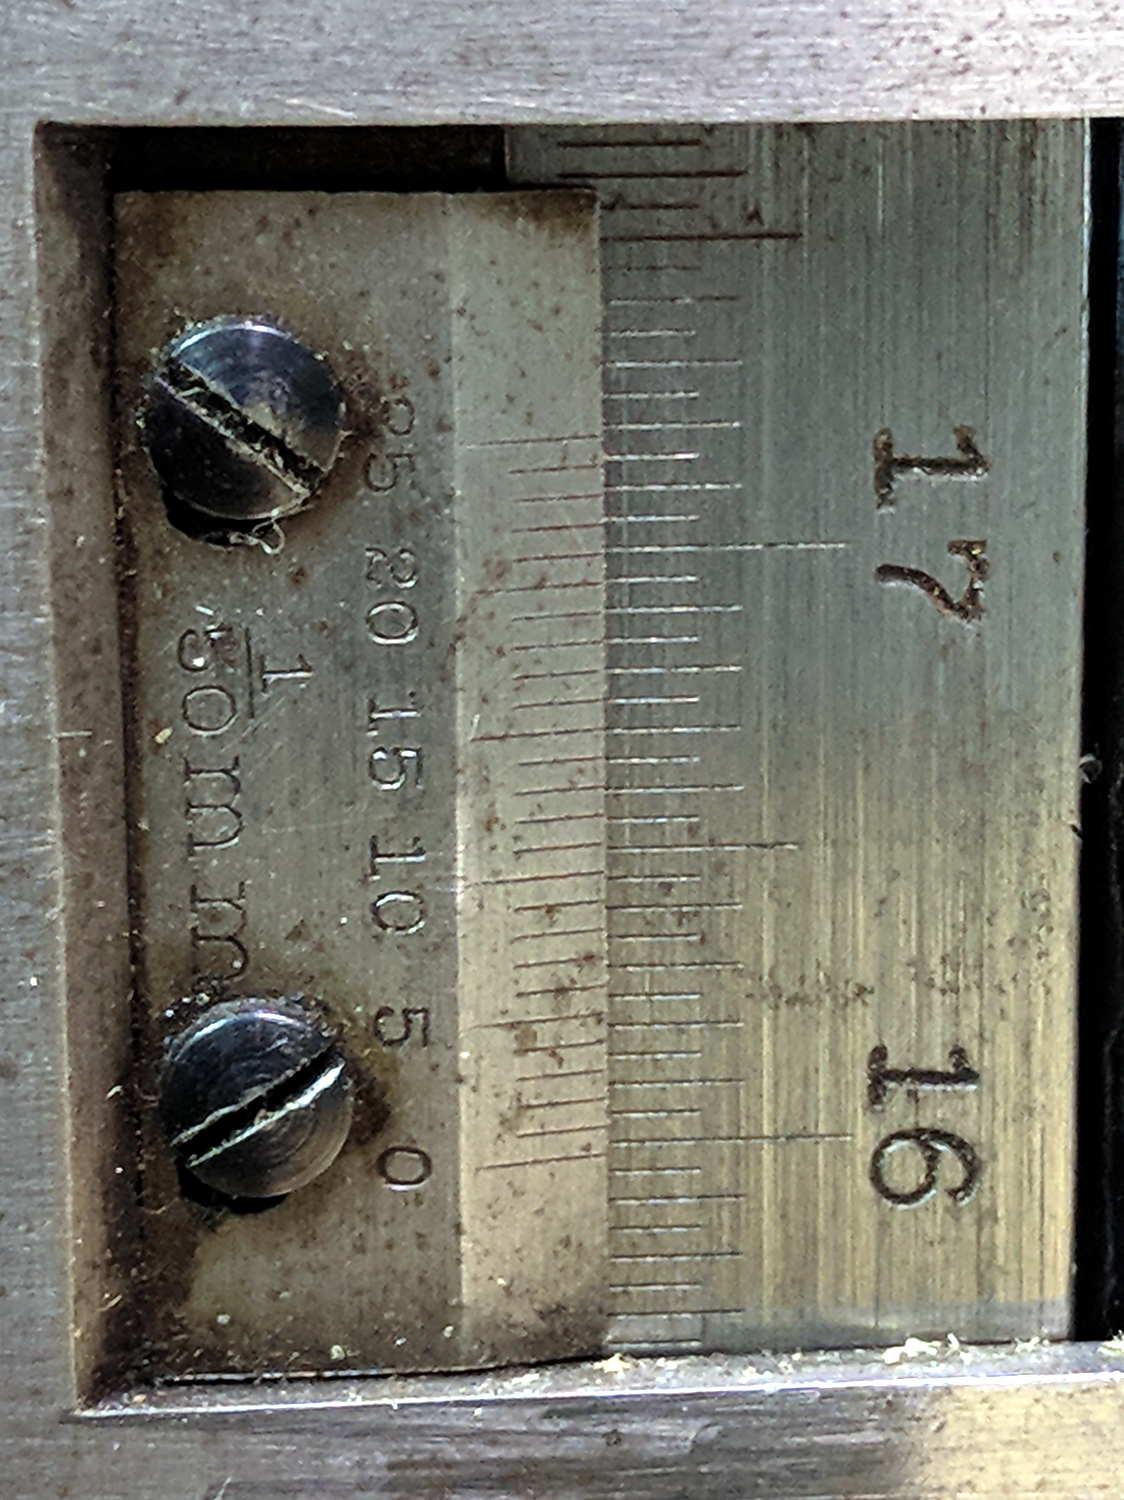
The first time around, I simply set both pairs of MPCNC rails to equal heights using my height gage (*) as a reference, rather than as a measurement tool:
MPCNC – Rail height measurement
By now, I assume all the plastic bits have shaken themselves down and the rails have settled into their more-or-less permanent locations, so it’d be useful to measure the actual rail heights and adjust as needed. The scale along the vertical bar of the height gage gives the height of the top surface of the projecting arm above the bench:
Brown and Sharpe 585 Height Gage
Normally, the gage base would sit on a surface plate. Building an MPCNC on a big granite slab would certainly cut down on the shakes from overly enthusiastic acceleration settings!
The nicely reshaped and polished lathe bit transfers the top surface of the gage arm to the top of the MPCNC rail, so whatever height shows up on the vernier gives the rail height. The exact value, of course, doesn’t really matter in this situation, but when you need an actual measurement, it’s got you covered.
The two brackets slide along the height gage, with the thumbscrews on the right locking them in position. To measure a height, you loosen both thumbscrews, slide the whole affair to put the arm bracket at about the right height, tighten the top thumbscrew to anchor the adjusting bracket, twirl the knurled wheel to precisely position the arm bracket, then read the height from the scale.
The other scale on the other side has inches, but nobody uses those any more. Right?
Things I didn’t get quite right the first time around:
The numbers along the right side are in centimeters
The smallest lines on that scale mark 0.5 mm increments
The numbers on the vernier have units of 1/50 mm = 0.02 mm
So, to read the scale:
Multiply centimeters by 10 to get millimeters: 130
Add the number of whole millimeters below the 0 vernier index: 2
Add a half millimeter if needed: 0
Find the matching vernier increment: 10
Multiply the increment by 2: 20
Slap the decimal point two places left and add: 132.20
OK, try this one:
Vernier Height Gage – 159.84 mm
As I see it:
Read 15 cm
Count 9 ticks
Add the 0.5 mm tick
Match vernier tick 17, multiply and slap decimal = 0.34 mm
Add: 150 + 9 + 0.5 + 0.34 = 159.84 mm
There, now, that wasn’t so hard, was it?
There’s obviously a parallax issue between the edge of the vernier scale and the main scale; it’s easier to get it right in person than in the photograph.
I pronounced the reading as “160 minus point 5 is 159 and a half plus point 34 is point 84”, but I also take eight photographs as I work my way around the MPCNC frame to review any suspicious results.
The maker’s mark on my height gage says it’s a Brown & Sharpe 585 with a 19 inch scale; B&S has long since been Borged. Back in the day, this painstakingly applied etching distinguished it from all the other height gages in the shop:
Brown and Sharpe 585 Height Gage – D.E 1-I-3 etching
Plumbing and car troubles continue to plague folks in Search Engine City.
If I could monetize my broom handle thread IP, I’d be rich, I tell you, rich.
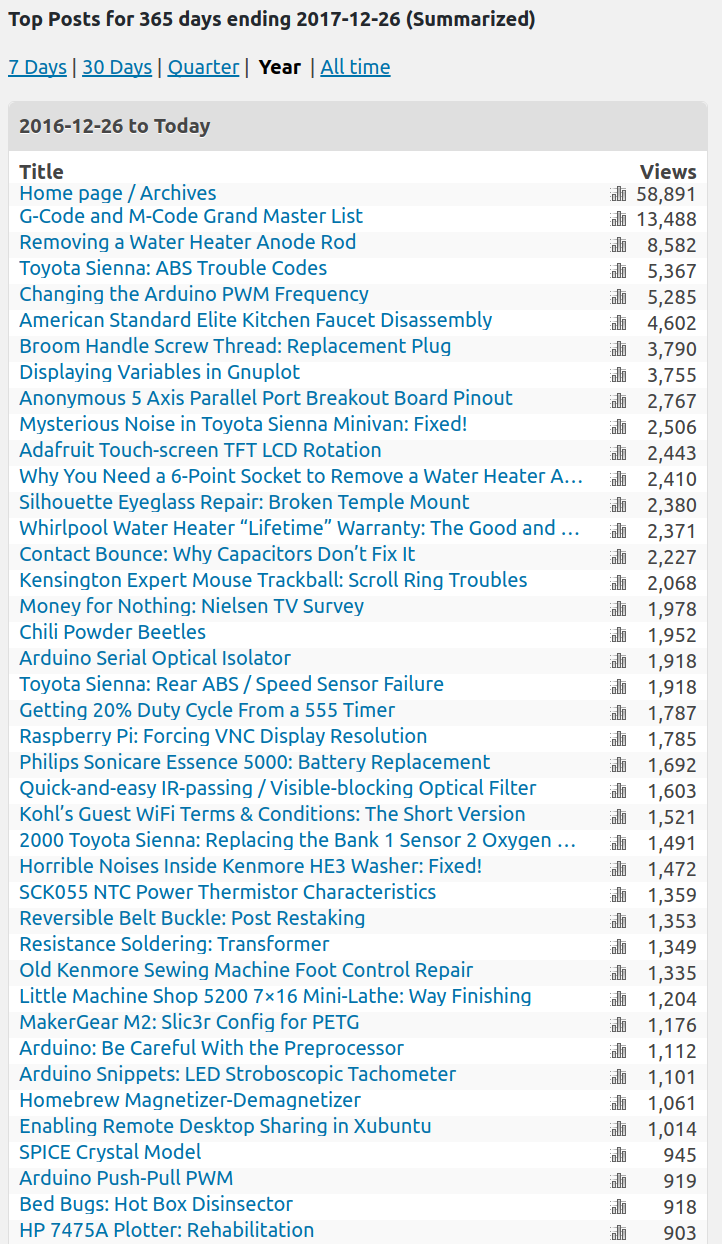
Some interesting (and rounded) numbers from the ads you (presumably) don’t see, because adblocking.
The blog gets just under 30 k page views/month, call it 1 k/day. Because most of the traffic arrives from search engines, each viewer looks at only 1.6 pages. Dividing the two suggests 18 k viewers/month.
WordPress now shows 90 k ad impressions/month. Dividing 90 k impressions by 18 k viewers gives 5 ad impressions/viewer, which is about what you’d expect from the three ads appearing on the main page and each post seen individually: 3 ads/page × 1.6 page views/visitor = 4.8 ads/visitor.
Before the big WP advertising push, they reported 15 k ad impressions/month for roughly the same 30 k page views/month and 1.6 pages/visitor. At one ad per page (which I don’t know for sure, but it seems reasonable), 30 k views should produce 30 k ad impressions. I can’t account for the discrepancy.
Those of you using ad blockers (which I highly recommend!) don’t know what you’re missing.