Ed Nisley's Blog: Shop notes, electronics, firmware, machinery, 3D printing, laser cuttery, and curiosities. Contents: 100% human thinking, 0% AI slop.
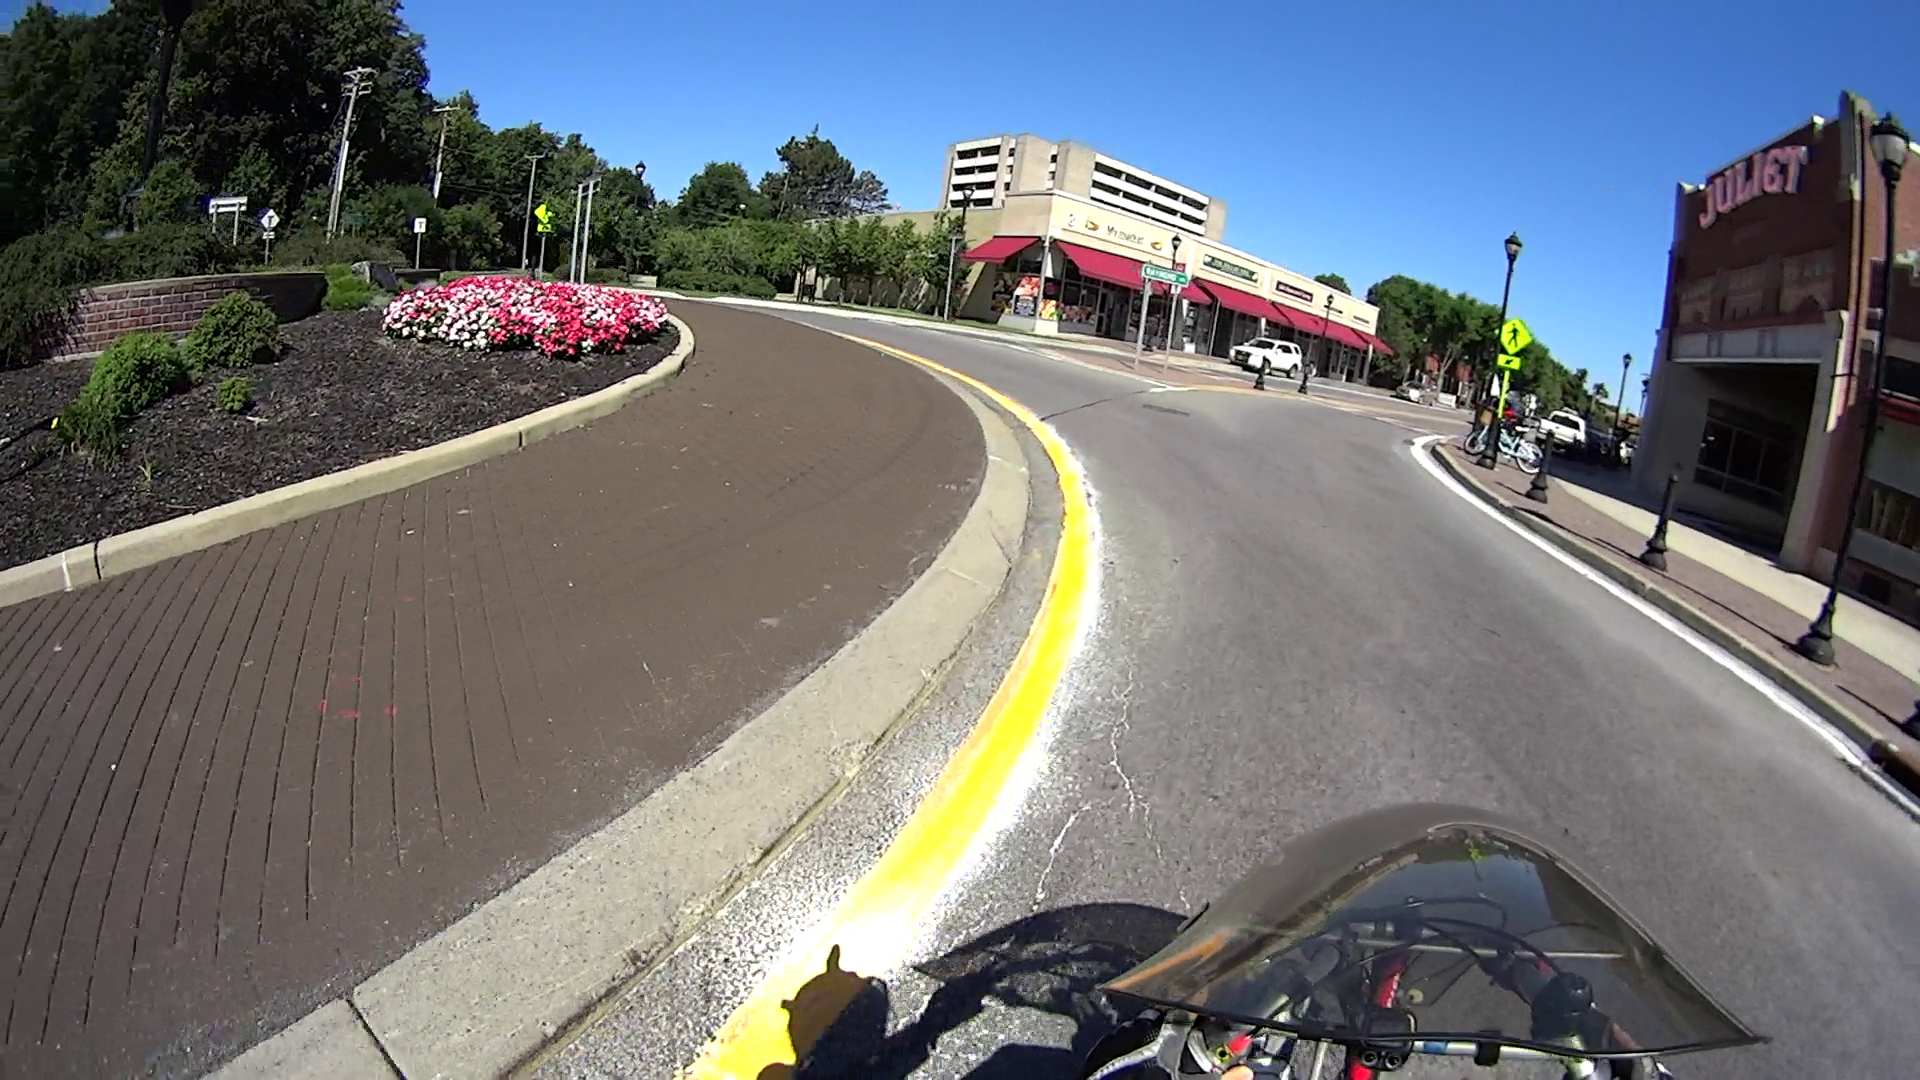
I generally ride somewhat further into the travel lane than some folks would prefer, but I have good reason for that. Here’s how bicycling along Raymond Avenue at 14 mph = 20 ft/s on a pleasant summer morning works out…
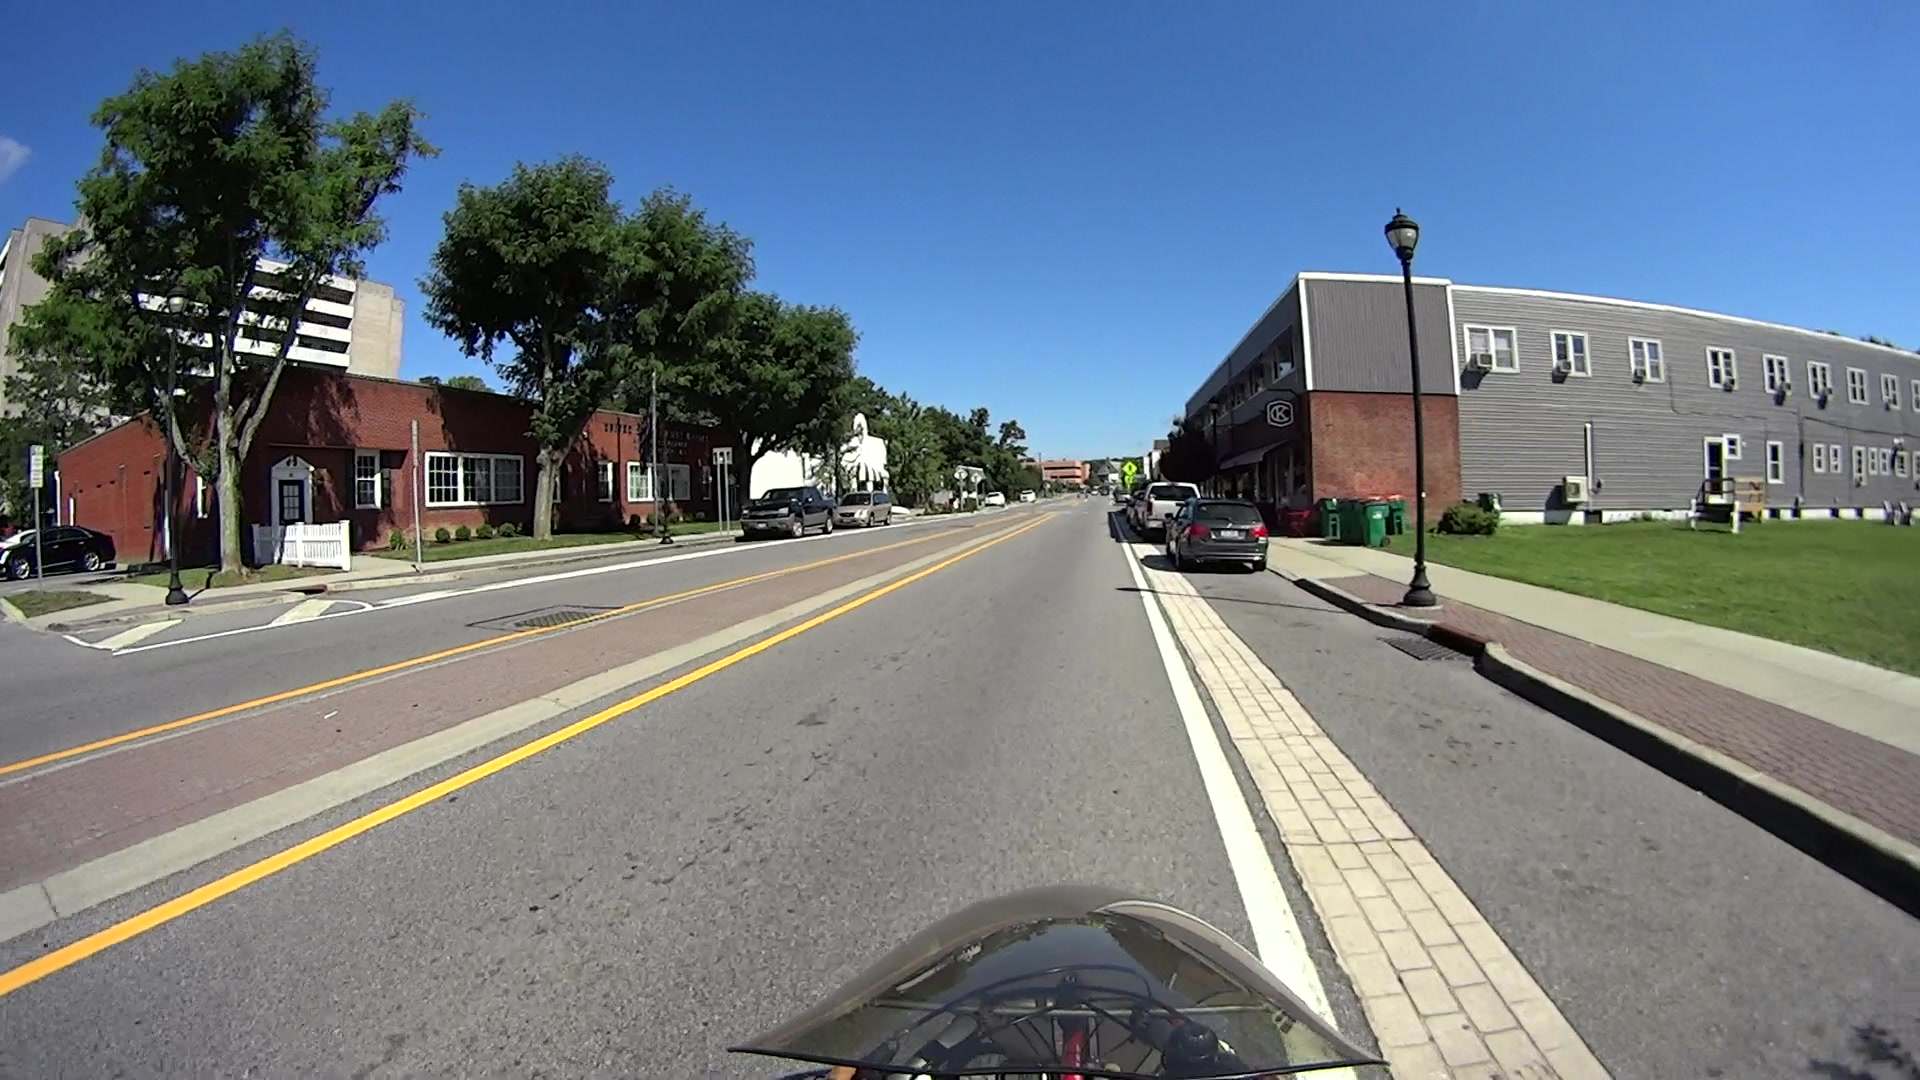
T = 0.000 — Notice anything out of the ordinary?
Raymond Ave – Door Near Miss – 2016-08-03 – 0018
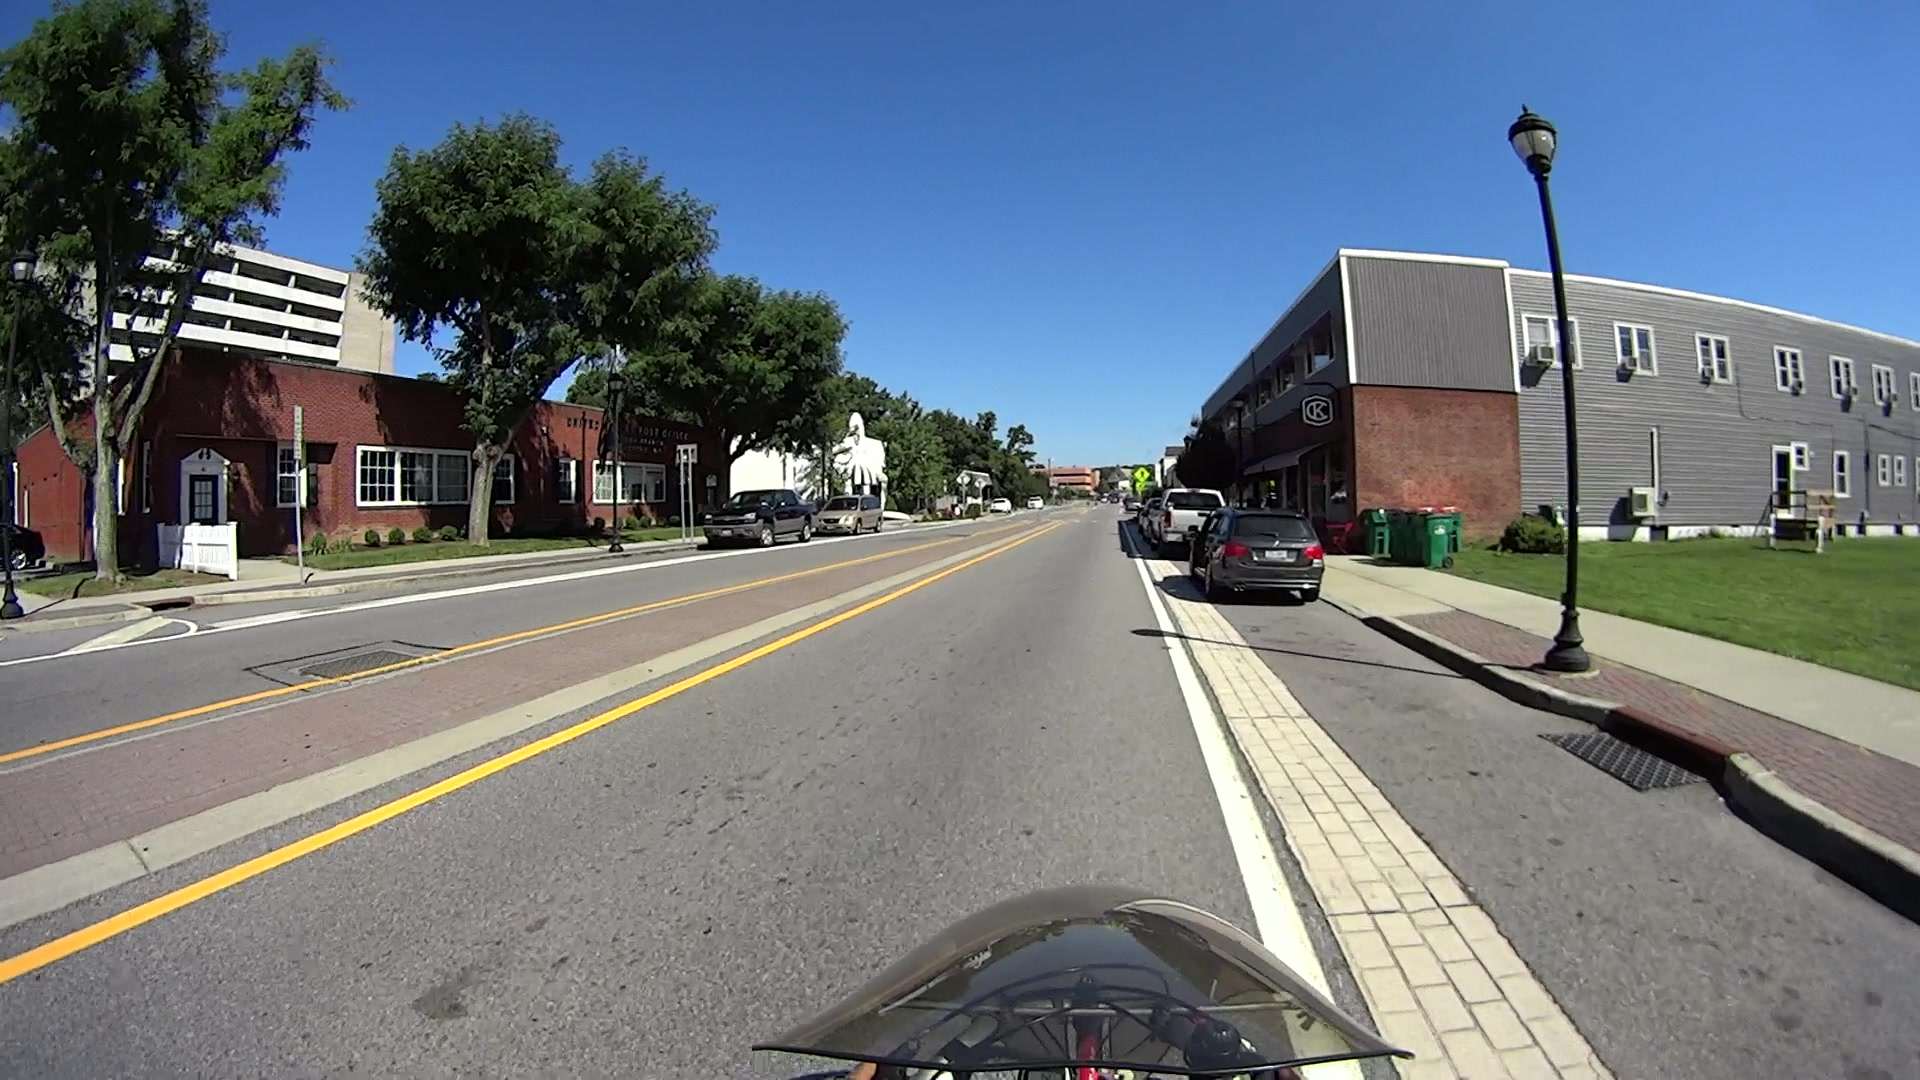
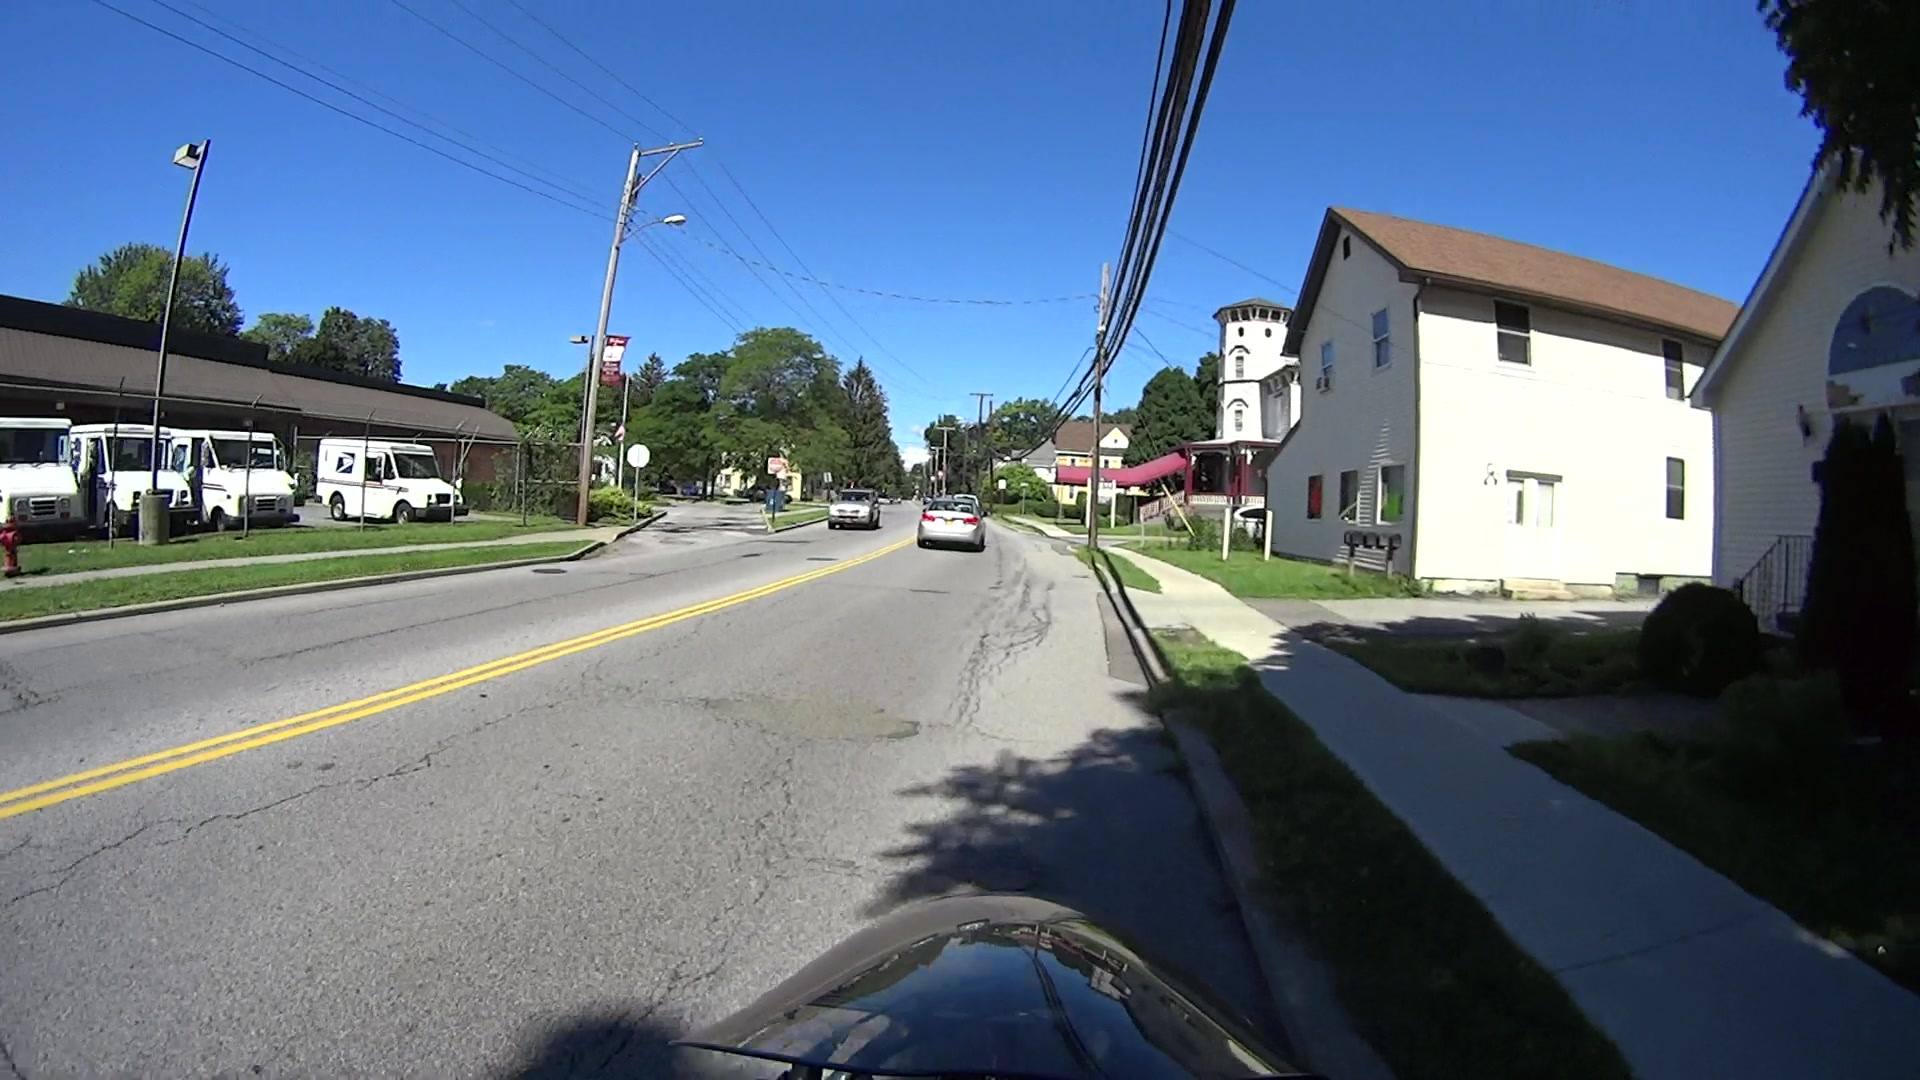
T = 1.000 — Me, neither:
Raymond Ave – Door Near Miss – 2016-08-03 – 0078
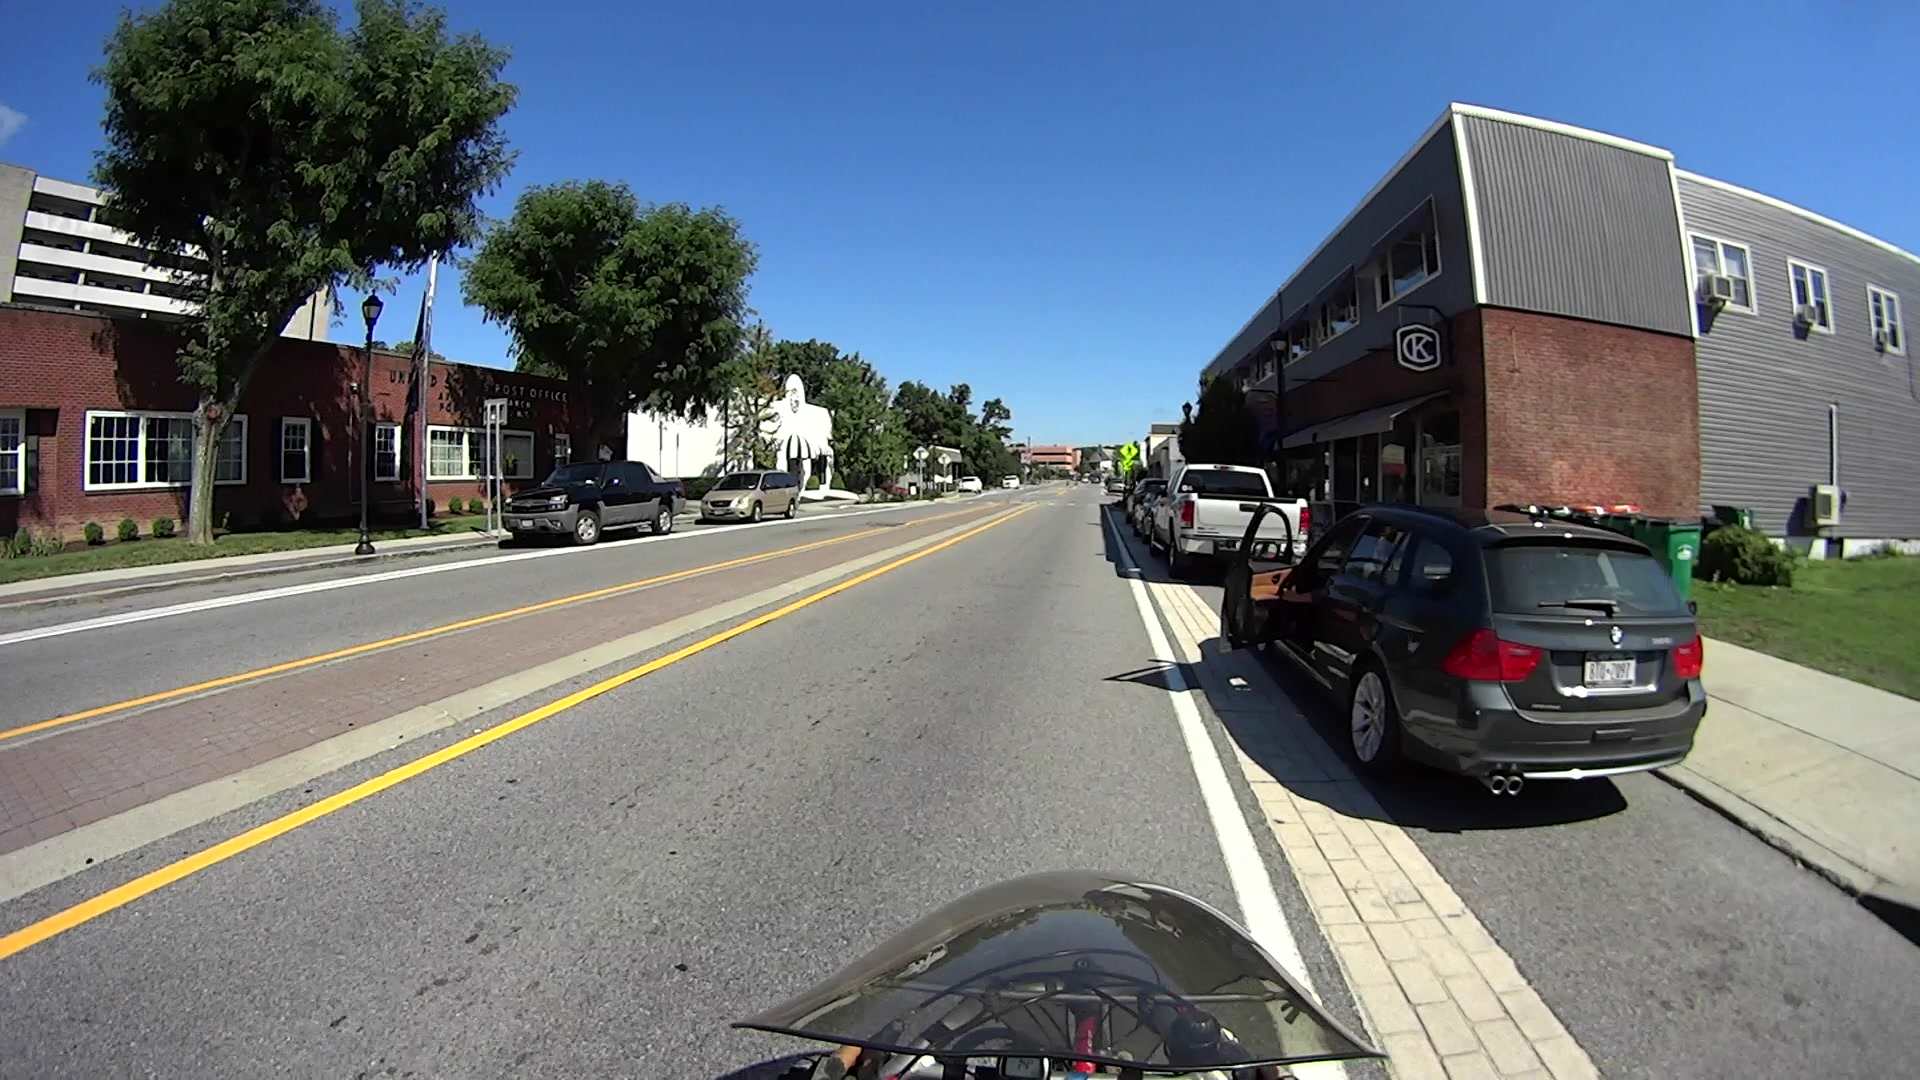
T = 1.500 — Ah!
Raymond Ave – Door Near Miss – 2016-08-03 – 0108
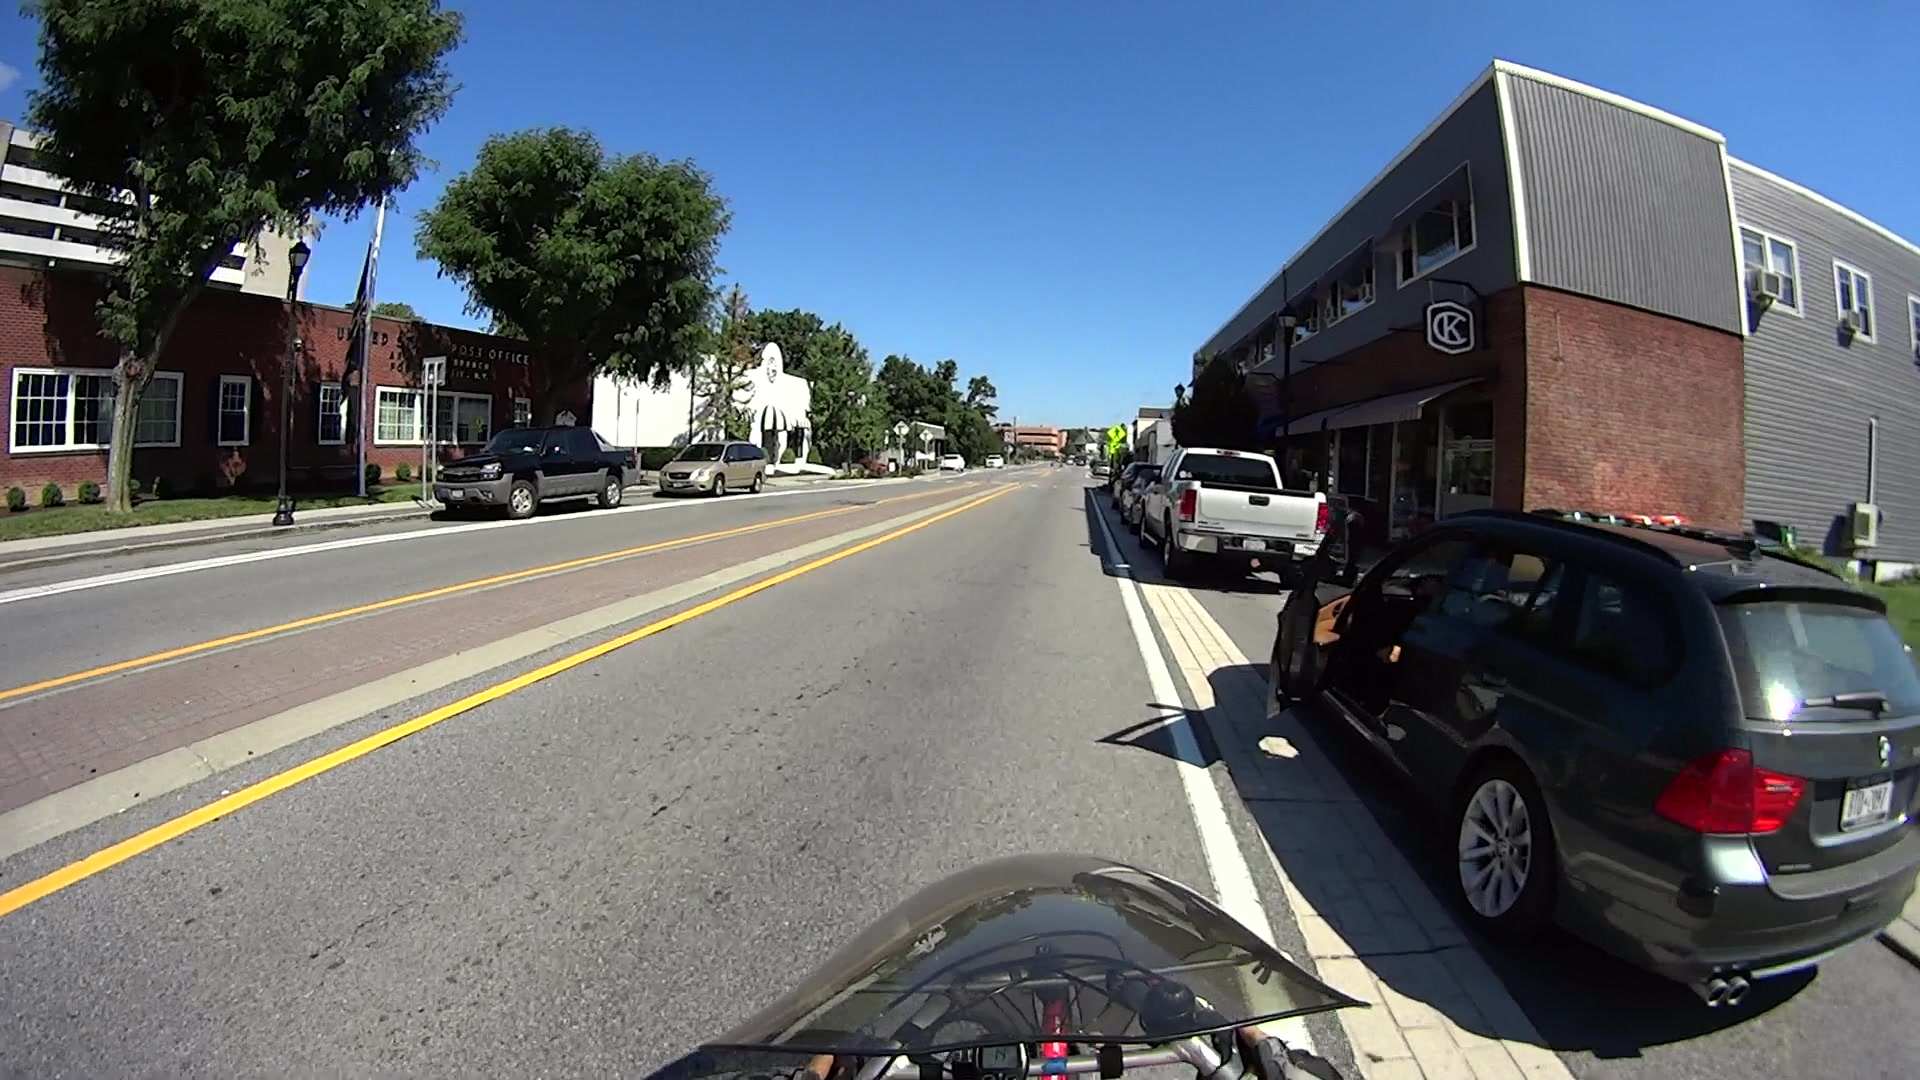
T = 2.000 — I’m flinching into the right turn required for a sharp left turn:
Raymond Ave – Door Near Miss – 2016-08-03 – 0138
Less than half a second reaction time: pretty good, sez me.
T = 2.833 — End of the flinch:
Raymond Ave – Door Near Miss – 2016-08-03 – 0183
T = 3.000 — Now I can lean and turn left:
Raymond Ave – Door Near Miss – 2016-08-03 – 0198
T = 3.267 — This better be far enough left:
Raymond Ave – Door Near Miss – 2016-08-03 – 0214
T = 3.333 — The door isn’t moving:
Raymond Ave – Door Near Miss – 2016-08-03 – 0218
T = 3.567 — So I’ll live to ride another day:
Raymond Ave – Door Near Miss – 2016-08-03 – 0232
I carry a spectacular scar from slashing my arm on a frameless car window, back in my college days: the driver flipped the door open as I passed his gas cap at a good clip. The collision wrecked the window, the door, and my bike, but didn’t break my arm, sever any nerves, or cut any arteries. I did discover human fatty tissue, neatly scooped from under my arm onto the window, is yellowish, which wasn’t something I needed to know.
Searching for Raymond Avenue will bring up other examples of bicycle-hostile features along this stretch of NYSDOT’s trendy, traffic-calmed design…
NYSDOT re-striped Rt 376 using paint with sprayed-on glass beads, rather than plastic strips, which produces lovely rainbows when the sun comes from directly behind. Alas, my helmet camera can’t resolve faint colors against the background glare and doesn’t show the circular reflection cutoff:
Glass Bead Retroreflection – 2016-07-20
However, the scattered beads light up the pavement’s cracks and crevices.
Four days later, the drifts of beads have dissipated to leave bright reflections anywhere the tires don’t reach:
Glass Bead Retroreflection – 0219
That’s along the big traffic circle at the Raymond / Collegeview / Forbus intersection.
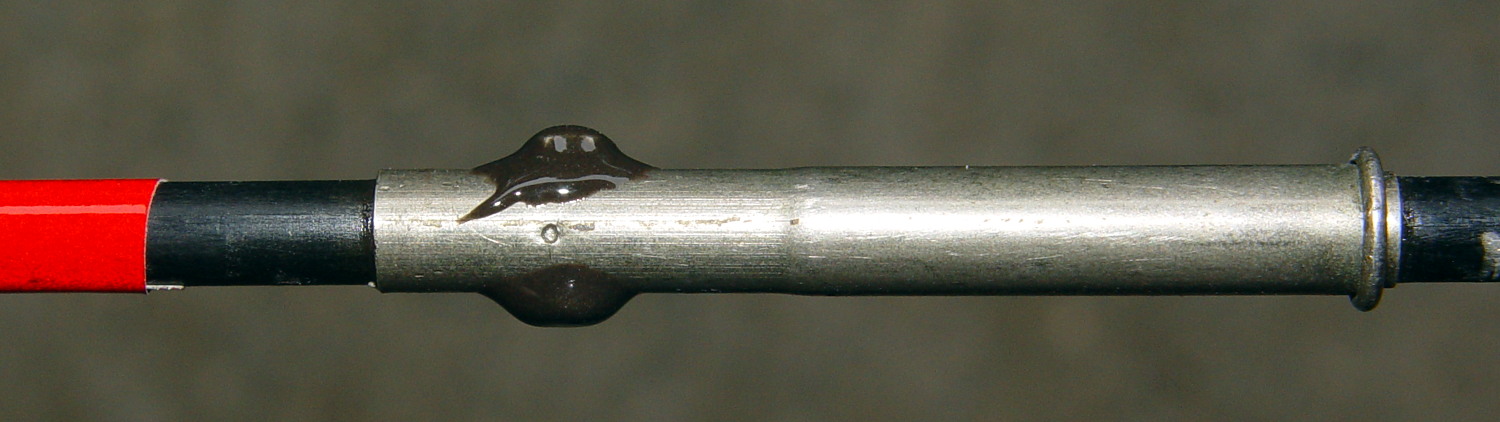
Riding into the Village of Wappingers Falls, there’s a lumpy patched pothole just ahead of the fairing & front wheel:
Water Droplets – 2016-07-19 – 0196
You can watch (and I can hear) the fairing flex as the front end jounces over the patch:
This slideshow requires JavaScript.
The hydration pack slung behind the seat also jounces and, when the reservoir bag bottoms out, the sudden pressure increase squirts water out of the bite valve, all over my face and goggles, and way out in front of the camera:
This slideshow requires JavaScript.
The camera runs at 60 images/second: those 28 images span all of 450 ms.
Two seconds later, the droplet stabilized into a nice round lens:
Water Droplets – 2016-07-19 – 0360
The low humidity of a lovely day evaporated the drop after another three minutes…
Four miles later, a blowout through a tread gash previously covered by the tire liner
A puncture flat directly through the tread
Basically, erosion from the (last remaining, I think) liner in the rear tire of Mary’s bike caused the first flat; I patched the tube and didn’t notice the gash. After the blowout, I patched the tube again, booted the gash (with a snippet from a roll of PET bottle plastic I carry around for exactly that purpose), stuck an ordinary patch atop the boot to cover its edges, and the whole mess has held air just fine for the last week. I’m reluctant to mess with success.
Not having a tire liner caused the third flat, this time on my bike. The wound looked like a nail or glass shard punched directly through the Kevlar armor behind the tread. Fortunately, it happened (or, more exactly, I realized I had a flat) half a mile from home, so I fired a CO2 cartridge into the tube and pedaled like crazy, which got me halfway to the goal and I rolled the rest of the way on a dead-flat tire.
Ya can’t win.
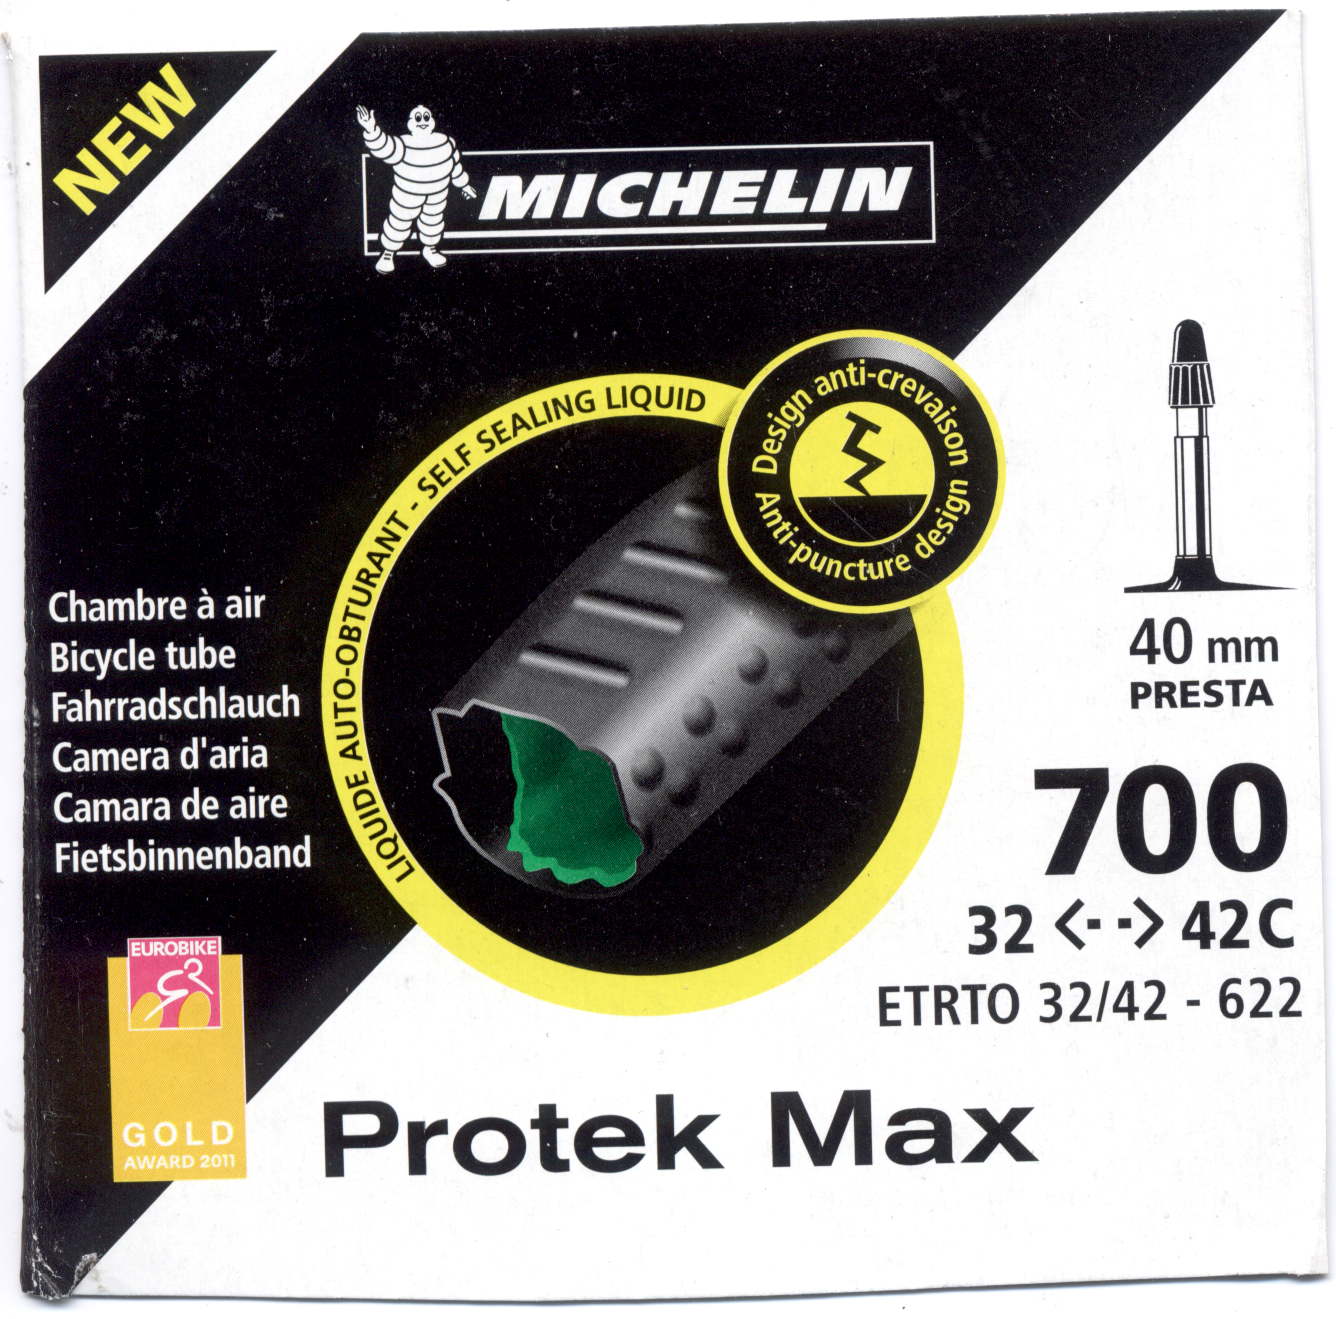
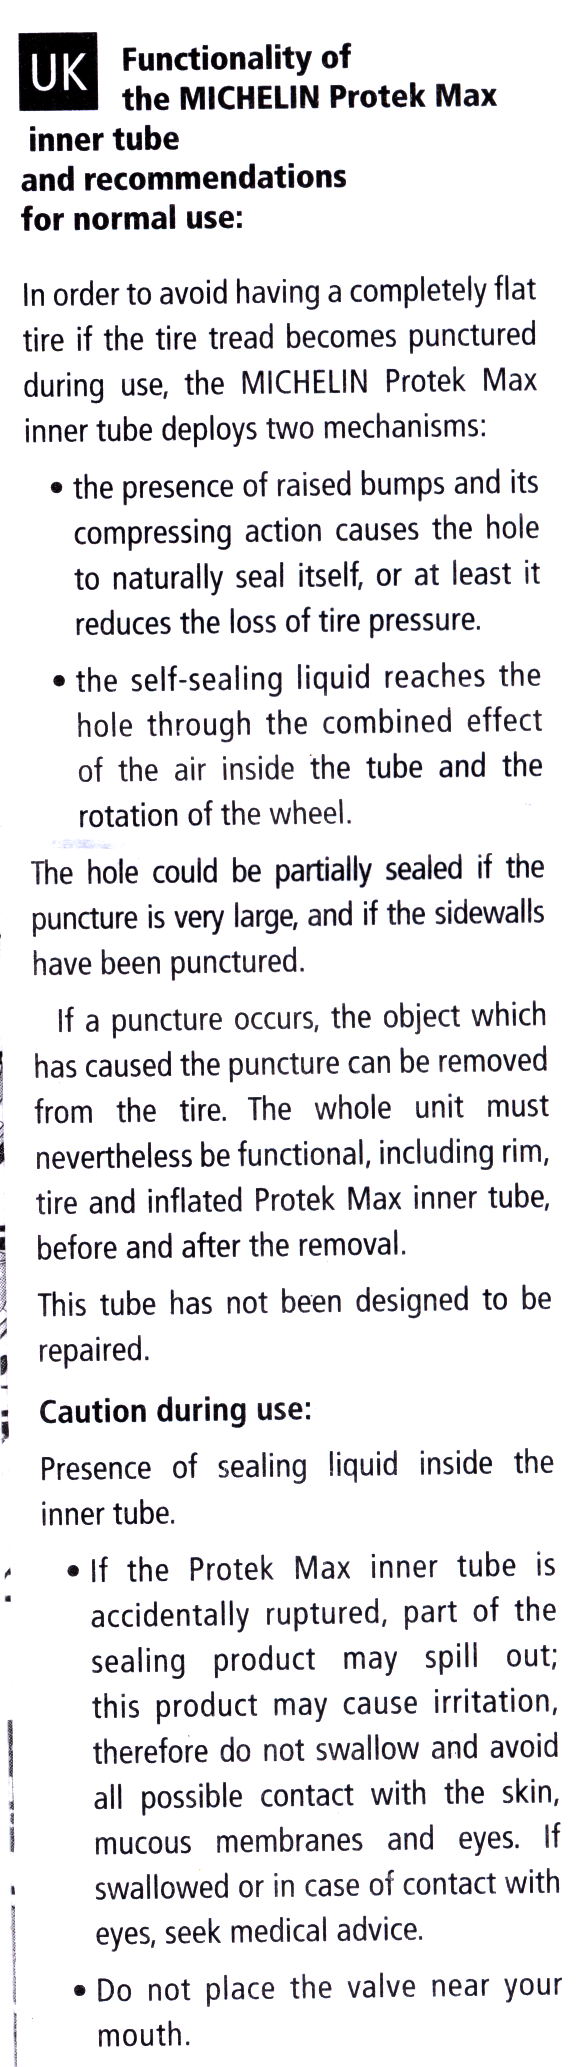
So I picked up a pair of Michelin Protek Max tubes, the weirdest things I’ve ever stuffed into a bike tire:
Michelin Protek Max Tube – carton
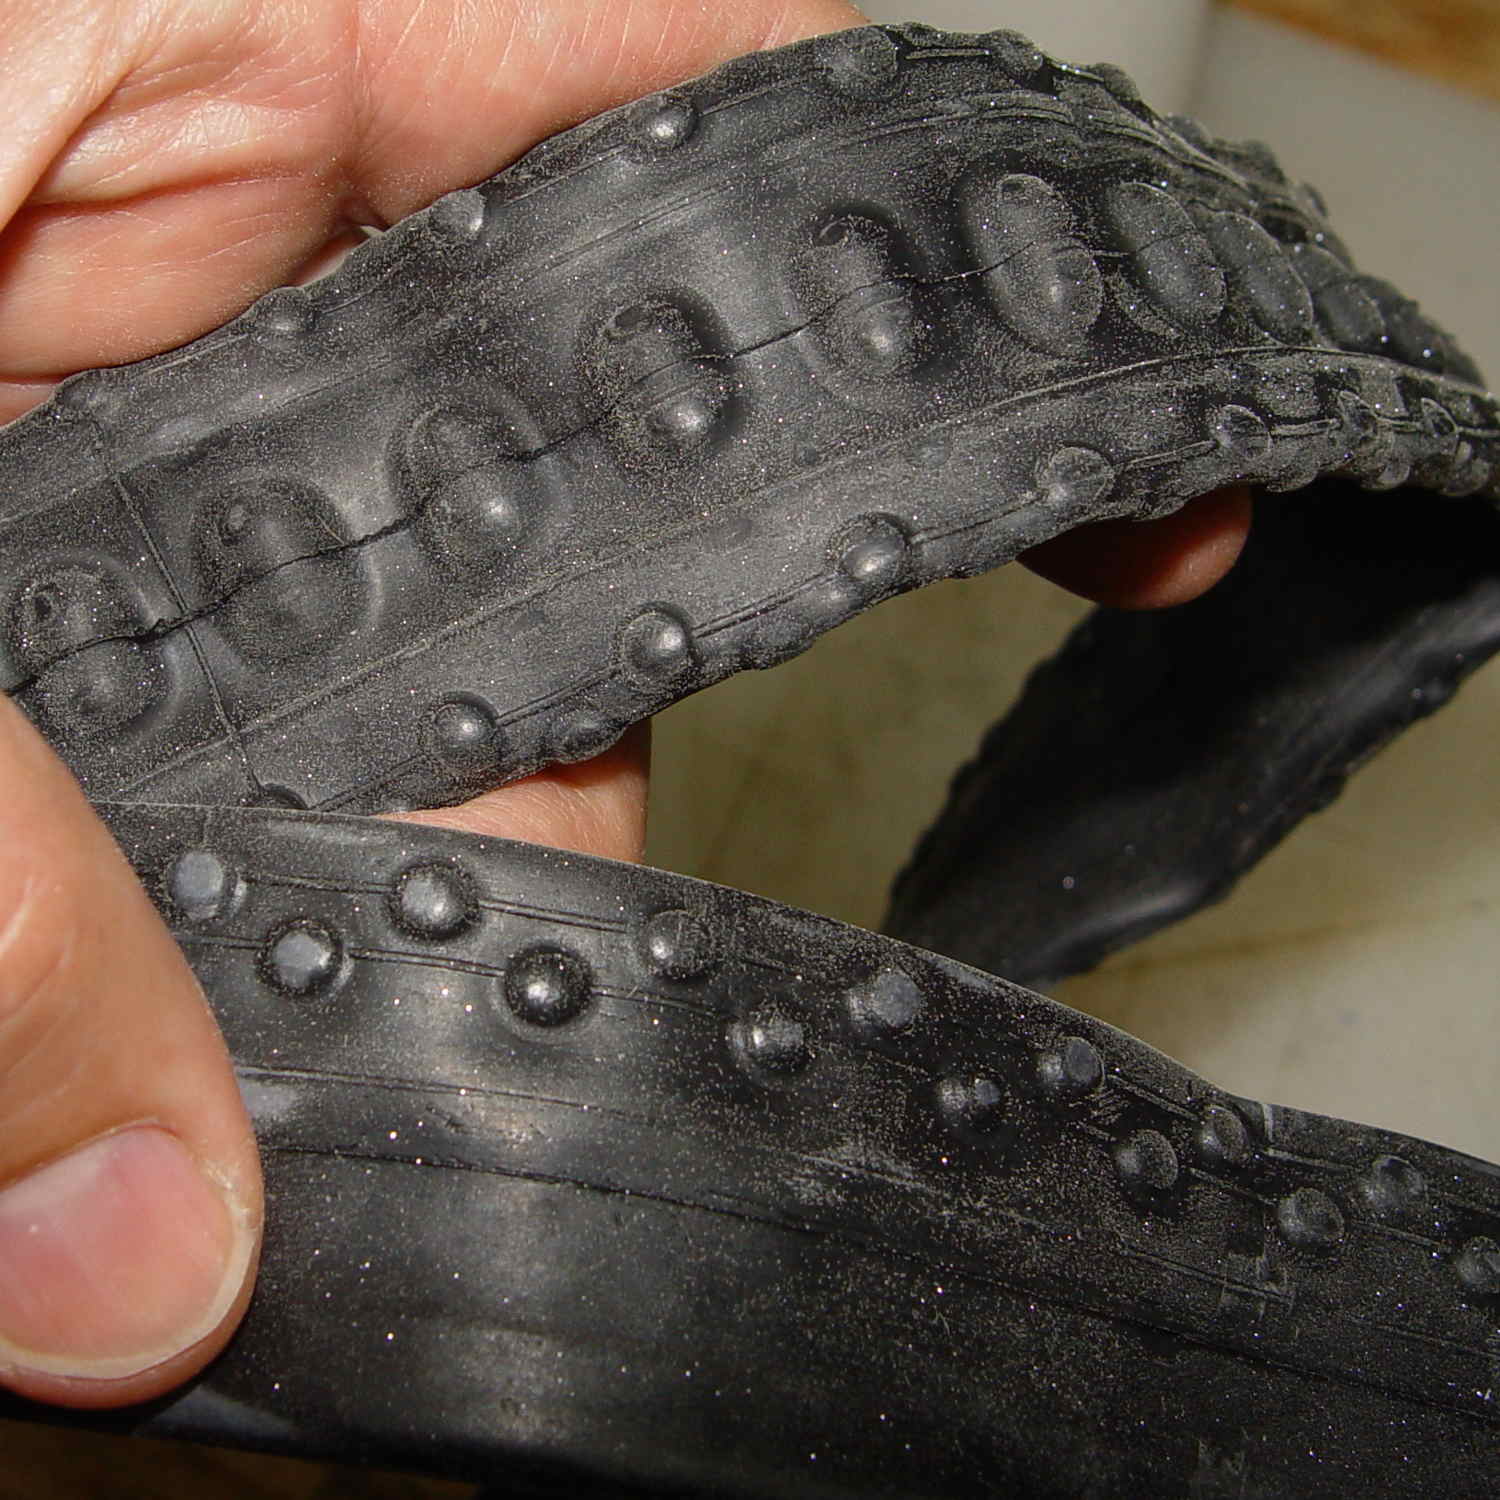
The bumps along the tread surface are much larger and uglier than shown in that picture:
Michelin Protek Max tube
The rubber forming the protrusions has the same thickness as the rest of the tube, so you’re looking at soft, flexible shapes, rather than thick bumps.
The “liquid” inside must be a thin film over the inner surface. I’ve never been a big fan of tire sealants, mostly because they’re reputed to ooze to the bottom of the tire into off-balance puddles.
For future reference, the Official Quasi-Instruction Manual / Blurb (clicky for more dots):
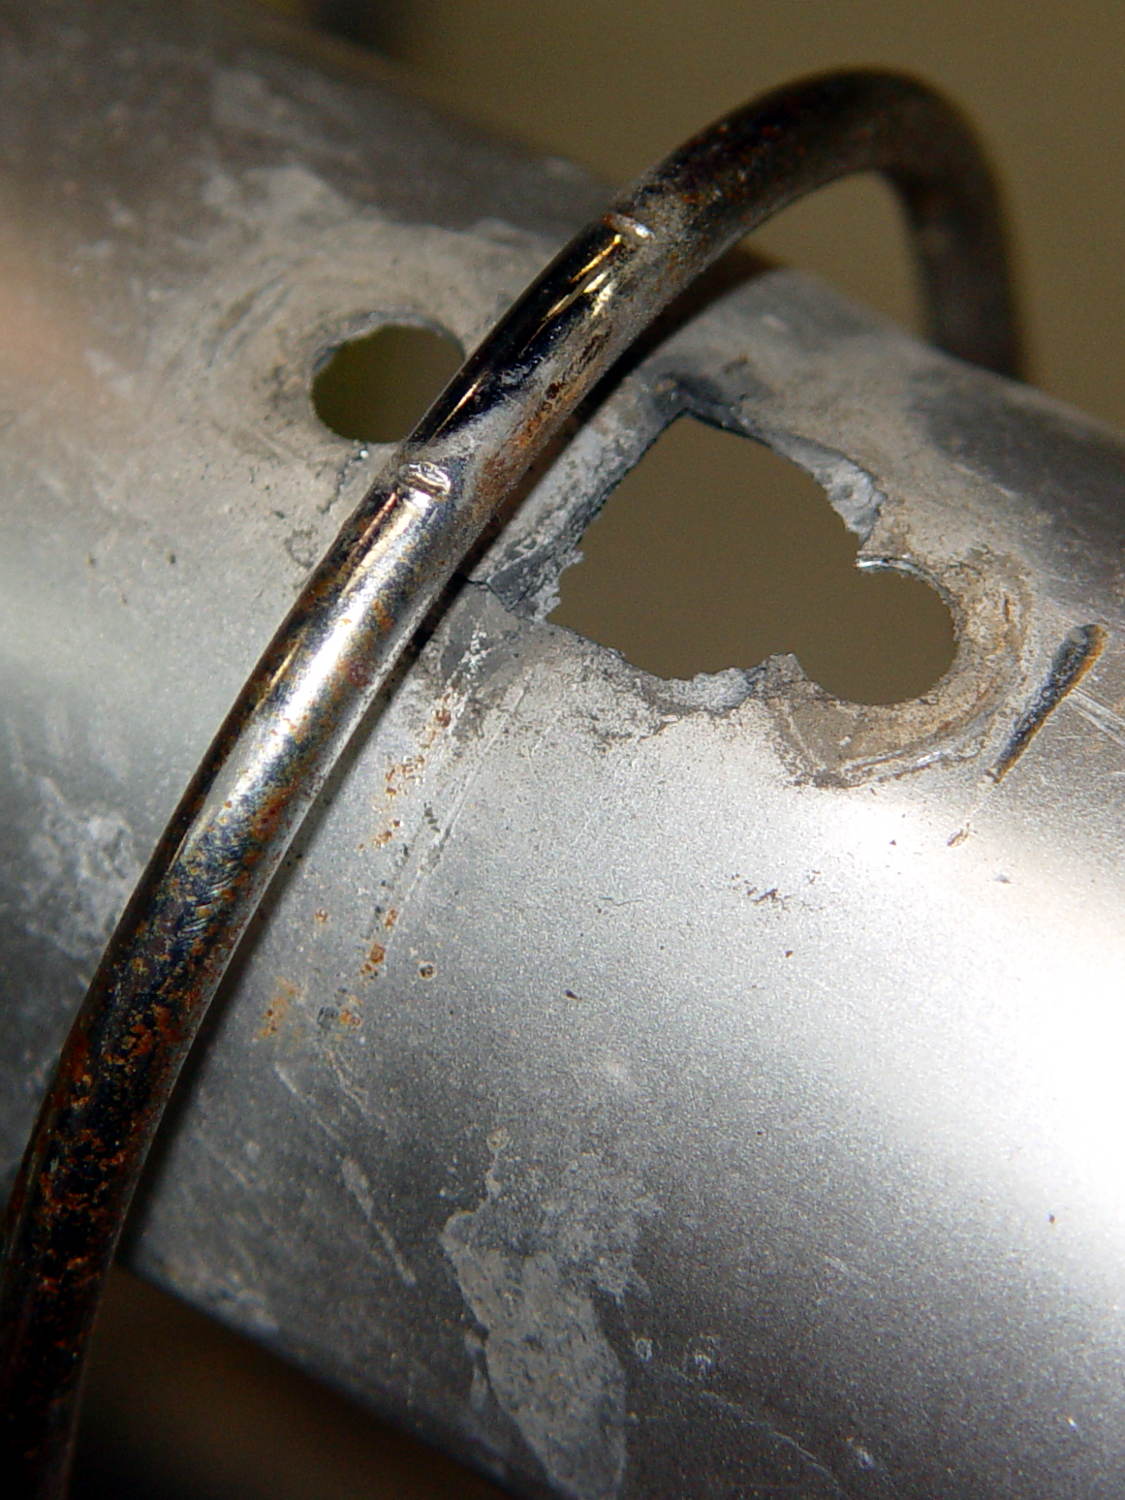
We agreed that repairing the failed flag ferrule made the trailer much quieter, but it still seemed far more rattly than we remembered. It just had to be the fender, somehow, and eventually this appeared:
BOB Yak Fender Mount – fractures
The obviously missing piece of the fender fell out in my hand; the similar chunk just beyond the wire arch fell out after I took the pictures. Yes, the wire has indented the fender.
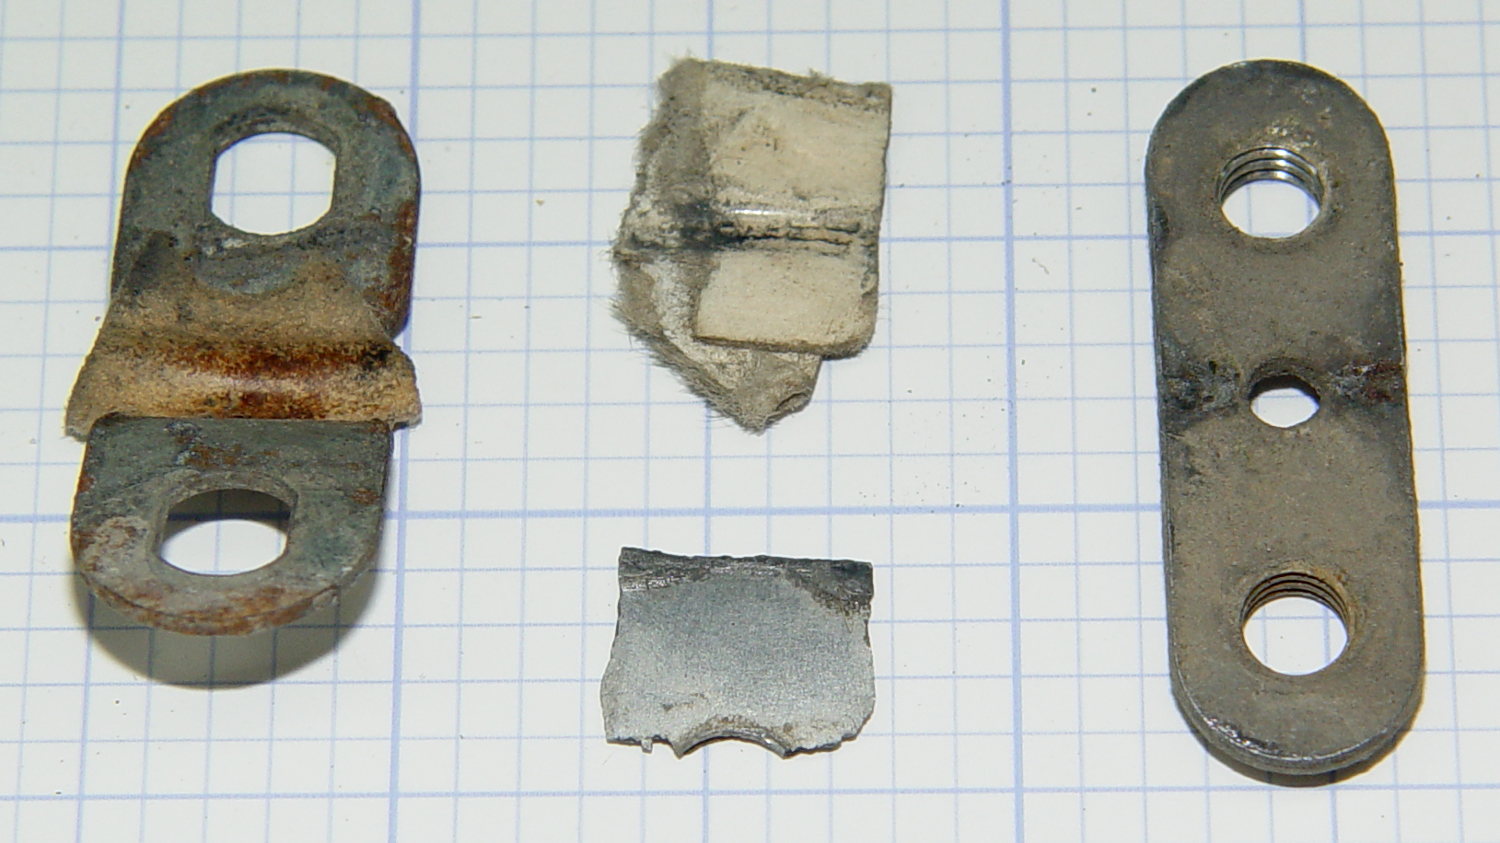
The arch supports the aluminum fender, with a pair of (flat) steel plates clamping the wire to the fender:
BOB Yak Fender Mount – screw plates and pads
The cardboard scraps show I fixed a rattle in the distant past.
Being aluminum, the fender can’t have a replacement piece brazed in place and, given the compound curves, I wasn’t up for the requisite fancy sheet metal work.
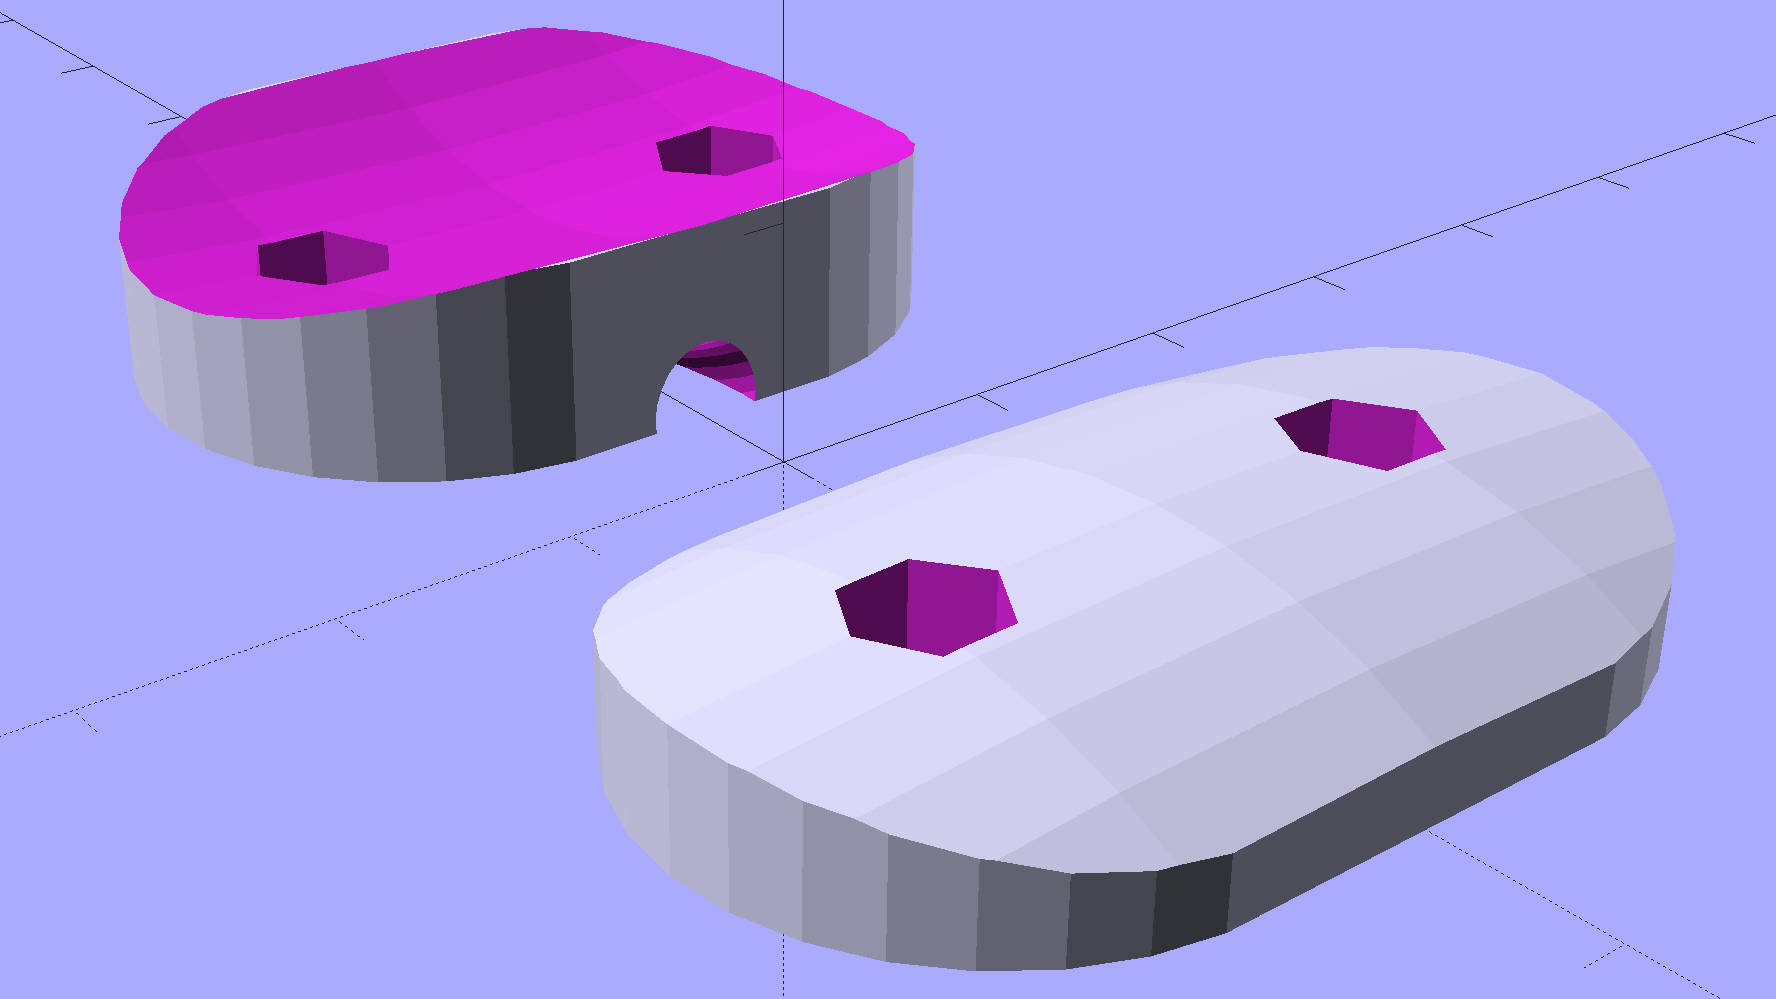
Instead, a bit of math produces a pair of shapes:
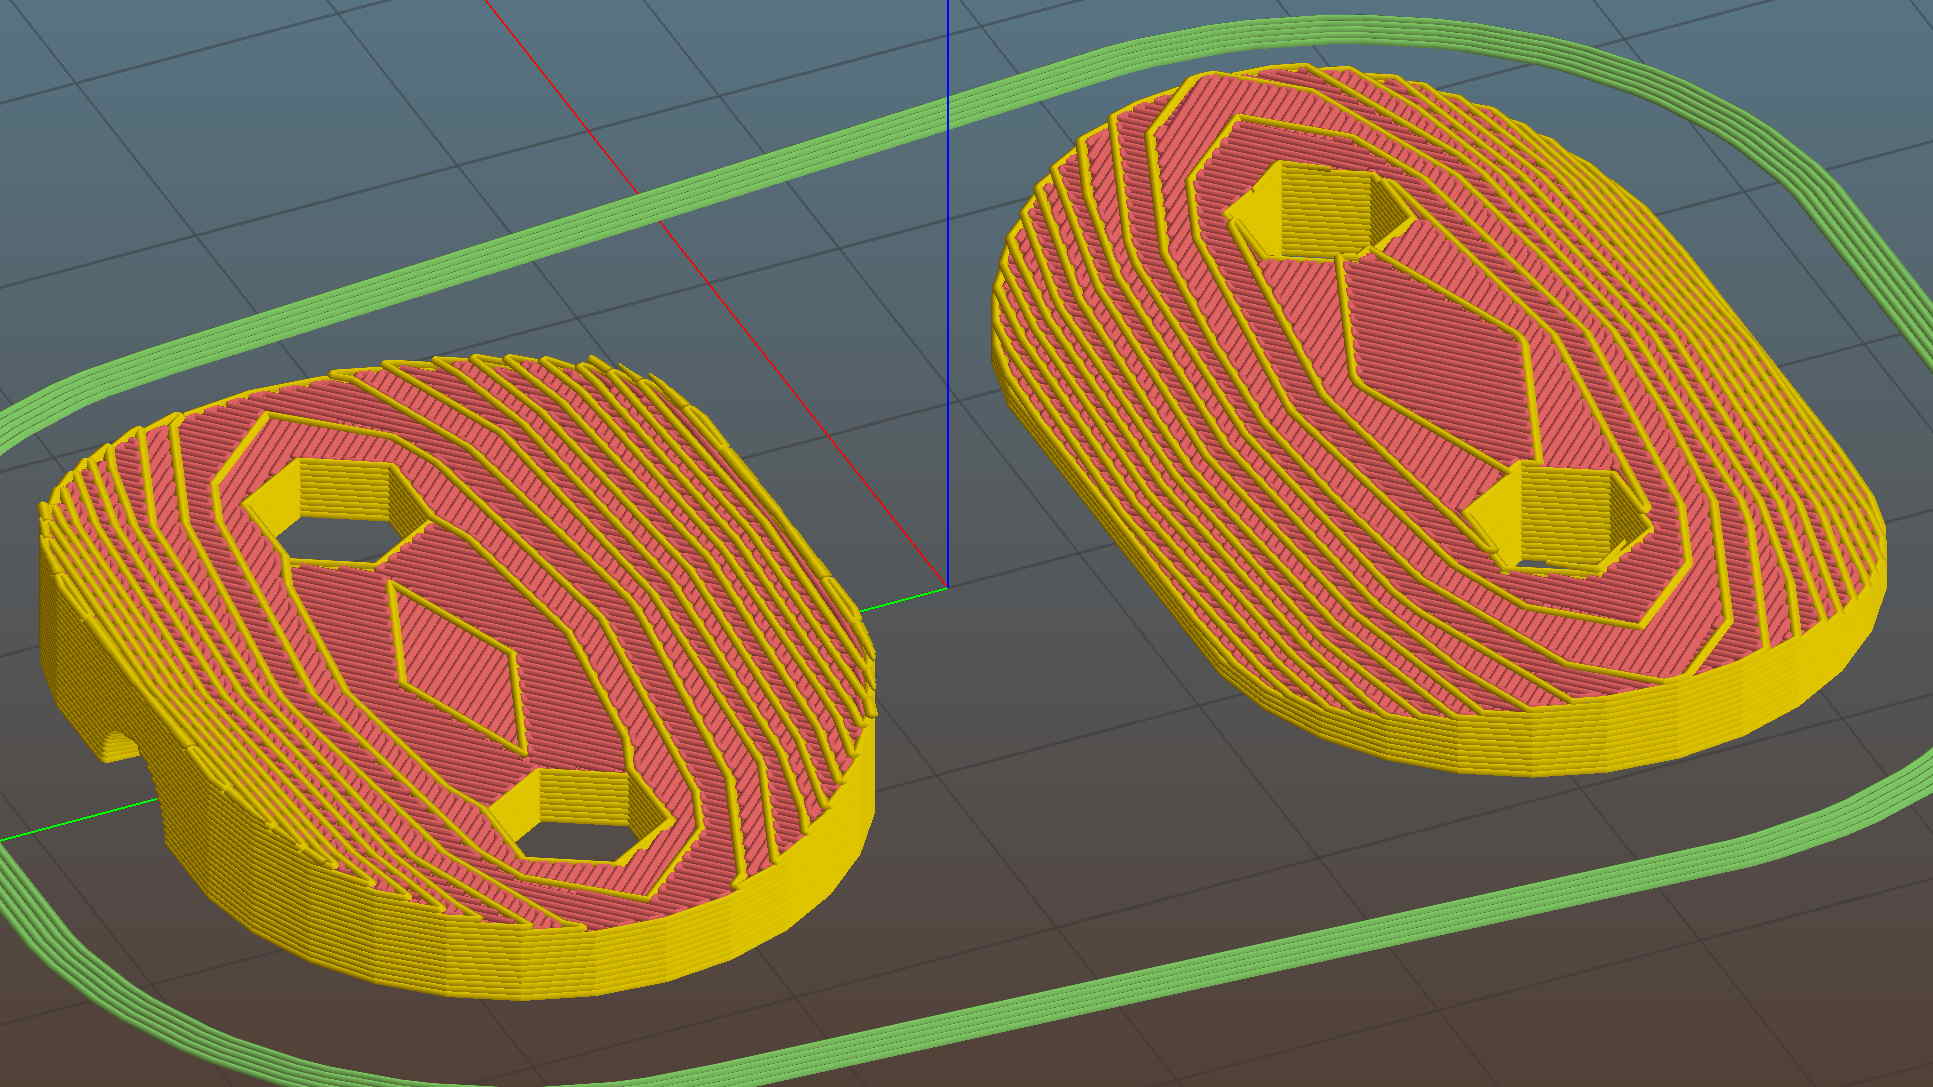
BOB Yak Fender Mount – solid model
In this case, we know the curve radii, so the chord equation gives the depth of the curve across the (known) width & length of the plates; the maximum of those values sets the additional thickness required for the plates. The curves turn out to be rather steep, given the usual layer thickness and plate sizes, which gives them a weird angular look that absolutely doesn’t matter when pressed firmly against the fender:
BOB Yak Fender Mount – Slic3r preview
The computations required to fit Hilbert Curve surface infill into those small exposed areas took basically forever; given that nobody will ever see them, I used the traditional linear infill pattern. A 15% 3D Honeycomb interior infill turned them into rigid parts.
The notch in the outer plate (top left, seen notch-side-down) accommodates the support wire:
BOB Yak Fender Mount – outer
The upper surface would look better with chamfered edges, but that’s in the nature of fine tuning. That part must print with its top surface downward: an unsupported (shallow) chamfer would produce horrible surface finish and life is too short for fussing with support. Given the surrounding rust & dings, worrying about aesthetics seems bootless.
The original screws weren’t quite long enough to reach through the plastic plates, so I dipped into my shiny-new assortment of stainless steel socket head cap screws. Although the (uncut) M5x16 screws seem to protrude dangerously far from the inner plate, there’s another inch of air between those screws and the tire tread:
BOB Yak Fender Mount – inner
Given the increase in bearing area, that part of the fender shouldn’t fracture for another decade or two.
I loves me my M2 3D printer …
The OpenSCAD source code as a GitHub Gist:
This file contains hidden or bidirectional Unicode text that may be interpreted or compiled differently than what appears below. To review, open the file in an editor that reveals hidden Unicode characters.
Learn more about bidirectional Unicode characters
At some point along a recent grocery ride, the top half of the flag mast on the BOB Yak trailer went missing.
We had a general idea of where it happened, but, fortunately, I Have The Technology:
This slideshow requires JavaScript.
The flag and pole ended up just off the road, only slightly the worse for wear. I hadn’t planned on riding two dozen miles on a rather hot and humid summer day, but so it goes.
The lower ferrule chafed away enough of the fiberglass pole that it could slip downward, eventually releasing the upper ferrule:
BOB Yak Flag – ferrule chafing
That split near the end enlarged the pole enough that the ferrule couldn’t slide off, so I contented myself with cross-drilling the whole affair for a 1-72 screw, packing epoxy into the hole, tucking more epoxy up inside the bottom end of the ferrule, then burying the screw and nut:
BOB Yak Flag – reassembled ferrule
While I had it on the bench, I replaced the somewhat shredded fluorescent orange tape just under the flag and added a strip of diagonally striped red-and-white retroreflective tape for an attractive barber-pole appearance.