Ed Nisley's Blog: Shop notes, electronics, firmware, machinery, 3D printing, laser cuttery, and curiosities. Contents: 100% human thinking, 0% AI slop.
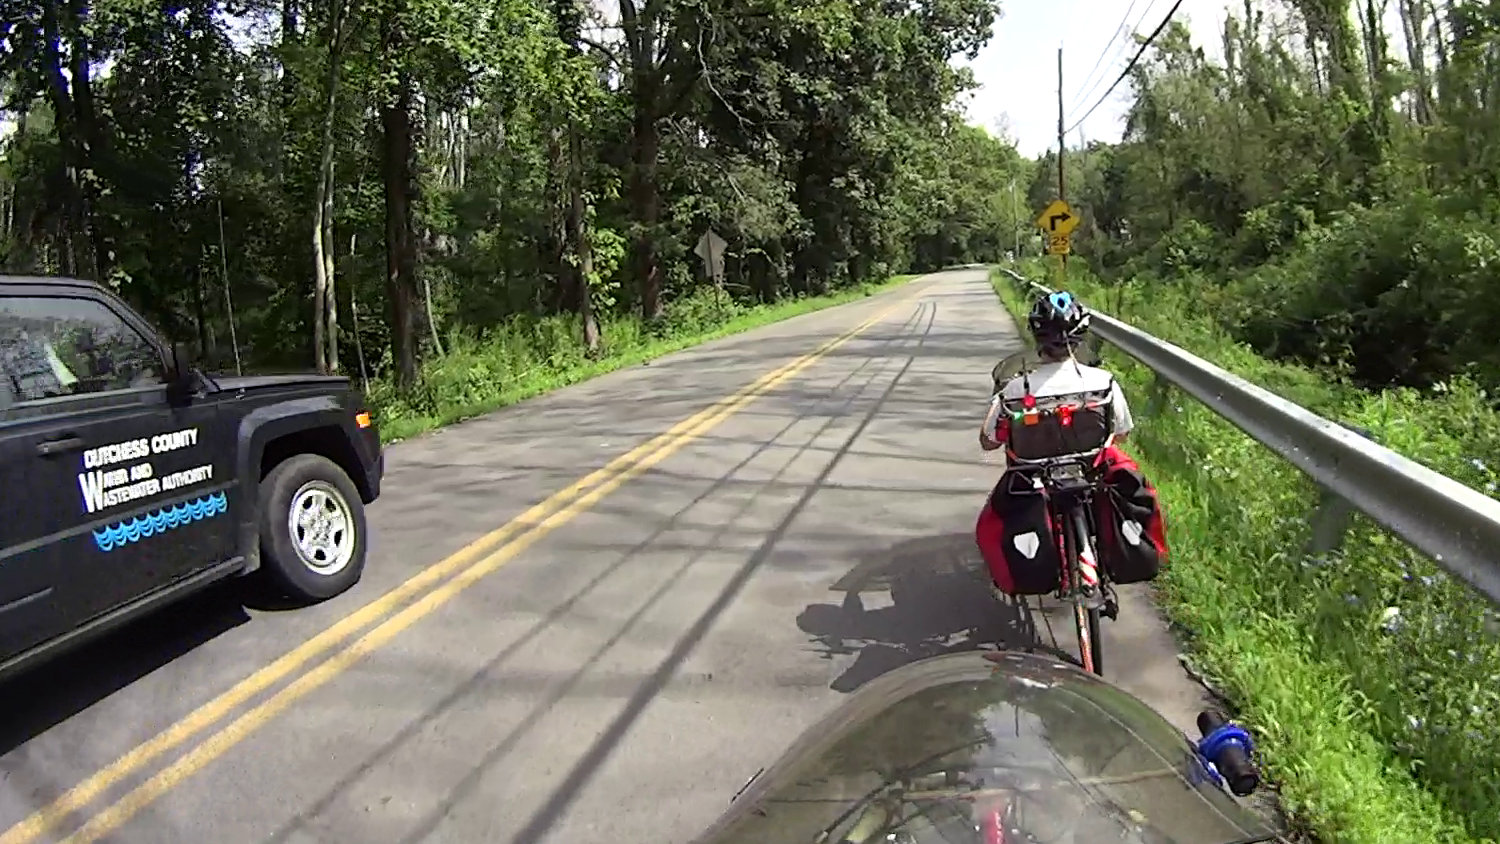
The driver gave us plenty of room, which is always nice:
Tire tracks at Maloney Trailhead – DCWWA SUV on Maloney 2018-08-20
But then the SUV turned into the Maloney Rd entrance to the Dutchess Rail Trail:
Tire tracks at Maloney Trailhead – DCWWA SUV entering – 2018-08-20
Which was specifically designed to exclude motor vehicles:
Tire tracks at Maloney Trailhead – DCWWA SUV tracks – 2018-08-20
Later, I was told it’s an “allowable access” for Water Authority vehicles and, in any event, because their SUV didn’t leave the biggest ruts and tracks, they think it’s all good:
Tire tracks at Maloney Trailhead – 2018-08-20
The ramp joins the trail at an acute angle, so the SUV required some backing & filling to get around:
Then it’s an easy drive to the water meter about 2500 feet down the trail:
Tire tracks at Maloney Trailhead – Dutchess Water Authority SUV – 2018-08-20
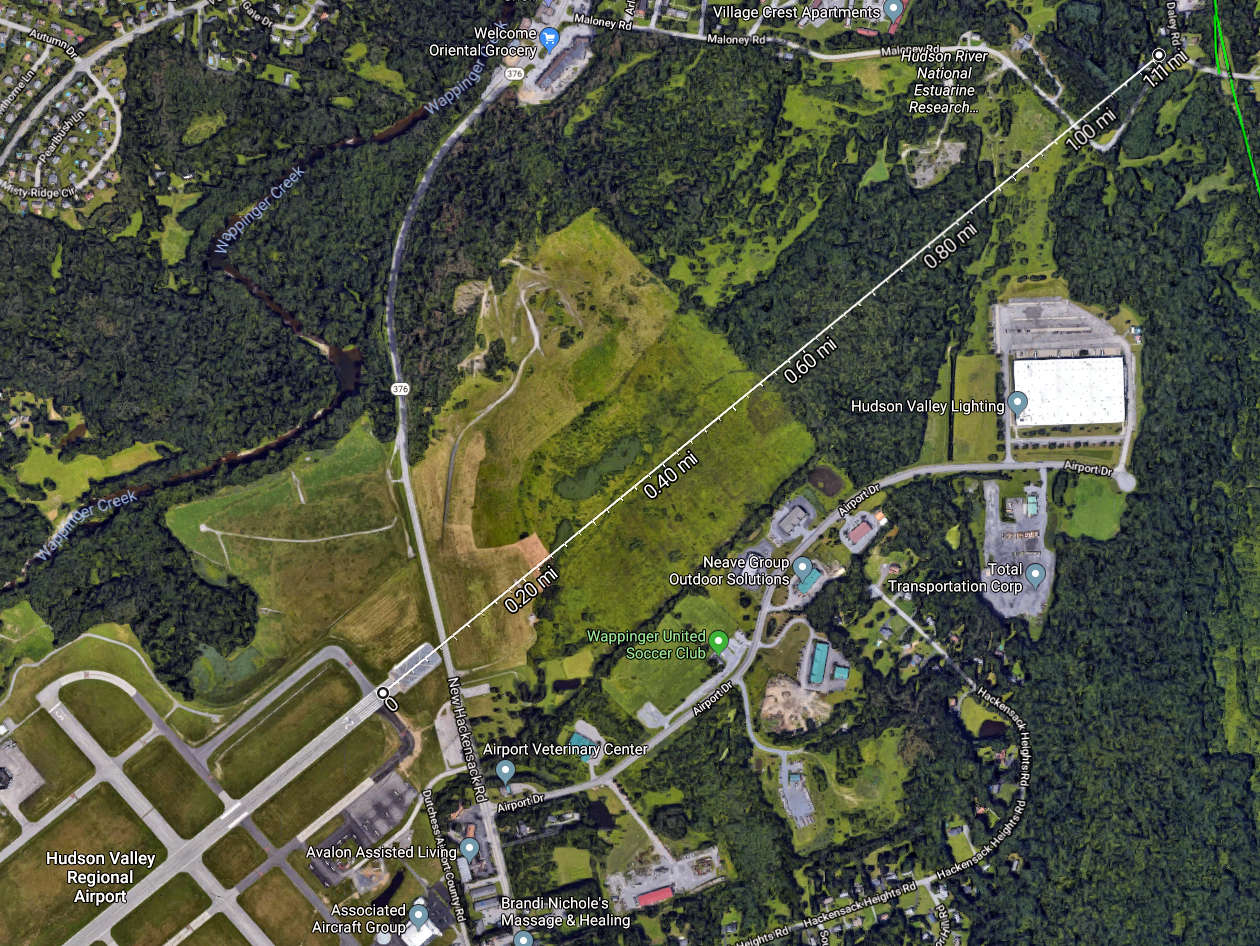
There’s an Official Vehicle Access gate one mile south of the Maloney ramp that’s about 3800 feet from the water meter. I’m told they use the Maloney ramp to reduce the distance they drive on the rail trail; evidently, destroying the entrance Just Doesn’t Matter.
I’m trying to develop an attitude between Zen and apathy, with just enough indifference to not care when somebody tells me how wonderful things will be in the future.
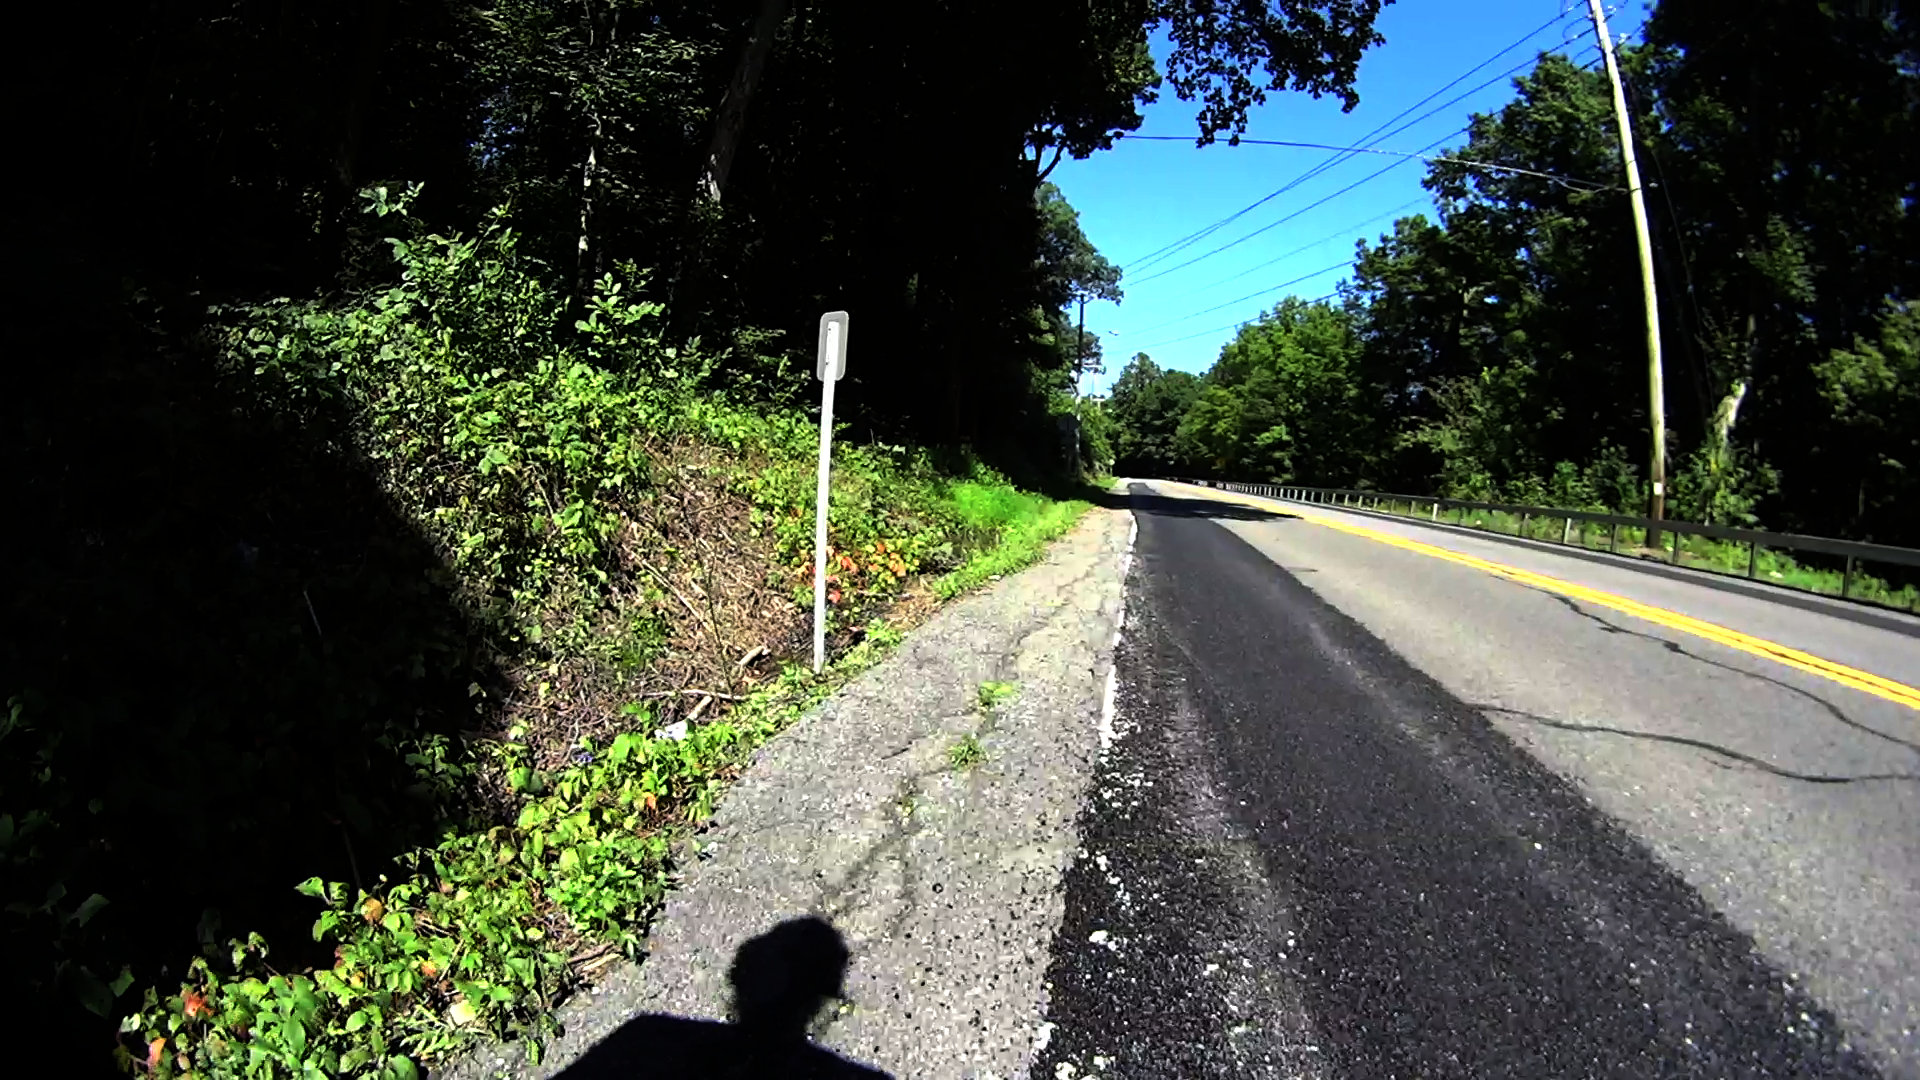
One might expect the NYS Department of Transportation to maintain New York State Bike Route 9, a.k.a. NYS Rt 376 from Poughkeepsie to Red Oaks Mill, in a bicycle-aware manner.
One would be mistaken.
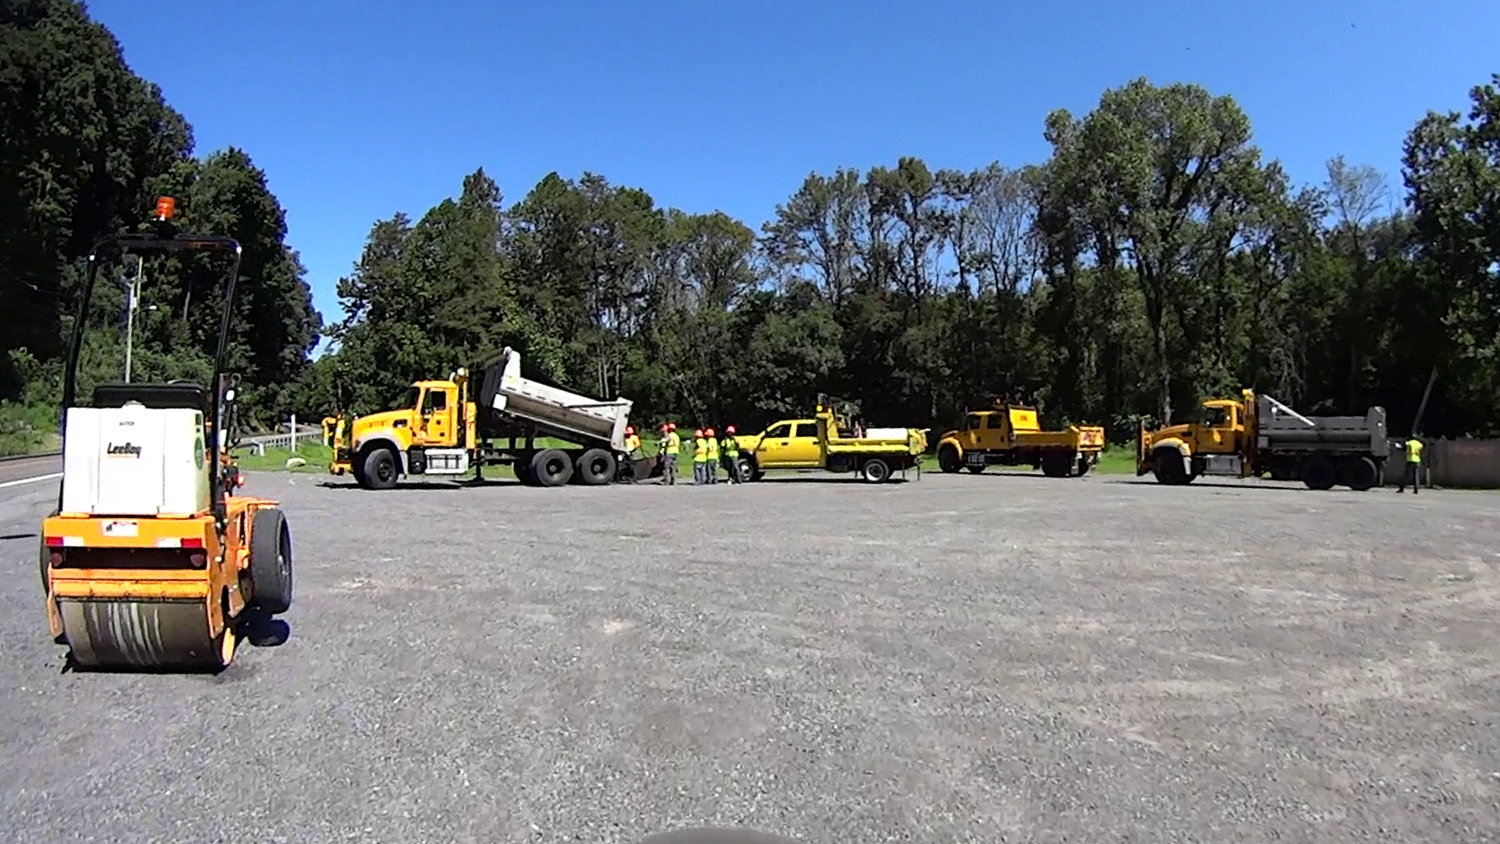
The most recent patch strip very carefully avoids the deteriorated shoulder, all the way around the curve:
The crew chief said they were there because “somebody wrote a letter” describing the conditions. I suppose that would be me, although after half a year it’s hard to establish causation, let alone correlation.
He also says no details of the letter reached him, which explains why they laid the patches in the travel lane, rather than repairing the conditions I described. He was adamant they were doing the best they could with the inadequate manpower, materials, and time available for the projects.
There are absolutely no requirements to consider bicyclist safety in their repairs, so laying asphalt over the shoulder never happens.
NYS DOT’s Bicycling FAQ says I should “take the lane” around that curve, due to the deteriorated shoulder, to ensure motorists pass only when it’s safe.
Whenever I offer to take a NYS DOT bureaucrat on an inspection ride along their roads, they never have the time. Of course, they don’t “work” on weekends, so they’re unwilling to join me on a pleasant ride around the area some Saturday or Sunday morning.
Just another day of bicycling along NYS DOT’s “complete streets” …
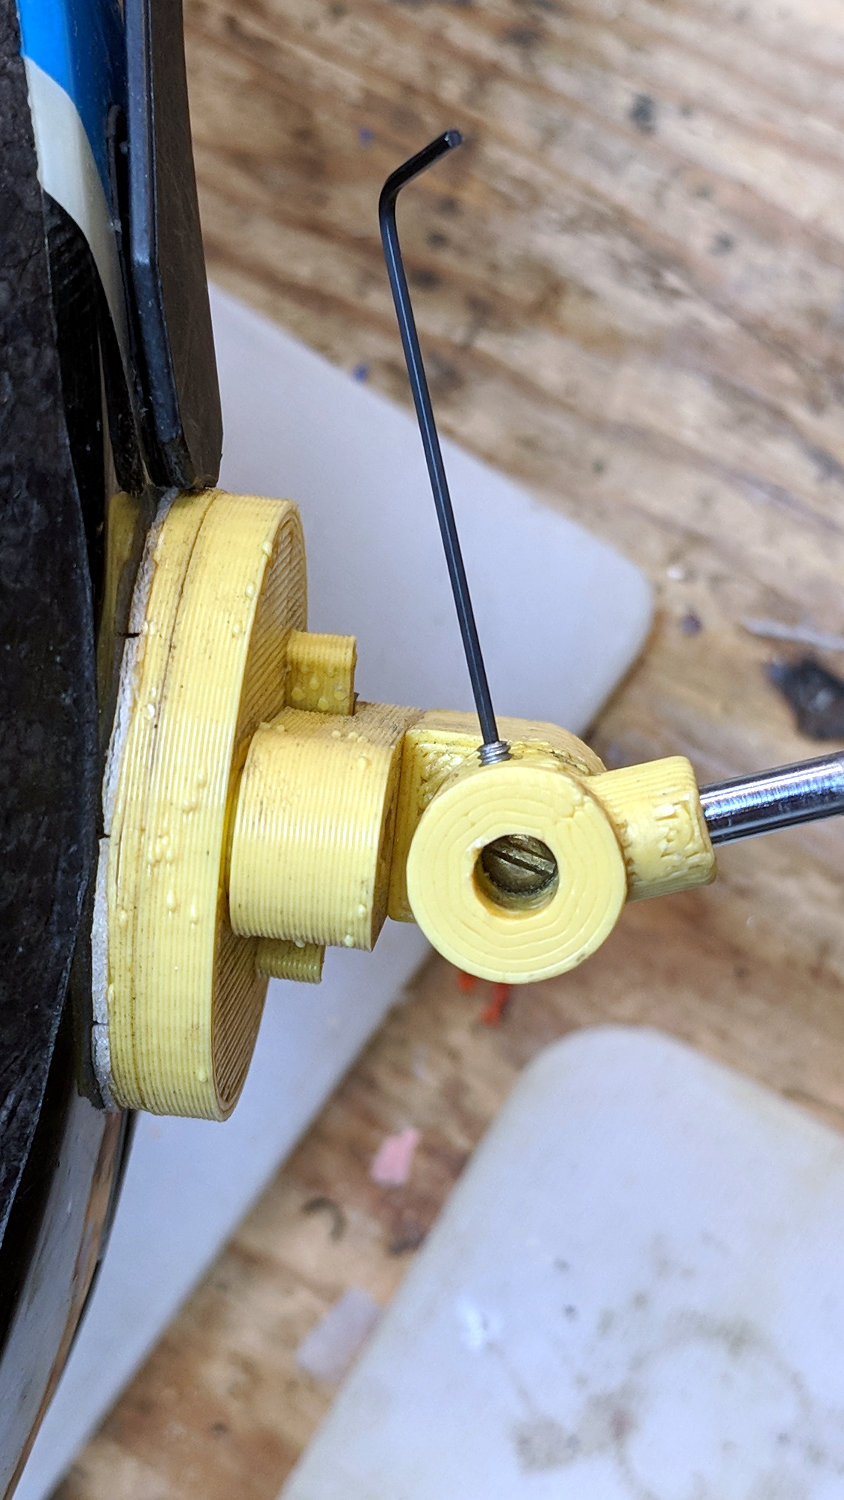
That’s a 0.035 inch = 35 mil hex wrench, of which Eks reminds me “Any time your design requires a tiny [obscene gerund] wrench, you’re doing it wrong”.
So it’s not unusual to ride under a small plane on final approach. Having a Gulfstream V fly directly overhead, however, is a real attention-getter:
Gulfstream V on final – Maloney Rd – 2018-08-26
What’s not at all obvious from the picture is how big a GV looks when seen directly overhead through those trees just ahead on the corner where our paths crossed. There’s a 360 ft (above sea level) hill directly on the flight path, so it’s at maybe 600 ft ASL and 400-ish ft AGL.
Thrust-reversal thunder rolled over us 50 seconds later, as we rode up the rail trail access ramp. Figuring we’re 15 sound-seconds from the strip, the GV was 30 seconds from touchdown.
After a few days of downtime, an Official Makergear Thermistor arrived and is now installed amid a dab of heatsink compound:
M2 – Thermistor with heatsink compound
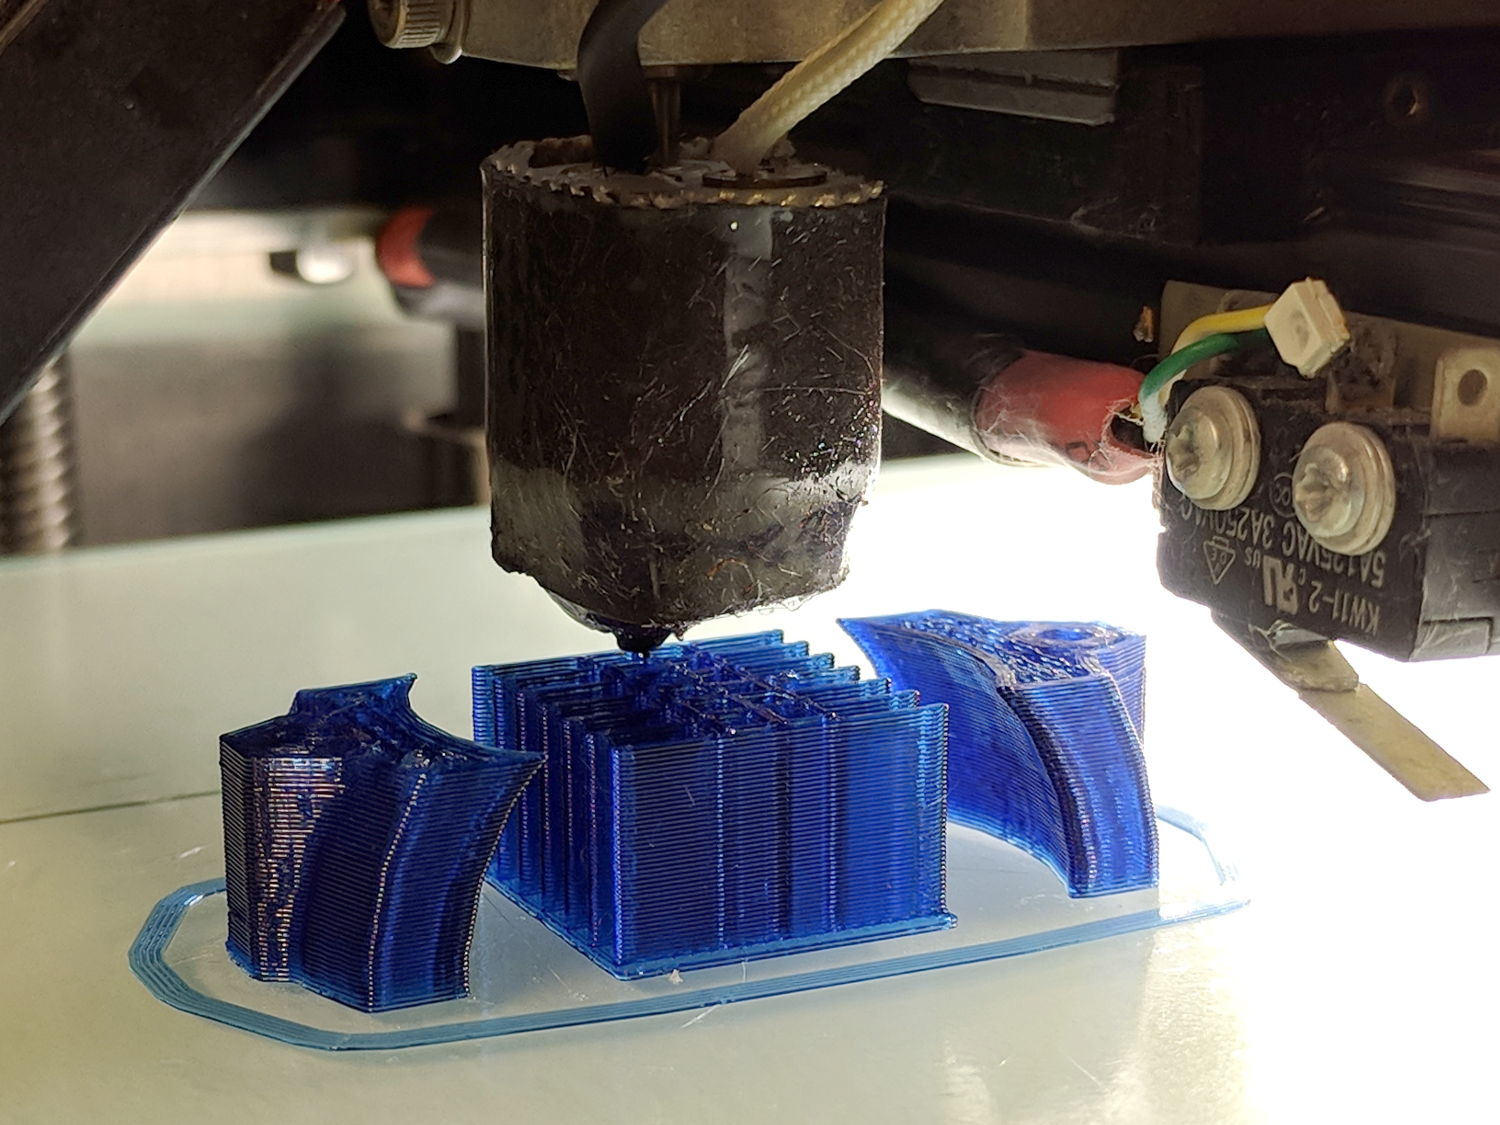
With the hot end set a bit higher than usual, position the platform at Z=0, lower the nozzle to be flat on the platform, tighten the lock screw, then run off a set of large calibration squares:
M2 – Nozzle Z Offset Recal – first test
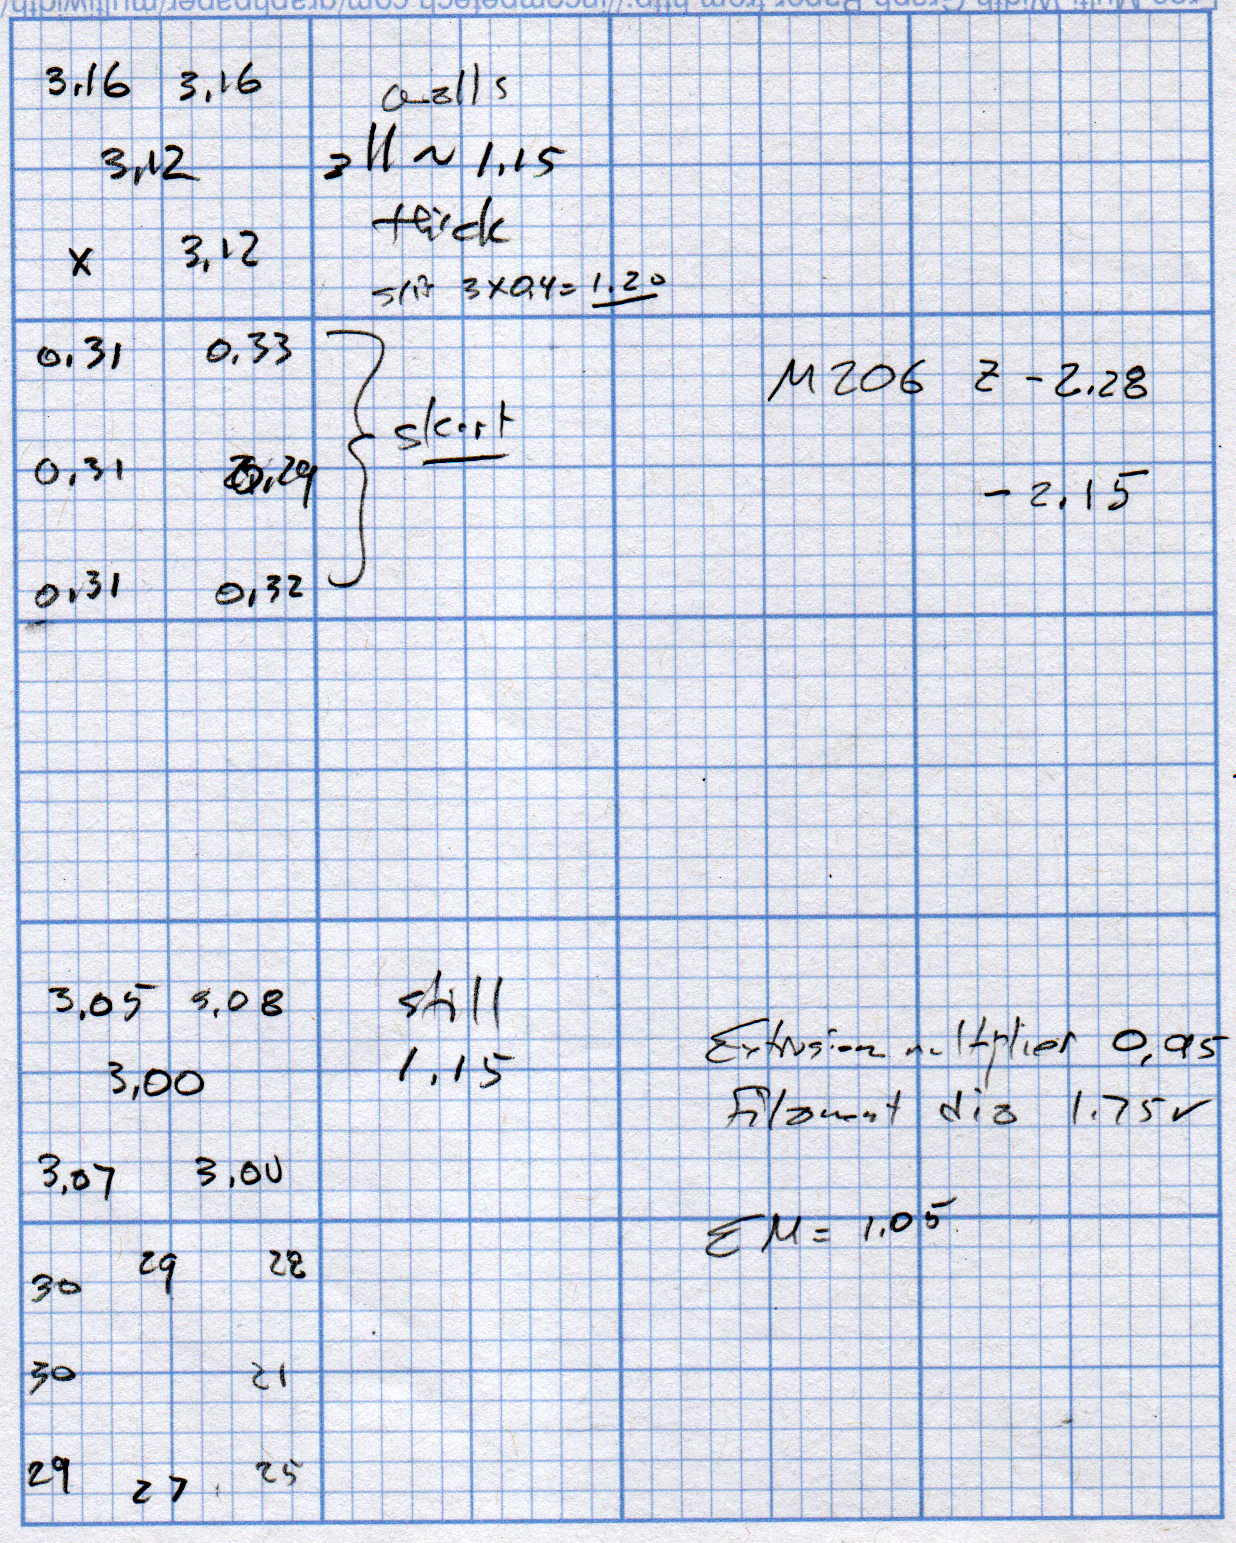
The scrambled square in the front left says the Z=0 nozzle position came out just a bit too far above the platform and, indeed, the measurements (upper left numbers) say it’s off by 0.15-ish mm:
M2 Nozzle and Platform Re-Cal Measurements
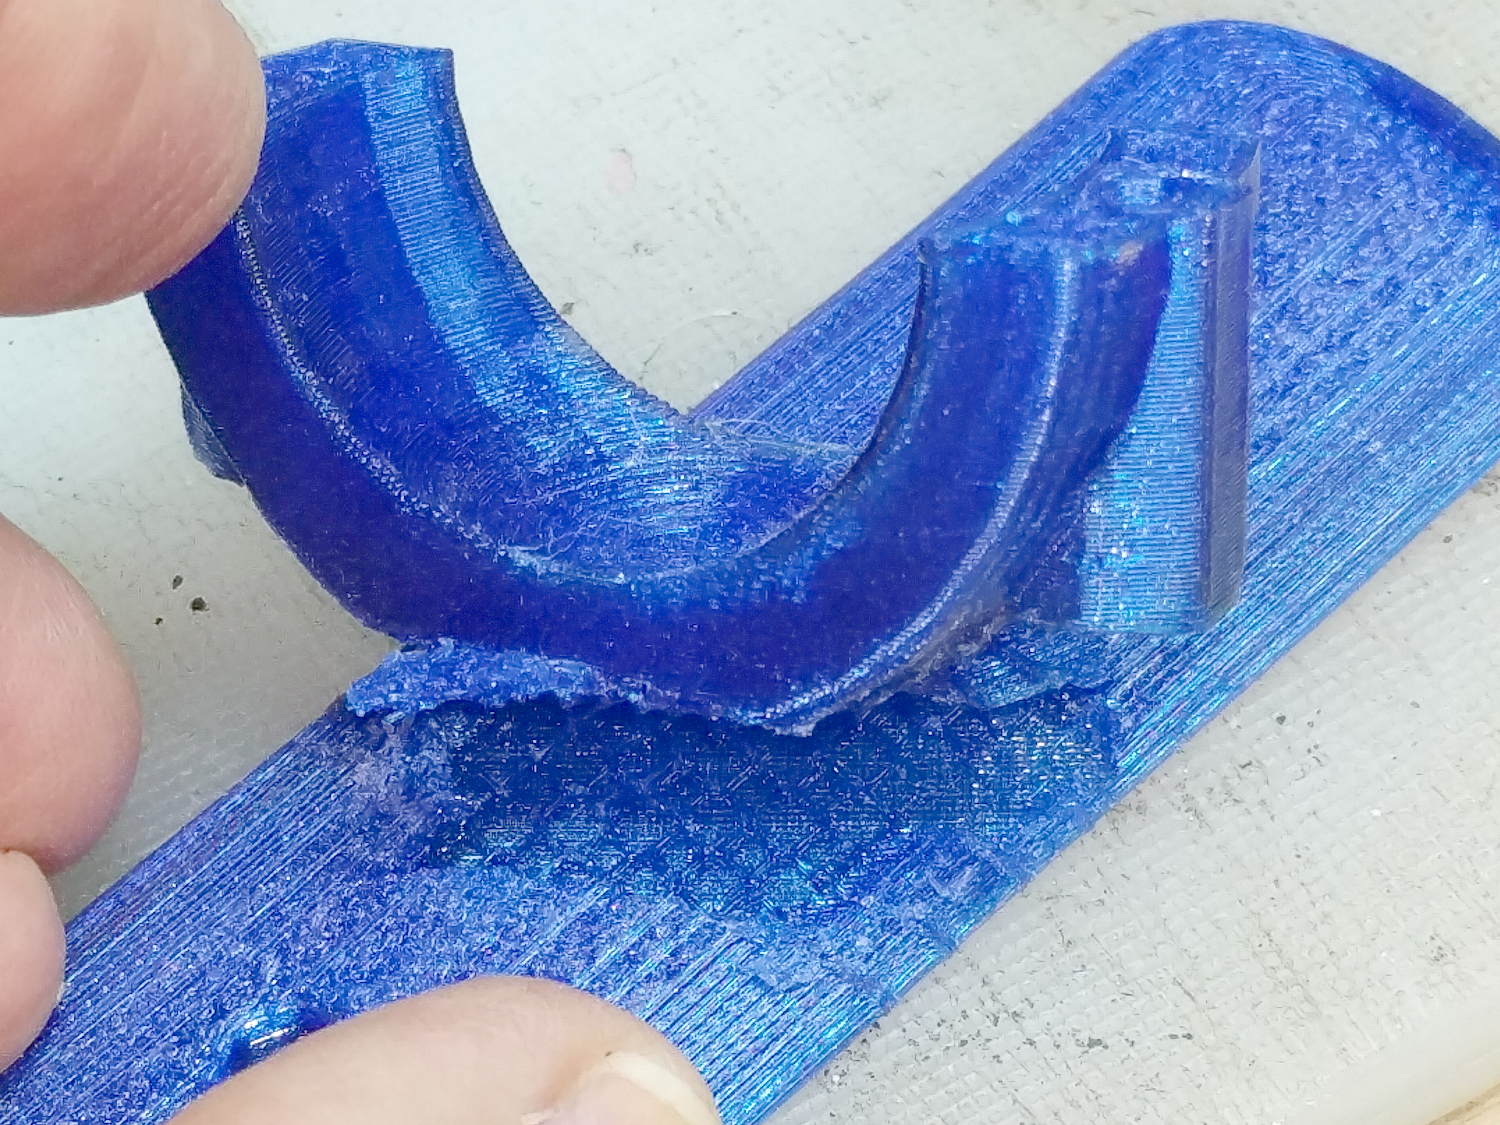
Probably a little PETG stuck to the nozzle; I hate adjusting things when they’re burning hot.
The walls are also thin by a smidge, but the first order of business is to reset the Z offset with M206 Z=-2.15. With that in hand, the second set of squares came out at 3.00 to 3.08 mm (lower left numbers), which I defined to be Close Enough.
The 0.08 mm variation across the platform isn’t enough to worry about.
The first skirt threads were too thick and not solidly bonded together, but the second skirt came out normally, with a thickness from 0.21 through 0.30, which is also Good Enough.
The three-thread walls were still 1.15 mm, rather than 1.20 mm, so the EM should go from 0.95 to 0.95*1.20/1.15 = 1.05.
Next, a set of single-thread thinwall boxes to verify the Z offset and recheck the Extrusion Multiplier:
M2 – Nozzle Z Offset Recal – thinwall test
They’re dead on 3.00 mm tall, varying by not enough to worry about.
Their single-thread walls are 0.38 mm, not the intended 0.40, which suggests the EM should become 0.95*0.40/0.35 = 1.00.
It turns out the filament diameter at this part of the roll is scant of 1.75 mm, maybe 1.73 mm, so I decided to not fiddle with the EM.
The flange around the bottom of the arch support grid (in the middle) is intentional; it’s not an overstuffed first layer. The clamp sections rise from the platform just like they grew there.
So the M2 is back in operation and I have a spare thermistor on the shelf!
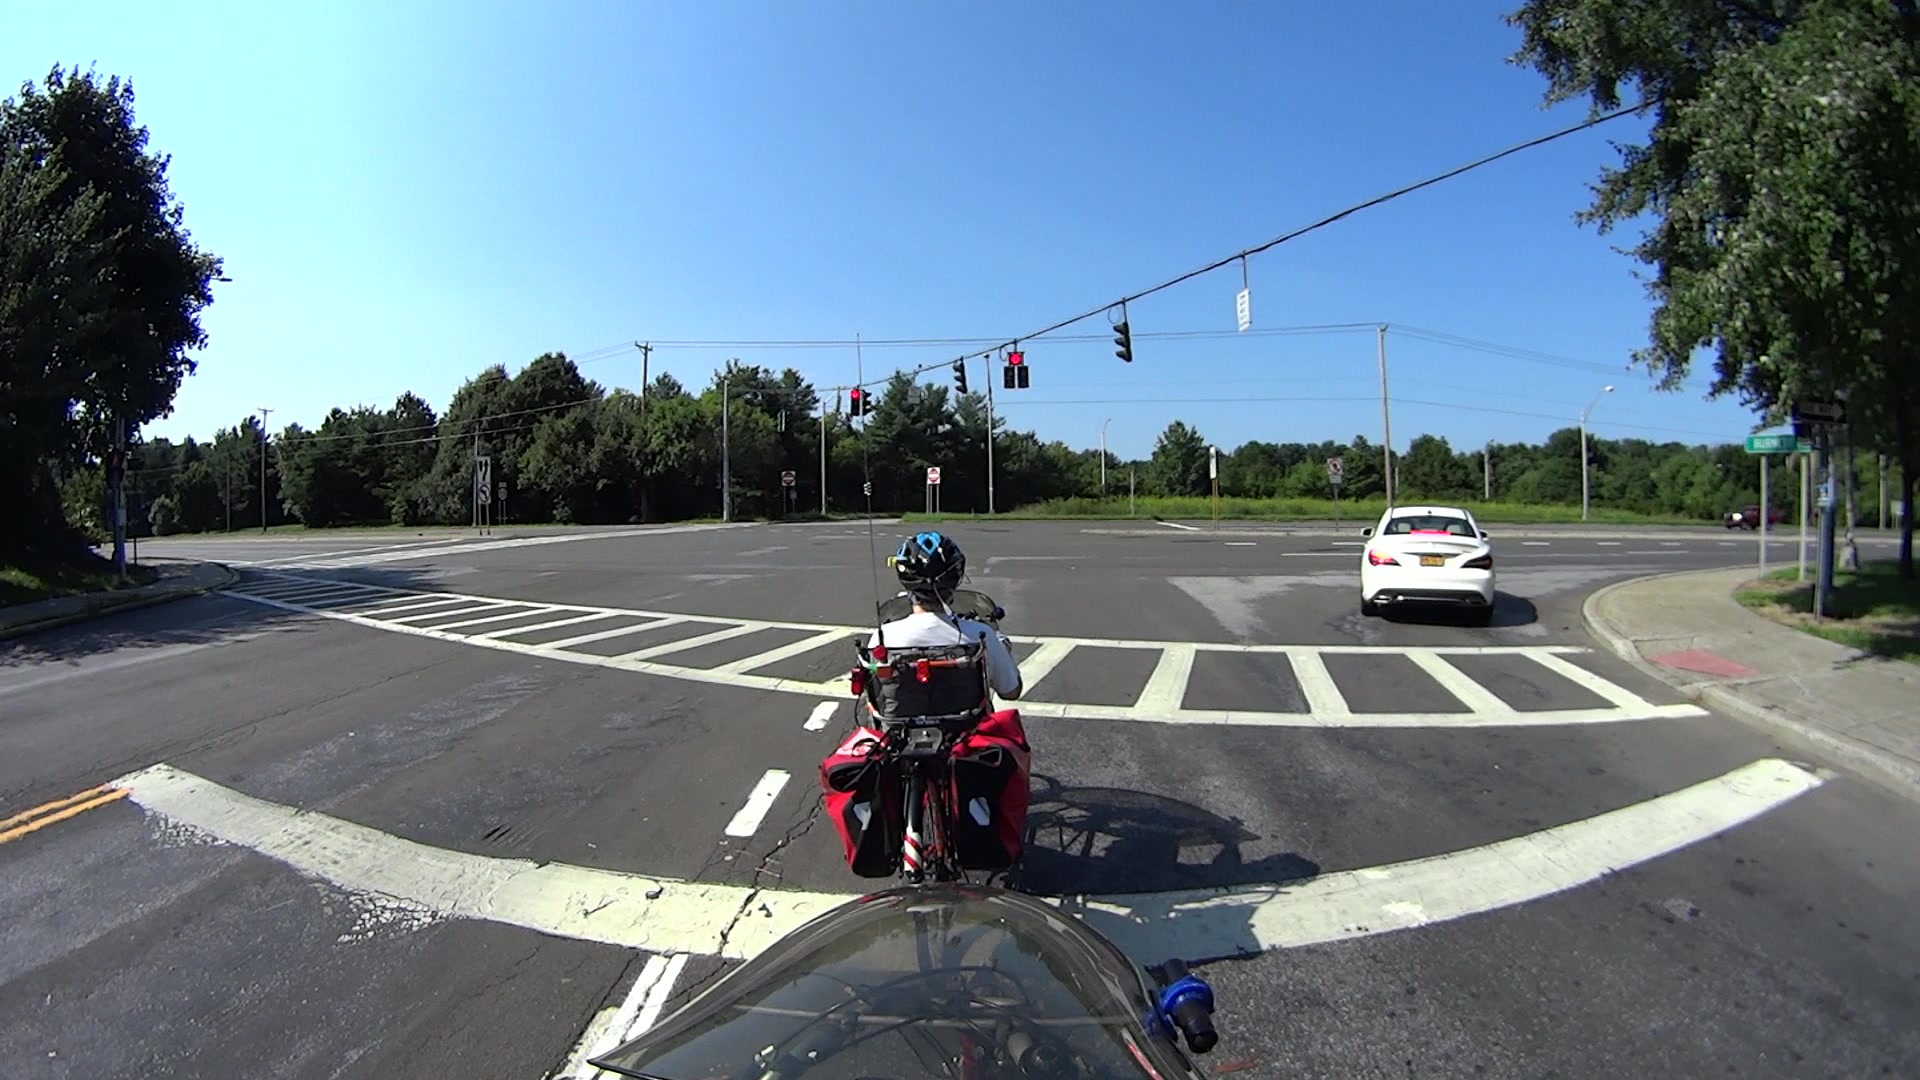
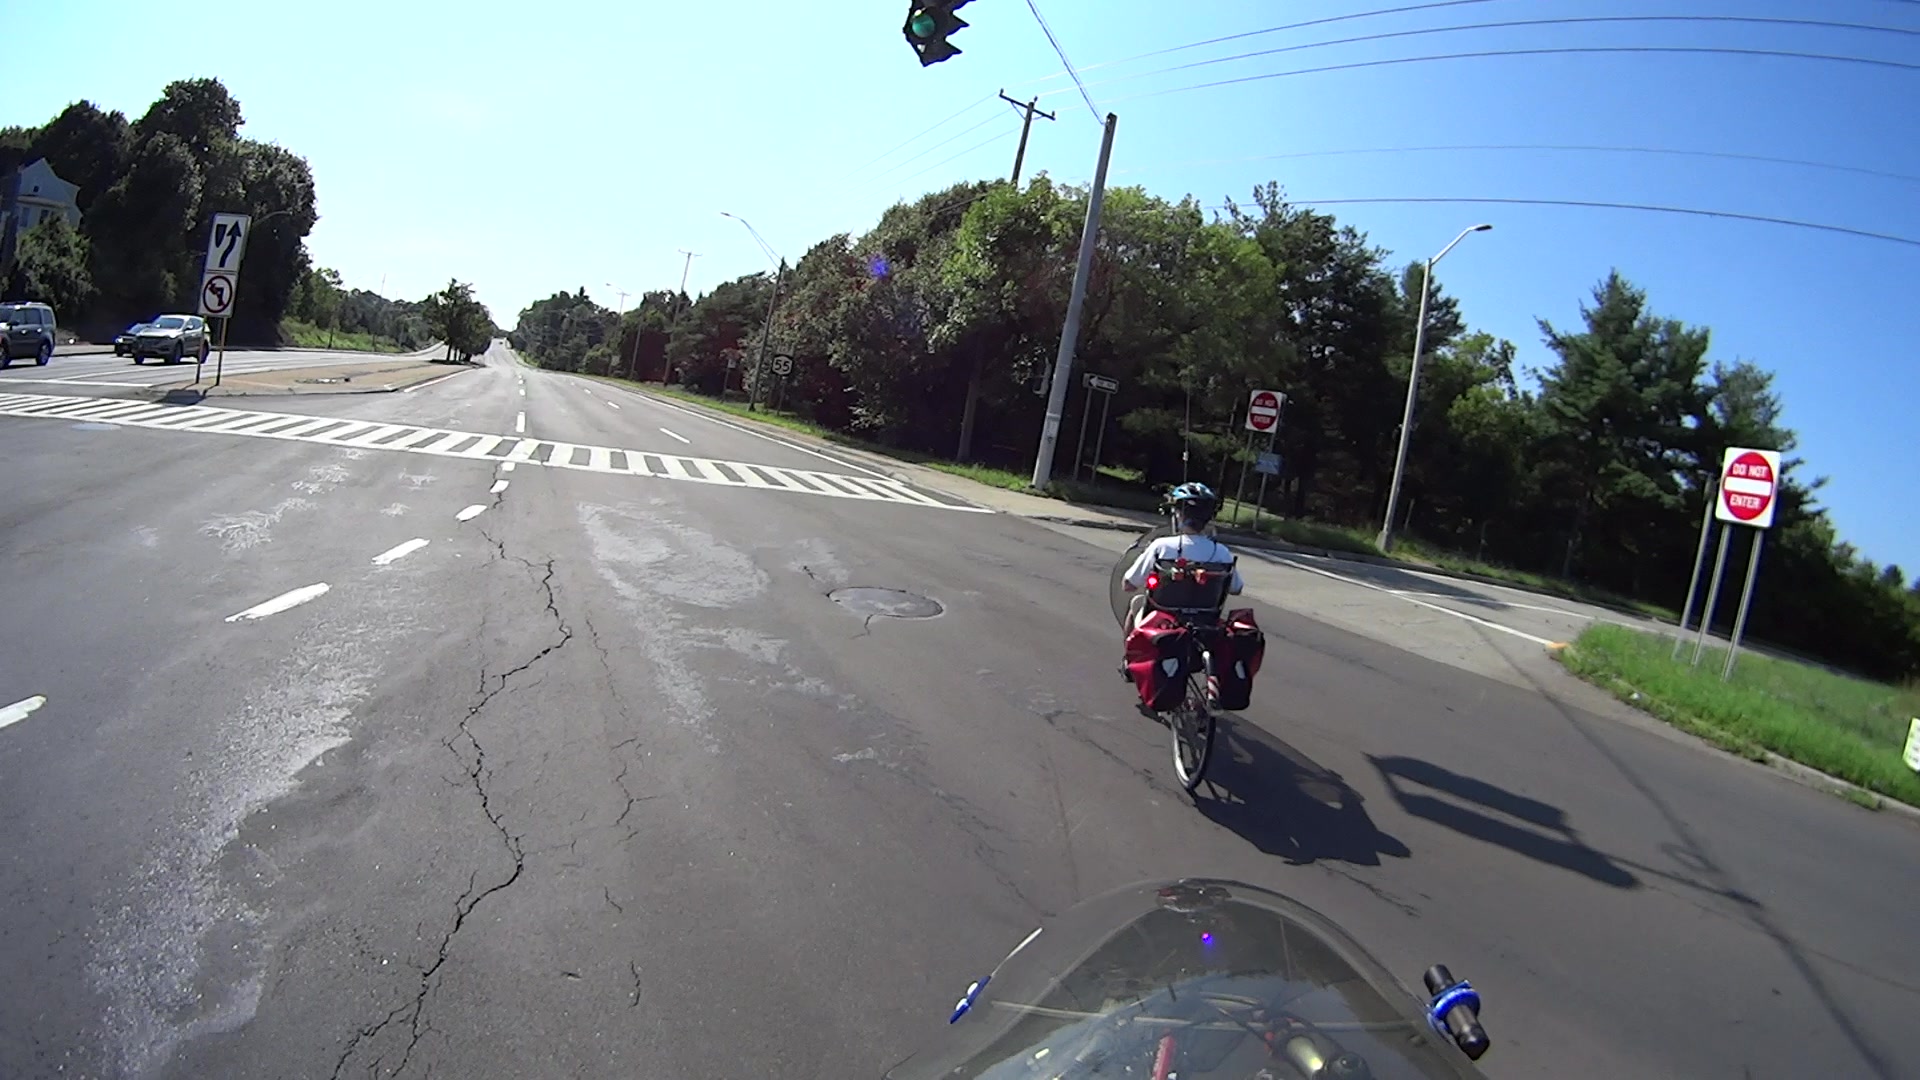
We’re waiting at the end of Burnett Blvd, with the signal red and the clock at T = -0.17 seconds (photo numbers in 1/60 second frames):
RedRunner-0194
You can’t hear the car (barely visible) approaching on the far left, but we can.
T = 0.00 – We get a green light and the (more visible) car is accelerating hard:
RedRunner-0204
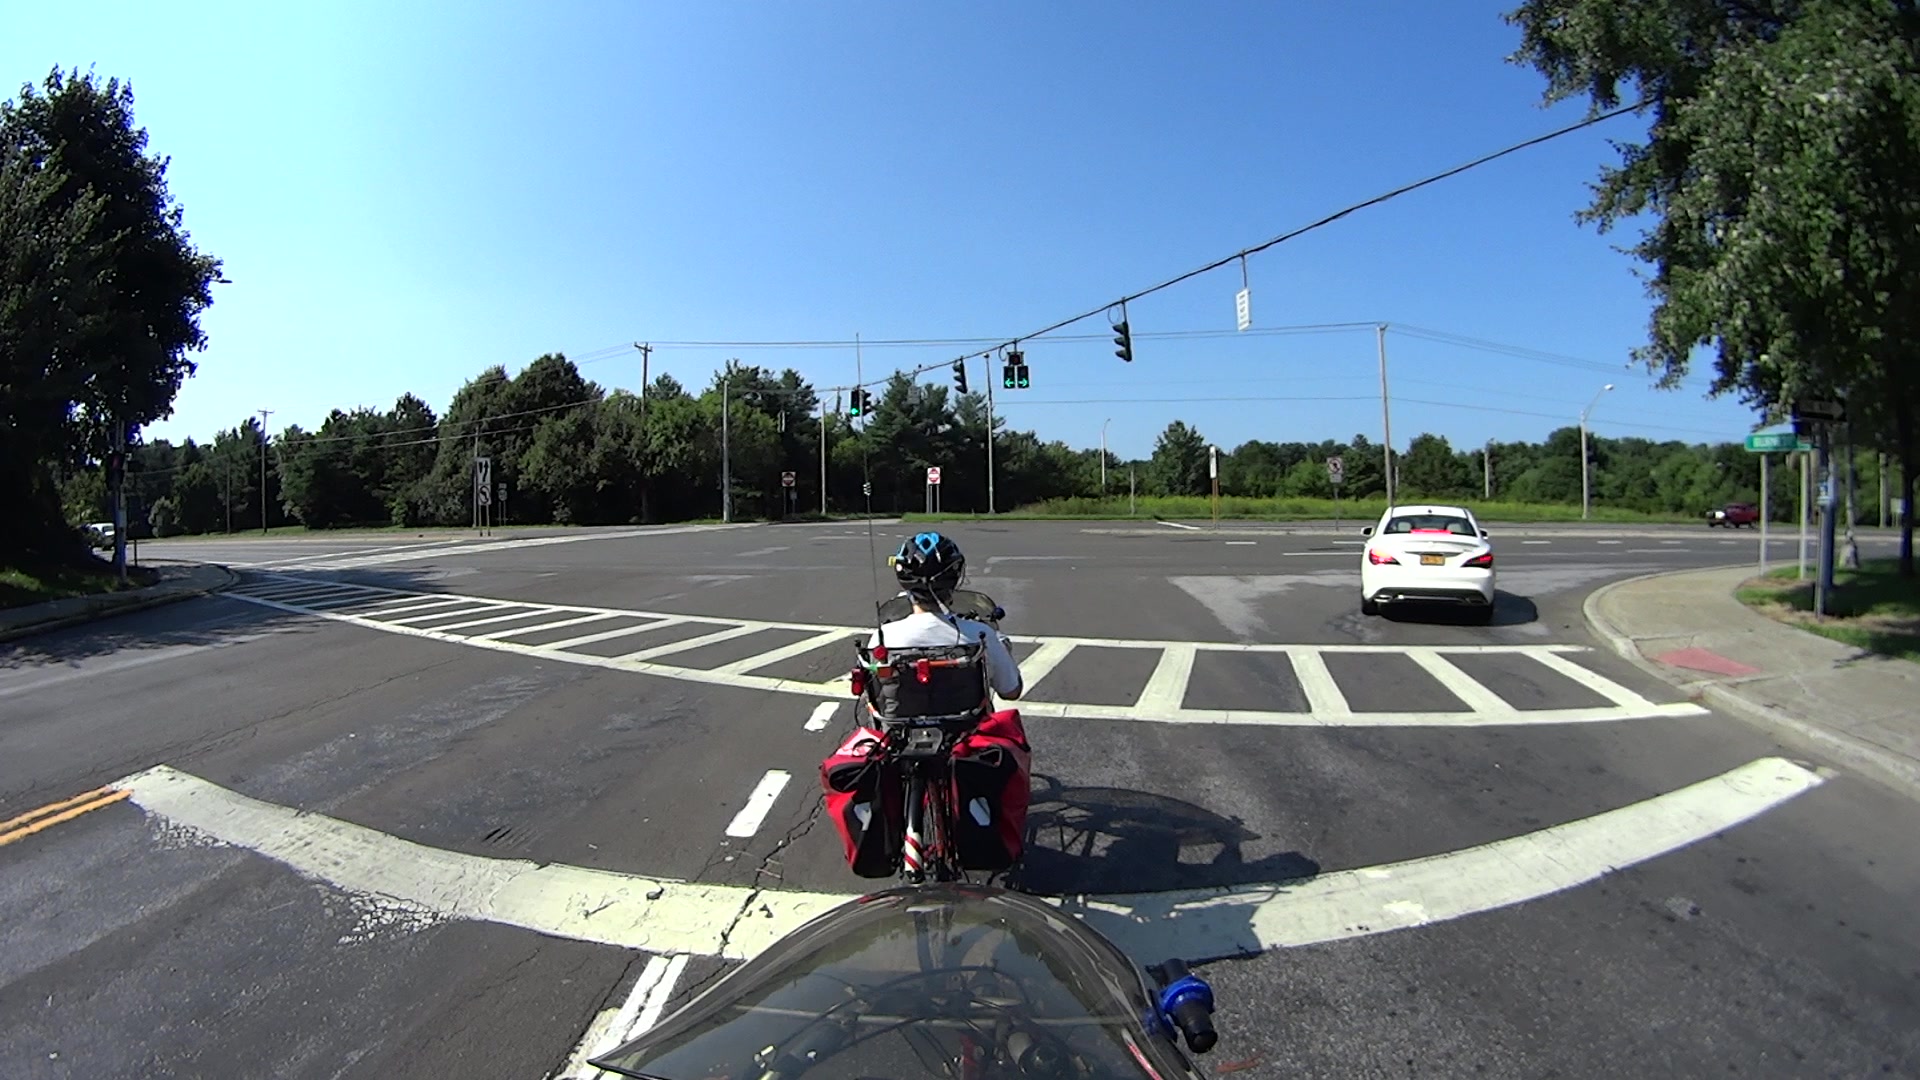
T = 1.00 – The car reaches the crosswalk:
RedRunner-0264
Note that the driver of the car to our right isn’t moving, either.
T = 2.03 – Car passes through intersection:
RedRunner-0326
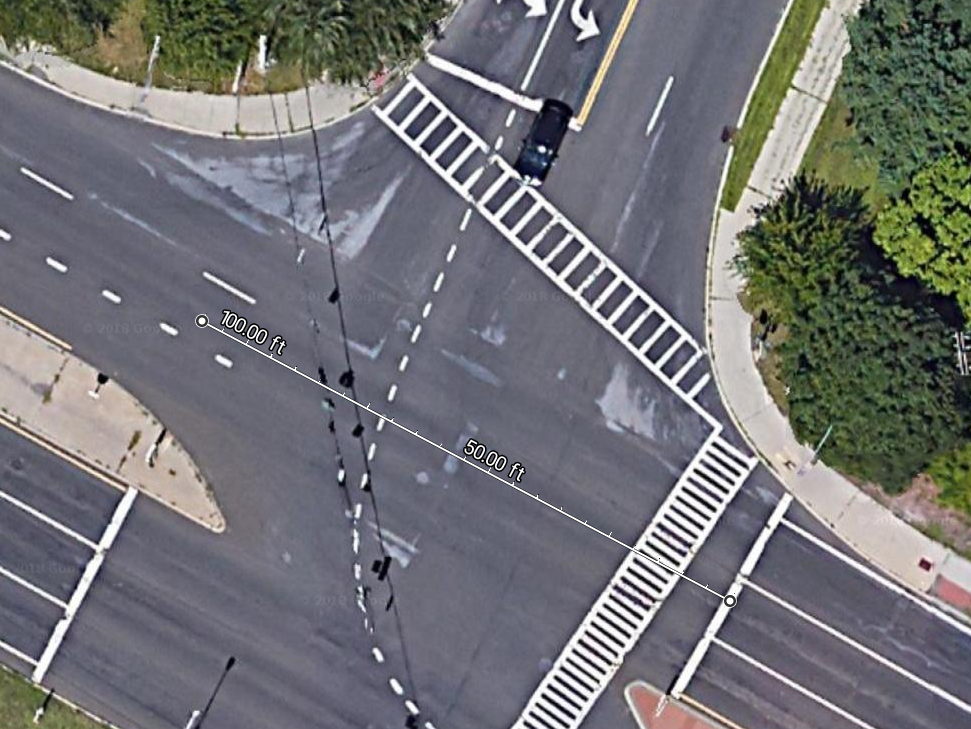
The view from above, showing the distance between those two positions is 100 feet:
Burnett at Rt 55 – Distance along Rt 55
Do the math: 100 ft / 1.03 s = 97 ft/s = 66 mph.
There’s a reason we don’t start moving instantly when a traffic signal turns green.
T = 3.17 – We start moving, as does the car to our right, with our signal still green:
RedRunner-0394
T = 4.88 – Whoops, our signal turns yellow:
RedRunner-0497
T = 9.28 – Our signal turns red:
RedRunner-0761
The signal timing hasn’t changed over the years:
Green = 4.88 s
Yellow = 4.40 s
Elapsed time from green to red: 9.28 seconds. No problem if you’re a car, death if you’re a bike.
T = 10.42 – We’re pedaling hard in the intersection:
RedRunner-0829
The white car to our far right started moving into the intersection about the time we did. If you’re going to say we shouldn’t run the light, you gotta deal with cars first, OK?
Note the car approaching from the right on the far side of Rt 55. That’s a 40 mph zone, the driver sees a green light, and we’re still in the intersection.
T = 12.50 – We’ve been moving for 9.33 s, which puts Mary directly in the path of the oncoming car:
RedRunner-0954
T = 14.83 – The oncoming driver having spotted us and slowed down, we’re asymptotically approaching the right-hand lane of Rt 55, passing beyond the steel manhole cover:
RedRunner-1067
If you plunk “burnett signal” into the search box at the upper right, you’ll find plenty of previous incidents along these lines.
Despite bringing this hazard to their attention many times (“We appreciate and share your interest in making our highway systems safe and functional for all users.“), NYS DOT obviously doesn’t care.
If any of their employees commuted to their office building (which overlooks this very intersection), perhaps they would care, but they don’t: we have yet to see a bicycle in the DOT’s token bike rack.
DOT says they’re in favor of Complete Streets, but, seven years on, it’s just another day on the only route between Arlington and the Overocker Trailhead of the Dutchess County Rail Trail.