After a few days of downtime, an Official Makergear Thermistor arrived and is now installed amid a dab of heatsink compound:

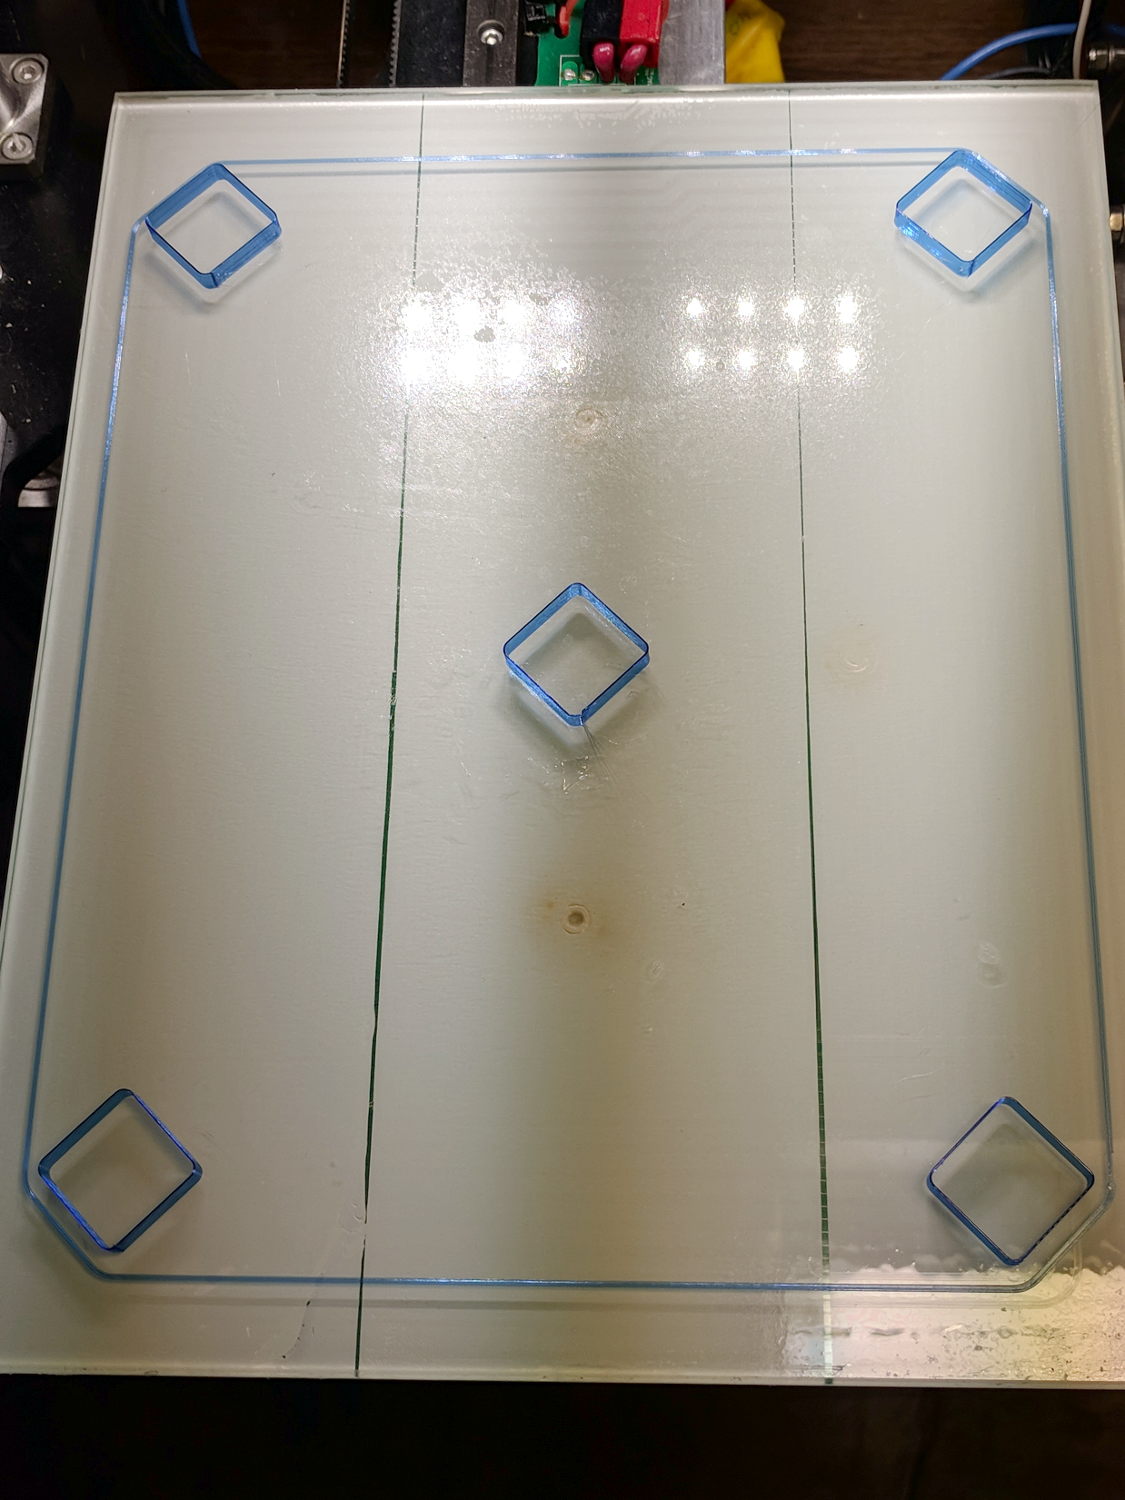
With the hot end set a bit higher than usual, position the platform at Z=0, lower the nozzle to be flat on the platform, tighten the lock screw, then run off a set of large calibration squares:

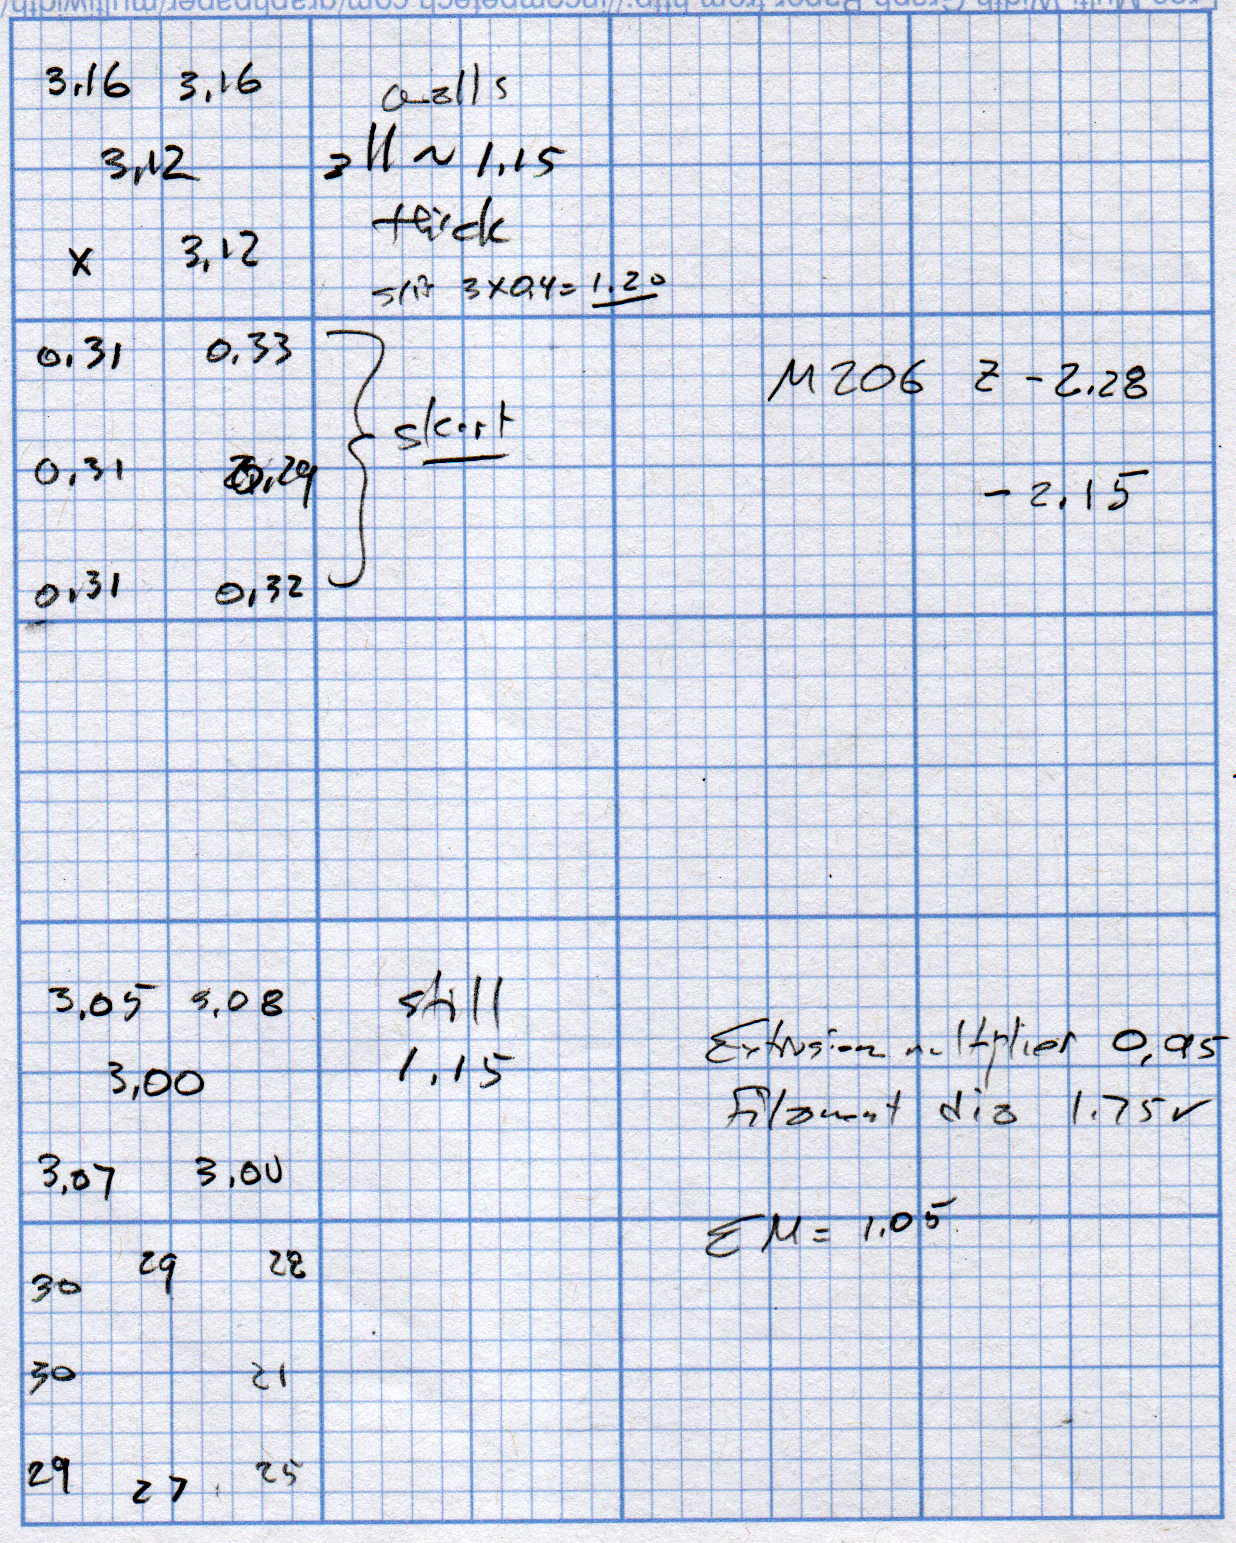
The scrambled square in the front left says the Z=0 nozzle position came out just a bit too far above the platform and, indeed, the measurements (upper left numbers) say it’s off by 0.15-ish mm:
Probably a little PETG stuck to the nozzle; I hate adjusting things when they’re burning hot.
The walls are also thin by a smidge, but the first order of business is to reset the Z offset with M206 Z=-2.15. With that in hand, the second set of squares came out at 3.00 to 3.08 mm (lower left numbers), which I defined to be Close Enough.
The 0.08 mm variation across the platform isn’t enough to worry about.
The first skirt threads were too thick and not solidly bonded together, but the second skirt came out normally, with a thickness from 0.21 through 0.30, which is also Good Enough.
The three-thread walls were still 1.15 mm, rather than 1.20 mm, so the EM should go from 0.95 to 0.95*1.20/1.15 = 1.05.
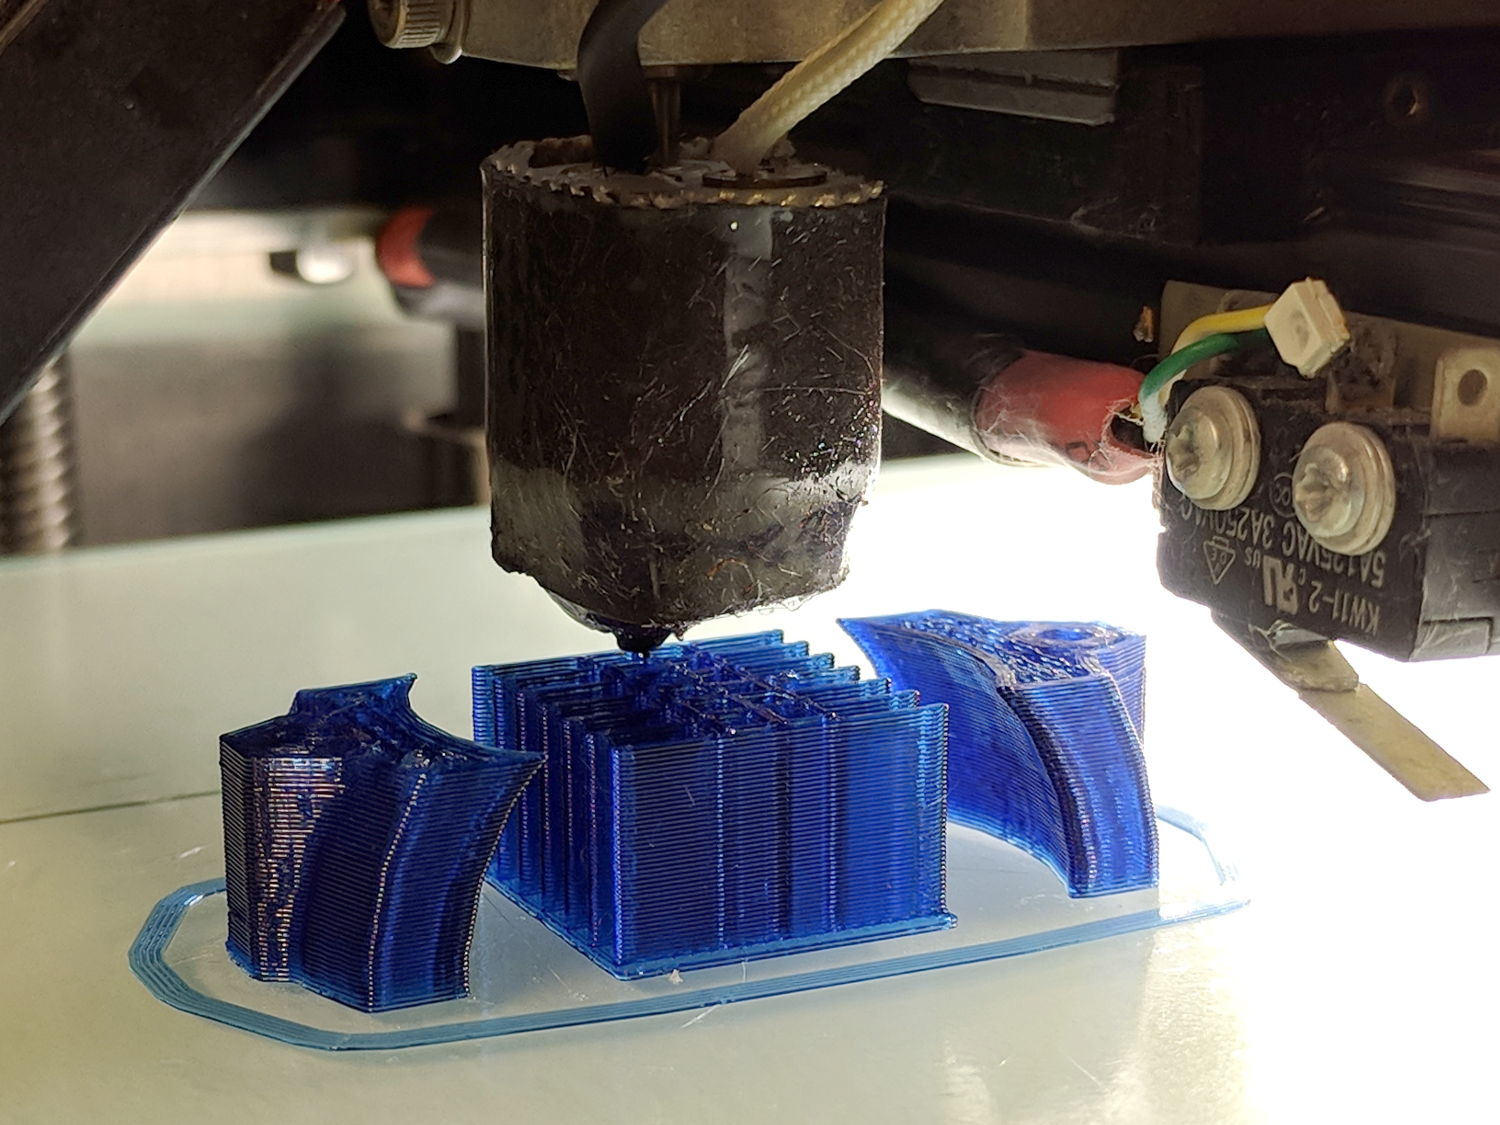
Next, a set of single-thread thinwall boxes to verify the Z offset and recheck the Extrusion Multiplier:
They’re dead on 3.00 mm tall, varying by not enough to worry about.
Their single-thread walls are 0.38 mm, not the intended 0.40, which suggests the EM should become 0.95*0.40/0.35 = 1.00.
It turns out the filament diameter at this part of the roll is scant of 1.75 mm, maybe 1.73 mm, so I decided to not fiddle with the EM.
The first production part came out fine:
The flange around the bottom of the arch support grid (in the middle) is intentional; it’s not an overstuffed first layer. The clamp sections rise from the platform just like they grew there.
So the M2 is back in operation and I have a spare thermistor on the shelf!

Comments
One response to “Makergear M2: Nozzle Z Offset Recalibration”
[…] a few hours after installing a replacement thermistor and recalibrating the M2, but nested repairs happen every now and […]