The Smell of Molten Projects in the Morning

Ed Nisley's Blog: Shop notes, electronics, firmware, machinery, 3D printing, laser cuttery, and curiosities. Contents: 100% human thinking, 0% AI slop.

Category: Recumbent Bicycling

Cruisin’ the streets

  • Specialized MTB Shoes vs. Shimano PD-M324 SPD Pedals

    Long ago, I put Shimano PD-M324 pedals on Mary’s Tour Easy, because she prefers a pedal with a platform on one side and SPD cleats on the other.

    Shimano PD-M324 pedal - SPD side
    Shimano PD-M324 pedal – SPD side

    Those are newish-old-stock from the Big Box o’ Bike Parts, as she’s worn out the previous pedals.

    She recently got a pair of Specialized MTB shoes:

    Specialized MTB Shoes - PD-M324 clearance
    Specialized MTB Shoes – PD-M324 clearance

    The shoes work fine with the more-or-less standard Shimano PD-M520 double-entry SPD pedals on my bike:

    Shimano PD-M520 pedal
    Shimano PD-M520 pedal

    But the soles jammed against the frame on the PD-M324 pedals.

    So I carved away enough rubber around the cleat sockets for clearance to float properly with the cleats latched. A bit of trial-and-error, probably with a bit more to come after on-the-road experience, but definitely a step in the right direction.

    Protip: always always always arrange the workpiece so the blade trajectory cannot intersect any part of your body, no matter what slips occur.

  • Park Spoke Tension Meter vs. 20 inch Wheel Spokes

    Obviously, the good folks at Park Tool never anticipated a three-cross spoke pattern on a 20 inch wheel:

    Park Tool Spoke Tension Meter vs 406 wheel
    Park Tool Spoke Tension Meter vs 406 wheel

    It’s my trusty Park Tool TM-1 Spoke Tension Meter, unchanged since shortly after the turn of the millennium.

    For future reference, the rebuilt wheel spoke tensions came out around 25, slightly lower than the 27-ish I measured on Mary’s bike; it didn’t occur to me to measure the tension until after I’d relaxed the spokes. I’ll ride it for a while before doing any tweakage.

    The spoke pattern is pretty close to four-cross, due to the large-flange Phil Wood hubs:

    Tour Easy Front Spoke Pattern
    Tour Easy Front Spoke Pattern

    Which makes for a hella-strong wheel, particularly seeing as how it’s very lightly loaded. The Tour Easy we got for our lass came with a radially spoked rim around a Phil hub.

    I transferred the hub and laced spokes intact to the new rim by the simple expedient of duct-taping the spokes into platters, removing the nipples, stacking the rims, sliding the spokes across into their new homes, reinstalling the nipples, then tightening as usual.

  • Presta Valve to Schraeder Hole Adapter

    The front rim on my Tour Easy developed a distinct bulge, of the sort usually caused by ramming something, but I’m not Danny McAskell and the bulge got worse over the course of a few weeks, suggesting the rim was deforming under tire pressure. Having ridden it upwards of 35 k miles with plenty of trailer towing and too much crushed-stone trail riding, the brake tracks were badly worn and it’s time for a new rim.

    An Amazon seller had an identical (!) rim, except for the minor difference of having a hole sized for a Schraeder valve stem, rather than the Presta valves on the original rims. One can buy adapters / grommets, but what’s the fun in that?

    The brake track walls are 1.5 mm thick on the new rim and a scant 1.0 mm on the old rim, so, yeah, it’s worn.

    A few measurements to get started (and for future reference):

    Presta to Schraeder Adapter - dimension doodle
    Presta to Schraeder Adapter – dimension doodle

    If you don’t have an A drill, a 15/64 inch drill is only half a mil larger and, sheesh, anything close will be fine.

    Introduce a suitable brass rod to Mr Lathe:

    Presta-Schraeder Adapter - parting off
    Presta-Schraeder Adapter – parting off

    Break all the edges and drop it in place:

    Presta-Schraeder Adapter - installed
    Presta-Schraeder Adapter – installed

    One could argue for swaging the adapter to fit flush against the curved rim, but commercial adapters don’t bother with such refinements and neither shall I.

    The 7.0 mm length got shortened to fit flush with the center of the rim:

    Presta-Schraeder Adapter - valve stem installed
    Presta-Schraeder Adapter – valve stem installed

    It’s brass, because the rim is heaviest on the far side where the steel pins splicing the ends live, and, with the tube & tire installed, the rim came out almost perfectly balanced. Which makes essentially no difference whatsoever, of course.

    The shiny new rim sports shiny new reflector tape (from the same stockpile, of course).

    That was easy …

  • Tour Easy Daytime Running Light: 18650 Cell Extraction Tab

    The running lights on our Tour Easy fairing sit just about perfectly level, despite how they appear in relation to the fairing edge:

    Flashlight Mount - LC40 - finger ball - side
    Flashlight Mount – LC40 – finger ball – side

    And, because they’re firmly attached to the fairing mount, there’s no way to tilt them to extract the 18650 cell.

    This took entirely too long to figure out:

    Lithium 18650 Cell Extractor Tab
    Lithium 18650 Cell Extractor Tab

    The LC40 end caps have a recess exactly where it’ll do the most good: capturing the tab inside the cap means it can’t interfere with the rear contact spring:

    Lithium 18650 Cell Extractor Tab - Anker LC40
    Lithium 18650 Cell Extractor Tab – Anker LC40

    Swapping cells no longer requires muttering!

  • Tour Easy Front Fender Clip: Longer and Stronger

    We negotiated the Belmar Bridge connection stairway from the Allegheny River Trail to the Sandy Creek trail:

    Belmar Bridge Stairs - Overview
    Belmar Bridge Stairs – Overview

    We’re maneuvering Mary’s bike, but you get the general idea. Our bikes aren’t built for stairways, particularly ones with low overheads:

    Belmar Bridge Stairs - Low Overhead
    Belmar Bridge Stairs – Low Overhead

    The front fender clip on my Tour Easy snapped (at the expected spots) when the mudflap snagged on one of the angles:

    Belmar Bridge Stairs - First Turn
    Belmar Bridge Stairs – First Turn

    For some inexplicable reason, I didn’t have a roll of duct tape in my packs, so the temporary repair required a strip of tape from a battery pack, two snippets of hook-and-loop tape, and considerable muttering:

    Tour Easy front fender clip - expedient repair
    Tour Easy front fender clip – expedient repair

    It was good for two dozen more miles to the end of our vacation, so I’d say that was Good Enough.

    The new version has holes in the ferrules ten stay diameters deep, instead of six, which might eliminate the need for heatstink tubing. I added a small hole at the joint between the curved hooks and the ferrules to force more plastic into those spots:

    Front Fender Clip - Slic3r
    Front Fender Clip – Slic3r

    I also bent the hanger extension to put the fender’s neutral position closer to the wheel.

    We’ll see how long this one lasts. By now, I now have black double-sticky foam tape!

    The OpenSCAD source code as a GitHub Gist:

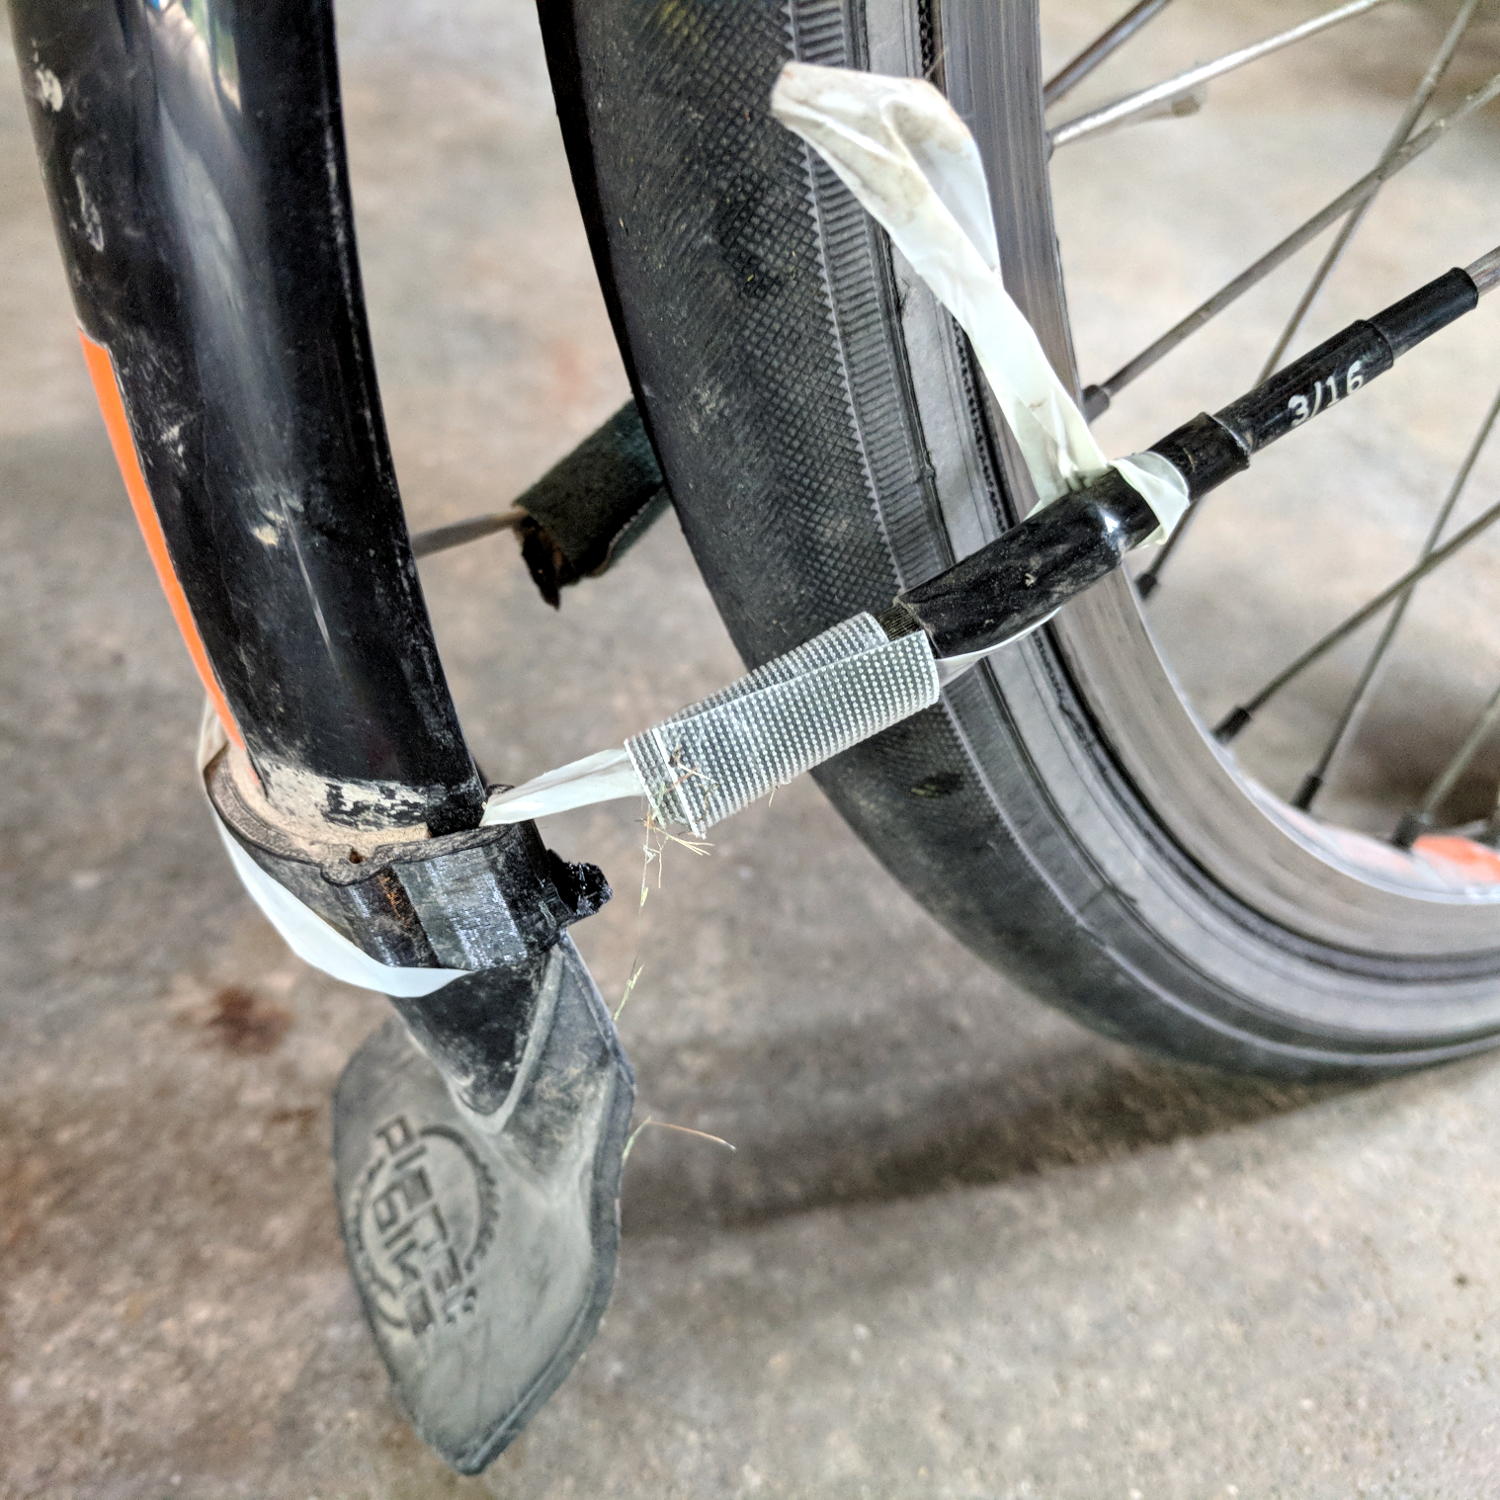
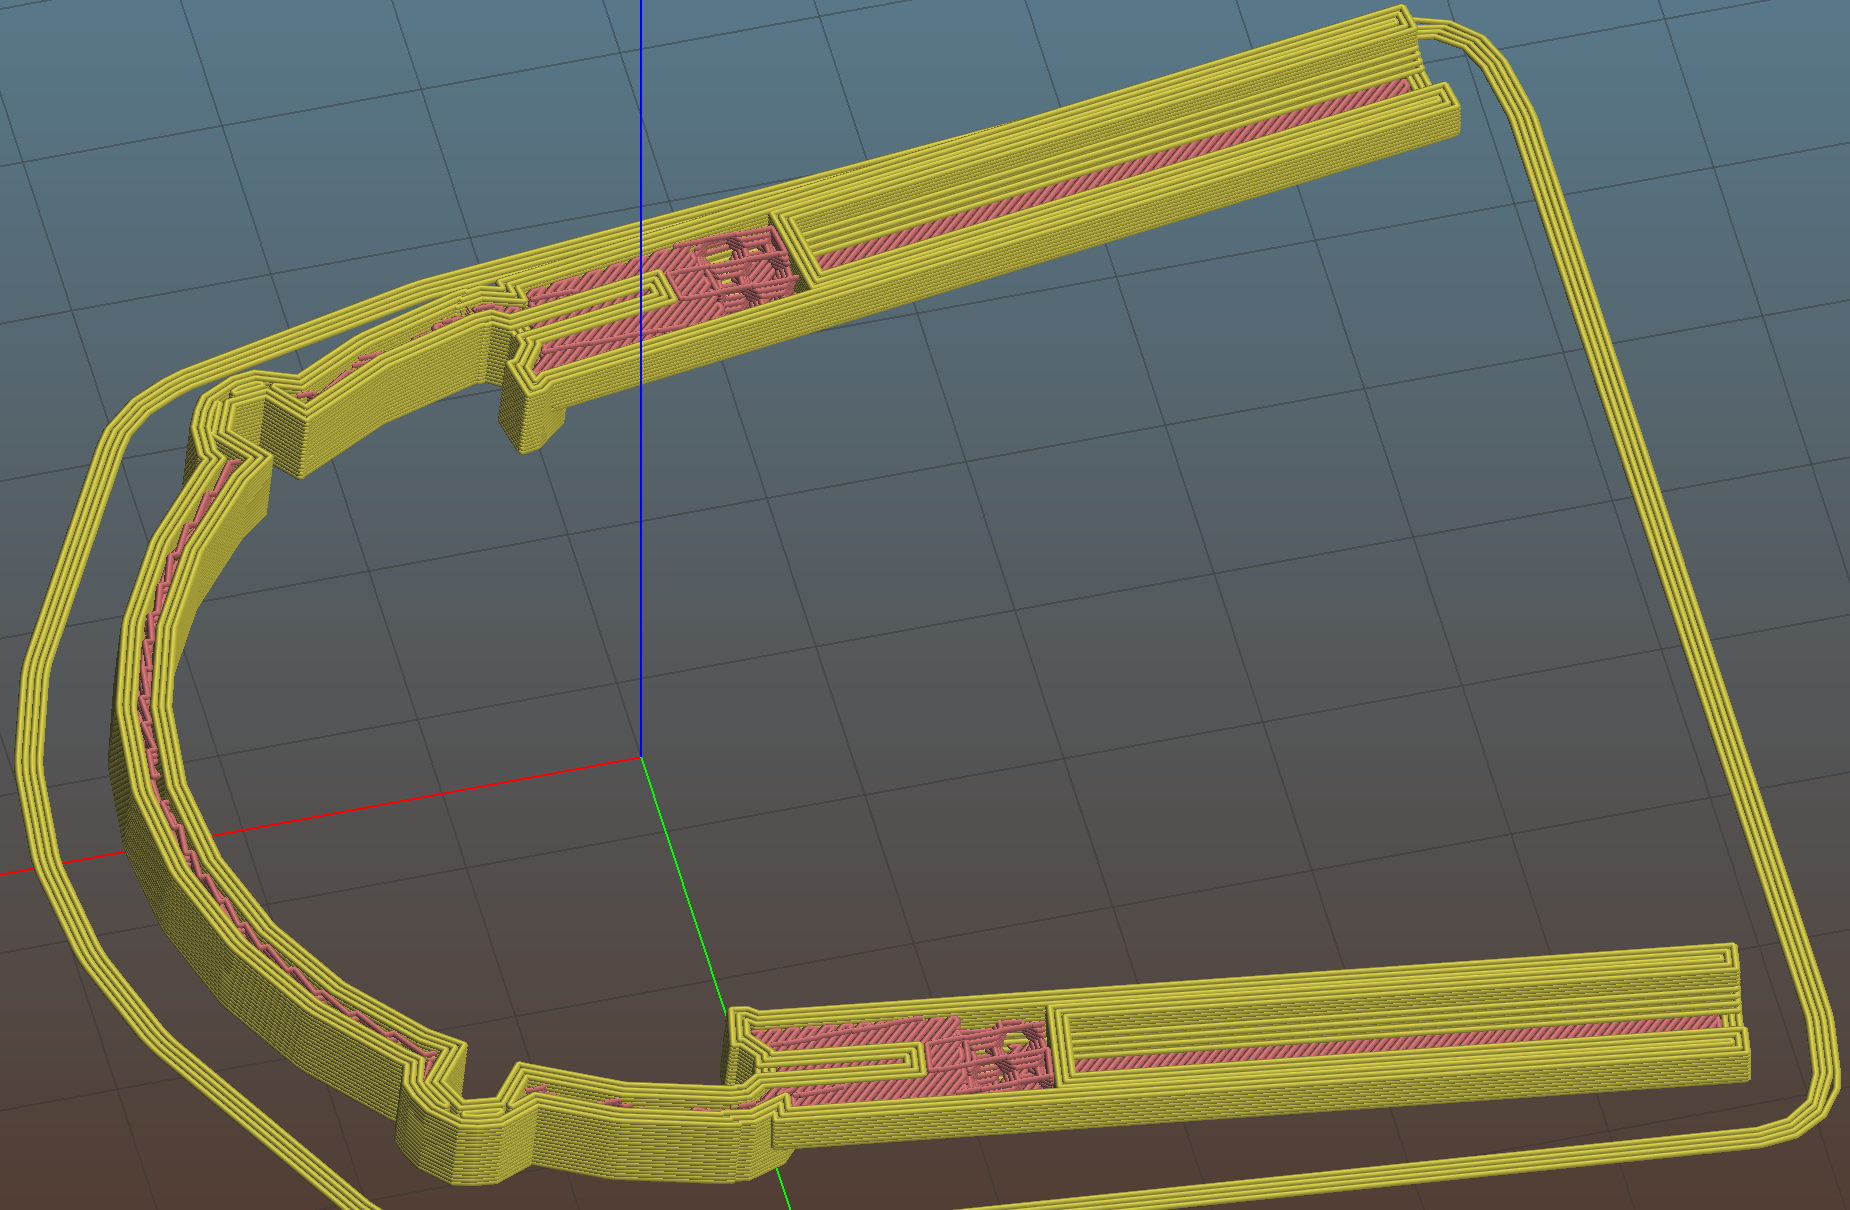
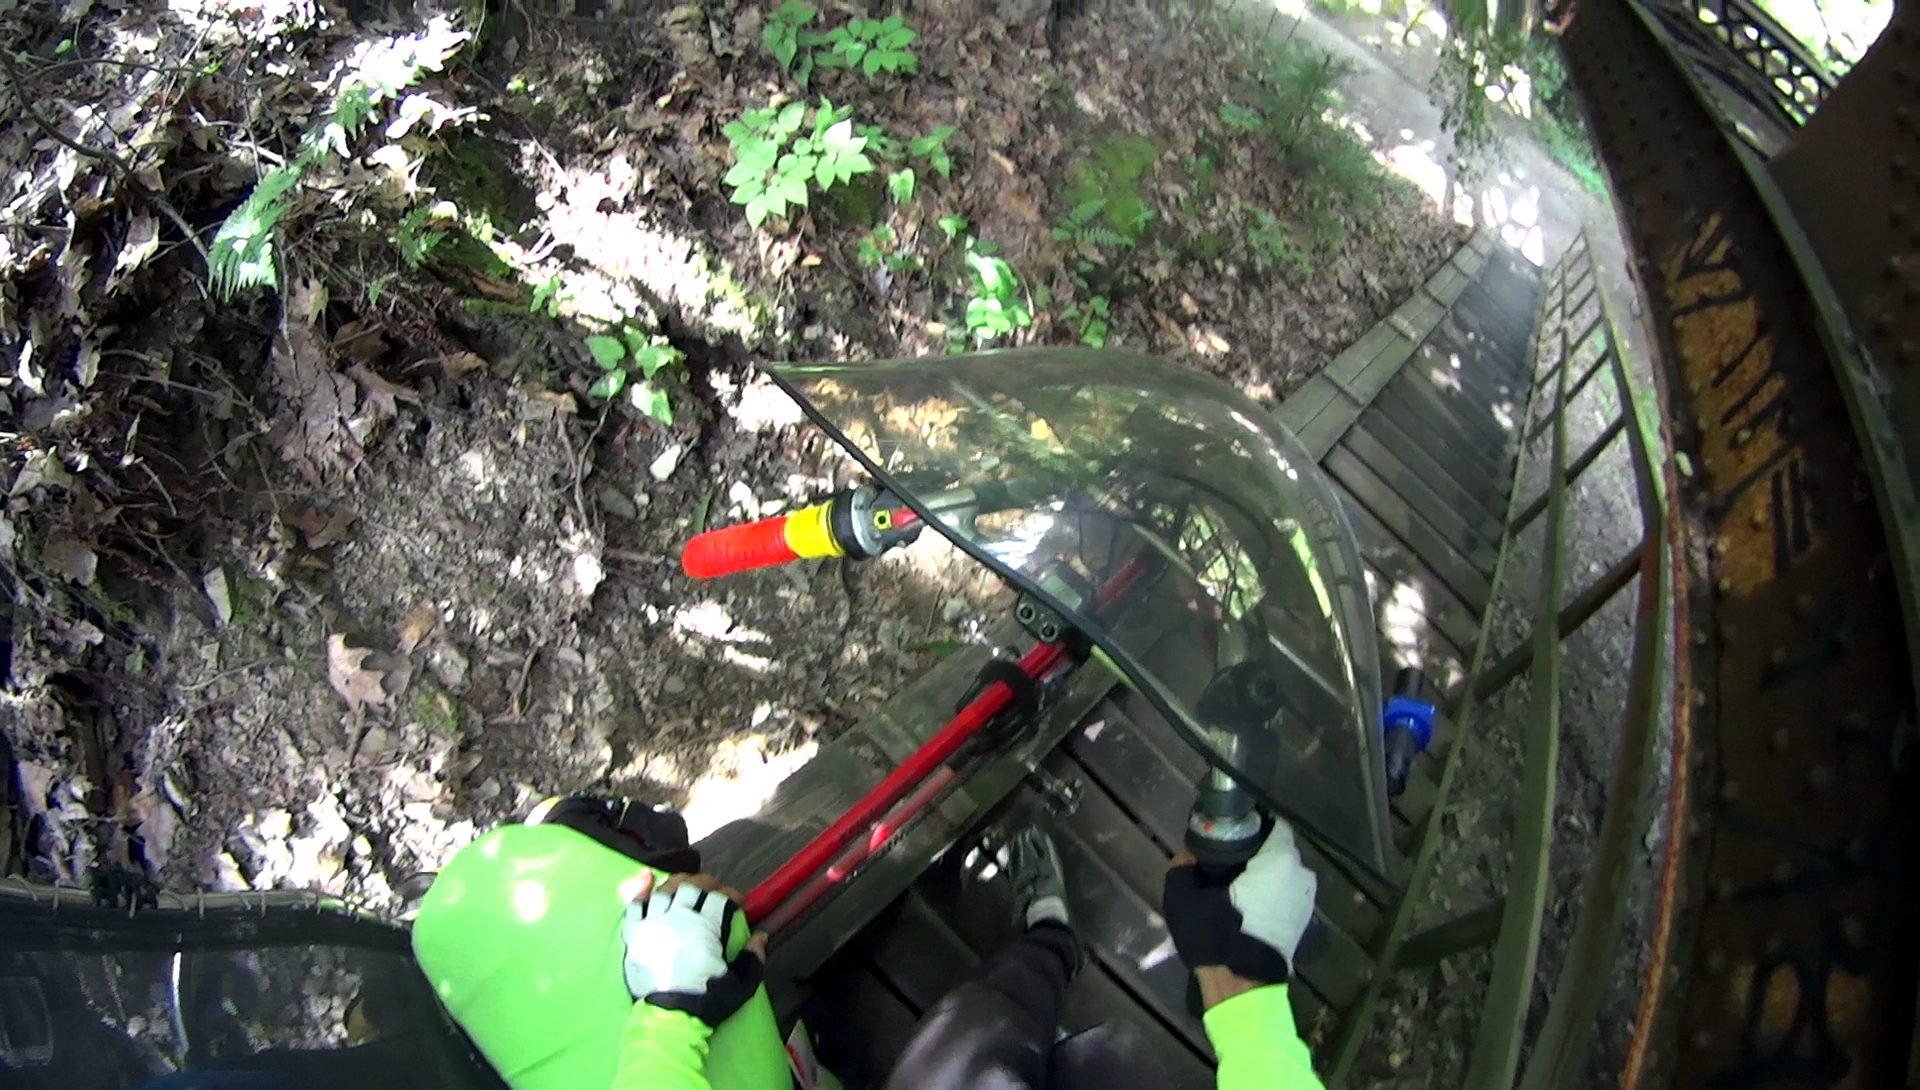
    // Tour Easy front fender clip
    // Ed Nisley KE4ZNU July 2017
    Layout = "Build"; // Build Profile Ferrule Clip
    //- Extrusion parameters must match reality!
    ThreadThick = 0.25;
    ThreadWidth = 0.40;
    HoleWindage = 0.2;
    Protrusion = 0.1; // make holes end cleanly
    inch = 25.4;
    function IntegerMultiple(Size,Unit) = Unit * ceil(Size / Unit);
    //———————-
    // Dimensions
    // special case: fender is exactly half a circle!
    FenderC = 51.0; // fender outside width = chord
    FenderM = 21.0; // height of chord
    FenderR = (pow(FenderM,2) + pow(FenderC,2)/4) / (2 * FenderM); // radius
    echo(str("Fender radius: ", FenderR));
    FenderD = 2*FenderR;
    FenderA = 2 * asin(FenderC / (2*FenderR));
    echo(str(" … Arc: ",FenderA," deg"));
    FenderThick = 2.5; // fender thickness, assume dia of edge
    ClipHeight = 15.0; // top to bottom, ignoring rakish tilt
    ClipThick = IntegerMultiple(2.5,ThreadWidth); // thickness of clip around fender
    ClipD = FenderD; // ID of clip against fender
    ClipSides = 4 * 8; // polygon sides around clip circle
    BendReliefD = 2.5; // bend arch diameter
    BendReliefA = 2/3 * FenderA/2; // … angle from dead ahead
    BendReliefCut = 1.5; // factor to thin outside of bend
    ID = 0;
    OD = 1;
    LENGTH = 2;
    StayDia = 3.3; // fender stay rod diameter
    StayOffset = 15.0; // stay-to-fender distance
    StayPitch = -5; // angle from stay to fender arch
    DropoutSpace = 120; // stay spacing at wheel hub
    StayLength = 235; // stay length: hub to fender
    StaySplay = asin((DropoutSpace – FenderC)/(2*StayLength)); // outward angle to hub
    echo(str(" … Pitch: ",StayPitch," deg"));
    echo(str(" … Splay: ",StaySplay," deg"));
    FerruleSides = 2*4;
    Ferrule = [StayDia,3*FenderThick/cos(180/FerruleSides),10*StayDia + StayOffset]; // ID = stay rod OD
    FerruleHoleD = 0.1; // small hole to create solid plastic at ferrule joint
    //———————-
    // Useful routines
    module PolyCyl(Dia,Height,ForceSides=0) { // based on nophead's polyholes
    Sides = (ForceSides != 0) ? ForceSides : (ceil(Dia) + 2);
    FixDia = Dia / cos(180/Sides);
    cylinder(r=(FixDia + HoleWindage)/2,
    h=Height,
    $fn=Sides);
    }
    //———————-
    // Clip profile around fender
    // Centered on fender arc
    module Profile(HeightScale = 1) {
    linear_extrude(height=HeightScale*ClipHeight,convexity=5) {
    difference() {
    offset(r=ClipThick) // outside of clip
    union() {
    circle(d=ClipD,$fn=ClipSides);
    for (i=[-1,1])
    rotate(i*BendReliefA) {
    translate([ClipD/2 + BendReliefD/2,0,0])
    circle(d=BendReliefD,$fn=6);
    }
    }
    union() { // inside of clip
    circle(d=ClipD,$fn=ClipSides);
    for (i=[-1,1])
    rotate(i*BendReliefA) {
    translate([ClipD/2 + BendReliefCut*BendReliefD/2,0,0])
    circle(d=BendReliefD/cos(180/6),$fn=6);
    translate([ClipD/2,0,0])
    square([BendReliefCut*BendReliefD,BendReliefD],center=true);
    }
    }
    translate([(FenderR – FenderM – FenderD/2),0]) // trim ends
    square([FenderD,2*FenderD],center=true);
    }
    for (a=[-1,1]) // hooks around fender
    rotate(a*(FenderA/2))
    translate([FenderR – FenderThick/2,0]) {
    difference() {
    rotate(1*180/12)
    circle(d=FenderThick + 2*ClipThick,$fn=12);
    rotate(1*180/8)
    circle(d=FenderThick,$fn=8);
    rotate(a * -90)
    translate([0,-2*FenderThick,0])
    square(4*FenderThick,center=false);
    }
    }
    }
    }
    //———————-
    // Ferrule body
    module FerruleBody() {
    translate([0,0,Ferrule[OD]/2 * cos(180/FerruleSides)])
    rotate([0,-90,0]) rotate(180/FerruleSides)
    difference() {
    cylinder(d=Ferrule[OD],h=Ferrule[LENGTH],$fn=FerruleSides,center=false);
    translate([0,0,StayOffset + Protrusion])
    PolyCyl(Ferrule[ID],Ferrule[LENGTH] – StayOffset + Protrusion,FerruleSides);
    }
    }
    //———————-
    // Generate entire clip at mounting angle
    module FenderClip() {
    difference() {
    union() {
    translate([FenderR,0,0])
    difference() { // angle and trim clip
    rotate([0,StayPitch,0])
    translate([-(FenderR + ClipThick),0,0])
    Profile(2); // scale upward for trimming
    translate([0,0,-ClipHeight]) // trim bottom
    cube(2*[FenderD,FenderD,ClipHeight],center=true);
    translate([0,0,ClipHeight*cos(StayPitch)+ClipHeight]) // trim top
    cube(2*[FenderD,FenderD,ClipHeight],center=true);
    }
    for (j = [-1,1]) // place ferrules
    translate([Ferrule[OD]*sin(StayPitch) + (Ferrule[OD]/2)*sin(StaySplay),j*(FenderR – FenderThick/2),0])
    rotate(-j*StaySplay)
    FerruleBody();
    }
    for (i=[-1,1]) // punch stiffening holes
    translate([FenderThick/2,-i*(FenderR – FenderThick/2),Ferrule[OD]/2])
    rotate([0,-90,i*StaySplay])
    PolyCyl(FerruleHoleD,Ferrule[OD],FerruleSides);
    }
    }
    //———————-
    // Build it
    if (Layout == "Profile") {
    Profile();
    }
    if (Layout == "Ferrule") {
    FerruleBody();
    }
    if (Layout == "Clip") {
    FenderClip();
    }
    if (Layout == "Build") {
    FenderClip();
    }

    As a bonus for paging all the way to the end, here’s the descent on the same stairway:

    Belmar Bridge Stairs - Descent
    Belmar Bridge Stairs – Descent

    No, I wasn’t even tempted …

  • Anker LC40 Flashlight: Anodizing Fade

    The top surface of the Anker LC40 flashlight serving as the daytime running light on Mary’s bike sees plenty of sunlight, particularly when it’s sitting beside her garden plots, and the black anodized finish on the screw-in battery cap has begun fading:

    Anker LC40 Flashlight - Anodizing fade
    Anker LC40 Flashlight – Anodizing fade

    The bottom side of the cap is in fine shape, as is the main case, so the two parts came from different metal finishing lines.

    The light on my bike, a marginally newer and essentially identical Bolder LC40, remains all black. I have no idea what “Bolder” means in this context.

    Obviously, I must get out more …

  • Ortlieb Backroller Pack Drop

    Although the pair of Ortlieb Back-Roller packs on Mary’s bike make her look like a long-distance tourist, we’re actually on our way to her garden plot:

    AS30V-0285
    AS30V-0285

    The left-side pack suddenly seemed unusually floppy:

    AS30V-0300
    AS30V-0300

    One second later:

    AS30V-0360
    AS30V-0360

    Another second and it’s visible under my right hand:

    AS30V-0420
    AS30V-0420

    The view from her bike at about the same time:

    Ortlieb-0158
    Ortlieb-0158

    I’m expecting to fall to my right, but it’d have been better if I hadn’t kicked the bag:

    Ortlieb-0169
    Ortlieb-0169

    The pack went under the rear wheel and out the far side:

    Ortlieb-0185
    Ortlieb-0185

    Where it came to rest in the middle of the trail:

    Ortlib pack drop - aftermath
    Ortlib pack drop – aftermath

    Elapsed time from the first picture: just under 5 s.

    Did you notice the other cyclist in the other pictures? She’s why I veered so hard to my right!

    A pair of these latches hold the pack onto the rear rack:

    Ortlieb pack drop - QL latch detail
    Ortlieb pack drop – QL latch detail

    When they’re properly engaged, they look like this:

    Ortlieb pack drop - QL latch - secure
    Ortlieb pack drop – QL latch – secure

    When they’re not, they look like this:

    Ortlieb pack drop - QL latch - whoopsie
    Ortlieb pack drop – QL latch – whoopsie

    Which is obvious in the picture and inconspicuous in real life.

    The strap emerging from the top of the latch serves as both a carrying handle and latch release: pull upward to open the latches and release them from the bar, lift to remove the pack, and carry it away as you go. Installing the pack proceeds in reverse: lower the pack onto the rack bar, release the handle, and the latches engage.

    Unless the pack is empty enough to not quite fully open the latches as you carry it, in which case the closed latches simply rest on the bar. We’ve both made that mistake and I generally give her packs a quick glance to ensure sure they’re latched. In this case, the plastic drawer atop the racks (carrying seedling pots on their way to the garden) completely concealed the pack latches.

    Tree roots have been creasing the asphalt along that section of the rail trail: the bike finally bounced hard enough to lift the drawer and fall off the rack rod.

    Memo to Self: In addition to the visual check, lift the packs using the strap across the middle holding the rolled-down top in place. Remember, don’t check by lifting the carrying handle, because it just releases the latches; another easy mistake to make.

    Whew!