Ed Nisley's Blog: Shop notes, electronics, firmware, machinery, 3D printing, laser cuttery, and curiosities. Contents: 100% human thinking, 0% AI slop.
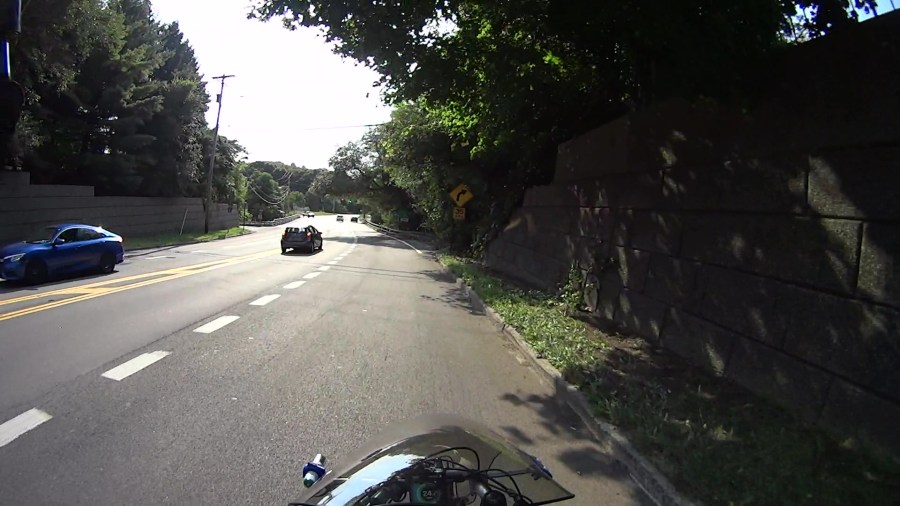
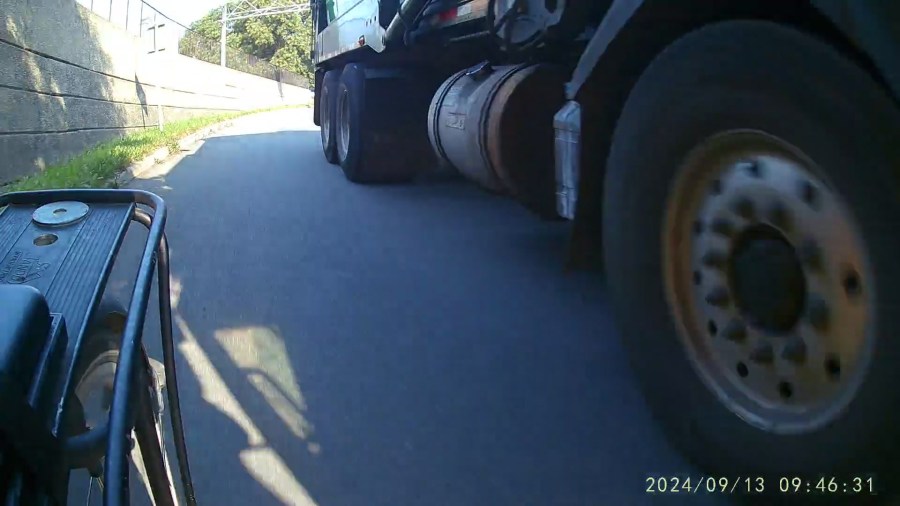
I’m riding downhill from Red Oaks Mill toward the bridge across the Wappinger Creek, pedaling a bit over 24 mph = 37 feet/sec, far enough into the lane to avoid trash along the curb on the right:
Royal front 2024-09-13 – 078
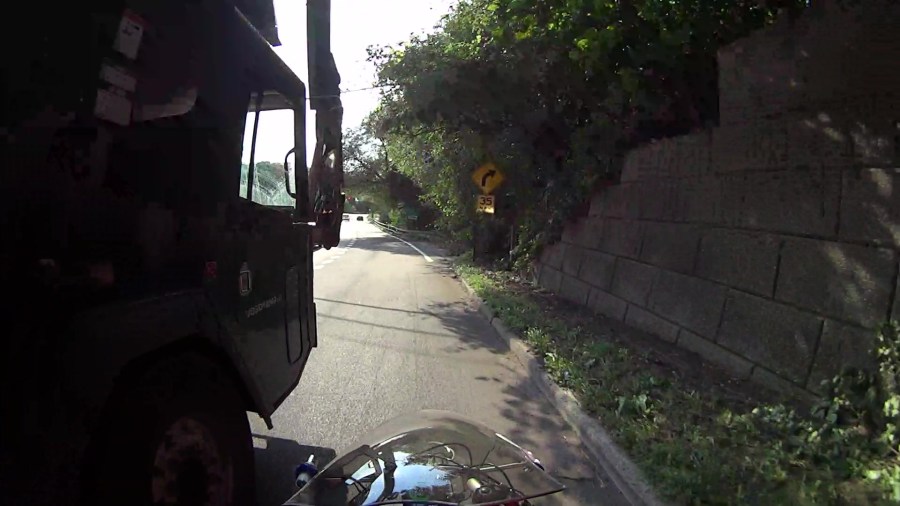
Although you can barely see the vehicle passing on my left, I’ve just realized I am in one heap of trouble.
Half a second later (the frame number in the caption ticks along at 60 fps) I’m caught in the slipstream:
Royal front 2024-09-13 – 108
Another half second and I’m leaning slightly to the right:
Royal front 2024-09-13 – 138
Make that wobbling:
Royal front 2024-09-13 – 158
Well, that’s a relief:
Royal front 2024-09-13 – 178
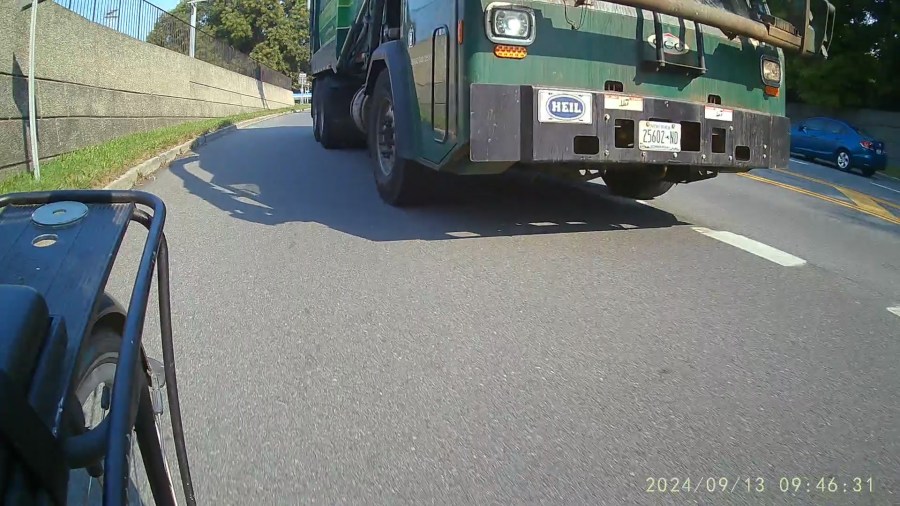
The truck is now completely within our lane and I’m further to the right, so our paths really were converging:
Royal front 2024-09-13 – 208
Elapsed time: 2.2 seconds.
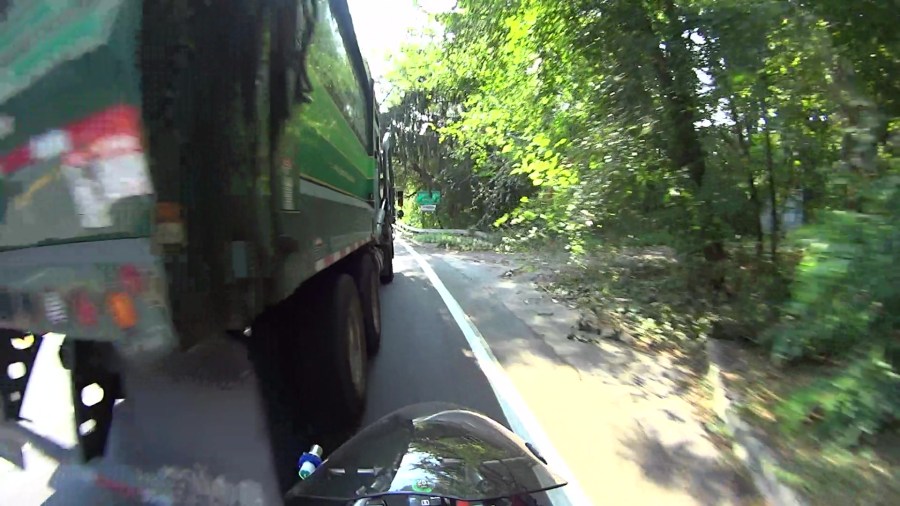
The view from the rear shows the driver started with reasonable clearance (these frames tick at 30 fps):
Royal rear 2024-09-13 – 090
A second later, the dumpster grabber is about even with my handlebars, corresponding to the first helmet camera picture:
Royal rear 2024-09-13 – 120
A third of a second later:
Royal rear 2024-09-13 – 130
The rear wheels passed much closer:
Royal rear 2024-09-13 – 180
In general, Royal’s drivers give us plenty of clearance.
In this case, I think he badly misjudged how fast I was moving and figured he would be well past by the time he had to be completely in the right lane to avoid vehicles in the left-turn lane on the bridge.
However, intent wouldn’t make me any less dead after a trip around those tires …
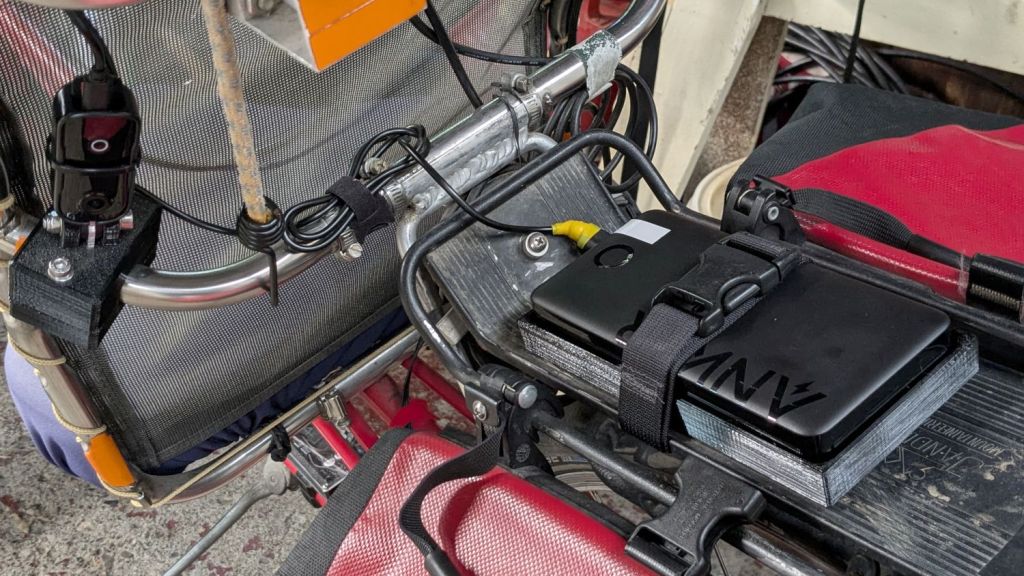
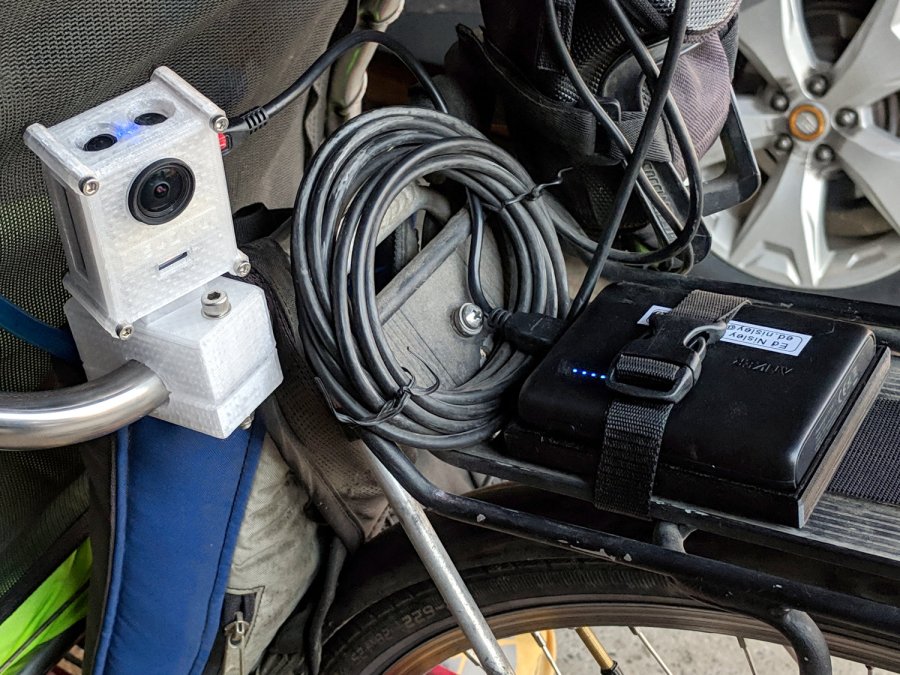
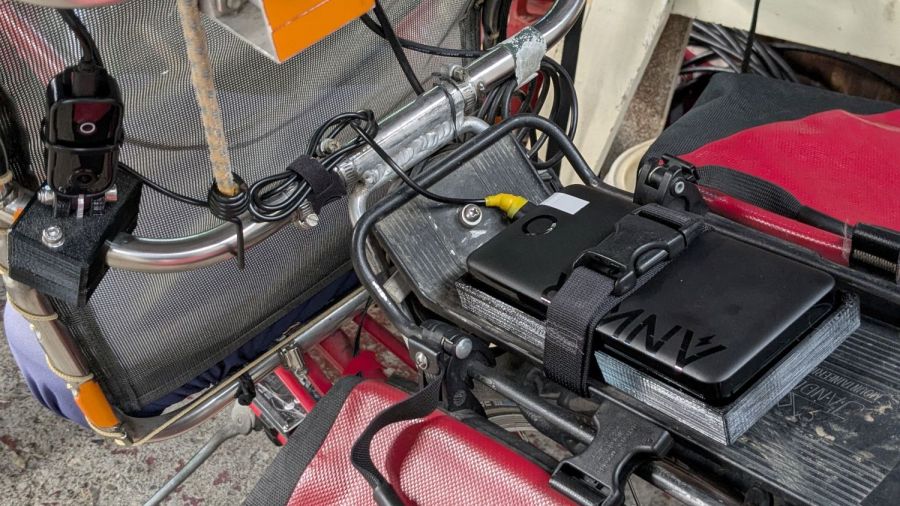
The Anker 325 20K V2 power bank is considerably chunkier, as befits its 20,000 mA·hr cell capacity (although the fine print says 12,500 mA·hr output):
Anker 20K V2 Power Bank – installed
The white tape stripe on the top marks the USB port on the end to reduce the fumbling involved in an out-of-sight socket. There’s also a USB-C port on that end for both charging the pack and powering other devices.
The new mounting cradle descends directly from the 13000 cradle:
Anker 325 20KV2 Power Bank – slicer preview
The model includes a projection of the battery on the XY plane for export to an SVG file suitable for laser-cutting an EVA foam pad to cushion the bumps.
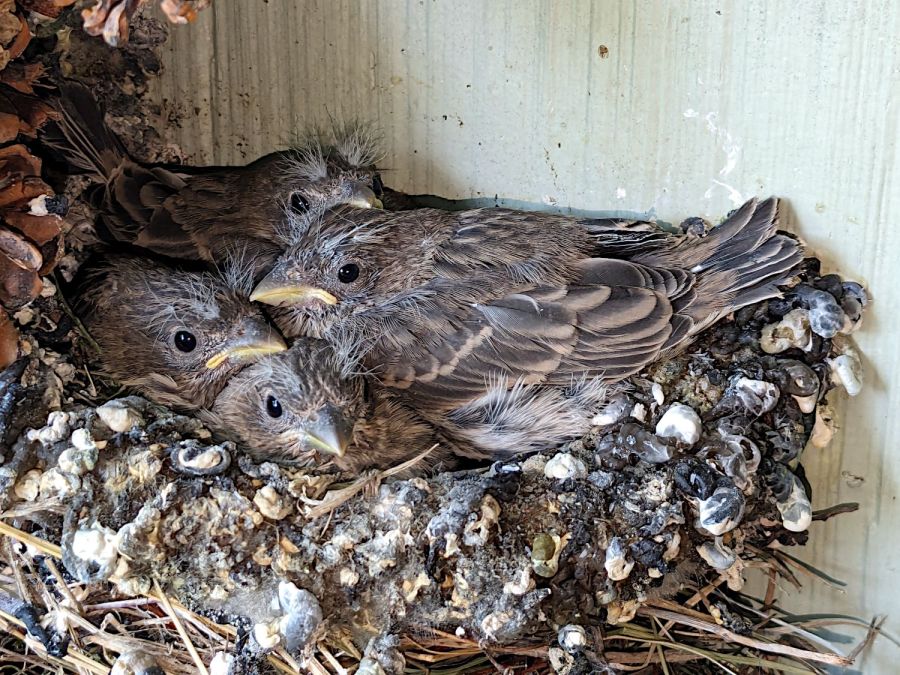
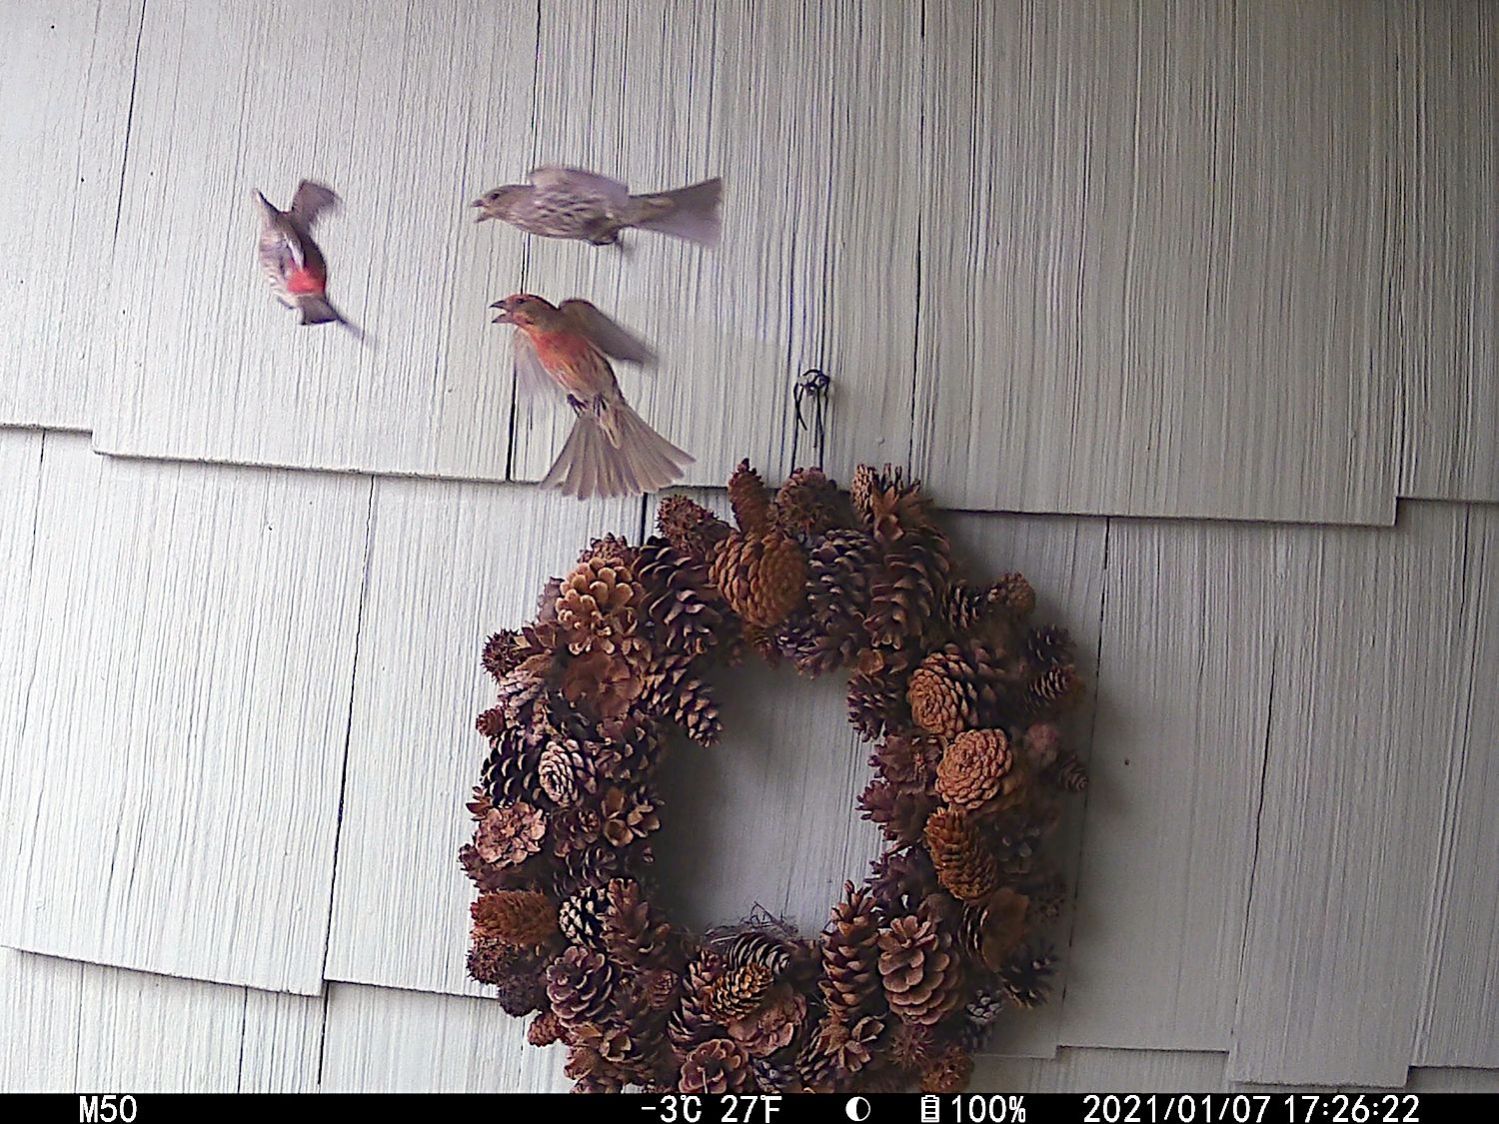
Earlier this year, a pair of House Finches chose the a pine cone wreath hanging outside our front door for their nest.
One day a Starling attacked:
Starling Attack – IM_00052
Starling Attack – IM_00053
Starling Attack – IM_00054
There’s a Youtube video of the action following those pictures:
Ms. Finch suffered a peck to the head raising a few feathers into a small topknot, but seemed otherwise undamaged. The eggs survived unscathed and a month later they fledged a quartet of new finches:
House Finch chicks – pre-fledging – 2024-05-18
Yes, they’re surrounded by a ring of bird crap: finch chicks can aim and fire overboard, but they don’t have much range.
The same finch pair abandoned their second nest after a Brown-headed Cowbird added an egg and punctured both Finch eggs:
House Finch nest – Cowbird egg vs punctures
Their third attempt failed after four eggs when a Cowbird added a fifth:
House Finch nest – Cowbird egg with 4 finch eggs
A few days after that picture, something tore that nest apart and destroyed all the eggs:
House Finch nest – destruction with feathers
The scattered feathers suggest a major battle with severe injuries.
Three nesting attempts produced only four fledglings: a bad year for those two finches.
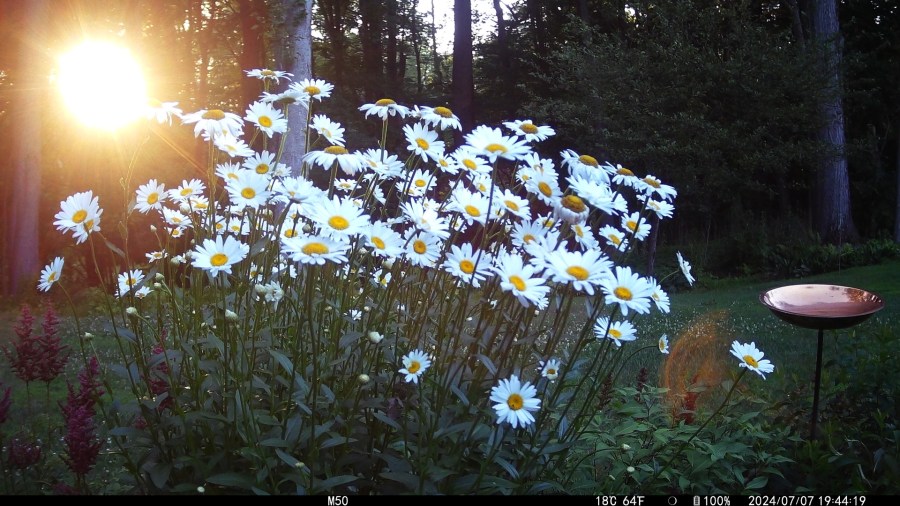
Morning KP provides considerable time to watch the goings-on in the back yard, including the wide variety of pollinators (formerly known as “bees”) in the stand of daisies just off the deck:
Daisy thumbnail – 348
I wondered if the flower heads tracked the sun or just sort of stood there, so I deployed the trail camera to take one picture every five minutes for a bit over 24 hours. Converting just under 500 images into a movie required this incantation:
The short answer: daisies don’t really track the sun, but they move more than I expected. The stalks carrying unopened flowers writhe all around, occasionally getting stuck on other stems and suddenly snapping free. I was particularly surprised at the number of bees going about their business just around midnight.
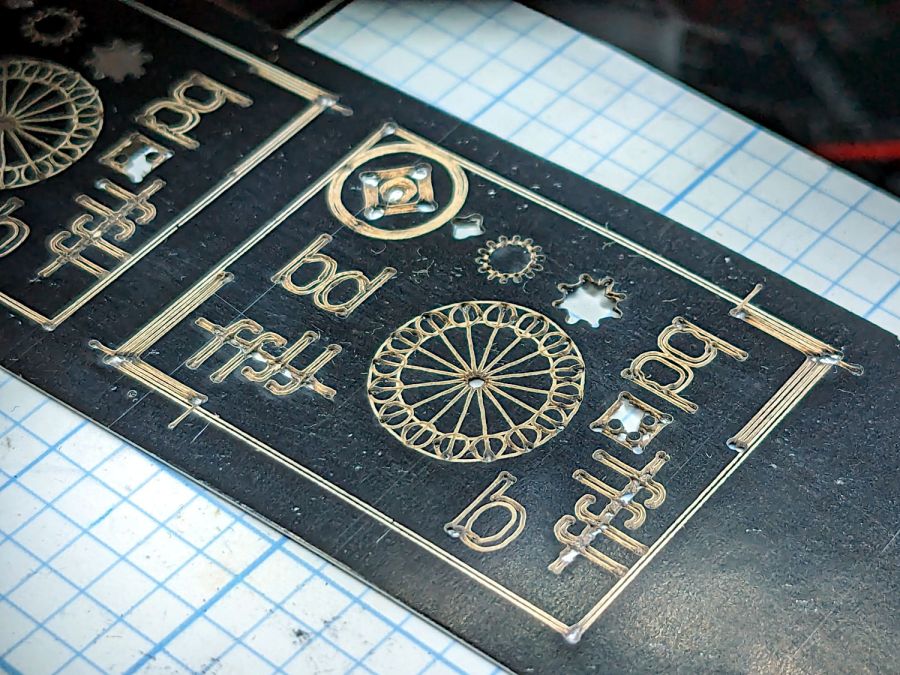
That’s the standard backlash test pattern shrunken down to a little over an inch wide, with the laser power reduced to the bare minimum. Despite that, the numerous holes show where the pattern concentrates enough energy to vaporize the paper.
The “paper” seems to be laminated between two black plastic sheets that smell terrible when engraved, so they’re probably some form of acrylic. The Amazon product description is, despite all the verbiage- remarkably uncommunicative of the actual materials involved.
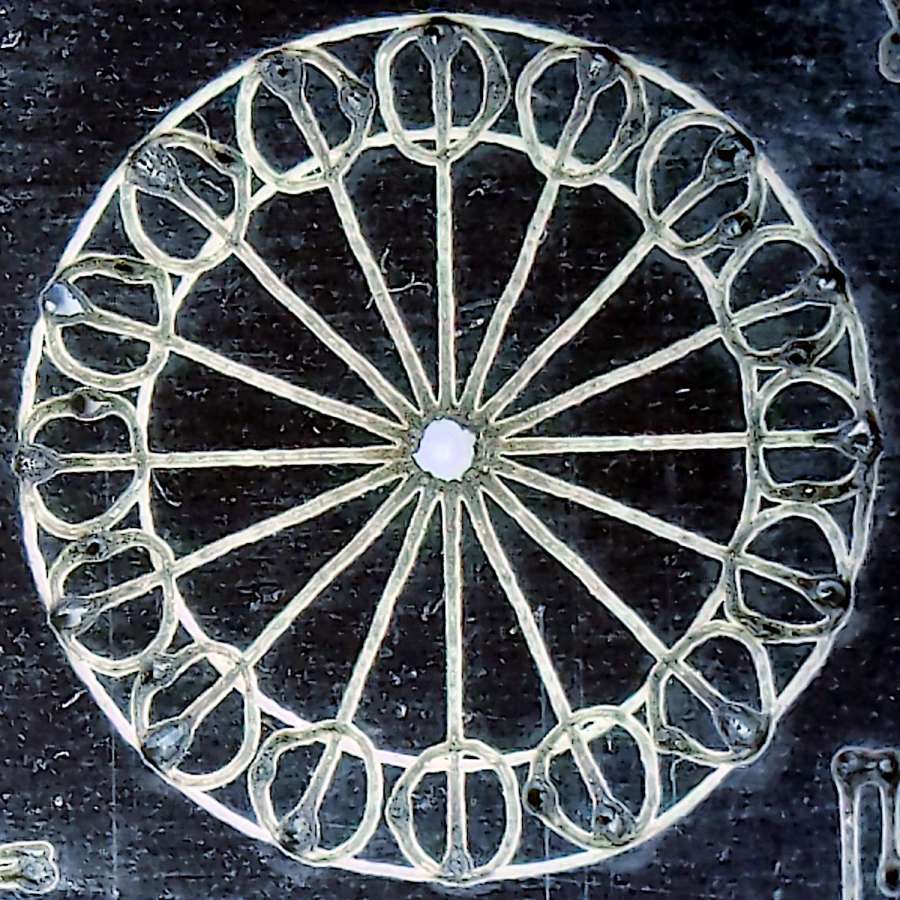
The circular pattern is 10 mm diameter on the outside:
Laser test paper – miniature pattern detail
Those should be circles around the perimeter, but their distortion shows what happens when you try to move a hulking CO₂ laser head around a 1.5 mm diameter circle at 400 mm/s. Of course, the actual speed is nowhere near that fast along such tiny vectors.
The traces are about 0.2 mm wide, with obvious scorches where the beam starts and stops, which agrees reasonably well with previousmeasurements.
All in all, both the paper and the laser pattern look better than I expected, particularly as the results indicate the machine has no measurable backlash at all.
I thought cleaning that mess up would solve an intermittent power problem, but the camera continued to fail immediately after being deployed and finally refused to work at all.
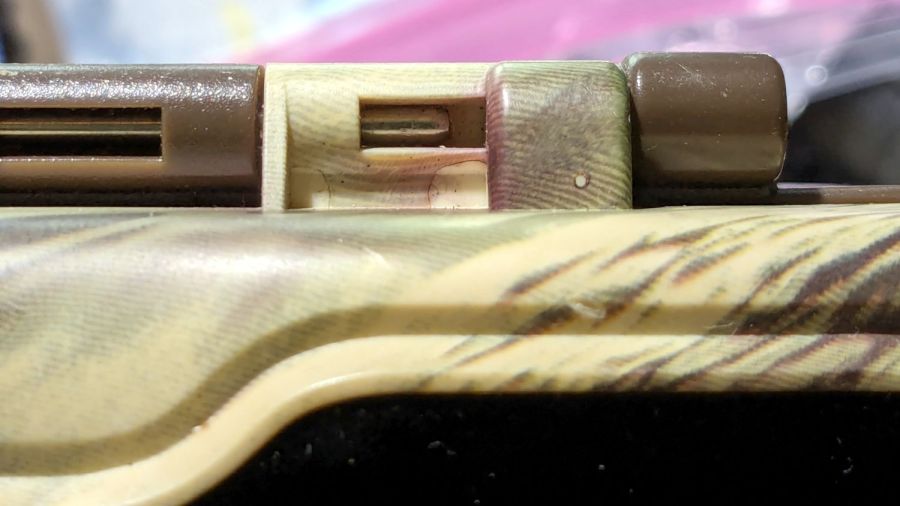
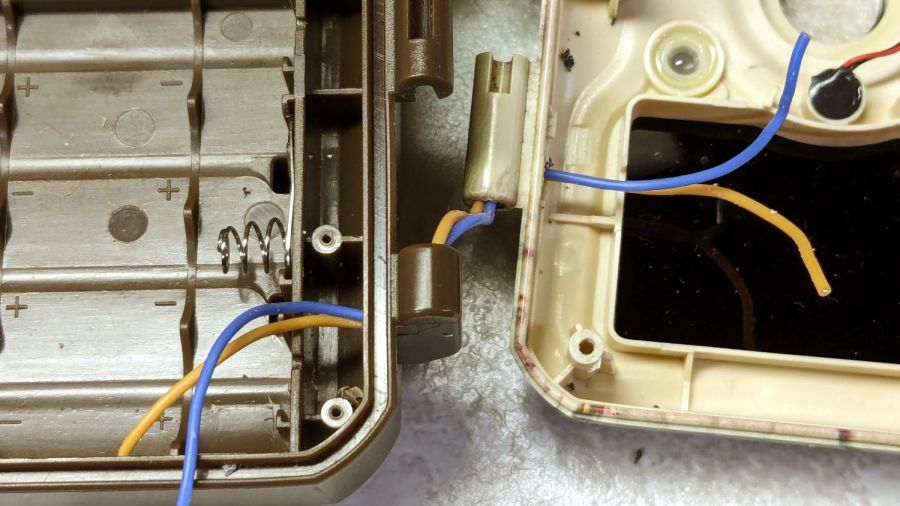
The camera case has eight (!) AA cells in one half connected to the electronics in the other half by a pair of wires that pass through the hinge between the halves:
M50 Trail Cam – pivot wire route
The steel rod is the hinge pivot, with the battery half wearing brown and the electronics half in lighter plastic. As you’ll see in a bit, the rod is fixed in the electronics half and the battery half pivots around it.
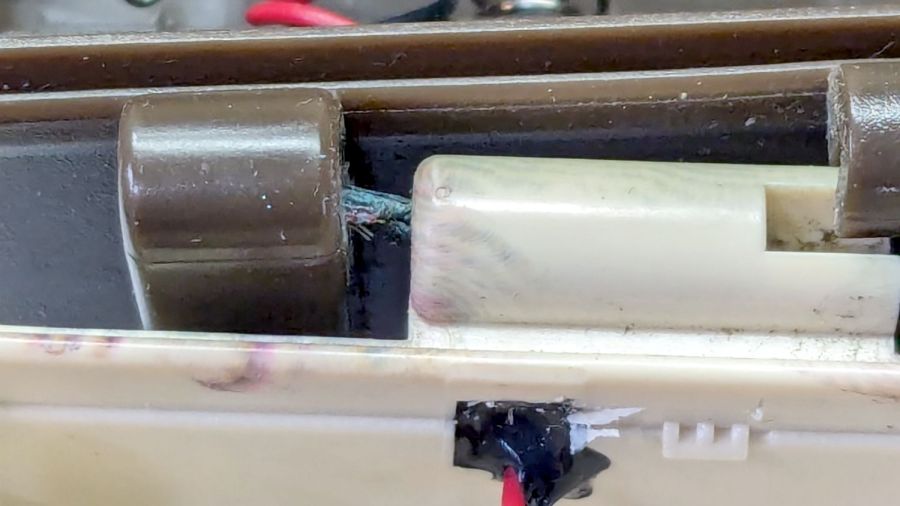
The two short case sections on the right contain the two wires carrying the 6 V battery power. Some gentle manipulation suggested the fault lay inside those hinge sections, which meant I had to figure out how to get them apart.
The other end of the steel rod has a knurled section jammed firmly into the electronics half, but I managed to carve away just enough plastic to expose just enough of the knurl to get just enough of a grip (yes, with a pair of genuine Vise-Grip 10WR Locking Pliers, accept no substitutes) to yoink the rod out:
M50 Trail Cam – extracted pivot
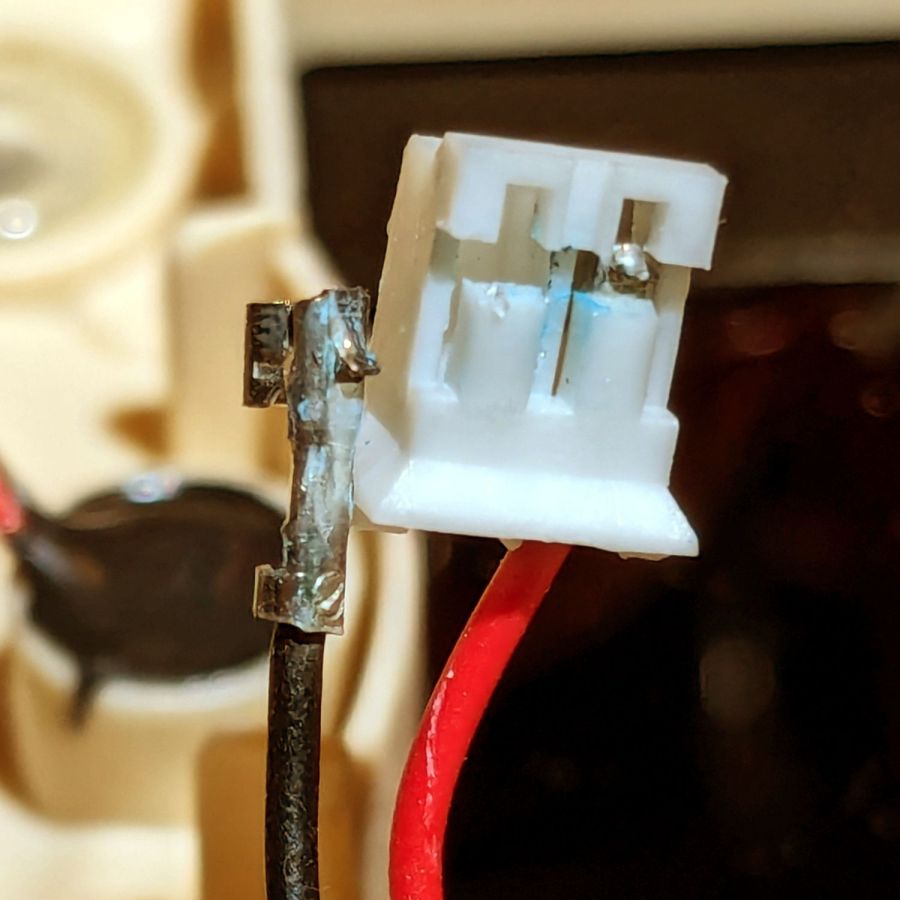
With the hinge released, the problem became immediately obvious:
M50 Trail Cam – failed hinge wires
Yes, those are wire strands poking out of the hole in the left hinge section.
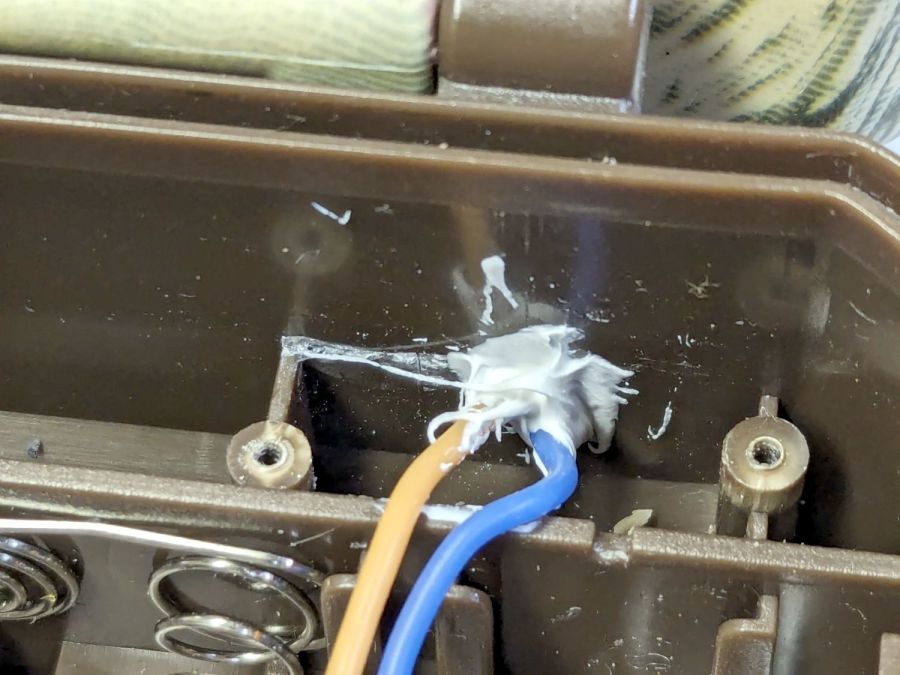
A tedious needle-nose tweezer session extracted the remains of the wires from the hinge and cleaned out the adhesive:
M50 Trail Cam – extracted OEM PVC wires
Although those two hinge sections are hollow with plenty of room for the wire, it seems the assembler squirted adhesive into both sections to glue the wires in place. As a result, every time I opened the case to charge the batteries, maybe two millimeters of wire twisted 180° degrees. The wonder is that it lasted as long as it did.
I snaked a pair of 20 AWG silicone-insulated wires through the hinge sections:
M50 Trail Cam – silicone rewiring
The OEM wires had PVC insulation, which is a terrible choice for wires that will undergo lots of flexing, but that’s what SJCam used.
Two untidy blobs of acrylic caulk do at least as good a job of sealing the case openings as the black gunk visible in the earlier pictures:
M50 Trail Cam – new caulk
I left all of the wire in the hinge un-stuck, hoping the twist will distribute itself over maybe 5 mm of wire and last longer.
In anticipation of future repairs, however, I left enough of the knurled end of the hinge rod exposed to get an easy grip:
M50 Trail Cam – restaked pivot
Solder the new wires to the old pads, assemble in reverse order, and it works as well as it ever did:
The alert reader will note I did not reset the camera clock after charging the batteries, a process requiring the janky SJCam app.
The two finches on the right have been constructing a nest in the wreath hanging at our front door. They tolerate our presence, although they’d be happier if delivery folks dropped packages elsewhere.