Ed Nisley's Blog: Shop notes, electronics, firmware, machinery, 3D printing, laser cuttery, and curiosities. Contents: 100% human thinking, 0% AI slop.
As you might expect by now, I harvest various bits & pieces from the PCs falling off the trailing edge of my assortment. The bag of obsolete DRAM recently floated to the top of the heap:
DRAM Assortment – overview
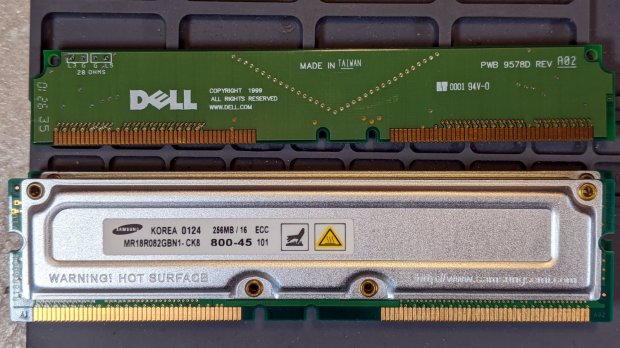
Half a gig of ECC RAM from what might have been a fire-breathing Pentium Pro box:
DRAM Assortment – 256 MB ECC
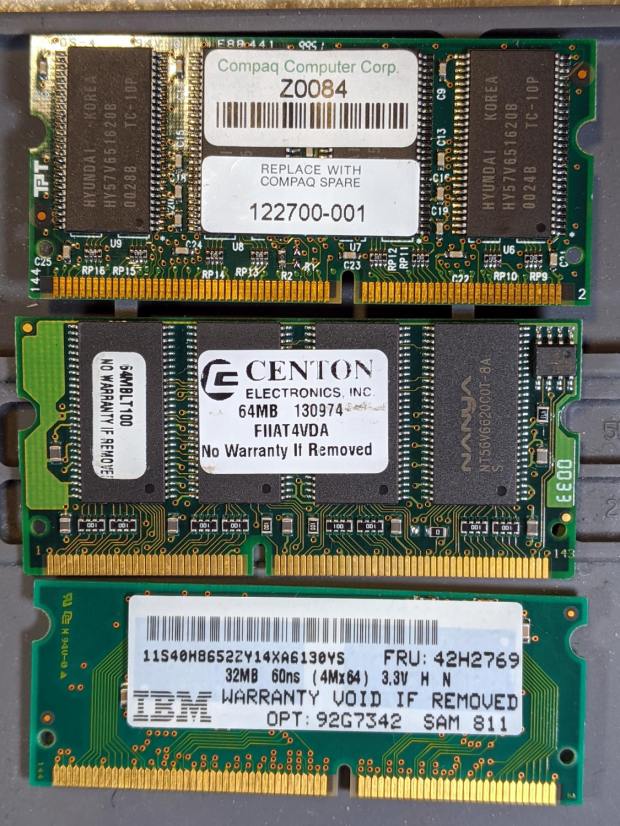
The PCBs along the top apparently filled vacant memory slots.
Some 32 and 64 MB DRAM from a few IBM laptops I turned into picture frames:
DDR2 DRAM in assorted sizes & speeds:
DRAM Assortment – PC2 DDR
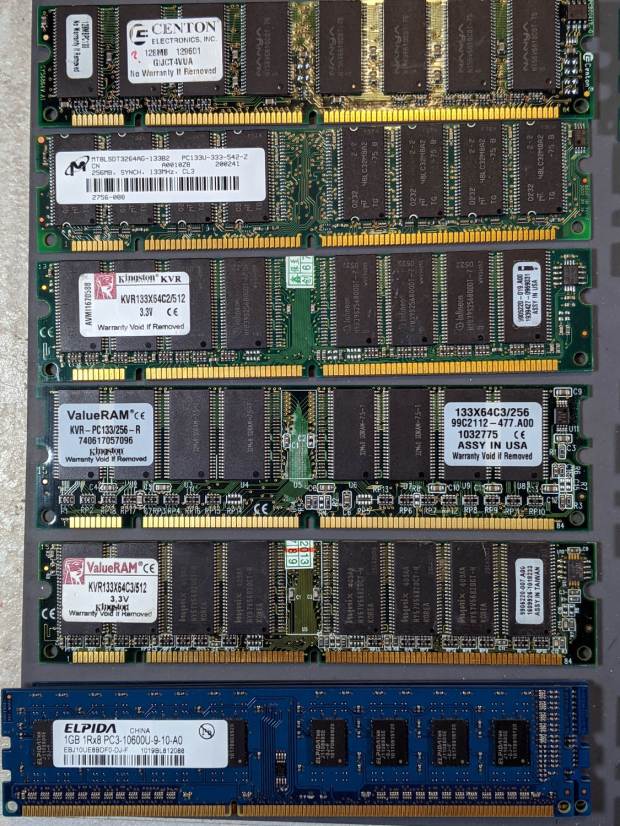
PC133 DDR DRAM, with four sticks of 1 GB PC3 along the bottom:
DRAM Assortment – PC133
If you look closely, you may see something you can use. No reasonable offer refused …
lsusb
Bus 002 Device 002: ID 8087:0024 Intel Corp. Integrated Rate Matching Hub
Bus 002 Device 001: ID 1d6b:0002 Linux Foundation 2.0 root hub
Bus 001 Device 004: ID 248a:ff0f
Bus 001 Device 007: ID 058f:9410 Alcor Micro Corp. Keyboard
Bus 001 Device 006: ID 047d:1020 Kensington Expert Mouse Trackball
Bus 001 Device 005: ID 046d:c508 Logitech, Inc. Cordless Trackball
Bus 001 Device 003: ID 0451:2046 Texas Instruments, Inc. TUSB2046 Hub
Bus 001 Device 002: ID 8087:0024 Intel Corp. Integrated Rate Matching Hub
Bus 001 Device 001: ID 1d6b:0002 Linux Foundation 2.0 root hub
Bus 004 Device 006: ID 05e3:0748 Genesys Logic, Inc.
Bus 004 Device 005: ID 0480:a202 Toshiba America Inc Canvio Basics HDD
Bus 004 Device 004: ID 0bda:0411 Realtek Semiconductor Corp.
Bus 004 Device 003: ID 0451:8041 Texas Instruments, Inc.
Bus 004 Device 002: ID 0bda:0411 Realtek Semiconductor Corp.
Bus 004 Device 001: ID 1d6b:0003 Linux Foundation 3.0 root hub
Bus 003 Device 006: ID 256c:006d
Bus 003 Device 004: ID 0bda:5411 Realtek Semiconductor Corp.
Bus 003 Device 003: ID 0451:8043 Texas Instruments, Inc.
Bus 003 Device 002: ID 0bda:5411 Realtek Semiconductor Corp.
Bus 003 Device 001: ID 1d6b:0002 Linux Foundation 2.0 root hub
Yes, the space normally occupied by the product description is blank. The first blank description comes from a generic wireless keypad’s USB receiver; the 0x248a Vendor ID claims be Maxxter, a step down from the usual Logitech ID rip, and its 0xff0f Device ID looks bogus to me, too.
The 0x256c Vendor ID isn’t in the online databases yet, but some grepping found it in /lib/udev/rules.d/65-libwacom.rules:
Note, however, that the Device ID is 0x006e, where the upgraded V2 tablet is 0x006d; I have no idea why the number goes down as the version goes up. Change all instances of the former to the latter.
Even though the Wacom driver can apparently handle the older H610Pro, the V2 tablet’s buttons were missing in action.
xsetwacom --verbose set "HUION Huion Tablet Pen stylus" MapToOutput "DP-1"
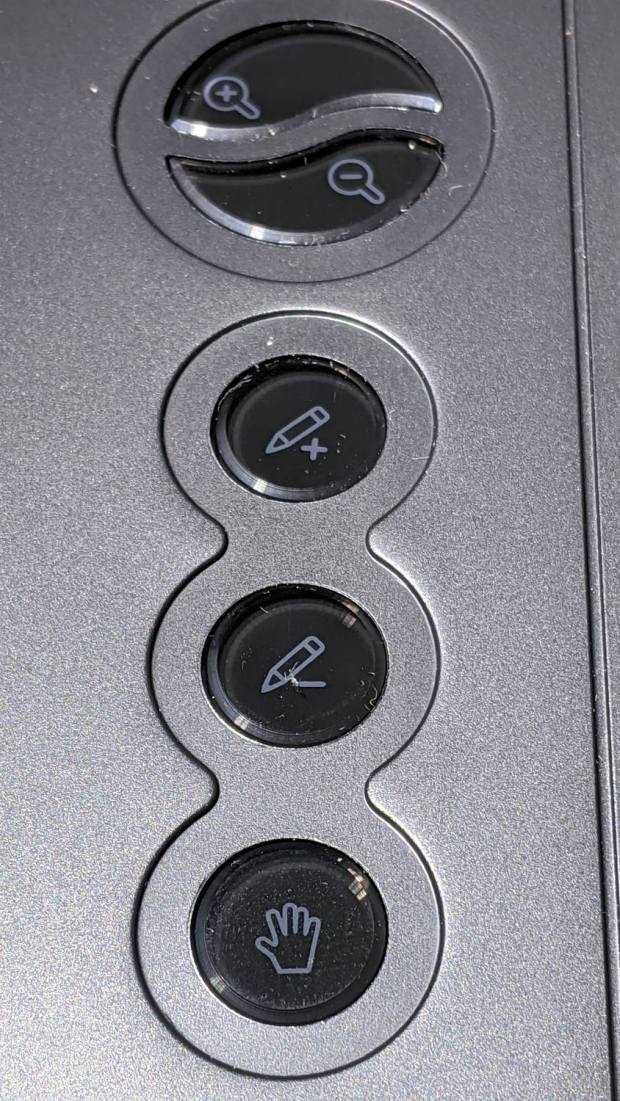
The various buttons still need configuration, although that’s in the nature of fine tuning. The top three buttons are 1, 2, 3, with the rest tagging along at 8 through 12. They take trendy gray-on-black labeling to an absurd limit:
Huion H610Pro V2 – embedded gray-on-black buttons
That’s with intense overhead lighting shining into the buttons and lighting up the lower-surface iconography. In normal light, they’re shiny black disks with invisible legends and, no, they’re not backlit.
The overall button-tweaking syntax:
xsetwacom set "HUION Huion Tablet Pad pad" button 12 key whatever
Where whatever comes from the list in /usr/include/X11/keysymdef.h, per the doc in man xsetwacom and a list of possibilities from:
xsetwacom --list modifiers "HUION Huion Tablet Pad pad"
For example, this causes the bottom button to spit out a question mark:
xsetwacom set "HUION Huion Tablet Pad pad" button 12 key shift /
It’s not obvious changing the buttons from their default button numbers to anything else makes any sense; just tweaking individual programs to map those numbers into useful actions should work better.
(*) It has a “battery-free” stylus which, to my way of thinking, is a major selling point.
A new-to-me Dell Optiplex 9020 needed a BIOS update, which, as always, arrives in a Windows / DOS EXE file. Because I’d already swapped in an SSD and installed Manjaro, I had to (re-)discover how to put the EXE file on a bootable DOS USB stick.
Unzip it to get the USB image file, then find the partition offset:
fdisk -l FD12FULL.img
Disk FD12FULL.img: 512 MiB, 536870912 bytes, 1048576 sectors
Units: sectors of 1 * 512 = 512 bytes
Sector size (logical/physical): 512 bytes / 512 bytes
I/O size (minimum/optimal): 512 bytes / 512 bytes
Disklabel type: dos
Disk identifier: 0x00000000

Device        Boot Start     End Sectors   Size Id Type
FD12FULL.img1 *       63 1048319 1048257 511.9M  6 FAT16
Mount the partition as a loop device:
sudo mount -o loop,offset=$((63*512)),uid=ed FD12FULL.img /mnt/loop
See how much space is left:
df -h /mnt/loop
Filesystem      Size  Used Avail Use% Mounted on
/dev/loop0      512M  425M   87M  84% /mnt/loop
The image file is 512 MB and has 87 MB available. The BIOS file is 9.5 MB, so copy the file to the “drive”:
cp O9020A25.exe /mnt/loop
Which knocks the available space down by about what you’d expect:
df -h /mnt/loop
Filesystem      Size  Used Avail Use% Mounted on
/dev/loop0      512M  435M   78M  85% /mnt/loop
Unmount the image “drive”:
sudo umount /mnt/loop
Copy the image file to a USB stick:
sudo dcfldd status=progress bs=1M if=FD12FULL.img of=/dev/sdg
512 blocks (512Mb) written.
512+0 records in
512+0 records out
Pop the USB stick in the Optiplex, set the BIOS to boot from “Legacy” ROMs, whack F12 during the reboot, pick the USB stick from the list, and It Just Works™:
BIOS Update screen
We have a couple of other 9020s around that need the same treatment, so the effort won’t go to waste.
I installed the XFCE flavor of Manjaro Linux (beside Win 8.1 Pro) on a new-to-me Dell Latitude 7250 serving as our new Token Windows box and carry-along-able Linux laptop.
Manjaro being an offshoot of Arch, they have plenty of guides and references, with How to Set up X11VNC Server being most useful at the moment. This box needs only a VNC server and apparently works with ‑xdamage for faster updates.
With the laptop plugged into an external display and Manjaro set up to use both displays, the X11VNC server feeds both to the client with the proper positioning, producing a truly panoramic, albeit scaled, view:
WinFlip – X11VNC dual screen
TightVNC on Windows does much the same thing, although (AFAICT) Windows doesn’t allow different background pictures on the two screens; that’s irrelevant to my mmmm use case.
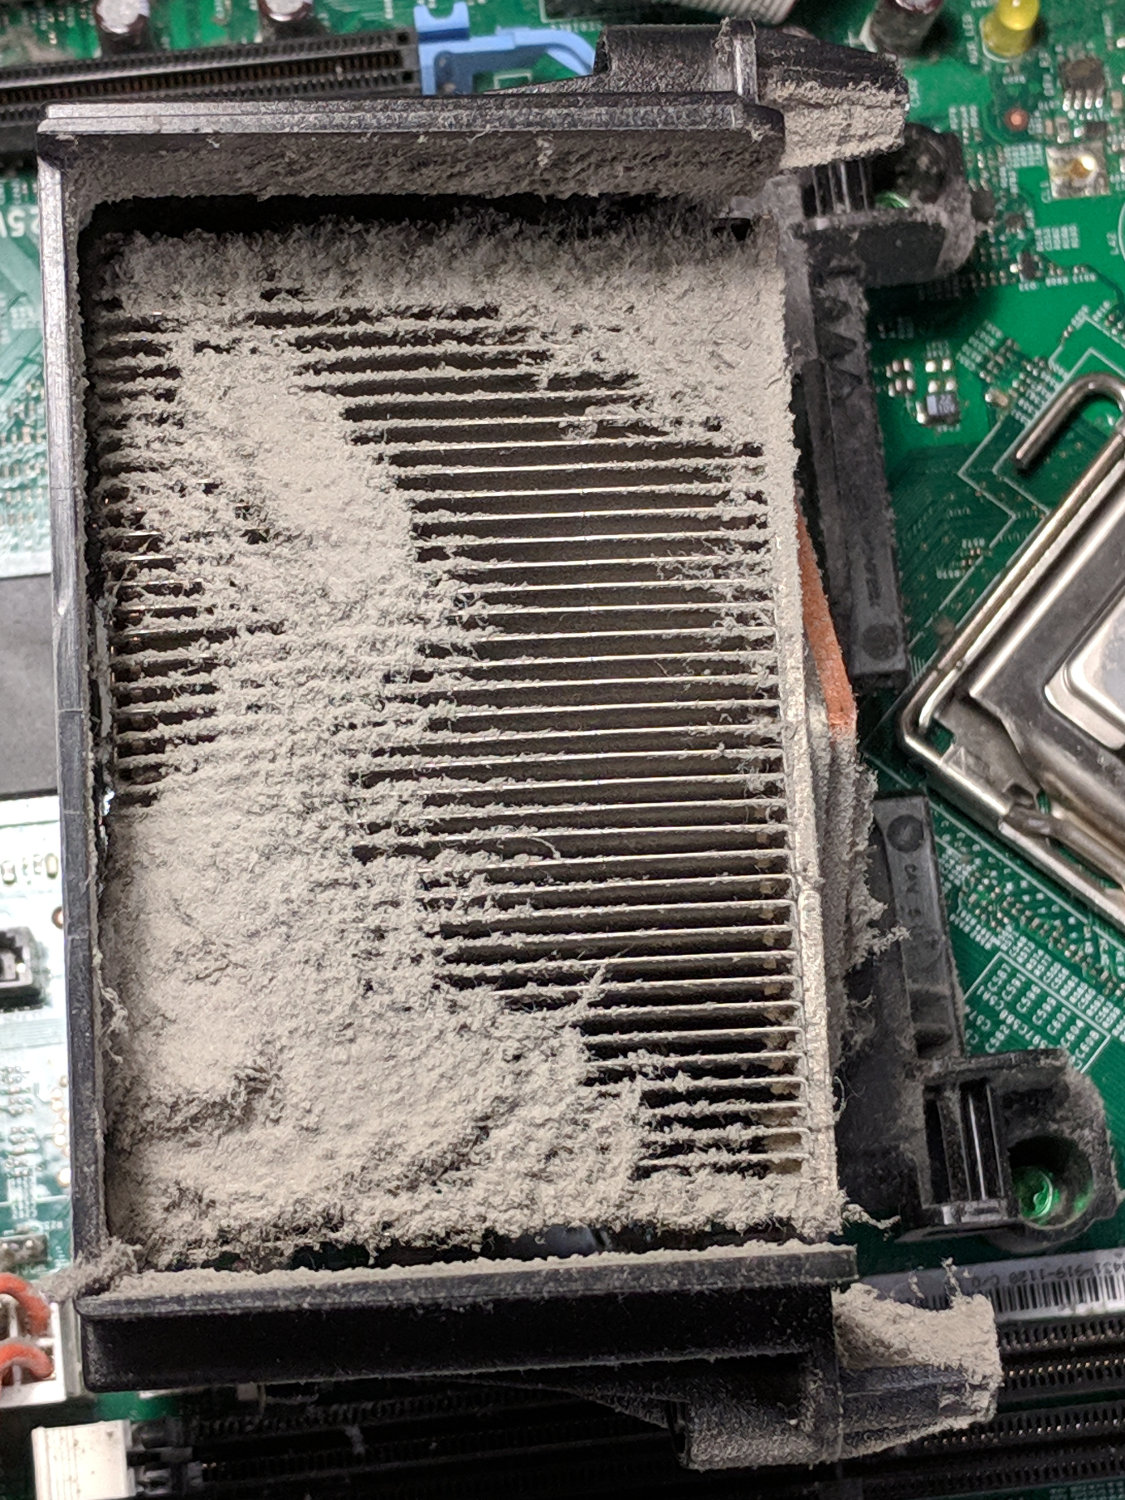
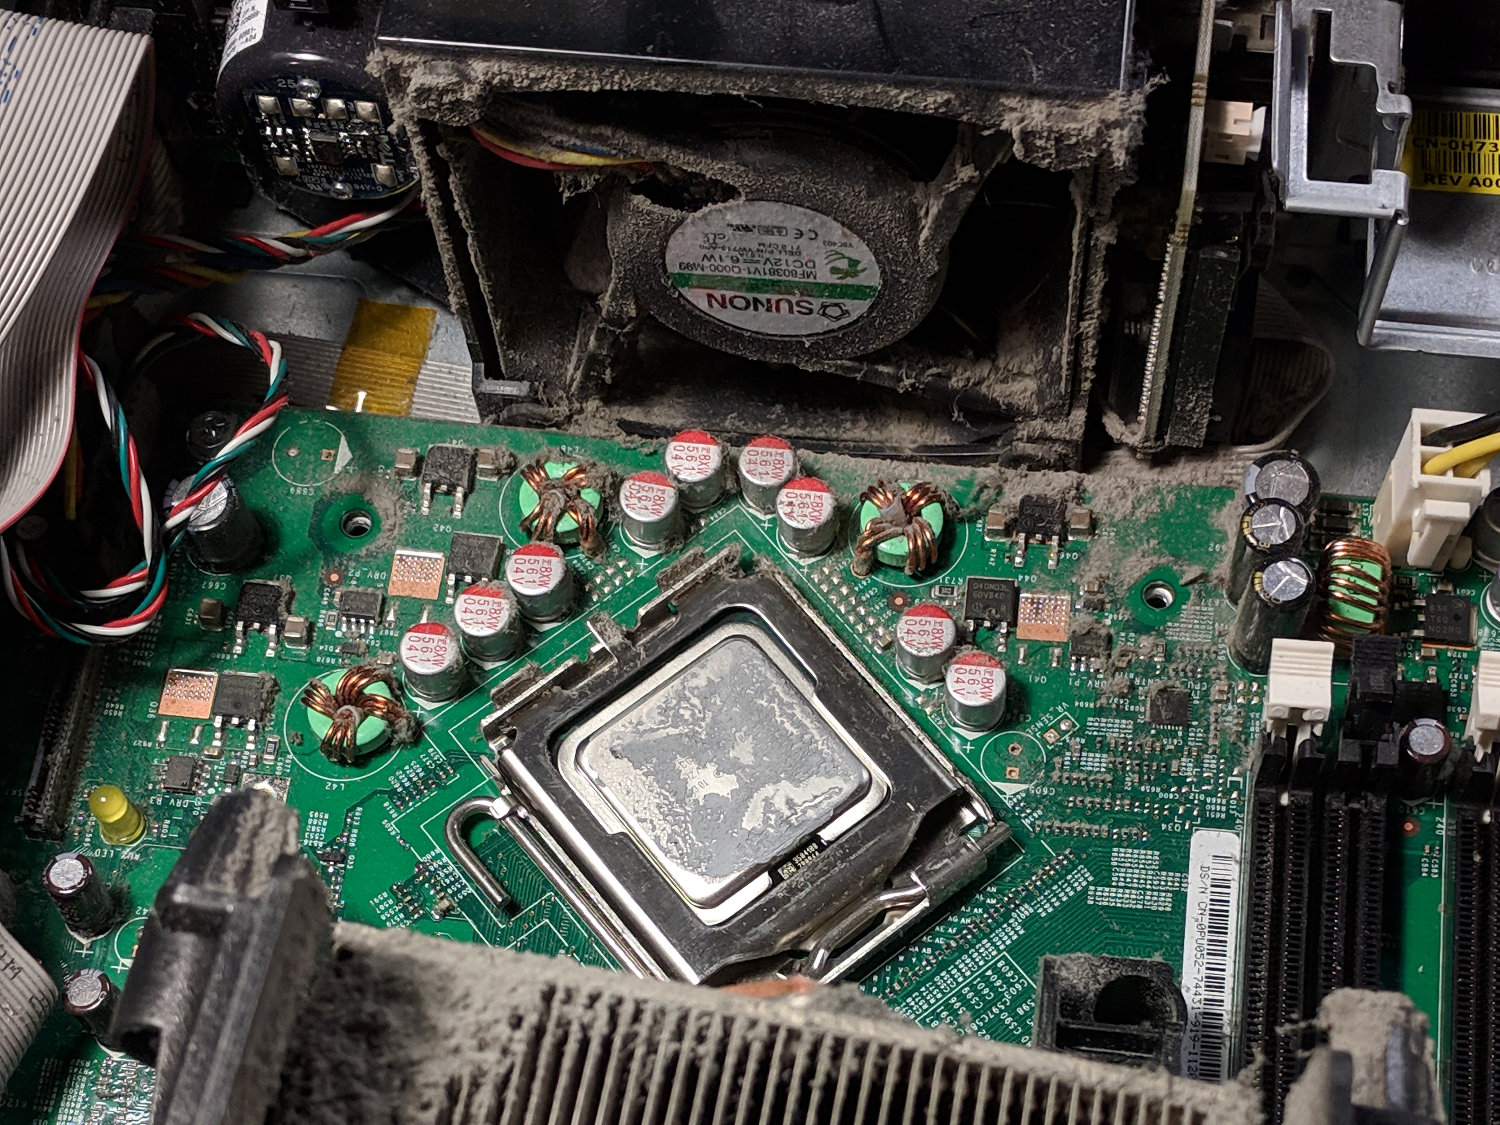
This appeared while harvesting heatsinks and suchlike from a defunct Dell Optiplex:
Clogged CPU heatsink
The only way to get access to that end of the heatsink is to break the heatsink’s thermal bond to the CPU, which seems like a Bad Idea if you intend to continue using the thing:
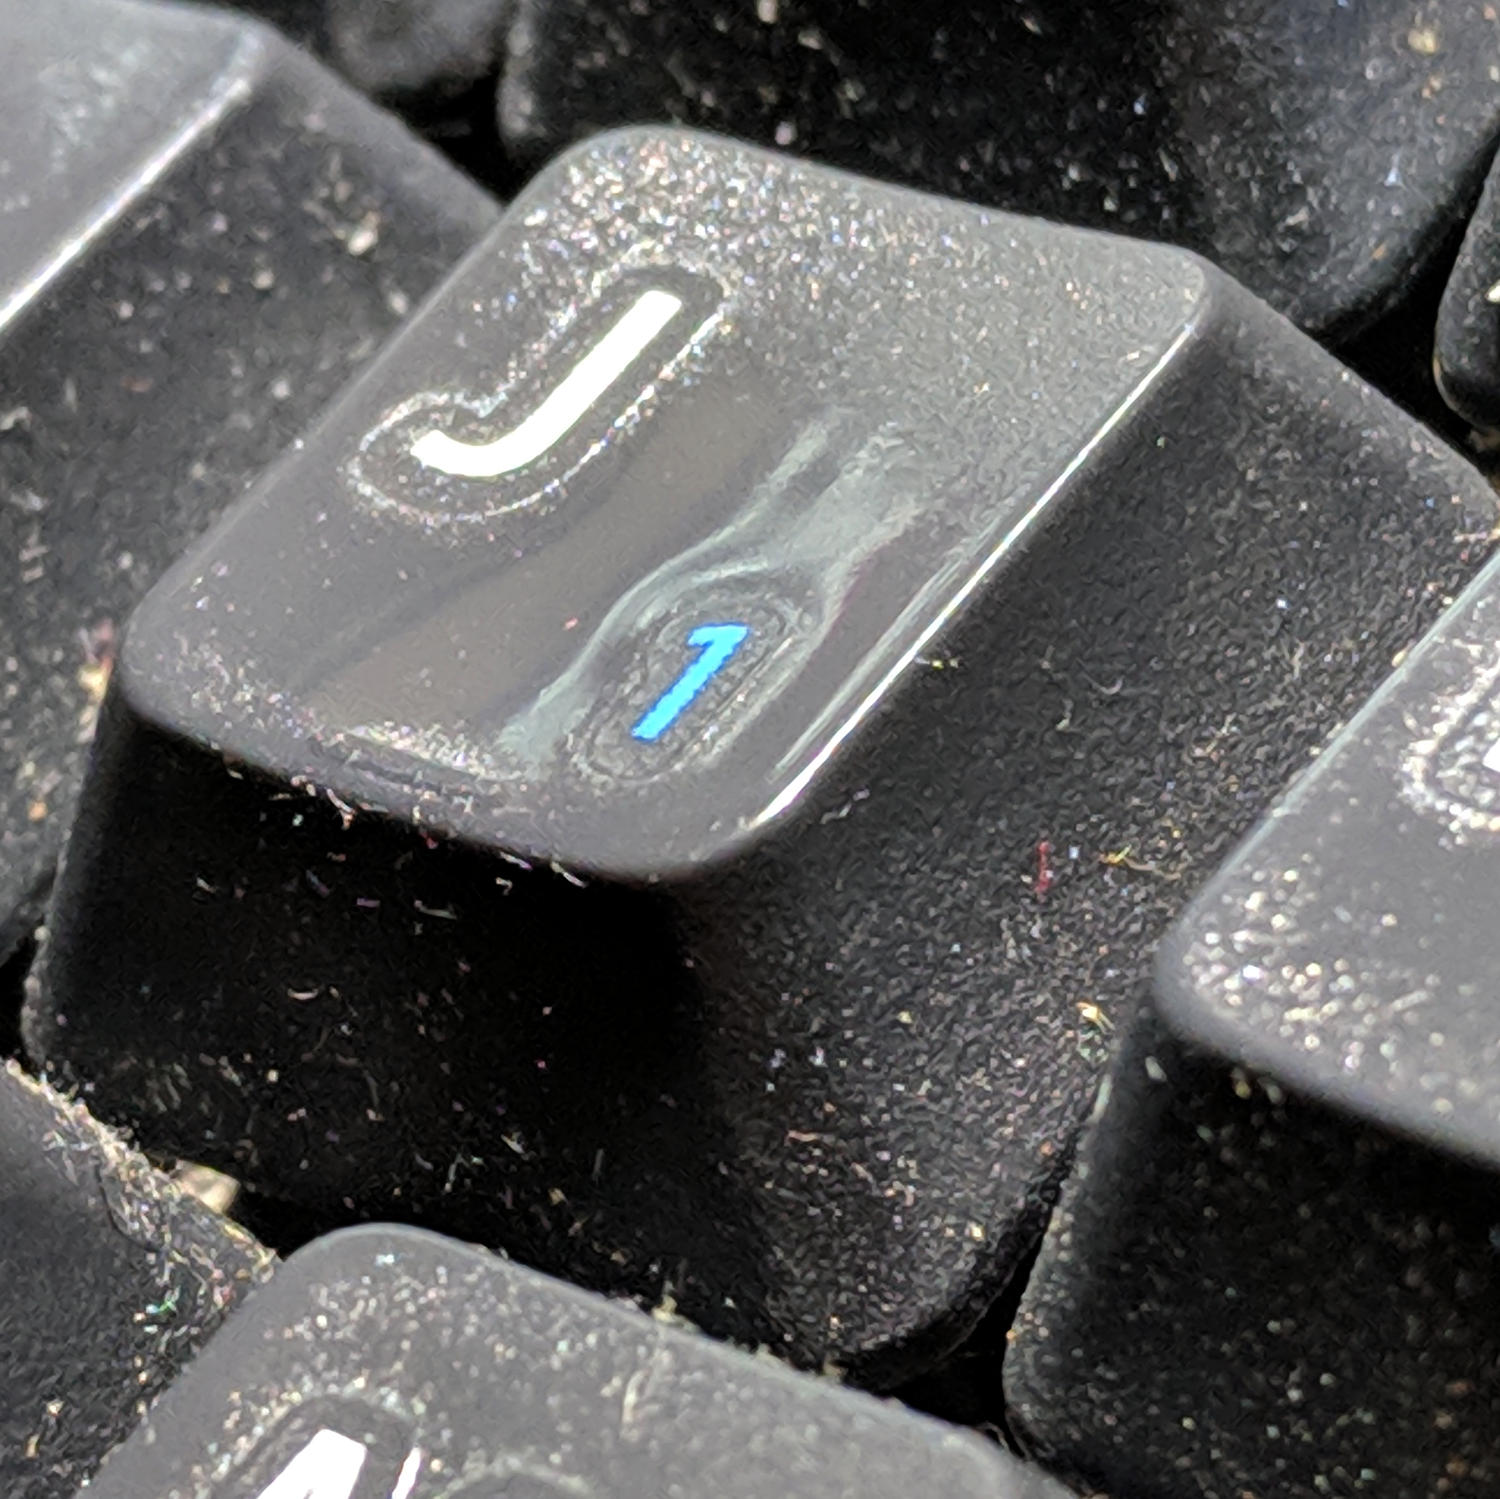
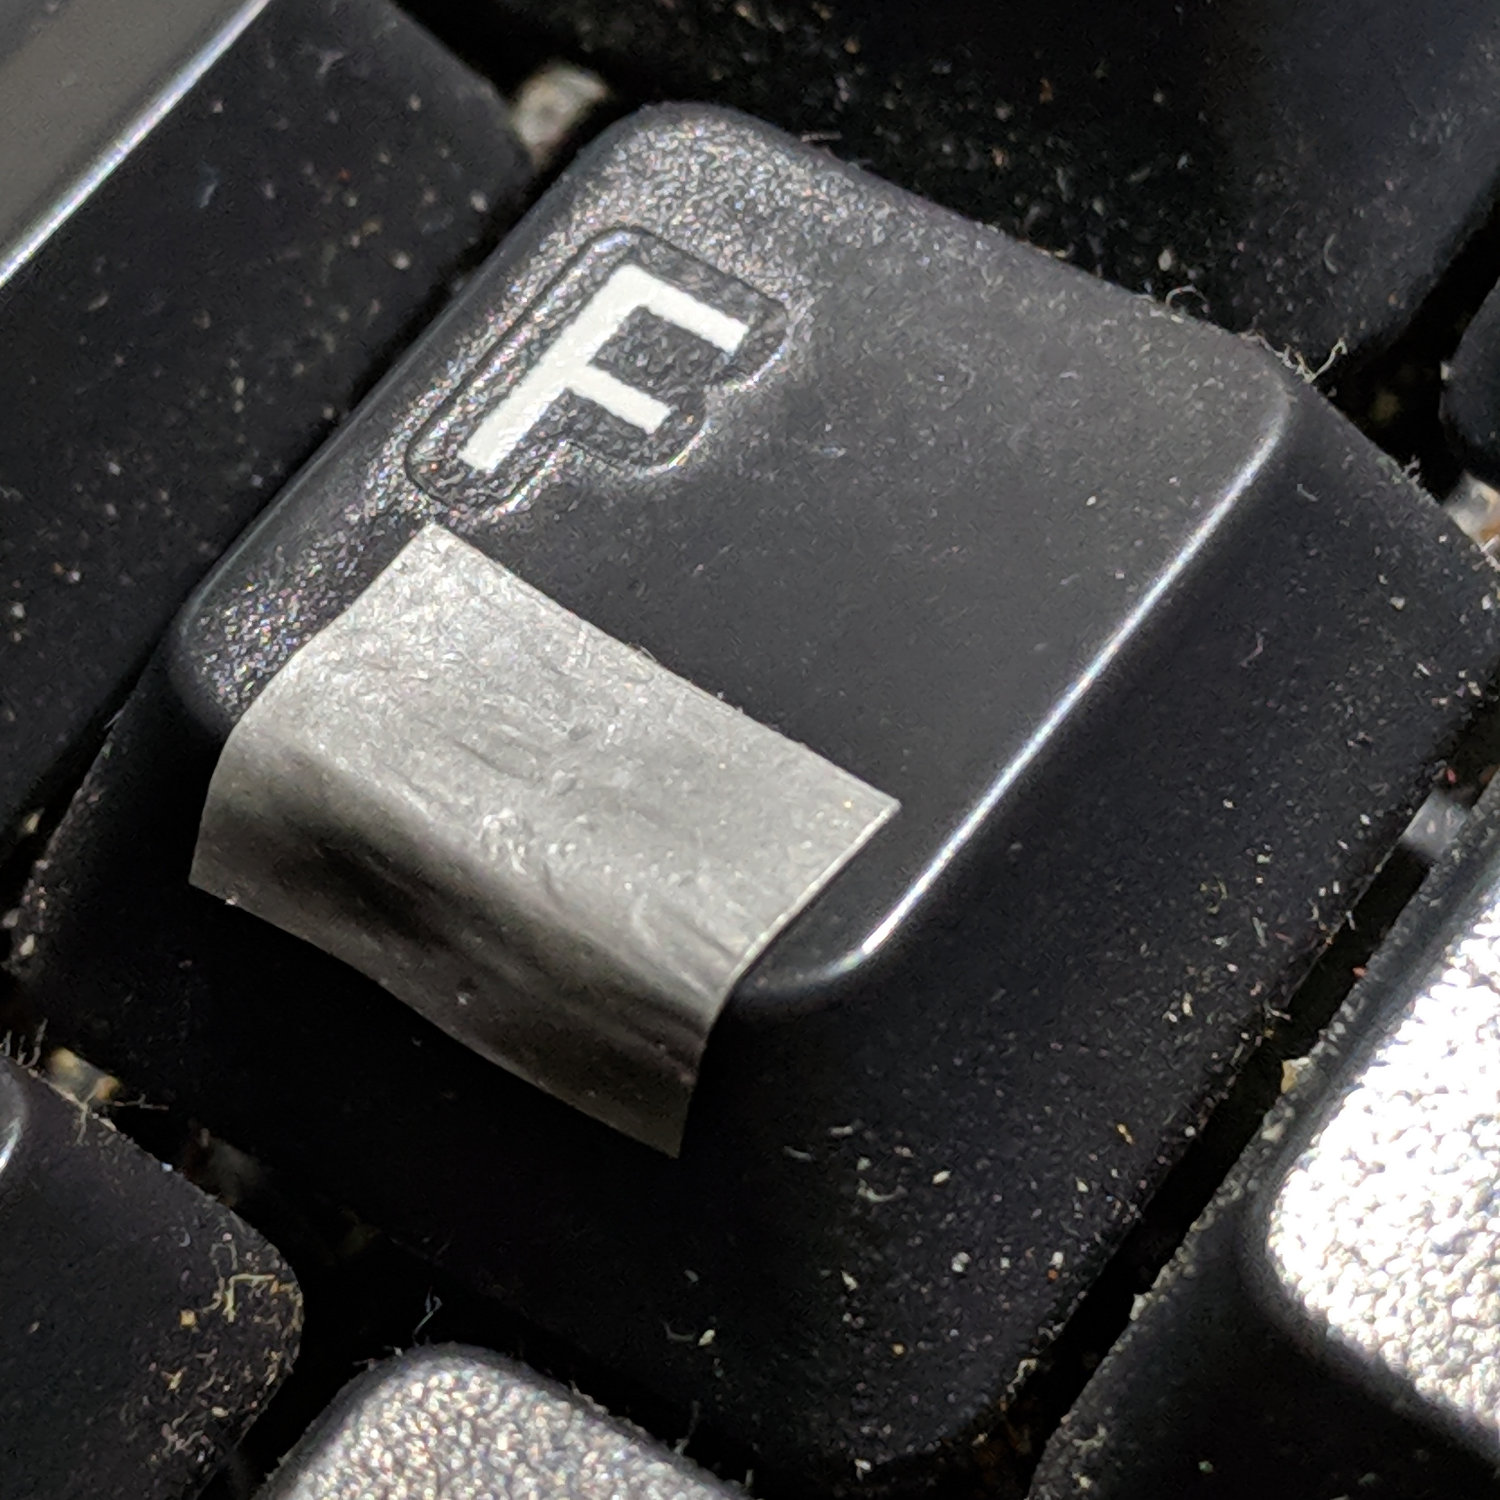
The ultimate fix will likely involve a dab of epoxy, but a duct tape snippet should show me how much of a bump my fingers need to find the home keys without conscious thought:
Kinesis keyboard – tape bump
Early returns suggest one layer isn’t quite prominent enough; some iteration will be in order.
All those annoying CNN auto-play videos will vanish, along with any videos you might have wanted. For me, it’s a reasonable tradeoff, as most (useful) videos will be available on Youtube or elsewhere.
The built-in browser controls you might think of activating, as I have, don’t work on CNN videos, because CNN uses theoplayer, a “universal” Javascript-based player. It’s not Flash, it’s not HTML5, it’s not a specific video thing, it’s a way to work around all those blocking mechanisms.
Mostly, I don’t get news from CNN, but occasionally a link will lead there, a video appears, and instantly gets muted.
Burn them. Burn them all.
Update: Some sites run auto-play videos through JW Player, which you kill thusly:
||jwcdn.com
||content.jwplatform.com
That blocks the source of the player, which seems to not depend on the site using it. So far, so good.